Installing a new bathroom sink
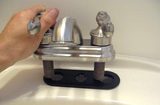
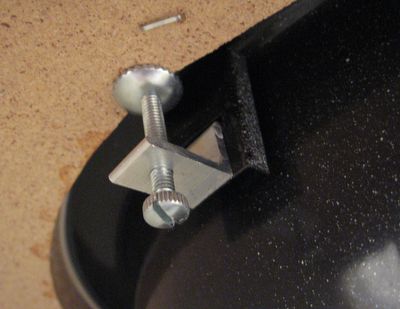 Metal sinks are generally mounted with little screw clips
like the one shown at left. Once you loosen them, they unhook
from the sink, so that the sink can be lifted out.
Metal sinks are generally mounted with little screw clips
like the one shown at left. Once you loosen them, they unhook
from the sink, so that the sink can be lifted out.
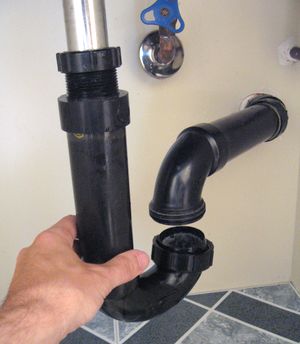 The other thing to disconnect is the drain. If the trap on
your sink is the type that can be detached, then it's easiest
to just take the whole trap off. This will make putting the new
sink in easier. Not all traps come off though. if the trap has
a little plug on the bottom that can be removed, it's not the kind
that comes off.
The other thing to disconnect is the drain. If the trap on
your sink is the type that can be detached, then it's easiest
to just take the whole trap off. This will make putting the new
sink in easier. Not all traps come off though. if the trap has
a little plug on the bottom that can be removed, it's not the kind
that comes off.
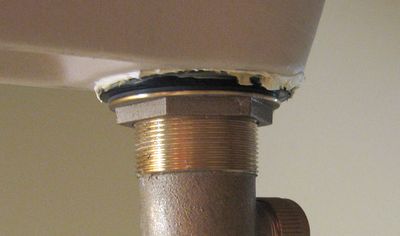
Either way, the stem from the drain on the sink is released by loosening the big plastic nut at the end of the drain pipe part, nearest to the sink's drain. This allows the sink's drain to be pulled out.
There's a funny little wedge shaped seal that will stick to the drain pipe, and cause the plastic nut from drain pipe to stick on the stem of the sink. Be sure to put the nut and wedge shaped seal on the new drain pipe in the same way. If the seal ends up getting wrecked, you can actually buy these seals new where you buy plumbing parts.
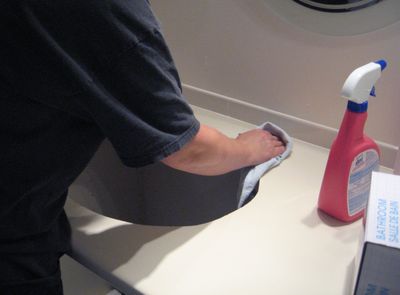
With the sink removed, it's time to clean the crud from around the edge.
I was replacing the sink with a porcelain sink. There were no clips that go on the bottom of the sink. The only thing to hold it in place is gravity, and caulking.
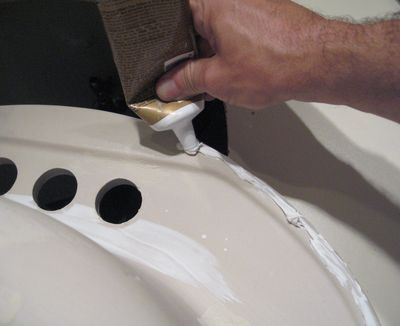
I used caulking from a tube. It's harder to get a nice bead from a tube than a caulking gun, but I used a tube because the rest of a caulking gun cylinder will start to go bad once the tube is opened, and I didn't need that much. Be sure to apply enough caulking to make a good seal all around. Othrwise, water may leak around the sink and wet the particleboard counter top (particle board does not stand up well to getting wet)
With the bead of caulking on the sink, I carefully then lowered it over the hole, making sure that it's centred right.
 Next it's time to install the drain. The drain typically clamps itself
into the hole from the top and bottom. On the bottom there is a wide conical rubber
gasket that presses against the sink, with a brass washer behind it and
a nut to tighten it. I put caulking all around the rubber gasket
just to be on the safe side.
Next it's time to install the drain. The drain typically clamps itself
into the hole from the top and bottom. On the bottom there is a wide conical rubber
gasket that presses against the sink, with a brass washer behind it and
a nut to tighten it. I put caulking all around the rubber gasket
just to be on the safe side.
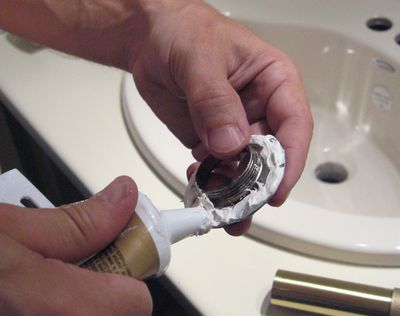 The instructions say to seal it at the top with putty,
though caulking will do the job too. It's important to seal
around the part that goes in on top, so that if you close the drain plug,
the water stays in the sink instead of leaking around this part.
The instructions say to seal it at the top with putty,
though caulking will do the job too. It's important to seal
around the part that goes in on top, so that if you close the drain plug,
the water stays in the sink instead of leaking around this part.
 It helps to have a helper for this part - somebody to hold the drain in
from the bottom while screwing the flange in from the top.
It helps to have a helper for this part - somebody to hold the drain in
from the bottom while screwing the flange in from the top.
Once the top part is screwed on as far as it will go, it's time to grab a pipe wrench and tighten the nut from the bottom to pull it all together and put some pressure on that rubber gasket on the bottom.
Be sure to dry fit everything first before you assemble it with caulking. Caulking is really messy once you get it on your fingers. It's best to have a roll of paper towel handy to wipe your fingers with when you work with caulking. Otherwise you inevitably get it on everything, including your clothing. Caulking doesn't wash out! The saving grace of caulking is that it does stay soft, and you can still scrape it off hard surfaces even after it has solidified, unlike putty.
 It's a good idea to install the drain plug mechanism before installing the trap.
Or at least I realized that because when I did it, I ended up accidentally dropping
the plug part down into the trap and had to remove the trap to get it
out. Getting that rod that sticks out to the right to go through a hole
in the drain plug, and putting it all together is surprisingly fiddly. I couldn't
put that part in before installing the drain mechanism because it would have gotten
in the way when installing the flange on the top. But really, that's
more part of installing the faucet
It's a good idea to install the drain plug mechanism before installing the trap.
Or at least I realized that because when I did it, I ended up accidentally dropping
the plug part down into the trap and had to remove the trap to get it
out. Getting that rod that sticks out to the right to go through a hole
in the drain plug, and putting it all together is surprisingly fiddly. I couldn't
put that part in before installing the drain mechanism because it would have gotten
in the way when installing the flange on the top. But really, that's
more part of installing the faucet
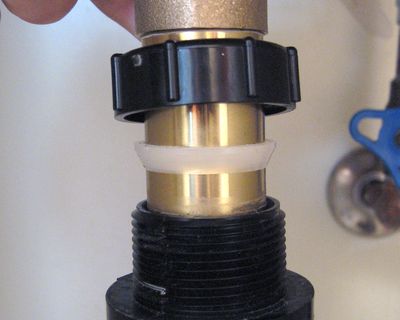 The bottom of the drain spout always seals to the drain plumbing using one of these
clever conical, or wedge type of gaskets. The nut on top pushes the wedge into
the drain pipe, which compresses it and cause it to perfectly seal between the
drain plumbing and the spout from the sink.
The bottom of the drain spout always seals to the drain plumbing using one of these
clever conical, or wedge type of gaskets. The nut on top pushes the wedge into
the drain pipe, which compresses it and cause it to perfectly seal between the
drain plumbing and the spout from the sink.
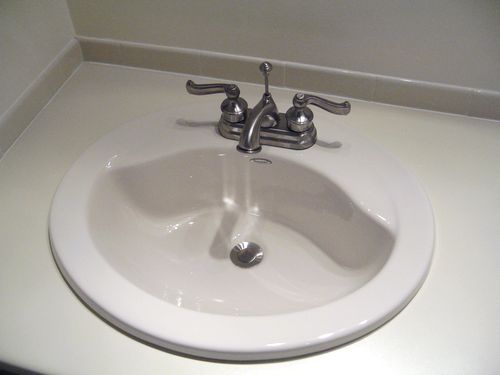 And the sink all done and installed, with new faucets.
Looks much better than the old one.
And the sink all done and installed, with new faucets.
Looks much better than the old one.
See also:
 Installing a new faucet
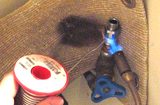 Soldering a faucet
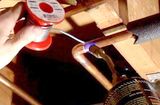 Rerouting a copper plumbing pipe
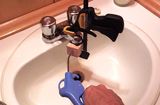 Drain plumbing fast
 Installing a socket in finished drywall
 Skylight installation
Back to my Woodworking website.
More home improvement projects
![]()