Installing the molding
 Installing molding usually involves cutting miters. I actually have a miter saw, but
I just wasn't getting a very clean cut. Like most miter saws, mine has too
much flex to it to make really clean cuts.
Installing molding usually involves cutting miters. I actually have a miter saw, but
I just wasn't getting a very clean cut. Like most miter saws, mine has too
much flex to it to make really clean cuts.
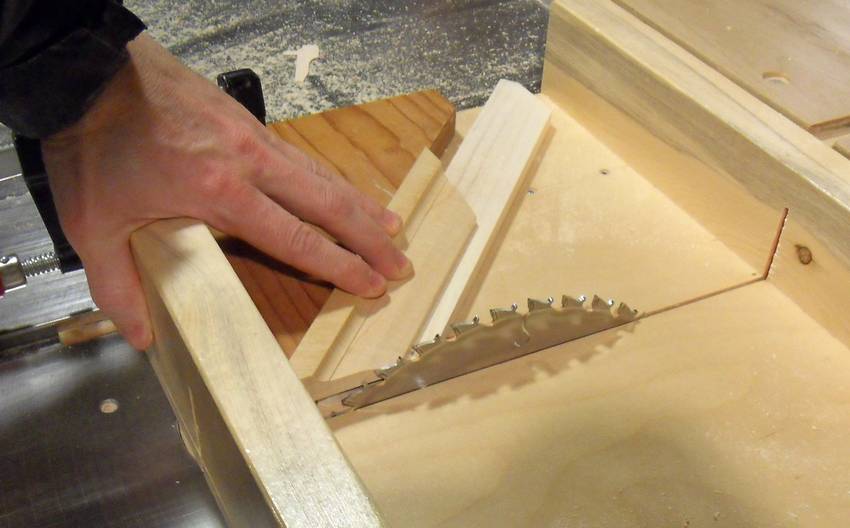
so I put a 45-degree angle on my table saw sled and used that to trim the miters. The sled got in the way for cutting miters in the middle of a piece of wood, so I had to make crosscuts first, then cut the miters. The miters, trimmed on the table saw, ended up mirror smooth.
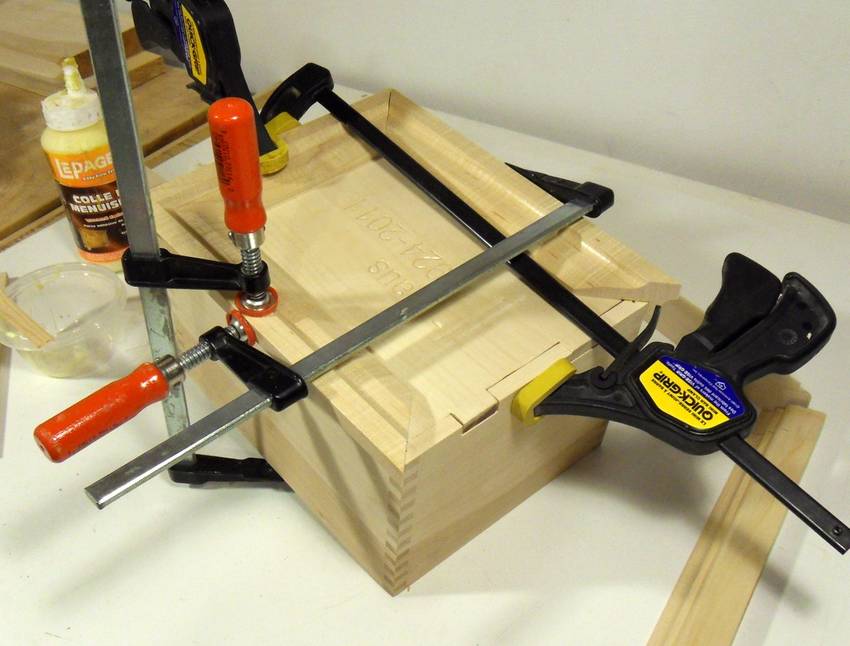 I had to glue the top molding on one piece at a time. I always used the previous
piece as a reference for where the next piece should align. But with clamps in the
way, I could at most glue down two pieces before I had to stop and wait for the glue
to dry.
I had to glue the top molding on one piece at a time. I always used the previous
piece as a reference for where the next piece should align. But with clamps in the
way, I could at most glue down two pieces before I had to stop and wait for the glue
to dry.
I don't like the idea of using a brad nailer to attach molding with. And even if I had a brad nailer, it wouldn't most likely have split my wood. Thin pieces of hard maple don't nail well.
 I made a cutout on the bottom moldings so that the ends of the molding
would form a sort of foot.
I made a cutout on the bottom moldings so that the ends of the molding
would form a sort of foot.
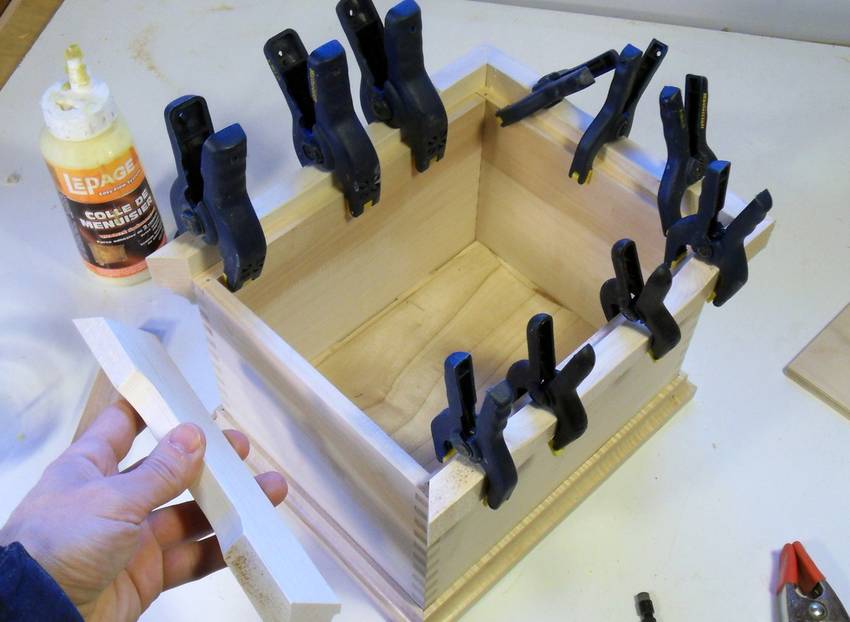 The bottom molding was much easier to glue on, seeing that I could just clamp it to the
inside of the box with some spring clamps.
The bottom molding was much easier to glue on, seeing that I could just clamp it to the
inside of the box with some spring clamps.
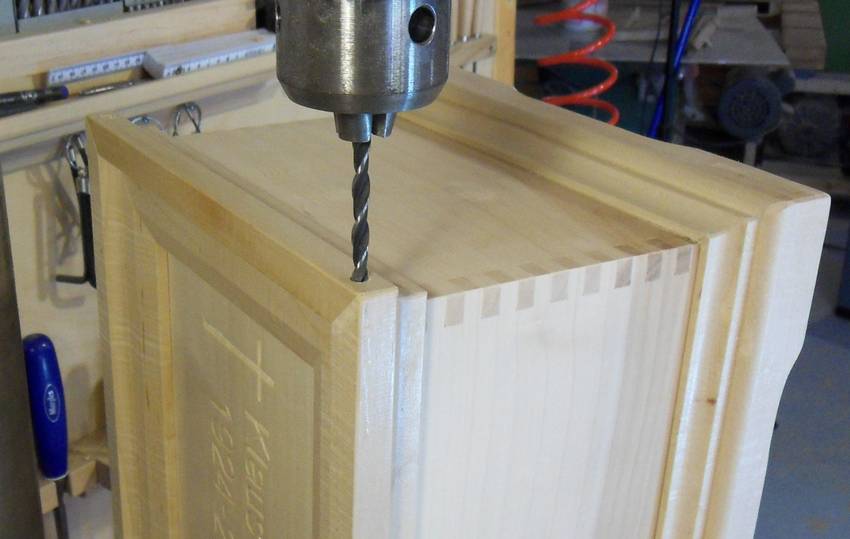 I had some concerns that the top molding might at some point come loose, especially because
I didn't have that much gluing surface for it. So I reinforced the corners of the
molding with a small dowel.
I had some concerns that the top molding might at some point come loose, especially because
I didn't have that much gluing surface for it. So I reinforced the corners of the
molding with a small dowel.
 My experience attempting to shop for dowels at The Home Depot lately is that the quality
of their dowels is so poor that it's not worth even looking.
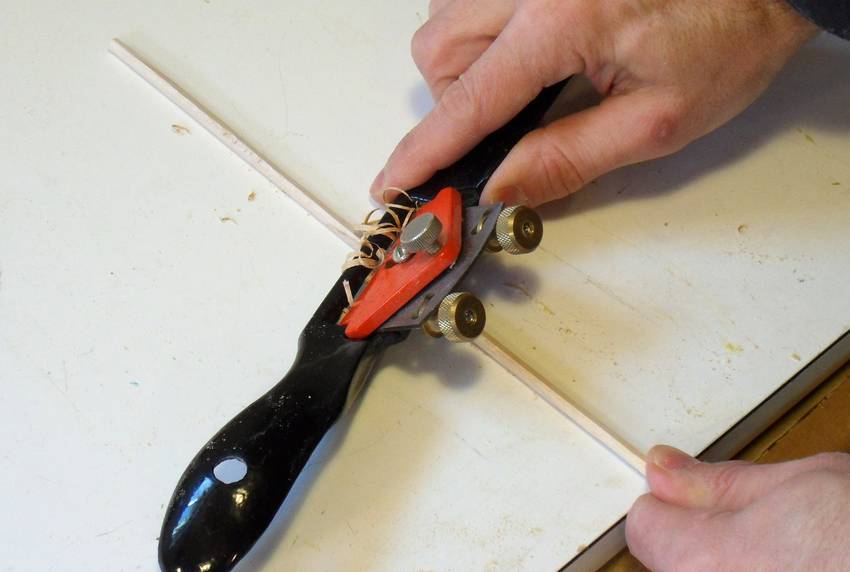
So for this application, I cut a square piece of maple the size of my holes, and then
used a spokeshave to shave the corners down to make it an octagonal section. For the
4mm holes I drilled, octagonal is close enough.
My experience attempting to shop for dowels at The Home Depot lately is that the quality
of their dowels is so poor that it's not worth even looking.
So for this application, I cut a square piece of maple the size of my holes, and then
used a spokeshave to shave the corners down to make it an octagonal section. For the
4mm holes I drilled, octagonal is close enough.
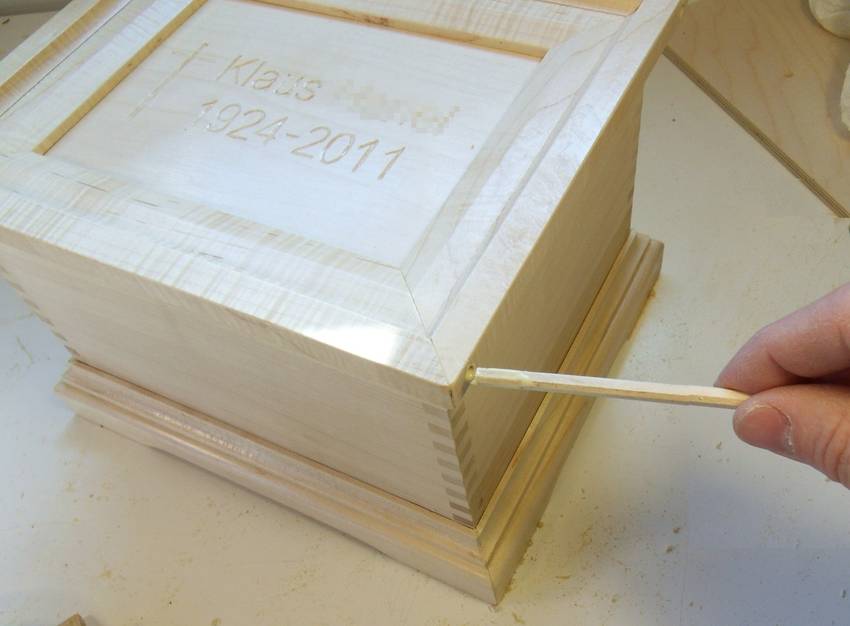 I put glue in the holes and on the dowel, then pushed it in, flush cut
it and shaved it flat with a chisel
I put glue in the holes and on the dowel, then pushed it in, flush cut
it and shaved it flat with a chisel
Back to Urn for ashes