Kevin's knock down workbench
 Kevin Ciampi writes:
Hi Mattias, Thought I should give something back for all the good information you have given.
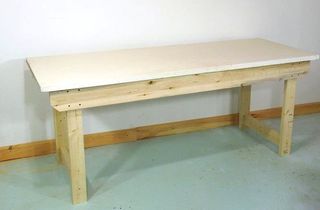
I recently moved to a new shop and all the workbenches and storage were built into my old shop so I didn't take any with me. This is a knock down workbench which is pretty rigid and is made out of 2x stock. It borrows quite a bit from one of your work tables. I made it all out of some old scaffolding I used last year to replace the roof on my garage. The only thing I actually bought for it was the top, I wanted something non stick.
In my new shop I found it pretty frustrating not having any tables so I tried to keep the design simple and substantial. It was mostly made with a table saw, a circular saw, a drill, a router, and a few hand tools.
Regards,
Kevin
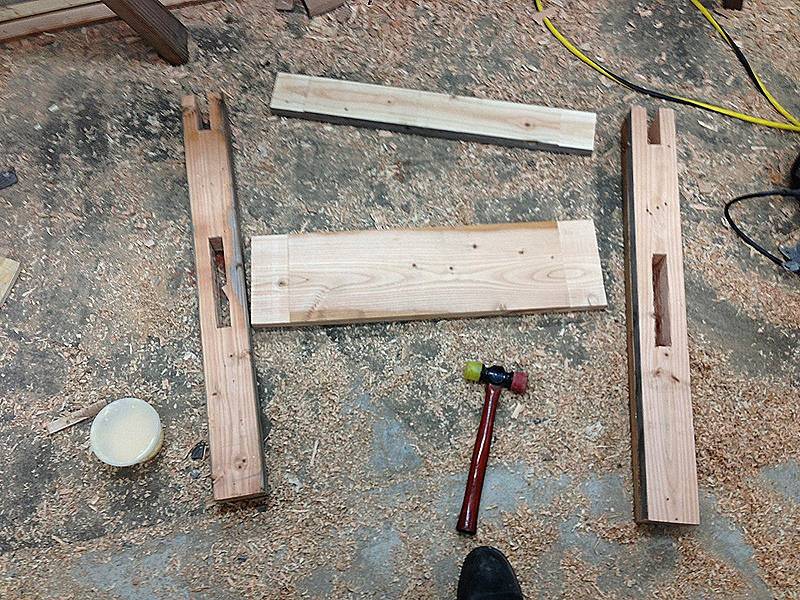 Leg subassembly layout. I planed some of the parts a little just to
make it easier to cut the tenons on the table saw since the lumber I
used was badly cupped and so I didn't have to use construction adhesive
to double up the 2x4's
Leg subassembly layout. I planed some of the parts a little just to
make it easier to cut the tenons on the table saw since the lumber I
used was badly cupped and so I didn't have to use construction adhesive
to double up the 2x4's
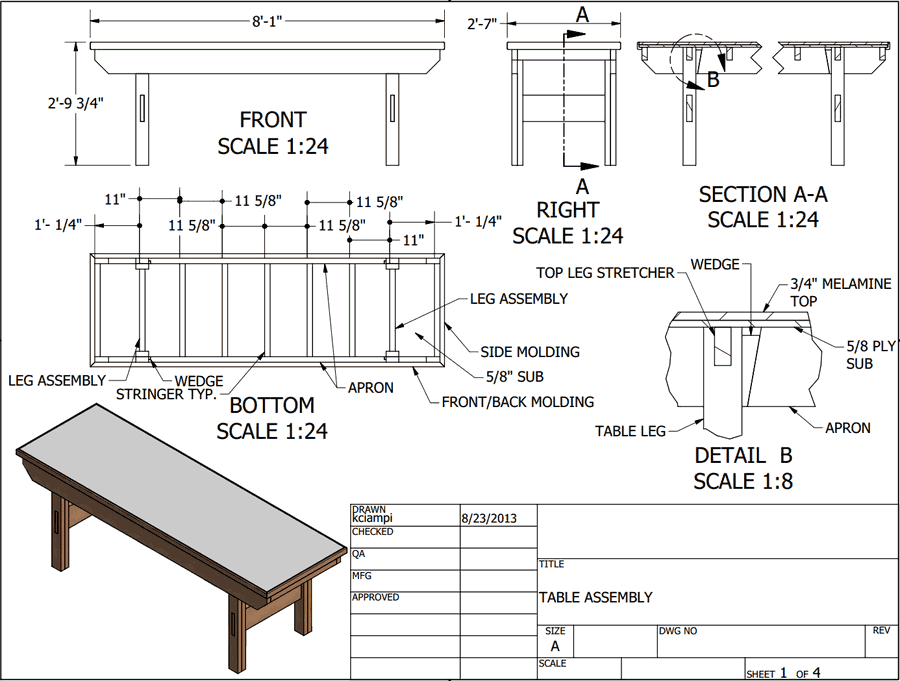
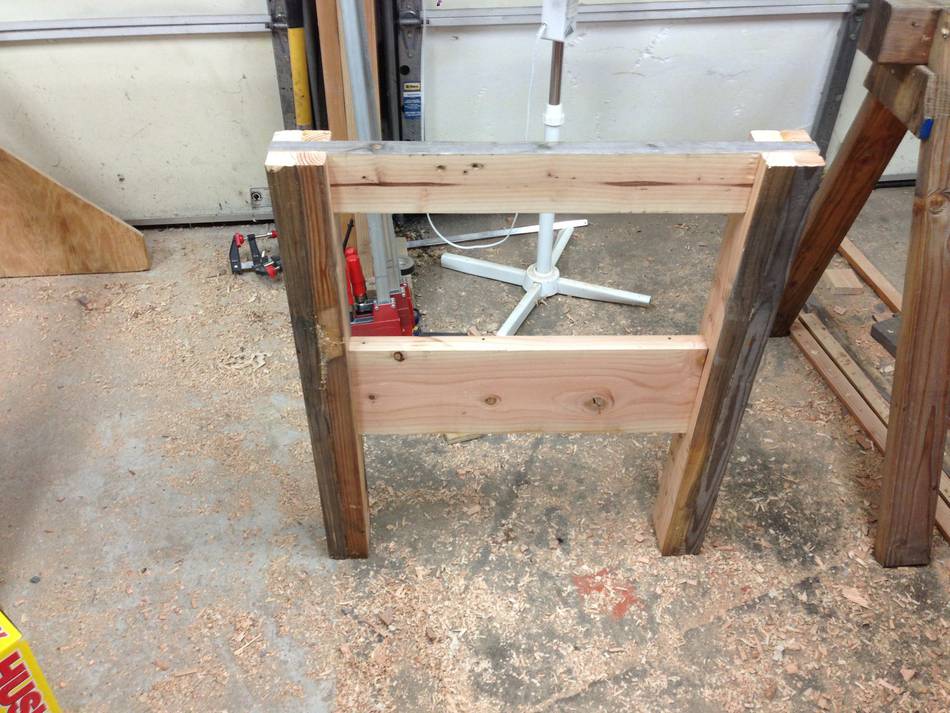 One complete leg subassembly. I left the top horizontal 2x4 a slightly proud to
allow the bottom of table top to bear on it, instead of just on the top of the
legs. This assembly is so rigid and the connections so large that
dowels would have done the job just as nicely as mortise and tenons.
Note that I didn't cut a rabbet into the top of the legs to support the
apron. I later glued on a block but adjusted the plans for this.
One complete leg subassembly. I left the top horizontal 2x4 a slightly proud to
allow the bottom of table top to bear on it, instead of just on the top of the
legs. This assembly is so rigid and the connections so large that
dowels would have done the job just as nicely as mortise and tenons.
Note that I didn't cut a rabbet into the top of the legs to support the
apron. I later glued on a block but adjusted the plans for this.
 Next I put the aprons on the legs and tapped everything around with a
mallet. Using a wedge leg connection makes this pretty easy.
Next I put the aprons on the legs and tapped everything around with a
mallet. Using a wedge leg connection makes this pretty easy.
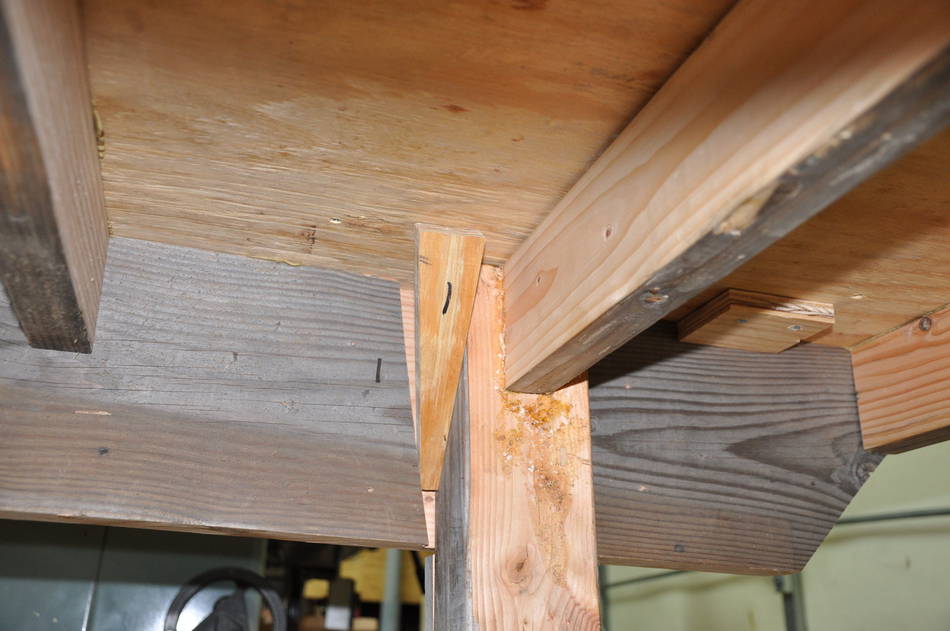
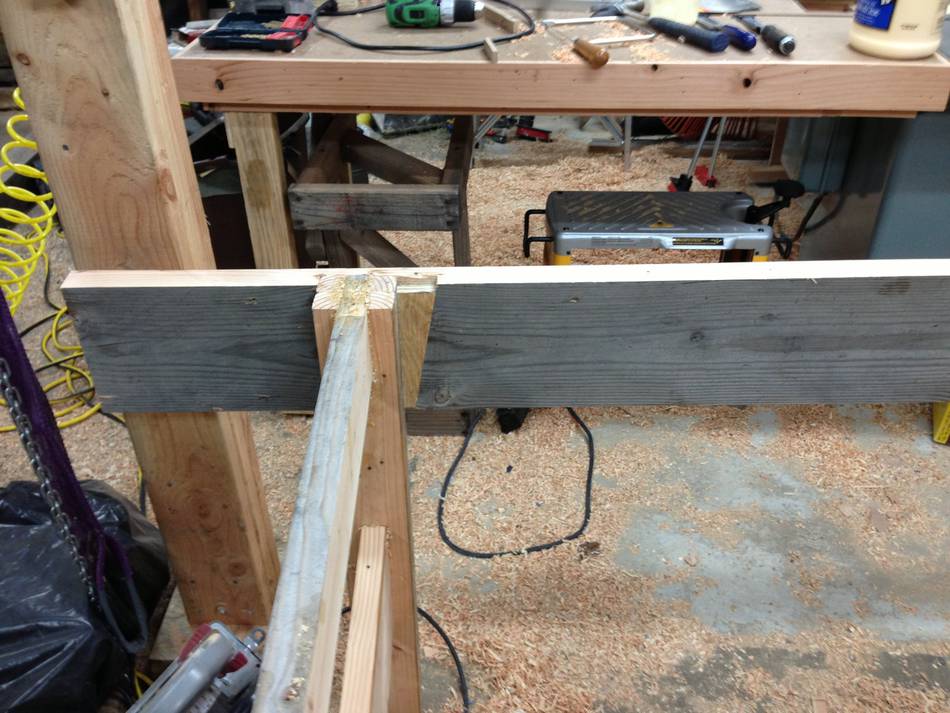 Close-up of the leg wedge connection. The wedges are just cut out of
3/4" plywood left over from redoing the roof. The apron dadoes are
cut with a circular saw,
and hammer similar to what I have seen you do on a
few of your projects.
Close-up of the leg wedge connection. The wedges are just cut out of
3/4" plywood left over from redoing the roof. The apron dadoes are
cut with a circular saw,
and hammer similar to what I have seen you do on a
few of your projects.
 All table supports were just screwed in.
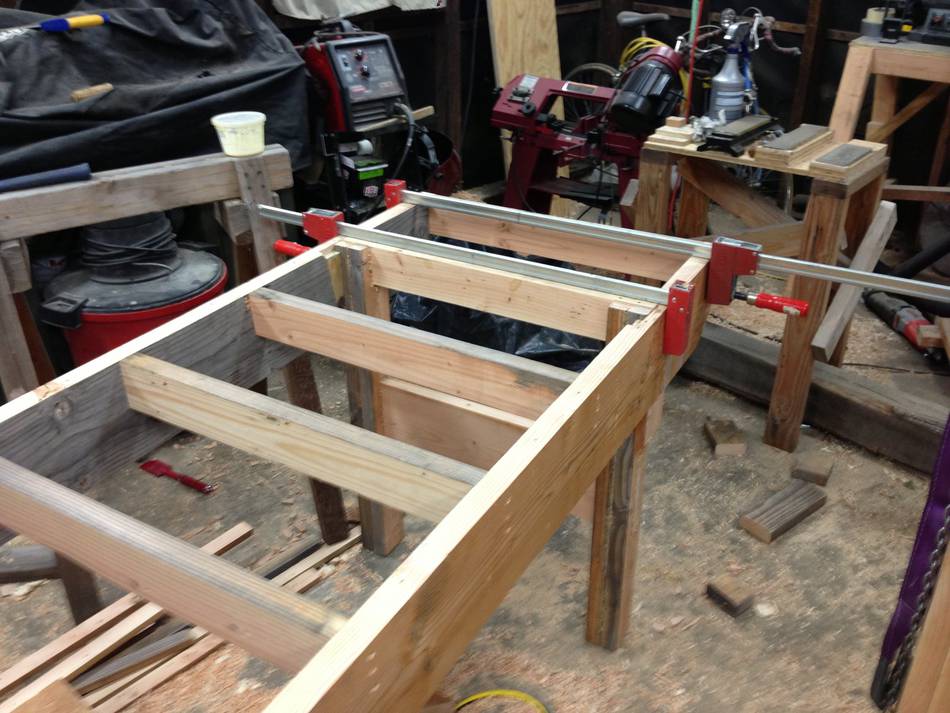
I found it pretty helpful to clamp the pieces as I went to keep them
from moving and to prevent having bumps in the top.
All table supports were just screwed in.
I found it pretty helpful to clamp the pieces as I went to keep them
from moving and to prevent having bumps in the top.
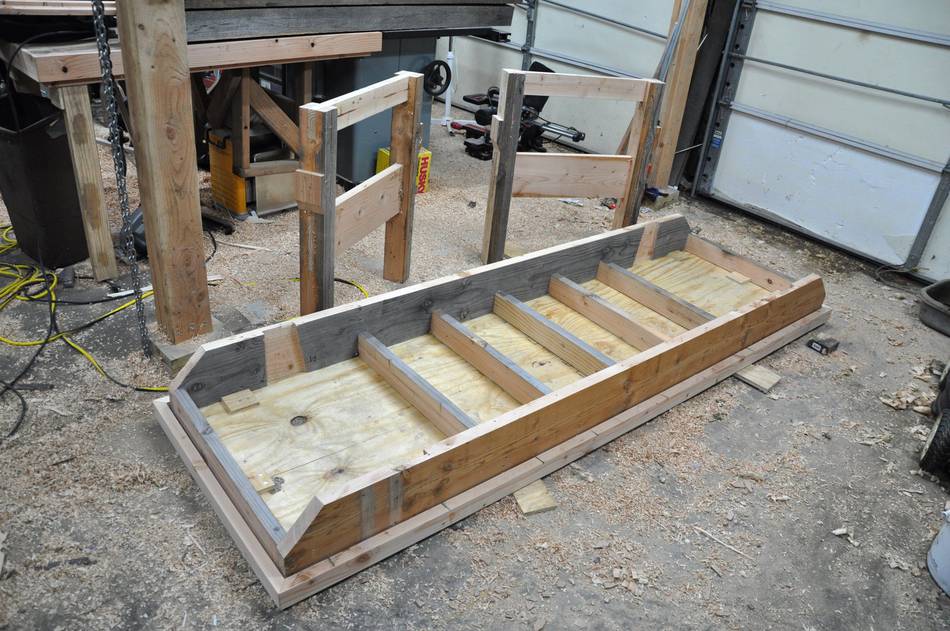
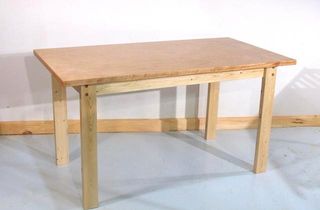
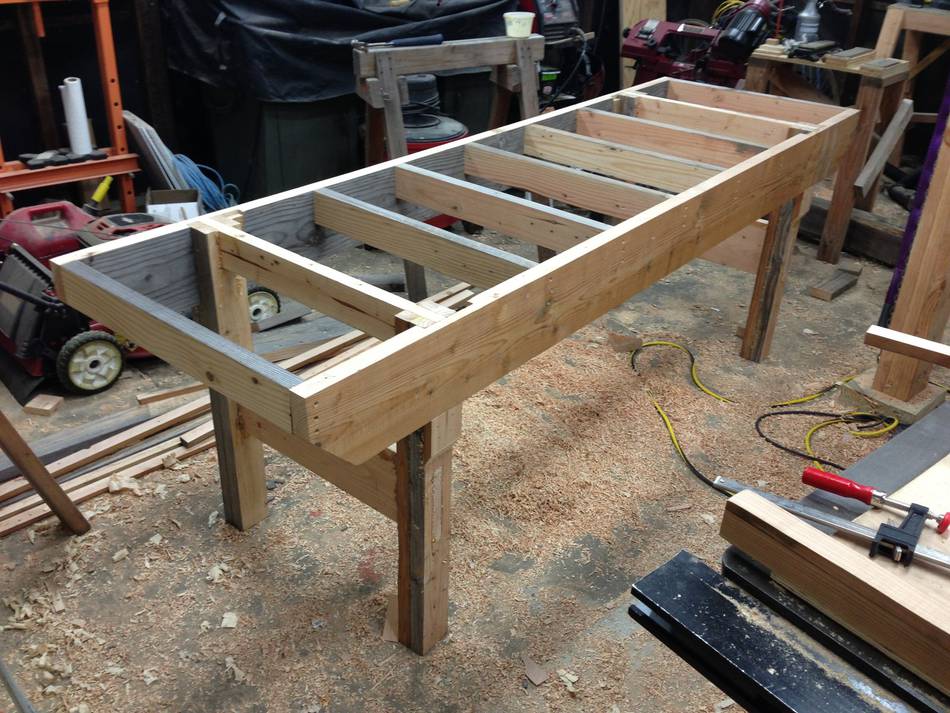 The completed frame, you can see the glue blocks I added to support the
apron instead of using a rabbet as in the plans.
The completed frame, you can see the glue blocks I added to support the
apron instead of using a rabbet as in the plans.
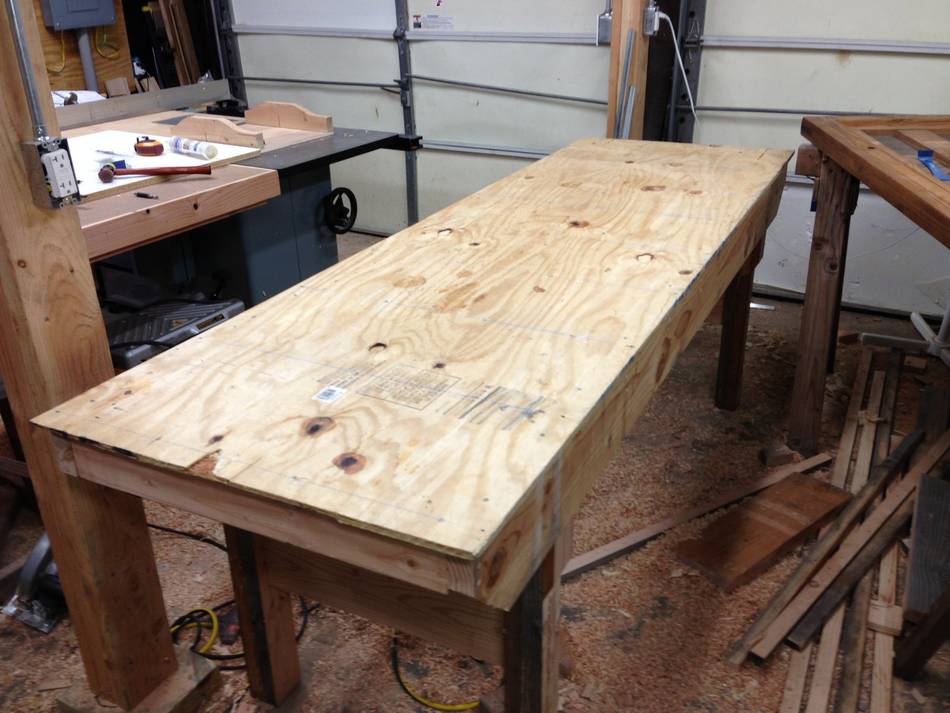 The 5/8" plywood top. This is glued and nailed (construction adhesive)
to the framing except for the removable legs. I used a couple of blocks
screwed to the plywood to make sure the top registered straight and
centered once it was glue up time.
The 5/8" plywood top. This is glued and nailed (construction adhesive)
to the framing except for the removable legs. I used a couple of blocks
screwed to the plywood to make sure the top registered straight and
centered once it was glue up time.
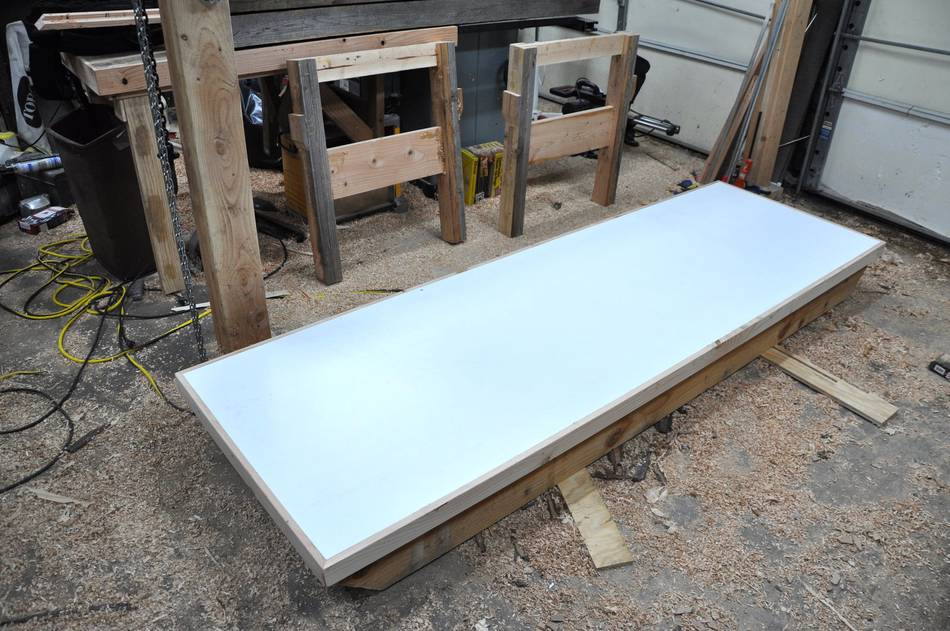
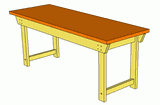
 The completed table. The melamine is screwed on from the bottom. I cut
it 1/16" large and used a flush trim router bit to keep it even with the
plywood. The molding does not actually touch the aprons. Dimensional
lumber is just not straight enough especially after it has been sitting
outside. I just finish nailed it to the 5/8 ply.
The completed table. The melamine is screwed on from the bottom. I cut
it 1/16" large and used a flush trim router bit to keep it even with the
plywood. The molding does not actually touch the aprons. Dimensional
lumber is just not straight enough especially after it has been sitting
outside. I just finish nailed it to the 5/8 ply.
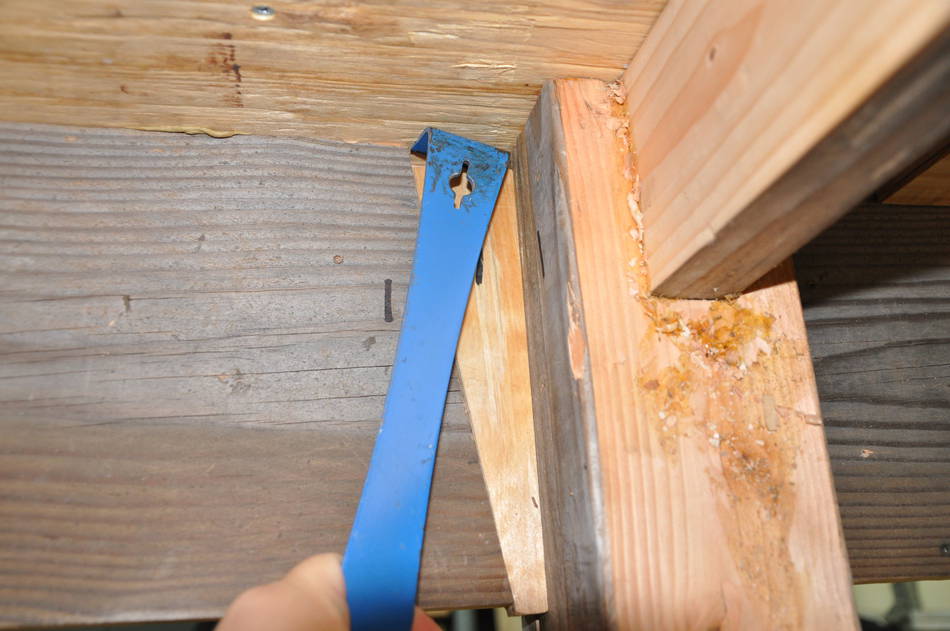
I have seen that wedge detail (for locking the legs) elsewhere. I first saw it on Paul Sellers bench (he is on YouTube) when I was researching what other people have come up with (although it took him like 15 episodes because he uses only hand tools). Although the melamine could be changed if it gets damaged, it never needs to be disturbed to take the legs off. The table can actually be disassembled and reassembled in minutes. There is enough taper in the joint that the wedge can be started on an angle and tapped in with the top in place. Once it is in I just use a pry bar against the bottom of the table top to snug them.
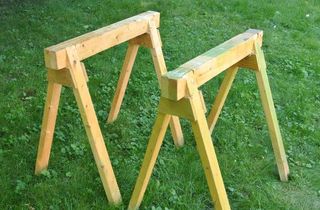
The wedges have a surprising amount of bite, that wood sat outside for a year before I brought it inside. One of the aprons was really twisted so I clamped it to the leg assembly and drove the wedges with a mallet. With the clamps removed (so I could build in some clearance to slide the legs between the aprons later) the wedges held the twist out so I could cut all the cross framing to permanently hold it straight. The third picture shows the table without the glue blocks on the legs, only the wedges are holding the table together (and the twist out of the apron in the back of the photo). The table can be assembled by, and actually moved by, only one person although the top (especially the melamine) is heavy.
Other notes:
I may end up drilling 3/8" holes in the top over the wedges so I can really drive them but so far I haven't seen the need. Lightly snugged the wedges make a pretty effective moment connection. The table height is pretty irrelevant. At 2' 9 3/4" some might find this a little low. I am not tall and the table is designed to be 1/4" lower than my table saw top.
Thanks,
Kevin
See also:

 Mattias Karlsson's workbench project
Back to my Woodworking website.