Michael Mules's bandsaw
Michael Mules has written extensively about his experience building a bandsaw, with many pictures on a forum and on facebook. I have condensed the info and pictures into a single easy to read page, but for more detail, please refer to the source material.
http://www.woodworkforums.com/f27/wip-homemade-bandsaw-142786/
Oct 25 2011
Hi all, after some fairly difficult projects (chopping board, tool
boxes, toy car) I though I would take on an easy challenge, and decided
to build my own bandsaw - mostly because I want to build a rocking horse
for my younger daughter's second birthday, and it would be easier to
build the design I have in mind using a bandsaw.
I bought plans
for making a bandsaw from Matthias Wandel, here. I wanted
a bandsaw that had enough clearance to deal with at least 25cm resawing,
and my budget was in the (low) hundreds, not thousands. Matthias' design
gives me 27cm resaw capacity and has cost me to date (plans, motor,
blade and pretty much all wood included) a bit under $300.
The first thing I did when I opened the plans was marvel at their
detail.
The SketchUp file alone is pure gold with around 20 or so
separate diagrams and views of absolutely every bit. I also like the
fact it was all dimensioned in cm, rather than inches. The cut list,
hardware list and the step by step instructions (with photos of his
build) are similarly comprehensive and have helped considerably to
cut down on mistakes and wasted time.
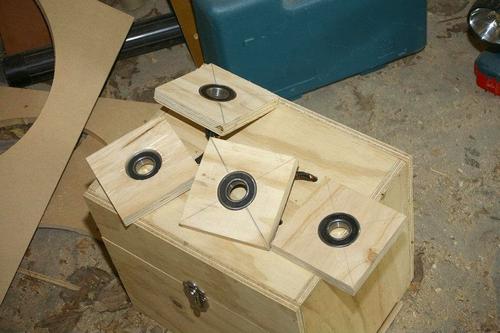
While this was going on, I cut out circles of 19mm and 12mm MDF with my
router and circle-cutting jig, and glued them together to make the
wheels, and cut out a circle of 18mm ply in the same way to make a
pulley for the drive wheel. After measuring my v-belt angle and depth I
pinned the pulley onto my tenoning jig and used the table saw to shape
its channel.
To put bearings onto the wheels, I had to hammer/press them into plywood
flanges - after trying to press them in with my crappy vice (and bending
the handle in the process) I used the gentle art of persuasion to get
them into position. Then, I glued them to the wheels. The first wheel I
made had too much wobble, so I had to make another one, cut up the
flanges to extract the bearings and make new ones. But the new wheel has
less than 1mm lateral wobble, so it was time well spent.
I foolishly bought 25mm ID bearings and fitted them to the wheels before
I bought the shaft. My problem? In Melbourne, the only available steel
round bar is 24mm (But for $7 all up, I could live with that), so I
firstly shimmed them with duct tape, which lasted fine for a couple of
months, and then later with cut-up soft drink cans (which is what I am
still using, and it works a treat). Since I don't have a metal tap, I
used hose clamps to keep the wheels in place, and so adjusted the cover
dimensions accordingly.
To hold the wheels on the bench, I made the bandsaw's bottom wheel mount
first, and just bolted it down. When I finished with it, I then bolted
it to the frame.
Oct 26 2011
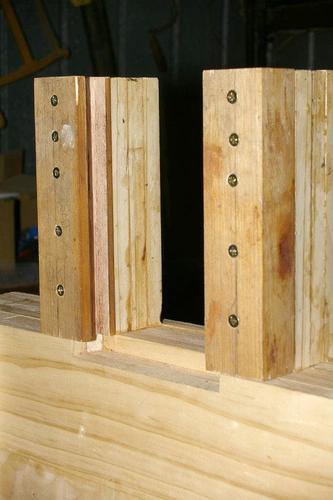
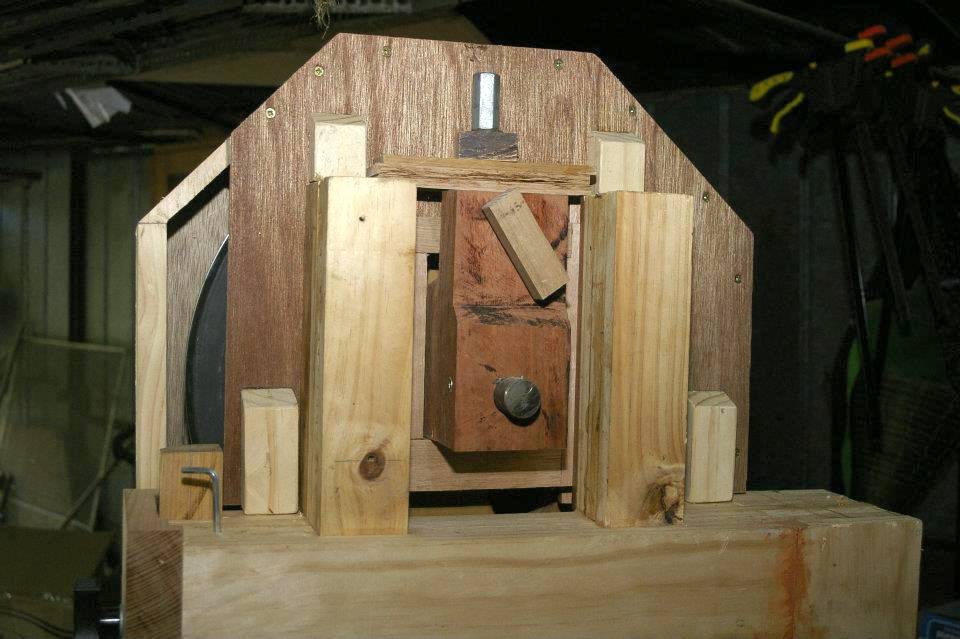
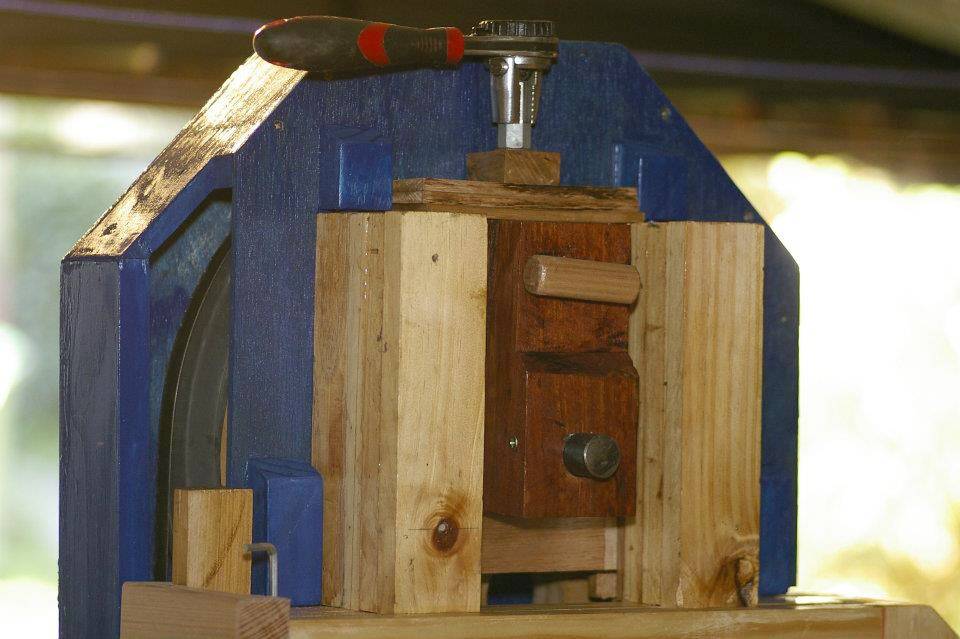
This part has to hold, tension and adjust the tilt of the top wheel, and
is made of a frame, brackets, wheel-block and crank.
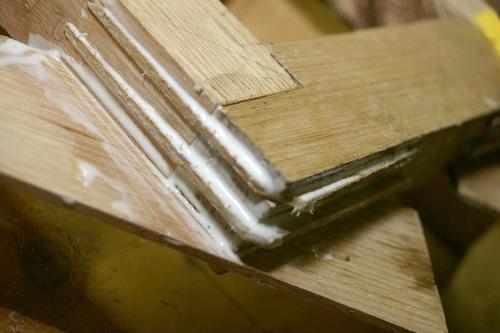
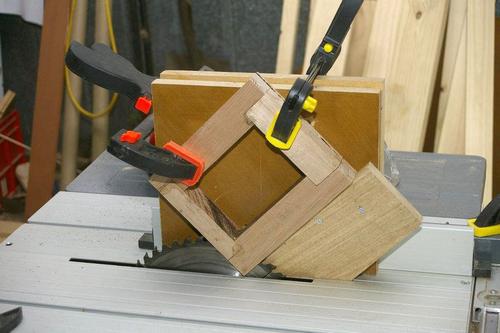
I made the frame first, and added splines for strength. To add the
splines, I modified my tenoning jig to hold the frame at 45 deg. over
the table saw to cut the channels. Then, I used a drill press and chisel
to make the bottom shelf in the frame.
In hindsight, it may have been easier to have cut the shelf before
gluing it up (I'll remember that for my next bandsaw ).
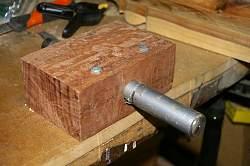
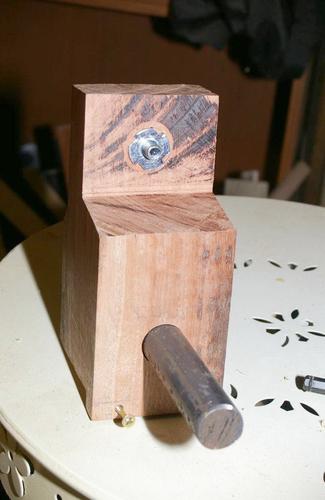
The top wheel mount, like the bottom wheel mount, I made out of an offcut
of a redgum sleeper/post that was left over from making raised garden
beds. It sits in the frame and the bolt in the top pushes against the
top of the frame, and adjusts wheel tilt.
I made the brackets out of a length of wood I found under the house, and
cut channels in to them using the table saw.
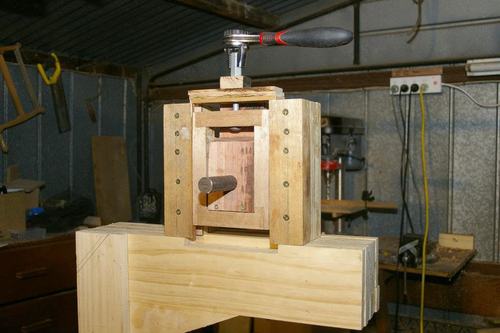
The frame and block are moved up and down in the frame by a long bolt
and coupler nut crank. To make the crank handle, I really need a working
bandsaw, so a wrench does for now. The 'springs' are slats of tassie
oak.
The top cover had to be built a little higher than in your plans because
of the amount of travel I needed to tension my large blade, so I can't
use the tension adjuster with the cover on. My solution is to use a
ratcheting wrench that now lives permanently on the bandsaw, as that was
easier than having to re-engineer the top assembly to stick a handle up
above the cover.
Oct 27 2011
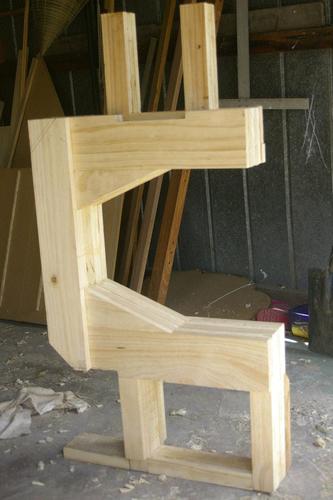 So, first thing I did was cut the wood for the frame, all 72 pieces of
it. Then, over about a week or so, I glued it up, layer by layer. The
final laminated frame is very strong and when I stood on the top of it
and bounced, it didn't - no flex, no movement, nothing.
So, first thing I did was cut the wood for the frame, all 72 pieces of
it. Then, over about a week or so, I glued it up, layer by layer. The
final laminated frame is very strong and when I stood on the top of it
and bounced, it didn't - no flex, no movement, nothing.
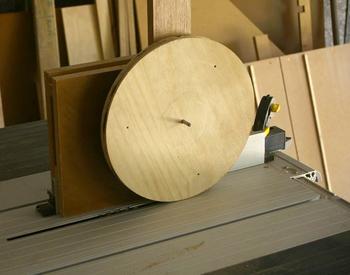
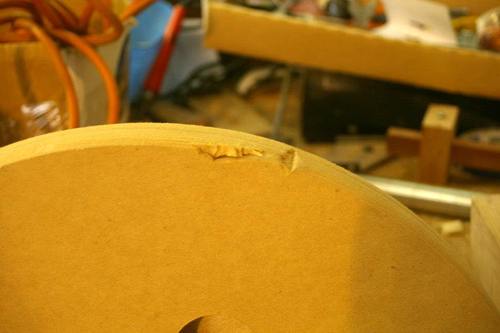
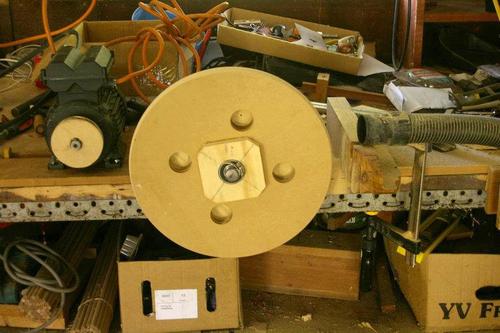 The plans call for spinning up the wheels with the motor and then truing
them and putting a crown on the rim by turning them as if on a lathe. If
you look at the photo of my initial setup, you might see a chunk out of
the rim - I have no turning experience or turning chisels, so my single
attempt to use a wood chisel to turn the wheel, not only took a piece of
the wheel with it, it also took a chunk out of the tool rest I had
rigged up and scared the bejezus out of me. So I switched to using a rasp
and file instead to shape the wheel - possibly slower, but far, far, far
safer and more controllable.
The plans call for spinning up the wheels with the motor and then truing
them and putting a crown on the rim by turning them as if on a lathe. If
you look at the photo of my initial setup, you might see a chunk out of
the rim - I have no turning experience or turning chisels, so my single
attempt to use a wood chisel to turn the wheel, not only took a piece of
the wheel with it, it also took a chunk out of the tool rest I had
rigged up and scared the bejezus out of me. So I switched to using a rasp
and file instead to shape the wheel - possibly slower, but far, far, far
safer and more controllable.
 Of course, with all that yummy MDF dust, I set up my shop vac to catch
as much as possible and wore a respirator, and found it fascinating to
watch the stream of dust come off the rasp and flow in a tight stream
through the air into the waiting hose, provided I held it in the right
place.
Of course, with all that yummy MDF dust, I set up my shop vac to catch
as much as possible and wore a respirator, and found it fascinating to
watch the stream of dust come off the rasp and flow in a tight stream
through the air into the waiting hose, provided I held it in the right
place.
 To see if it worked, I put the two wheels on, and tightened it up. Nice,
tight guitar-string tension on the blade, it stayed on the wheels, the
tensioner and tilt adjustment worked like a charm. (And nothing broke or
even looked like it could!)
To see if it worked, I put the two wheels on, and tightened it up. Nice,
tight guitar-string tension on the blade, it stayed on the wheels, the
tensioner and tilt adjustment worked like a charm. (And nothing broke or
even looked like it could!)
Then, I turned the wheels to see if the band would stay on the rims, and it wouldn't. It took me a bit of worrying and thinking to realize that the wheels, while the same distance from the frame, and directly in line with each other, were tilted on different planes. The bottom wheel, in particular, was angled with its top towards the frame, so I spent a bit of time planing the wheel mount to give it a flatter angle.
Then, with a bit of tilt-adjustment on the top wheel, success! The blade stayed in the centre of the wheels when I turned it with my hand.
So I clamped the motor on. The belt I have is a bit too long for the frame, so I'm waiting on a shorter one to arrive in the mail, but just to see if all my work was worth it or not, I just clamped it in place to see if it would work.
It was a big relief to see the blade stay on the wheels when it turned!
Oct 28 2011
I put inner tubes onto the wheels, and they seem to work fine. They were pretty straightforward to do too, and don't slip around, even though they're not glued on.
I'm not sure when the next update will be though, my wife gave birth to our third (and final!) child this morning, so I may not be able to get much time in the shed under my belt for the next little while.
Nov 6 2011

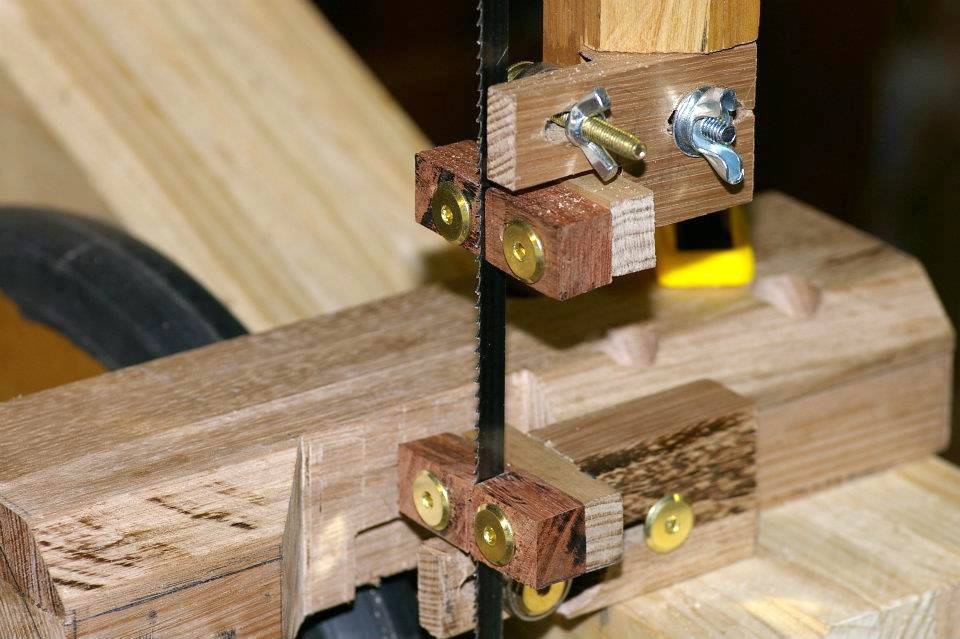
The latest work I have done has been to put the blade guides together and attach them to the bandsaw.
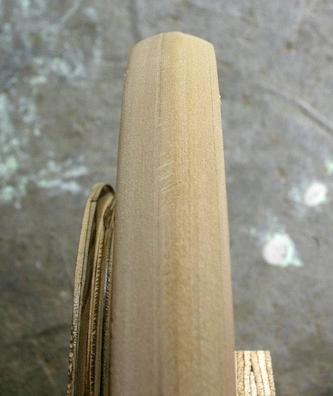
The bandsaw column was going to be made from a bit of redgum, but I stuffed up the cutting of it on the table saw, and after cutting it developed a slight bow, so I made another one out of a bit of cypress fence post. The column clamp was also shaped on the table saw - the piece wandered a little in cutting the bevel, but it still clamps OK, so it will do for now.
The most nerve-wracking part of this process was cutting the channel for it into the frame, because there was going to be no second chance if I got it wrong (but I didn't, so that was okay).
The top blade guide went together alright; my little rotary tool got a good workout cutting the bolts to size, and the bearing is from an old rollerblade wheel.
The bottom blade guide attaches to the mounting block for the table, so I had to build that first. It's made from two pieces of tassie oak glued together, and will eventually have trunnion cradles doweled to either end. I have to put the rest of the saw together first though, because I need a bandsaw to make the trunnions.
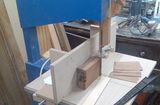
With the bottom block and guides together (after cutting the attachment slot in the guide upside down and having to make another guide), I got a bit impatient and clamped the block to the frame to see if the setup fit around a blade.
It did, which was a relief. Then, because I'm not good at waiting, I tried to cut a piece of wood with the saw (just 19mm tassie oak, because that was what was lying on the ground at the time). The motor's not on yet (I'm waiting on a shorter belt) so I turned the top wheel with one hand, and sort of pushed the wood through with the other.
Goodness, did it cut easily! I reckon I had around 200rpm on the wheel (when motorized it will be going around 550rpm), and it took no effort to push the wood through the blade. I'm really looking forward to seeing what it can do when it's finished.
Dec 17 2011
I've made a bit more progress on the bandsaw since last time I posted. Once reports were in, and the little one started sleeping more regularly, I've been able to get out into the shed a few times and do a bit more.
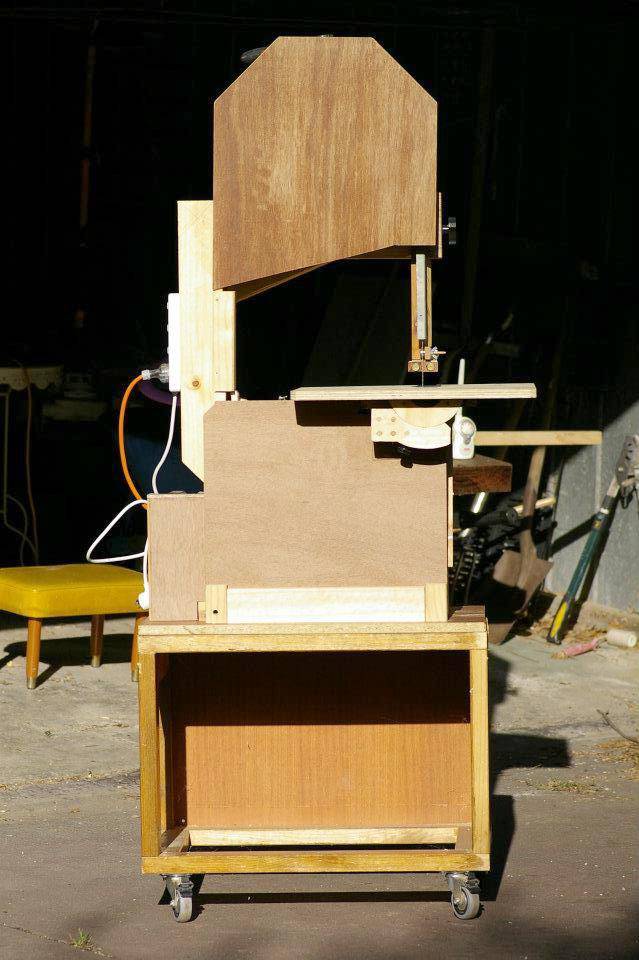
After getting the blade guides on and attaching the motor, the next step was to put covers on, because while the blade tracks beautifully on the tires, it is somewhat disconcerting (not to mention excessively dangerous) to have the blade whizzing around at 550rpm totally exposed.
Putting the motor on was interesting in itself. Because I couldn't readily find a pulley of the right size or shaft diameter, I had made one out of plywood. But its shaft hole was a bit off-centre, and I had made it too loose for the v-belts I had, so I made a new one. Same method as the previous ones on the table saw. Only this time I got a bit slack and was rushing, the upshot of which was it got shot across the garage (with drill bit still inside it), and I went inside to bandage up a lovely new gash on one of my fingers. Morals of the story? Wear gloves, don't rush and pay proper attention to what I'm doing.
So, fortunately the pulley wasn't damaged, so I replaced the old pulley and found that while it did reduce vibrations (with balancing the wheels and correct tension, once it's up to speed, it has very little vibration at all), whenever I pushed anything more than about 10mm thickness through it, it would bog down and after a while of doing this I would get a smell of burning rubber. So I re-seated the motor and switched v-belts, and it goes like the clappers now. The biggest I've pushed through so far is a 10cm redgum posts, but it didn't even pause or skip a beat.
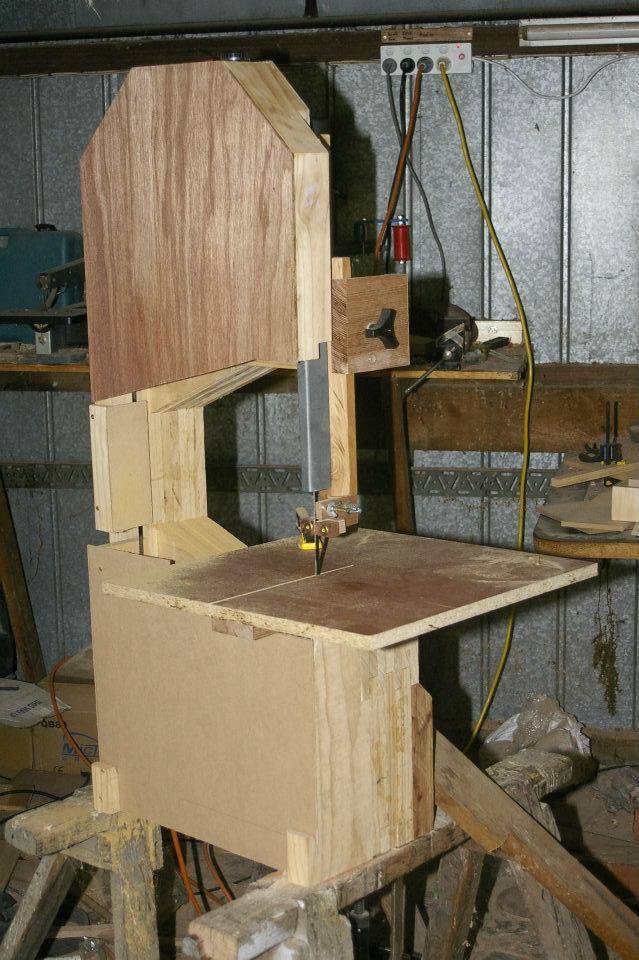

Anyway, I used the bandsaw to cut and shape the bottom cover brackets, and I've put on a temporary cover because I only have a temporary non-tilting table. I'll build the final cover when I get the table done, because that will affect its shape. The top cover is the proper one, and is held in place by pegs. I made it a bit deeper than in the plans because my shafts are longer to accommodate the hose clamps I'm using to hold the wheels on. This makes it very easy to get the cover on and off, and I must have done something right with making the pegs, because it is a nice, snug fit, with absolutely no rattling or movement once in place.
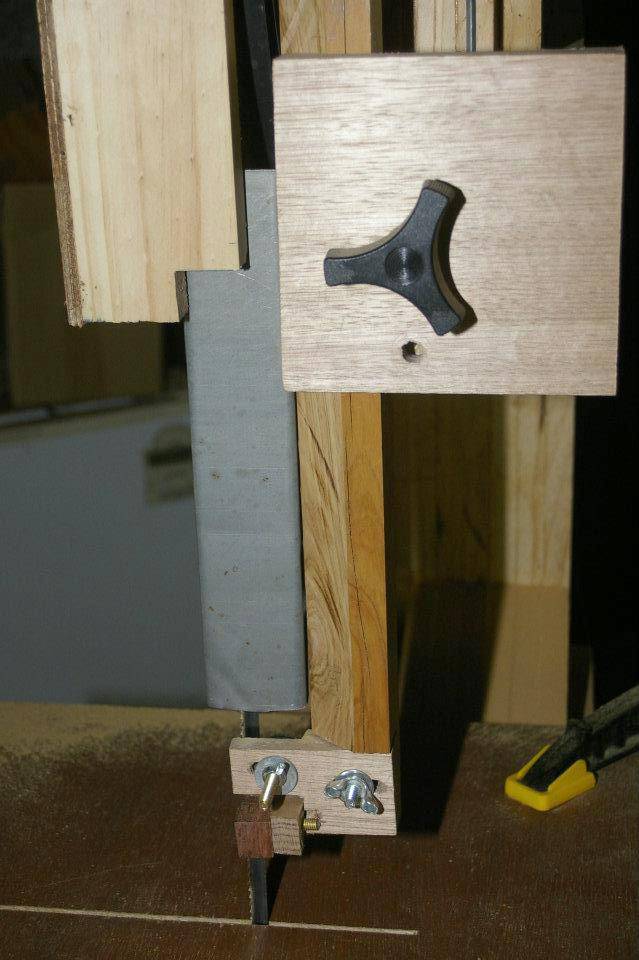
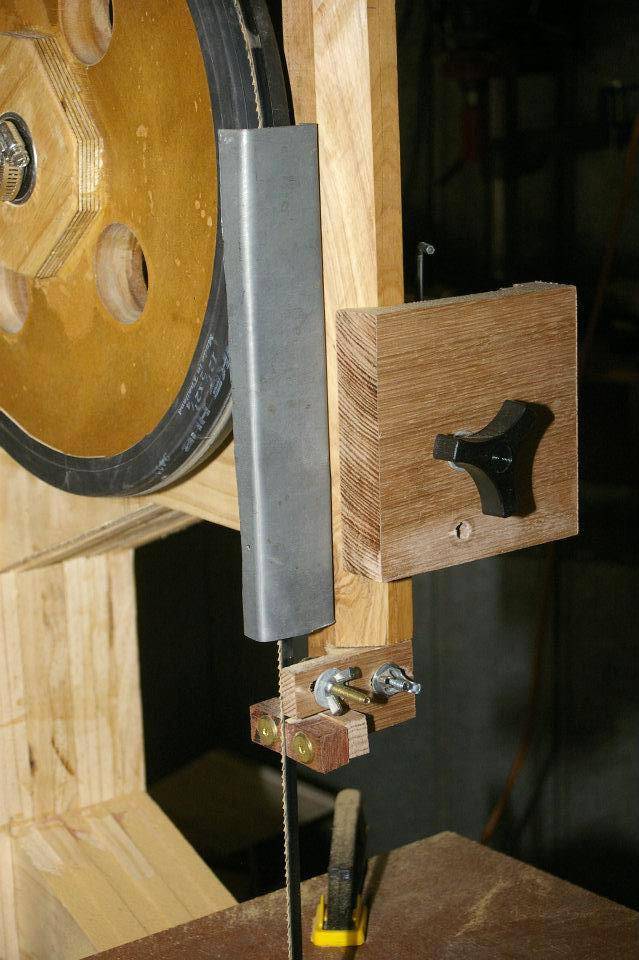
The last thing I did was put a metal blade cover on the guide column. There was a bit of sheet metal (not sure what) in the garage when we bought the place, so I cut it up with tin snips, bent it in my engineering vise and screwed it in place.
I still need to put a switch on to the frame, build the tilting table and final bottom cover, build a stand and give the whole thing a varnish and coat of paint (on the covers). But other than that, it's functional and ready to use.
Which is good, because tomorrow I'm starting on a rocking horse, which will hopefully be ready to go by Boxing Day (my second daughter's birthday).
Apr 4 2011
 Well it's been a few months, but I've finally found some time to
complete the bandsaw. Part of the problem was that since it has been
functional and safe since late December, I have been using it to do
other stuff rather than finishing it off.
Well it's been a few months, but I've finally found some time to
complete the bandsaw. Part of the problem was that since it has been
functional and safe since late December, I have been using it to do
other stuff rather than finishing it off.
The tilting table was finished in January, but I forgot to take photos of it; however, Matthias has excellent videos and pictures up on his website of how it goes together. I did make a slight change to his design though. He dowels the trunnion cradles to the table mount block, and I didn't feel that I had the ability to be as precise as he was (I have had some misfortunate attempts at doweling other things in the recent past ). So instead, I glued them in place, and then through-dowelled them, rather than having blind dowels. As best I could work out it will be as strong as the more traditional method, if a little messier to look at.
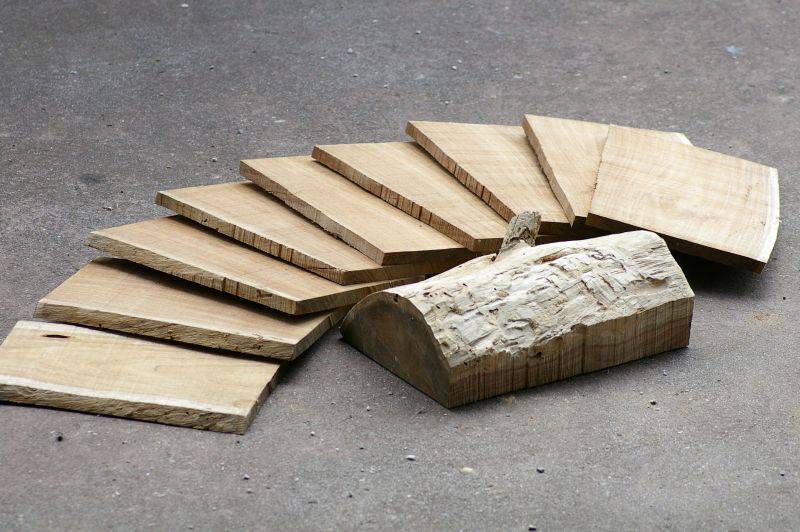
Then, apart from adding a power bar to the side to act as a switch (I have no electrical skills, so wasn't about to go about playing with the wiring) as I couldn't find an extension lead that ends with a switch for the life of me, I did nothing to it until this week. But school holidays have given me some time, and with the added impetus of a trailer load of green logs to slab and cut up for the lathe, I finished it off.
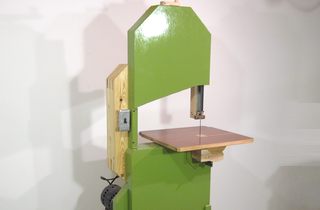
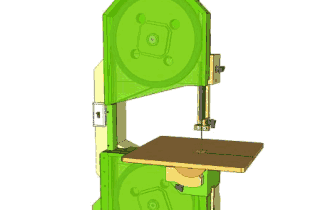
Please ignore the stand it is on; it is a bodge-job using random scraps of wood, and was done in half a day in between baby feeds. I just put a rectangular bin underneath it to catch the sawdust.


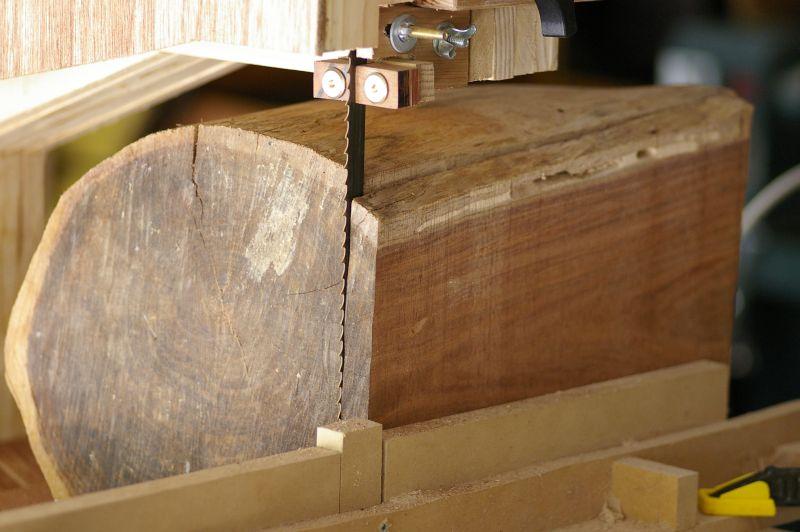
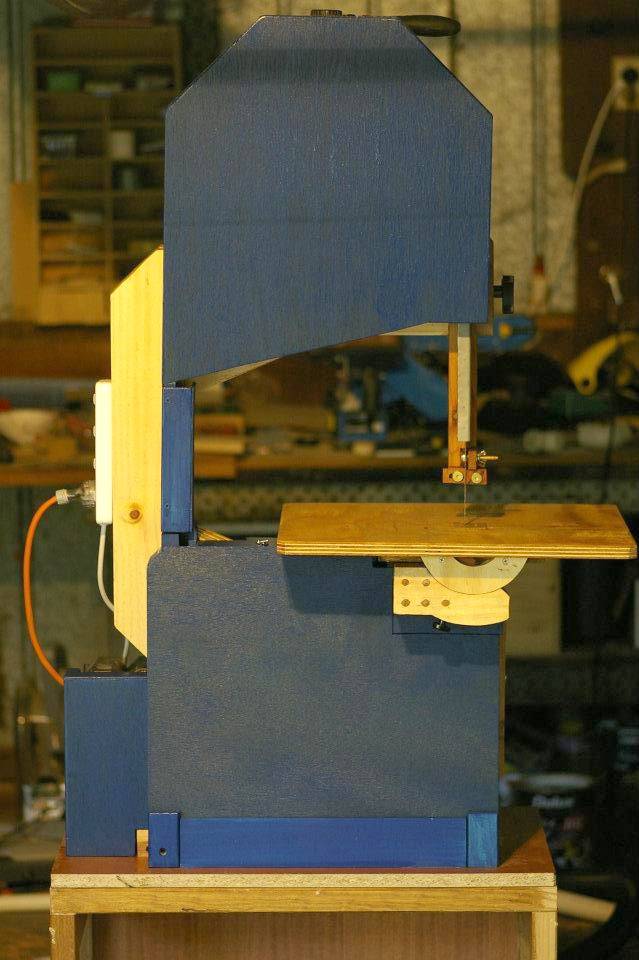 The blue paint is left over from making a doll's house, and the lighting
on the picture doesn't do it justice. I included a picture of
it slabbing a piece of 15 y.o. blackwood for my next project, a
cantilevered sewing box. (And of course the rocking horse again, the
reason I got permission to make it in the first place).
The blue paint is left over from making a doll's house, and the lighting
on the picture doesn't do it justice. I included a picture of
it slabbing a piece of 15 y.o. blackwood for my next project, a
cantilevered sewing box. (And of course the rocking horse again, the
reason I got permission to make it in the first place).
Not having had a bandsaw before, since making this one, I'm wondering how I ever did without it! My thanks to Matthias at woodgers.ca, where I found and bought the plans. It must be close to the best $20 I've ever spent.
More about Mike Mules's bandsaw:
http://www.woodworkforums.com/f27/wip-homemade-bandsaw-142786/
See also:
 More Reader built bandsaws |
 My homemade bandsaw |
 My homemade bandsaw / sawmill |
 16" bandsaw plans |
Back to my Woodworking website