Warren Brownell's Gilliom / woodgears bandsaw
Warren Brownell writes:
Hi Matthias,
 Here are pictures of a rebuild of the 18" Gilliom saw I
originally built in 1975. I had disassembled the saw and just brought
the Gilliom parts with me when I moved to Hawaii a few years back. I've
been a big fan of your site for a while and was never happy with the
vibration in the upper part of the old saw, though I have to say, it
always got the job done. So when I started the rebuild, it was a pretty
obvious choice to me to put the old Gilliom parts on a glue lam frame
following your basic design.
Here are pictures of a rebuild of the 18" Gilliom saw I
originally built in 1975. I had disassembled the saw and just brought
the Gilliom parts with me when I moved to Hawaii a few years back. I've
been a big fan of your site for a while and was never happy with the
vibration in the upper part of the old saw, though I have to say, it
always got the job done. So when I started the rebuild, it was a pretty
obvious choice to me to put the old Gilliom parts on a glue lam frame
following your basic design.
I just made the first cut with the saw this morning and it works
beautifully. With a solid frame I felt confident to upgrade from the old
saws 3/4hp 1725 rpm motor to a 1 1/2hp 3450 rpm motor. I switched the
old 2 1/2" motor pulley to a 2" which was the smallest pulley I had
around. The blade is moving quick and it cut a piece of 3/4 plywood
faster than I'm interested in feeding it in. The Gilliom saw was
designed to saw at 2000 blade feet per minute and I'd imagine the new
saw is over 3000 fpm.
My goal was to use as many of the old Gilliom parts as possible. The
Gilliom bearings and shift are bolted to the lower frame which puts the
pulley on the opposite side of the frame from your saw. I cut 3 extra
inches off the shaft. The doors close with the hanger bolts and
wing nuts from the old saw.
I splurged on a pair of urethane tires. They're not supposed to need glue
but I was concerned they could slide off (they are really slick). A thin
film of urethane glue solved that problem. The tires and a hand full of
nuts and bolts were my only other expenses. The frame is made from
resawed wood left over from a friend's ceiling and the
plywood is left over from the kitchen cabinets in my house.
The saw is sitting on a 16" high base and stands 6' 3" (1.9 m) tall,
plus the adjustment knob on top. I don't know what it weighs but it was
all I could do to lift it up on the base.
I have some koa stored under the shop so the next project is to unbolt
the table and make a bolt-on sawmill attachment similar to Rudolph
Baumueller's. I'm confident the saw will have no problem turning the
koa into lumber.
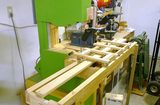
 I went old school and drew out plans on a sheet of shelf paper. Your
plans are behind on the wall for reference. The upper part of the frame
is made from some tongue and grooved pine left over from a friends ceiling project.
I went old school and drew out plans on a sheet of shelf paper. Your
plans are behind on the wall for reference. The upper part of the frame
is made from some tongue and grooved pine left over from a friends ceiling project.
 The lower frame is from a packing crate.
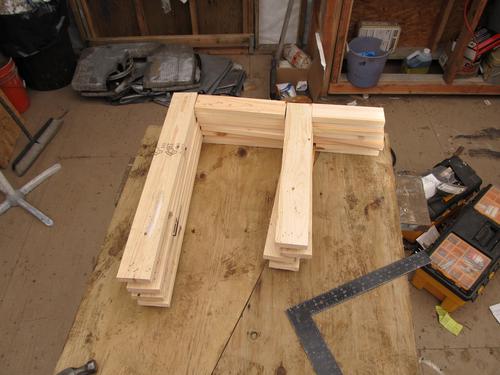
I did a dry assembly with drywall screws to make certain that everything was going to line up ok.
The Gilliom shaft was too long and I cut it later.
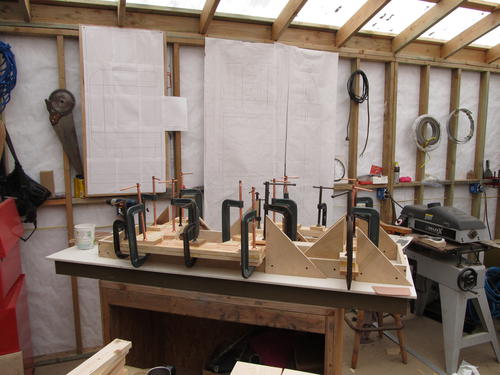 I made an assembly jig out of plywood so everything would lay flat and
I'd have room for the clamps. I also used the drywall screws from the
dry assembly to line things up. There were small irregularities in the
thickness of the pine that gave me a few hassles. If I'd thought of it
I would would have run everything though the thickness sander first.
But it all worked out ok anyway.
I made an assembly jig out of plywood so everything would lay flat and
I'd have room for the clamps. I also used the drywall screws from the
dry assembly to line things up. There were small irregularities in the
thickness of the pine that gave me a few hassles. If I'd thought of it
I would would have run everything though the thickness sander first.
But it all worked out ok anyway.

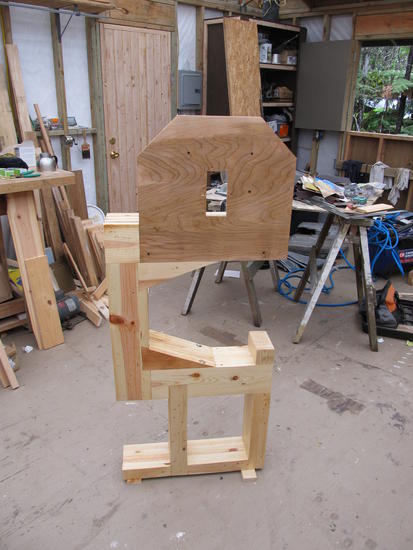
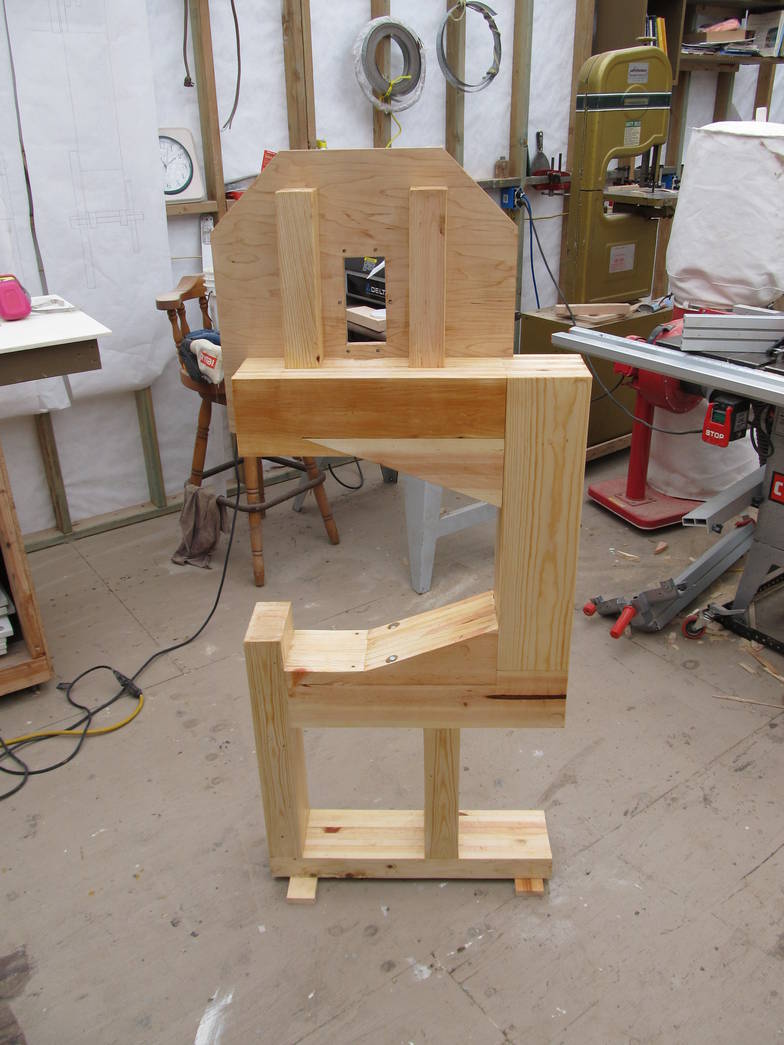
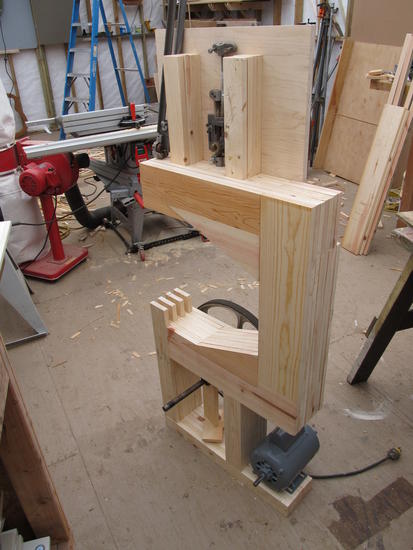
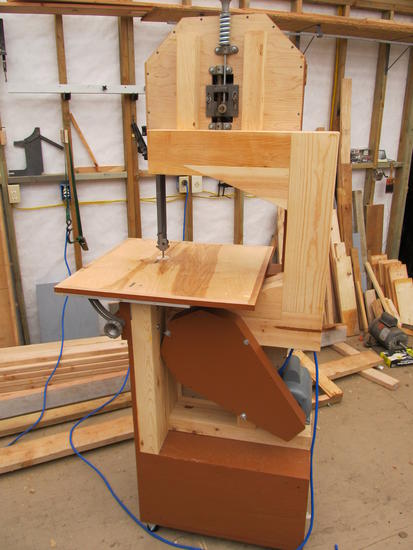
Here everything is glued up, the upper plywood piece is screwed and
glued in place and the holes are drilled to attach the Gilliom shaft and
bearings.
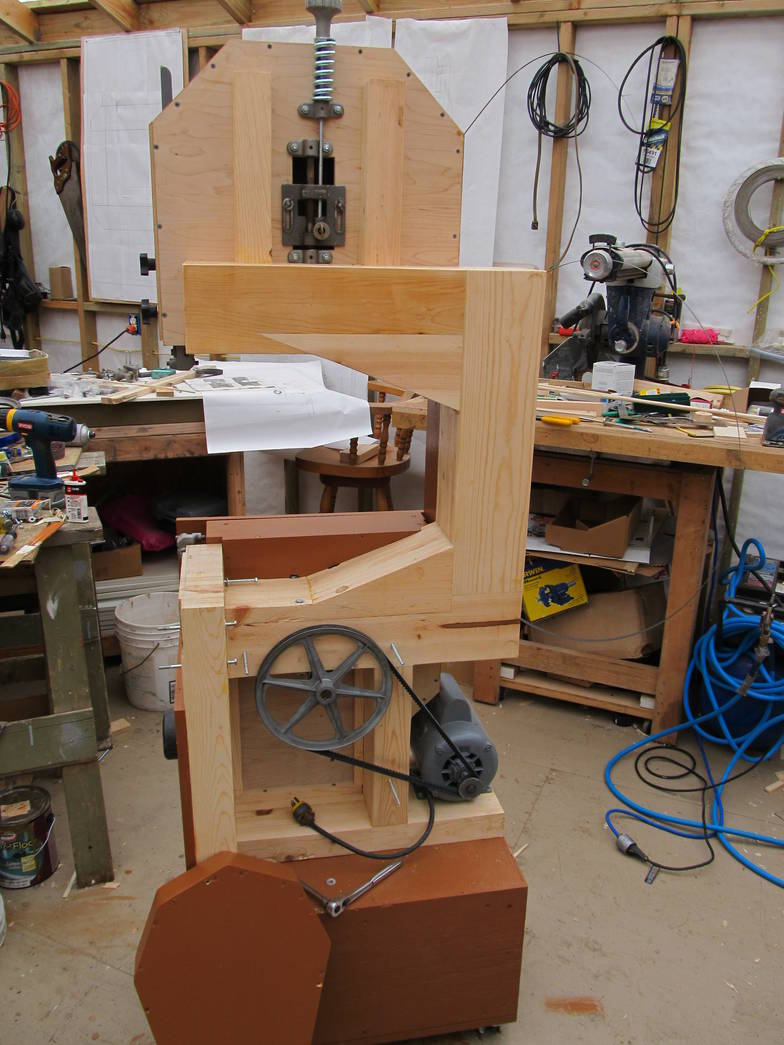
 I put a blade on with a little tension to get the bearings on in the
right place. The shaft had to be square to the frame and the back of
the blade running straight with the vertical part of the frame. I also
checked the location of the lower blade guide so there would be the
correct clearance between the frame and the blade. That determined how
much of the shaft would need to be cut off.
I put a blade on with a little tension to get the bearings on in the
right place. The shaft had to be square to the frame and the back of
the blade running straight with the vertical part of the frame. I also
checked the location of the lower blade guide so there would be the
correct clearance between the frame and the blade. That determined how
much of the shaft would need to be cut off.
 I widened the front of the saw to give more support to the bolt on
table. I wanted to be able to remove the table and bolt on a sawmill
sled similar to the one
Rudolf Baumueller has on his saw.
I widened the front of the saw to give more support to the bolt on
table. I wanted to be able to remove the table and bolt on a sawmill
sled similar to the one
Rudolf Baumueller has on his saw.
There was discussion in the Gilliom builders
group a while back about adding a spring to the upper wheel adjuster.
The thought was that if you eliminate the natural flex that the old saw
had it would be good to add a spring. This made sense to me so I bought
a spring from Grizzly. It's the same spring they use on several of
their bandsaws in this size range and it seems to be doing the job. It
does make the wing nuts on the tensioner obsolete. If I were to tighten
them now it would lock the vertical position.
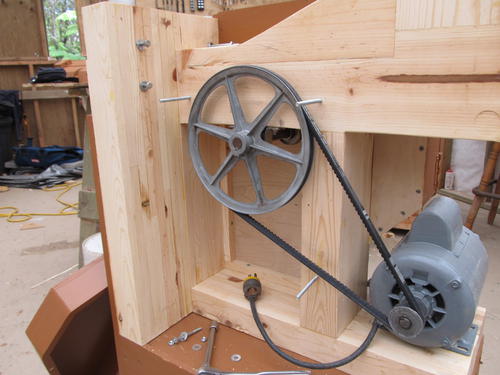
The belt guard
is held on with wing nuts on three pieces of 1/4" all-thread that I
threaded into 3/16" holes.

The dust port is the end of a 3" ABS plumbing fitting with a short piece
of 3" pipe glued into it. The 3" pipe fits snugly into a hole drilled
with a 3 1/2" hole saw. My 4" vacuum hose is a tight fit on the
plumbing fitting.
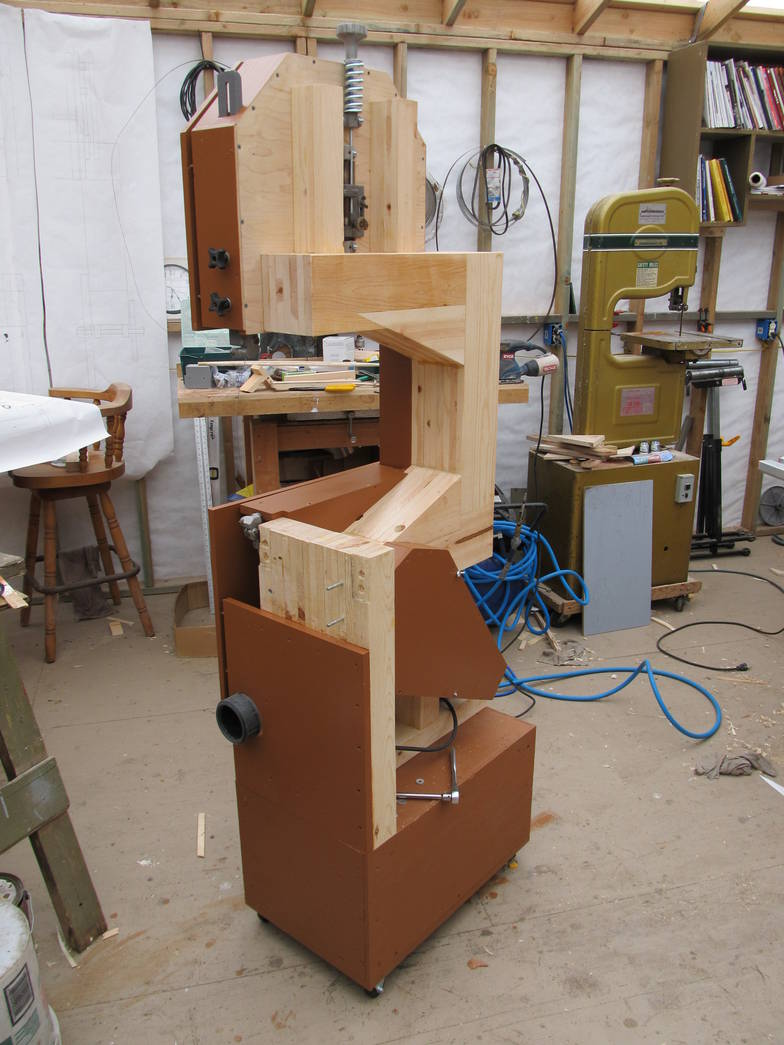
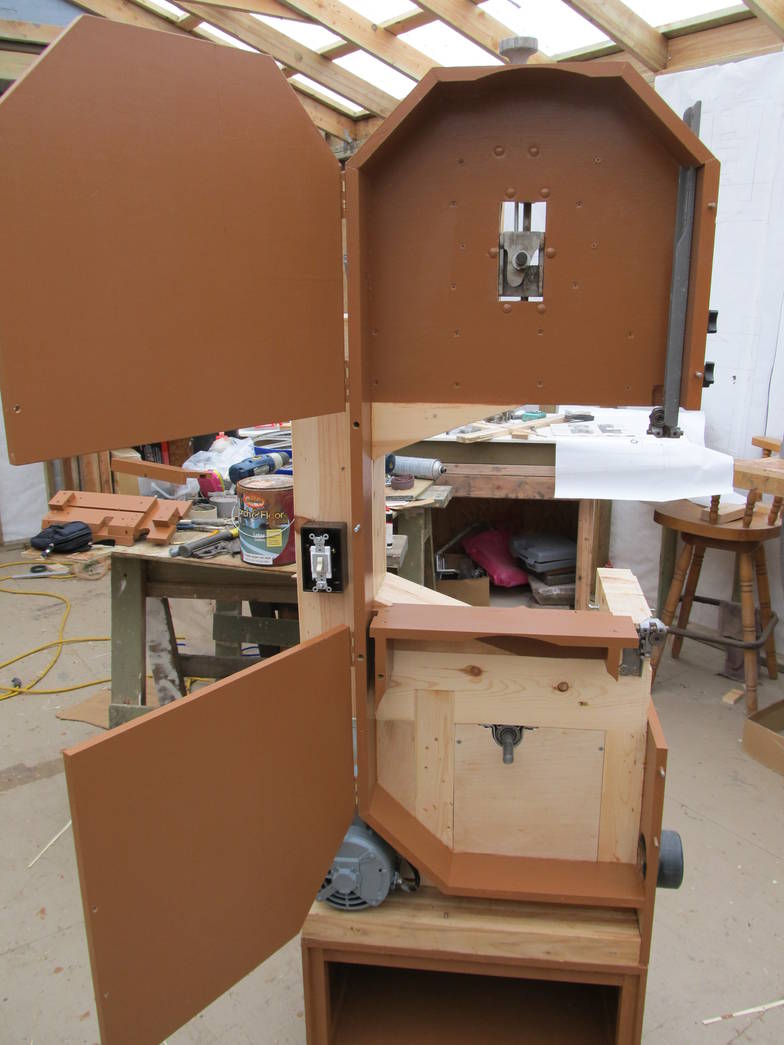
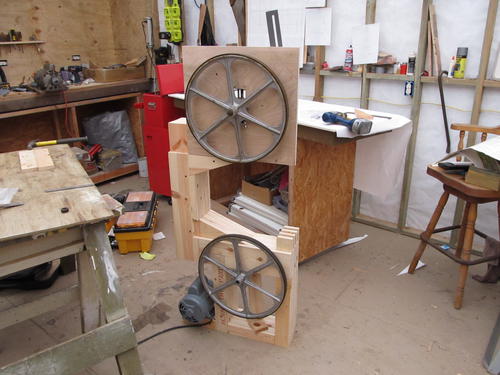
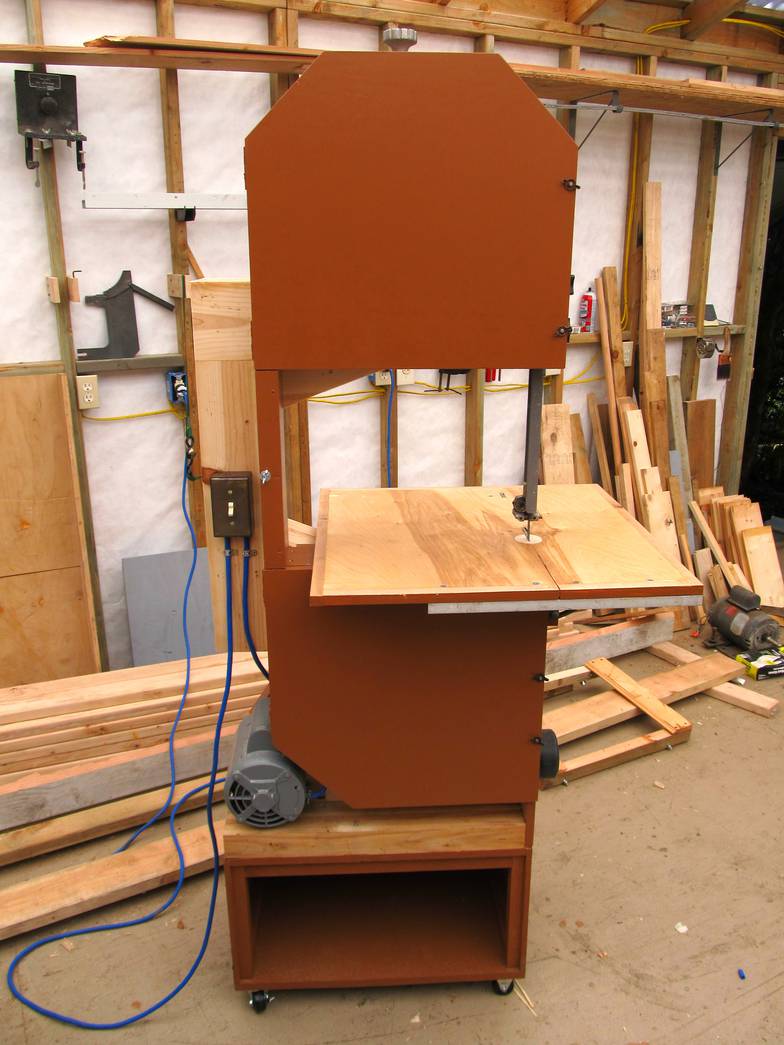
 The switch is in place ready to wire and the saw is ready to have the
wheels put on. The hanger bolts and wing nuts that hold the doors
closed are from the old Gilliom saw. The 3/4" X 4" pine wheel surround
is attached with glue and 3" deck screws countersunk a couple inches
into the edge of the pine. The motor is 1 1/2 HP 3450 rpm. Gilliom
cautioned against using more than a 3/4 HP 1725 rpm motor but with the
extra frame stiffness this saw handles the bigger motor fine.
The switch is in place ready to wire and the saw is ready to have the
wheels put on. The hanger bolts and wing nuts that hold the doors
closed are from the old Gilliom saw. The 3/4" X 4" pine wheel surround
is attached with glue and 3" deck screws countersunk a couple inches
into the edge of the pine. The motor is 1 1/2 HP 3450 rpm. Gilliom
cautioned against using more than a 3/4 HP 1725 rpm motor but with the
extra frame stiffness this saw handles the bigger motor fine.
The Gilliom ran at 2000 blade feet per minute.
Jim Wheeler over at the
Gilliom builder's yahoo group did the calculation and figures this saw at
3300 fpm. A major improvement!
I'm also pushing the old design with a wider blade. Gilliom maxed out
with a 1/2" blade and I'm running a 3/4" blade. This is pushing the
design of the Gilliom blade guides but since the 3/4" blade is much
thicker and stiffer it seems to be working.
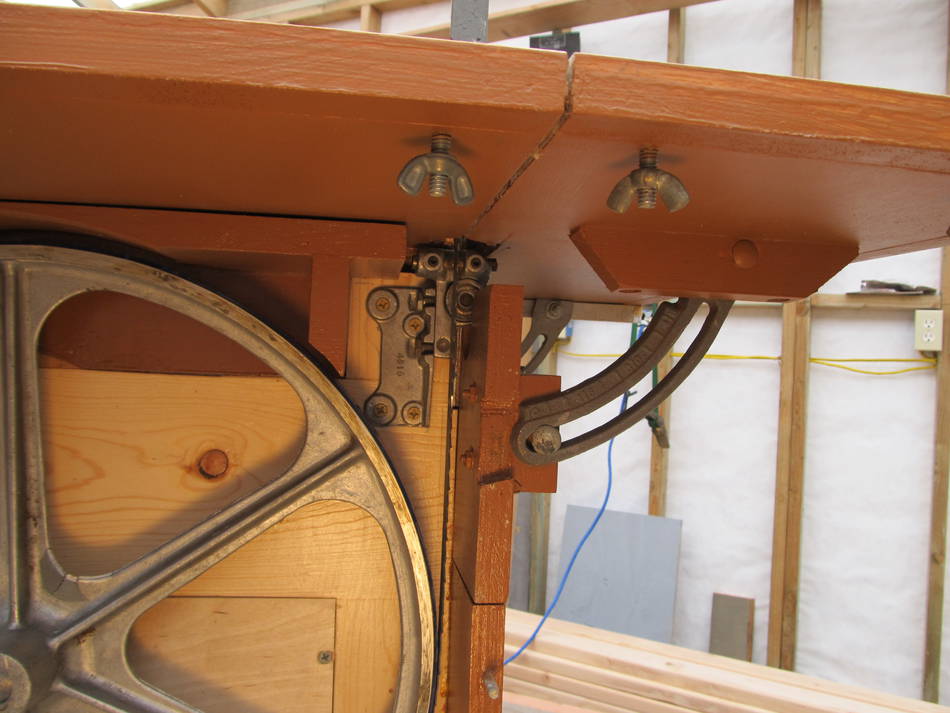
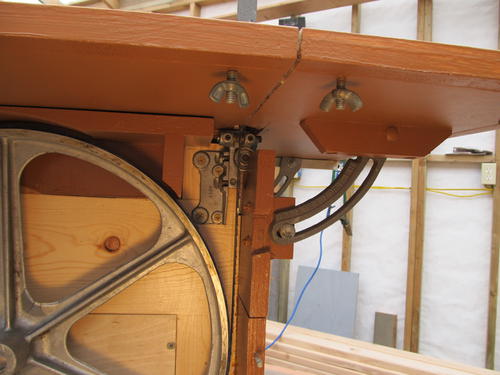
 The underside of the bolt-on table. Hinges, tilt mechanism and aluminium
stiffener are all from the old Gilliom saw. The aluminium was the back
guide for a fence and stuck out 3" past the edge of the table. I still
have the parts to build the fence but since they've been sitting around
for almost 40 years it's probably not happening. I was tired of bumping
into the aluminium so I set it back even with the table edge.
The underside of the bolt-on table. Hinges, tilt mechanism and aluminium
stiffener are all from the old Gilliom saw. The aluminium was the back
guide for a fence and stuck out 3" past the edge of the table. I still
have the parts to build the fence but since they've been sitting around
for almost 40 years it's probably not happening. I was tired of bumping
into the aluminium so I set it back even with the table edge.
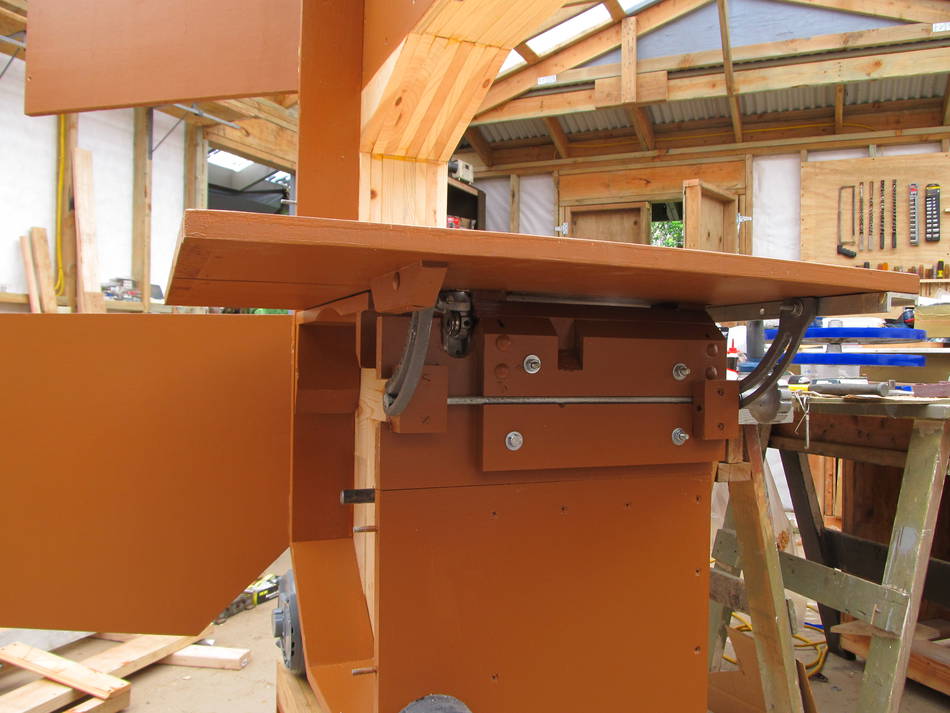
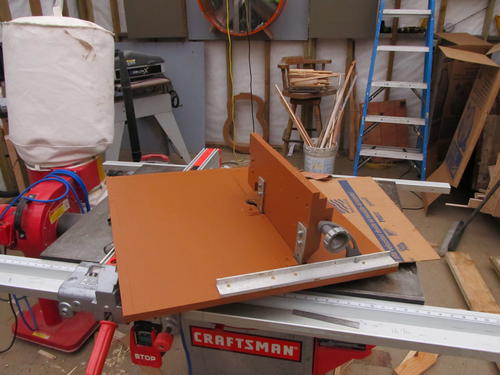
 The table bolted onto the saw. The piece of hardwood in front is the
"stiffener" from the old saw. The notch cut in the top was for clearance
for a piece of hardwood that stiffened the table. Gilliom suggested
using a sink cutout for the table which I did on the original saw. It
gave a nice smooth Formica surface and I kind of miss it. Gilliom has
the tightening knob in front but on this saw I moved it to the back so
it wouldn't interfere with the lower door.
The table bolted onto the saw. The piece of hardwood in front is the
"stiffener" from the old saw. The notch cut in the top was for clearance
for a piece of hardwood that stiffened the table. Gilliom suggested
using a sink cutout for the table which I did on the original saw. It
gave a nice smooth Formica surface and I kind of miss it. Gilliom has
the tightening knob in front but on this saw I moved it to the back so
it wouldn't interfere with the lower door.
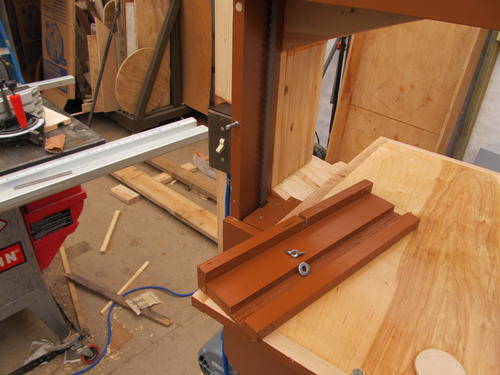
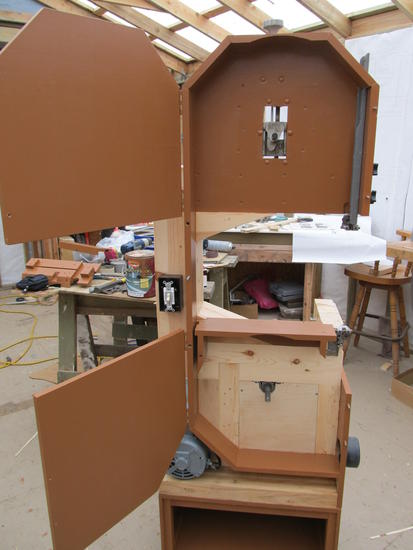
The back blade guard was my own "invention."
Back blade guard in place.
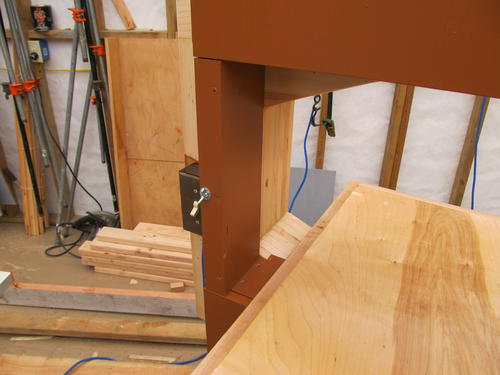
View of the lower blade guide.
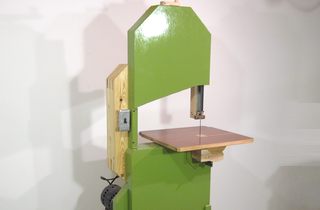
Finished saw. It's standing on a 16" tall box. Total
height is 6' 3" plus the tensioning knob. The Gilliom aluminium strip on
the front of the table can be removed by loosening 4 wing nuts to change
the blade.
Warren Brownell, Volcano, HI
Matthias Comments
I never used a Gilliom saw myself, but from the design, with all the difficult
parts provided in the kit, I think it was a pretty easy to build saw.
The main caveat seemed to be that it wasn't that stiff. Retrofitting a laminated
beam frame into the old one would be very awkward, so building an enclosure around
a laminated beam frame makes more sense.
I'm told the Gilliom company still exists, but they have absolutely no web presence, so it's hard
to be sure. The kit wasn't that cheap, and with cheap import bandsaws, I think the kit
is much less attractive. Though, if you can build a bandsaw without a kit from scratch,
that changes the equation again.
More about Gilliom manufacturing
 Here are pictures of a rebuild of the 18" Gilliom saw I
originally built in 1975. I had disassembled the saw and just brought
the Gilliom parts with me when I moved to Hawaii a few years back. I've
been a big fan of your site for a while and was never happy with the
vibration in the upper part of the old saw, though I have to say, it
always got the job done. So when I started the rebuild, it was a pretty
obvious choice to me to put the old Gilliom parts on a glue lam frame
following your basic design.
Here are pictures of a rebuild of the 18" Gilliom saw I
originally built in 1975. I had disassembled the saw and just brought
the Gilliom parts with me when I moved to Hawaii a few years back. I've
been a big fan of your site for a while and was never happy with the
vibration in the upper part of the old saw, though I have to say, it
always got the job done. So when I started the rebuild, it was a pretty
obvious choice to me to put the old Gilliom parts on a glue lam frame
following your basic design.