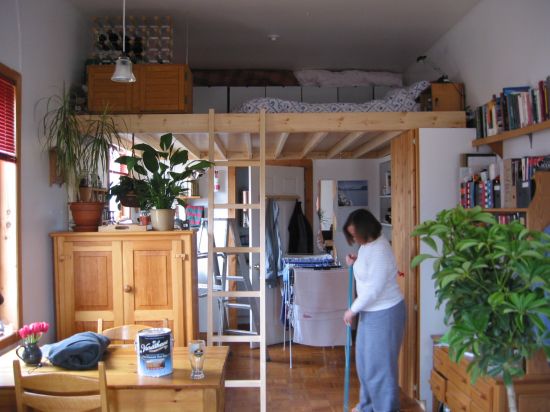
When my sister Johanna moved into a tiny studio apartment back in 2004, she wanted a loft for a bed so that at least she could get the bed out of the way. The apartment had a 10'6" (3.2 meter) high ceiling, so there was ample height for a workable sleeping loft.
I decided to build a platform above the kitchen end of the apartment, with the top of the platform at a height of 7 ' (2.1 meters). This still gave her about 3' 6" (105 cm) of height for he loft, enough to sit up. But also leaving enough height below so that there was no risk of bumping one's head against it.
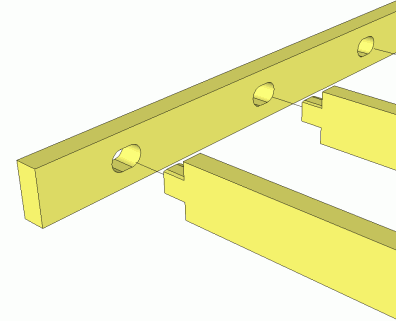
I didn't want to use up any more height than necessary, so I used 2x4's for the joists of this loft, and tenoned them into the supports, rather than resting them onto a support.
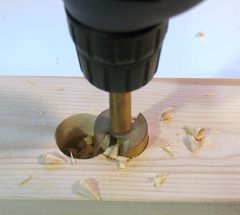
 The mortises consisted of two 1 1/4" partially overlapping, drilled 3/4" apart. At that spacing,
the center of the second hole was still outside the center of the first hole, which allowed
me to drill both with a hand drill. This did make the hole a little bit wider than
the tenon, but it cut down on the amount of chiseling and fitting I'd have to do to get the
joist's tenons into the holes.
The mortises consisted of two 1 1/4" partially overlapping, drilled 3/4" apart. At that spacing,
the center of the second hole was still outside the center of the first hole, which allowed
me to drill both with a hand drill. This did make the hole a little bit wider than
the tenon, but it cut down on the amount of chiseling and fitting I'd have to do to get the
joist's tenons into the holes.
One the end that was against the wall, I only used a 2x4 for a support, as I could screw it directly into the wall studs in several places, so there was no issue of the support sagging.
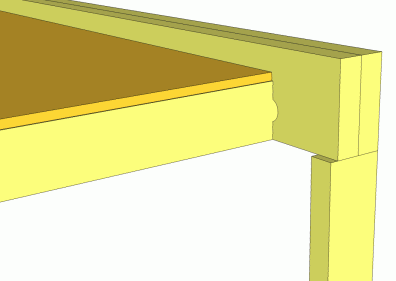
On the other end, I used two 2x6's, one with holes in it for the joists, the other attached to the front, to hide the holes, and provide more strength.
To support the cross beam formed by the two 2x6's, I put a vertical stud against the wall and down to the floor to support the load. The support on one side ended up being inside a vertical cupboard, so it was conveniently hidden.
I could have eliminated the need for this support by running the joists across from wall to wall, but I wanted to keep the loft a little bit away from the kitchen window, so I didn't want to screw it into that wall. The other catch would have been that the room was 10.5' wide, so I would have had to use 12 foot 2x4's, and that would not have been very steady. Plus, it would have been impossible to insert the 2x4 joists into the holes on either end! As it was, the 2x6's provided a nice lip on the front edge to keep small objects from rolling off the loft by accident.
 My sister originally just wanted something quick and nailed together from 2x4's and plywood.
I convinced her to spend an extra $50 for some veneered plywood, and varnish for everything.
With the loft being above the kitchen area, this would make it easier to clean grease off of it
eventually.
My sister originally just wanted something quick and nailed together from 2x4's and plywood.
I convinced her to spend an extra $50 for some veneered plywood, and varnish for everything.
With the loft being above the kitchen area, this would make it easier to clean grease off of it
eventually.
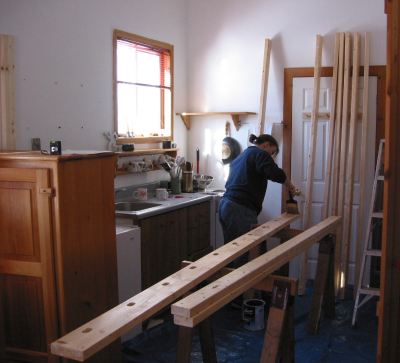
I got my sister to varnish the parts as I was making them. Here she's varnishing the front support, with the holes for the joists. The water based varnish dries quickly, so we were able to get two coats onto it without holding up building the loft too much. its a heck of a lot easier varnishing the parts than it is to varnish once its built.
I also brought my thickness planer, and planed a millimeter off each side of the lumber before varnishing. 2x4's come planed, but they are never planed as smoothly as one would plane something for indoor use.
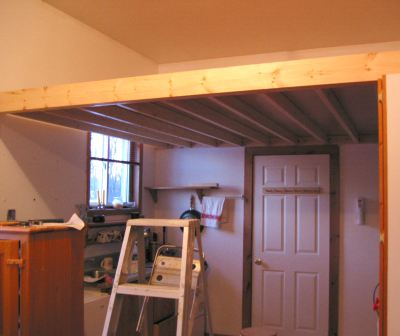
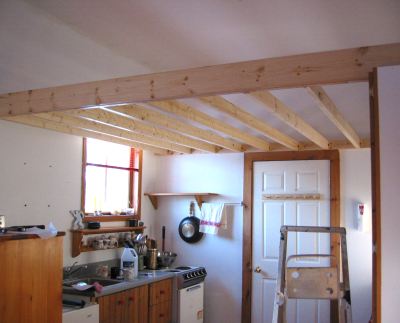 The joists are up. The door frame provided a convenient reference for the height and I used it
to support the rail while I screwed it against the studs in the wall.
The joists are up. The door frame provided a convenient reference for the height and I used it
to support the rail while I screwed it against the studs in the wall.
 In this photo, you can see parts of the holes for the mortises for the joists. Not ideal, but
given time constraints, not too bad.
In this photo, you can see parts of the holes for the mortises for the joists. Not ideal, but
given time constraints, not too bad.
I also screwed 3" wood screws through the joist support and tenon as an extra precaution, just in case the joist support should somehow split apart along the mortises.
It was screwing these screws in that my Makita drill broke.
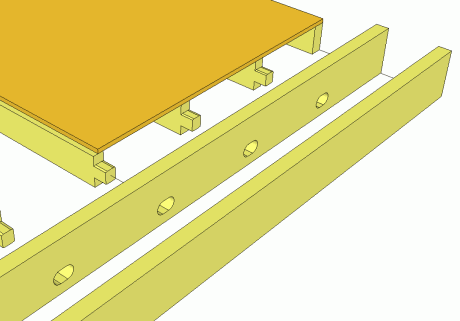
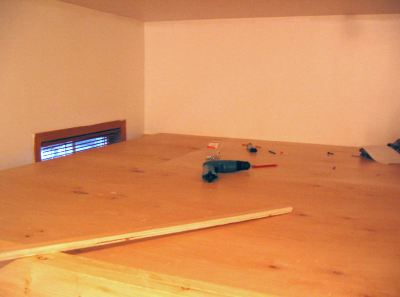 The plywood is mostly screwed in. I used the piece of wood nearest the camera as a ruler to mark
where the joists ran. I really wanted to avoid screwing into nothing — that
would have looked ugly from below.
The plywood is mostly screwed in. I used the piece of wood nearest the camera as a ruler to mark
where the joists ran. I really wanted to avoid screwing into nothing — that
would have looked ugly from below.
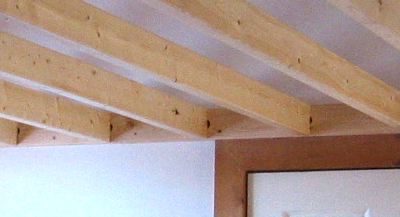
 The loft with the plywood installed, as seen from below. It was getting later in the day by this time,
so much less light from outside.
The loft with the plywood installed, as seen from below. It was getting later in the day by this time,
so much less light from outside.
There was stil a ladder to be built, but that was something to build in my workshop at a later date. In the mean time, the stepladder provided for my sister to climb up to the loft.
A month later, I finally got around to building a nice wooden ladder for the loft.
Next: Building the ladder for the loft
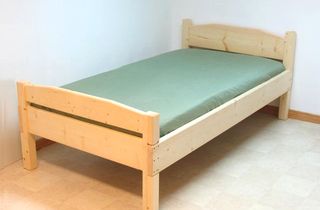 Building a bed from 2x4's
 Quick shelves with
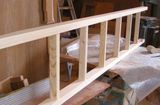 Loft bed ladder
 Tractor bunk bed
 Under bed storage