 Head board and post detail.
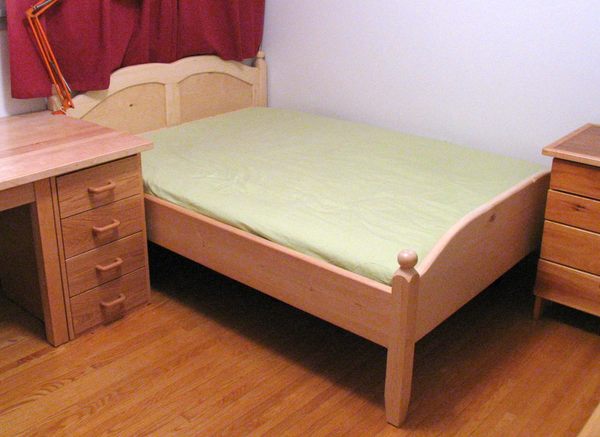 This is the bed where I had it originally set up.
I used an older style mattress that is only about 15 cm (6") thick, which allows
for plenty of room for keeping things under the bed. There is about 26 cm (10.5")
of space under the bed, plenty of room for keeping suitcases and such.
This is the bed where I had it originally set up.
I used an older style mattress that is only about 15 cm (6") thick, which allows
for plenty of room for keeping things under the bed. There is about 26 cm (10.5")
of space under the bed, plenty of room for keeping suitcases and such.
If you are planning on putting one of those newer really thick mattresses on it,
you may want to make the bed's legs a bit shorter.
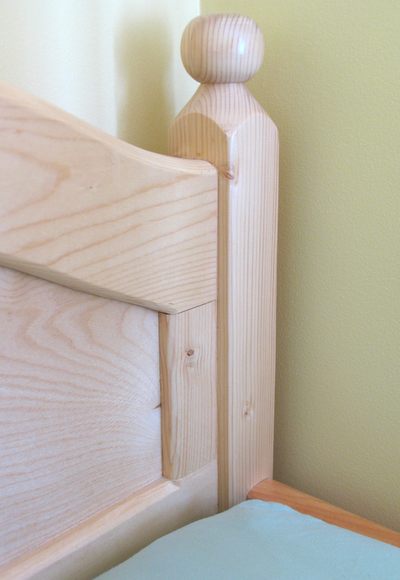
Head board and post detail.
I actually carved al the chamfers into the headboard
by hand. I didn't at the time have a chamfer bit for my router, and the quarter
round bit's roller guide would have hit the slot.
Lesson learned: Rout the inside edges of the boards before routing the slot.
But I liked the hand carved look that resulted.
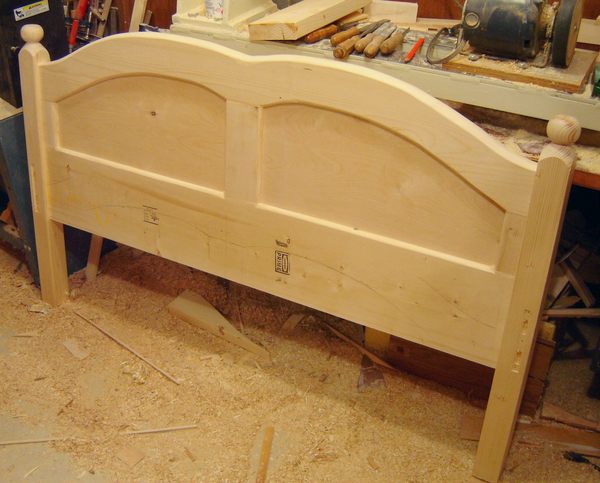 The headboard all finished up.
Even though the lumber came planed, I ended up running it all through my planer to get
a smoother surface. The dimensions in the plan are sized accordingly to account for a
millimeter of material removed from each side of the boards.
The headboard all finished up.
Even though the lumber came planed, I ended up running it all through my planer to get
a smoother surface. The dimensions in the plan are sized accordingly to account for a
millimeter of material removed from each side of the boards.
The bottom rail of the headboard needed a bit of flattening, and it ended up that the
top edge of it was all planed, and the labels, and some marks from when I was working out
the profile of the headboard were still visible on the board.
I left these on quite deliberately, because they get covered by the mattress. I kind of like having
a bit of hidden history of where it came from like that.
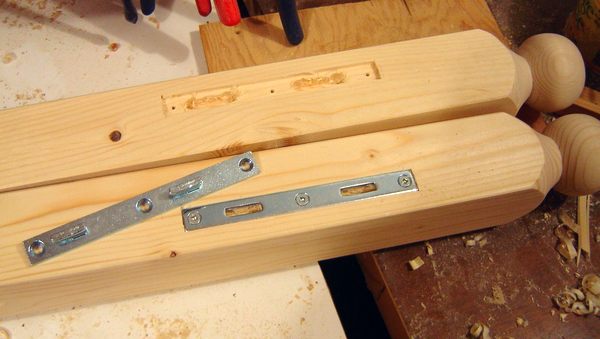 These are the 6" bed rail clips. At the time, these could be bought from the Home Depot, but
now they only have the 4" bed rail clips, which are too small. You can order the 6" bed rail
clips from rockler.com.
These are the 6" bed rail clips. At the time, these could be bought from the Home Depot, but
now they only have the 4" bed rail clips, which are too small. You can order the 6" bed rail
clips from rockler.com.
Alternately, you can forego all the bed rail clips and use pocket holes to screw the bed rails onto the posts. This reduces the costs, but means you need a screwdriver to take the bed apart for moving.
I used this approach for another bed, and you can see photos of
joining the rails with pocket holes here.
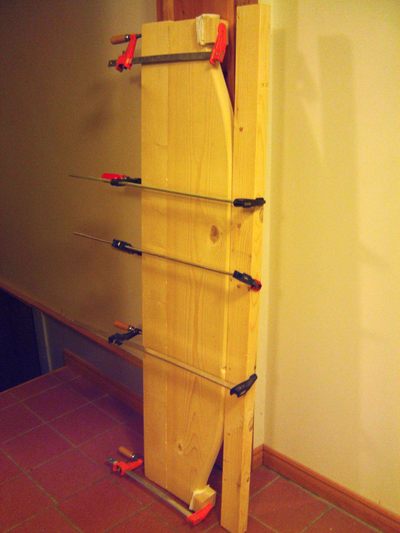 This picture shows gluing the footboard. The footboard is too wide to make out of one piece
of lumber. When I built the bed, I was too keen on seeing how the curve would turn out that I
neglected to laminate another piece to it to bring it up to full width until after I had cut and
carved the curve on the top. I had to make some special curved blocks to clamp the other
board to it without damaging the top. You can avoid this problem by laminating the boards
together before even cutting out the curve of the footboard.
This picture shows gluing the footboard. The footboard is too wide to make out of one piece
of lumber. When I built the bed, I was too keen on seeing how the curve would turn out that I
neglected to laminate another piece to it to bring it up to full width until after I had cut and
carved the curve on the top. I had to make some special curved blocks to clamp the other
board to it without damaging the top. You can avoid this problem by laminating the boards
together before even cutting out the curve of the footboard.
The headboard's top section is cut from a very wide single piece of lumber, so there was no
need to do any gluing on that.
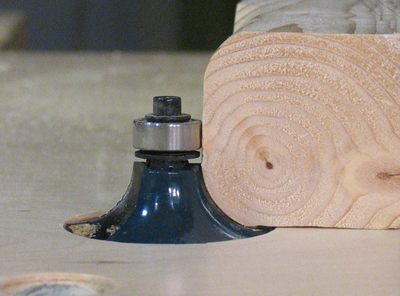 routing the rounds for the top edge of the headboard, footboard, and rails.
Its best not to raise the router bit all the way, so that there is still a little bit of an edge
left.
routing the rounds for the top edge of the headboard, footboard, and rails.
Its best not to raise the router bit all the way, so that there is still a little bit of an edge
left.
In the cad drawings, if you look closely, you can see I actually drew this curve as a chamfer.
SketchUp can get
slow, and the files get large with too many compound curves in the model.
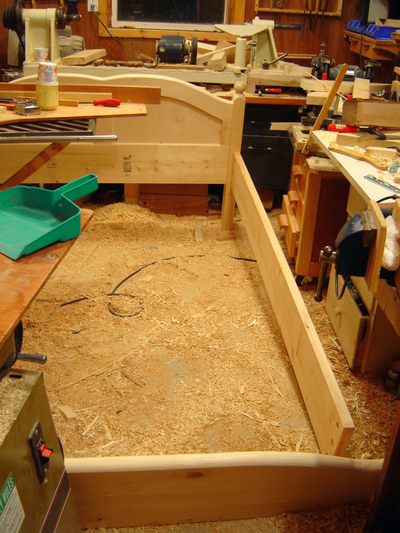 In my old garage workshop, I didn't actually have enough room to assemble the bed. But I could
assemble the headboard, footboard, and one rail around the table saw.
In my old garage workshop, I didn't actually have enough room to assemble the bed. But I could
assemble the headboard, footboard, and one rail around the table saw.
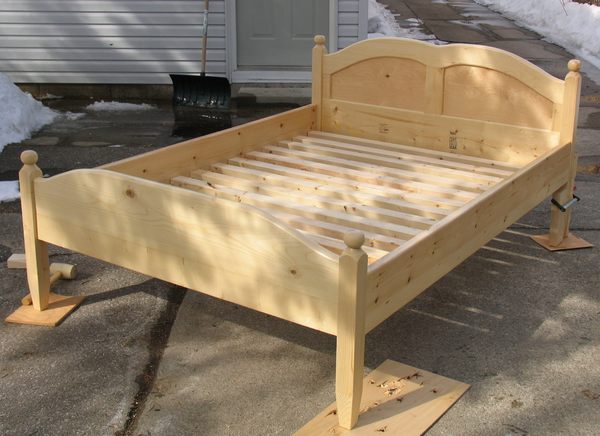 This is a photo of the first time I assembled the bed frame. In my old garage workshop,
I didn't have enough room to assemble it inside my shop, so the first test fit of everything
was actually on a nice day in my driveway.
This is a photo of the first time I assembled the bed frame. In my old garage workshop,
I didn't have enough room to assemble it inside my shop, so the first test fit of everything
was actually on a nice day in my driveway.
Back to my Woodworking website