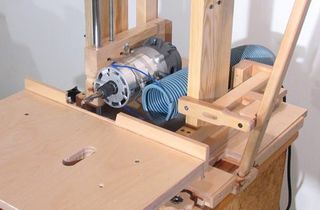
 While working on a my pantorouter machine,
I needed another hold down clamp, similar to one of these
drill press hold down clamps I had bought from
Busy Bee Tools.
While working on a my pantorouter machine,
I needed another hold down clamp, similar to one of these
drill press hold down clamps I had bought from
Busy Bee Tools.
But it was a Sunday, so the store was closed, and besides, the store is at the far end of town. So I thought I might try making a hold down clamp out of one of those really cheap Chinese made C-clamps that I never use anyway.
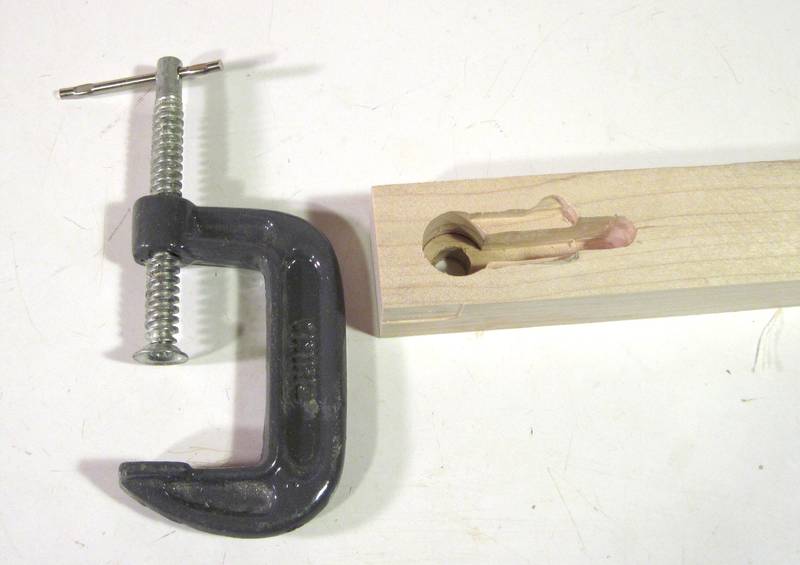 I started by milling a cavity into a piece of wood to fit around the top part of the
C-clamp. I milled out this cavity with a router using the new machine that I'm working
on (I'll write about that machine some other time), but my slot mortiser would have done just
as well.
I started by milling a cavity into a piece of wood to fit around the top part of the
C-clamp. I milled out this cavity with a router using the new machine that I'm working
on (I'll write about that machine some other time), but my slot mortiser would have done just
as well.
 I had to remove the bar handle to fit it in the block. It took a few
iterations to get it to fit perfectly. I was lucky the that paint
rubbed off on the wood just a bit, so I could tell where I needed to carve away more
wood after each fitting.
I had to remove the bar handle to fit it in the block. It took a few
iterations to get it to fit perfectly. I was lucky the that paint
rubbed off on the wood just a bit, so I could tell where I needed to carve away more
wood after each fitting.
 Having come this far, I figured my experiment was worth destroying the C-clamp for.
This really wasn't a very good clamp, but what I liked about it for this application is that it had a very coarse ACME thread, so that it doesn't take many turns to open and close it.
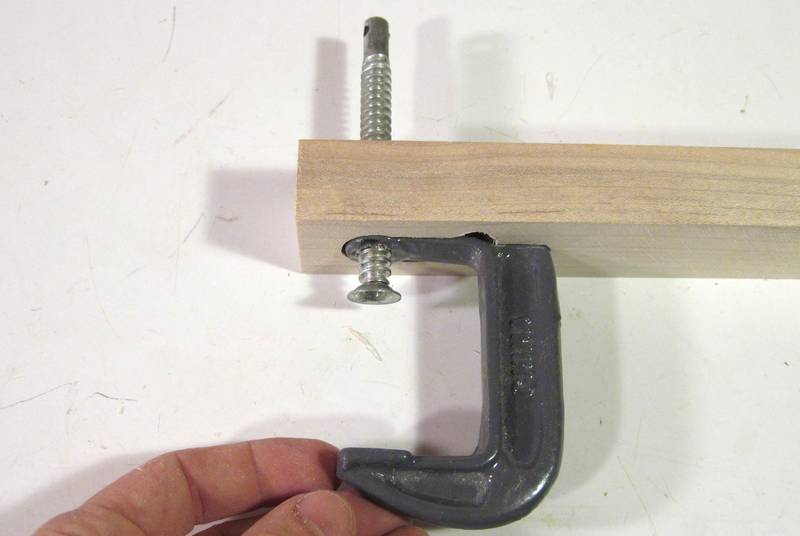
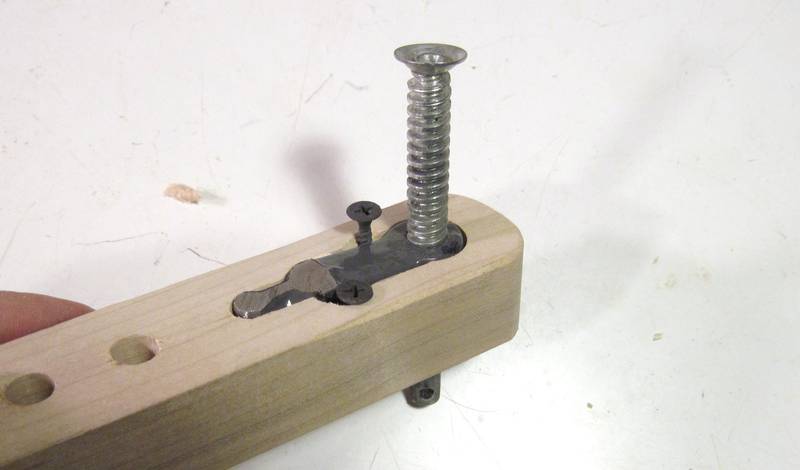 Two drywall screws next to the clamp hold it in the cavity. I originally thought I might
mount it by drilling some holes in the clamp, but judging by the type of sparks
I got when I cut it with an angle grinder, I realized that the steel on this clamp
was relatively hard and would have been difficult to drill. Fortunately, drywall
screws, with their relatively wide flat head, were able to hold it from the side.
Two drywall screws next to the clamp hold it in the cavity. I originally thought I might
mount it by drilling some holes in the clamp, but judging by the type of sparks
I got when I cut it with an angle grinder, I realized that the steel on this clamp
was relatively hard and would have been difficult to drill. Fortunately, drywall
screws, with their relatively wide flat head, were able to hold it from the side.
 One of the reasons I didn't use that clamp much was because the end of the screw is
just a piece of sheet metal. The sheet metal has sharp edges and doesn't spin
freely enough, so it marks up the wood as it's tightened. At this point I was
tempted to cut up one of my better clamps to avoid that problem, but the
cavity I carved in the wood only fit this particular clamp.
So I figured making a new pressure pad was the easier route.
One of the reasons I didn't use that clamp much was because the end of the screw is
just a piece of sheet metal. The sheet metal has sharp edges and doesn't spin
freely enough, so it marks up the wood as it's tightened. At this point I was
tempted to cut up one of my better clamps to avoid that problem, but the
cavity I carved in the wood only fit this particular clamp.
So I figured making a new pressure pad was the easier route.
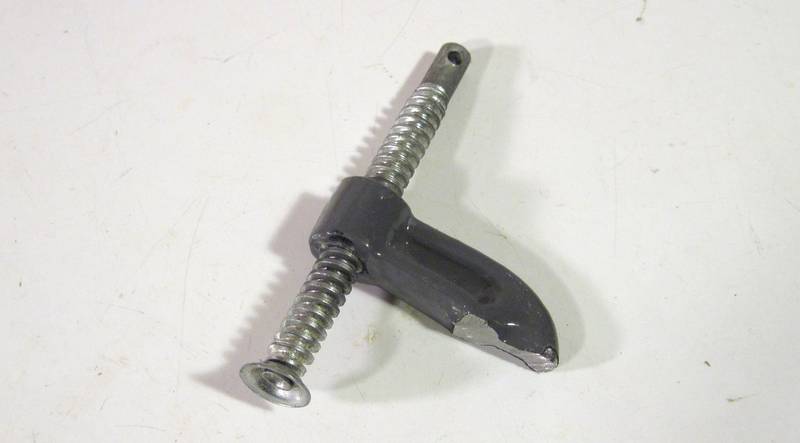
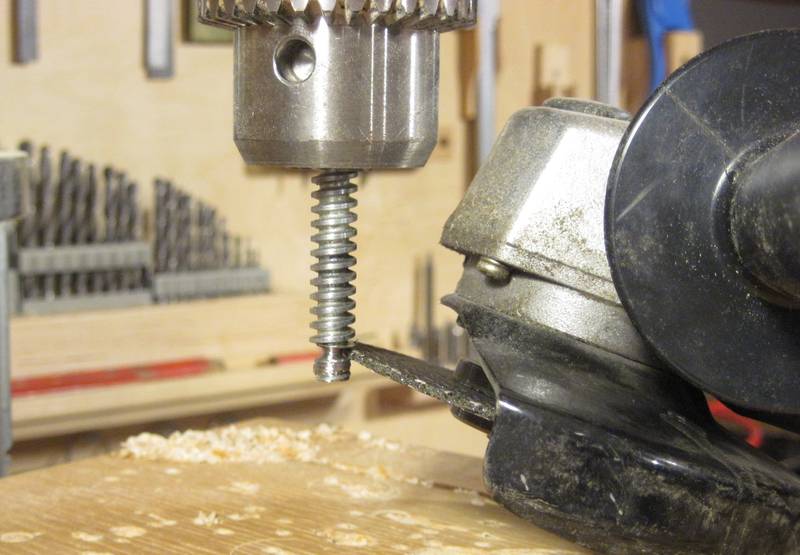
But how? I don't have a metal lathe to shape the end of the screw. So I spun the shaft up in my drill press, and used an angle grinder to shape a knob on the end, plus a groove behind it. I'm really surprised how well this crude technique actually works!
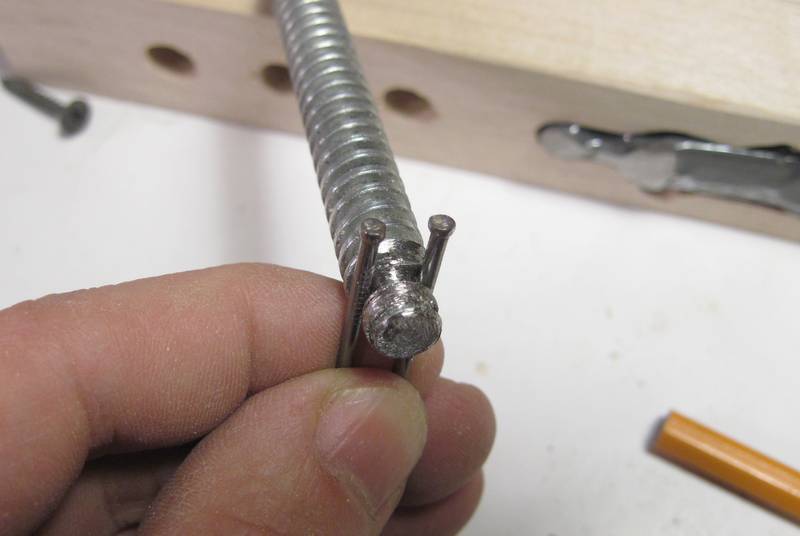 Two nails in the groove could hold the pressure pad onto the end of the screw
 I used a block of maple for the new clamp head. Instead of two nails, I ground the head
off a nail and then bent it into a U shape.
I used a block of maple for the new clamp head. Instead of two nails, I ground the head
off a nail and then bent it into a U shape.
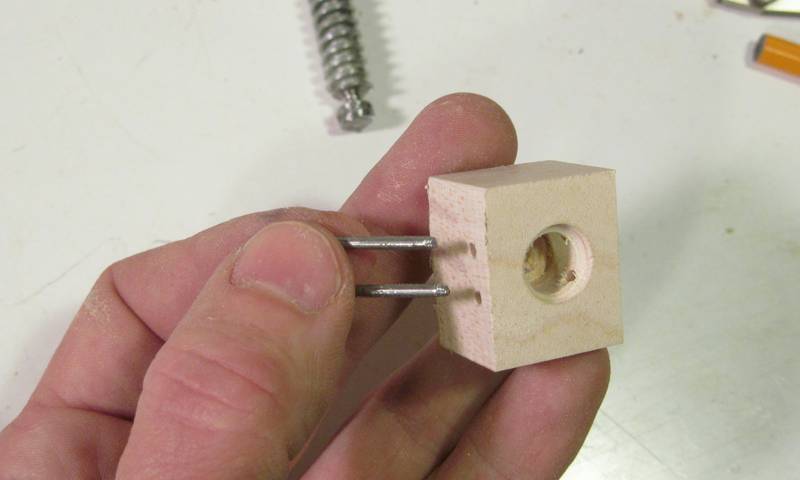
There's nothing in the bottom of the pressure pad to push against the metal, it's just the end of my bolt pushing against the wood. I used hard maple, so that should help. But this hold down clamp won't see crazy amounts of pressure, so this should do.
The photo is from when I checked the fit. I rounded the corners on it after that photo was taken.
 I had to destroy the original bar that served as a clamp handle to get it out.
I had to take it out to be able to inset the clamp into the cavity. I also would
not have been able to mount the screw in my drill press without taking the handle out.
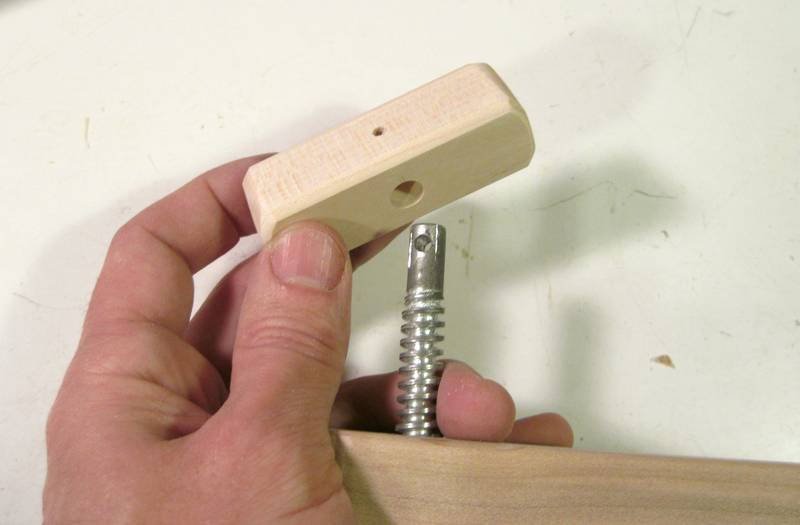
So now I had to make a new handle. I used
a piece of maple, with a hole just slightly smaller than the end of the shaft. I
pressed the end of it into the block and then drove a 1/8" (3 mm) diameter
pin through the hole to go through the hole in the shaft.
I had to destroy the original bar that served as a clamp handle to get it out.
I had to take it out to be able to inset the clamp into the cavity. I also would
not have been able to mount the screw in my drill press without taking the handle out.
So now I had to make a new handle. I used
a piece of maple, with a hole just slightly smaller than the end of the shaft. I
pressed the end of it into the block and then drove a 1/8" (3 mm) diameter
pin through the hole to go through the hole in the shaft.
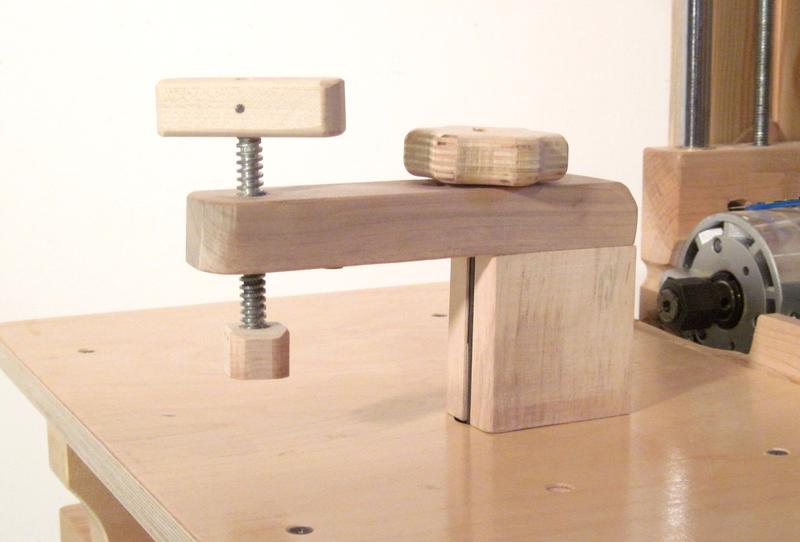
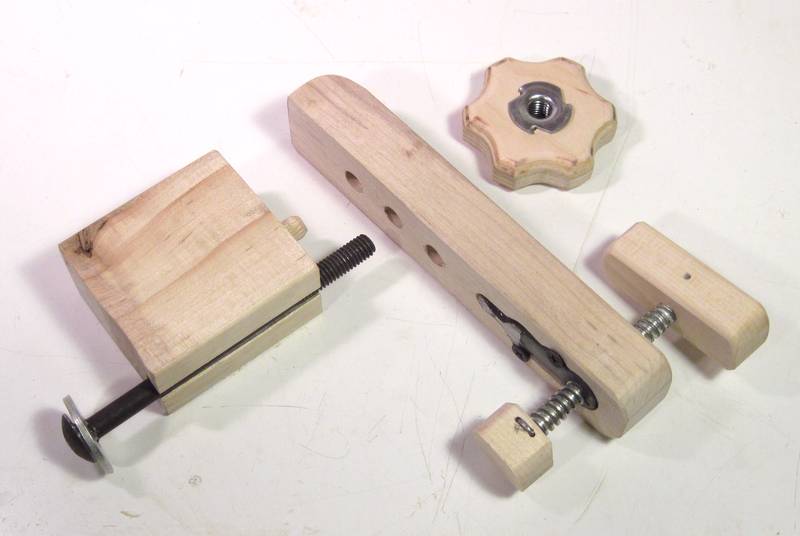
 So now I had a bar with a hold down screw on one end. This bar needs to be mounted some
distance above the work table on my machine. I made a spacer to fasten this bar
above the table.
So now I had a bar with a hold down screw on one end. This bar needs to be mounted some
distance above the work table on my machine. I made a spacer to fasten this bar
above the table.
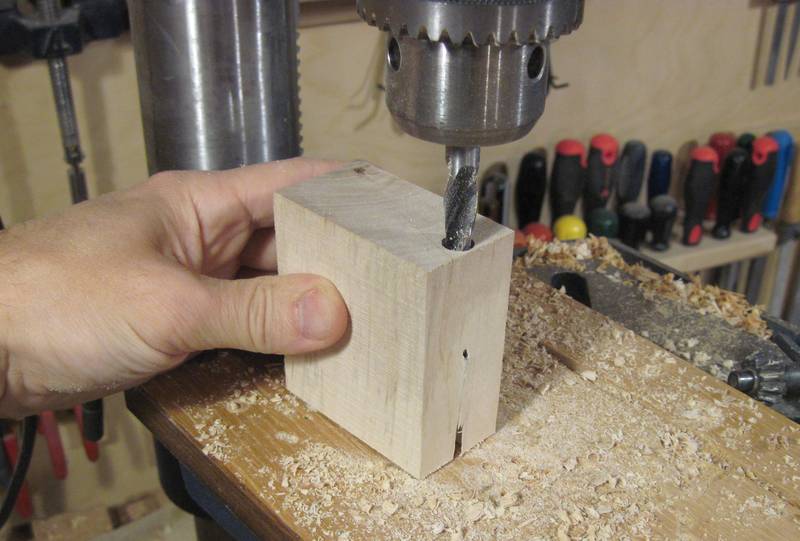
I drilled a hole for a bolt right on the edge of the spacer block. Basically, the bolt that holds the clamp might as well be as far forward as it can be, so I'd get maximum leverage from the bolt.
 With my drill partially breaking out the front of the slot, I opened that slot
along its length on the bandsaw (looks better that way). I also added a dowel pin
to help align that block with the bar.
With my drill partially breaking out the front of the slot, I opened that slot
along its length on the bandsaw (looks better that way). I also added a dowel pin
to help align that block with the bar.
The bar can be put on the block in two different positions to vary how far it extends. Mounting the bar and block on the table holds them together, so there's no need to have any other means of attaching the block to the bar.
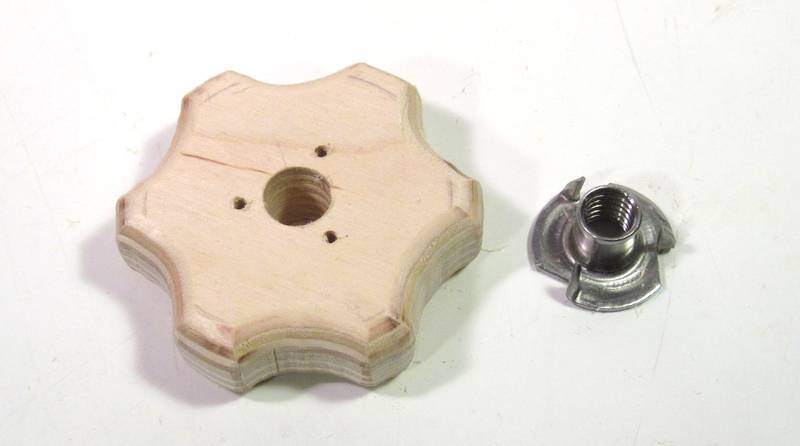 I made another knob to go on the end of the bolt that holds the hold down in place.
I cut it out of 3/4" (19 mm) Baltic birch, and mounted a T-nut in it.
I made another knob to go on the end of the bolt that holds the hold down in place.
I cut it out of 3/4" (19 mm) Baltic birch, and mounted a T-nut in it.
I figured it would be best if this one had a different shape as the handle for the screw. That way, I'd be less likely to absent mindedly loosen the whole hold down when I only meant to loosen the stock.
 With all the work I ended up doing to the cheap Chinese clamp to make it suitable,
I realized I would have done just as well if I started with a piece of 1/2" threaded rod instead.
That way I could have just used a T-nut instead of carving that complicated cavity for
the C-clamp bit.
With all the work I ended up doing to the cheap Chinese clamp to make it suitable,
I realized I would have done just as well if I started with a piece of 1/2" threaded rod instead.
That way I could have just used a T-nut instead of carving that complicated cavity for
the C-clamp bit.
The one advantage of having started with the clamp is that I ended up with a coarse ACME thread on my clamp. That means this clamp tightens faster and easier than if I had used 1/2" threaded rod, which would have had an 11 TPI thread.
The clamp is strong enough for use with router based machines such as my slot mortiser or the new machine that I'm working on. But the forces I encounter on my horizontal boring machine are far greater, so I'll stick with the less elegant but more heavy duty hold down design on that machine the way it is.
 Slot mortising machine
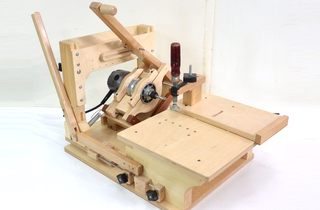 The pantorouter
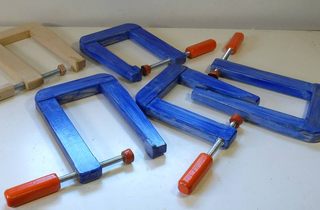 Making long-reach
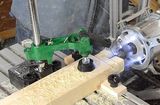 Toggle clamp for the