As kids we had these bow and arrow sets, which we played around with quite
a bit. Of course, they were not overly powerful so it
was only natural that at some point I experimented with building a crossbow.
Amongst the scrap metal in my dad's shop, there were a few strips of spring steel,
which seemed to be just right for this purpose.
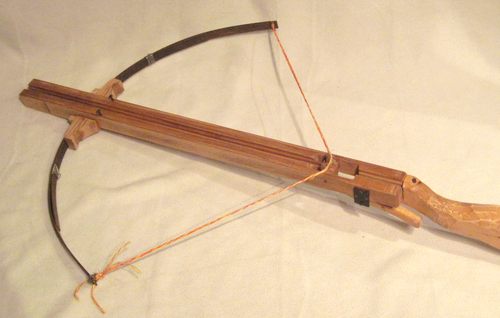
My design was dictated by the pieces of spring steel available. Seeing that it was
not that stiff, and that I wanted to be able to shoot the arrows from the kid's bow and
arrow set, I made the crossbow with a long, but relatively light draw. It's only
about 30 kilograms at full draw.
Proper crossbows have a much shorter and much heavier draw. Overall, I think a shorter
heavier draw would work better. I would have used more steel if I had more, but two
bands was all that was available. I used the full length of one band, and cut the other
band to be about 3/4" of its length and put it behind the first band.
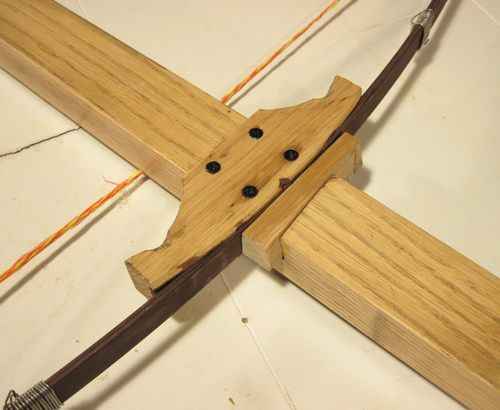
The bow doesn't get as much bending moment applied to it near the tips,
so the second band doesn't extend all the way to the tip of the bow.
That way, I figure, less energy
is used to accelerate the bow and, hopefully, more energy goes into the arrow.
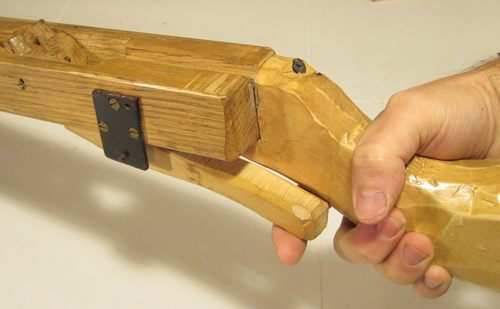
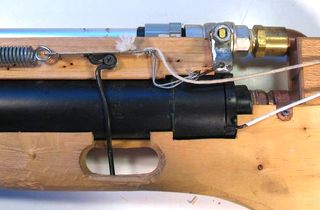
I made this bracket for holding the bow. The bow itself is just held in by driving a wedge into the
gap that the bow sits in. The wedge has a compound angle to it, which also helps keep it wedged in
against the run of the bow.
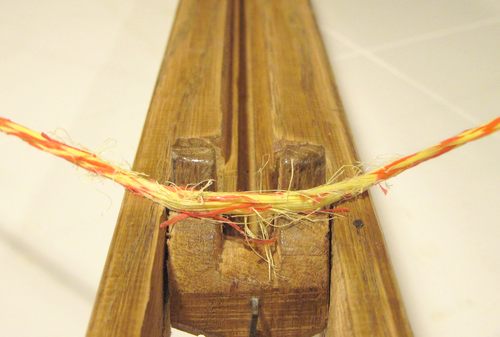
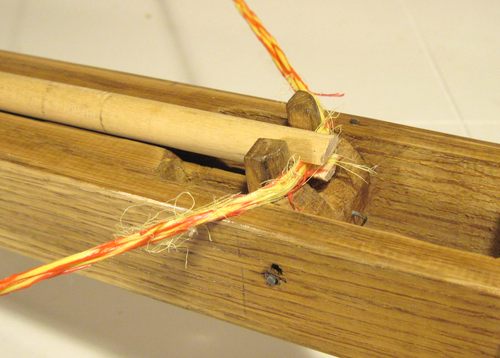
This photo shows the trigger mechanism. As you can see, the string is a little frayed.
That always happens over time, and the string needs to be replaced periodically. I usually
just used the string until it tore. When it does tear, it's always during shot so
there isn't the danger of it snapping unexpectedly.
You can see the groove for the arrow, with a narrower groove in the center of the main groove.
The narrow groove is for one of the arrow's tail feathers.
Shooting a kids bow and arrow straight up, it took 9 seconds for it to come back down.
Shooting the kids against anything firm would usually result in a smashed arrow.
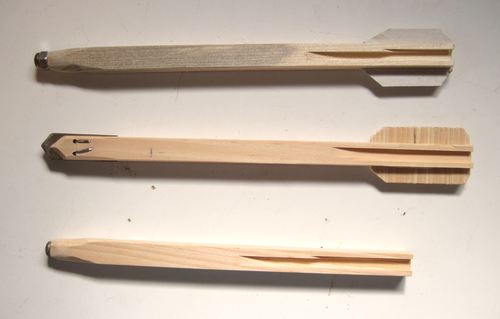
So I experimented with making my own arrows for the crossbow.
Getting arrows to be aerodynamically stable is tricky. If you shoot just a light
straight piece of wood, it's not uncommon for it to fly in an arc, and eventually land as far as
45 degrees from the direction it was aimed at. Weighting the front of an arrow helps a lot,
but there is still the problem of the arrow twirling, which can cause it to fly in a slight
corkscrew pattern. The addition of a tail really helps against that, plus it also helps
point the arrow forward. The problem is, unless the tail is really flexible, it tends to
break if it hits anything. My options in this regard were always limited.
Of the arrows shown at left, the middle one I made to pierce a pressurized pop bottle - see video
at the bottom of this page.
The design of the whole trigger mechanism and hook is such that an arrow can be hooked onto
the string with the bow drawn - a very useful feature when shooting arrows from a kids bow
and arrow set.
Of course, kids bow and arrow arrows were never meant to be shot quite this hard, so I had
to be careful what I shot them at. Straw bales would have been ideal, but there
weren't any around. Loose soil was good at stopping the arrow, except that you have to remember where
it went in, so you'd be able to dig it back out.
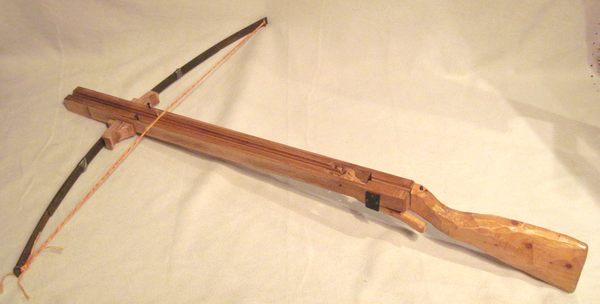
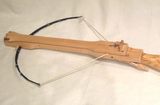
Some months after I built the crossbow, I made a nice gun stock for it, which I patterned after
the stock of a shotgun. The is very conveniently located to just pull it with
one's index finger.
Of course, there's no safety whatsoever, so one has to be very careful handling the crossbow once
it's drawn.
This video isn't really about this crossbow,
but you can see the crossbow being used.
 As kids we had these bow and arrow sets, which we played around with quite
a bit. Of course, they were not overly powerful so it
was only natural that at some point I experimented with building a crossbow.
As kids we had these bow and arrow sets, which we played around with quite
a bit. Of course, they were not overly powerful so it
was only natural that at some point I experimented with building a crossbow.
 My design was dictated by the pieces of spring steel available. Seeing that it was
not that stiff, and that I wanted to be able to shoot the arrows from the kid's bow and
arrow set, I made the crossbow with a long, but relatively light draw. It's only
about 30 kilograms at full draw.
My design was dictated by the pieces of spring steel available. Seeing that it was
not that stiff, and that I wanted to be able to shoot the arrows from the kid's bow and
arrow set, I made the crossbow with a long, but relatively light draw. It's only
about 30 kilograms at full draw.
 I made this bracket for holding the bow. The bow itself is just held in by driving a wedge into the
gap that the bow sits in. The wedge has a compound angle to it, which also helps keep it wedged in
against the run of the bow.
I made this bracket for holding the bow. The bow itself is just held in by driving a wedge into the
gap that the bow sits in. The wedge has a compound angle to it, which also helps keep it wedged in
against the run of the bow.
 This photo shows the trigger mechanism. As you can see, the string is a little frayed.
That always happens over time, and the string needs to be replaced periodically. I usually
just used the string until it tore. When it does tear, it's always during shot so
there isn't the danger of it snapping unexpectedly.
This photo shows the trigger mechanism. As you can see, the string is a little frayed.
That always happens over time, and the string needs to be replaced periodically. I usually
just used the string until it tore. When it does tear, it's always during shot so
there isn't the danger of it snapping unexpectedly.
 Shooting a kids bow and arrow straight up, it took 9 seconds for it to come back down.
Shooting the kids against anything firm would usually result in a smashed arrow.
Shooting a kids bow and arrow straight up, it took 9 seconds for it to come back down.
Shooting the kids against anything firm would usually result in a smashed arrow.
 The design of the whole trigger mechanism and hook is such that an arrow can be hooked onto
the string with the bow drawn - a very useful feature when shooting arrows from a kids bow
and arrow set.
The design of the whole trigger mechanism and hook is such that an arrow can be hooked onto
the string with the bow drawn - a very useful feature when shooting arrows from a kids bow
and arrow set.
 Some months after I built the crossbow, I made a nice gun stock for it, which I patterned after
the stock of a shotgun. The is very conveniently located to just pull it with
one's index finger.
Some months after I built the crossbow, I made a nice gun stock for it, which I patterned after
the stock of a shotgun. The is very conveniently located to just pull it with
one's index finger.
 Homemade marble shooting airgun
 Jenga pistol
 ABS pipe cannon
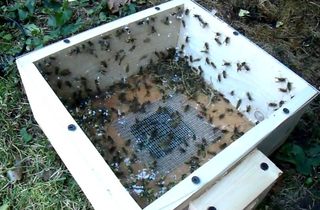 Wasp sucking machine
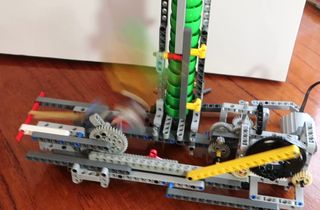 Lego machine catapult
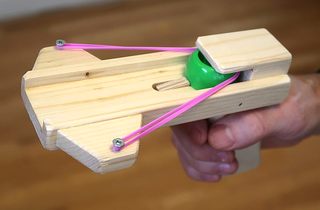 Plastic cap shooter