Router table for the table saw
My Delta Hybrid saw came with very long fence rails that extended way past the table. But to effectively clamp the fence, you need something to brace the fence rails at the right distance from each other against the force of the fence clamp.
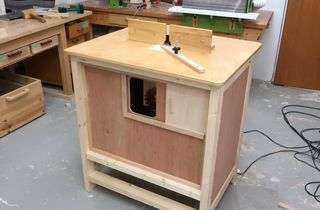
So the logical thing to do is to build some sort of frame to go on the right side of the table to extend the table. And the logical thing to do for this is to make it so that a router can be mounted under it. This has the advantage that both the table saw fence, and potentially the T-slot can be used with the router.
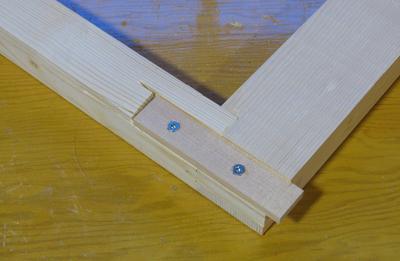
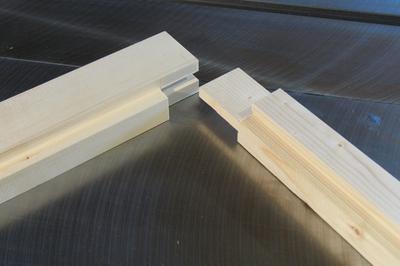 I built the frame out of spruce from 2x4's. The corners are joined with a simple
double lap joint.
The picture at left shows the joint before gluing.
I built the frame out of spruce from 2x4's. The corners are joined with a simple
double lap joint.
The picture at left shows the joint before gluing.
Note the rabbet on the inside edges. This is to support the plywood panel under which
the router is mounted. Also note how the left part of the lap joint is stepped to be narrower where
the joint is. If the lap joint were to go across the full width of the piece, then my
rabbet would cause a gap in the frame at the corner, which would look sily.
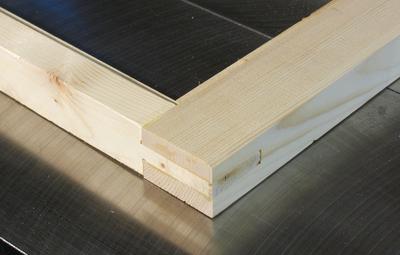 The lap joint assembled, and trimmed to size. I made the pieces so the frame would be
slightly larger than needed, so I could cut the frame precisely to size and the joints flush.
The lap joint assembled, and trimmed to size. I made the pieces so the frame would be
slightly larger than needed, so I could cut the frame precisely to size and the joints flush.
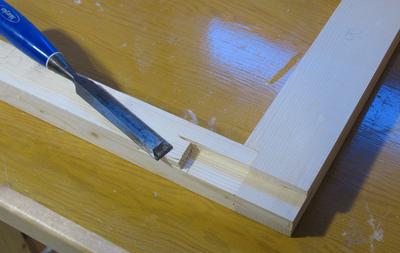 To support the frame vertically in the fence rails, I cut away part of each corner on
the bottom side of the frame, so I could screw small pieces of maple in to have them extend
into the slot on the fence rails.
I guess I could have made this an integral part of the frame, but by making it a separately
screwed in part, I could still shim it up to bring it exactly level with the table.
To support the frame vertically in the fence rails, I cut away part of each corner on
the bottom side of the frame, so I could screw small pieces of maple in to have them extend
into the slot on the fence rails.
I guess I could have made this an integral part of the frame, but by making it a separately
screwed in part, I could still shim it up to bring it exactly level with the table.
 And with he piece of maple screwed in. The piece of maple extends only a little past
the frame, as the slot in the aluminium rail is not that deep.
And with he piece of maple screwed in. The piece of maple extends only a little past
the frame, as the slot in the aluminium rail is not that deep.
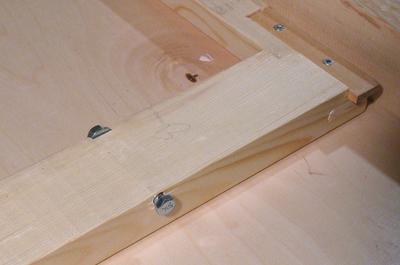 I also added a bolt to lock the frame against the fence rails. The bolt head on the nearer side slides
into the fence rail. The gap in the aluminum rail is just narrow enough to keep the bolt head from turning.
I also added a bolt to lock the frame against the fence rails. The bolt head on the nearer side slides
into the fence rail. The gap in the aluminum rail is just narrow enough to keep the bolt head from turning.
 Shown at left is how the bolt head fits snugly into the aluminium rail.
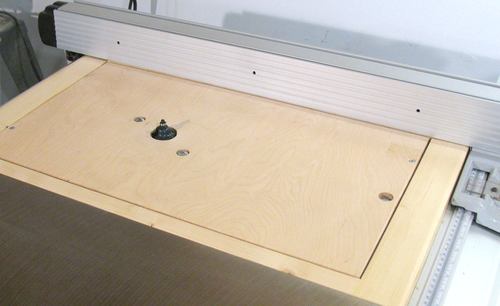
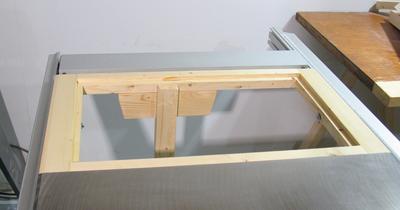 And here the frame is mounted on the saw. I also added a leg to the frame to support
the extended table.
And here the frame is mounted on the saw. I also added a leg to the frame to support
the extended table.
Also note the piece of aluminium on the far side of the frame. This part came with the saw,
and I guess the idea was that if one didn't build a table extension, one could always move that
between the rails where the fence was to be clamped, to give the rails a little bit of bracing
against the fence clamp. Kind of a feeble approach, but I figured I might as well use that
piece of extension to extend the table a little bit more.
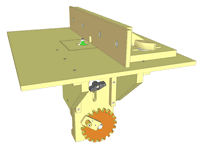
And with the router mounted. I still need to build a fence to attach to the saw's fence.
That way, I get the adjustment feature for free.
 I also have Plans for a wooden router lift availabe for sale
| |
See also:
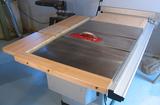 Table saw
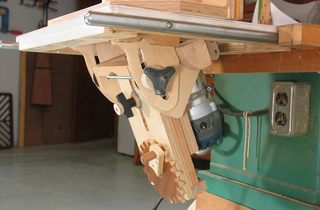
 A router table that's its own dust collector
 Free router table plans
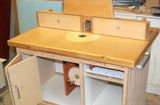
More on my Table saw
Back to my Woodworking website
![]()