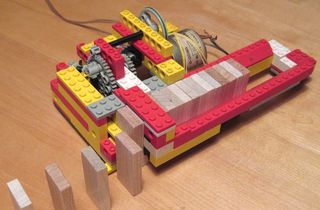
 I first built a domino row building machine of this type in 1985 out of Lego, then
built it again from memory in 2009 to make a video of it
I first built a domino row building machine of this type in 1985 out of Lego, then
built it again from memory in 2009 to make a video of it
I first built a domino row building machine of this type in 1985 out of Lego, then
built it again from memory in 2009 to make a video of it
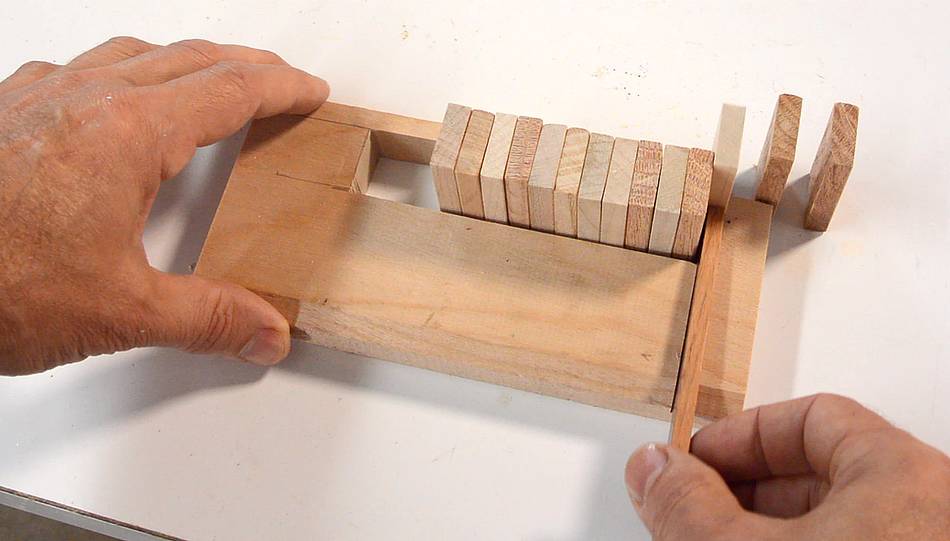
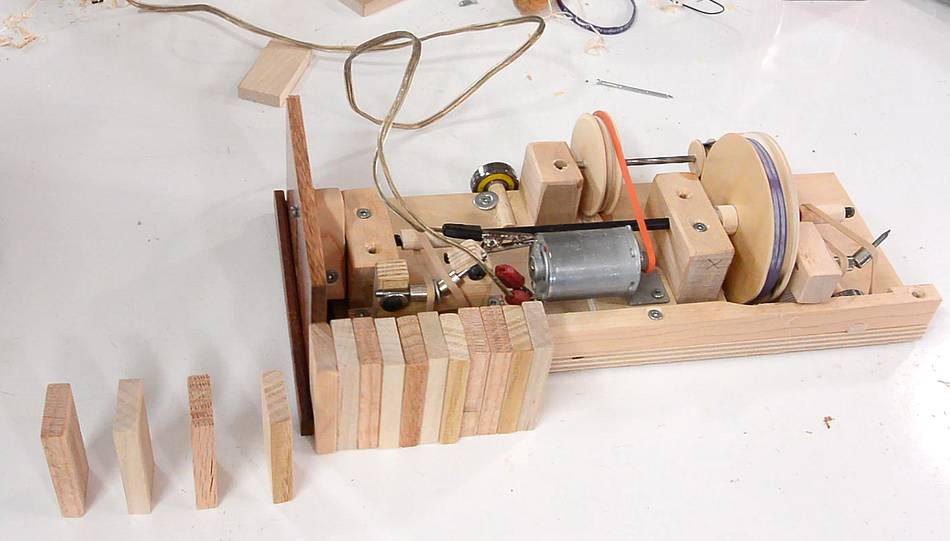
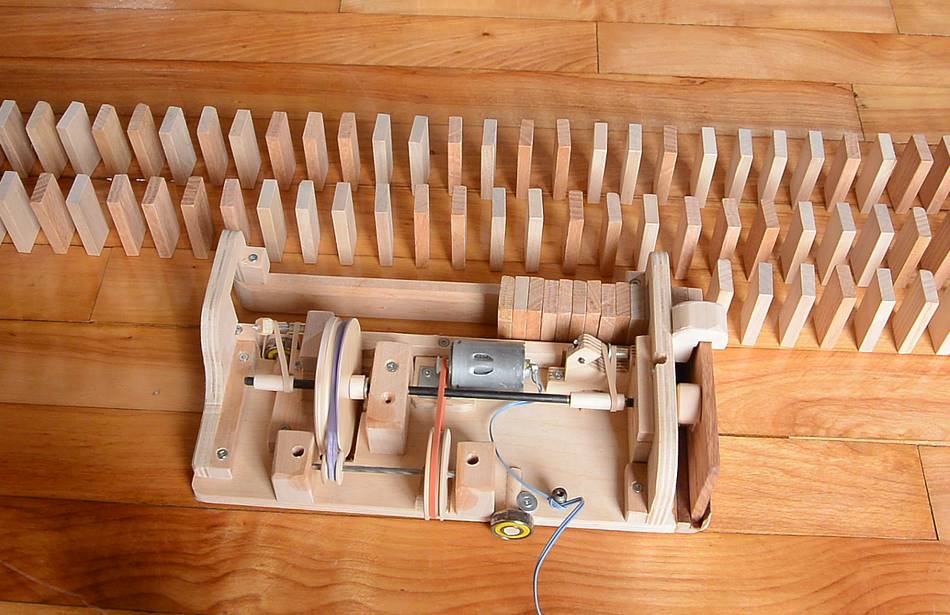
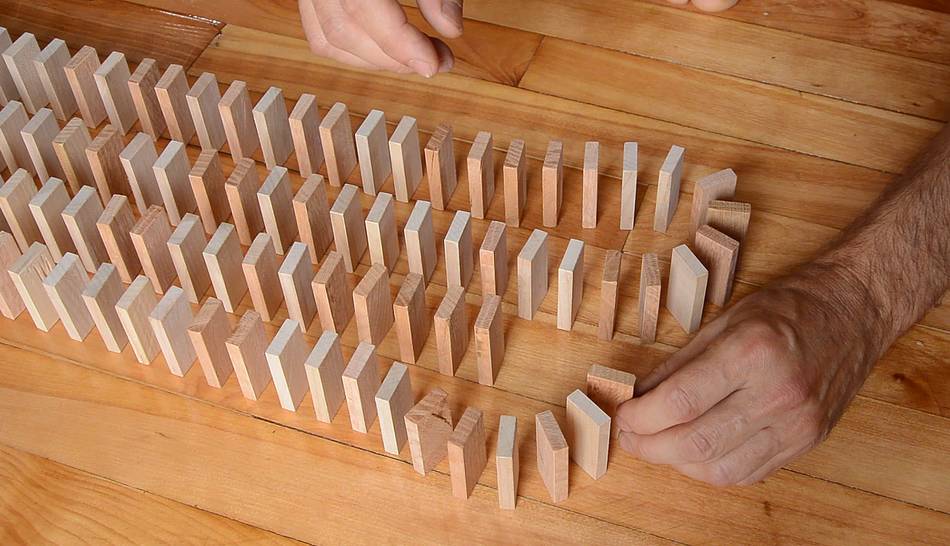
The machine works by pushing a magazine full of dominoes forward along the table while a slider pushes them out one at a time as the machine slowly drives along.

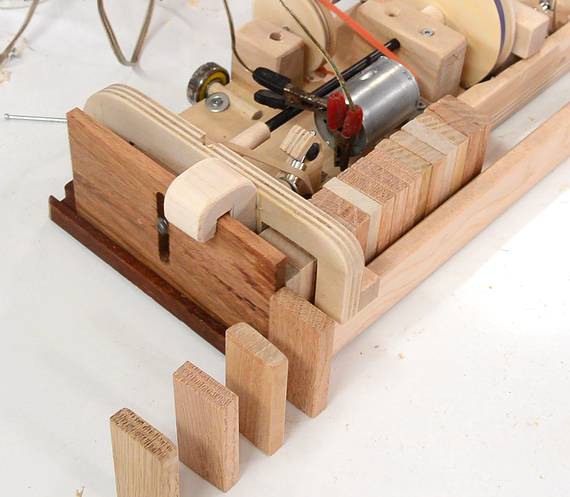
 I wanted to try building this machine again, but without Lego, mostly out of wood.
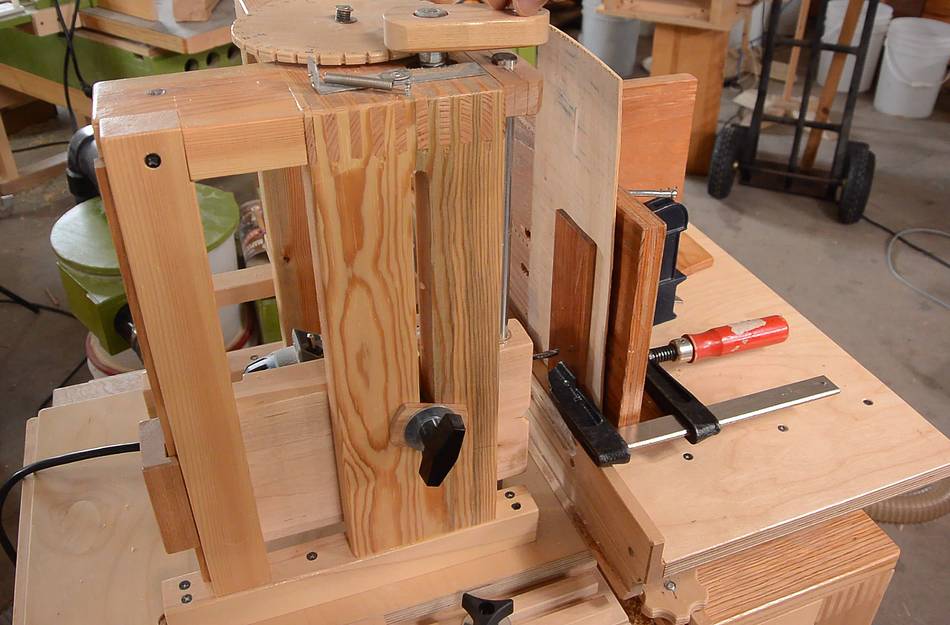
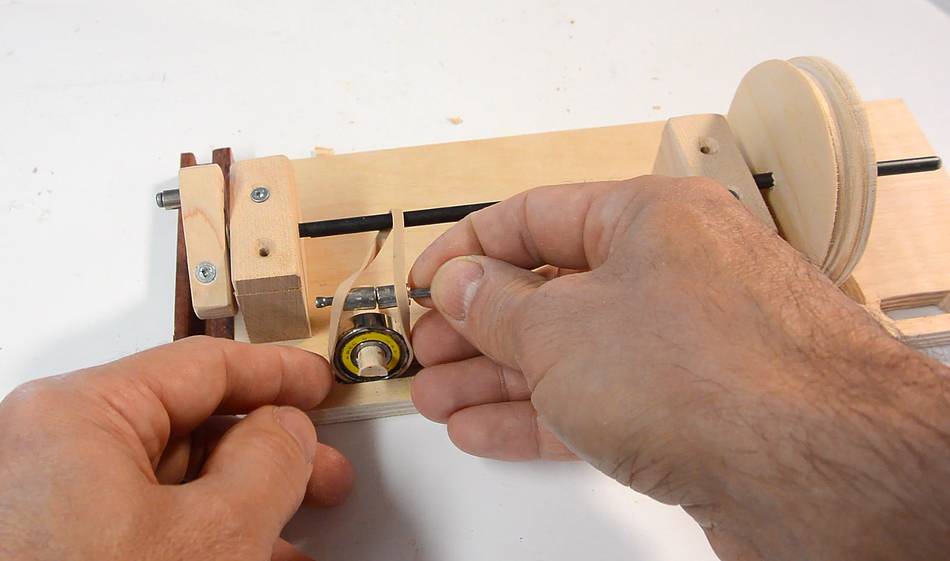
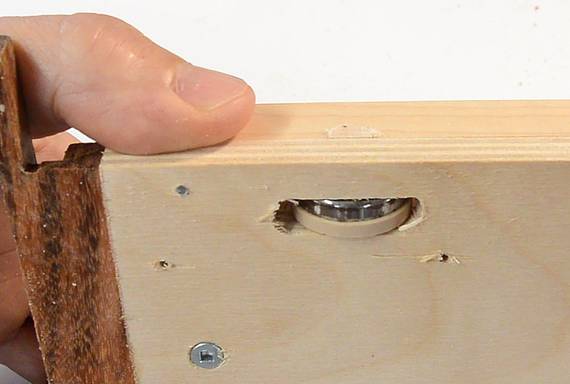
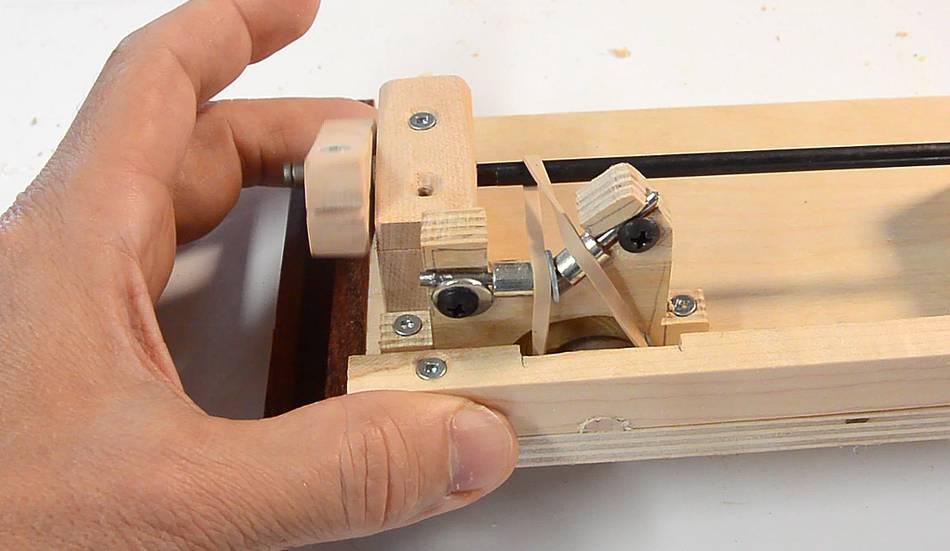
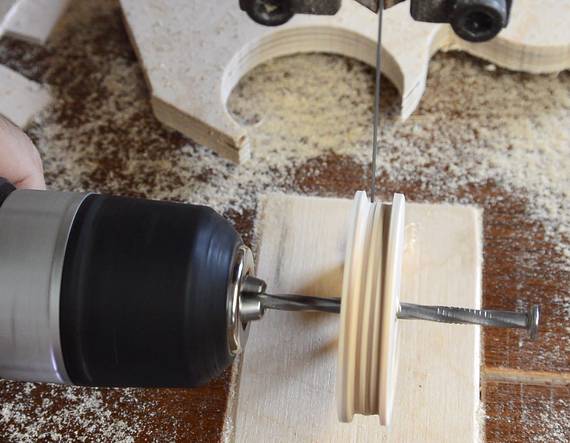
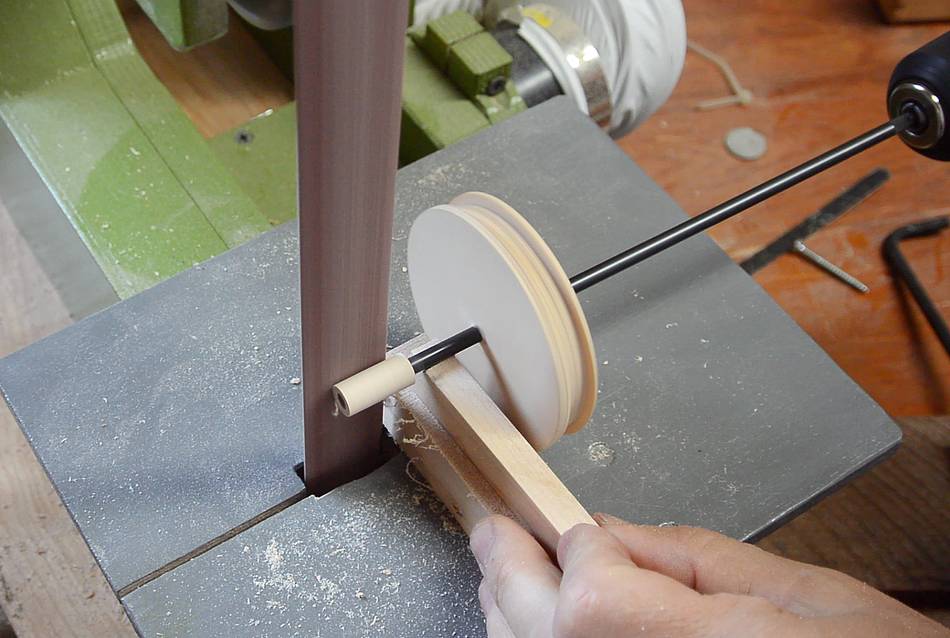
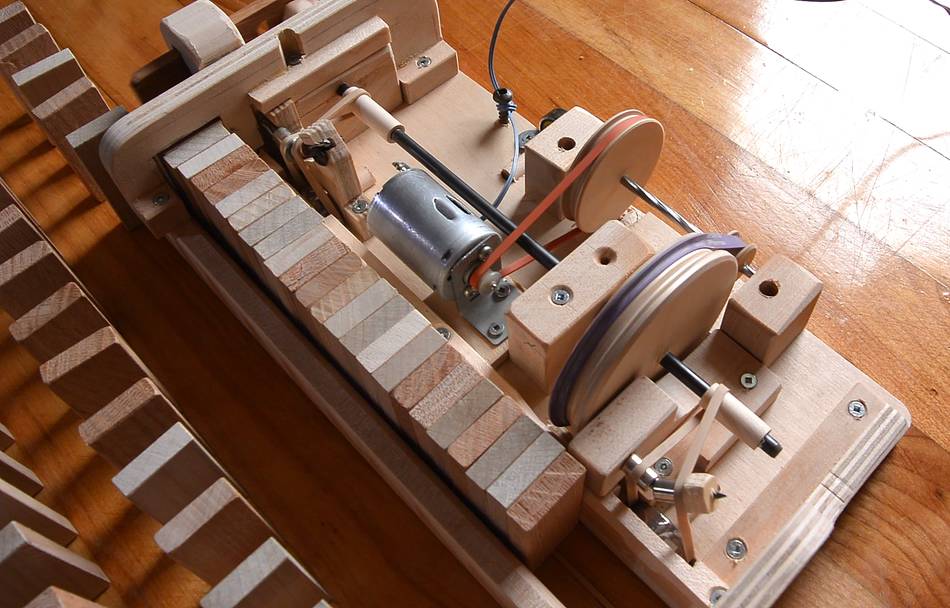
I made a crank that attaches to the end of a 3/16" (5 mm) steel shaft. I used a small spacer on a machine screw as a crank roller on the end of it.
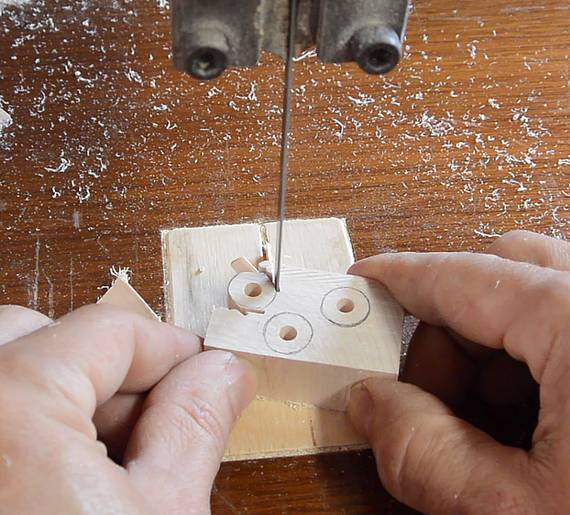
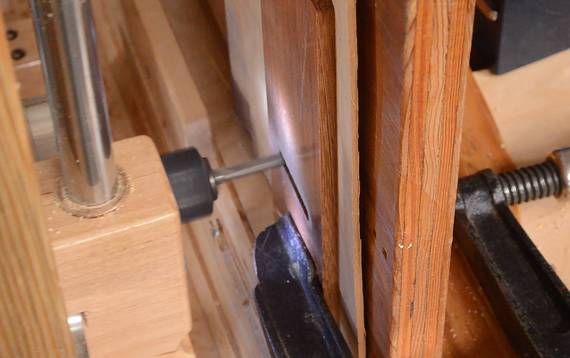 This roller runs in a slot on a slider. I cut the slot with my
slot mortising machine
This roller runs in a slot on a slider. I cut the slot with my
slot mortising machine
 The crank and slider make a Scottish yoke type mechanism to move the slider back and forth.
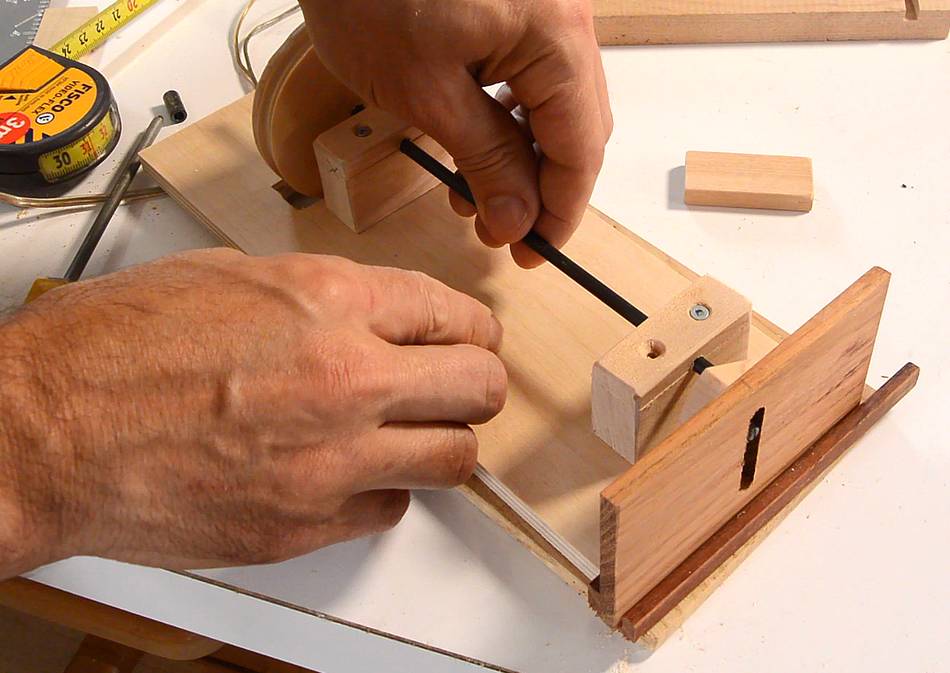
 For the forward drive, I figured the simplest would be to have the rubber band wrap around
some sort of wheel to drive it. I used roller skate bearings for the wheels. But making
the rubber band run around that was a challenge.
For the forward drive, I figured the simplest would be to have the rubber band wrap around
some sort of wheel to drive it. I used roller skate bearings for the wheels. But making
the rubber band run around that was a challenge.
 My first thought was just two small rollers on a nail, as shown at left. But the rubber band kept
tracking off the side on this.
My first thought was just two small rollers on a nail, as shown at left. But the rubber band kept
tracking off the side on this.
 Angling one of the rollers upward and back made it work fairly well.
 I figured I should make a copy of that roller arrangement to drive another wheel (to make
sure I have enough traction), but there wasn't room for the same arrangement at the
front of the machine, so I made a different support for the rollers, held just on one end.
This part was much easier, and if I was doing it again, I'd use the same arrangement
for both wheels.
I figured I should make a copy of that roller arrangement to drive another wheel (to make
sure I have enough traction), but there wasn't room for the same arrangement at the
front of the machine, so I made a different support for the rollers, held just on one end.
This part was much easier, and if I was doing it again, I'd use the same arrangement
for both wheels.
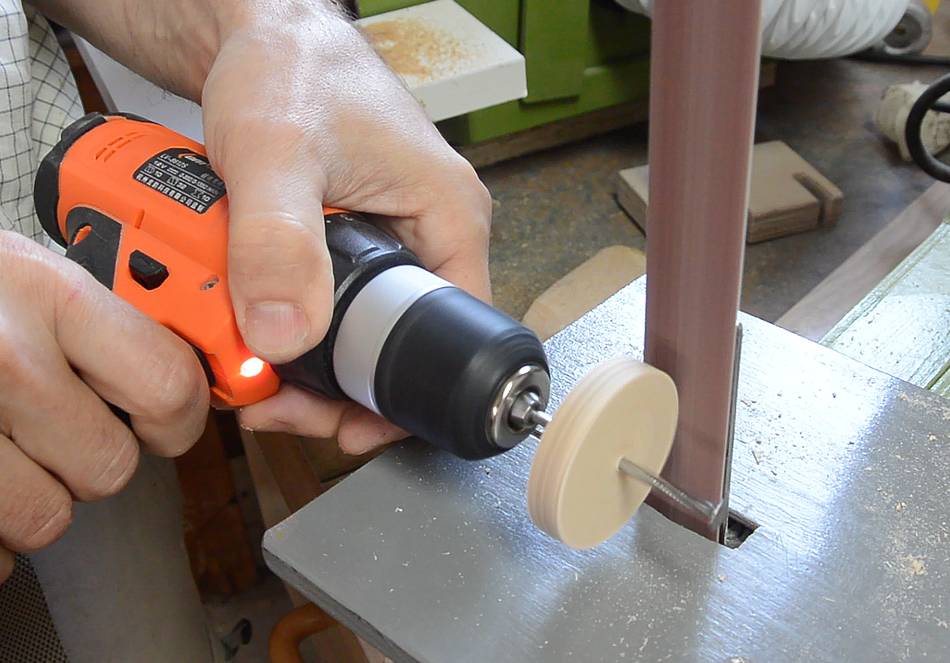 I needed to reduce the motor's speed for driving the main shaft, and for that I made
some more pulleys. I cut a disk out of some Baltic birch plywood, drilled a hole
slightly smaller than a large nail through it, and hammered a nail in the hole.
I needed to reduce the motor's speed for driving the main shaft, and for that I made
some more pulleys. I cut a disk out of some Baltic birch plywood, drilled a hole
slightly smaller than a large nail through it, and hammered a nail in the hole.
I then made sure the disk was perfectly round by spinning it against the belt sander.

 I then spun this disk against the bandsaw (running) to cut a groove for the belt in it.
This worked amazingly well.
I then spun this disk against the bandsaw (running) to cut a groove for the belt in it.
This worked amazingly well.
I know I will hear the usual mantra that anything round must be made on the lathe. But this was so much easier. I don't have to worry about the chisel catching the wood, nor do I have to figure out how to chuck it up on the lathe.
 I made a big and a small pulley. For an axle, I used the same twisted nail that
I used for shaping them. So I ground off the head on the bench grinder...
I made a big and a small pulley. For an axle, I used the same twisted nail that
I used for shaping them. So I ground off the head on the bench grinder...
 ...then used my belt sander to shape both ends of the nail small and round.
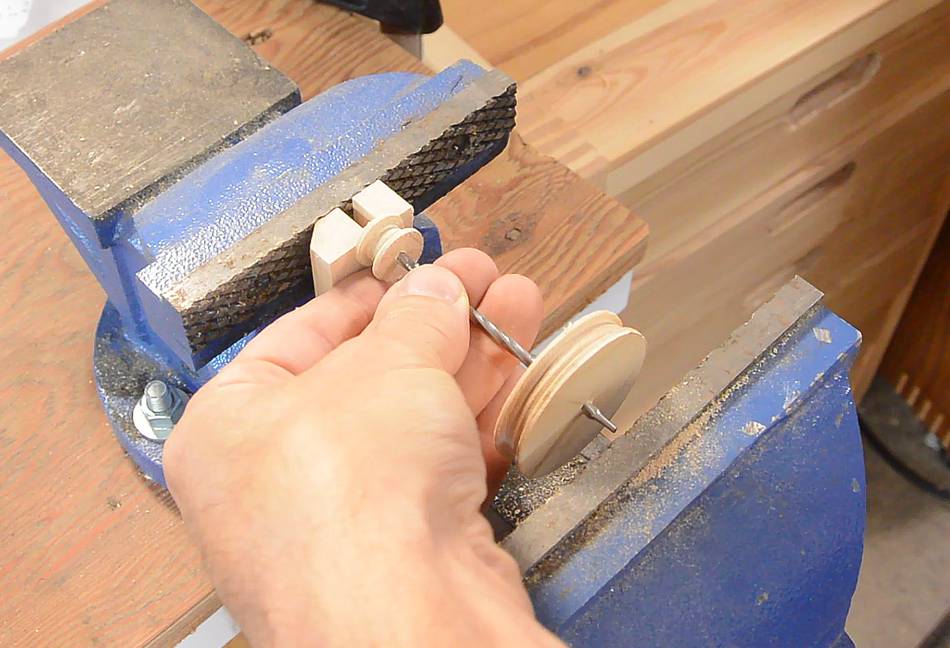 I then pressed the large and small pulleys onto the nail using a vise
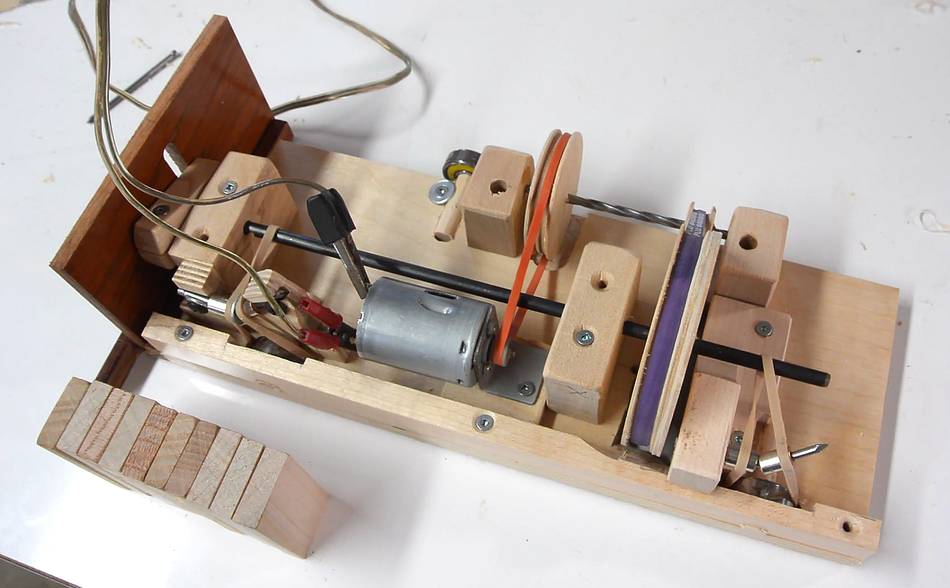 Two hardwood blocks with small holes in them act as bearings for this nail.
The motor drives the red rubber band on the nail shaft, which then drives the purple
one on the main shaft at the right speed.
Two hardwood blocks with small holes in them act as bearings for this nail.
The motor drives the red rubber band on the nail shaft, which then drives the purple
one on the main shaft at the right speed.
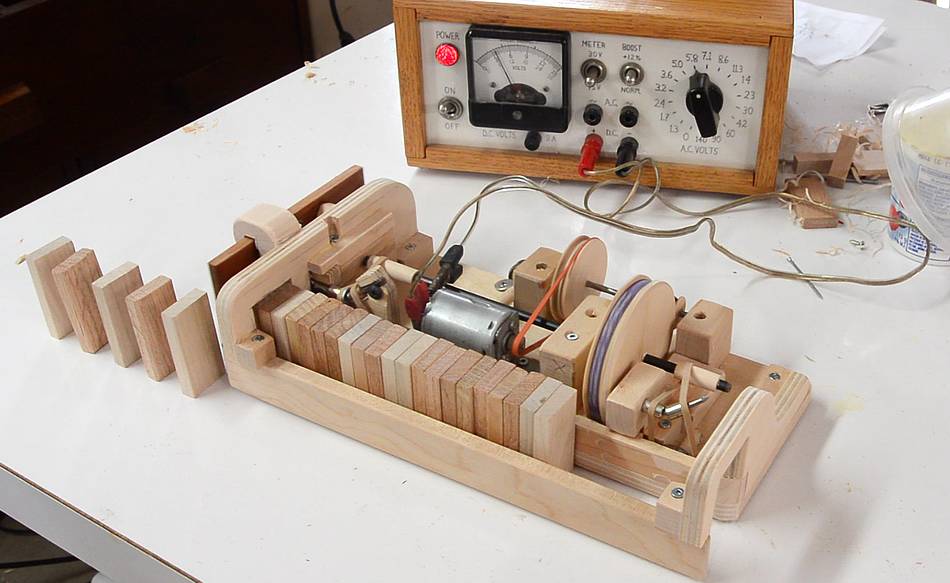
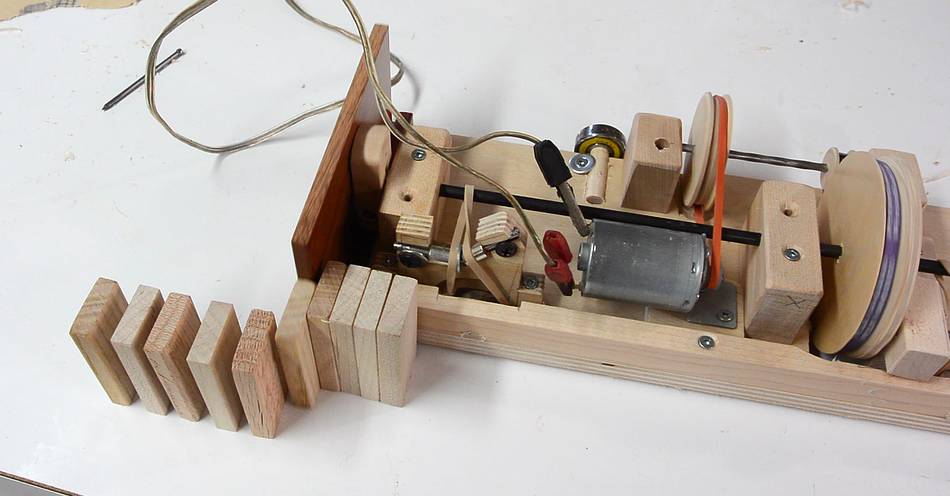 Testing the machine. The domino spacing was much too small. I needed to
make the drive wheels turn further for each turn of the main shaft.
Testing the machine. The domino spacing was much too small. I needed to
make the drive wheels turn further for each turn of the main shaft.
 I worked out what diameter I needed on the main shaft to get a spacing of about 2.5
cm, then cut out some wooden sleeves on the bandsaw and shaped them
to perfect cylinders by spinning them against the belt sander (again, this could have
been done, with much more difficulty, on a lathe)
I worked out what diameter I needed on the main shaft to get a spacing of about 2.5
cm, then cut out some wooden sleeves on the bandsaw and shaped them
to perfect cylinders by spinning them against the belt sander (again, this could have
been done, with much more difficulty, on a lathe)
 Testing again. Spacing was good. Now I just needed a second guide rail for
the domino magazine.
Testing again. Spacing was good. Now I just needed a second guide rail for
the domino magazine.
 A rather complicated plywood part reaches over the machine and over the row of
dominoes to hold the guide rail on the tail end of the machine. A hook attached
to the other side of this part also guides the top edge of the slider.
A rather complicated plywood part reaches over the machine and over the row of
dominoes to hold the guide rail on the tail end of the machine. A hook attached
to the other side of this part also guides the top edge of the slider.
The bracket to hold the front end of the rail was slightly simpler.
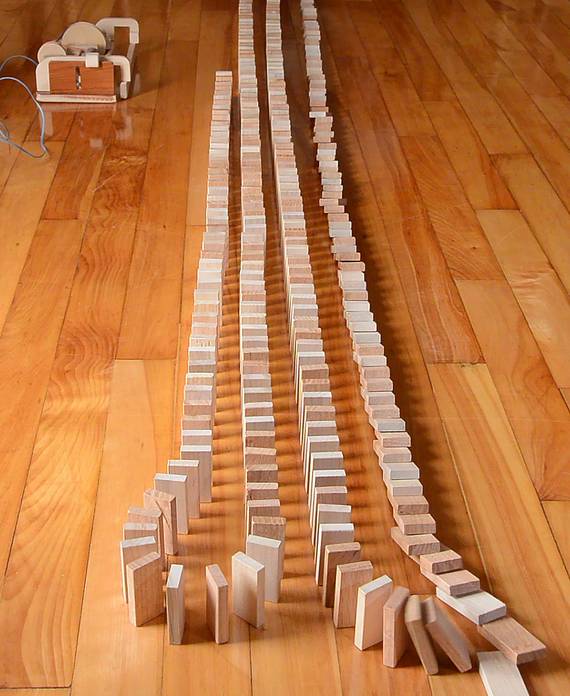
 Testing the completed machine.
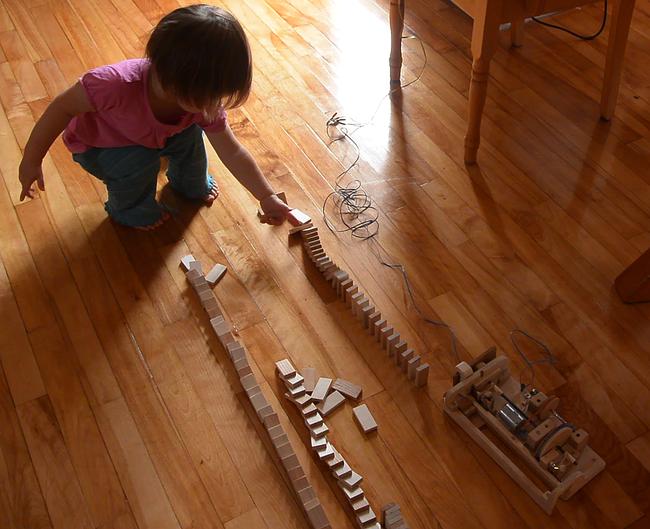
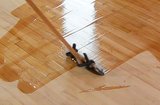
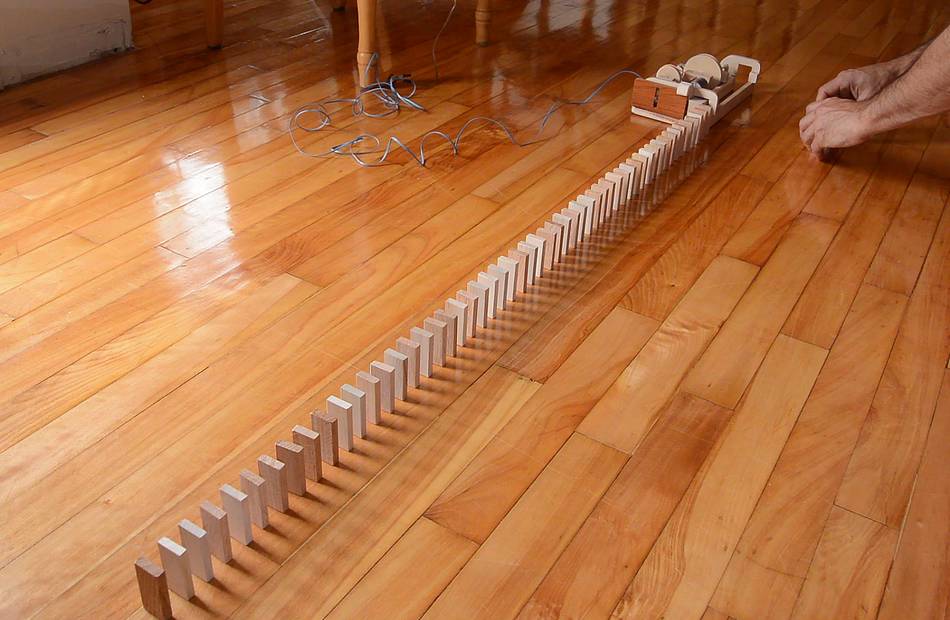 Then testing it on the kitchen floor (which I refinished a few months ago).
The machine needs a smooth flat floor to work. Any bumps can cause the dominoes to tip on their own.
Then testing it on the kitchen floor (which I refinished a few months ago).
The machine needs a smooth flat floor to work. Any bumps can cause the dominoes to tip on their own.
It took a few tries to get it all working. I had one domino tip over (caused by a speck of dirt stuck to the domino), so I swept the floor and tried again.
I also had problems with the forward drive. Whenever I pushed the machine to the side, the rubber band got pushed off the wheels and got jammed next to the wheels, preventing the machine from driving. I had fewer problems with this once I got in the habit of always lifting the machine before moving it.

Harriet was quite fascinated with the machine, though I had to do my testing during nap time to keep her from disturbing the dominoes. I wanted to take more photos of her interacting with the machine after that, but she had gotten shy about touching it because she previously picked it up and threw it on the floor, necessitating repairs, and some scolding.
A machine like this is not a good toy for a 2-year old, unfortunately.

 Lego domino row
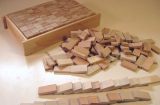
 Floor refinishing by trial and error
 Automatic hopper fed plastic cap catapult
 The slinky machine
 Plastic cap shooter
 Marble run blocks
 Solenoid engine
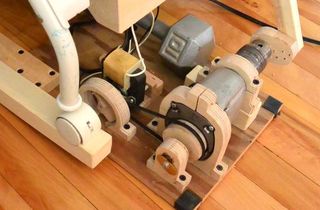 Baby rocking machine
 Jenga pistol