Photographing airborne dust
After I built my first small dust collector I started reading up more about airborne dust and health effects. Among the websites I came across was Bill Penz's website. Bill Penz takes somewhat of an extremist approach to dust collection.While not nearly as harmful as asbestos dust, sufficient amounts of wood dust can cause health problems. Specifically, it's the dust particles 5 microns and smaller that can get deep into the lungs. Dust that fine is too small be readily seen, and fine enough to stay suspended in the air for hours. The lungs have the ability to clean themselves, but for some forms of dust, such as asbestos or silicates (rock dust), that mechanism doesn't work very well. I assume that mechanism works better for types of dust and microparticles that we have evolved with over millennia, such as skin flakes and smoke. Where exactly wood falls I don't know. It seems like a natural enough substance, but then again, cavemen did not have power tools or sandpaper.
 I hate taking measures for problems I can't observe, and doubly so if I can't
tell if the measures are effective. So how to gauge airborne dust levels?
I hate taking measures for problems I can't observe, and doubly so if I can't
tell if the measures are effective. So how to gauge airborne dust levels?
If a sunbeam shines through a window into an otherwise dark room, you can always see dust particles floating in the air. So that seems like a reasonable gauge for some of the airborne dust that doesn't settle out quickly.
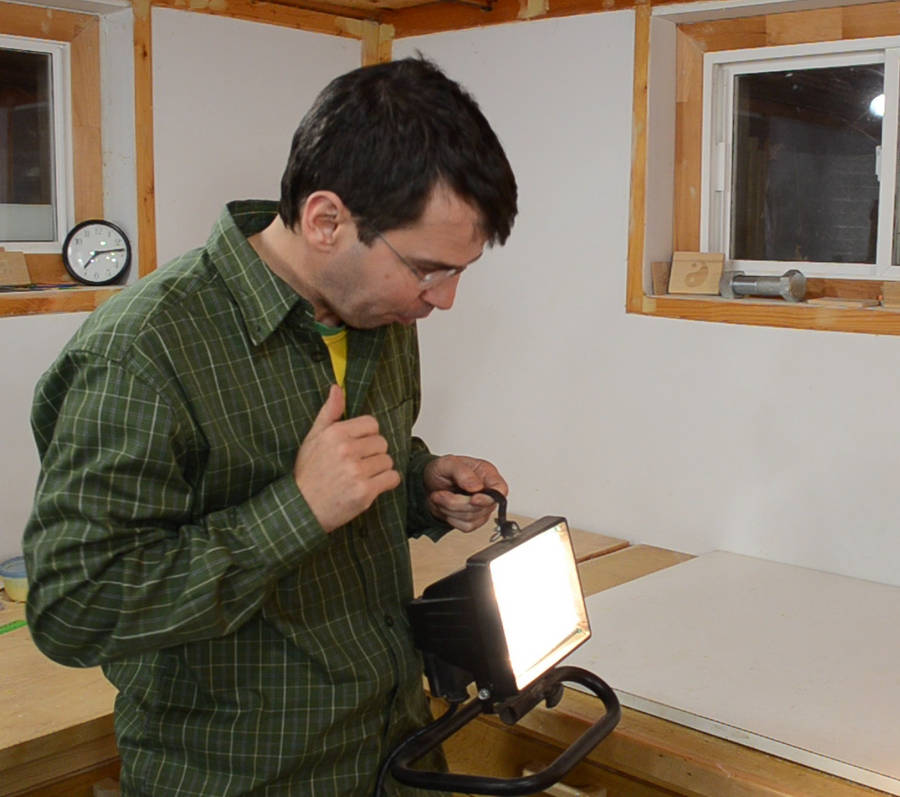
Unfortunately, you can't conjure up a sunbeam when you need one. But a 300 watt halogen light, immediately in front of it, is about as bright as sunlight.
 If I take this halogen light into an otherwise unlit room, shine it away from me, and look
down the front of it, I can always see some particles floating. In this photo, I also
took an inflatable sanding drum and squeezed it slightly, and you can see two plumes
of dust that shot out of it, floating away.
If I take this halogen light into an otherwise unlit room, shine it away from me, and look
down the front of it, I can always see some particles floating. In this photo, I also
took an inflatable sanding drum and squeezed it slightly, and you can see two plumes
of dust that shot out of it, floating away.
The other airborne dust particles are hardly visible. They are quite faint and always moving, so they are difficult to capture with a camera.
 So I figured I'd try photographing them with a flash.
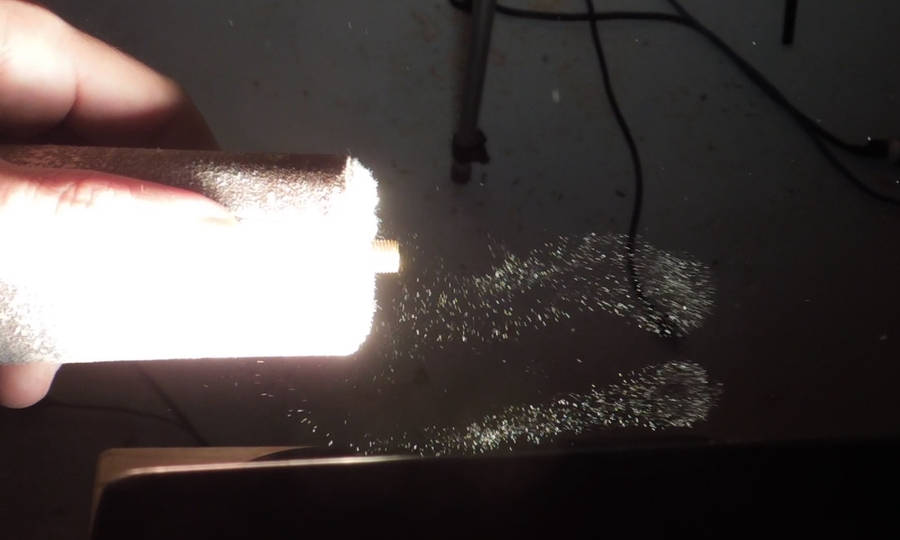
My first idea was to aim the flash directly at the camera, with an obstruction in the middle so that the camera can't see the flash directly. That way, only a slight deflection of light is needed for the dust particles to show up. Most things just a few microns thick are semi-transparent, but even opaque dust particles will cause deflection, simply by diffraction of light around the edges. This was quite good at showing dust that was otherwise invisible. The image at right was after vigorously shaking out my fleece jacket. Lots of dust!
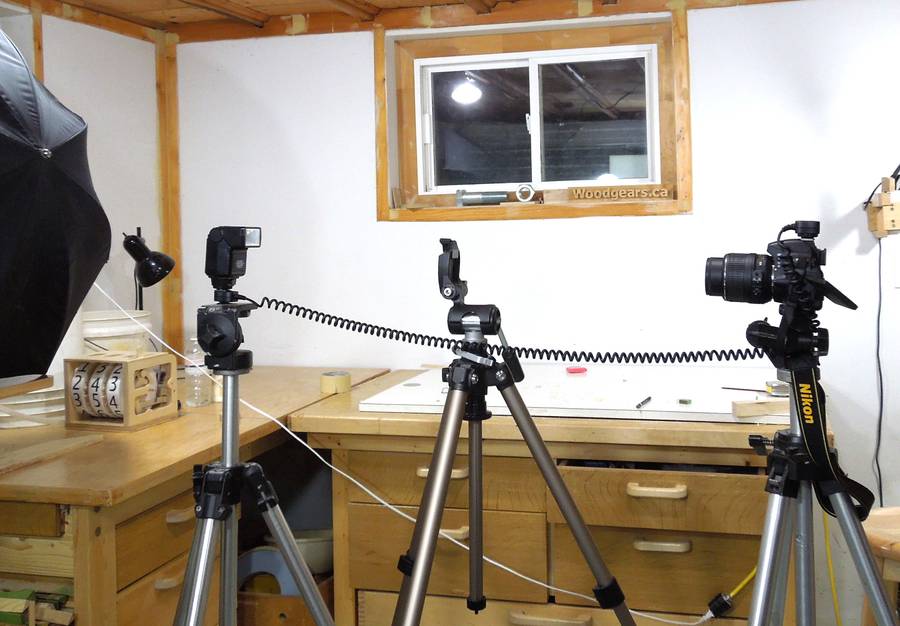
 I later switched to aiming the flash at a right angle to the camera. While this was not
quite as sensitive, I have more control over how far from the camera the lit-thru dust
particles are and can pre-focus the camera for that distance.
I later switched to aiming the flash at a right angle to the camera. While this was not
quite as sensitive, I have more control over how far from the camera the lit-thru dust
particles are and can pre-focus the camera for that distance.
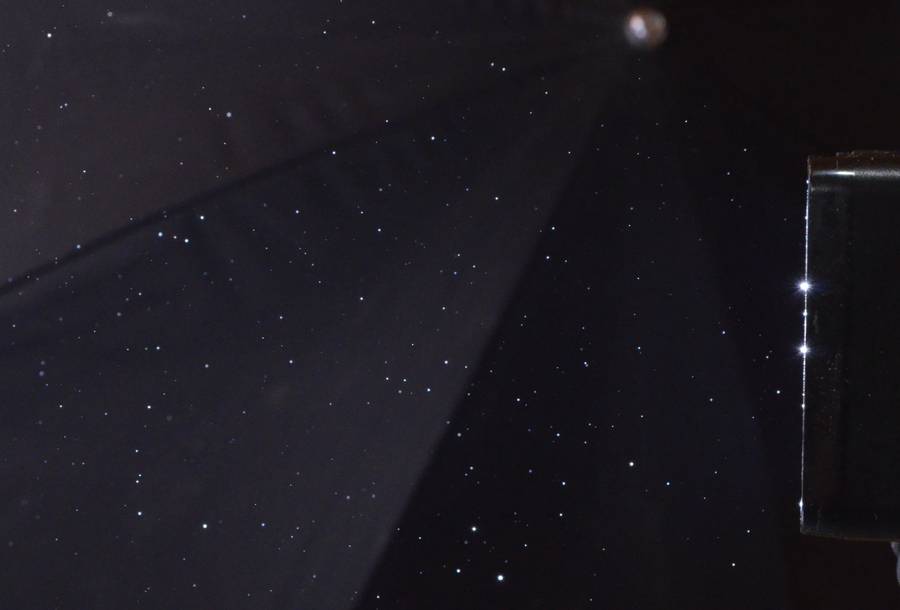 Here's a picture of the background dust level, when I'm not doing any woodworking.
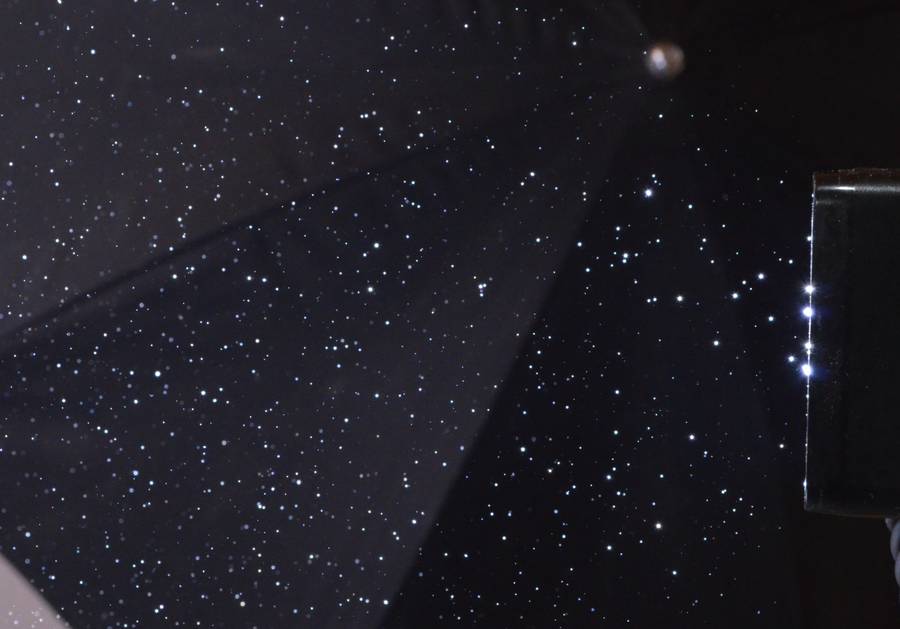 It's difficult to gauge the true background dust levels, because anything we do
releases more dust. Here's the same photo again, after holding my hands in front
of the flash and rubbing my sleeves.
It's difficult to gauge the true background dust levels, because anything we do
releases more dust. Here's the same photo again, after holding my hands in front
of the flash and rubbing my sleeves.
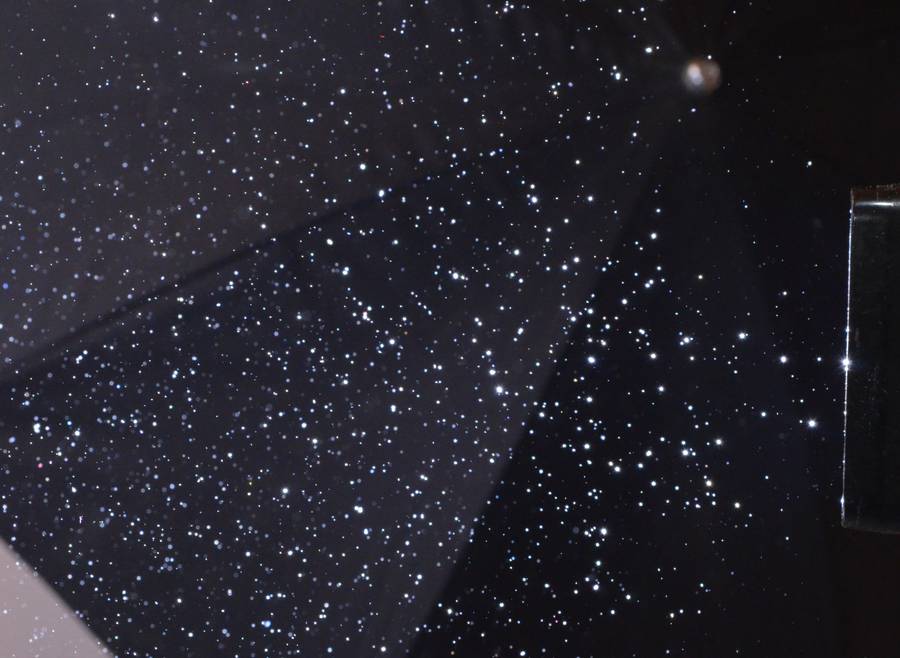 And the same photo after shaking my fleece jacket a bit.
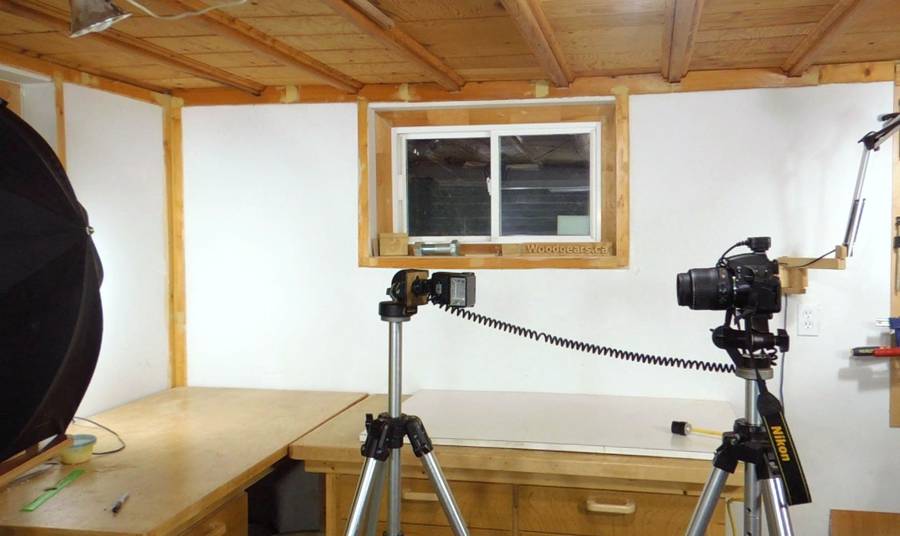
 Setting up two tripods and a black umbrella behind them is a bit awkward, so I figured I'd try to
make a more portable setup - one I could use regardless of lighting conditions.
Setting up two tripods and a black umbrella behind them is a bit awkward, so I figured I'd try to
make a more portable setup - one I could use regardless of lighting conditions.
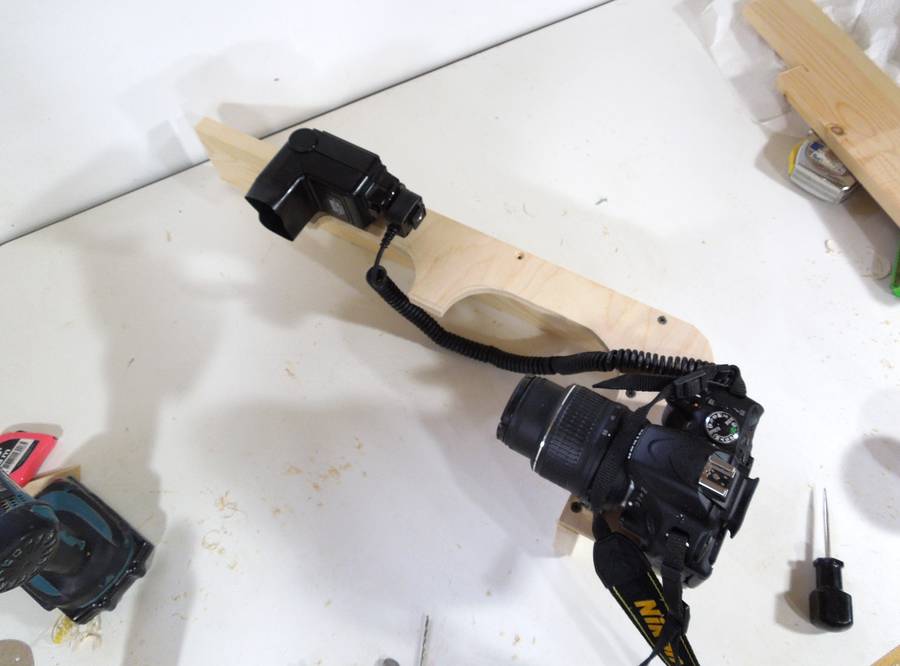
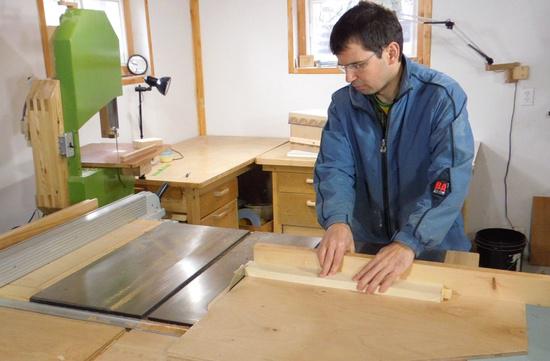
I started with a wooden frame to mount the camera and flash to.
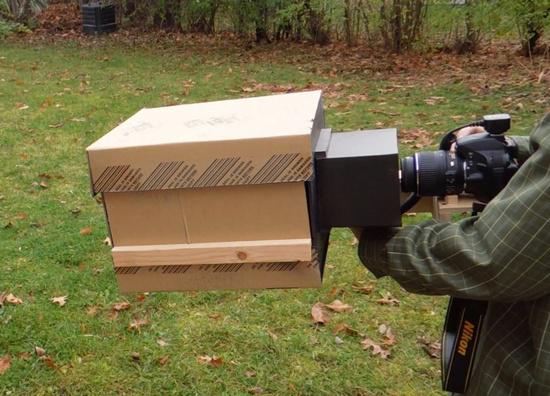
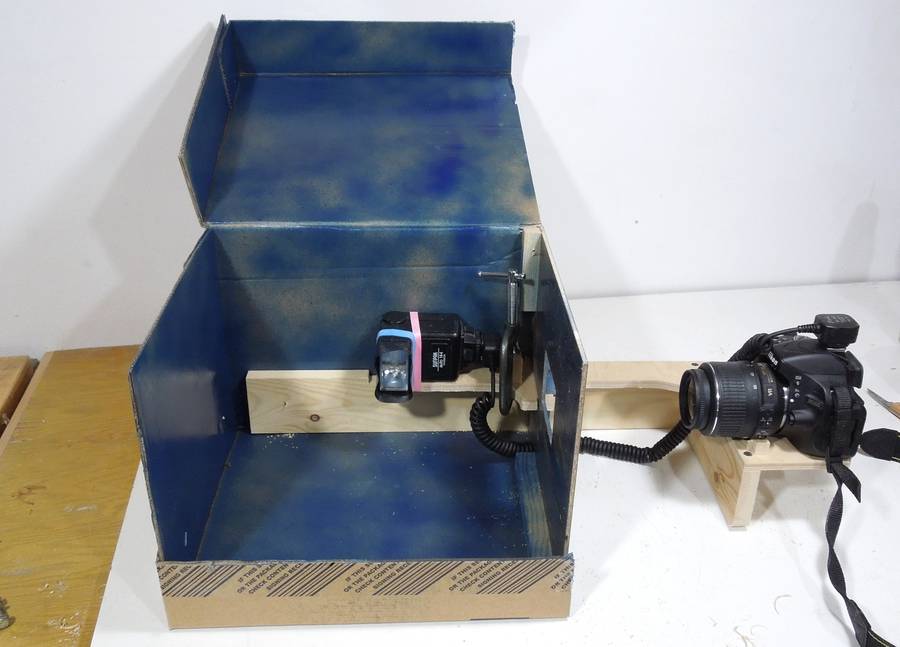 The wooden frame goes inside a box. Not to waste wood with my experiments, I made this box
out of cardboard.
The wooden frame goes inside a box. Not to waste wood with my experiments, I made this box
out of cardboard.
But the problem with setting off a bright flash inside a small box is that the whole box gets lit up. With the box about one tenth the dimensions of a small room, it's like setting off a flash ten times as large (and 100 times the area). So reflections needed to be controlled carefully.
I painted the insides of the box, first with the rest of some leftover dark blue spray paint from my air raid siren, then a coat of black..
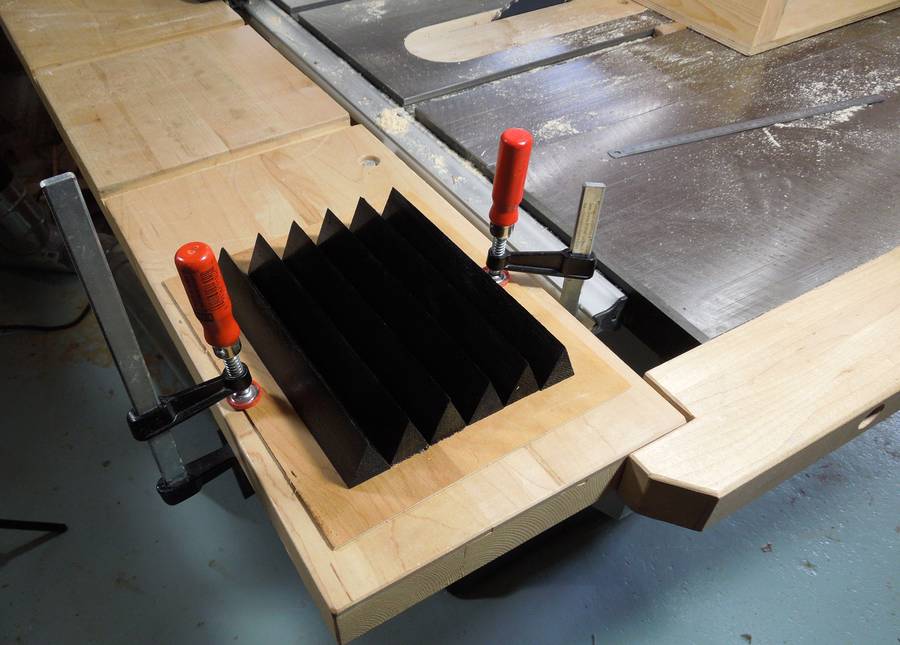
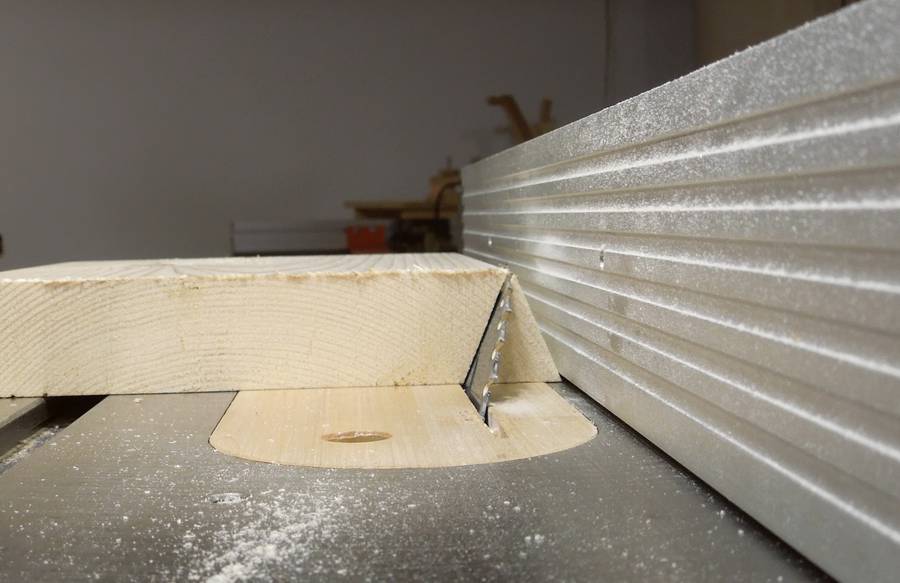 But I knew black paint alone would not be dark enough. So I made some triangular "fins" for the
background.
But I knew black paint alone would not be dark enough. So I made some triangular "fins" for the
background.
 I painted these fins glossy black. On account of their shape, it takes light multiple reflections
to bounce straight out of the fins. Each time the light is reflected off the black, somewhere around
about 95% of it is absorbed. So the more reflections are needed, the darker it looks.
I painted these fins glossy black. On account of their shape, it takes light multiple reflections
to bounce straight out of the fins. Each time the light is reflected off the black, somewhere around
about 95% of it is absorbed. So the more reflections are needed, the darker it looks.
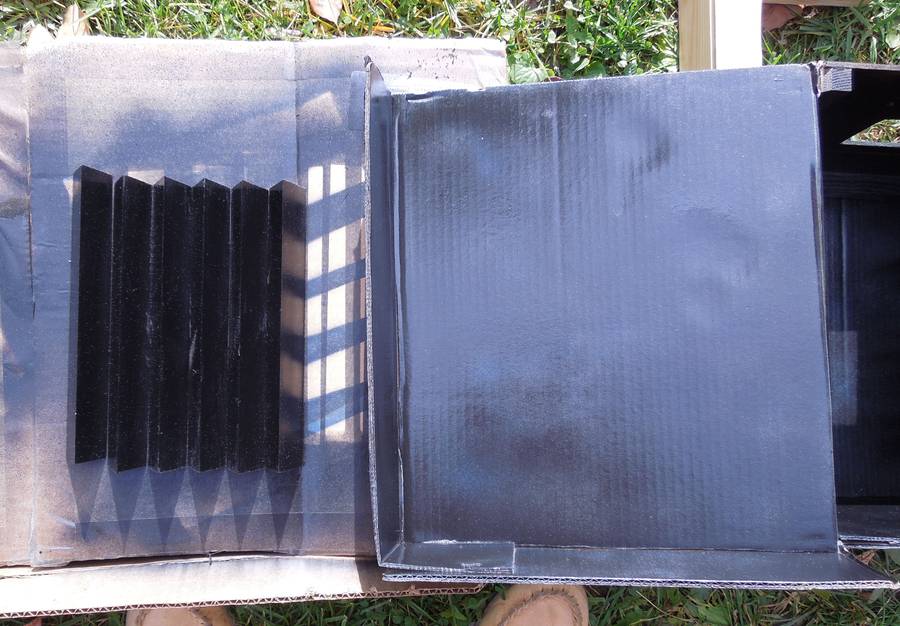
In this photo, looking down at the fins at left and some black painted cardboard at right. The black painted cardboard readily reflects some of the sky, and the fins look much darker even though the sun is shining on them directly (note the shadows).
 I glued the fins onto a piece of thin plywood. Snapped this photo of it, and it was odd to see the
area of the fins look like a black hole! They really don't look that dark to the eye because
the eye is much better at dealing with large contrasts.
I glued the fins onto a piece of thin plywood. Snapped this photo of it, and it was odd to see the
area of the fins look like a black hole! They really don't look that dark to the eye because
the eye is much better at dealing with large contrasts.
 The fins go in the back of the box, as a background so that the camera, looking into the box, is only
able to see the fins and the airborne dust.
The fins go in the back of the box, as a background so that the camera, looking into the box, is only
able to see the fins and the airborne dust.
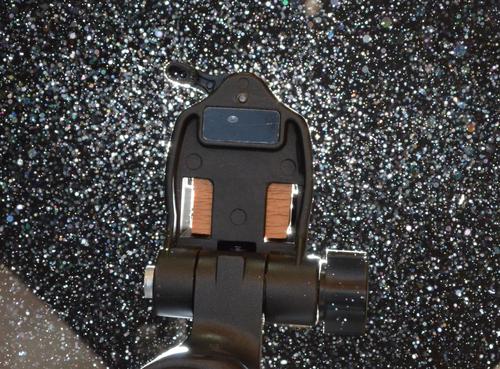
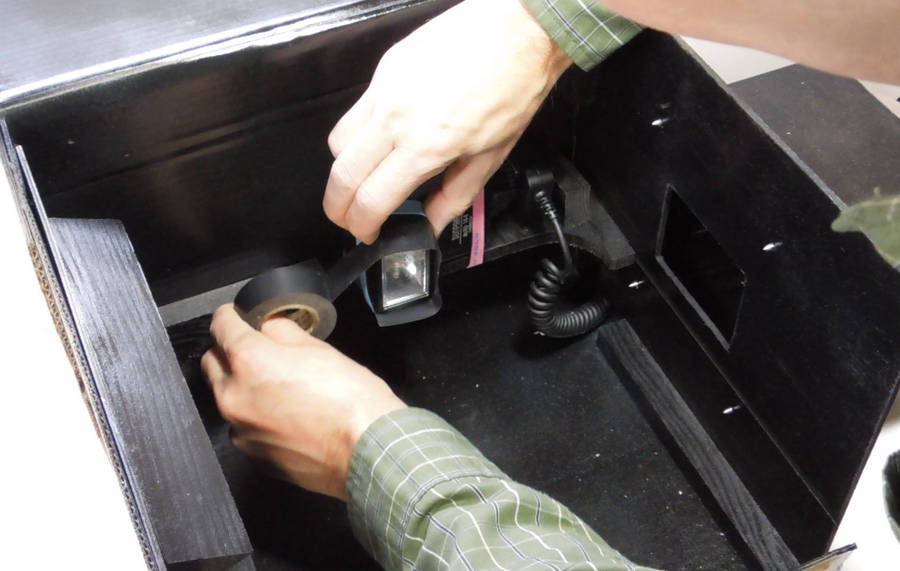
I also wrapped some electrical tape around the flash to prevent the camera from seeing the front of the flash, and also to send less light from the flash directly at the fins.
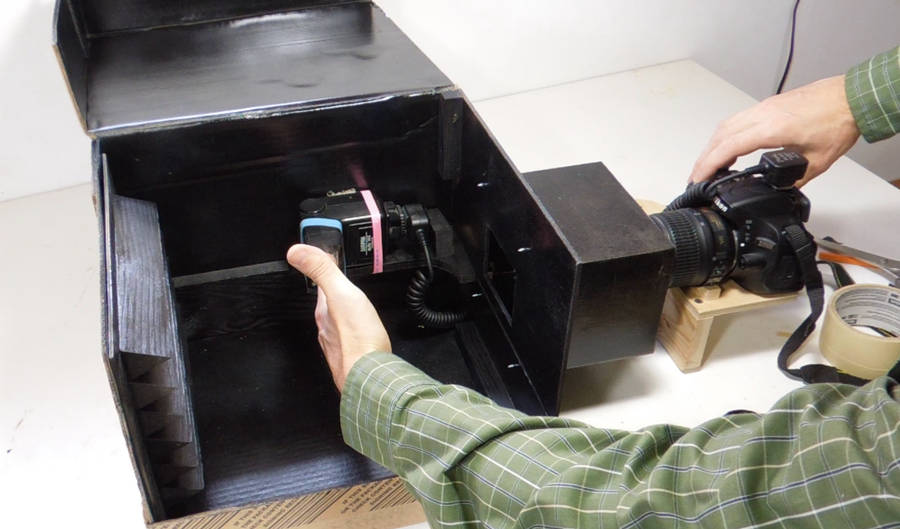 Letting the camera auto-focus focus on my hand in front of the flash. After that, I switched
the lens to "manual focus".
Letting the camera auto-focus focus on my hand in front of the flash. After that, I switched
the lens to "manual focus".
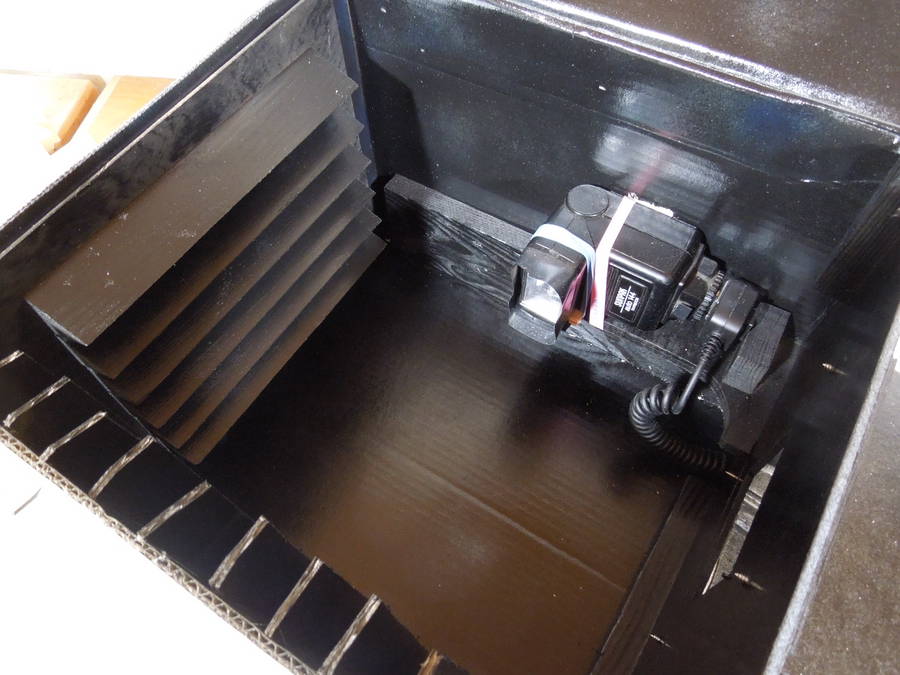 The flash is aimed at a series of cardboard fins. These aren't quite as effective as the
wooden fins in the back of the box, but they help prevent the reflected light from bouncing to
the fins in the back.
The flash is aimed at a series of cardboard fins. These aren't quite as effective as the
wooden fins in the back of the box, but they help prevent the reflected light from bouncing to
the fins in the back.
 Airborne dust in my workshop when I'm not woodworking.
 Another shot, this time in my living room...
 ... and the bedroom. It's dustier there. No surprise, I seem to get way more dust bunnies there
than in the rest of the house.
... and the bedroom. It's dustier there. No surprise, I seem to get way more dust bunnies there
than in the rest of the house.
 Here's a shot in my backyard. Fewer large particles, though if you zoom in on the image (click to enlarge),
you can see a lot of very faint particles just in front of the flash, more so than you can see in
the other photos.
Here's a shot in my backyard. Fewer large particles, though if you zoom in on the image (click to enlarge),
you can see a lot of very faint particles just in front of the flash, more so than you can see in
the other photos.

 Outside, on a day with not so great air quality.
Note all the fine particulate visible near the flash.
Outside, on a day with not so great air quality.
Note all the fine particulate visible near the flash.
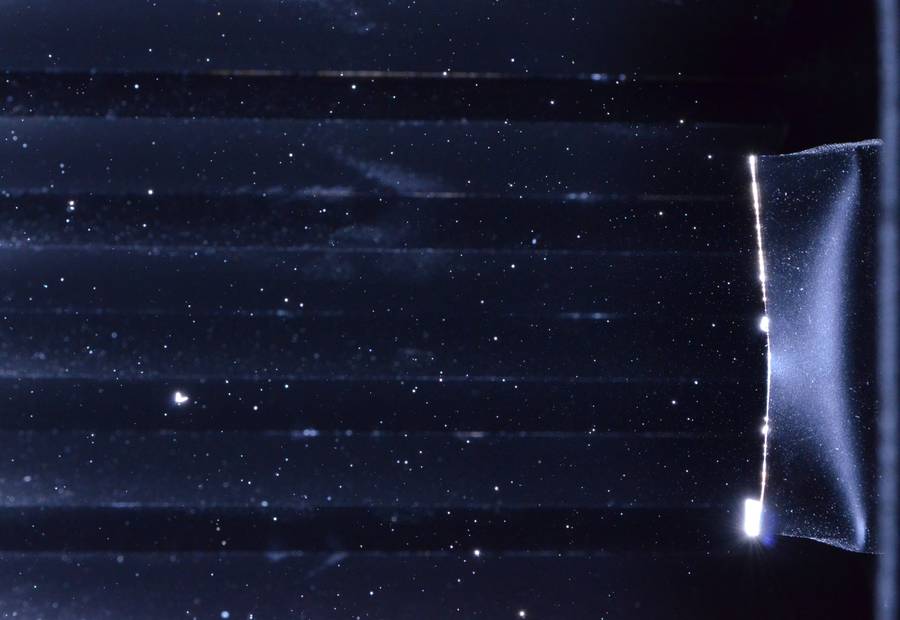
I didn't see as much fine particulate even after using the vacuum cleaner or the table saw in the photos below.

 The air in my shop after making just a few cuts on the table saw. As expected, using power tools
immediately raises the dust level substantially. Lots of larger particles, but not the dense cloud
of fine particulate in the bad air day shot outside.
The air in my shop after making just a few cuts on the table saw. As expected, using power tools
immediately raises the dust level substantially. Lots of larger particles, but not the dense cloud
of fine particulate in the bad air day shot outside.
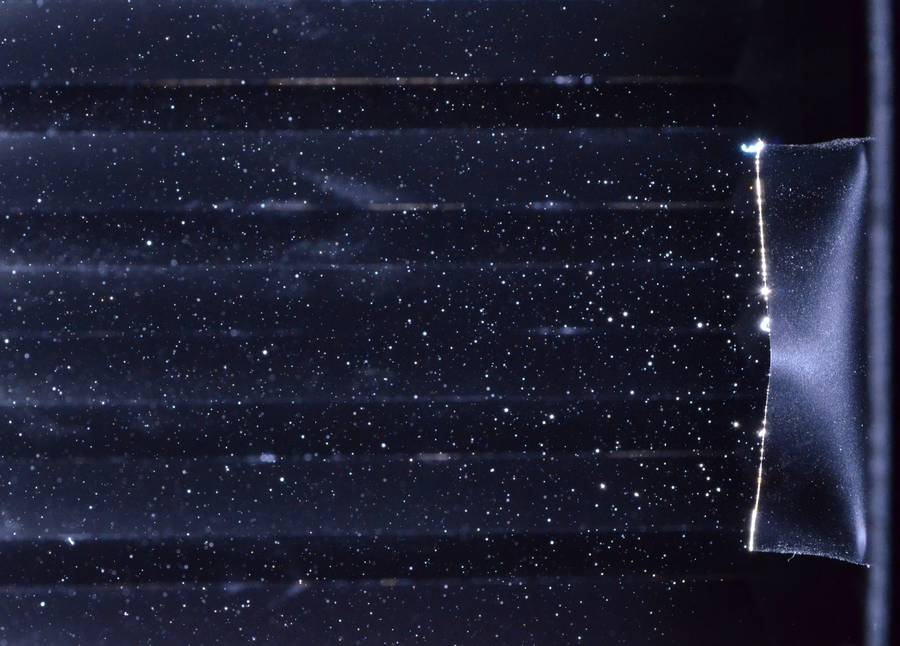
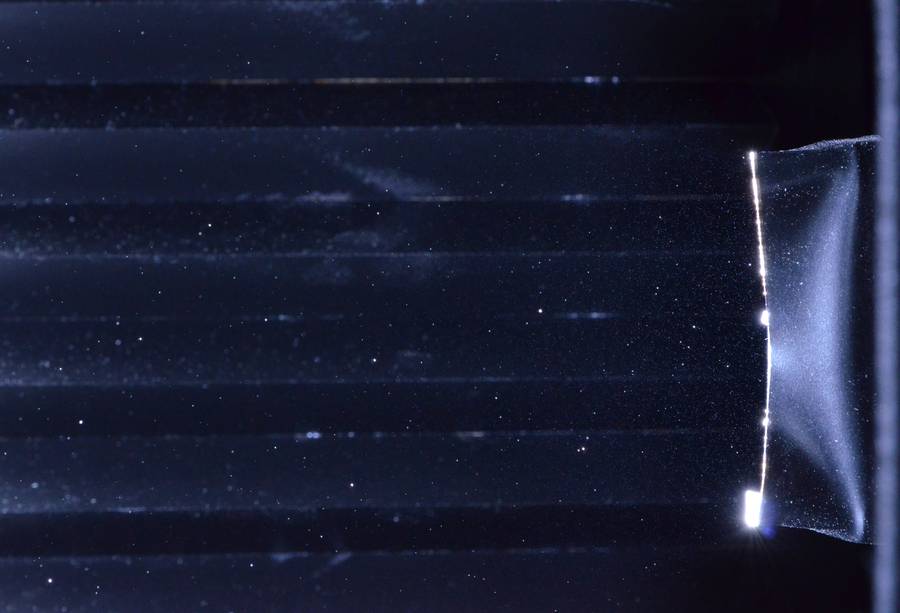
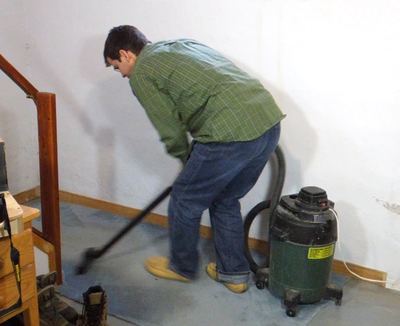 My shopvac, it turns out, emits a lot of dust. It only has one of those disposable
paper filter bags in it. I guess those paper filter bags are not very good, considering
how much dust was in the air after using it for just a few minutes.
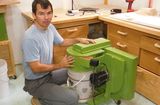
I also checked the dust coming out of a shopvac using a pleated cartridge filter,
and that was much less dust.
My shopvac, it turns out, emits a lot of dust. It only has one of those disposable
paper filter bags in it. I guess those paper filter bags are not very good, considering
how much dust was in the air after using it for just a few minutes.
I also checked the dust coming out of a shopvac using a pleated cartridge filter,
and that was much less dust.
See also:
 Building a small dust collector (version 1)
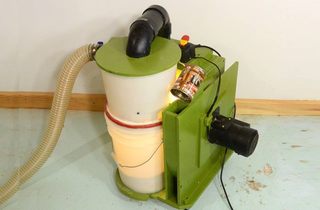 Small dust collector
(version 2)

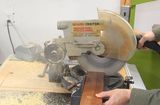 How much dust from a miter sw
 Document photographing stand (video only)
Back to my Woodworking website.