Homemade power feeder
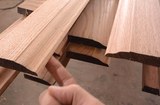
 When I made more than 300 ft (100m) of
baseboards
I figured a power feeder would be handy. I first jigged one up by attaching
a wheel to a shaft and put that in the drill, with a block of wood to hold
it on the table saw. That worked, but for the next cut I needed to put the wood
vertically against the fence, so I couldn't use this method.
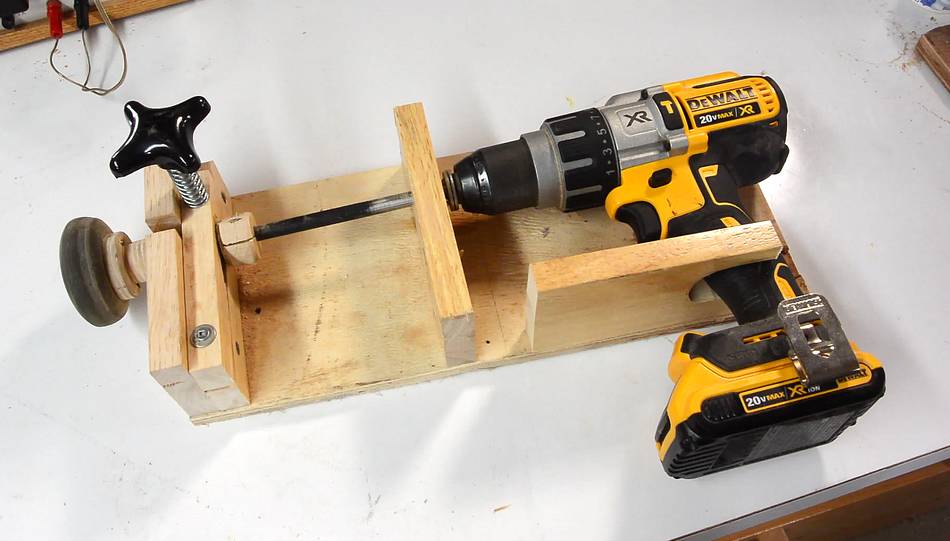
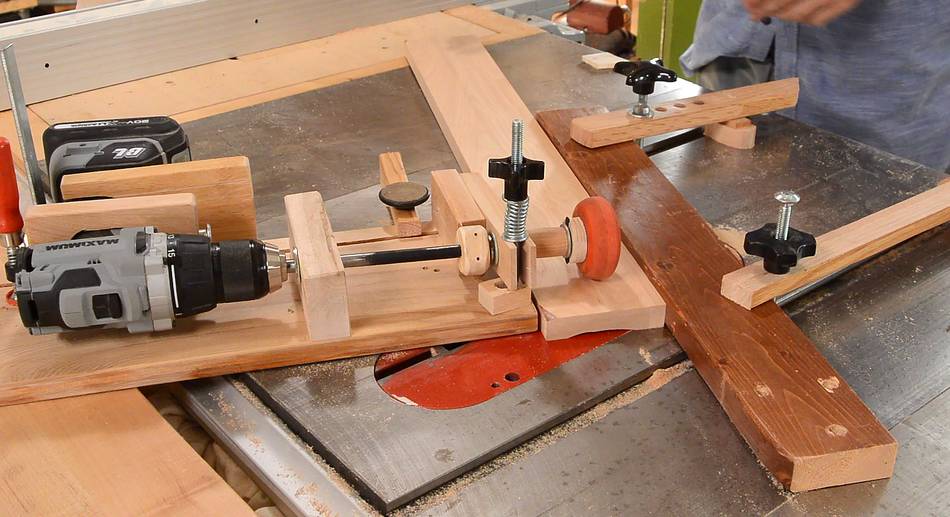
I refined the concept and mounted it on a piece of plywood
so it could be used vertically.
When I made more than 300 ft (100m) of
baseboards
I figured a power feeder would be handy. I first jigged one up by attaching
a wheel to a shaft and put that in the drill, with a block of wood to hold
it on the table saw. That worked, but for the next cut I needed to put the wood
vertically against the fence, so I couldn't use this method.
I refined the concept and mounted it on a piece of plywood
so it could be used vertically.
I don't often have a job that justifies using a power feeder, but it sure came in handy for the large batch of baseboards. I thought I'd revisit the idea in more detail.
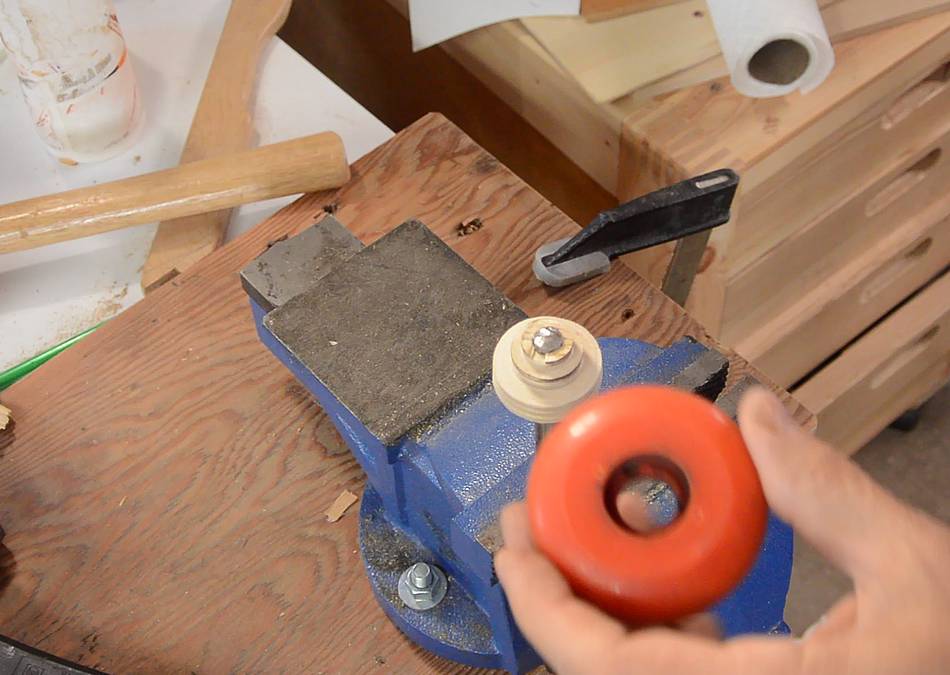
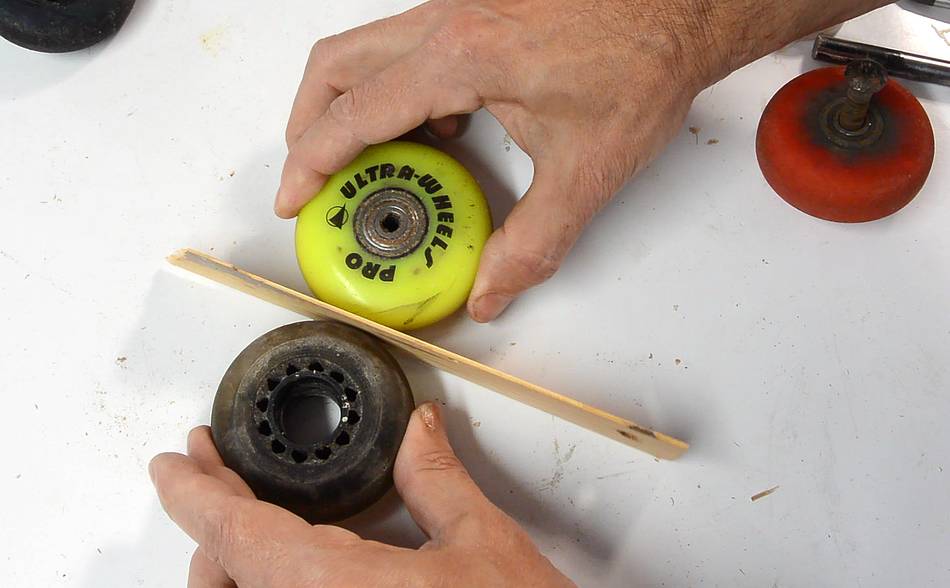 I have a lot of old roller skate wheels, and I wanted to use the grippiest one.
I pressed two different wheels against a strip of wood and rubbed back
and forth to see which one gripped the wood and which one it slid against.
I did that with five different wheels until I found the grippiest one.
I have a lot of old roller skate wheels, and I wanted to use the grippiest one.
I pressed two different wheels against a strip of wood and rubbed back
and forth to see which one gripped the wood and which one it slid against.
I did that with five different wheels until I found the grippiest one.
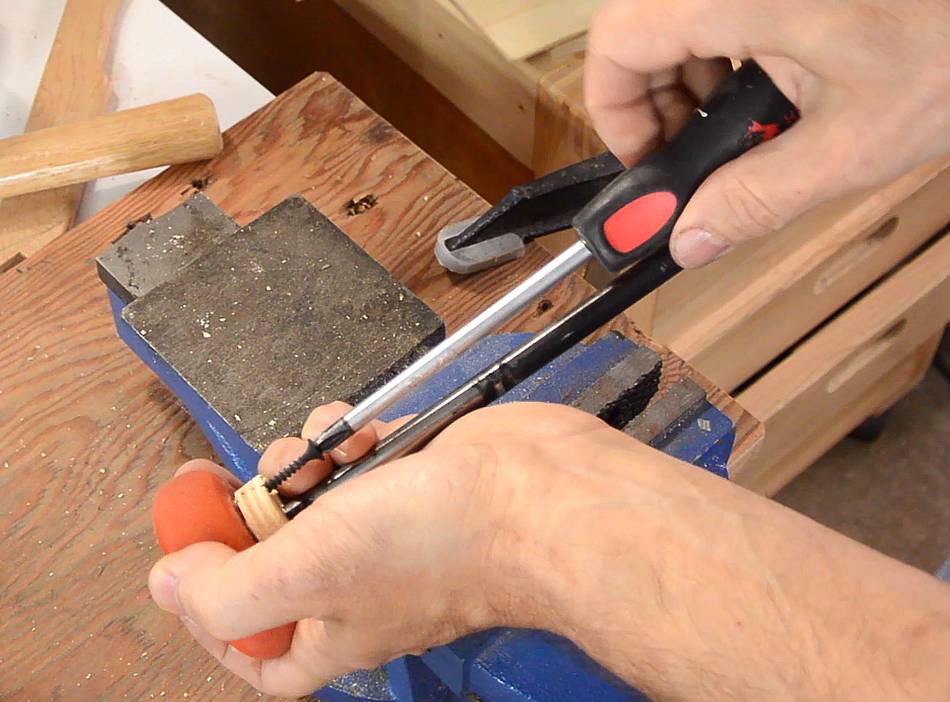
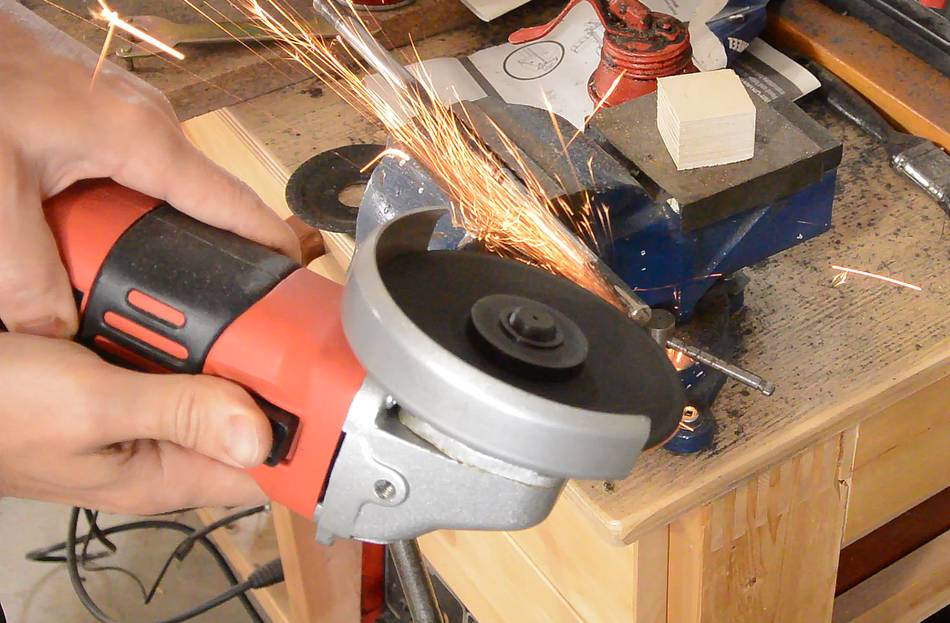 I needed to mount the wheel on a shaft. I started by roughening up the end
of the shaft with an angle grinder.
I needed to mount the wheel on a shaft. I started by roughening up the end
of the shaft with an angle grinder.
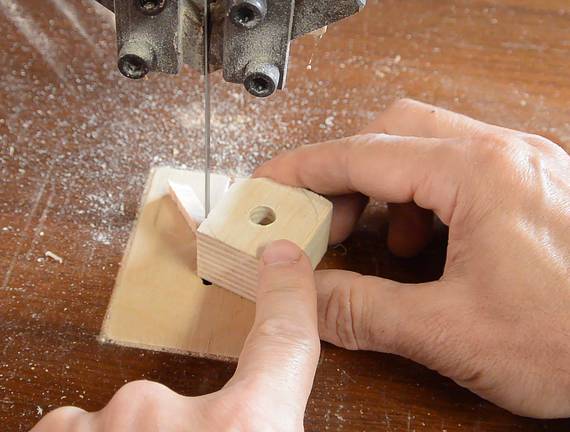
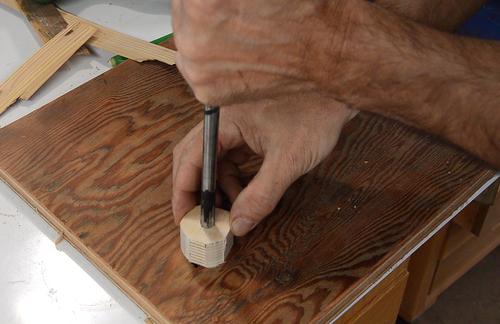 I then drilled a slightly undersized hole in a block of Baltic birch plywood,
cut that roughly round, then hammered the rod into the hole.
I then drilled a slightly undersized hole in a block of Baltic birch plywood,
cut that roughly round, then hammered the rod into the hole.
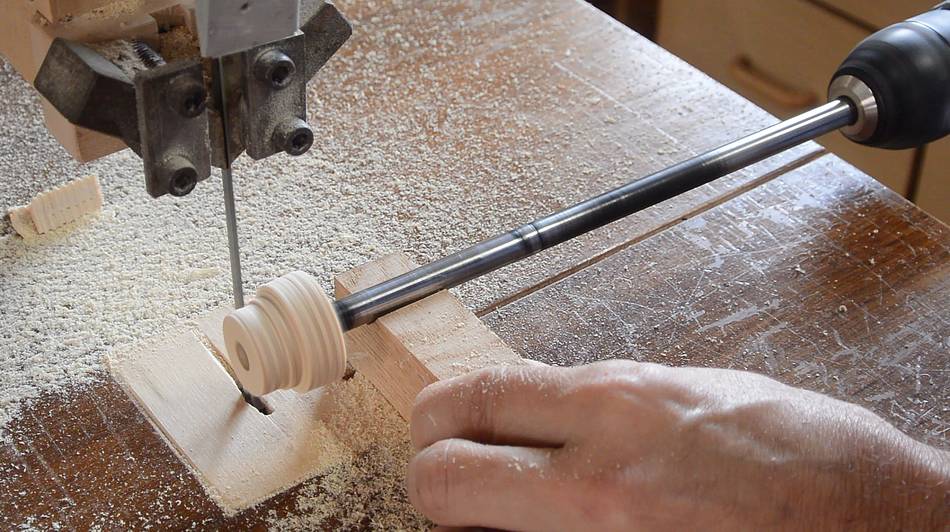
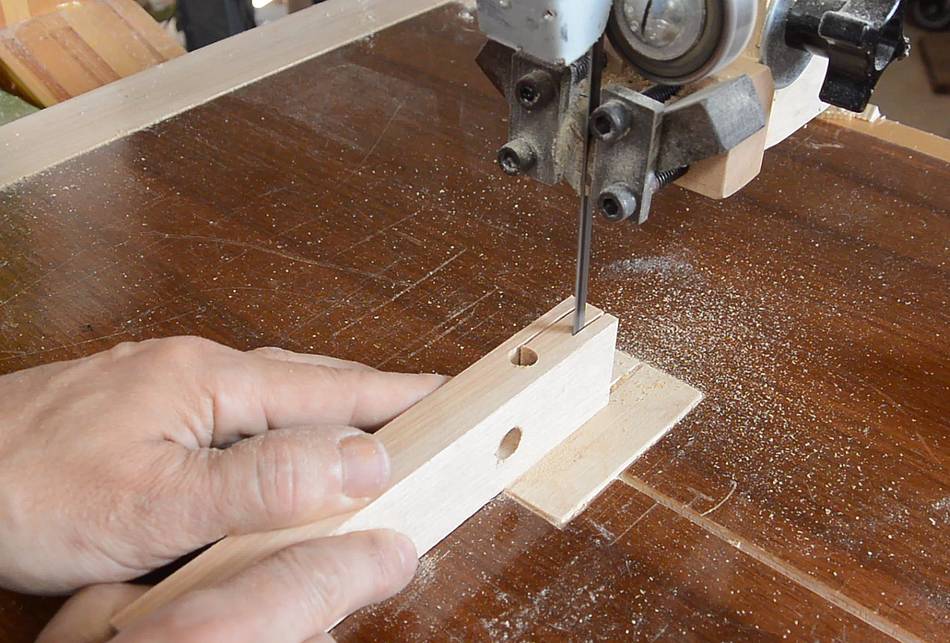
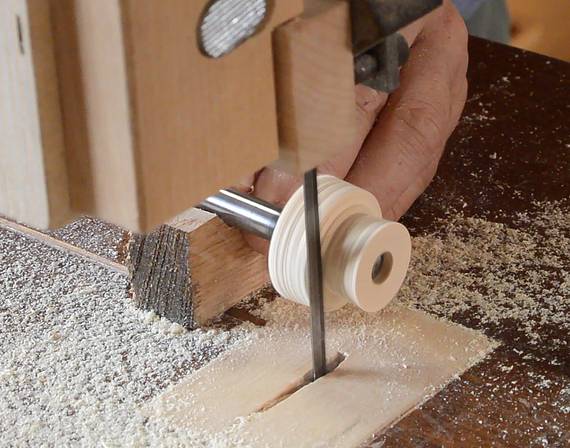 I then spun the block against a running bandsaw blade to shape it.
I discovered this technique when I made my
wooden domino building machine. It works really well!
I then spun the block against a running bandsaw blade to shape it.
I discovered this technique when I made my
wooden domino building machine. It works really well!
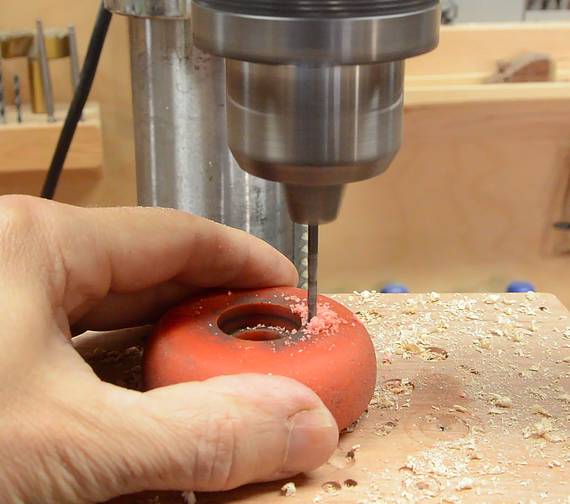 Having shaped the block to fit the wheel, I had to attach the wheel
somehow. Fortunately, the wheel was fairly drillable.
Having shaped the block to fit the wheel, I had to attach the wheel
somehow. Fortunately, the wheel was fairly drillable.
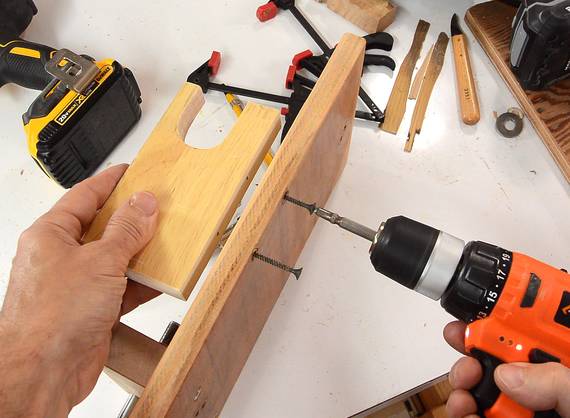
 I was able to screw it against the block of wood, with the screw thread
engaging the rubber wheel.
I was able to screw it against the block of wood, with the screw thread
engaging the rubber wheel.
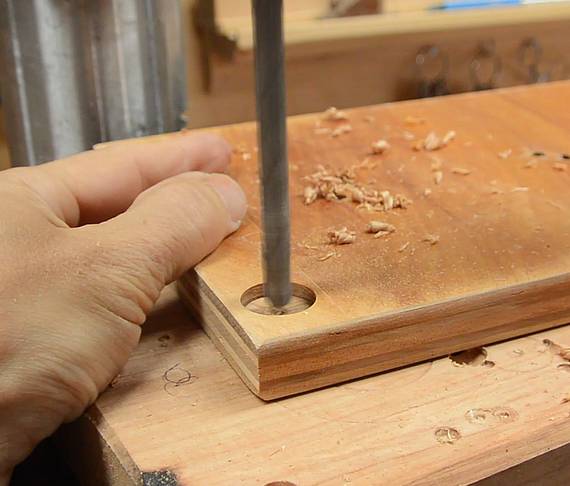
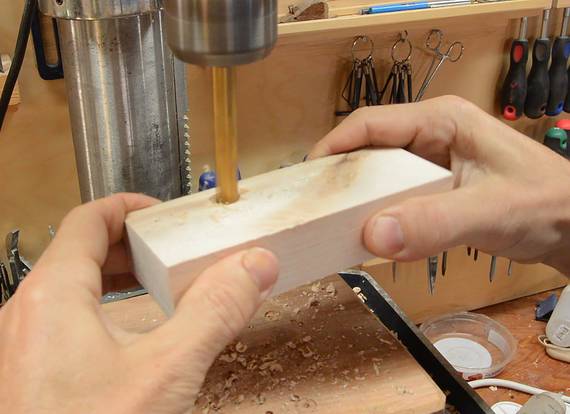
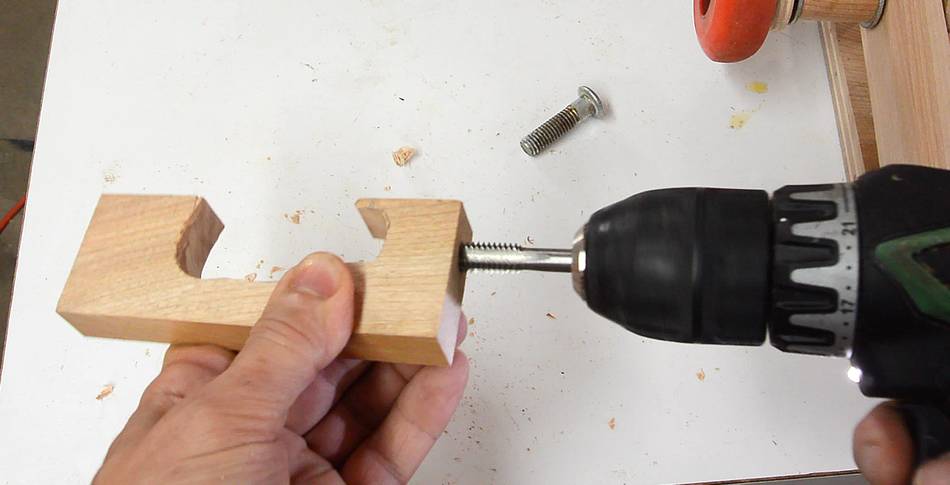
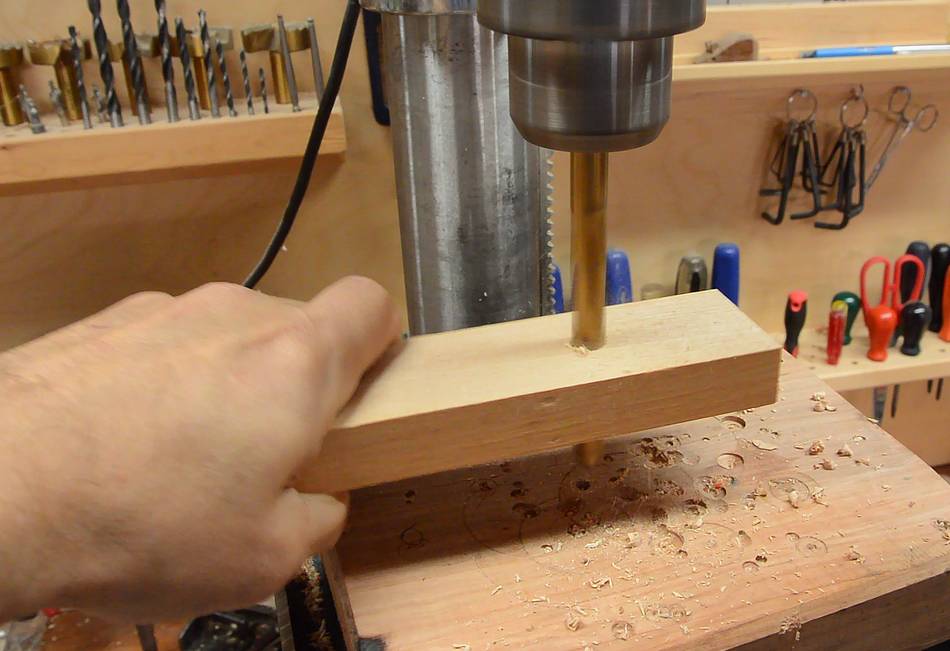 The shaft rotates in a block of wood, but it needs to be able to pivot for
vertical adjustment, I drilled a slightly undersized hole, then pivoted
the block back and forth (towards/away from me) with the drill in it to
make a hole that can accommodate the shaft tilting.
The shaft rotates in a block of wood, but it needs to be able to pivot for
vertical adjustment, I drilled a slightly undersized hole, then pivoted
the block back and forth (towards/away from me) with the drill in it to
make a hole that can accommodate the shaft tilting.
 I made a slot in the end of this block for the screw and spring to push
down on it.
I made a slot in the end of this block for the screw and spring to push
down on it.

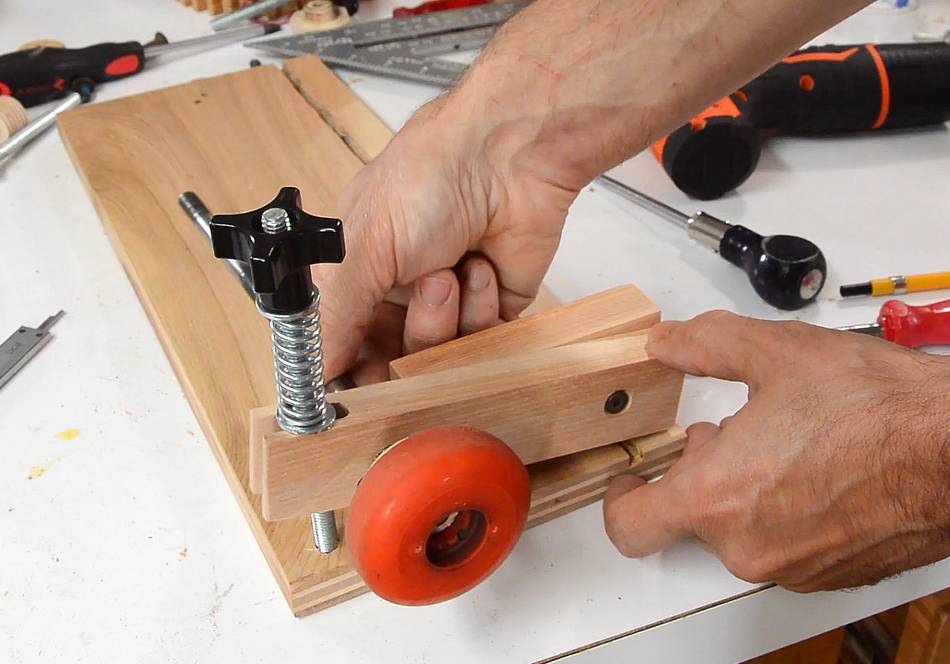
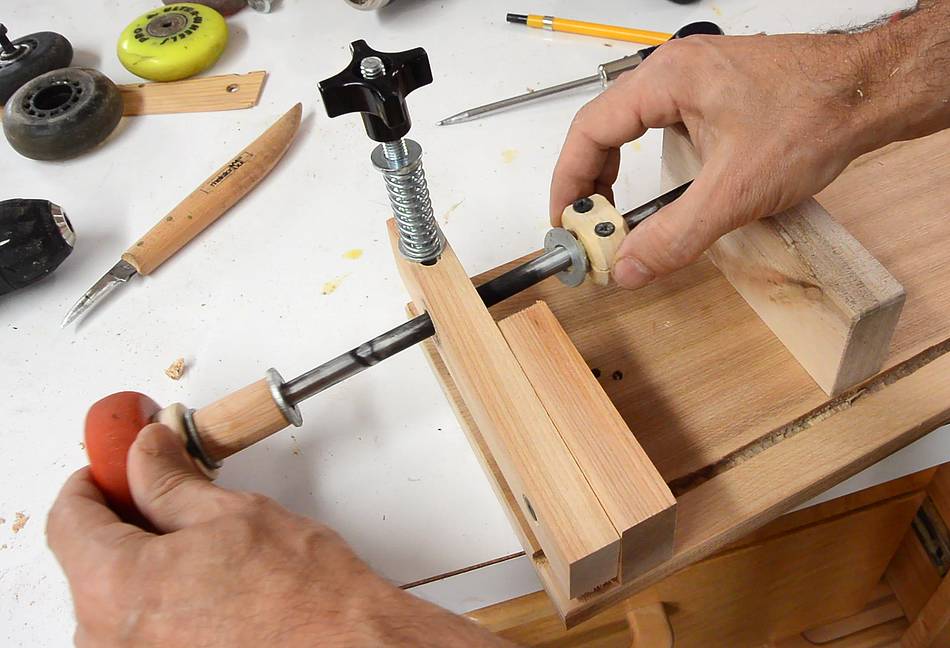
 I then made a hole for a carriage bolt head in a piece of plywood and put
it together.
I then made a hole for a carriage bolt head in a piece of plywood and put
it together.
The block with the shaft hole screws onto another block with just one screw to allow it to rotate for the vertical movement.
 This is about as high as the block will go.
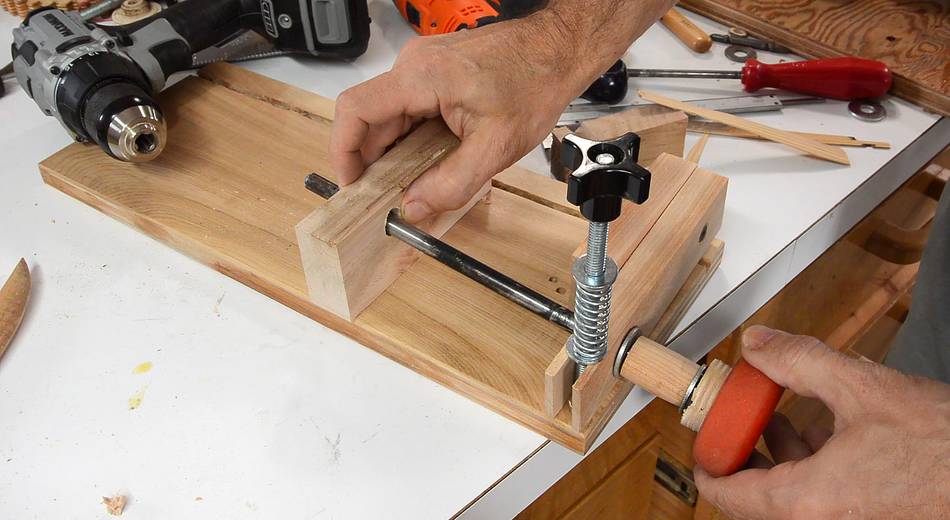
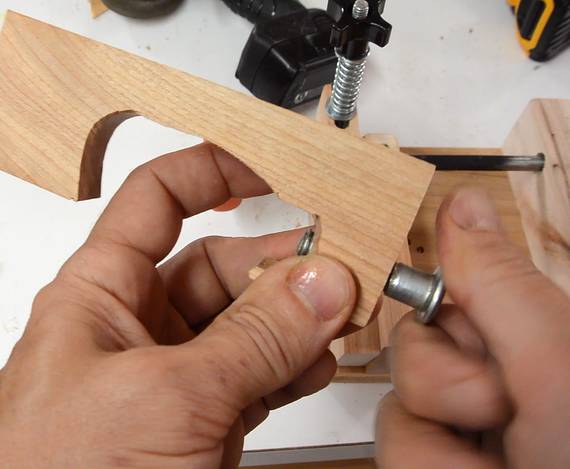
 It's best to have the wheel at an offset from the power feeder so
it can reach to the middle of wider boards. I made a wooden spacer
for this (just a piece of hardwood with a hole cut in it, cut round on the
bandsaw, then sanded, and placed between two washers)
It's best to have the wheel at an offset from the power feeder so
it can reach to the middle of wider boards. I made a wooden spacer
for this (just a piece of hardwood with a hole cut in it, cut round on the
bandsaw, then sanded, and placed between two washers)
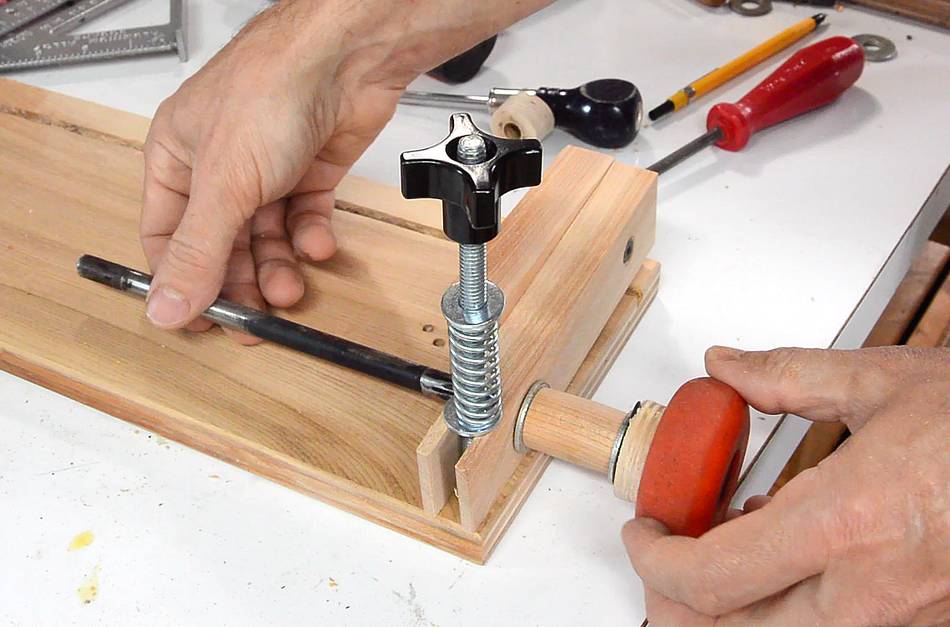
 Rather than using the drill's chuck for the other mount for the shaft, I figure
it would be better and easier to have another block that the shaft rotates in.
Rather than using the drill's chuck for the other mount for the shaft, I figure
it would be better and easier to have another block that the shaft rotates in.
I needed to figure out how high this needs to be mounted so the drill still has clearance even when the roller is at its highest position.
 I then made another block with an elongated hole on the drill press and
mounted it in place.
I then made another block with an elongated hole on the drill press and
mounted it in place.
 I don't want the shaft and wheel to fall out of the jig when no drill is
attached, so I made a little collar to go over the shaft. Two screws clamp
it together
I don't want the shaft and wheel to fall out of the jig when no drill is
attached, so I made a little collar to go over the shaft. Two screws clamp
it together
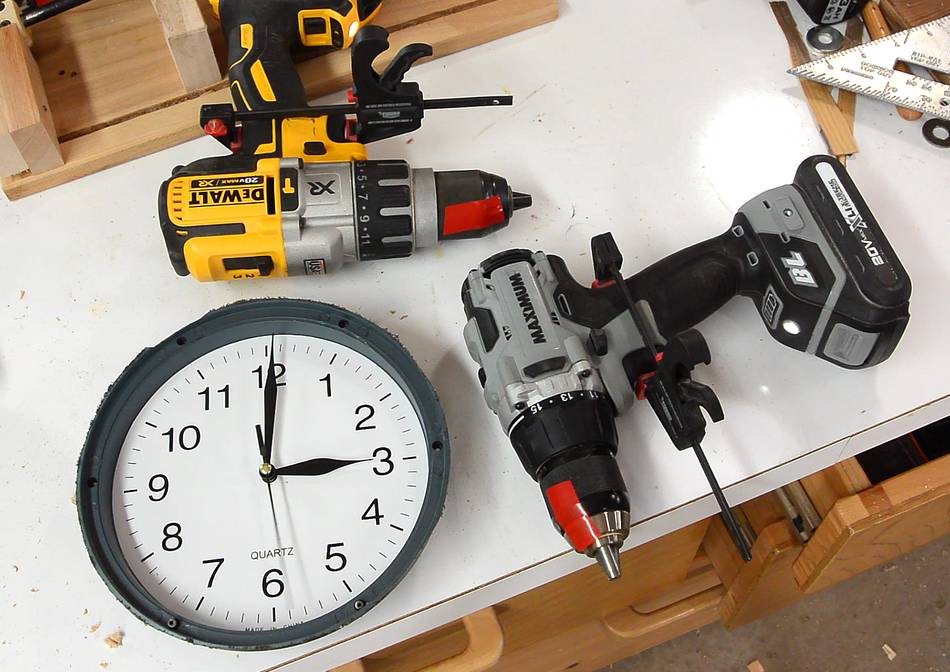 I was not sure which of my two brushless drills to use for this.
I previously used the DeWalt drill, which worked very well as a power
feeder, but after five minutes of having the trigger continuously pressed,
it always stopped. Probably the assumption is that the trigger is pushed by
some surrounding junk in a toolbox, as opposed to being part of some
Izzy Swan drill powered contraption.
I was not sure which of my two brushless drills to use for this.
I previously used the DeWalt drill, which worked very well as a power
feeder, but after five minutes of having the trigger continuously pressed,
it always stopped. Probably the assumption is that the trigger is pushed by
some surrounding junk in a toolbox, as opposed to being part of some
Izzy Swan drill powered contraption.
Testing both drills the DeWalt shut off after five minutes, but the other one didn't stop, even after ten minutes. So I figured I should make it work with that one. Though in some way I would have preferred to optimize it for the DeWalt, because I almost never use the DeWalt for drilling - it's just too big and heavy.
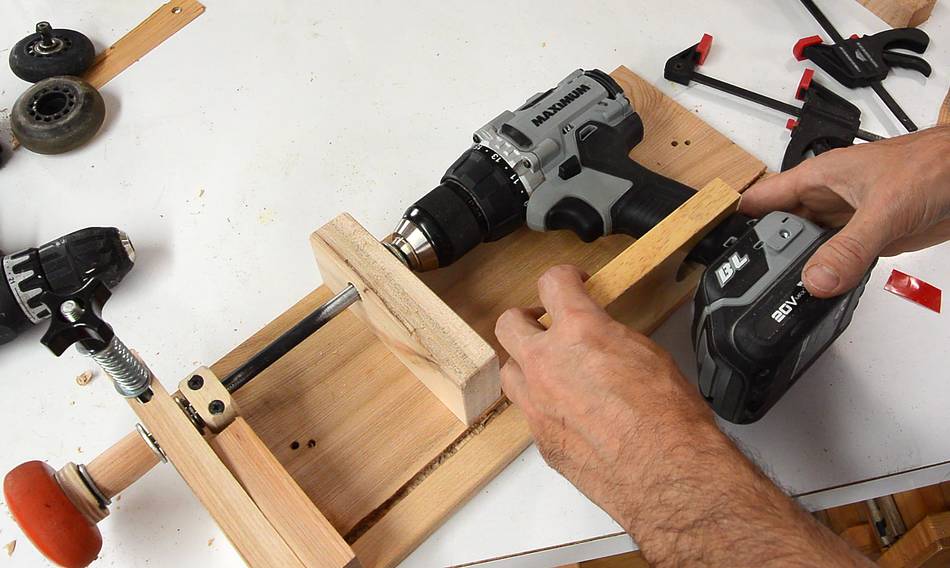
 I made a bracket to go around the handle to keep the drill from flipping over
from the torque.
I made a bracket to go around the handle to keep the drill from flipping over
from the torque.
 When I made the baseboards, I found it annoying to have to set the speed of the
drill every time I turned it on by putting a small clamp on the trigger,
especially with having to release the trigger and press it again every five
minutes of operation. So I made this dedicated clamp where I could set how
far it presses it in and then just slip it on and off the drill's trigger and
handle to start and stop it. A big screw is used to set how far it presses
the trigger.
When I made the baseboards, I found it annoying to have to set the speed of the
drill every time I turned it on by putting a small clamp on the trigger,
especially with having to release the trigger and press it again every five
minutes of operation. So I made this dedicated clamp where I could set how
far it presses it in and then just slip it on and off the drill's trigger and
handle to start and stop it. A big screw is used to set how far it presses
the trigger.

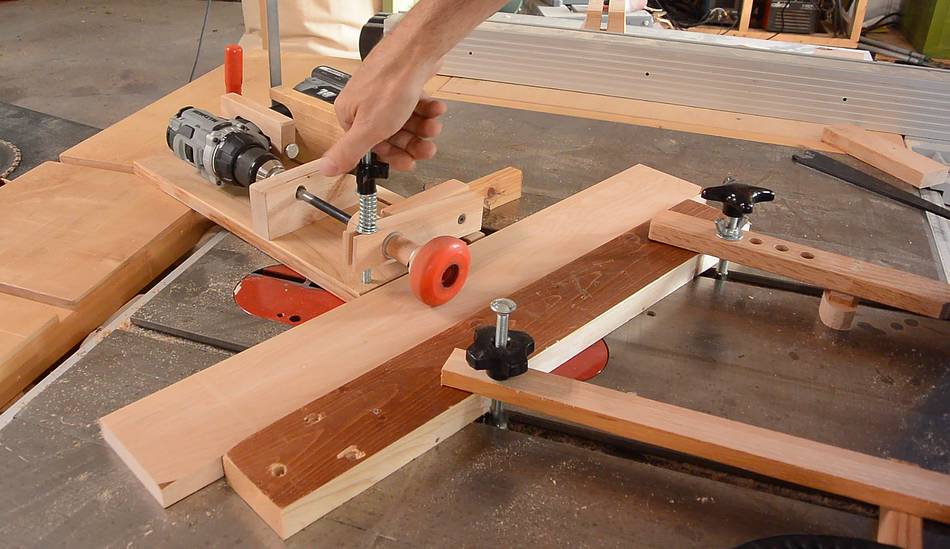 With the power feeder done, it was time to test it. When making
cove cuts on the table saw, a consistent
feed rate really helps, so I thought I'd test it with that.
With the power feeder done, it was time to test it. When making
cove cuts on the table saw, a consistent
feed rate really helps, so I thought I'd test it with that.
This drill, unfortunately, has a bit of waviness in the speed at its very lowest speeds, though I couldn't really see any symptoms of that in the resulting cut. Maybe some gear reduction would help, but that would add a lot of complexity.
 It is nice just starting the cut and watching it go slowly though the saw!
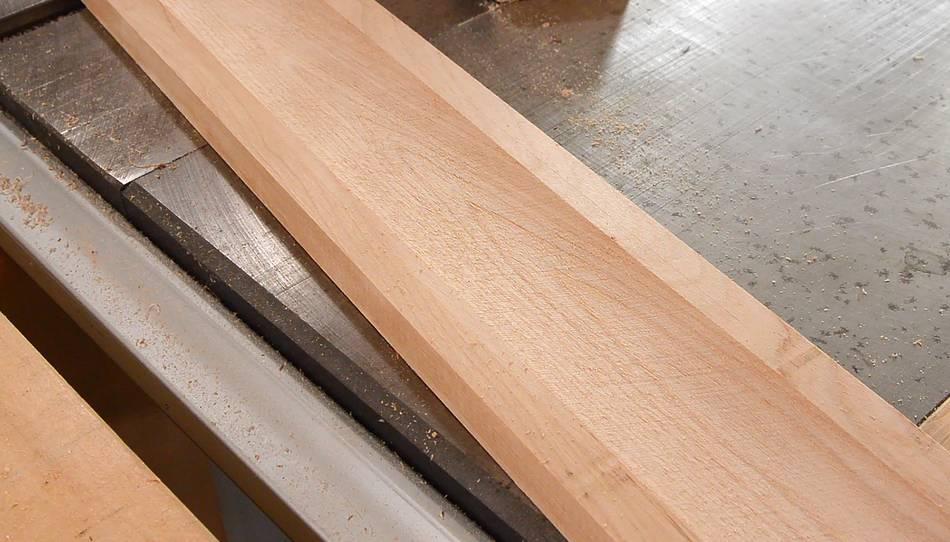 The cove cut wasn't entirely smooth (cove cuts, passing the stock diagonally
over the saw blade rarely are), but it was very consistent.
It helps that I was using a blade where I rounded the tops of all the teeth
for smoother cove cuts. I also passed the wood through three times without
raising the blade in between to help smooth it out.
The cove cut wasn't entirely smooth (cove cuts, passing the stock diagonally
over the saw blade rarely are), but it was very consistent.
It helps that I was using a blade where I rounded the tops of all the teeth
for smoother cove cuts. I also passed the wood through three times without
raising the blade in between to help smooth it out.
 And just a minute of sanding really cleaned it up.
So this feeder works. Ready for the next time I need a power feeder.
It is, of course, tempting to try to build one with two rollers (infeed and outfeed), coupled with wooden gears, and and maybe using a gear head motor instead of a drill. But this set-up works well enough for my needs. The large batch of baseboards that I made was really the first time I had a good use for a power feeder in my shop. And by keeping it simple, I hope this project is something that others are inspired to copy for their own needs.
See also:
 Making a big batch of baseboard molding
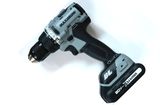 Advantages of a brushless cordless drill
 My "Ryokita" franken-drill
More home improvement projects on woodgears.ca