 Ron Walters writes:
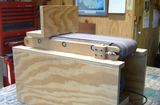
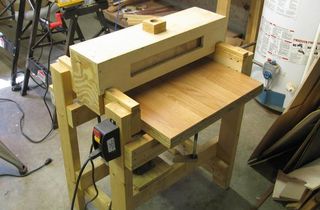
This project started off as a ShopNotes Drum Sander designed to sit on top of a table saw, replacing the saw blade with a drive pulley and powered by the table saw motor. This seemed a clumsy arrangement and Murphy's Law told me I would immediately need the table saw just as soon as I got the sander set up.
For the body of the sander, the plans used MDF, which is not my favorite material.
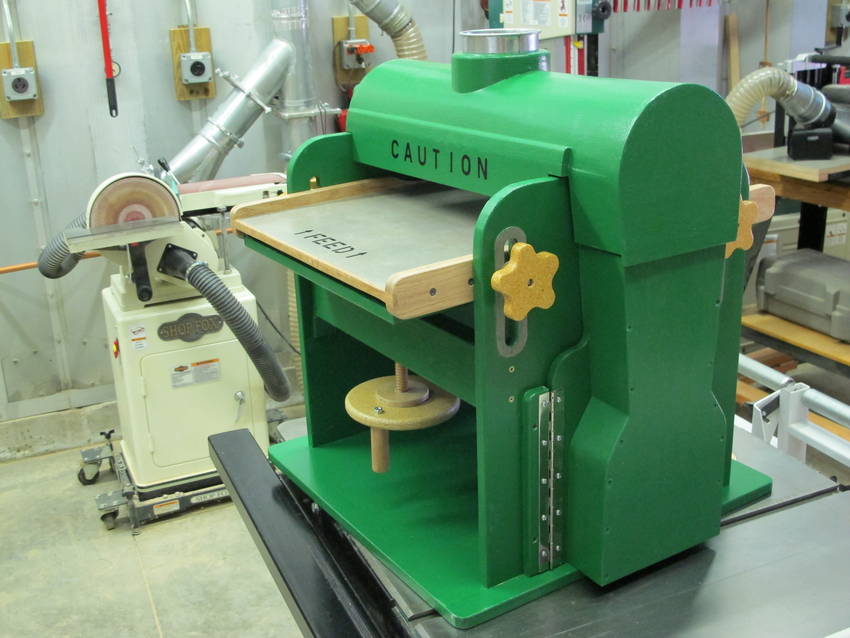
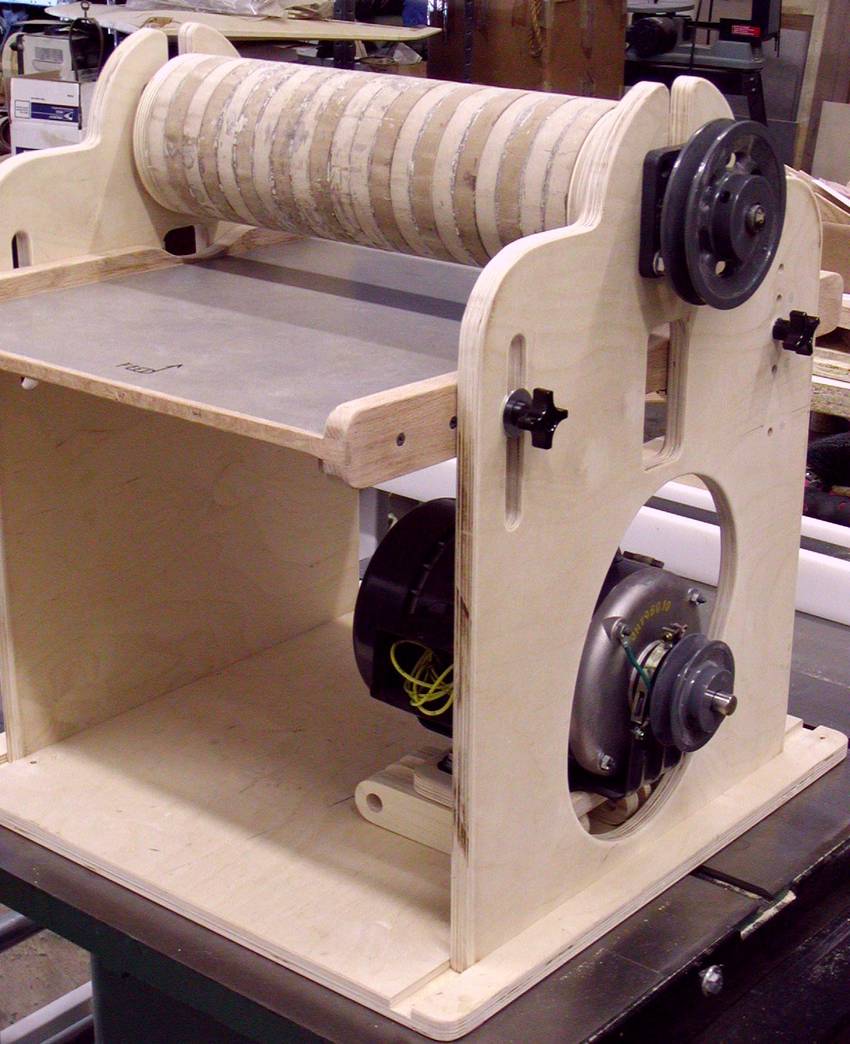
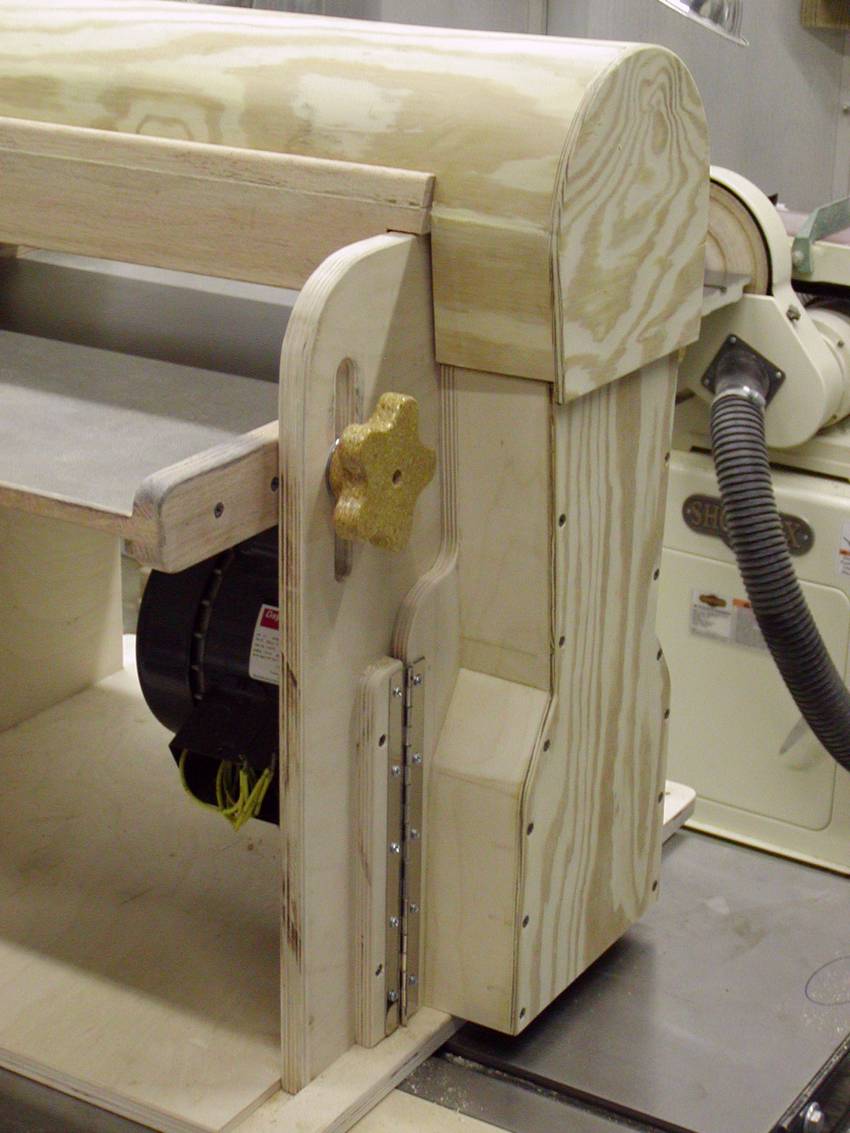
The sides of my sander were only going to be a single layer 3/4" Baltic Birch Plywood, so I decided to use flange bearings instead of pillow block bearings. I increased the height to accommodate a dedicated 1/3 HP 1725 RPM motor.
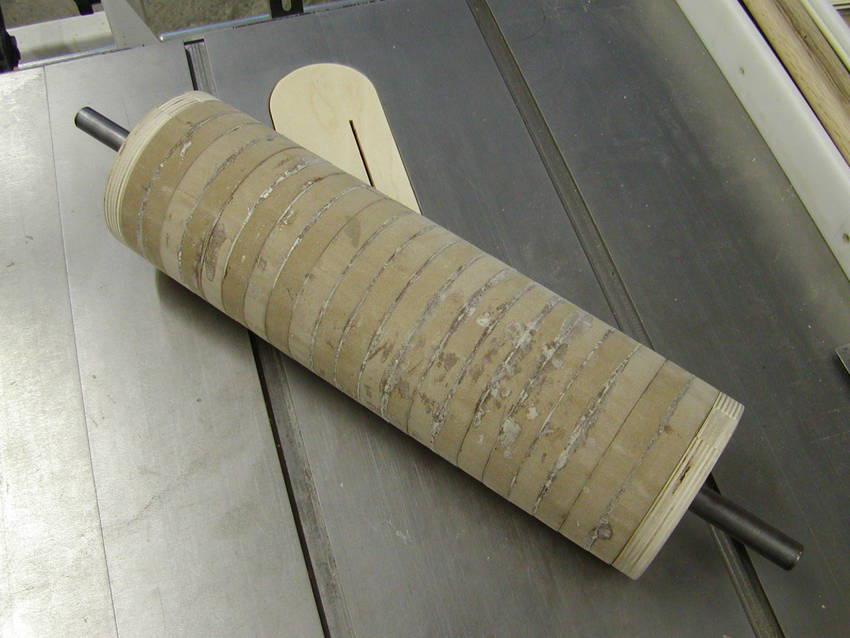 The 5" drum turns approximately 1100 RPM and the sander will handle 15.5"
wide stock. The drum is a stack of nineteen 3/4" MDF discs plus two 3/4" Baltic
Birch discs on a 3/4" steel shaft
The 5" drum turns approximately 1100 RPM and the sander will handle 15.5"
wide stock. The drum is a stack of nineteen 3/4" MDF discs plus two 3/4" Baltic
Birch discs on a 3/4" steel shaft
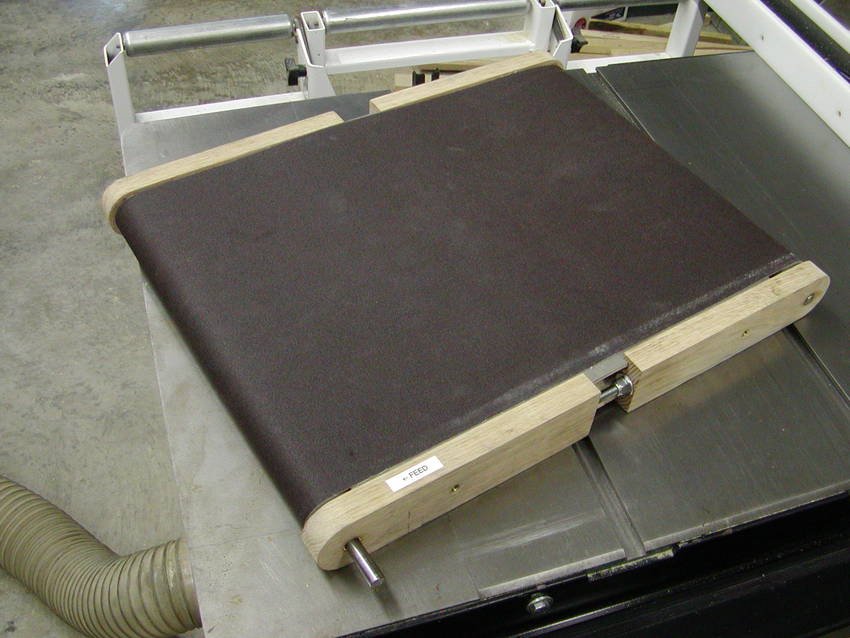 The main problem with this sander design was the conveyor feed table.
The conveyor was a 16"x 48" sanding belt and the end rollers were made of
PVC pipe. I made a power feed for the conveyor at the very beginning of
this project, not expecting any problems with the conveyor. The power feed
worked perfectly but was of no use with a conveyor that would not track
straight. I built this arrangement 3 times from scratch and never could
get the conveyor belt to track straight.
The main problem with this sander design was the conveyor feed table.
The conveyor was a 16"x 48" sanding belt and the end rollers were made of
PVC pipe. I made a power feed for the conveyor at the very beginning of
this project, not expecting any problems with the conveyor. The power feed
worked perfectly but was of no use with a conveyor that would not track
straight. I built this arrangement 3 times from scratch and never could
get the conveyor belt to track straight.


![]() I tried different rollers, flipping one roller end-for-end,
reversing the belt (conveyor). I borrowed my wife's seamstress tape
(when she wasn't looking) to measure circumferences (I thought possibly
there might be something wrong with the 16x48 belt). I tried making a
temporary crown on one roller (then both rollers) by using staggered
layers of tape. Finally I had to give up on this design of conveyor feed.
I tried different rollers, flipping one roller end-for-end,
reversing the belt (conveyor). I borrowed my wife's seamstress tape
(when she wasn't looking) to measure circumferences (I thought possibly
there might be something wrong with the 16x48 belt). I tried making a
temporary crown on one roller (then both rollers) by using staggered
layers of tape. Finally I had to give up on this design of conveyor feed.
So, I built a solid flat table that allows stock to be fed through the front and pulled out the back or fed with a push stick, to push the stock past the rotating drum.
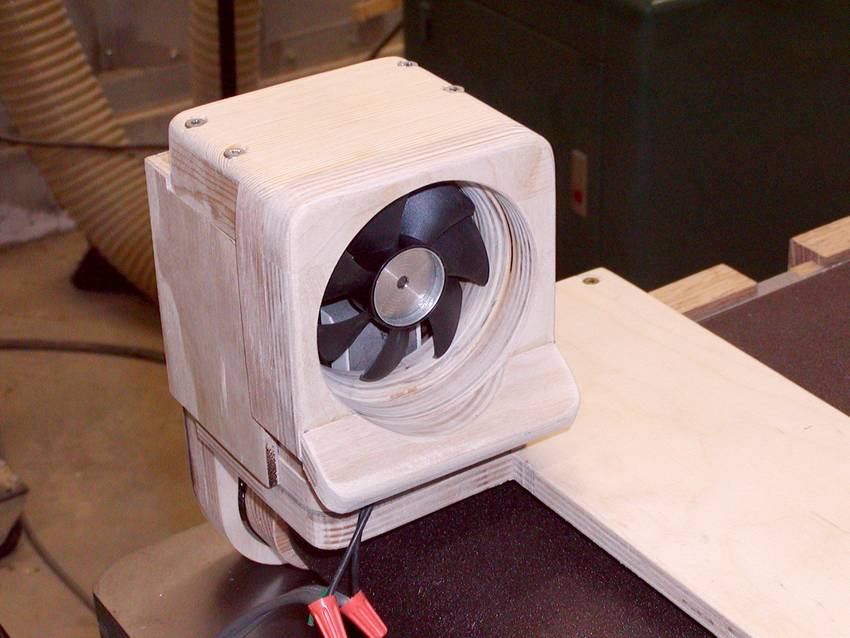
I fired up the motor on the drum sander. Glued a cheap sheet of Made In China 100 grit sandpaper to a piece of particle board and made a few passes to start cleaning up the drum. That dust collector doesn’t miss a speck of dust... Then again I had a 4” dust collector hose, used on my joiner, attached to it... ordinarily I will use a 3” hose.
I took the dust collector off briefly so I could watch the “sanding action” as I passed the board with the sandpaper under the drum a couple of times. I would estimate this thing could evenly apply a 1/4” layer of dust across your entire shop in just under 20 minutes... especially that MDF... Wow!
There was a little vibration at first, which seems to have settled down after a bit of sanding on the drum. That is a 4.75" pulley on the drum (I ordered a 5" but it looks more like 4.75" to me) and a 3" on the motor so the drum is running just under 1100 rpm. The shaft is plain 3/4" cold rolled steel. The shaft is cross drilled in a couple of places and some 1/8" piano wire inserted to engage the discs to eliminate any chance of slipping on the shaft. I laminated the discs on the shaft with polyurethane glue. I can see some hairline cracks in the MDF so a 1mm spacing every 3 or 4 discs is probably a very good idea. If I ever decide to make a new drum I'll probably get a higher quality piece of shafting.

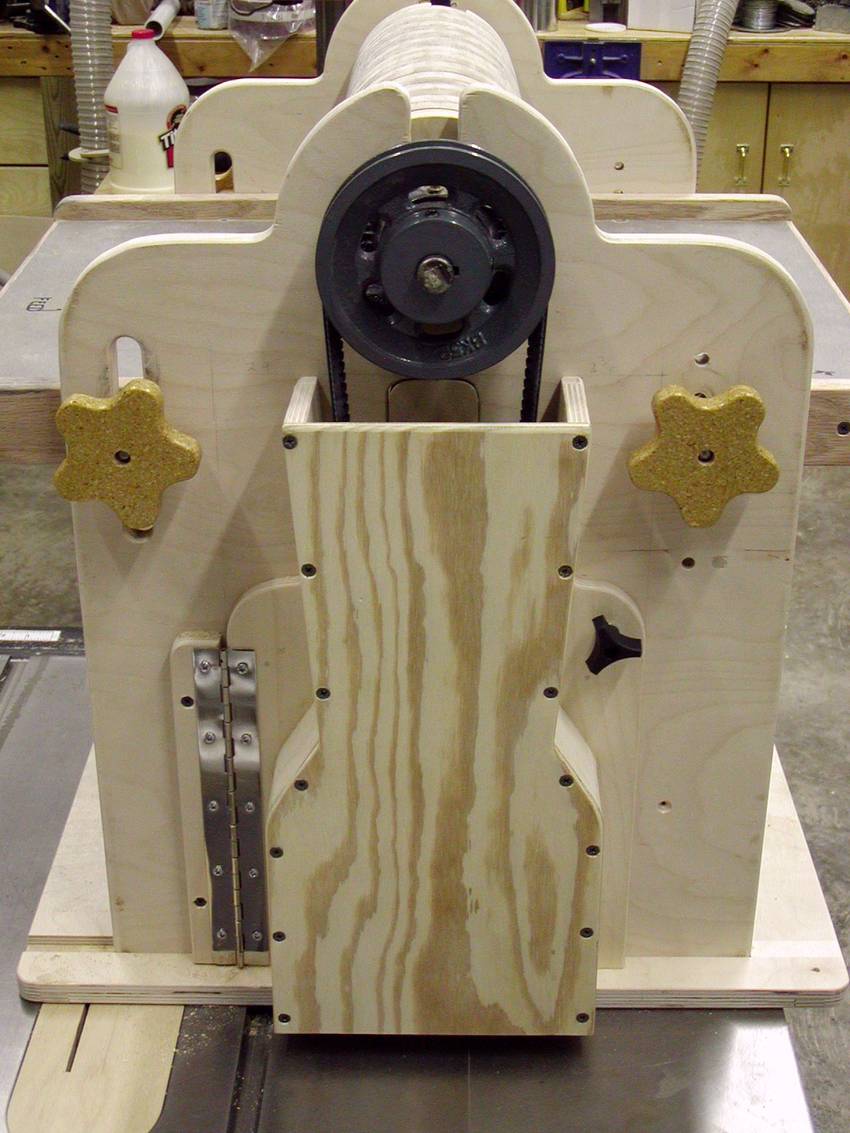
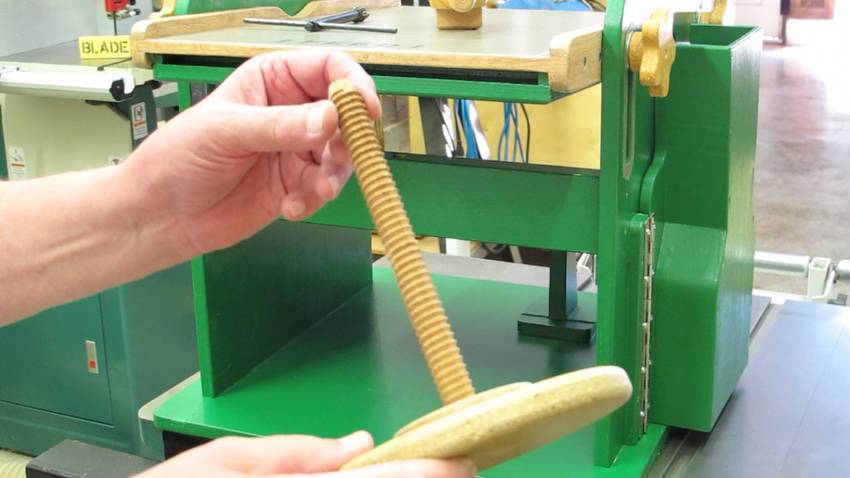
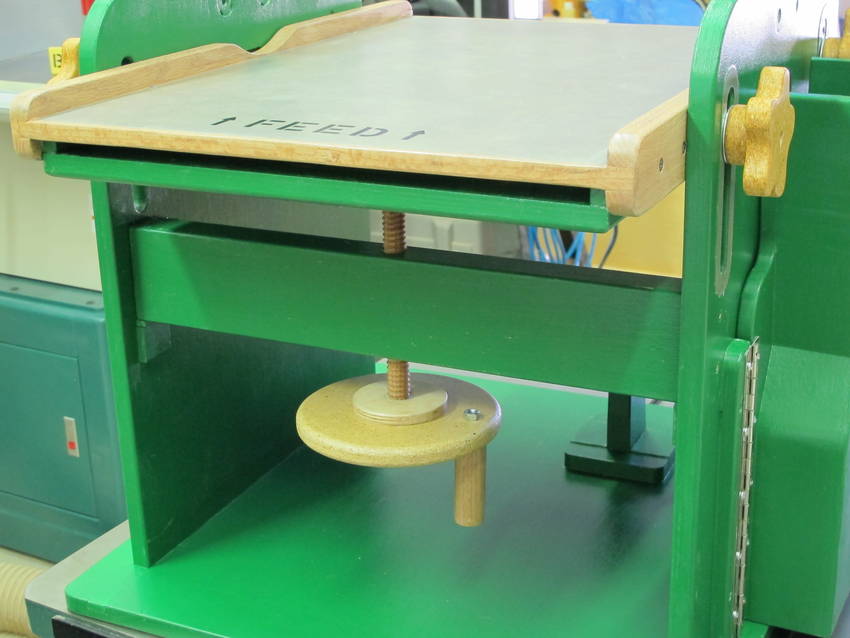 My table elevating mechanism is a threaded 3/4" oak dowel. Matching threads were cut
in the supporting section of 2x4. I used a wood threading tap & die set obtained at
Grizzly several years ago. It works quite well. I used linseed oil for the lubricant
when cutting the threads.
My table elevating mechanism is a threaded 3/4" oak dowel. Matching threads were cut
in the supporting section of 2x4. I used a wood threading tap & die set obtained at
Grizzly several years ago. It works quite well. I used linseed oil for the lubricant
when cutting the threads.
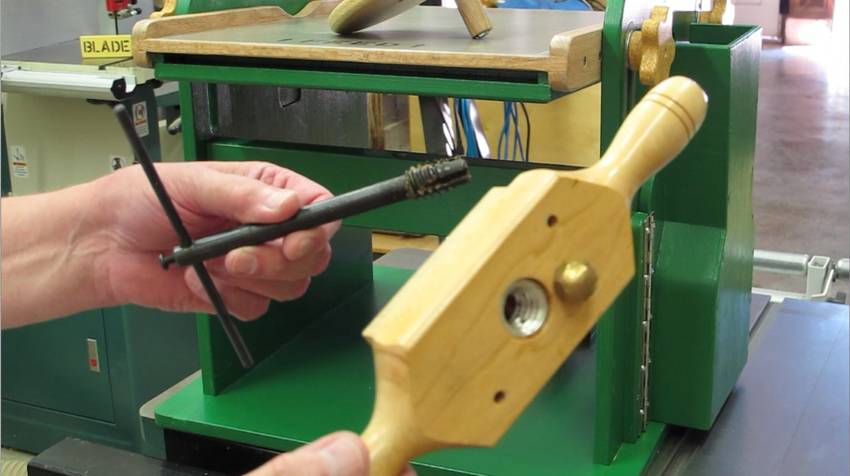
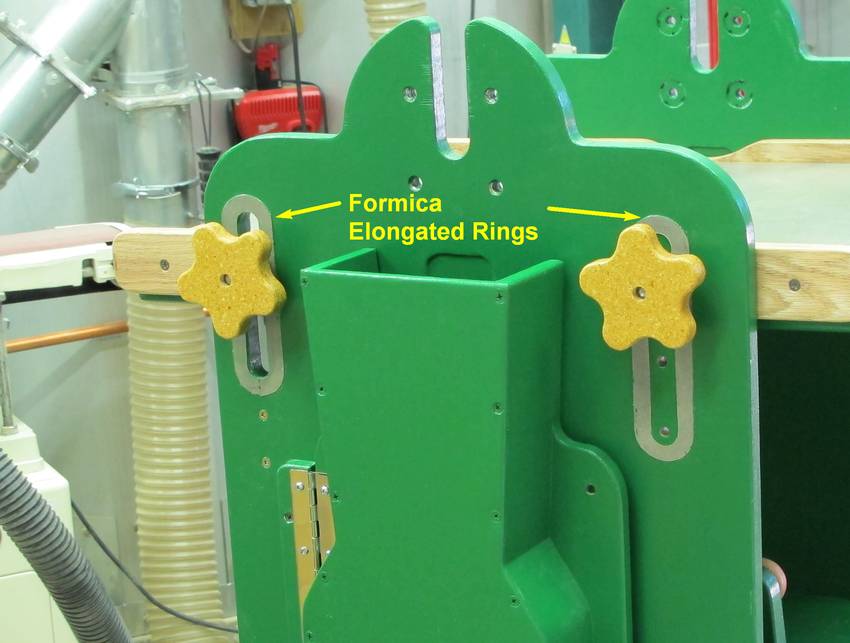 I cut these elongated rings from Formica to (hopefully) keep the washers
behind the star knobs from scarring up
the paint when the table is adjusted up and down.
I cut these elongated rings from Formica to (hopefully) keep the washers
behind the star knobs from scarring up
the paint when the table is adjusted up and down.
I ran the drum sander... The tape backed Velcro is VERY sticky... if it ever needs replacing it’s probably easier to make a new drum than try to remove that stuff. The Velcro is 4” wide and the roll of 100 grit sandpaper is 3” wide, so there aren't any gaps. I had a short plank 8” wide 1” thick piece of rough sawn oak and I sanded both sides, many very light passes, until it was about as good as what would have come out of my planer. It seems to catch nearly all of the dust. It appears the board being sanded partially blocks the air flow on the sides and some dust ends up being pushed to the end of the table and onto the floor. But the dust hood is pretty good.
Afterwards, the sandpaper still looks and feels like new so the life of the sandpaper will probably be pretty good... stay away from paint and varnish.
My Formica top on the table is pretty scratched up... may end up replacing it with metal one day.
Getting the ends of the sandpaper cut just right the first time for a nice spiral wrap is a bit of work... replacement pieces can be measured and cut from the first piece.
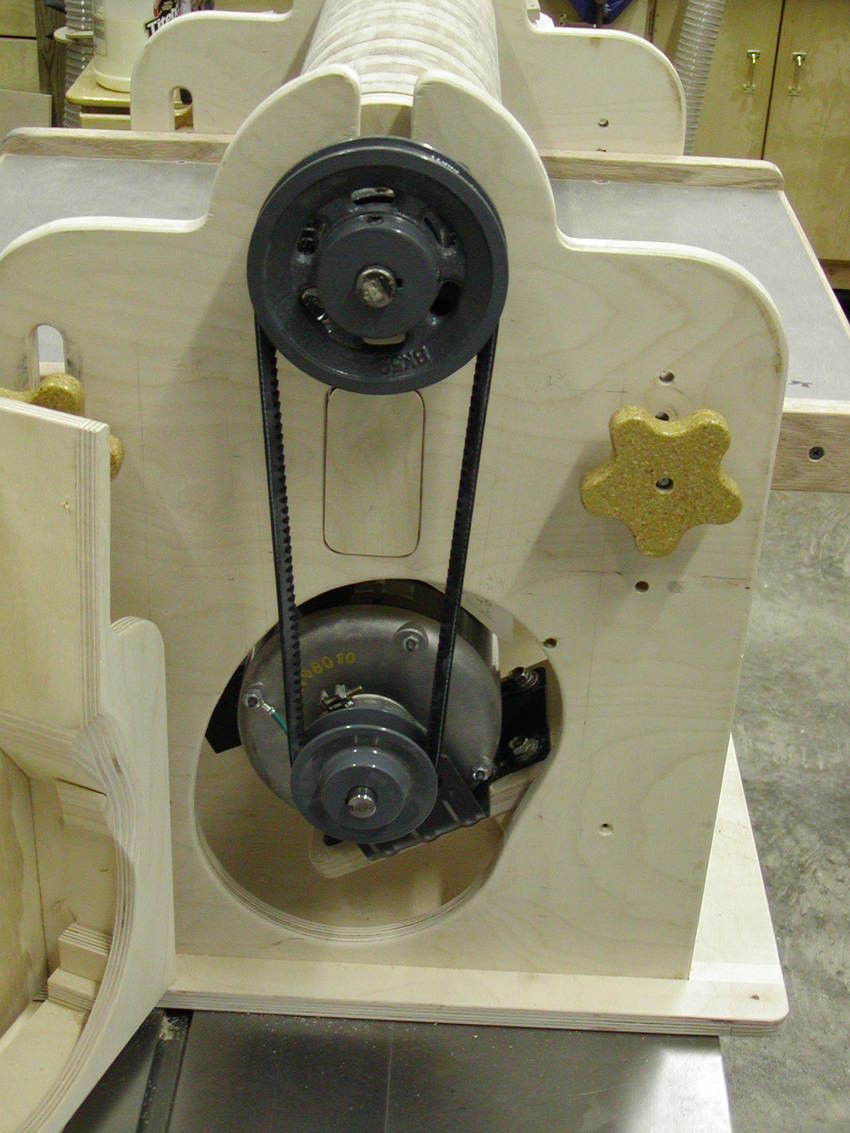
![]() One thing I have found on the drum sander... even though I thought I had the drum
trued to the table pretty good... after putting the Velcro on the drum and then
the sandpaper (not exact thickness)... I seem to be slightly looser on the drive
pulley end (right side) and tighter on the left side. If I were to do this
again I would consider making some sort of adjustable mount for the off-side
(left side) bearing. A fine thread adjustment with a star knob
would allow for those fine adjustments as things wear/warp/whatever, so you
wouldn't need to re-true the drum. It would also allow for sanding a slight
taper. Raising and lowering the off-side bearing slightly probably wouldn’t
have much affect on the belt/pulley.
One thing I have found on the drum sander... even though I thought I had the drum
trued to the table pretty good... after putting the Velcro on the drum and then
the sandpaper (not exact thickness)... I seem to be slightly looser on the drive
pulley end (right side) and tighter on the left side. If I were to do this
again I would consider making some sort of adjustable mount for the off-side
(left side) bearing. A fine thread adjustment with a star knob
would allow for those fine adjustments as things wear/warp/whatever, so you
wouldn't need to re-true the drum. It would also allow for sanding a slight
taper. Raising and lowering the off-side bearing slightly probably wouldn’t
have much affect on the belt/pulley.
I screwed some oak strips under the bearings as a reference for where the bearings were in case I needed to remove the drum (which I did). It is probably good enough for anything I'll be doing, but just for fun I think I will try to place some shim stock under the left side bearing. There is some slop in the bolt holes.
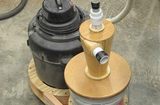 Shopvac dust cyclone
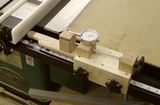 Table saw fence micro adjuster
 Scrollsaw reindeer
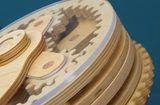 Planetary gear drive
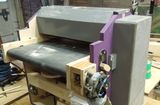
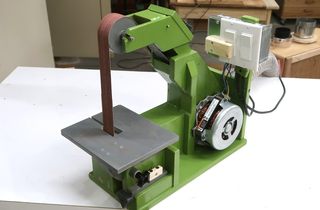 1.5x48" strip sander build
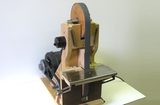
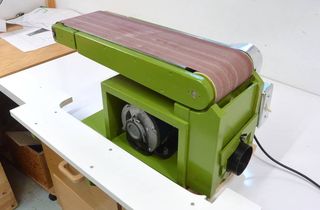 6x48" belt sander build