
For me, one of the main challenges to building a table is making a sturdy joint between the legs and the frame, while still making it possible to take the table apart for moving.
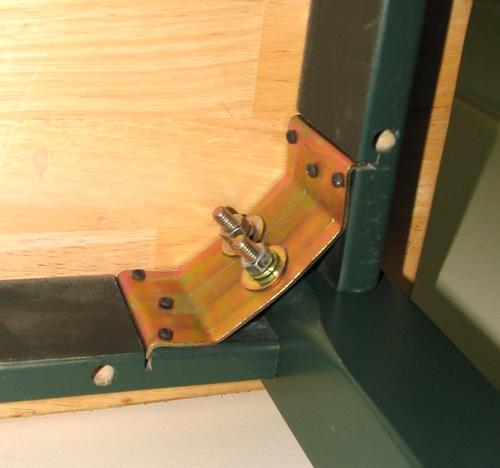
The obvious and sturdiest choice would be to just use mortise and tenon join the apron rails and the legs together, but that arrangement can't be taken apart for moving. For most commercial wooden tables, the apron rails aren't really joined to the legs. Instead, a diagonal piece is mounted between the rails, and a single large bolt that pulls the legs in against the rails, pulling the leg against the apron rails.
 With the screw tightened, this makes for a reasonably rigid joint, although it always bothers me
to have the leg attached by just a single bolt. There also isn't a good way for
the vertical load to be transferred from the apron rails to the legs.
I keep thinking, what if you wanted to stand a baby elephant on a table constructed like that?
Surely, it would fail.
With the screw tightened, this makes for a reasonably rigid joint, although it always bothers me
to have the leg attached by just a single bolt. There also isn't a good way for
the vertical load to be transferred from the apron rails to the legs.
I keep thinking, what if you wanted to stand a baby elephant on a table constructed like that?
Surely, it would fail.
Even so, I did try to join legs to a table like that once. But the problem is, this approach requires
holes to be drilled at a 45 degree angle into the wood. This is very difficult to do accurately, even
with a drill press.
The drill simply pulls to the side too much
 when it enters the wood, and even once in the wood, the drill still tries to follow
the diretion of the grain instead of drilling straight.
when it enters the wood, and even once in the wood, the drill still tries to follow
the diretion of the grain instead of drilling straight.
With the holes not quite accurate, the whole thing just doesn't line up properly. So the main reason for not doing it this way is frustration. If you do opt for this approach, I'd recommend getting leg brace hardware - essentially a metal bracket that replaces the piece of wood at a 45 degree angle. Lee Valley Tools sells these.
Nonetheless, I didn't feel like buying these brackets, and I wanted something sturdier anyway.
The approach I used for several tables now is to join the legs on the end to each other with mortise
and tenon joints, and attach these to the rails that run along the length of the table with stub of wood
that is also mortised into the legs, but screwed to the rails.
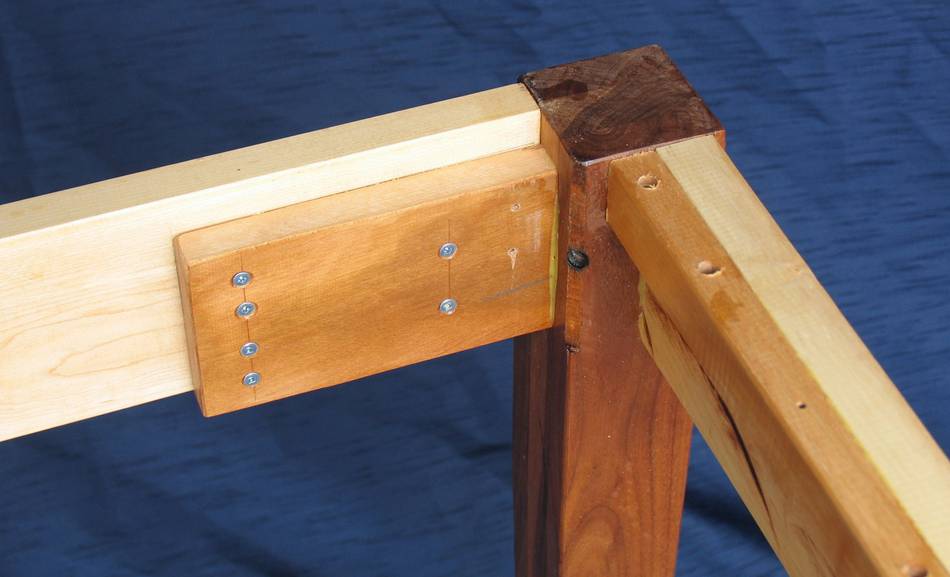
for added strength, I join some pieces of doweling into the ends of the rails, which help with alignment and transfer load (ok, this isn't really necessary, but it will help withstand my imagined baby elephant standing on the table).
For the table I was building here, I used some walnut table legs I scrounged from some discarded library furniture. My original idea was to actually dowel the legs with the rails, just to see how well this could be done if one did not have a mortising machine. Plus, I could use my clever horizontal boring jig idea.
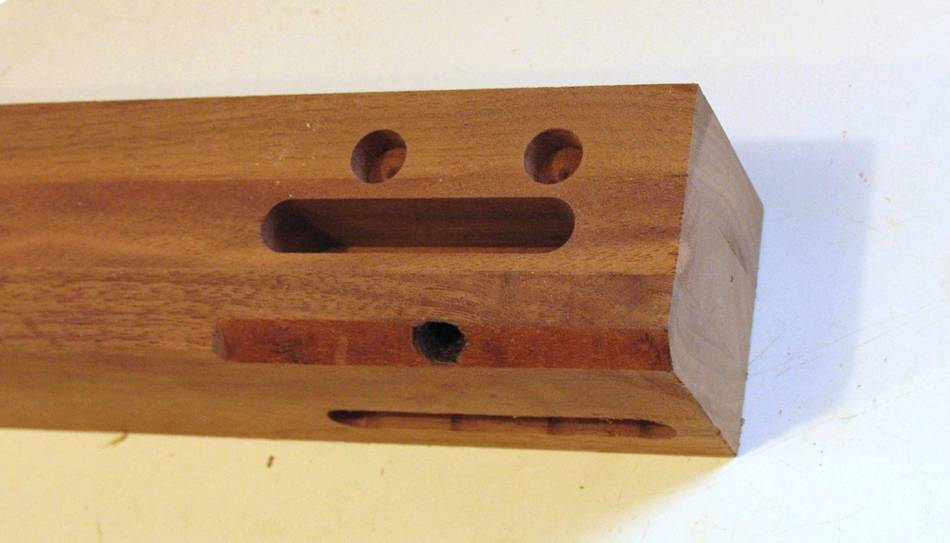
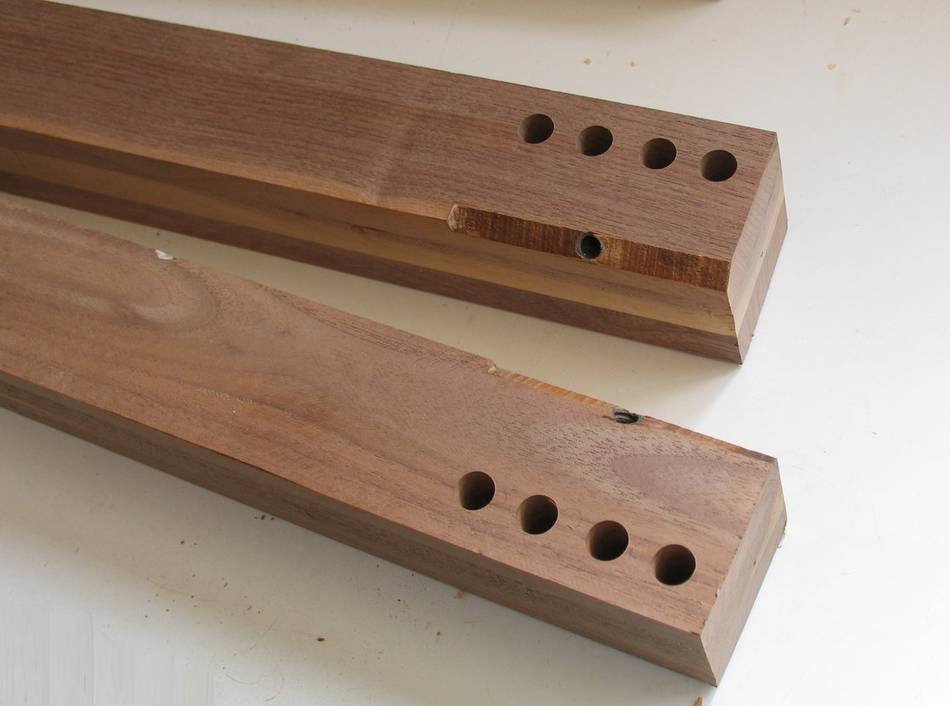 Unfortunately, even with the horizontal boring jig, the holes I drilled in the ends of the rail ended up
being at just a little bit of an angle. The problem was that my horizontal boring jig, and even the drill
I use with it, just don't have the rigidity to force the drill to go straight, especially if the drill
on its own likes to wander. I had other drills that had less of a tendency to wander, but these would have
taken a lot more force to drill into the end grain. A doweling jig
would have done the trick, but I didn't have one at the time.
Unfortunately, even with the horizontal boring jig, the holes I drilled in the ends of the rail ended up
being at just a little bit of an angle. The problem was that my horizontal boring jig, and even the drill
I use with it, just don't have the rigidity to force the drill to go straight, especially if the drill
on its own likes to wander. I had other drills that had less of a tendency to wander, but these would have
taken a lot more force to drill into the end grain. A doweling jig
would have done the trick, but I didn't have one at the time.
So that was a bit of setback. I didn't have another two pieces of wood handy for just re-drilling the holes more carefully. After some thought, I just cut a mortise with my mortising machine where the holes were drilled in both pieces, and join the apron to the leg with a loose tenon.
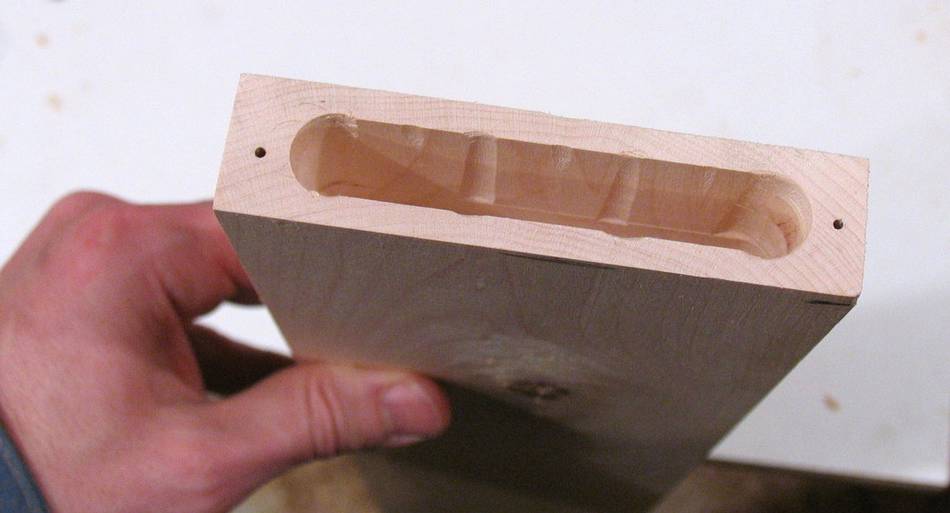 My home made mortising machine does have the rigidity needed for this job, so I just cut a slot
mortise where my holes were. Really, I should just cut mortises in both pieces more often, especially
when I need to put a tenon on the end of a very long piece that would hit the ceiling if
I put it in my tenon jig.
My home made mortising machine does have the rigidity needed for this job, so I just cut a slot
mortise where my holes were. Really, I should just cut mortises in both pieces more often, especially
when I need to put a tenon on the end of a very long piece that would hit the ceiling if
I put it in my tenon jig.

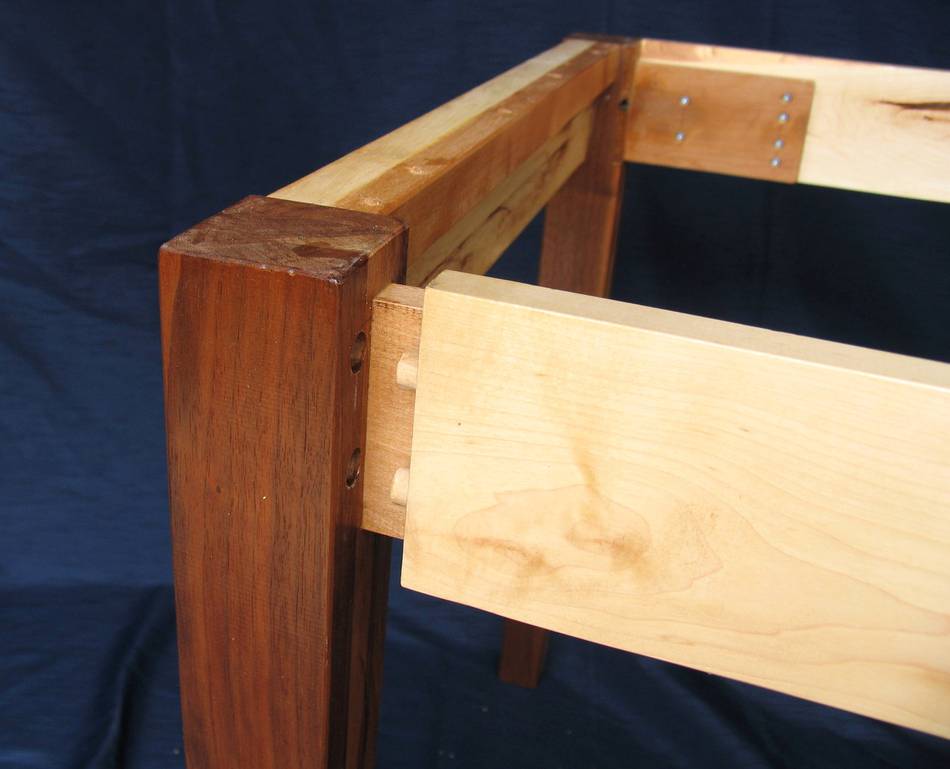
 Having recovered from the crooked holes, I went on to make the short pieces of wood that the apron rails
that run along the length of the table are screwed onto. The tenon for the short pieces only
has a shoulder on one side. You can't see that piece normally, so it doesn't matter how it looks.
Having recovered from the crooked holes, I went on to make the short pieces of wood that the apron rails
that run along the length of the table are screwed onto. The tenon for the short pieces only
has a shoulder on one side. You can't see that piece normally, so it doesn't matter how it looks.
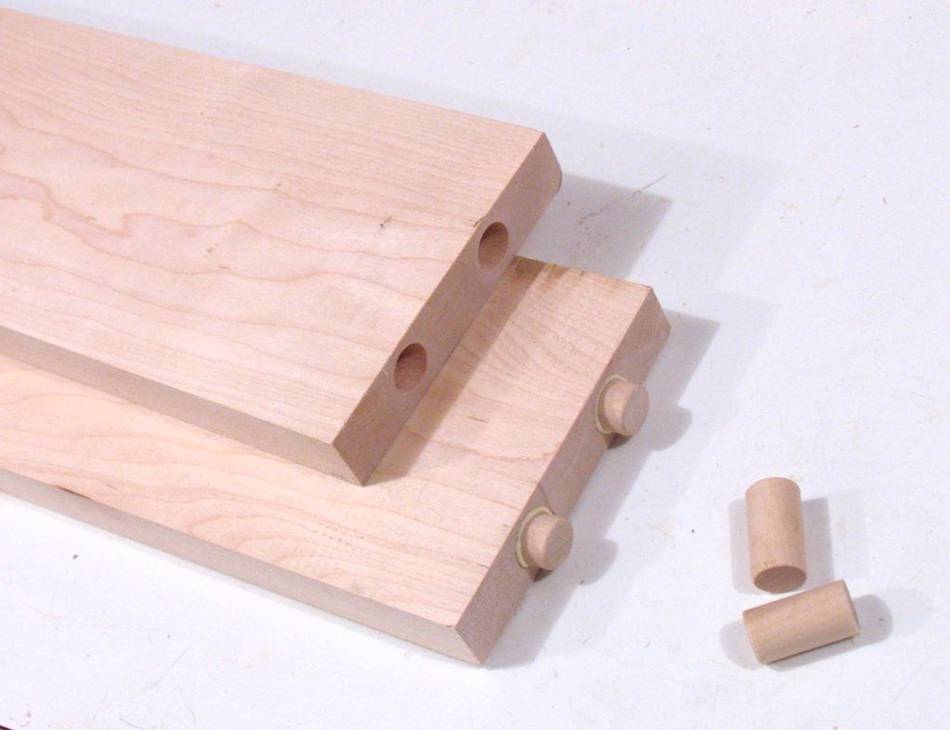
Next I put pegs in the ends of the apron rails to mate with the holes I had drilled in the legs. These are there to align the ends of the rails as well as to transfer vertical load onto the legs (again, thinking of the imaginary baby elephant).
 I wanted this table to have tapered legs, so before attaching anything to the legs, I had to do
the tapering.
I wanted this table to have tapered legs, so before attaching anything to the legs, I had to do
the tapering.
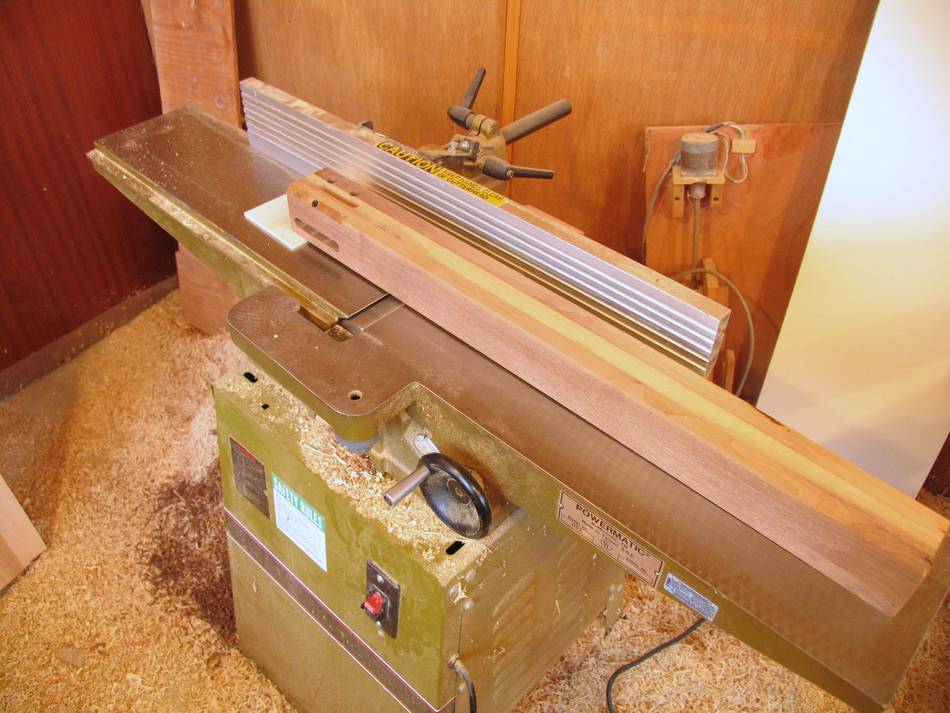
I prefer to do this sort of work on a jointer. First I mark the final size on the bottom end of the leg, and then, using a spacer under the workpiece at the other end, I make successive cuts (starting after the spacer, to taper the leg. The spacer thickness is such that the top of the leg doesn't get tapered. This keeps the surfaces near the joints square, which makes life easier.
 This diagram gives an idea of how to work out how thick the spacer needs to be to be
for the taper start at the right point along the leg.
It's easiest to work out by holding a ruler to the table leg.
This diagram gives an idea of how to work out how thick the spacer needs to be to be
for the taper start at the right point along the leg.
It's easiest to work out by holding a ruler to the table leg.
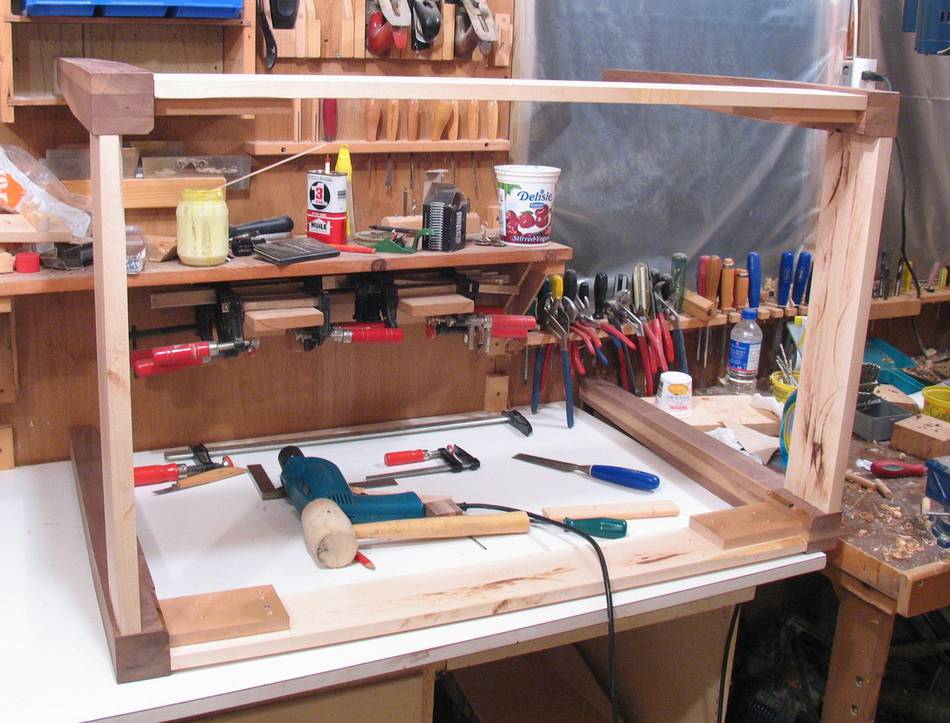
The next step was to glue the mortise and tenon joints. These formed two assemblies with two legs each and two short pieces of wood sticking out to attach the longer apron rails to.
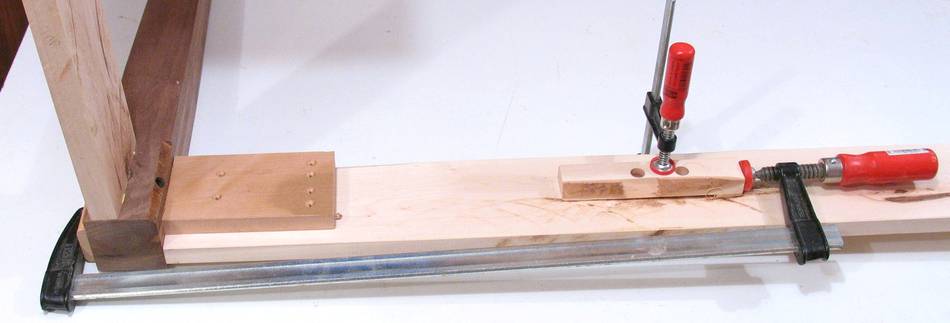 I then assembled it with the rails, and drilled the screw holes. I clamped the long rails
to the assemblies as shown here to make sure the rails were securely pushed into the legs. I didn't
have clamps long enough to clamp end to end, so I clamped a small block to the rails, and then
clamped to that block to push the rail into the leg. This limited the amount of force I could apply,
but I didn't need that much - just enough to make sure it was securely
in while I drilled the screw holes.
I then assembled it with the rails, and drilled the screw holes. I clamped the long rails
to the assemblies as shown here to make sure the rails were securely pushed into the legs. I didn't
have clamps long enough to clamp end to end, so I clamped a small block to the rails, and then
clamped to that block to push the rail into the leg. This limited the amount of force I could apply,
but I didn't need that much - just enough to make sure it was securely
in while I drilled the screw holes.
 And a last step was to glue a ledge to the inside of the end apron rails. The table top is screwed
on through this ledge from the bottom. I drilled six holes in this ledge so I could hold the top
well enough to restrain it from warping over time.
And a last step was to glue a ledge to the inside of the end apron rails. The table top is screwed
on through this ledge from the bottom. I drilled six holes in this ledge so I could hold the top
well enough to restrain it from warping over time.
 The screw holes in this ledge are expanded near the top, to allow a little bit of latitude
in terms of side to side movement that might be caused by
shrinkage and expansion
of the table top from humidity changes.
The screw holes in this ledge are expanded near the top, to allow a little bit of latitude
in terms of side to side movement that might be caused by
shrinkage and expansion
of the table top from humidity changes.
![]() This is important for a table top made of solid wood (as opposed to plywood or particle board),
as it will change dimensions by several millimeters across the width of the table in the cross-grain
direction with humidity changes.
This is important for a table top made of solid wood (as opposed to plywood or particle board),
as it will change dimensions by several millimeters across the width of the table in the cross-grain
direction with humidity changes.
Shrinkage and&nmbsp;expansion in the direction of the grain is much less,
and with the rail at a right angle to the table top's grain, its important to accommodate
different rates of shrinkage and expansion.
For the table top, any sane person would just laminate several planks side to side. But I wanted something fancy I could make from scrap wood, I went on to make this crazily labour intensive Wood tiled table top.
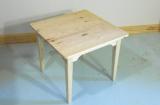
The resulting table, with the black walnut legs, birch apron, and mahogany and birch table top does have a very distinctive kind of look. I'm especially pleased with how the black walnut came out looking with the varnish on it, considering its gray-ish appearance unfinished.
After I moved in 2007, this became my dining table. But it was too small for hosting diner parties, so I built an extension for it
 More about building wooden tables
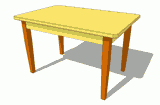
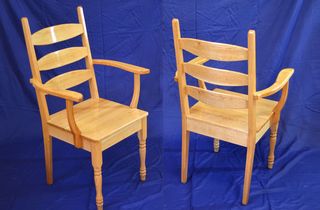 Building wooden chairs
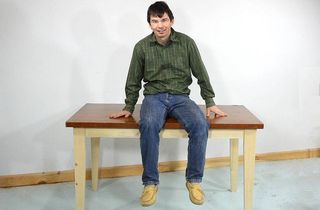 Building a simple table with minimal tools
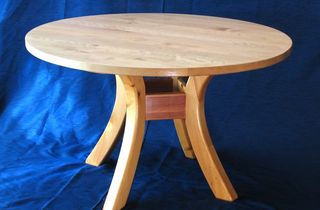 Round dining table
 Miter joined table
 Wood tiled table top