Building a tile patterned table top
This unique table top design came out of my desire to build a hardwood topped table using the hardwood from firewood.
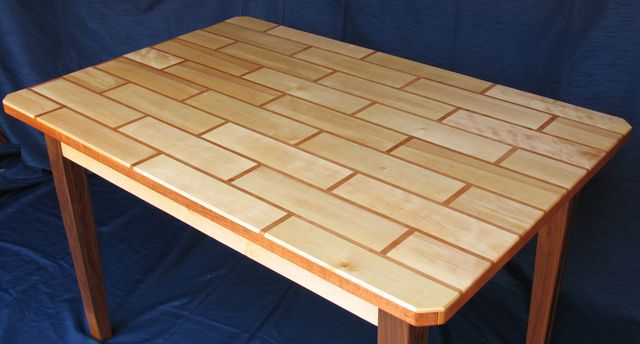
I had a lot of large straight pieces of birch firewood, scrounged from my dad's wood pile. Being firewood, these were unfortunately only about 35 to 40 cm long each. I wanted to cut these into thin strips and cover the top of a table top that was otherwise made of inexpensive spruce lumber. But rather than hide the joints where the pieces came together, I decided to make a brick pattern like design out of it. The 'mortar' parts would be comprised of darker mahogany trim. I could have done it without the trim, but then it would just look like an ordinary hardwood table top made of finger jointed wood, which would not look that special.
Making the basic table top
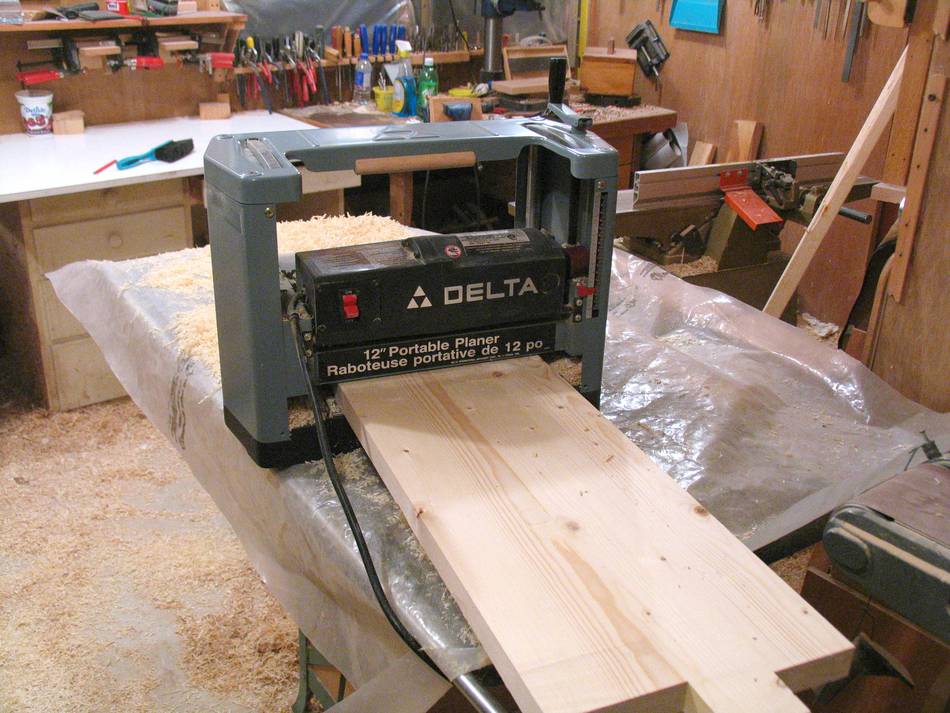
 The basic table top is just made of laminated spruce construction lumber from the Home Depot.
I planed these smooth and square, and then laminated together into wider boards.
I actually started with 2x8's, but ripped them through the middle so I could alter
the orientation of the grain, to hopefully cut down on future warping of the table top.
The basic table top is just made of laminated spruce construction lumber from the Home Depot.
I planed these smooth and square, and then laminated together into wider boards.
I actually started with 2x8's, but ripped them through the middle so I could alter
the orientation of the grain, to hopefully cut down on future warping of the table top.
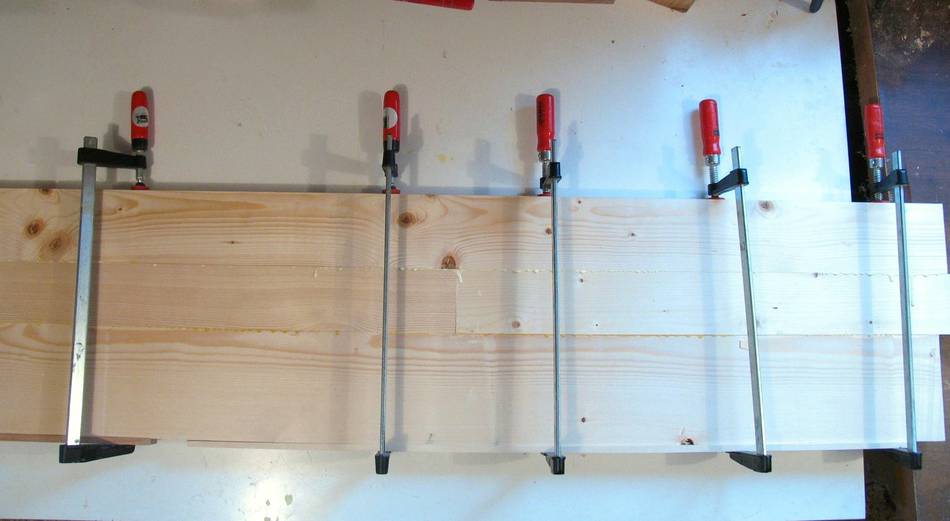
 I first laminated sections of three parts wide that were just less than 12" wide, so I
could still run them through my thickness planer. After laminating, I planed them
down to the final thickness of 25 mm.. That way, I didn't have to worry about
smoothing out the glue joints for gluing the sections together.
I first laminated sections of three parts wide that were just less than 12" wide, so I
could still run them through my thickness planer. After laminating, I planed them
down to the final thickness of 25 mm.. That way, I didn't have to worry about
smoothing out the glue joints for gluing the sections together.
The whole width of the table could be encompassed by three segments of three pieces wide.
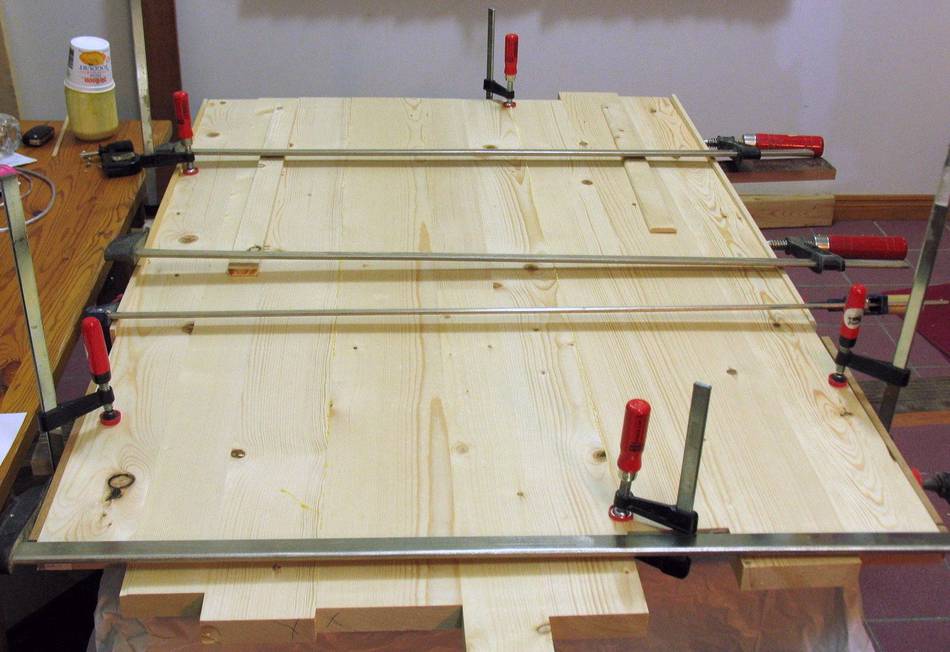 The next step was to glue these three wider boards I had made together. At this point
getting them aligned was more critical. Also, having the jointer cut a very straight
edge also became became much more critical, because I couldn't just flex the wider boards
like I could narrower stock when cmalping them side to side. I ended up running the
individual wider sections over the jointer again to get a very straight edge.
The next step was to glue these three wider boards I had made together. At this point
getting them aligned was more critical. Also, having the jointer cut a very straight
edge also became became much more critical, because I couldn't just flex the wider boards
like I could narrower stock when cmalping them side to side. I ended up running the
individual wider sections over the jointer again to get a very straight edge.
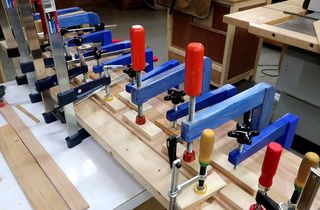
Also note the two small clamps towards the front and back in this picture. I used these to help align the joints. Overall, I only had two joints that needed cleaning up. And because my intent was to cover the whole thing with pieces of hardwood, I didn't need to clean it up that well either.
Adding the mahogany surround
 Because I wanted the table top to look like it was all made from hardwood, I had to
add hardwood trim around all the edges. I used some Mahogany for that.
Because I wanted the table top to look like it was all made from hardwood, I had to
add hardwood trim around all the edges. I used some Mahogany for that.
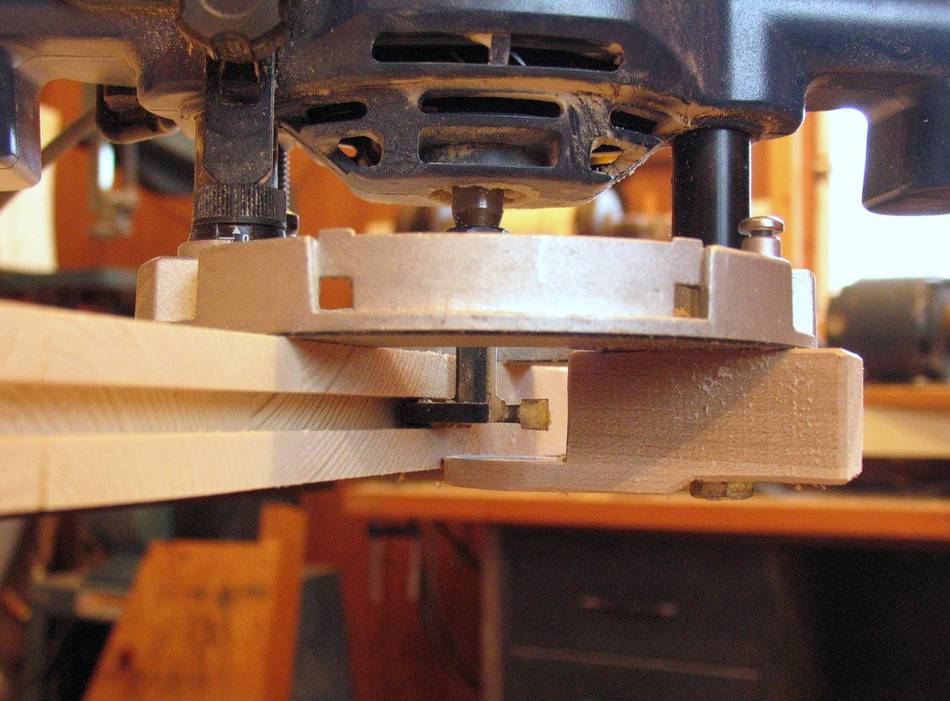
The trim on the end grain was a bit trickier. I joined it by cutting a groove in the end grain of the table and the trim. The router bit I used was actually a T-slot router bit, which has no guide roller. I screwed a substitute for a roller onto the router base - you can see it in this picture.
The table was easy enough to route. The mahogany pieces I routed before cutting them, always cutting a grove on either ends of the mahogany board, then cutting the part with the grove in it ant, and route another grove. That way, I didn't have to worry about how to hold the small piece to be routed.
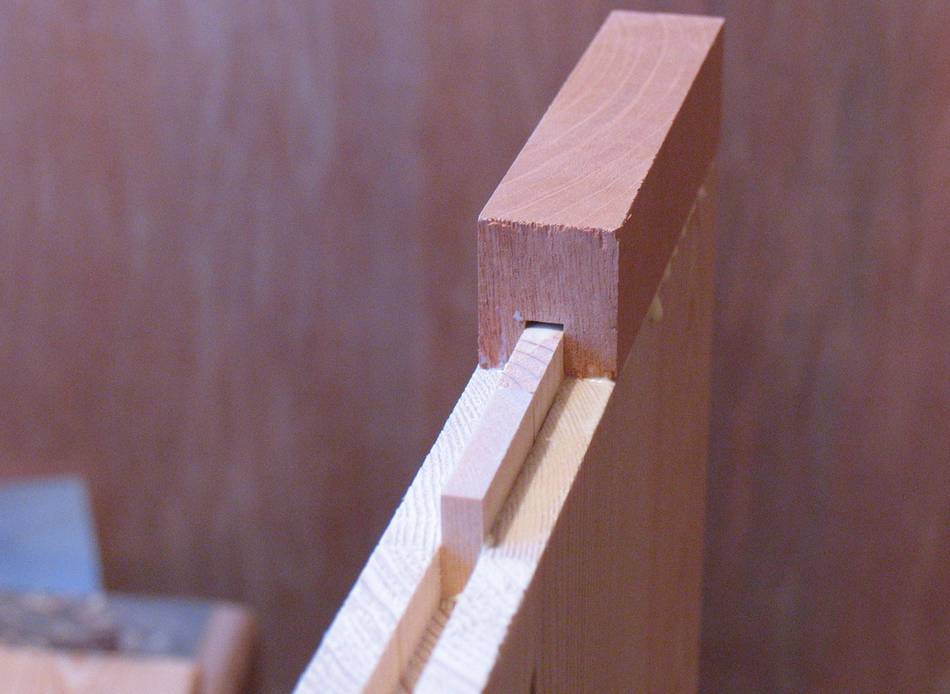 Here's gluing the end pieces with tongues inserted into both slots. Note how the
grain of all the pieces is facing the same way.
Here's gluing the end pieces with tongues inserted into both slots. Note how the
grain of all the pieces is facing the same way.
I did it this way so that the grain of the trim faced the same way as that of the table. Having the grain of the trim on the table face perpendicular to the table top would be asking for trouble in terms of dealing with seasonal shrinkage and expansion from humidity changes.
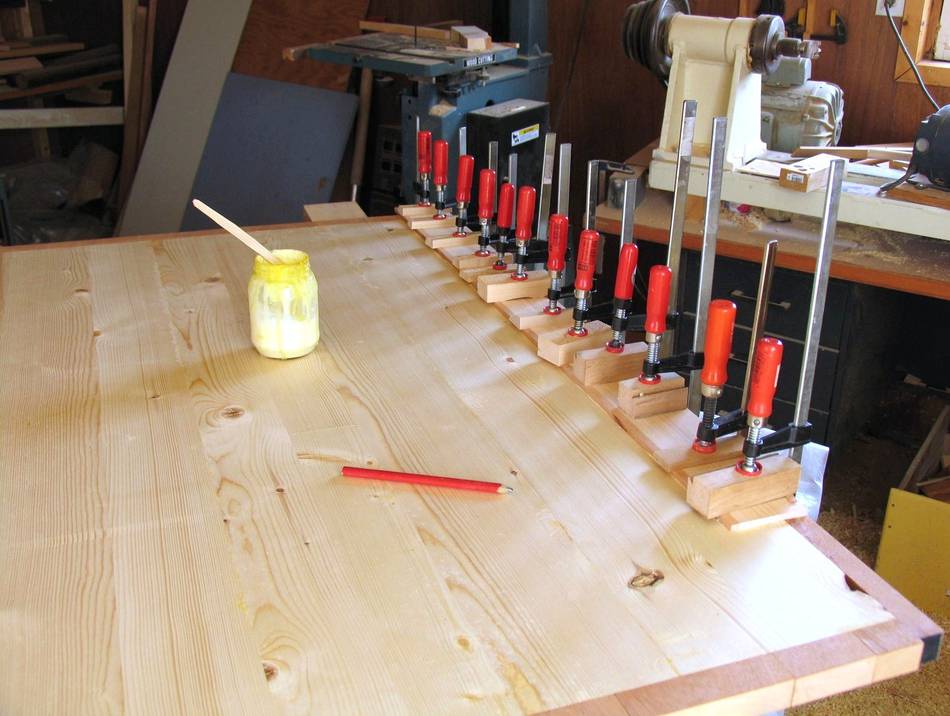
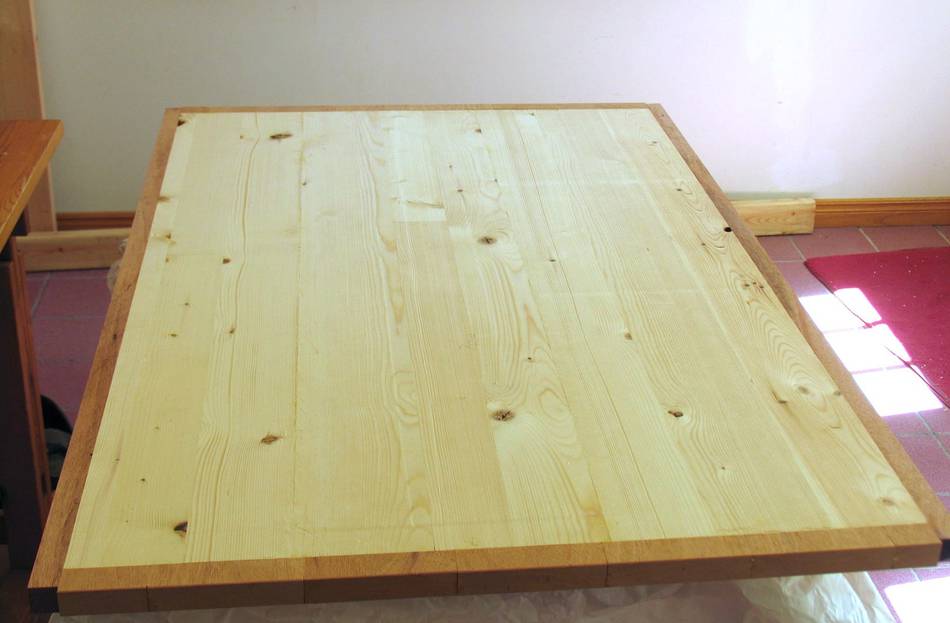 The table top with the mahogany surround glued to the ends, as well as to the sides. The sides
are just glued on without any fancy joinery. For side by side laminated gluing, the glue
joint is about as strong as the wood itself, so no need to get fancy.
The table top with the mahogany surround glued to the ends, as well as to the sides. The sides
are just glued on without any fancy joinery. For side by side laminated gluing, the glue
joint is about as strong as the wood itself, so no need to get fancy.
Looked pretty nice that way actually, but the table top is only spruce, which is too soft to really stand up to daily use.
Making the birch tiles
 These are the pieces of birch firewood, cut to size, and with three sides planed flat.
I ended up using most of these pieces of wood to make the tiles.
These are the pieces of birch firewood, cut to size, and with three sides planed flat.
I ended up using most of these pieces of wood to make the tiles.
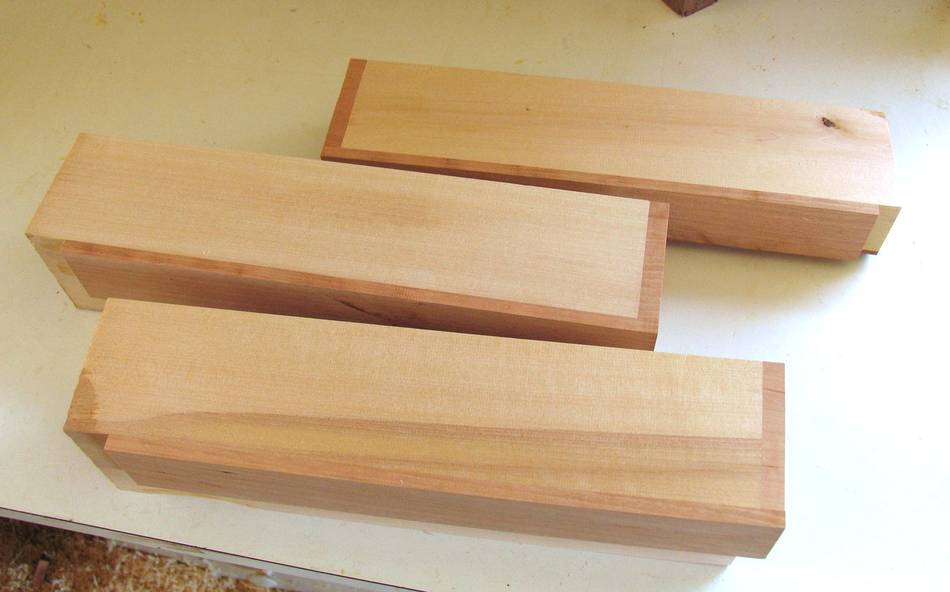 I glued a strip of mahogany along one side, as well as a piece on the ends of the pieces
of firewood before slicing off tiles with the table saw. The end piece has the grain
facing the same way as the rest of the piece of wood - again, keeping grain alignment
the same so that future expansion and contraction won't lead to cracking.
I glued a strip of mahogany along one side, as well as a piece on the ends of the pieces
of firewood before slicing off tiles with the table saw. The end piece has the grain
facing the same way as the rest of the piece of wood - again, keeping grain alignment
the same so that future expansion and contraction won't lead to cracking.
With the trim to go between the tiles already glued to the tiles before I actually cut the tiles, it saves a lot of work in terms of having fewer wood parts to glue down on the table top.
 I only have a 1.5 hp 9" contractor style table saw, so there's no way
to rip cut a tile in one pass. Even a 12" table saw would not have the depth of cut
needed. So I cut from both sides. I also cut in two passes. Otherwise, I'd have
to feed the piece much slower, and that always causes the wood to get scorched
from too much heat.
I only have a 1.5 hp 9" contractor style table saw, so there's no way
to rip cut a tile in one pass. Even a 12" table saw would not have the depth of cut
needed. So I cut from both sides. I also cut in two passes. Otherwise, I'd have
to feed the piece much slower, and that always causes the wood to get scorched
from too much heat.
Doing it as two passes from each side allows me to move the work piece fast enough that burning is a non issue.
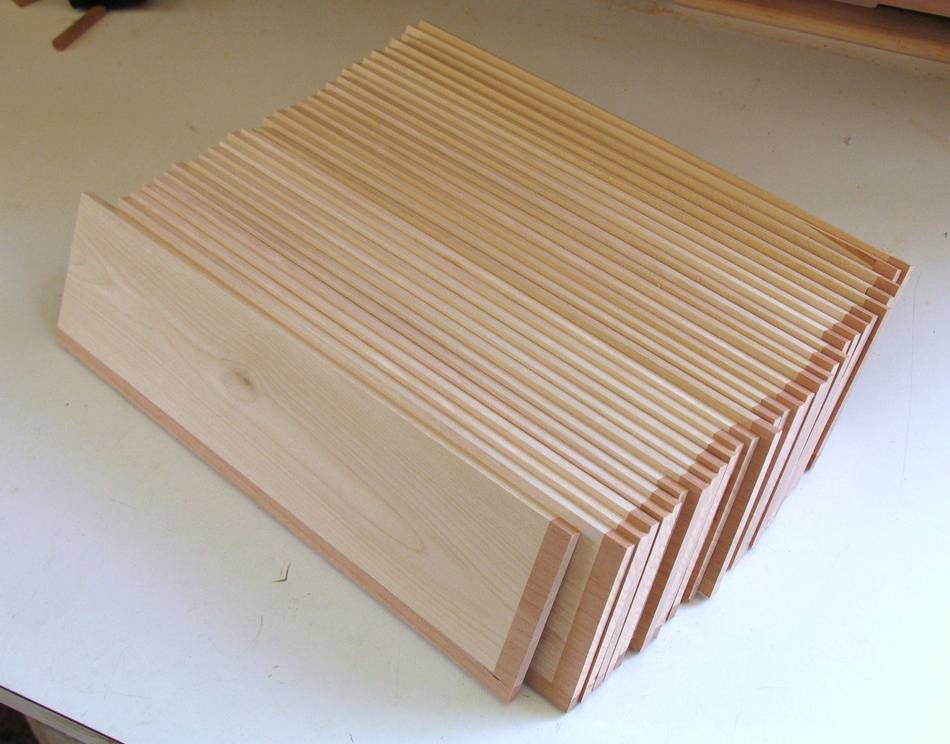 After cutting off the tiles, I ripped another millimeter off their width to make
sure they are all the same width. Here's all the tiles stacked on my bench.
After cutting off the tiles, I ripped another millimeter off their width to make
sure they are all the same width. Here's all the tiles stacked on my bench.
Pretty looking, eh?
Gluing the tiles
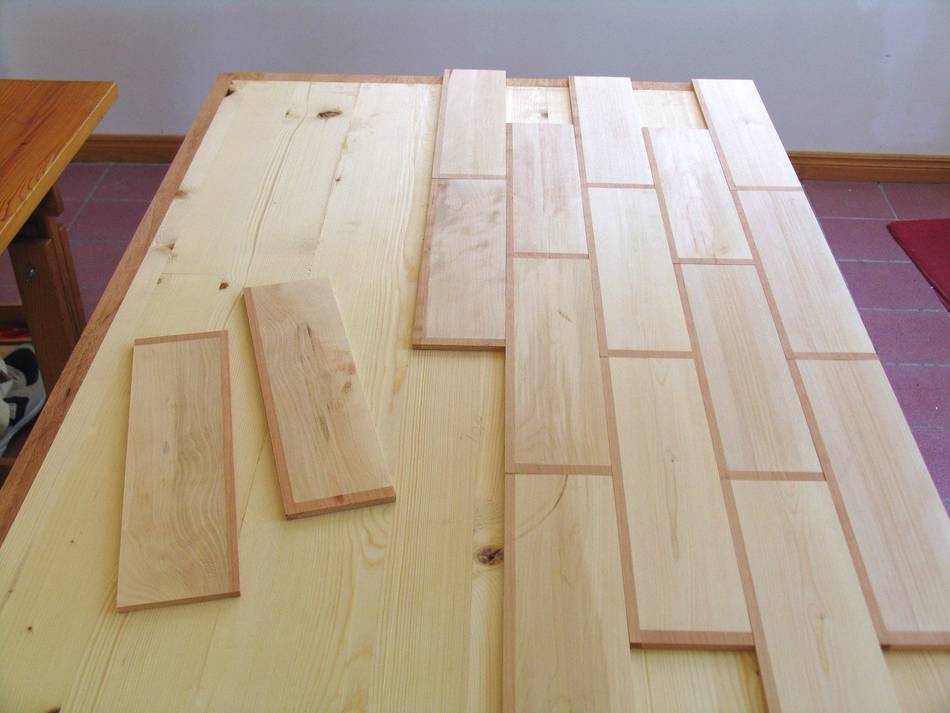 Here's arranging the tiles on the table, just to see how it will look, and to make
sure I have enough tiles of sufficient quality to cover the table with.
Here's arranging the tiles on the table, just to see how it will look, and to make
sure I have enough tiles of sufficient quality to cover the table with.
 Gluing the tiles was a bit of a challenge. Gluing the first row was easy enough.
I could still reach the second row from the edge by using my larger clamps, but
moving beyond that, I had to improvise a little bit for how to clamp the tiles down
when gluing.
Gluing the tiles was a bit of a challenge. Gluing the first row was easy enough.
I could still reach the second row from the edge by using my larger clamps, but
moving beyond that, I had to improvise a little bit for how to clamp the tiles down
when gluing.
What I came up with was to have a 2x4 with a lot of holes in it, and some long wood
screws with the points ground off. I clamped the 2x4 to the table on either end,
then put blocks on the tiles where I wanted to clamp them, and screw the wood screws
against them.
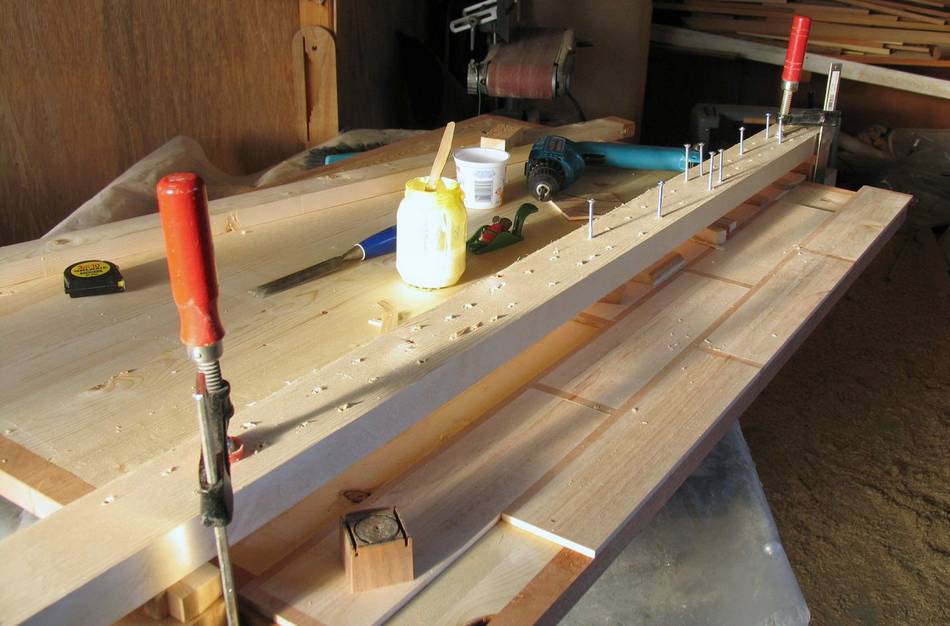
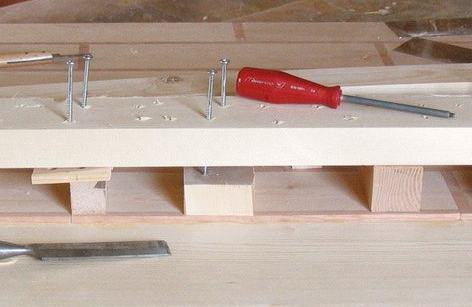 This wasn't ideal either, because as I tightened the screws, the 2x4 would flex
a little, and loosen the other screws. I later started pre-tensioning the 2x4 by
having it clamp against a block in the middle of the table as a reference.
This wasn't ideal either, because as I tightened the screws, the 2x4 would flex
a little, and loosen the other screws. I later started pre-tensioning the 2x4 by
having it clamp against a block in the middle of the table as a reference.
In doing all this, I also had a 2" thick board of maple underneath the table, to keep the table from flexing ever so slightly as I clamped using the 2x4. I didn't want the glue drying with the table top bowed, because then it might stay that way.
 I only applied glue to the area for one new tile at a time. Overall, I only glued down
three tiles at a time for the main part of the table, and then let it dry enough
before moving on. So it took some time to glue all the tiles down.
I only applied glue to the area for one new tile at a time. Overall, I only glued down
three tiles at a time for the main part of the table, and then let it dry enough
before moving on. So it took some time to glue all the tiles down.
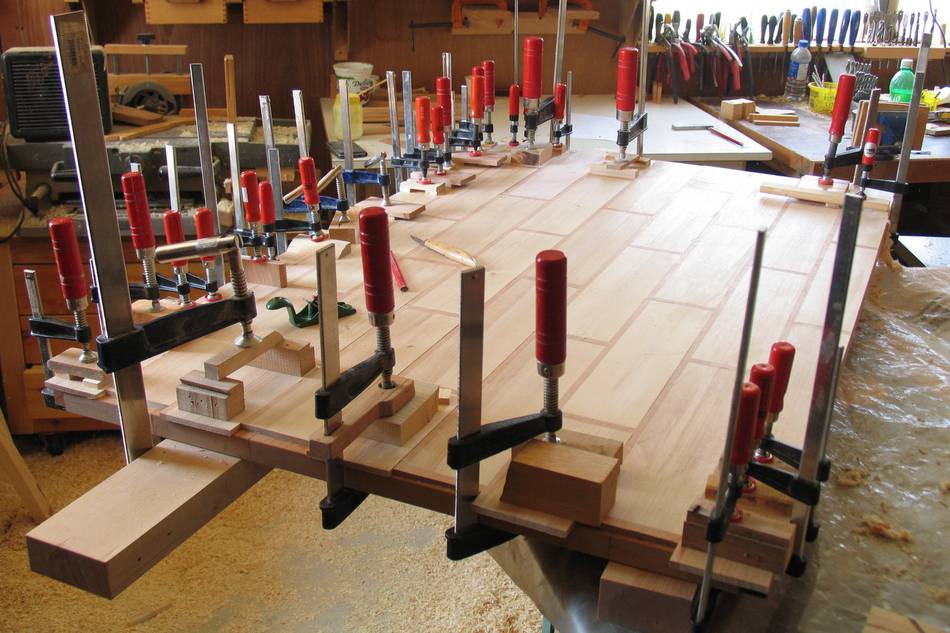 Once I got the last row in, I could clamp it from the edge again. I then also
added all the half-tiles from the ends of the table, which I also could reach
with some of my larger clamps. Somehow, I always end up running out of clamps!
Once I got the last row in, I could clamp it from the edge again. I then also
added all the half-tiles from the ends of the table, which I also could reach
with some of my larger clamps. Somehow, I always end up running out of clamps!
Leveling the surface
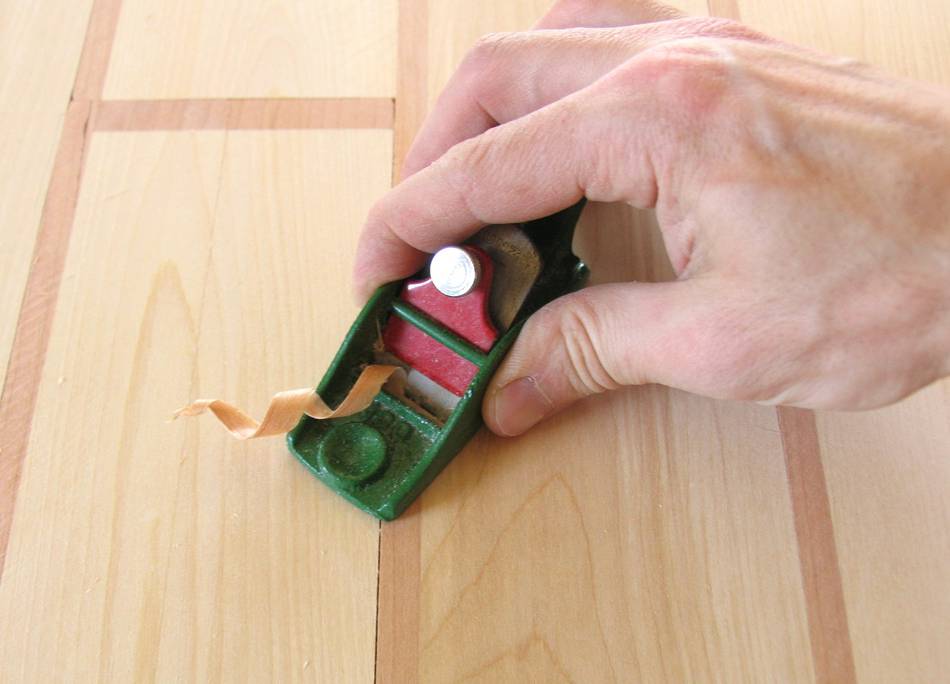 After gluing down all the tiles, they were not all level with each other, with
a few spots having half a millimeter in difference in height between adjacent
tiles. I smoothed this out with a hand plane and
using a cabinet scraper
After gluing down all the tiles, they were not all level with each other, with
a few spots having half a millimeter in difference in height between adjacent
tiles. I smoothed this out with a hand plane and
using a cabinet scraper
 I still had a few gaps in the tiles though - sometimes the tiles slipped a bit as
I glued them, and so there was two places where I had a half millimeter gap between
the tiles. This I filled with sawdust, which I made by sanding a spare piece of
birch. The shavings from the cabinet scraper are not suitable for this job.
I still had a few gaps in the tiles though - sometimes the tiles slipped a bit as
I glued them, and so there was two places where I had a half millimeter gap between
the tiles. This I filled with sawdust, which I made by sanding a spare piece of
birch. The shavings from the cabinet scraper are not suitable for this job.
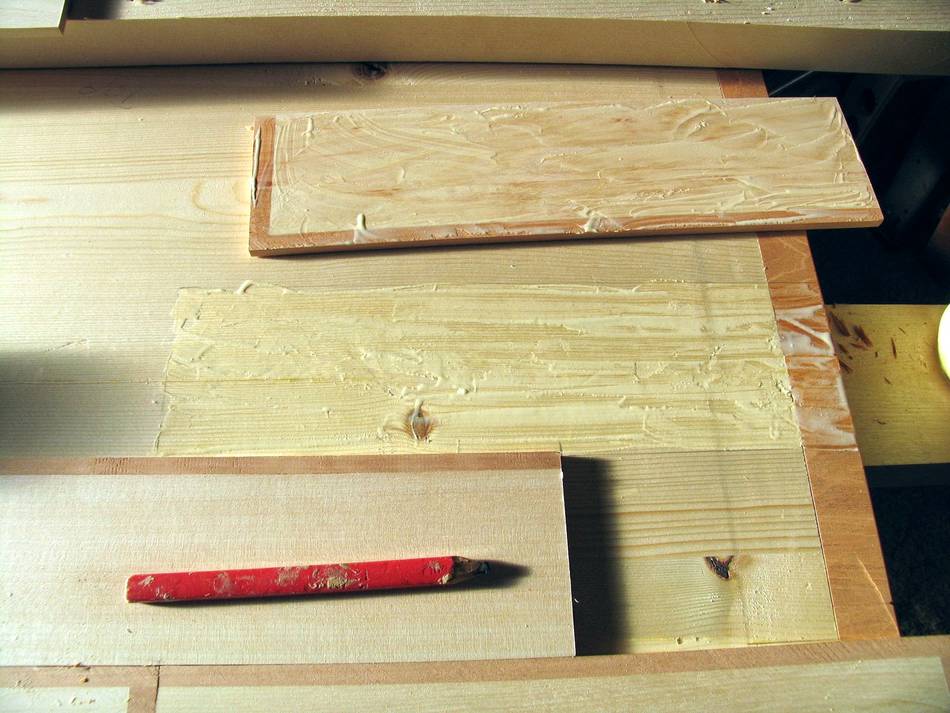
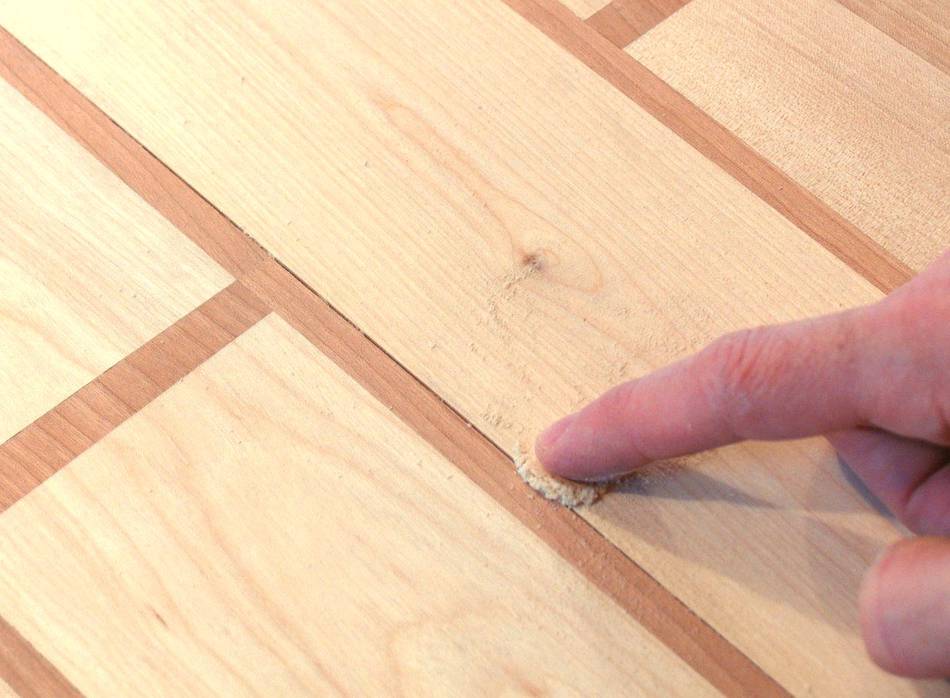
 Here's a close up of the same crack after filling. You can barely notice it.
I sealed the sawdust in the crack with varnish. Unfortunately, the varnish tends
to lift the sawdust out of the crack again, so its best to have some sawdust and
a rag with a touch of varnish on it and to alternate varnish and sawdust until
the crack is full of varnish soaked sawdust. I didn't take pictures of this
part of the process, because I had my hands full of varnish.
Here's a close up of the same crack after filling. You can barely notice it.
I sealed the sawdust in the crack with varnish. Unfortunately, the varnish tends
to lift the sawdust out of the crack again, so its best to have some sawdust and
a rag with a touch of varnish on it and to alternate varnish and sawdust until
the crack is full of varnish soaked sawdust. I didn't take pictures of this
part of the process, because I had my hands full of varnish.
Some people say to use a glue and sawdust mixture for filling cracks, but getting glue on your work piece always causes problems with the finish, so might as well just glue the sawdust into the crack with varnish.
I used an alkyd based varnish for the whole table top, because it protects better against moisture. With all the gluing I did on it, I wanted to minimize the risk of the top getting ruined from water somehow getting into it.
Related pages:
 Hardwood table top from scrap wood
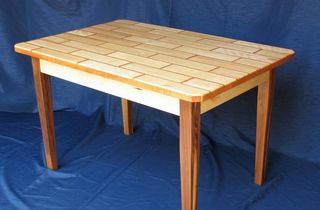 Building a table
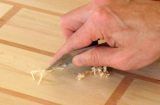 Using and sharpening
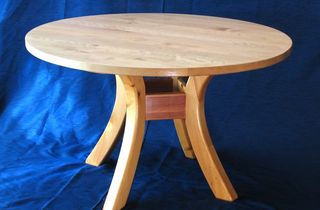 Round dining table
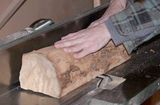 Reclaiming lumber
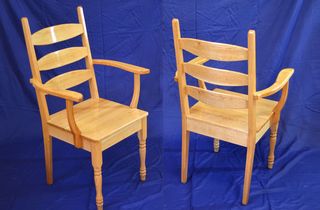 Kitchen chairs
To Woodworking index