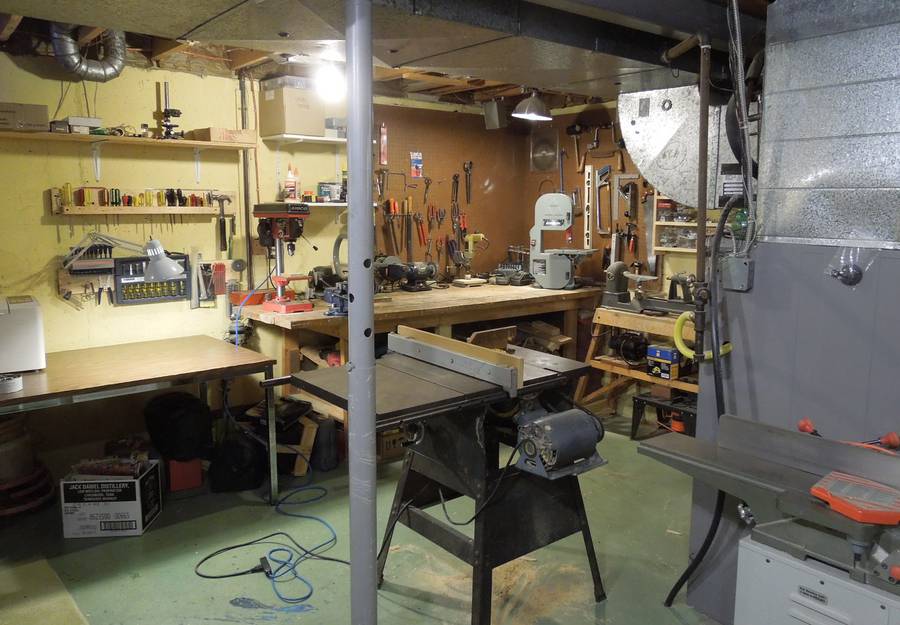
 My brother Markus isn't
into woodworking as much as I am, but he likes to have a few tools
in his basement to build things as the need arises.
My brother Markus isn't
into woodworking as much as I am, but he likes to have a few tools
in his basement to build things as the need arises.
My brother Markus isn't
into woodworking as much as I am, but he likes to have a few tools
in his basement to build things as the need arises.
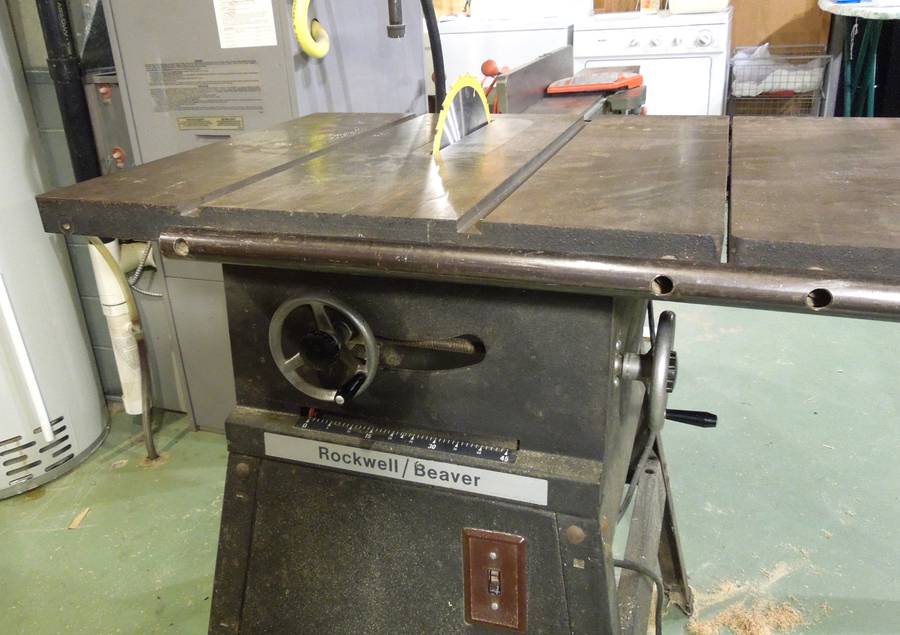 His table saw is an old Rockwell/Beaver model, probably from the 1970s or early
1980s, with a 3/4 HP motor. The saw works well enough, but it
has a worn out height adjustment mechaism, and the blade could no longer
be raised all the way. This probably bothered me more than it bothered
him. I had an idea for how this could be fixed, so recently
I took up the challenge.
His table saw is an old Rockwell/Beaver model, probably from the 1970s or early
1980s, with a 3/4 HP motor. The saw works well enough, but it
has a worn out height adjustment mechaism, and the blade could no longer
be raised all the way. This probably bothered me more than it bothered
him. I had an idea for how this could be fixed, so recently
I took up the challenge.
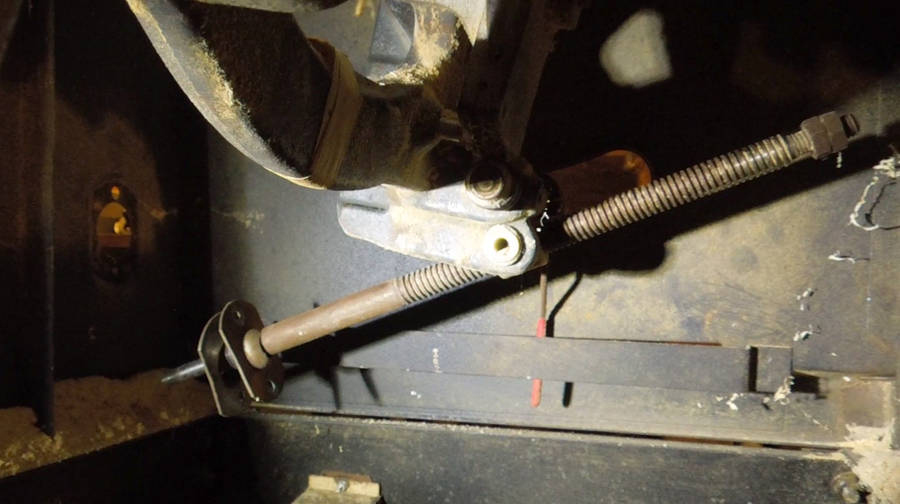
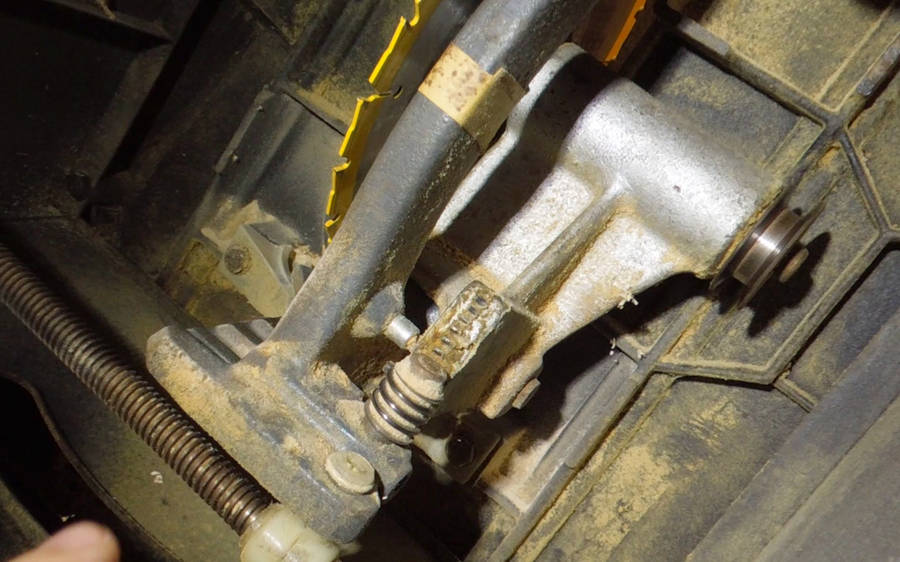 Here's looking into the saw from below. Near the center of the image, you can
see a worm gear, which drives a curved rack back and forth to tilt the
blade mount up and down. That rack was worn out, and it would skip teeth
at either end of its range.
Here's looking into the saw from below. Near the center of the image, you can
see a worm gear, which drives a curved rack back and forth to tilt the
blade mount up and down. That rack was worn out, and it would skip teeth
at either end of its range.
 First thing, take the motor off. Oh, and unplug it, of course. Though
once the motor is off, that doesn't matter much anymore!
First thing, take the motor off. Oh, and unplug it, of course. Though
once the motor is off, that doesn't matter much anymore!
I have to admit, I probably only unplugged the saw when I needed to plug a light into the extension cord.
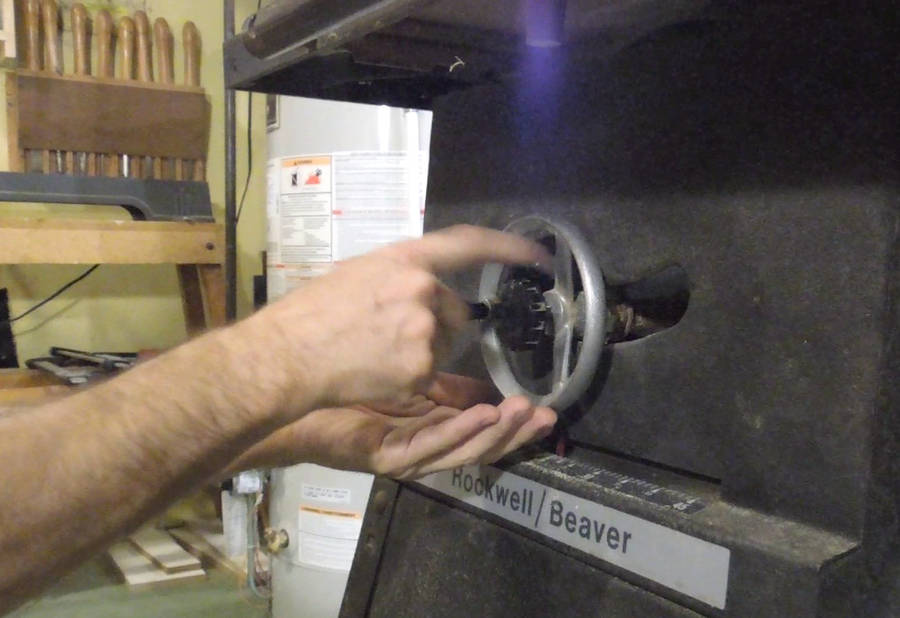 Removing the height and tilt cranks.
 The flange holding the end of the tilt screw to the enclosure is also unscrewed.
It helps to tilt the saw to about 30 degrees before doing this so the
tilt screw can then be pulled completely into the enclosure
by tilting the saw back to vertical.
The flange holding the end of the tilt screw to the enclosure is also unscrewed.
It helps to tilt the saw to about 30 degrees before doing this so the
tilt screw can then be pulled completely into the enclosure
by tilting the saw back to vertical.
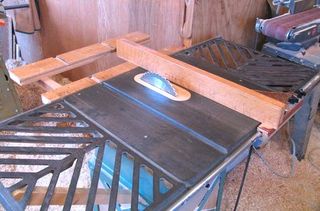
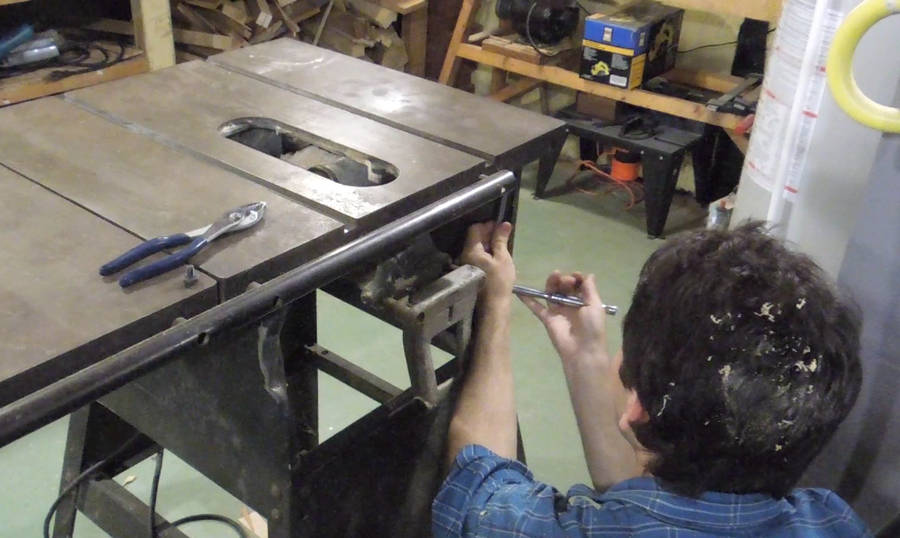 Next undoing the four bolts that hold the table onto the sheet metal enclosure.
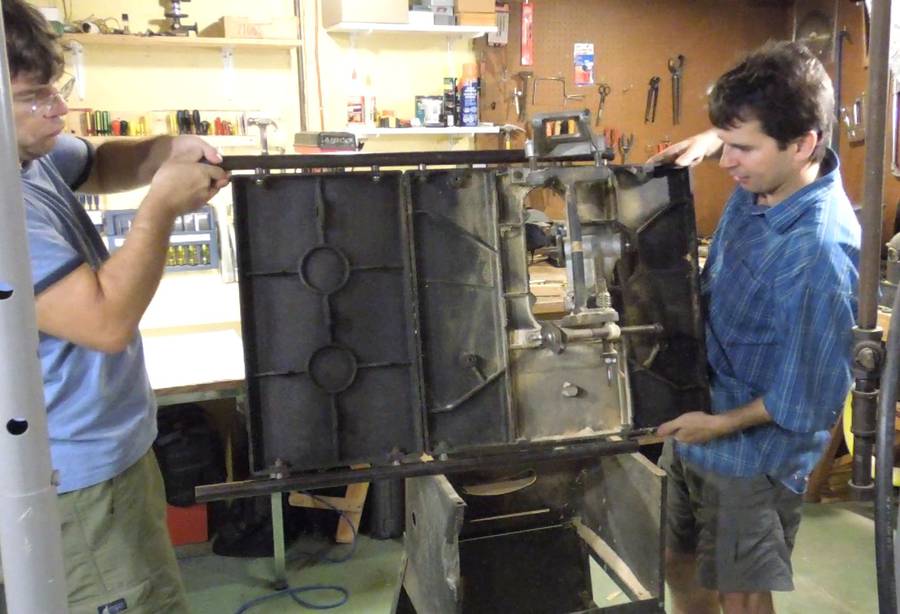 Now lifting the table off the saw and flipping it over. It helps to have
an extra pair of hands. If I was doing it alone, I would
have removed the extension table to make it easier to handle
alone.
Now lifting the table off the saw and flipping it over. It helps to have
an extra pair of hands. If I was doing it alone, I would
have removed the extension table to make it easier to handle
alone.
 Here's the guts of the table saw - the trunnions, arbor, and height adjustment
mechanism. It would be fun to use that to build another table saw, but the only
place to get a mechanism like that is from an old table saw, and that would
make building one kind of pointless.
Here's the guts of the table saw - the trunnions, arbor, and height adjustment
mechanism. It would be fun to use that to build another table saw, but the only
place to get a mechanism like that is from an old table saw, and that would
make building one kind of pointless.
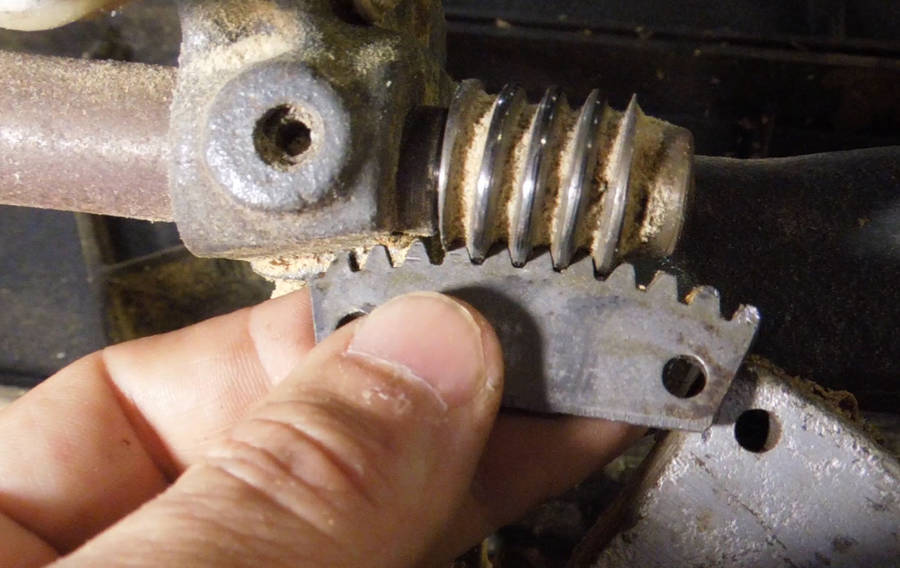
 And here's the worm gear and rack. You can barely see how the teeth are worn
towards the right end of it.
And here's the worm gear and rack. You can barely see how the teeth are worn
towards the right end of it.
The rack is a piece of steel, about 5 mm thick, held in the cast iron part by two pins.
 The best way to remove pins like that is with a press, but that would require
removing the whole mechanism from the saw. I didn't want to do that.
The best way to remove pins like that is with a press, but that would require
removing the whole mechanism from the saw. I didn't want to do that.
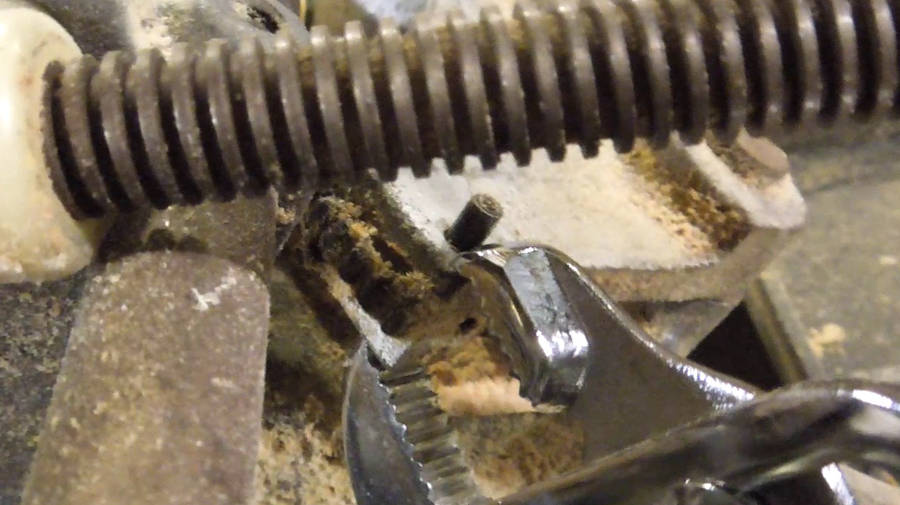
One of the pins sticks out the back, where it bumps up against another pin, which serves to limit how far up the blade can be raised.
Using a pipe wrench, I was able to push on the back end of that pin to slide it forward (pin already moved in the photo).
 To get it all the way out, I grabbed the front with a pipe wrench, then used
a screwdriver to lever the wrench away from the casting, pulling the pin with it.
To get it all the way out, I grabbed the front with a pipe wrench, then used
a screwdriver to lever the wrench away from the casting, pulling the pin with it.
Vise-grips would have been better, but this was at my brother's, and I didn't know where he keeps his.
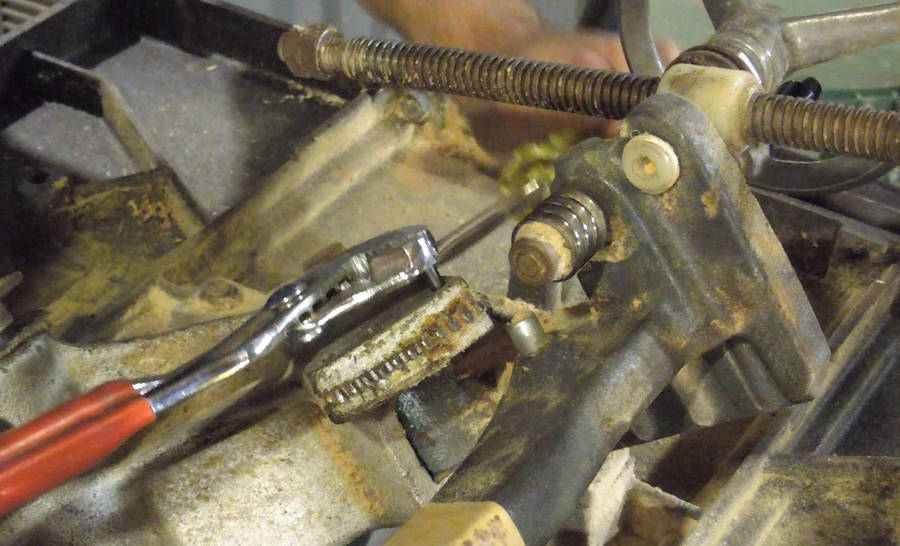
 The other pin was flush with the casting on both sides, so it was
harder to get out. It was tempting to push it out by driving it with a punch
and a hammer,
but that can cause the end of the pin to expand, making it tighter.
So I put a short screw against one end, and a hollow spacer on the other end,
then squeezed it with a pipe wrench. The spacer is to give the wrench
something to push against without preventing the pin from coming out of
the casting. The pin moves left in this picture.
The other pin was flush with the casting on both sides, so it was
harder to get out. It was tempting to push it out by driving it with a punch
and a hammer,
but that can cause the end of the pin to expand, making it tighter.
So I put a short screw against one end, and a hollow spacer on the other end,
then squeezed it with a pipe wrench. The spacer is to give the wrench
something to push against without preventing the pin from coming out of
the casting. The pin moves left in this picture.
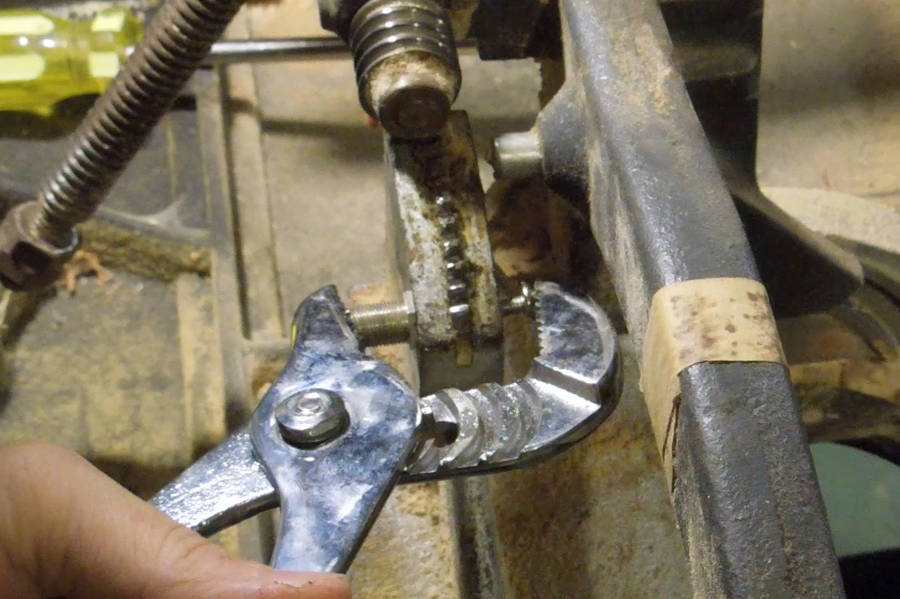
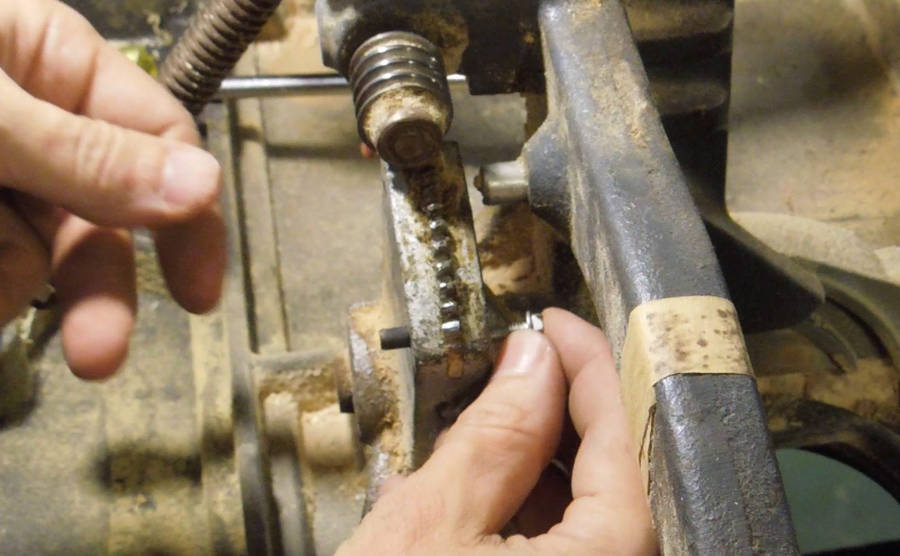 Pin partially out, now following it with a longer screw to get it all the way out.
 With the pins out, using a large nail and a hammer to tap the metal part out
of the slot.
With the pins out, using a large nail and a hammer to tap the metal part out
of the slot.
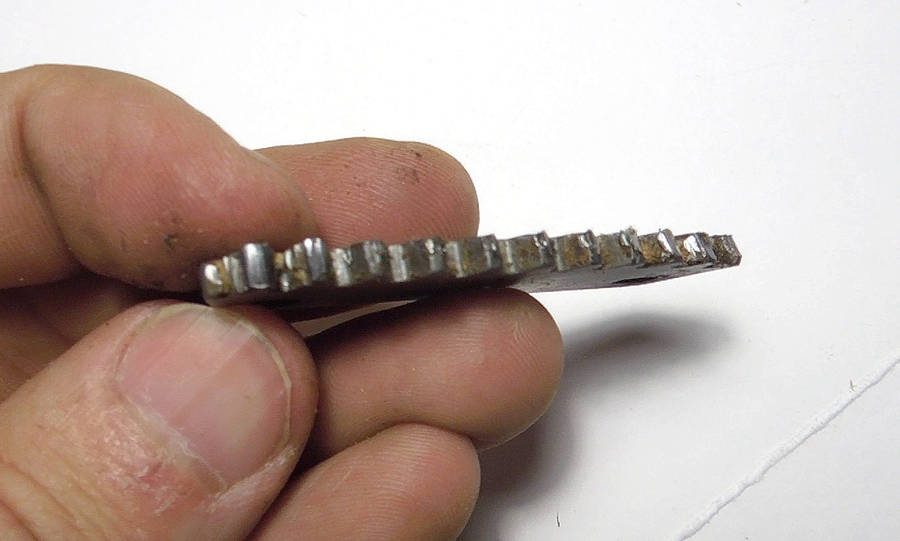 A closer look at the metal part, with the worn teeth.
 My plan was to file the teeth a little deeper and then position the comb closer
to the worm gear. But examining it, it I could see that the comb could be
placed much closer to the worm gear even without deepening the teeth.
It looks like the way the saw was built, only the tip of the teeth
actually engaged the worm gear.
My plan was to file the teeth a little deeper and then position the comb closer
to the worm gear. But examining it, it I could see that the comb could be
placed much closer to the worm gear even without deepening the teeth.
It looks like the way the saw was built, only the tip of the teeth
actually engaged the worm gear.
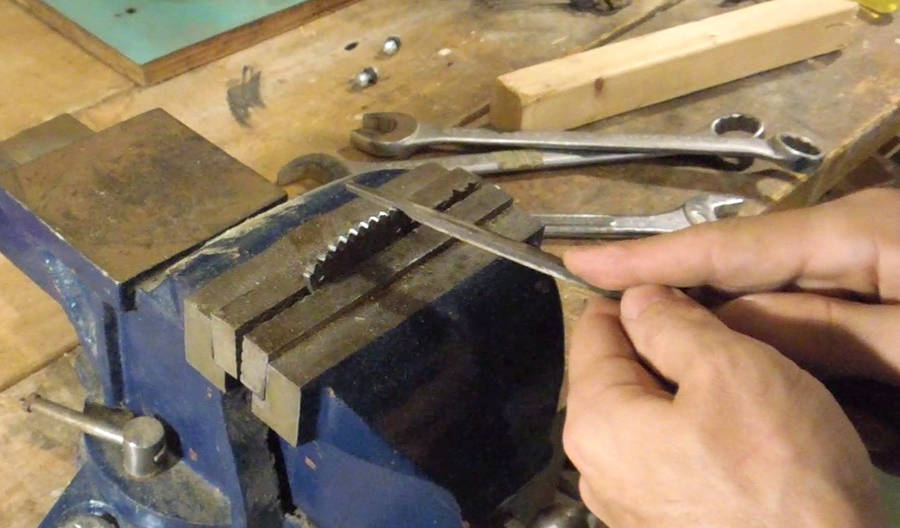 Cleaning up some of the edges of the worn teeth with a triangular file ...
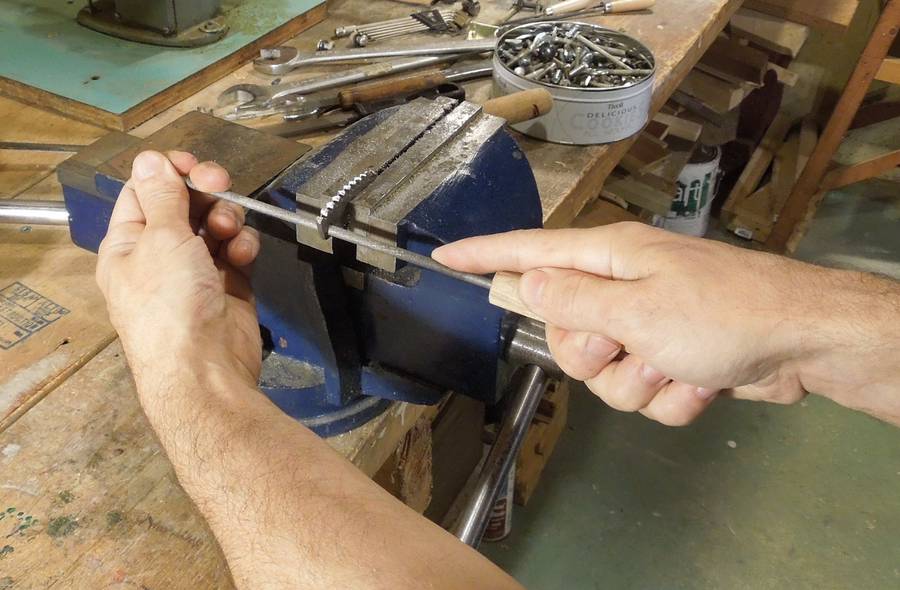 ... and then elongating the two holes to allow the part to be set
closer to the worm gear.
... and then elongating the two holes to allow the part to be set
closer to the worm gear.
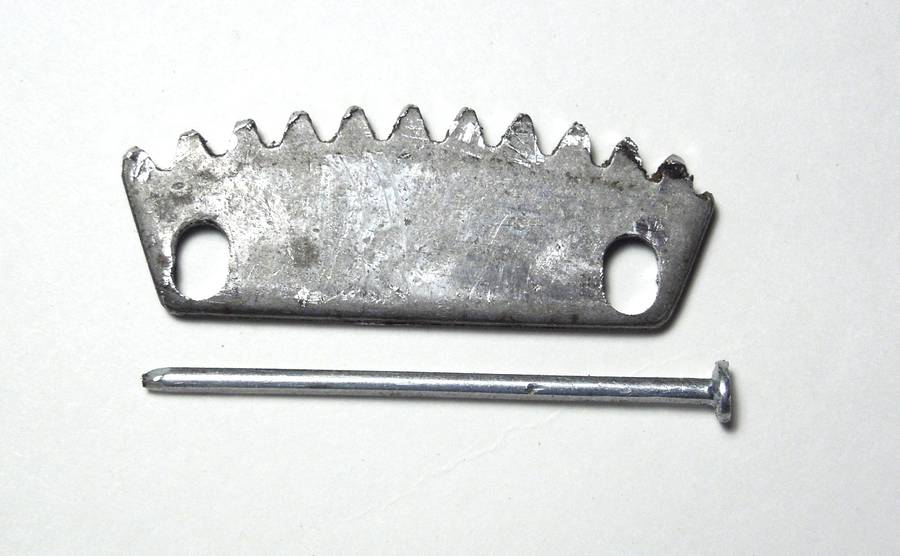 Elongated slots, and a nail, flattened on two sides, to place behind the part
as a spacer to move it closer to the worm gear.
Elongated slots, and a nail, flattened on two sides, to place behind the part
as a spacer to move it closer to the worm gear.
The flattened nail is a bout 2 mm thick. I first tried a strip of metal 1.5 mm thick, but realized I could go closer, so made this 2 mm spacer.
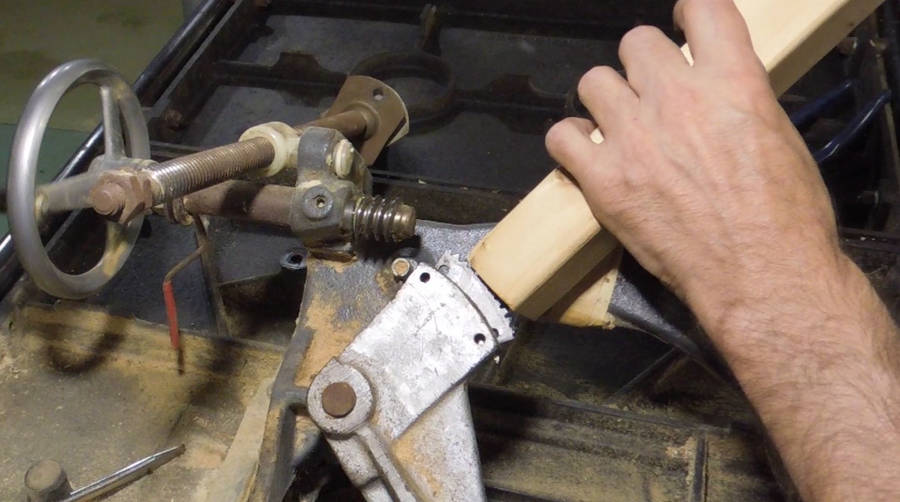 Tapping the part back in.
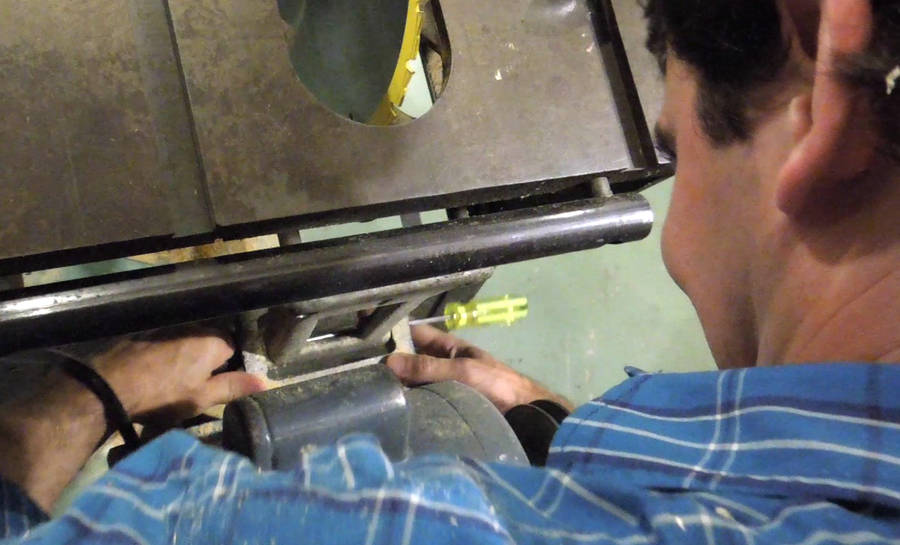
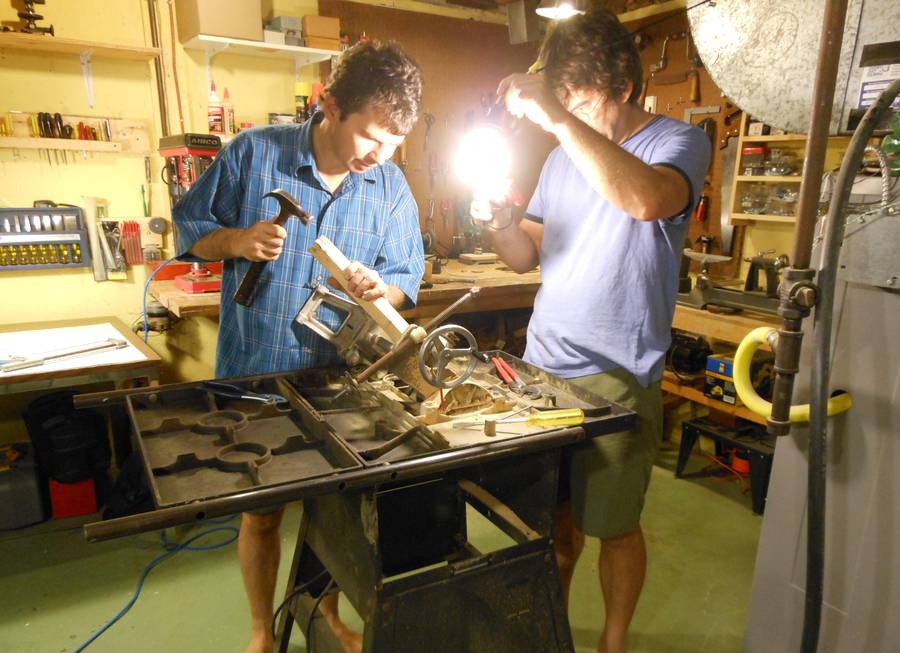 Markus was a lot of help, especially for getting video of the whole procedure.
It's always easier when somebody is holding the camera, so they can follow the
action. I don't need to worry about accidentally moving out of frame.
He's also holding a light (the camera is just below the lamp).
Markus was a lot of help, especially for getting video of the whole procedure.
It's always easier when somebody is holding the camera, so they can follow the
action. I don't need to worry about accidentally moving out of frame.
He's also holding a light (the camera is just below the lamp).
 The spacer "nail", tapping it all the way in. The head is on the side that is usually
further up, so I don't think this will come out from vibrations.
The spacer "nail", tapping it all the way in. The head is on the side that is usually
further up, so I don't think this will come out from vibrations.
 Pushing the pins back in, much easier than getting them out.
The only tricky part was making sure the holes were aligned well enough that the pin would go through.
 Fixed mechanism, it works smoothly without skipping or jamming. It helps
to put a bit of grease on it too.
Fixed mechanism, it works smoothly without skipping or jamming. It helps
to put a bit of grease on it too.
After that, it was just a matter of putting the saw back together. The repair was easier than I had anticipated.
Looking at my own older 9" Rockwell/Beaver table saw, it has the same arrangement of worm gear and metal comb/rack. So I wouldn't be surprised if other saws have the same problem. Although on my Delta hybrid table saw, the height adjustment rack is much wider and part of the casting
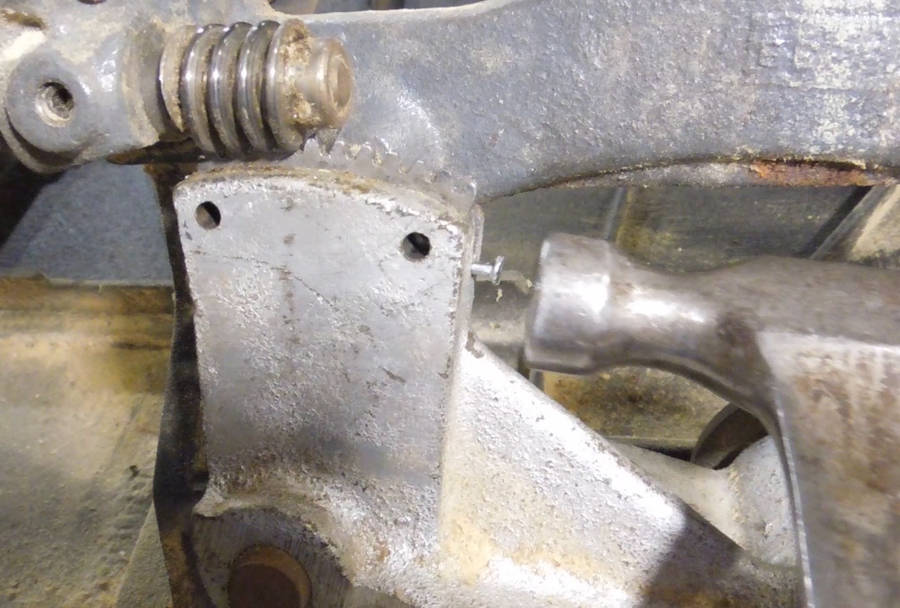
An easier way to fix it
A reader has pointed out that the bushing that mounts the shaft with the worm gear on it has its hole drilled off-center. By loosening the set screw (center of image above), that bushing can be rotated to adjust how close the worm gear is to the comb. Had I known this, I could have saved myself an hour or two messing with the spacer when I fixed this saw.
 My old Rockwell / Beaver table saw
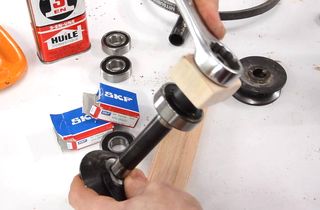 Hybrid table saw bearing replacement
 Fixing the wobble in a table saw arbor
 Table saw alignment
 Making a zero clearance table saw insert
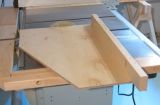 Table saw sled