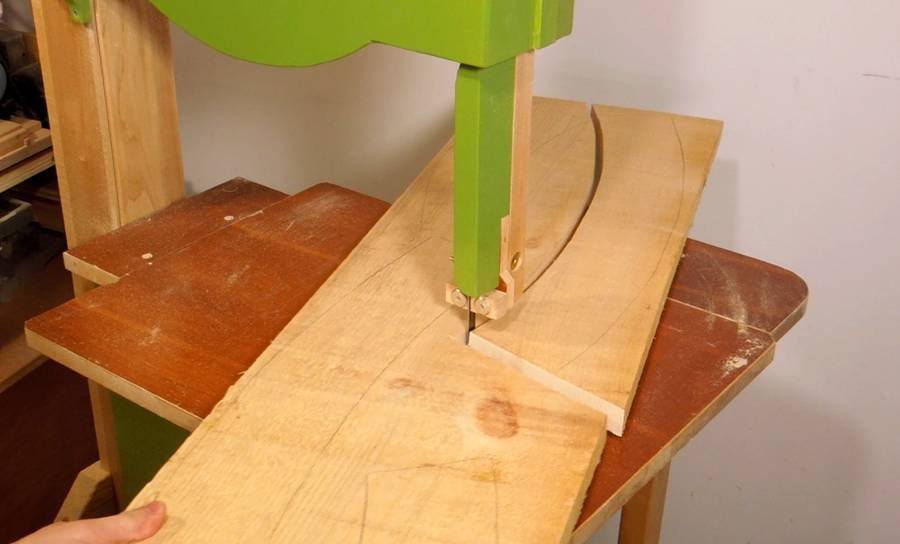
 Having made cardboard templates for the shapes I needed, I laid these out on an
unplaned piece of pine shelving and cut them out on my bandsaw.
Having made cardboard templates for the shapes I needed, I laid these out on an
unplaned piece of pine shelving and cut them out on my bandsaw.
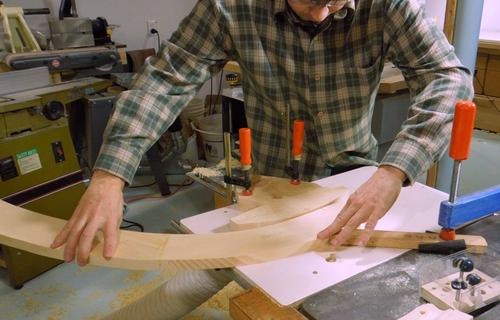
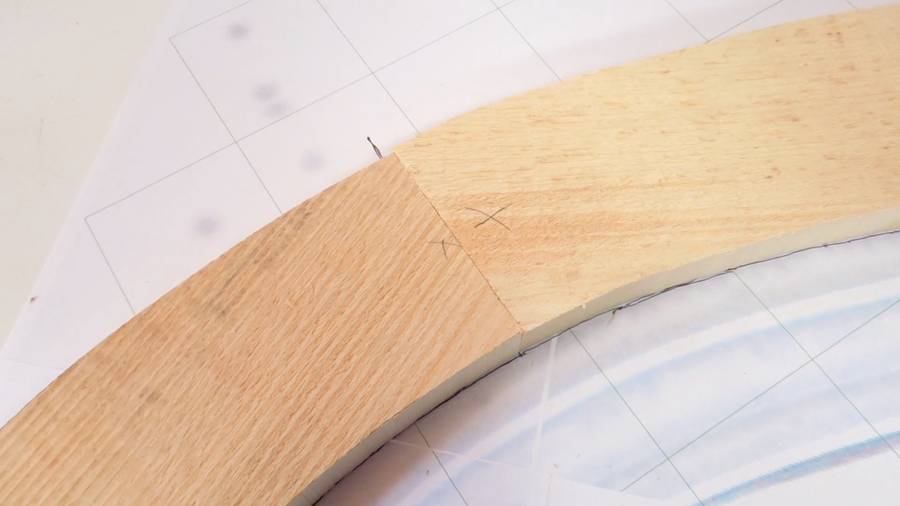 Next I laid the pieces out on my 1:1 paper template to make sure the
joint lined up when the pieces were properly aligned.
Next I laid the pieces out on my 1:1 paper template to make sure the
joint lined up when the pieces were properly aligned.
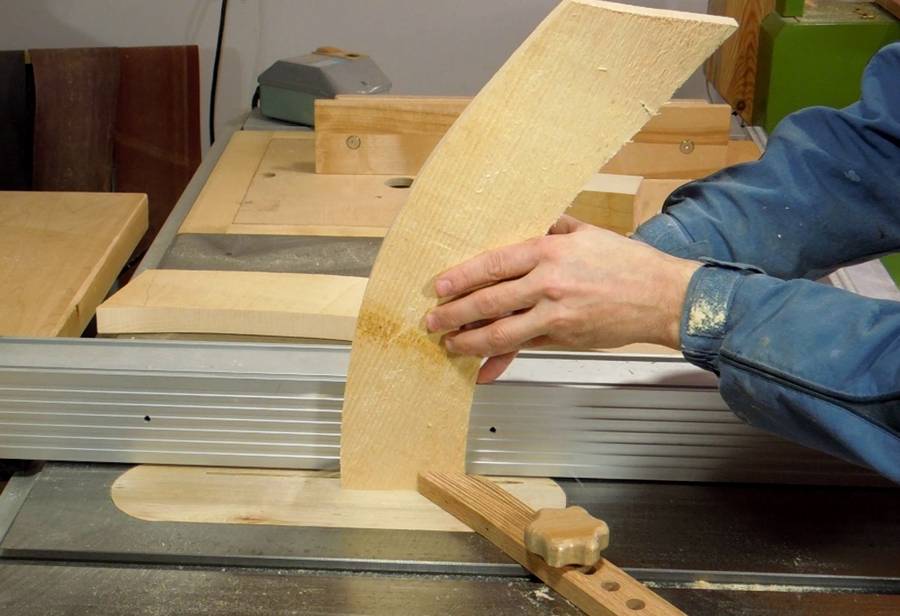
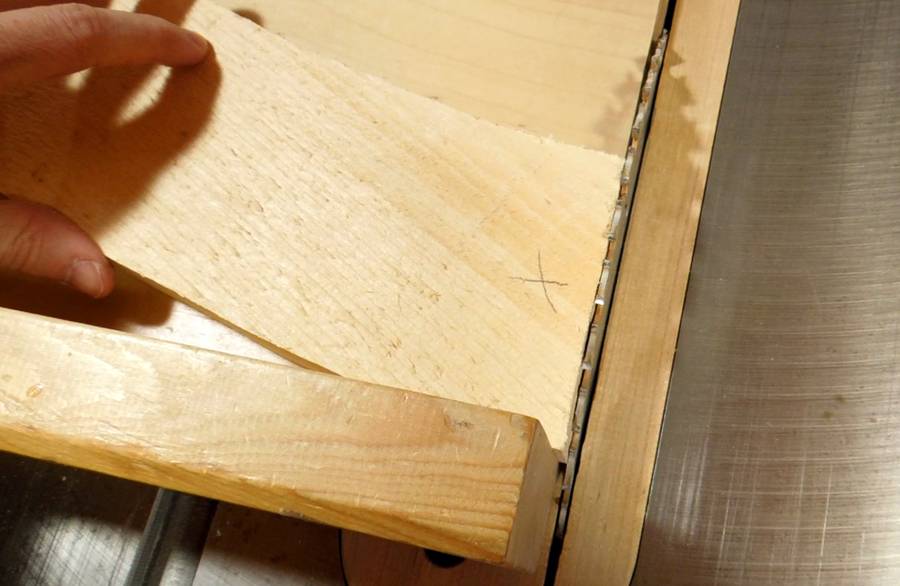 It took a few iterations on the table saw to shave the ends flat and
at just the right angle for that joint to work out.
It took a few iterations on the table saw to shave the ends flat and
at just the right angle for that joint to work out.
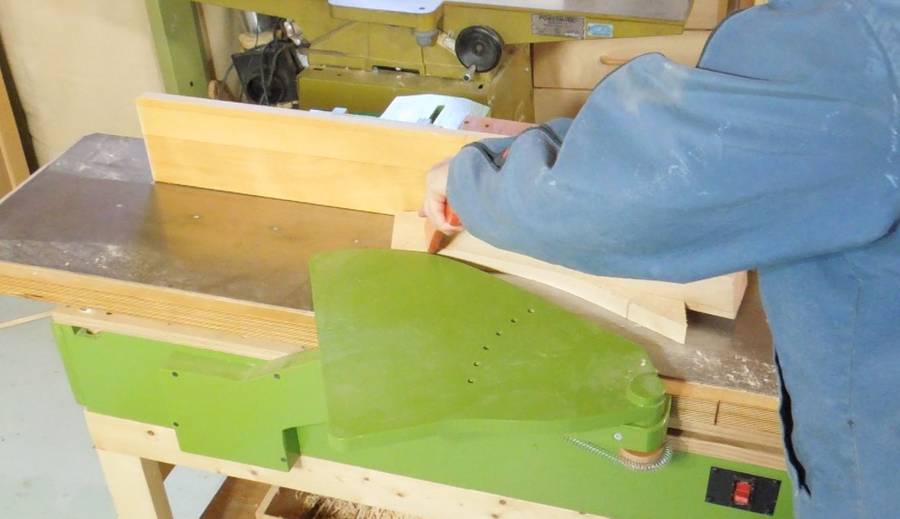 Next I flattened one side on the jointer.
I started with unplaned lumber, so that I'd be starting with slightly thicker lumber. The final trim needed to be 3/4" thick, and if I started with boards of that thickness, I wouldn't be able to plane out any misalignment in the joint.
 Next cutting a slot in one end of the pieces on the table saw...

 ... so that I could put a spline in to join the ends. The spline's grain is oriented
to go across the slot, not along the length of the spline. That way the splines
are strong across the joint, not along it.
... so that I could put a spline in to join the ends. The spline's grain is oriented
to go across the slot, not along the length of the spline. That way the splines
are strong across the joint, not along it.
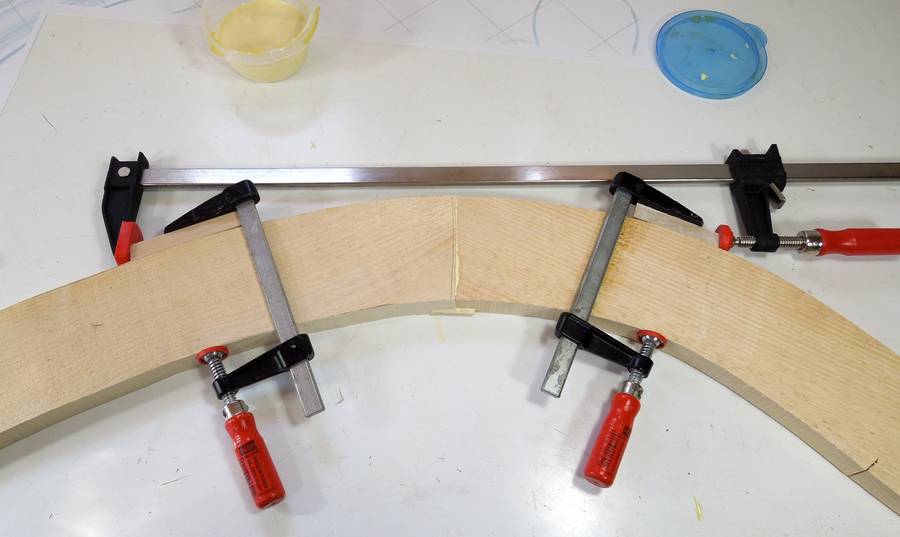 If I had more foresight, I would have left a bit of wood protruding past the
line on the outside of the arc to have something to hook a clamp onto.
As it was, I had to clamp some pieces of scrap to the outside of the arc
so I had something to hook on to.
If I had more foresight, I would have left a bit of wood protruding past the
line on the outside of the arc to have something to hook a clamp onto.
As it was, I had to clamp some pieces of scrap to the outside of the arc
so I had something to hook on to.
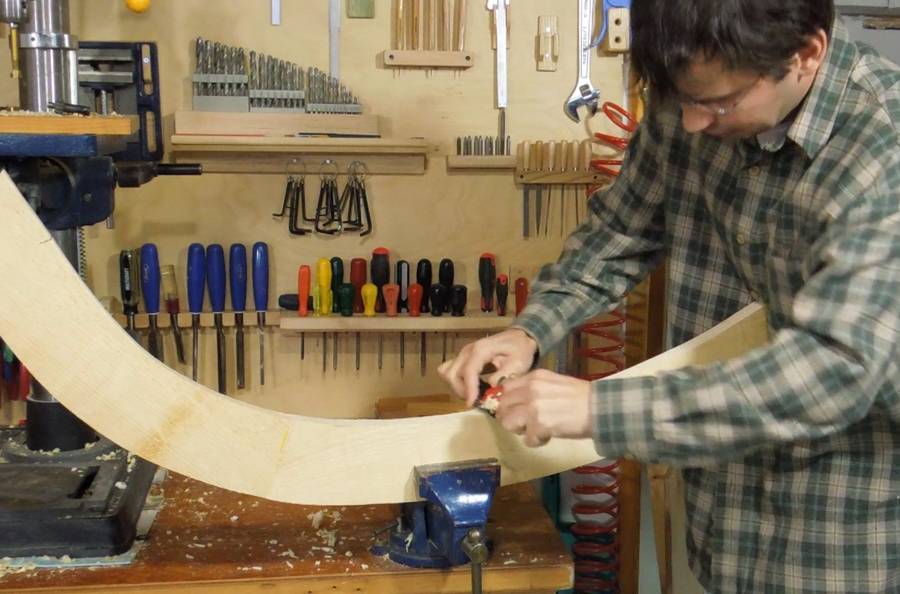 I smoothed the inside of the curve with a spokeshave. The inside curve will
be my reference surface for cutting the molding, so that side needs to be
continuous and smooth.
I smoothed the inside of the curve with a spokeshave. The inside curve will
be my reference surface for cutting the molding, so that side needs to be
continuous and smooth.
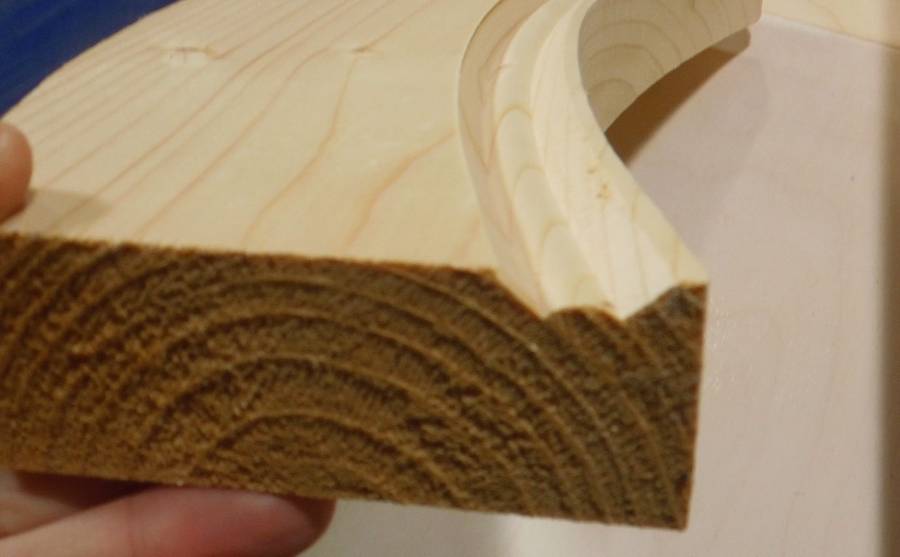
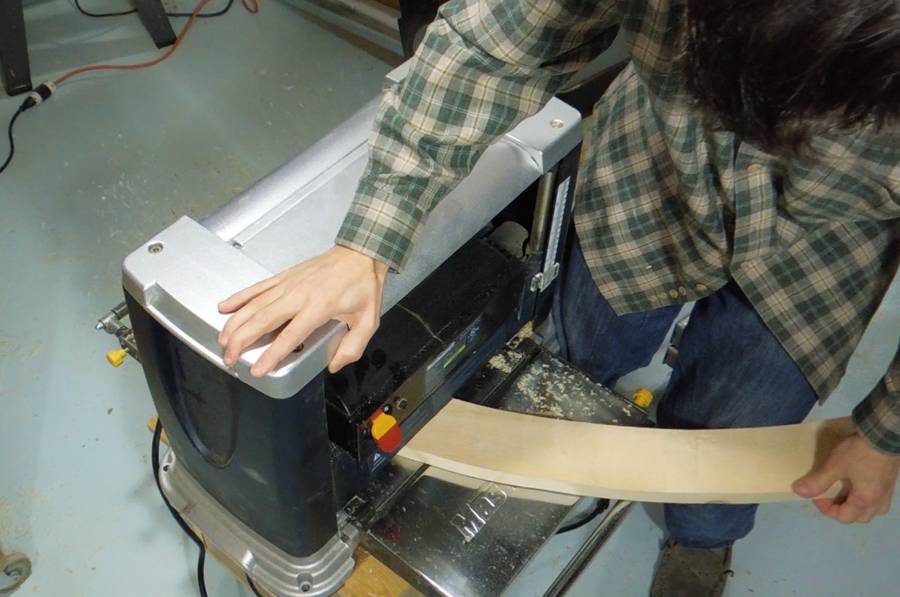 Next, planing it down to final thickness. This is where I can plane out
any slight misalignment in the joint. I'm using my knee to rotate the piece
as it goes through the planer. My planer isn't wide enough to run the curve
through without turning it.
Next, planing it down to final thickness. This is where I can plane out
any slight misalignment in the joint. I'm using my knee to rotate the piece
as it goes through the planer. My planer isn't wide enough to run the curve
through without turning it.
 Here's a scrap of the existing molding that I need to match.
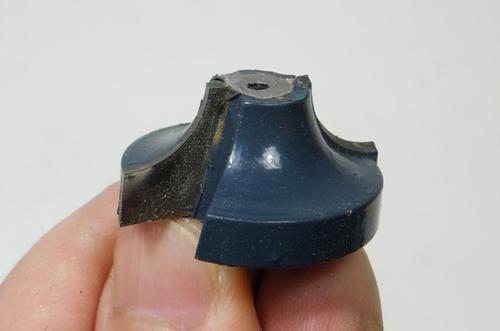
You can buy router bits that will make molding in one pass, but I don't know where one could get a bit that would produce this particular profile.
Playing around with the router bits from a cheap router bit set, I should be able to match those curves very closely using my tilting router lift.
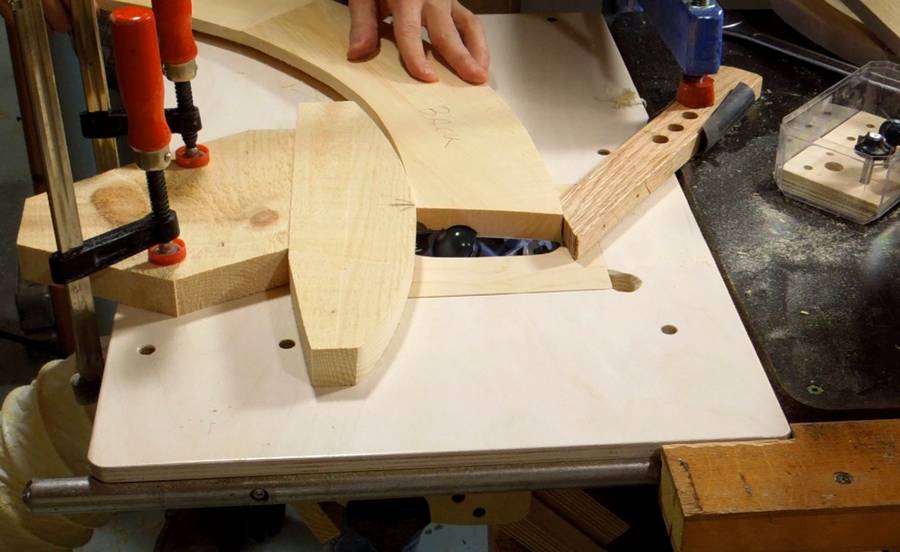
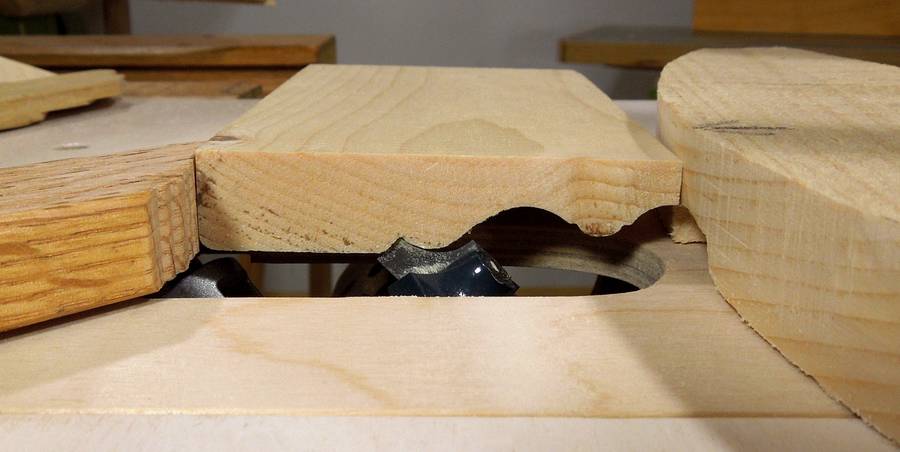
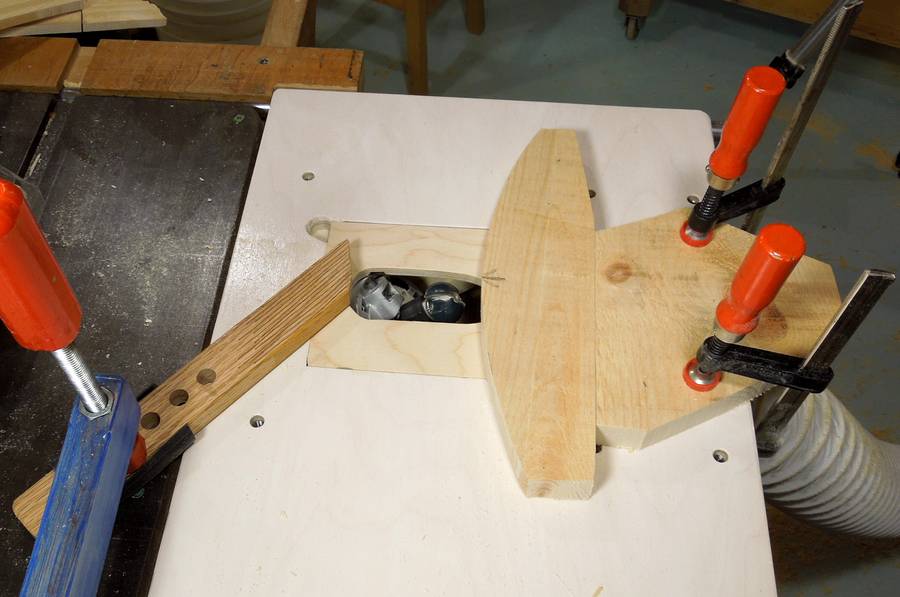 My setup for cutting the curved molding. I rigged up a temporary fence
on the right side. The curvature of this fence matches the tightest
bend of the molding I'm making. For the less curved parts of this
molding, I need to make sure the workpiece is always touching the
fence at the point where I penciled an arrow onto it.
My setup for cutting the curved molding. I rigged up a temporary fence
on the right side. The curvature of this fence matches the tightest
bend of the molding I'm making. For the less curved parts of this
molding, I need to make sure the workpiece is always touching the
fence at the point where I penciled an arrow onto it.
On the opposite side is a feather board to ensure that the molding will always be pushed up against the fence. That whole fence and featherboard setup could be improved with something more permanent, but I'm still experimenting with the feasibility of making curved molding.
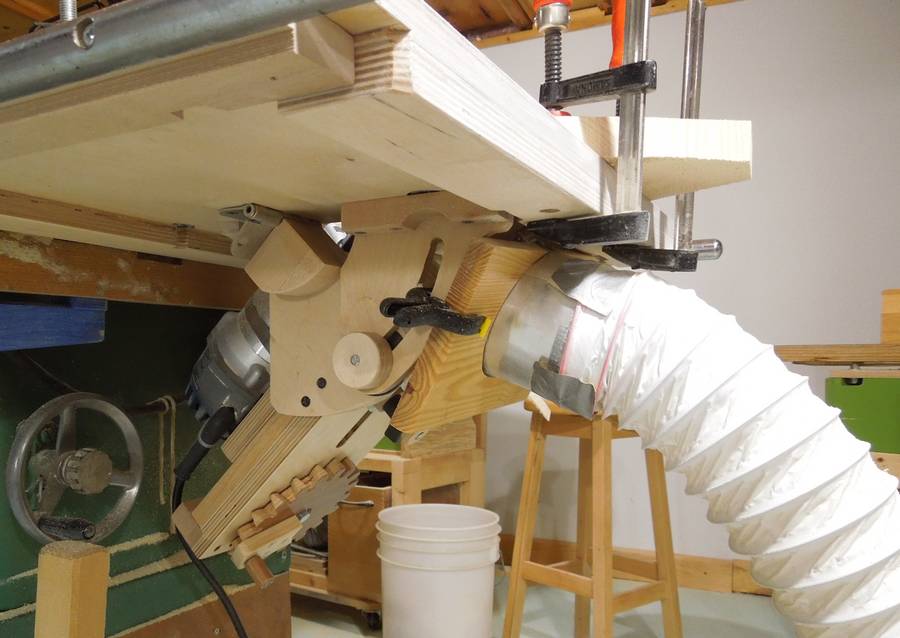 I don't have much of a dust collection setup for the router, but with most of
the cuts for this molding requiring a 45-degree tilt, it was relatively easy
to rig up a hose to catch the shavings. A tilting router lift is a bit tricky with
dust collection. if it's oriented upright, the dust needs to be
caught from the other side.
I don't have much of a dust collection setup for the router, but with most of
the cuts for this molding requiring a 45-degree tilt, it was relatively easy
to rig up a hose to catch the shavings. A tilting router lift is a bit tricky with
dust collection. if it's oriented upright, the dust needs to be
caught from the other side.
A nice thing about tilting the router is that the chips get thrown out of the workpiece and down. Very unlike cutting dadoes with a router.
 My first cut will be to cut this bead.
For that sort of cut, it's necessary to have a bit that's flat on top.
The bits from my router bit set all had guide bearings. I removed the guide bearing and ground off the bearing post for many of those bits by now.
It was a very inexpensive router bit set, and I have two of them, so no need to worry about potentially damaging the bits. Even without the guide bearing, the bit is still good for conventional roundover work if used with a fence.
 First cut on a test piece went well.
 Carefully guiding the piece along the cut. A bigger router table
top would have definitely been handy here!
Carefully guiding the piece along the cut. A bigger router table
top would have definitely been handy here!
I prefer not to get my hands too close to the cutter head. I experimented with pushing it along with push sticks, but I wasn't able to get the kind of control that I needed.
Even so, I never put my hands above where the router bit is. You never know.
 Setting up for the third pass. Basically, aligning the router bit with
the main cove in a scrap of the molding that I need to match.
Setting up for the third pass. Basically, aligning the router bit with
the main cove in a scrap of the molding that I need to match.
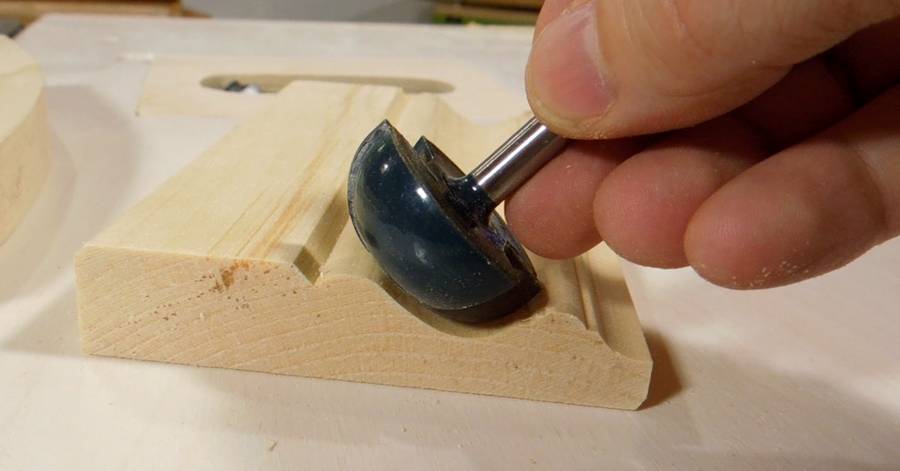
 Starting the third pass -- the large cove cut in the middle.
As it turned out, the lower corner of the bit was still in the wood, so I had to make another pass with the bit lowered a little bit. A more logical thing to do would have been to start with a shallow pass and then cut deeper.
 After the first four passes, it's starting to look like molding.
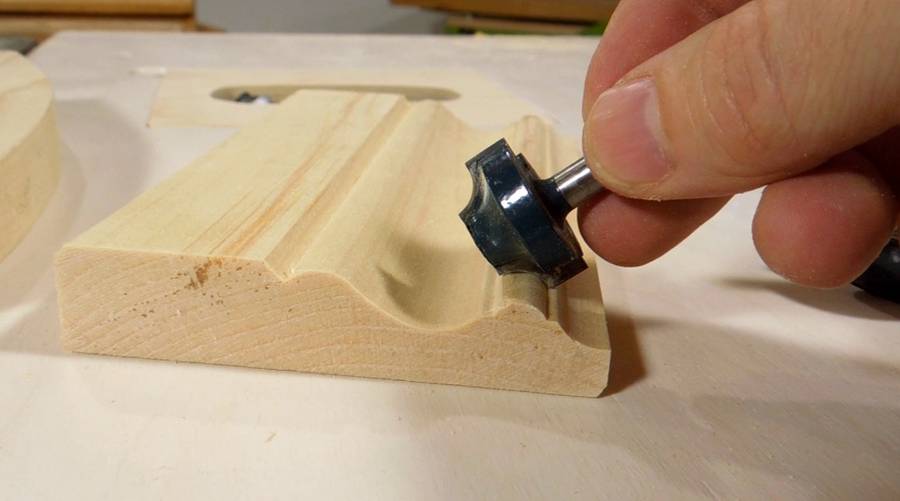
 Setting up for the final pass, a roundover bit to cut the last bead.
That bead would ideally connect smoothly with the cove cut previously.
The radius on the original molding was somewhere between the
1/4" and 3/8" (6 mm and 10 mm) radii bits that I have.
I ended up cutting it with the larger radius bit. This left a slight corner
in the transition to the cove cut, but it didn't take much sanding
to smooth that out.
Setting up for the final pass, a roundover bit to cut the last bead.
That bead would ideally connect smoothly with the cove cut previously.
The radius on the original molding was somewhere between the
1/4" and 3/8" (6 mm and 10 mm) radii bits that I have.
I ended up cutting it with the larger radius bit. This left a slight corner
in the transition to the cove cut, but it didn't take much sanding
to smooth that out.
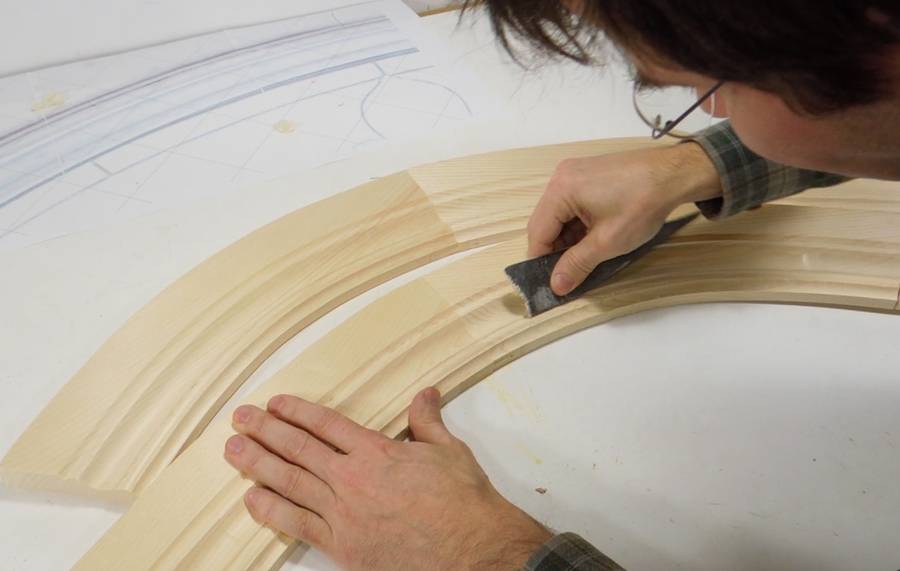 More sanding to clean up the corners.
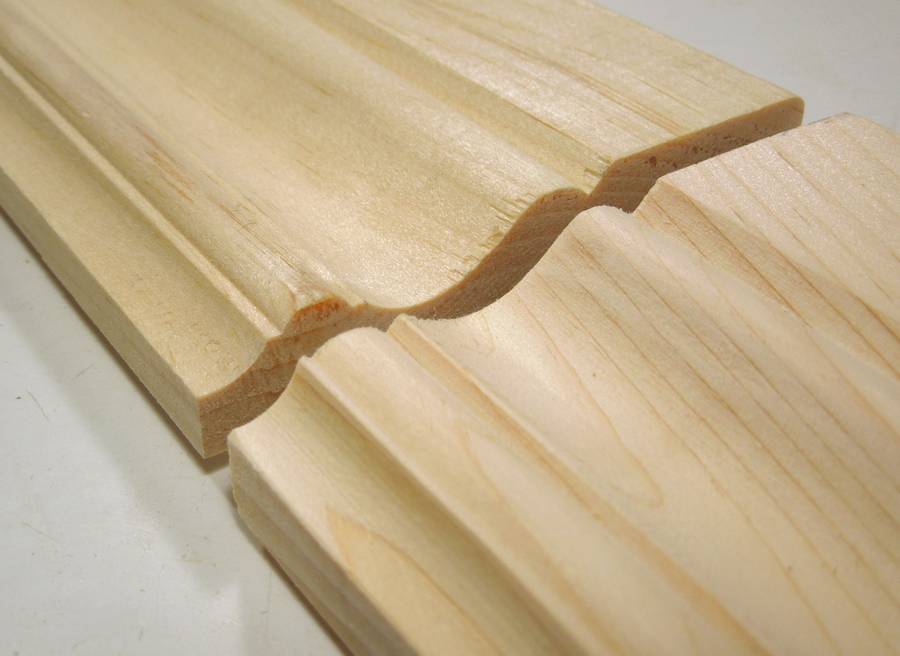 And here's comparing my final molding shape to the original molding I
was trying to match. The angle connecting to the bead on the left side is
45-degrees on either side on mine, but level with the molding on the original.
But unless you look closely, that difference isn't very noticeable.
And here's comparing my final molding shape to the original molding I
was trying to match. The angle connecting to the bead on the left side is
45-degrees on either side on mine, but level with the molding on the original.
But unless you look closely, that difference isn't very noticeable.
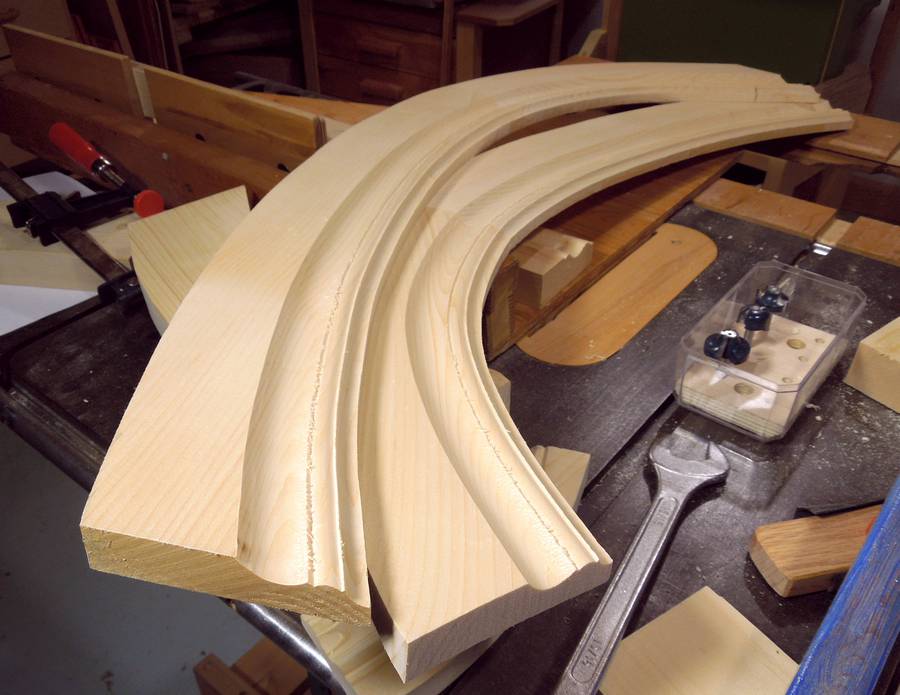
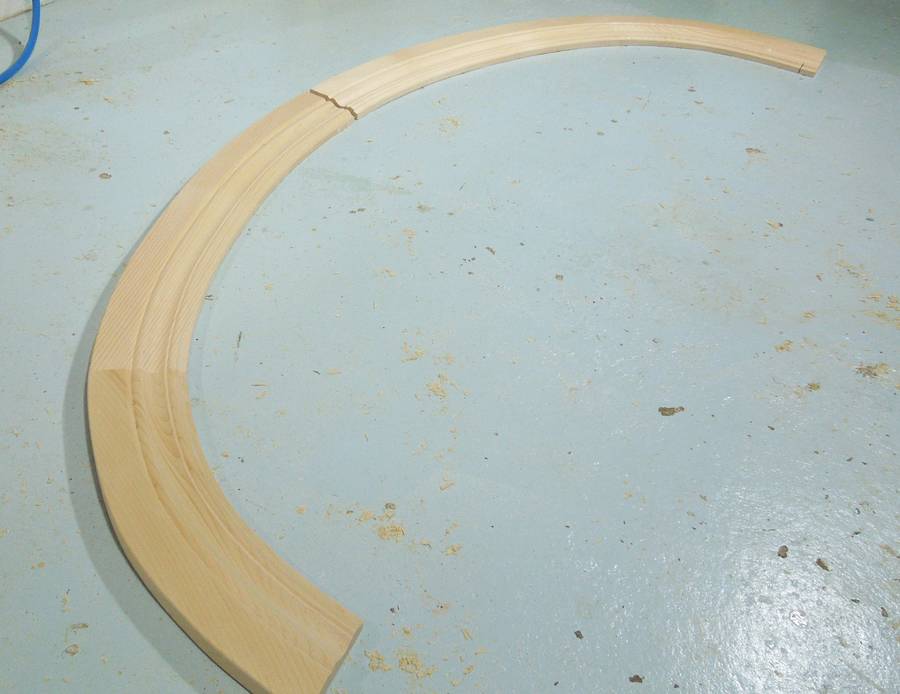 The two pieces laid out to form the arch above the doorway.
I'm deliberately not joining it in the middle. That way small adjustments
can still be made in case my measurements
were off by a few millimeters.
The two pieces laid out to form the arch above the doorway.
I'm deliberately not joining it in the middle. That way small adjustments
can still be made in case my measurements
were off by a few millimeters.
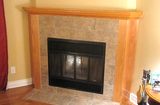
 And here's the trim, installed. I wasn't there for the installation,
so no photos or video of the actual process. Luc says it fit perfectly.
good to know. My first time using just a photograph for
a complicated fit like that.
And here's the trim, installed. I wasn't there for the installation,
so no photos or video of the actual process. Luc says it fit perfectly.
good to know. My first time using just a photograph for
a complicated fit like that.
 Making fireplace trim
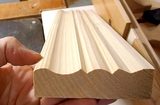 Molding tricks with a tilting router lift
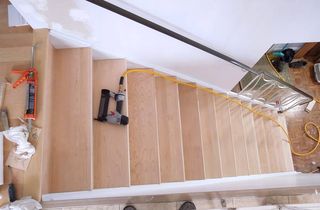 New treads for old stairs
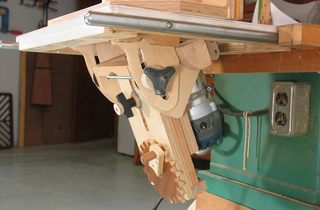 Tiltable router lift
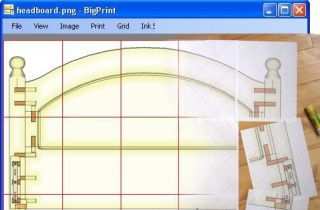 BigPrint program