 I started by ripping some thin strips off some white oak that I had lying around.
Many guitar makers use exotic woods for guitar sides, but because I
was still experimenting, I didn't want to use expensive materials.
I started by ripping some thin strips off some white oak that I had lying around.
Many guitar makers use exotic woods for guitar sides, but because I
was still experimenting, I didn't want to use expensive materials.
I started by ripping some thin strips off some white oak that I had lying around.
Many guitar makers use exotic woods for guitar sides, but because I
was still experimenting, I didn't want to use expensive materials.
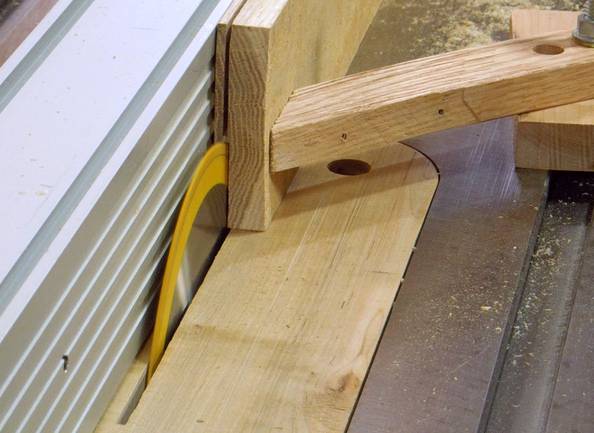
I used a thin kerf 7 1/4" (185 mm) blade, so as to waste less material, and to be easier on my saw. I cut from both sides to resaw a thin strip.
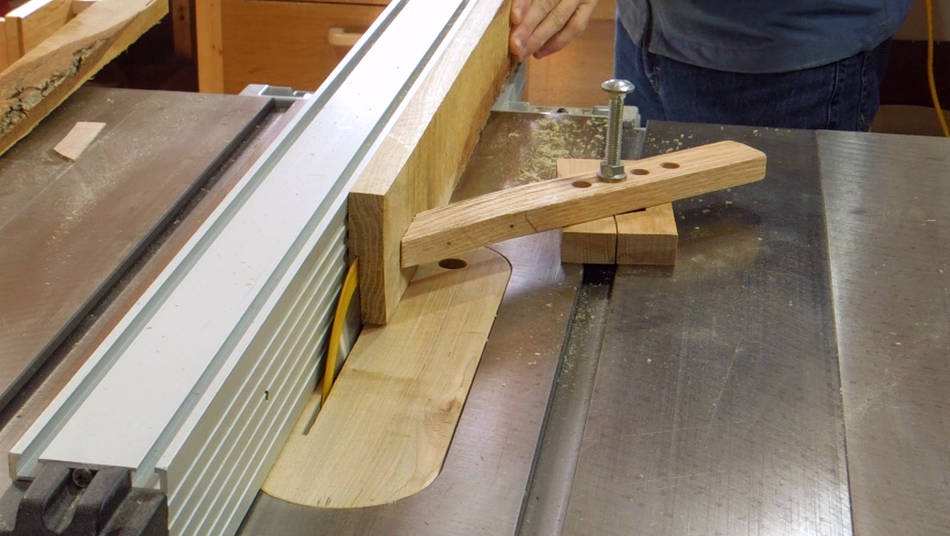
 Next I mounted a good quality 9" blade and passed the stock between
the blade and the fence to smooth and thin the sides. I could have used a 10" blade and
cut the whole side in one pass, but it would have been difficult and dangerous to push the
very thin stock behind the fully raised blade.
Next I mounted a good quality 9" blade and passed the stock between
the blade and the fence to smooth and thin the sides. I could have used a 10" blade and
cut the whole side in one pass, but it would have been difficult and dangerous to push the
very thin stock behind the fully raised blade.
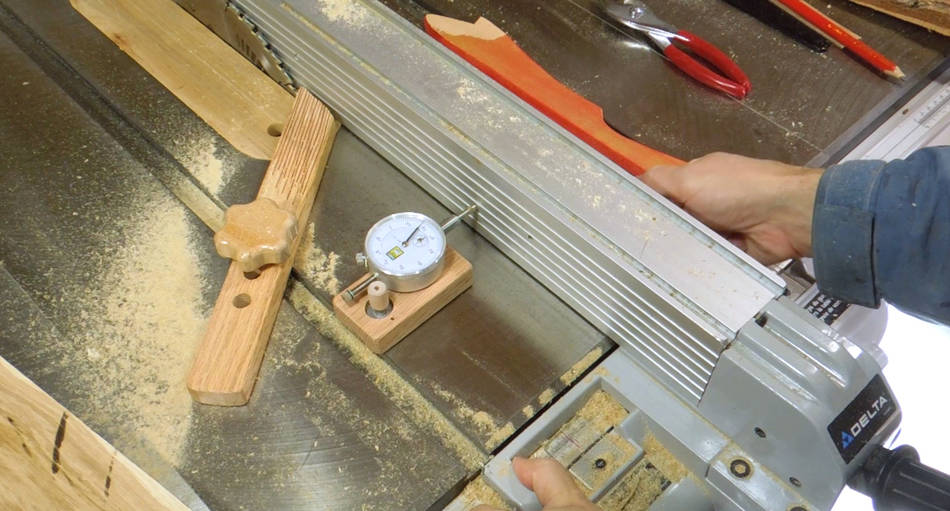 After two passes to cover the whole side, I checked the thickness, then used a dial
indicator to check as I moved the fence by a precise amount.
After two passes to cover the whole side, I checked the thickness, then used a dial
indicator to check as I moved the fence by a precise amount.
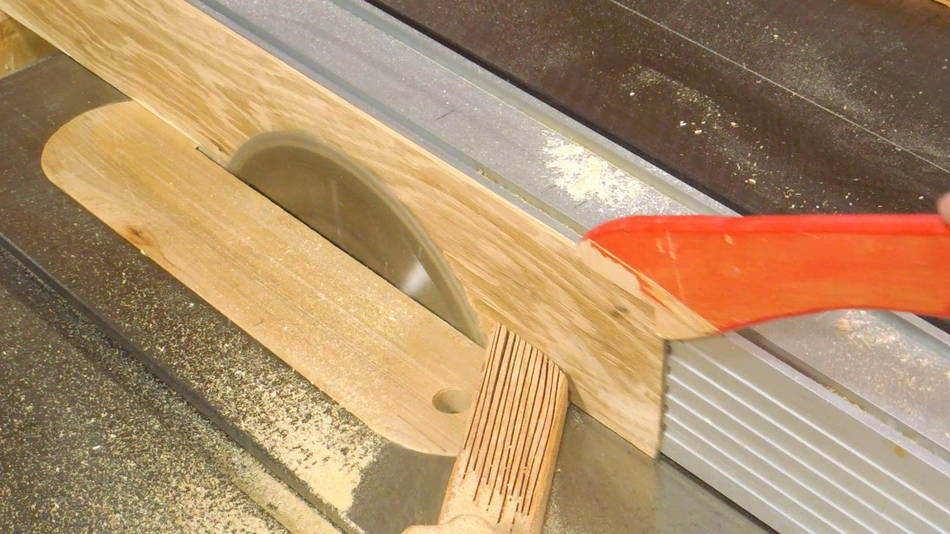 It's important to push the wood through in a continuous motion. Stopping will cause burn marks
on the wood. For the final pass, I pushed the wood through with my fingers, because I'd sometimes slip
off the wood with the push stick. Pushing it through, I put my hand over the fence, with just
my thumb extending over the edge. I figured that way, even if there was kickback, my thumb would
not be able to reach the blade.
It's important to push the wood through in a continuous motion. Stopping will cause burn marks
on the wood. For the final pass, I pushed the wood through with my fingers, because I'd sometimes slip
off the wood with the push stick. Pushing it through, I put my hand over the fence, with just
my thumb extending over the edge. I figured that way, even if there was kickback, my thumb would
not be able to reach the blade.
 Guitar makers usually use thickness sanders to get the wood
to its final thickness. So I figured, giving it a sanding to smooth it over would be a
good idea. I didn't do too much sanding though to avoid making the thickness inconsistent.
Guitar makers usually use thickness sanders to get the wood
to its final thickness. So I figured, giving it a sanding to smooth it over would be a
good idea. I didn't do too much sanding though to avoid making the thickness inconsistent.
 Finally, going over the wood with a scraper.
That worked better than sanding and left a smoother surface.
Finally, going over the wood with a scraper.
That worked better than sanding and left a smoother surface.
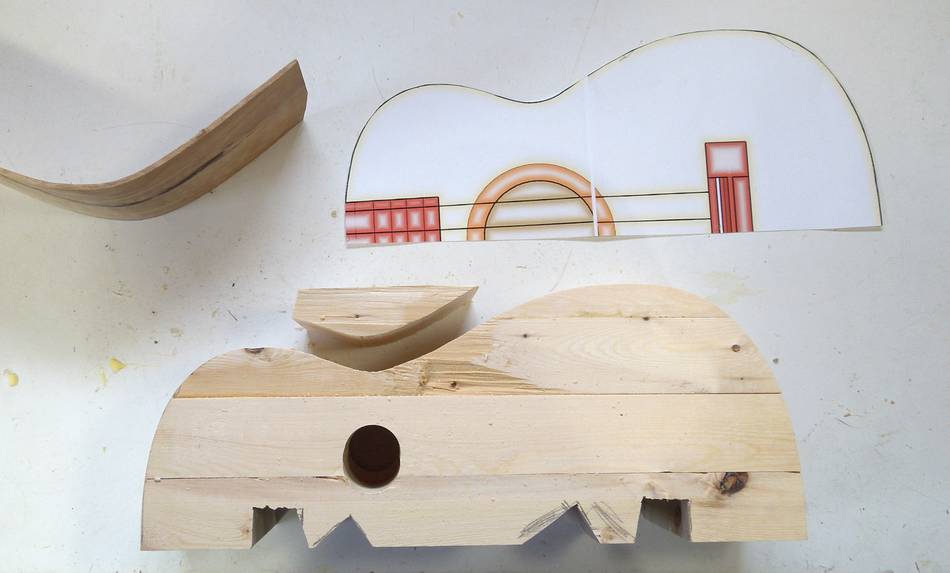 I used the shape of my Ukulele Sketchup CAD model to make a 1:1 printout of the profile,
using my BigPrint program, as usual.
I used the shape of my Ukulele Sketchup CAD model to make a 1:1 printout of the profile,
using my BigPrint program, as usual.
The next challenge was figuring out how to bend the wood around that form.
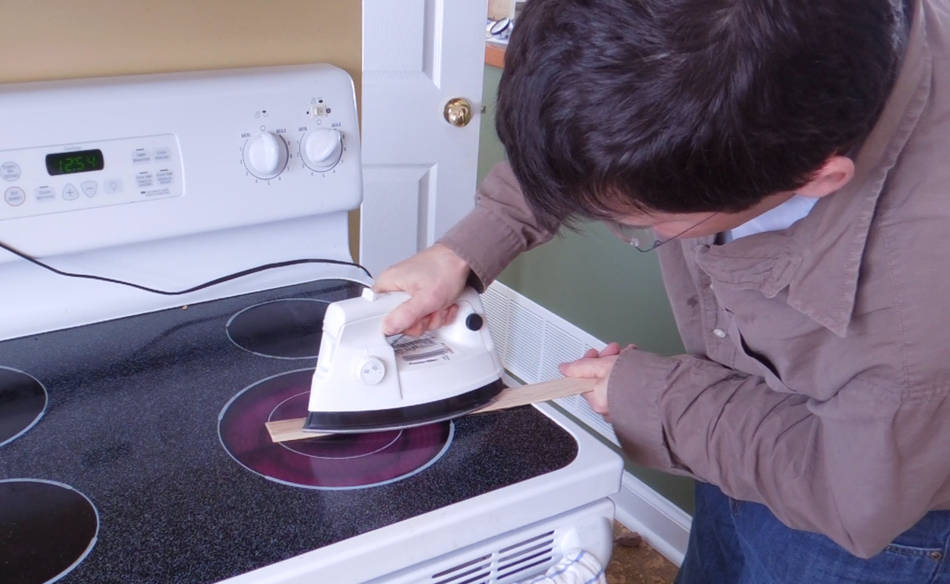
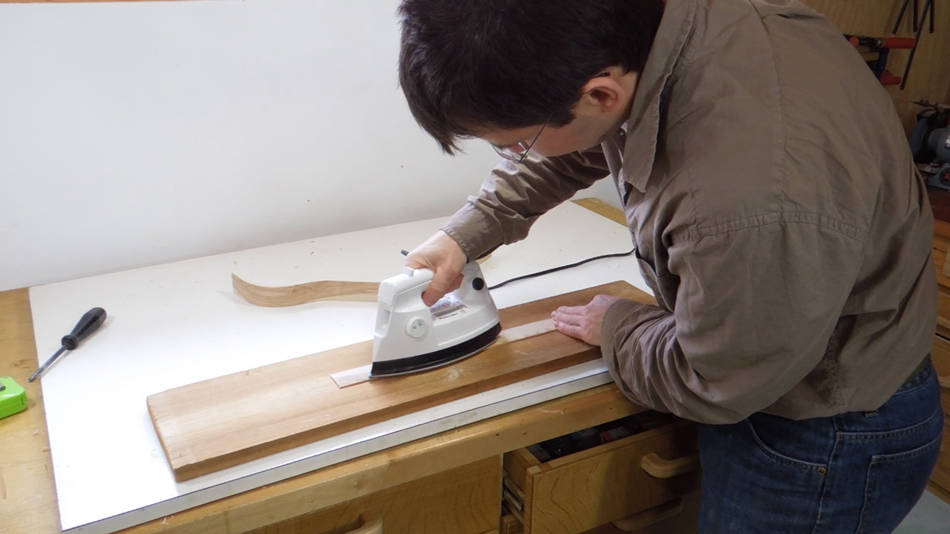 Heat and moisture both make wood easier to bend. Some guitar makers use a hot piece of
pipe to bend it over. Thinking of what I have in my house, I figured a steam iron
would be a good way to apply heat and moisture. I cut some more thin strips of oak
to try it.
Heat and moisture both make wood easier to bend. Some guitar makers use a hot piece of
pipe to bend it over. Thinking of what I have in my house, I figured a steam iron
would be a good way to apply heat and moisture. I cut some more thin strips of oak
to try it.
 The steam iron certainly helped make the wood more bendable, but it was hard to do the whole
piece, and with 2.5 mm thick sides around the relatively tight curves, some of the wood cracked.
The steam iron certainly helped make the wood more bendable, but it was hard to do the whole
piece, and with 2.5 mm thick sides around the relatively tight curves, some of the wood cracked.
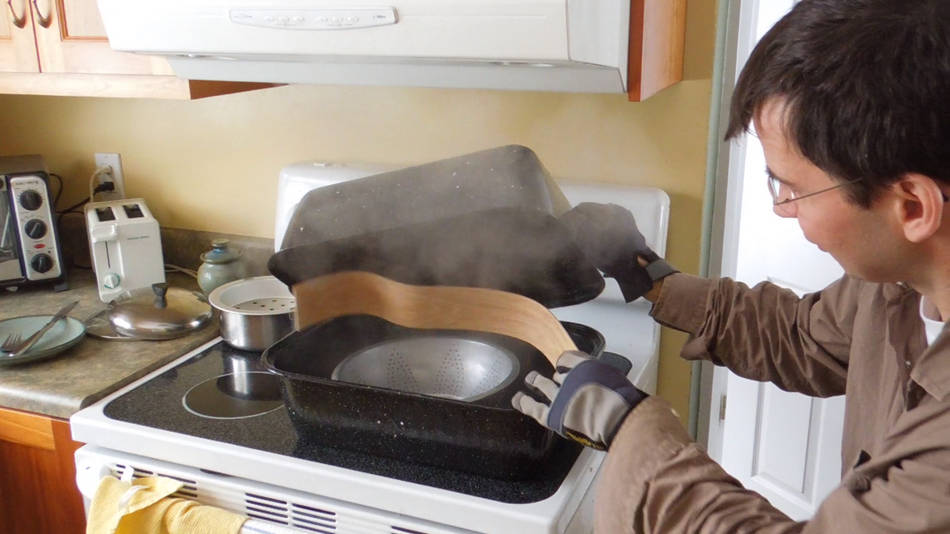
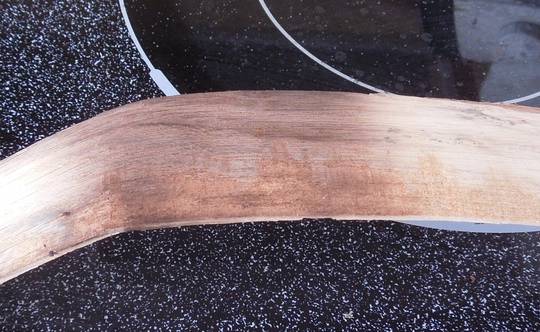 I figured, maybe I don't have enough heat. I experimented with a heat gun, but that realy
dried out the wood. Then I tried it with heat from both sides by ironing the wood on my stove
top. But it's easy to overdo it and I ended up charring the wood a little bit.
I figured, maybe I don't have enough heat. I experimented with a heat gun, but that realy
dried out the wood. Then I tried it with heat from both sides by ironing the wood on my stove
top. But it's easy to overdo it and I ended up charring the wood a little bit.
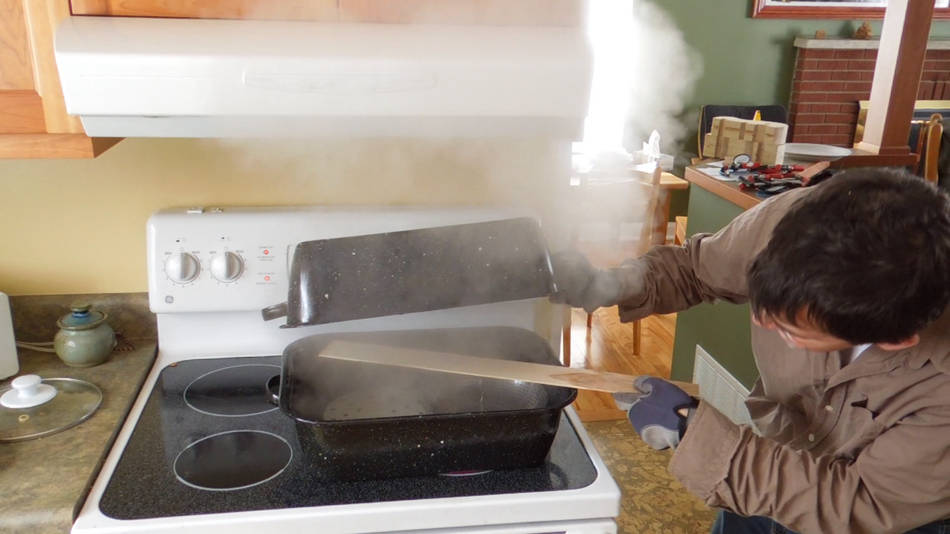 So I figured, steaming the wood is the way to go.
A turkey roasting pan is big enough to steam the whole side.
I bought this one at a thrift store for $6.
So I figured, steaming the wood is the way to go.
A turkey roasting pan is big enough to steam the whole side.
I bought this one at a thrift store for $6.
Turkey roasting pans aren't meant to be used on a stovetop, and they are not flat on the bottom, so not ideal. I pre-heated the water to a boil before dumping it into the roating pan. The non-flat bottom was ok for keeping the water boiling when placed on the largest burner on my stove.
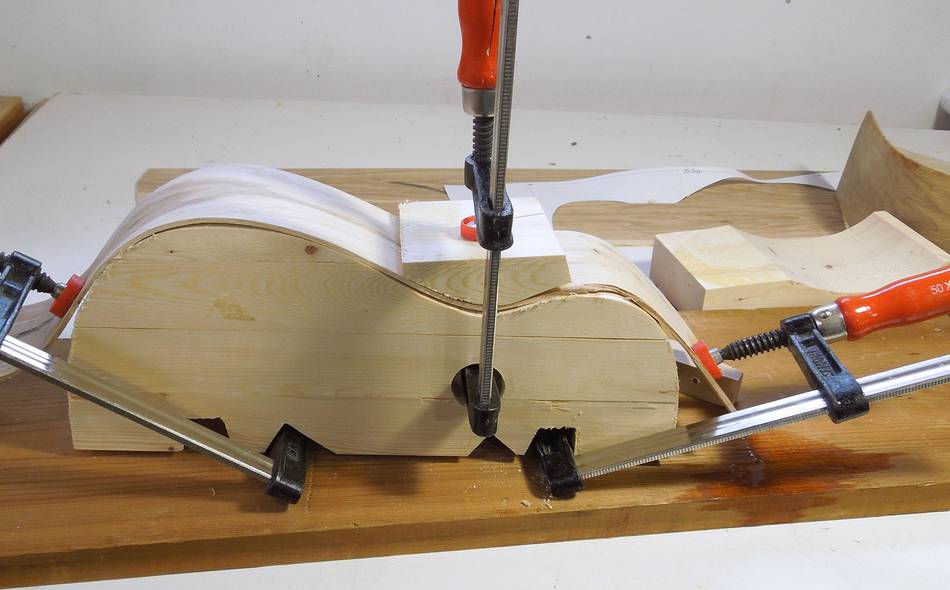
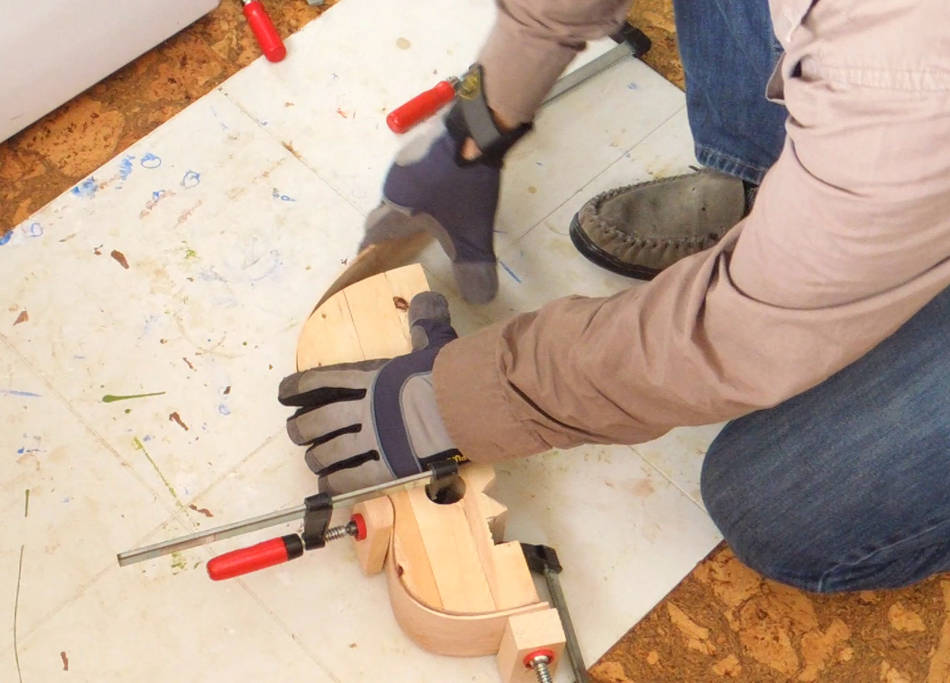 Bending the steamed strip around the sides of my form.
Gloves are very handy — the wood is too hot to
touch, and I have to work fast before it cools down too much.
Bending the steamed strip around the sides of my form.
Gloves are very handy — the wood is too hot to
touch, and I have to work fast before it cools down too much.
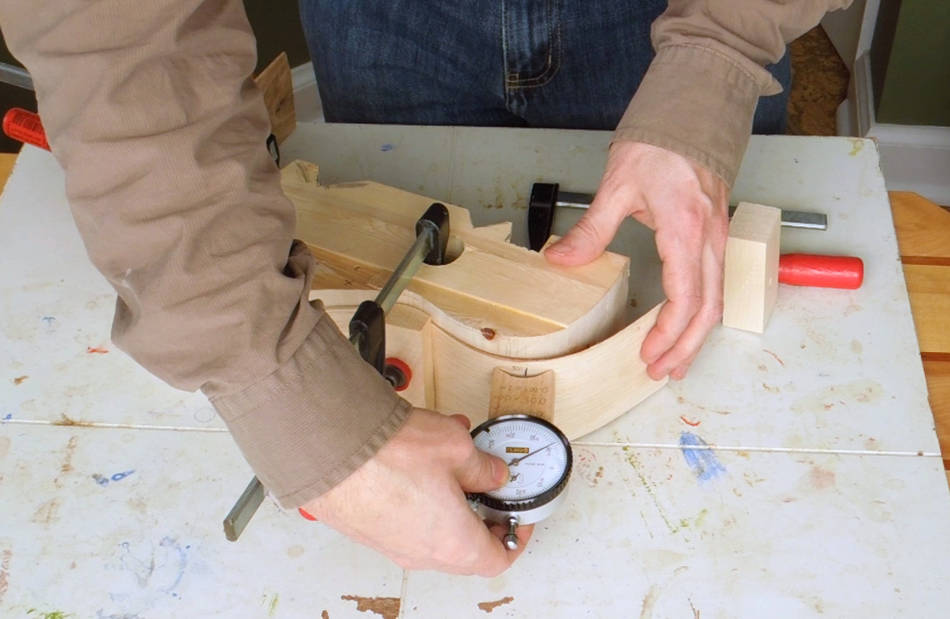 I left the strip bent around my form for 48 hours. But unclamping it, I got quite a lot of
spring-back in the wood.
I left the strip bent around my form for 48 hours. But unclamping it, I got quite a lot of
spring-back in the wood.
 I was curious how much the wood sprung back by, so I built a simple radius gauge
using a dial indicator mounted in a block of wood. I adjusted the dial indicator
to read zero when the gauge is pushed against a flat surface.
I was curious how much the wood sprung back by, so I built a simple radius gauge
using a dial indicator mounted in a block of wood. I adjusted the dial indicator
to read zero when the gauge is pushed against a flat surface.
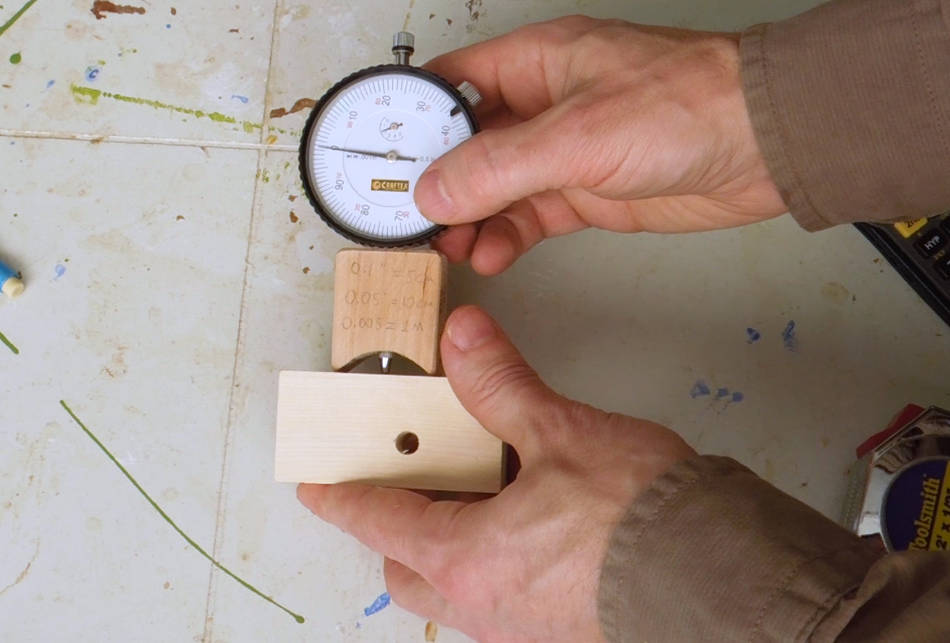
The gauge's wooden block is 3.15 cm wide, with the dial indicator in the middle. With that geometry, dividing 500 by the dial indicator reading (which is in thousandths of an inch) gives the radius of curvature in centimeters.
I made it 3.15 cm wide because that would give a 0.1" (100 thousandhs) with a 5 cm radius. I worked that out with using the Pythagorean theorem.
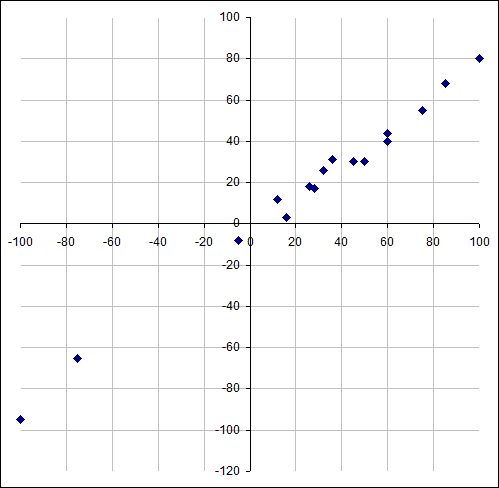
 I wanted to know what the relationship between bent-to radius and relaxed-to radius was.
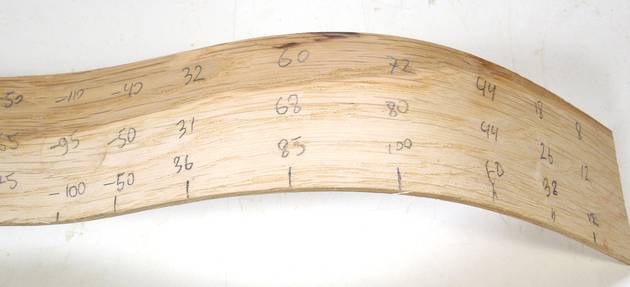
So I took a lot of readings along the length of the strip while it was still clamped to
the bending form, and then took the readings again once unclamped. I graphed the
dial indicator readings, with initial bend on the horizontal, and relaxed-to bend
on the vertical. The units are in dial indicator readings (higher numbers mean more
curved, smaller radius). The negative readings are for the inside-bend in the middle.
I wanted to know what the relationship between bent-to radius and relaxed-to radius was.
So I took a lot of readings along the length of the strip while it was still clamped to
the bending form, and then took the readings again once unclamped. I graphed the
dial indicator readings, with initial bend on the horizontal, and relaxed-to bend
on the vertical. The units are in dial indicator readings (higher numbers mean more
curved, smaller radius). The negative readings are for the inside-bend in the middle.
By the looks of it, there appeared to be a linear relationship, with the wood relaxing about 20% of its curvature immediately after unclamping.
 So I figured if I made a bending form that had 20% greater curvature than I needed, the wood
should relax to what I needed after unclamping. But how to come up with such a shape?
So I figured if I made a bending form that had 20% greater curvature than I needed, the wood
should relax to what I needed after unclamping. But how to come up with such a shape?
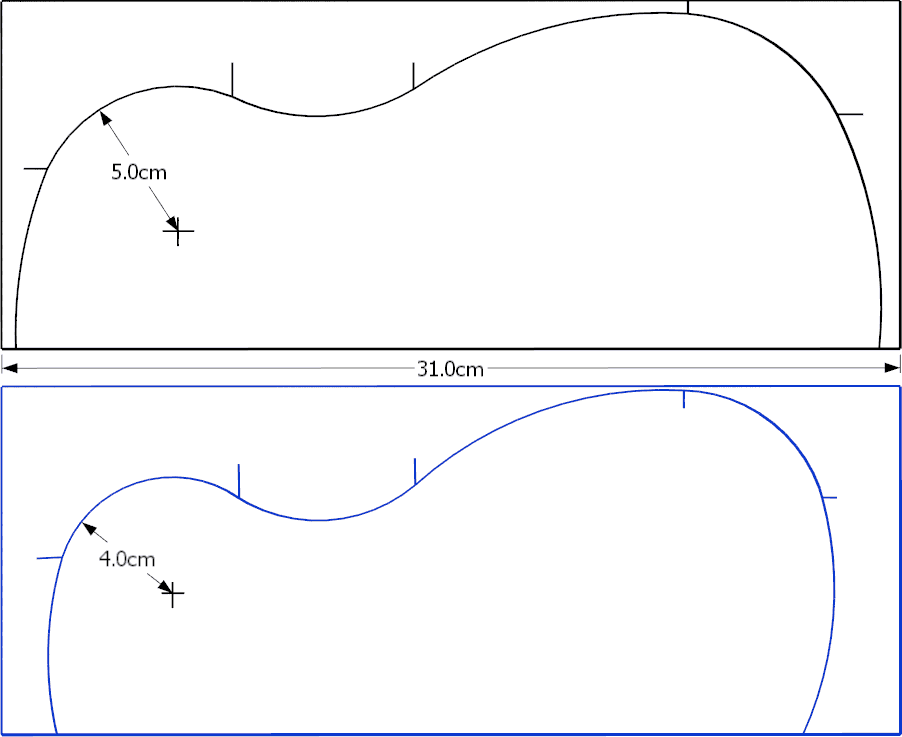
I started by approximating the ukulele shape as a series of circular arcs. The tick-marks on this drawing indicate the starts and ends of the circular arc segments.
I then reduced the radius of each arc by 20%, then adjusted the length of each arc to be what it was before. After that, I had to rotate the arcs so that they lined up with each other in a straight line again.
The final shape is the one you can see at left.
You may wonder what tricks I used to do this, but there were no tricks. It was a lot of manually changing parameters and lining it up by eye.

 I thought some more about methods for steaming the wood. The turkey roasting pan is barely big enough
for tenor ukulele, so you wouldn't be able to use it when making a guitar.
My next thought was to try to add a "chimney" to my rice cooker.
Rice cookers are about 600 watts. So I should expect to get about half as much steam out of
it as a kettle.
I thought some more about methods for steaming the wood. The turkey roasting pan is barely big enough
for tenor ukulele, so you wouldn't be able to use it when making a guitar.
My next thought was to try to add a "chimney" to my rice cooker.
Rice cookers are about 600 watts. So I should expect to get about half as much steam out of
it as a kettle.
I made a chimney out of some 3" ABS pipe that I had left over from making the balancing board. For a guitar, you would want to use 5" pipe (might be hard to find in plastic, maybe try galvanized heating duct piping). Shortly after, I saw the inlet pipe for a leaf blower in the neighbour's garbage. That would certainly be big enough.
I used a piece of solid pine to attach the pipe, figuring the steam would eventually destroy plywood. But the steam caused quite a bit of warping in the pine, so maybe plywood would have been better.
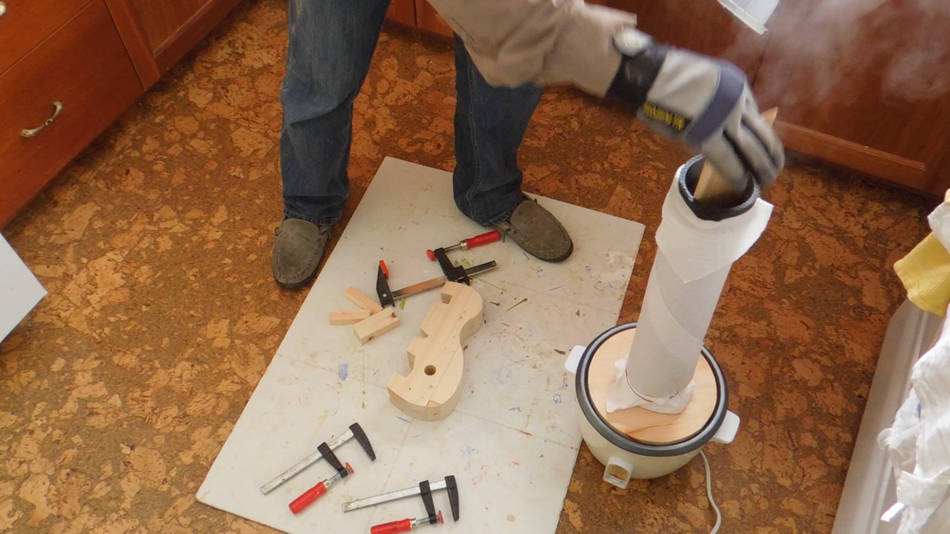 I also wrapped some paper towel around the pipe to insulate it.
Measuring the temperature at the top of the pipe, I was able to
get it up to 90 degrees Celcius, but only if I partially covered the end
of the pipe. Otherwise, there was too much convection pulling fresh air
through the chimney.
I also wrapped some paper towel around the pipe to insulate it.
Measuring the temperature at the top of the pipe, I was able to
get it up to 90 degrees Celcius, but only if I partially covered the end
of the pipe. Otherwise, there was too much convection pulling fresh air
through the chimney.
 I also realized that, over the course of a few days, my test sample relaxed further.
So I made two bending forms of the over-bent shape, so that I could keep the strips clamped
to the bending form until I was ready to use them.
I also realized that, over the course of a few days, my test sample relaxed further.
So I made two bending forms of the over-bent shape, so that I could keep the strips clamped
to the bending form until I was ready to use them.
 I wasn't satisfied with how I had clamped one of my strips to the bending form.
The turkey roasting pan was very useful for re-steaming the bent part.
It was interesting to see to what extent the wood re-straightened itself just from
re-steaming. I guess it takes a lot to truly bend wood into submission!
I wasn't satisfied with how I had clamped one of my strips to the bending form.
The turkey roasting pan was very useful for re-steaming the bent part.
It was interesting to see to what extent the wood re-straightened itself just from
re-steaming. I guess it takes a lot to truly bend wood into submission!
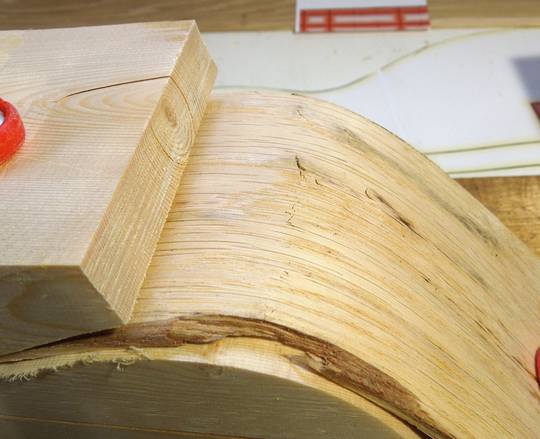
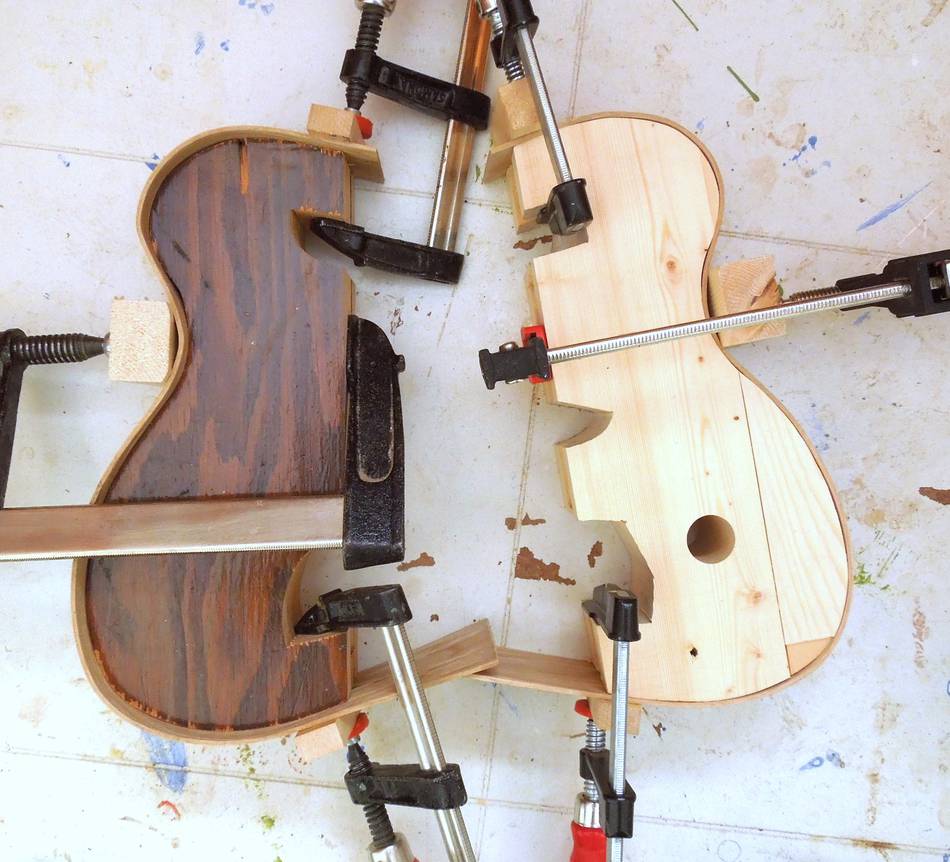
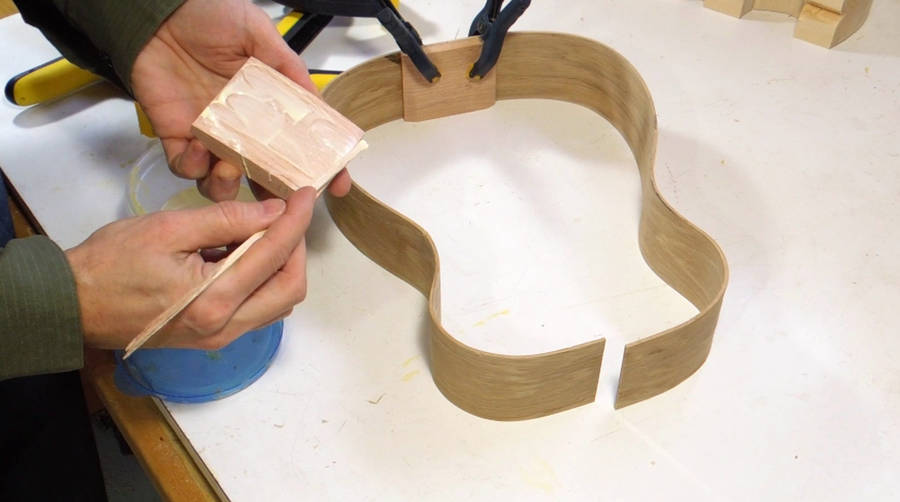
 The bent sides, straight off the form. Fairly close to what I had aimed
for, but not quite identical. Fortunately, I didn't need an exact match,
so I was pretty happy with how the parts came out.
The bent sides, straight off the form. Fairly close to what I had aimed
for, but not quite identical. Fortunately, I didn't need an exact match,
so I was pretty happy with how the parts came out.
 I made some neck and tail blocks. The neck block is slightly tapered on both sides
to match the shape of the wood. I did the initial taper on the table saw,
then used a belt sander to fine tune it.
I made some neck and tail blocks. The neck block is slightly tapered on both sides
to match the shape of the wood. I did the initial taper on the table saw,
then used a belt sander to fine tune it.
 I glued the blocks on with just regular yellow glue.
See also: Pat Hawley bending ukekele sides
Next: Making the sound board
To my ukulele page
![]()