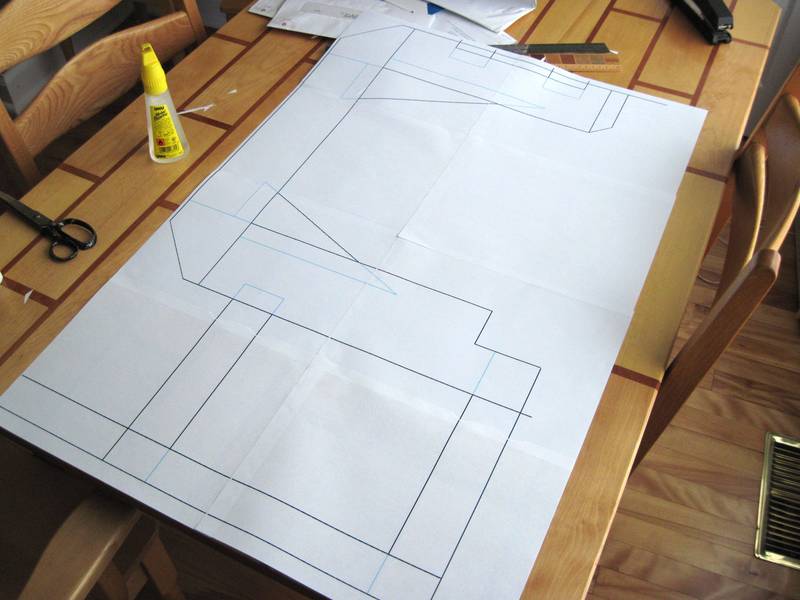
 I started by designing the bandsaw in SketchUp. Then I used my
BigPrint program to print a 1:1 layout of the frame over eight pieces of paper. I cropped off
at the top wheel mounts to keep the printout on eight sheets.
The laminated frame construction of my second bandsaw
worked out really well, so this one has the same basic frame design.
I started by designing the bandsaw in SketchUp. Then I used my
BigPrint program to print a 1:1 layout of the frame over eight pieces of paper. I cropped off
at the top wheel mounts to keep the printout on eight sheets.
The laminated frame construction of my second bandsaw
worked out really well, so this one has the same basic frame design.
 Next came the job of cutting up the wood. I cut up three panels from some used Ikea shelving
for most of the boards, plus all the softwood scraps I had lying around my workshop.
Next came the job of cutting up the wood. I cut up three panels from some used Ikea shelving
for most of the boards, plus all the softwood scraps I had lying around my workshop.
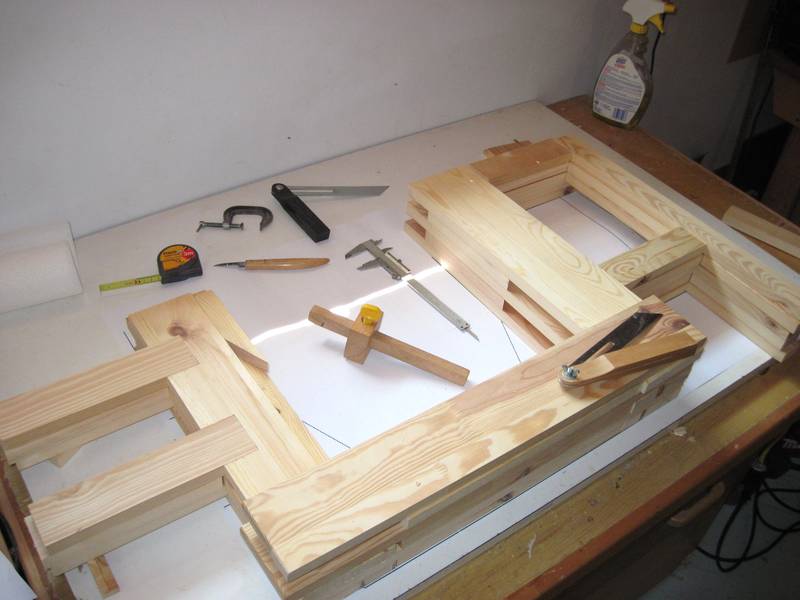
 The diagonal braces, or gussets, are one of the things that gives the frame a lot of strength.
They help to brace the corners, and also brace the top and bottom horizontal
members against twisting. The wheels are mounted in front of the frame, and the offset
load of the blade tension exerts a twisting force on parts of the frame.
The diagonal braces, or gussets, are one of the things that gives the frame a lot of strength.
They help to brace the corners, and also brace the top and bottom horizontal
members against twisting. The wheels are mounted in front of the frame, and the offset
load of the blade tension exerts a twisting force on parts of the frame.
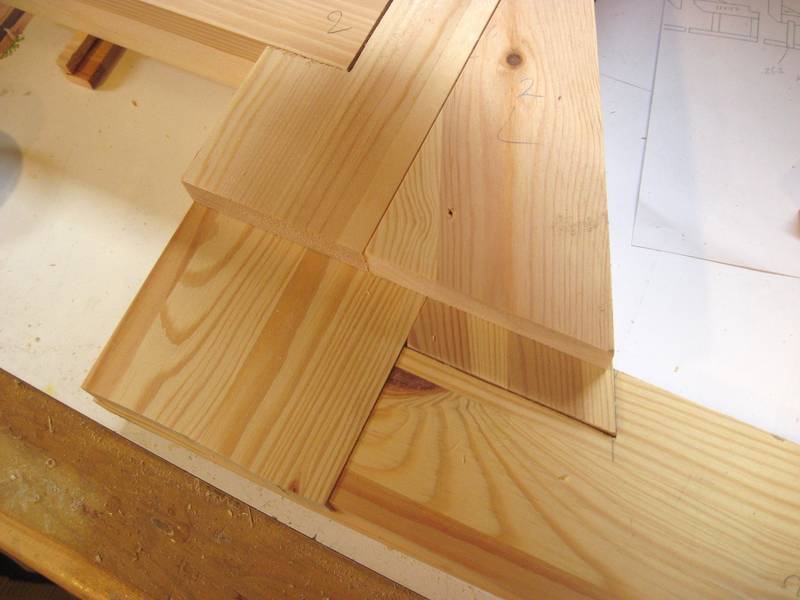
The gussets alternately protrude into the horizontal or vertical members of the frame to really tie into those pieces, sort of acting like a triple mortise and tenon joint on each end.
 I tried to get the fit just right so that the gussets form a solid glue joint on all sides.
I cut the triangles a bit too large, then cut them off on the shortest side to make them fit.
I tried to get the fit just right so that the gussets form a solid glue joint on all sides.
I cut the triangles a bit too large, then cut them off on the shortest side to make them fit.
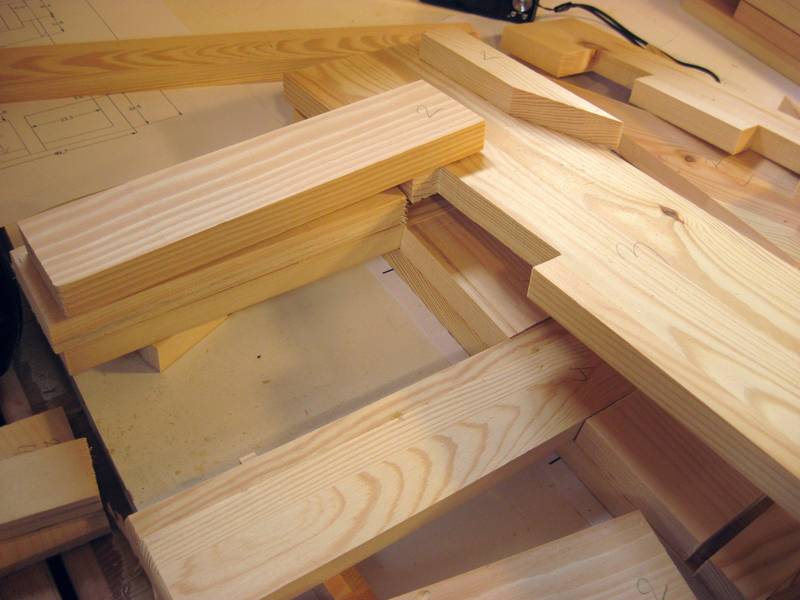 Here's showing how the top wheel mount fits into the frame. The outside layers of the
wheel mounts protrude into the frame to form a sort of double mortise and tenon joint.
Here's showing how the top wheel mount fits into the frame. The outside layers of the
wheel mounts protrude into the frame to form a sort of double mortise and tenon joint.
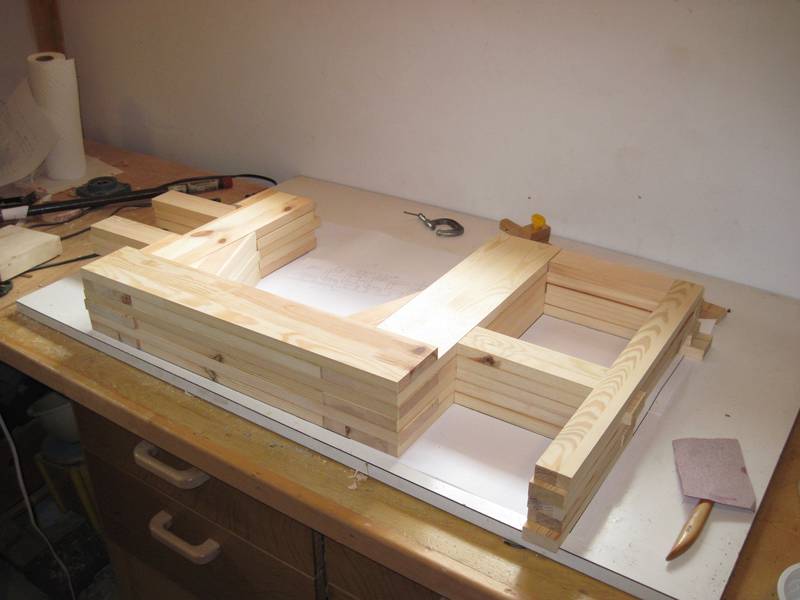 Most of the pieces stacked up, minus the back layer, which isn't a full layer.
It's a fair bit of lumber. But on the plus side, with most of it comprised of short pieces, it's a good way to use up scrap lumber.
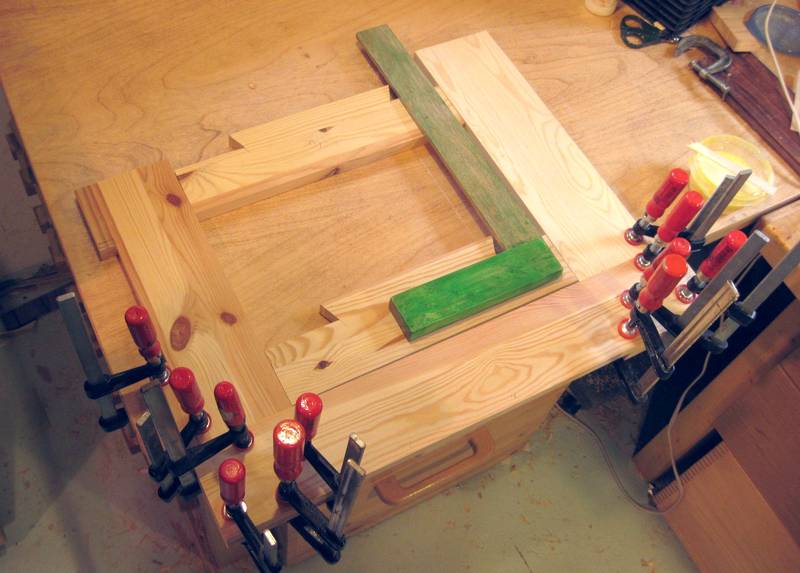 I started by gluing the front two horizontals and the front-most vertical pieces together.
I wanted to make sure I got the geometry of these just right so I could line the subsequent layers up with those ones. So I temporarily used two of the short vertical post pieces as spacers between the two horizontals to get that distance just right.
 Next I added the piece in between the horizontals, the gussets to go with that piece, and the next layer
of the post. This brought my post up to three layers.
Next I added the piece in between the horizontals, the gussets to go with that piece, and the next layer
of the post. This brought my post up to three layers.
When I built my second bandsaw, I ended up with a slight twist in my final frame that I had to plane out, so this time, I was careful to ensure it was flat while I glued it up. My workbench is sufficiently flat, so I clamped one part to the edge of the bench and used a weight to hold the other piece flat on the bench as I glued up the layers of the post.
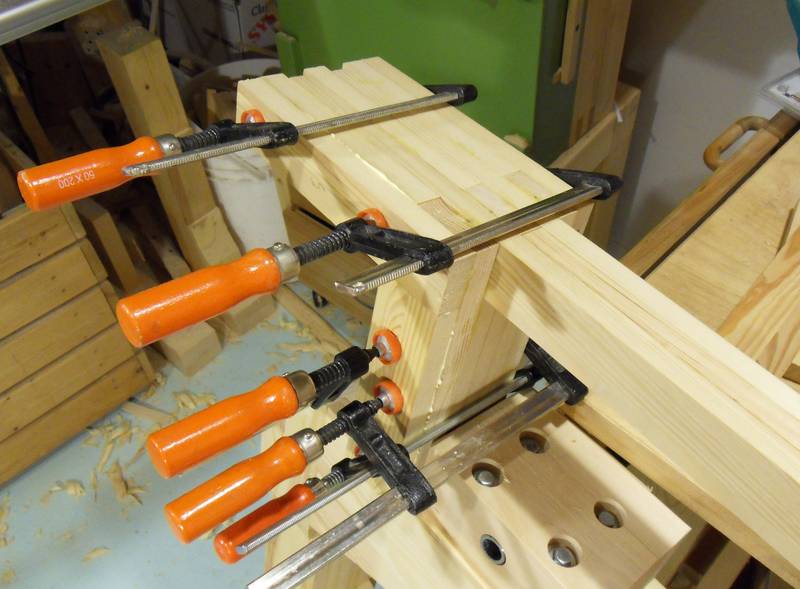
 Next adding the horizontal pieces of the second layer. I have a strip of wood
clamped to the ends of it (near the workbench edge) to ensure that I don't end up with any
twist in those parts.
Next adding the horizontal pieces of the second layer. I have a strip of wood
clamped to the ends of it (near the workbench edge) to ensure that I don't end up with any
twist in those parts.
Once I had this much added, the frame was quite stiff to twisting, so any subsequent layers just conformed to the existing shape.
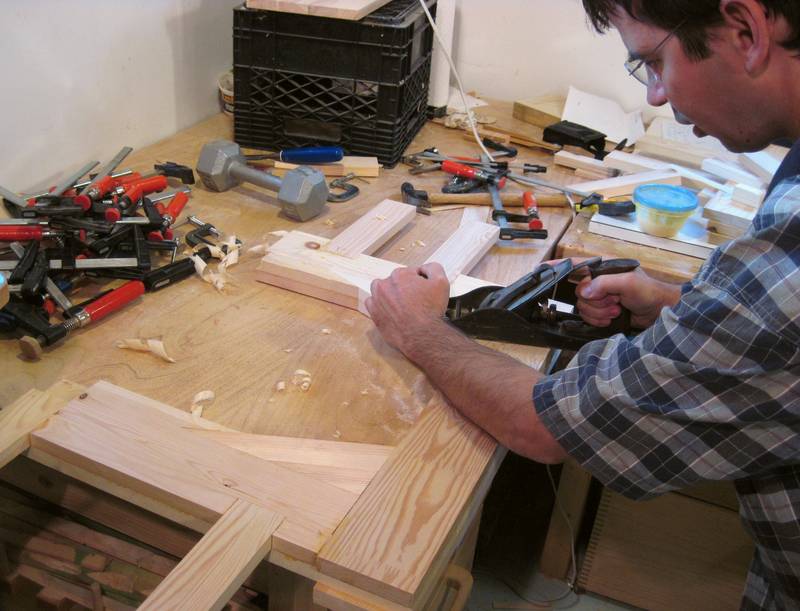 On my previous bandsaw, I planed all the lumber to make sure I had a consistent thickness. But for
this one, I just used the lumber as it was. As it turned out, it was not all consistently 18 mm,
so I had to use a plane to flatten it after every layer.
On my previous bandsaw, I planed all the lumber to make sure I had a consistent thickness. But for
this one, I just used the lumber as it was. As it turned out, it was not all consistently 18 mm,
so I had to use a plane to flatten it after every layer.
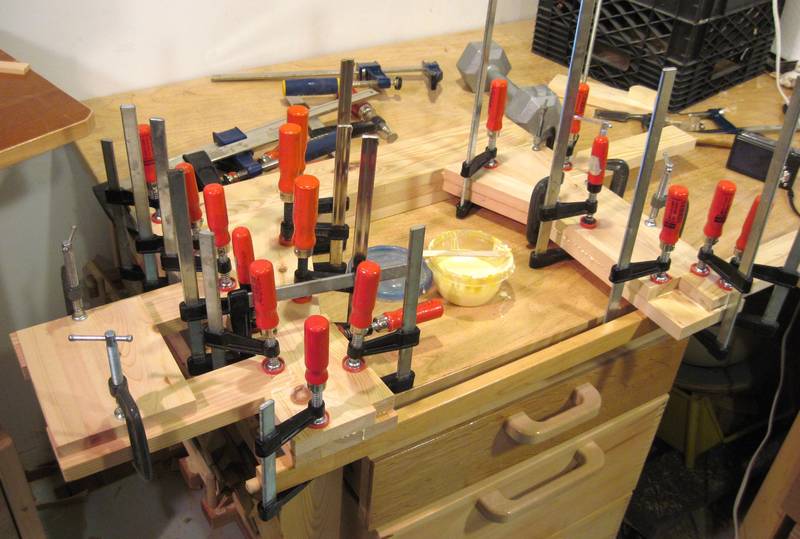
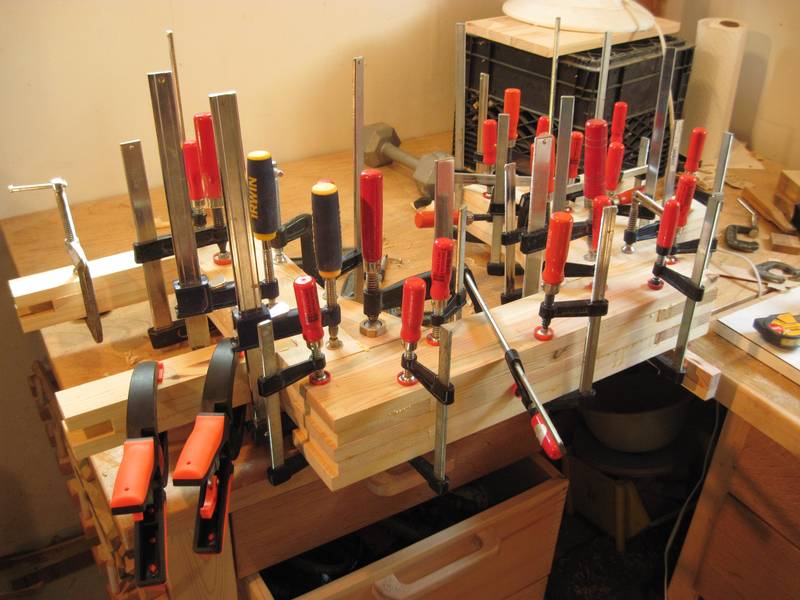 Gluing up the second last layer. It helps to have lots of clamps. If you don't have quite as many
clamps, you could glue up part of one layer at a time, or use screws to hold the pieces together
while the glue dries. Or maybe try making some clamps
Gluing up the second last layer. It helps to have lots of clamps. If you don't have quite as many
clamps, you could glue up part of one layer at a time, or use screws to hold the pieces together
while the glue dries. Or maybe try making some clamps
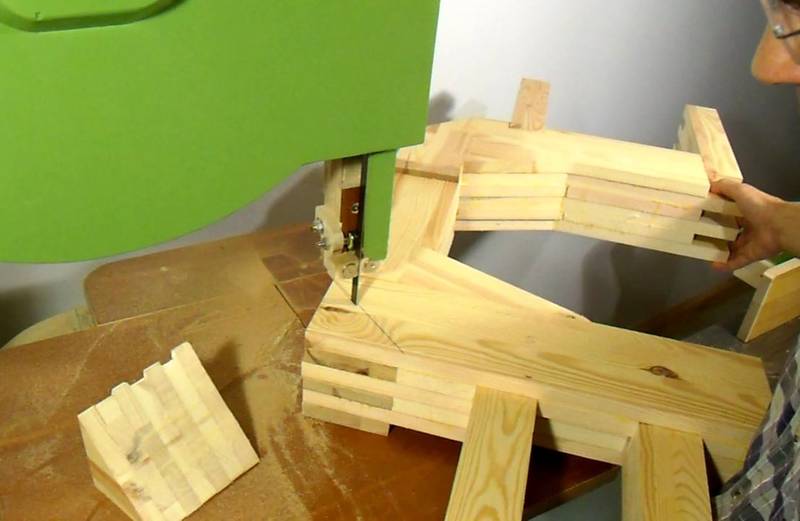 I prefer to cut some members a bit long and trim them to final length after gluing up.
A bandsaw is very handy for this job, but any hand saw could be used, or you could cut it with
a circular saw from both sides.
I prefer to cut some members a bit long and trim them to final length after gluing up.
A bandsaw is very handy for this job, but any hand saw could be used, or you could cut it with
a circular saw from both sides.
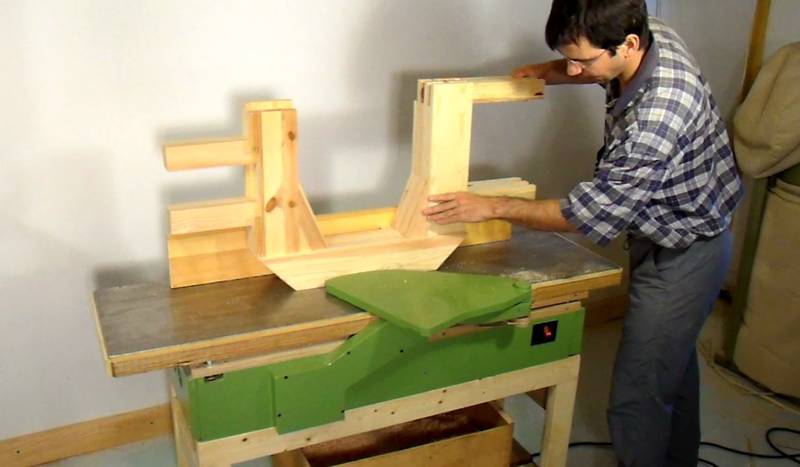 I plane the edges smooth to hide any misalignment. For the back edge I could use
my homemade jointer, but I had to do the
other edges with a spokeshave.
I plane the edges smooth to hide any misalignment. For the back edge I could use
my homemade jointer, but I had to do the
other edges with a spokeshave.
 I added the horizontal on the bottom, and some of the layers of the motor mount last.
I left out those parts initially so I could still get in there with a drill to
drill the pilot holes for the mounting holes of the bottom wheel mount.
I added the horizontal on the bottom, and some of the layers of the motor mount last.
I left out those parts initially so I could still get in there with a drill to
drill the pilot holes for the mounting holes of the bottom wheel mount.
"But wouldn't plywood be stronger?"
I thought it was obvious that solid lumber is stronger than plywood for this type
of application but I keep getting that question. The problem is that wood is
only strong along the direction of the grain, and plywood has half the grain at a
right angle. This makes it strong in two directions, but not good
for making beams. You can try it by cutting a board from plywood
and another of the same size from solid wood. Now support it on either
end and sand on it in the middle. You will see.
Next: Making the wheels