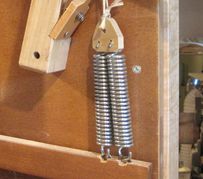
 could withstand. So I got myself some new stronger tension springs, and cranked
up the tension.
could withstand. So I got myself some new stronger tension springs, and cranked
up the tension.
 While the frame of the bandsaw could easily handle the tension,
I heard faint creaking noises from the wheels when I slowly turned them by hand.
On further investigation, I found that my upper wheel was
creaking slightly. I mounted a dial displacement indicator to the wheel, and was able
to measure a .001" pop back and forth of the cast iron bearing flange with respect
to the wheel. That in itself is pretty insubstantial, but I knew that
if it moved at all, it would surely work itself loose over time!
While the frame of the bandsaw could easily handle the tension,
I heard faint creaking noises from the wheels when I slowly turned them by hand.
On further investigation, I found that my upper wheel was
creaking slightly. I mounted a dial displacement indicator to the wheel, and was able
to measure a .001" pop back and forth of the cast iron bearing flange with respect
to the wheel. That in itself is pretty insubstantial, but I knew that
if it moved at all, it would surely work itself loose over time!
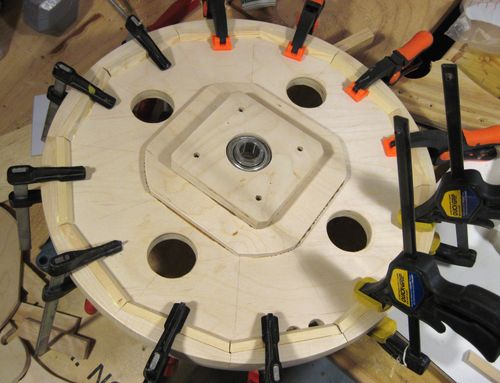
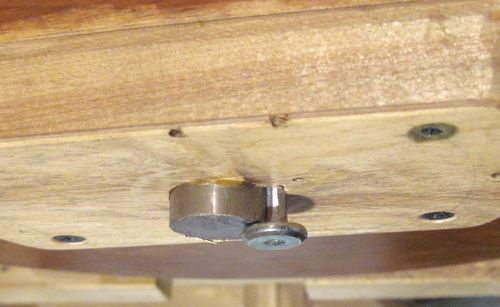
The nature of the problem was that my cast iron flange bearings were not attached
rigidly enough to the wheels. I had mounted them at a 45-degree angle to each
other, so I couldn't just replace my wood screws with washers with bolts going
through the wheel to press them together. I didn't really want to do that anyway,
because as the wood expands and contracts with humidity, the bolts would eventually
become loose too.
 The cast iron wasn't glued to the wood. Mostly, the flanges were held in place
laterally by four blocks of wood that I glued around the flanges.
For 150 pounds of blade tension, these blocks proved to be inadequate.
The cast iron wasn't glued to the wood. Mostly, the flanges were held in place
laterally by four blocks of wood that I glued around the flanges.
For 150 pounds of blade tension, these blocks proved to be inadequate.
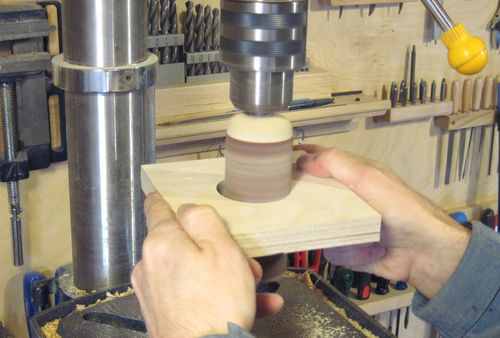
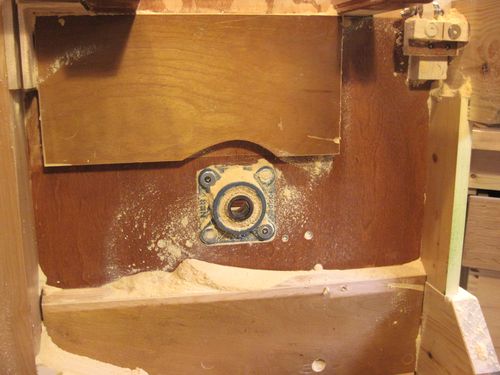
So I set out to make new wooden flanges. Although wood is not as strong as cast iron, I knew I could count on a really good glue bond between a wooden flange and the wooden wheel.
I reused the bearings from my self-aligning bearing flanges.
The bearing had an outside spherical surface of exactly 52 mm in diameter.
But my Forstner drill bit set is in imperial sizes, and the closest
I had was 2", which works out to 50.8 mm. So I had to expand the holes
with a sanding drum on my drill press. A spindle sander would have been better,
but I don't have one.
 I expanded the hole enough to be able to get the bearing into the flanges with a very
tight fit. The fit needed to be tight or the bearing would be able to work itself
loose again. For industrial applications, any bearing mounted inside a wheel is
always mounted with a press fit for this very same reason. A set screw simply
wouldn't do.
I expanded the hole enough to be able to get the bearing into the flanges with a very
tight fit. The fit needed to be tight or the bearing would be able to work itself
loose again. For industrial applications, any bearing mounted inside a wheel is
always mounted with a press fit for this very same reason. A set screw simply
wouldn't do.
 Having replaced the bearings and flanges, the new bearings were in a position just
a fraction of a millimeter from where the old ones were, so the wheel needed re-truing
and re-balancing.
Having replaced the bearings and flanges, the new bearings were in a position just
a fraction of a millimeter from where the old ones were, so the wheel needed re-truing
and re-balancing.
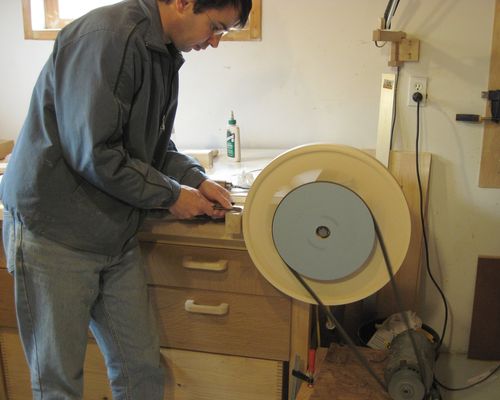
I had previously trued the upper wheel by mounting it on my extra long drive shaft of the bandsaw and spinning it up that way. But I had since shortened this shaft to its final length. So I made a temporary pulley, and attached it to the upper wheel with a pair of wood screws. This was enough to spin up the upper wheel on my workbench. Using some chisels on the wheels, in a lathe-like fashion, I turned it to run true again. When I checked the wheel with a dial indicator, it was within a range of 0.002" (.05 mm) all the way around.
I also found a slight bit of creak on my lower wheel. The 7'8" shaft fit reasonably
rightly in the 7/8" hole, but apparently, not tightly enough.
So I figured, why not just glue the shaft into the wheel?
If the glue holds all is well. If it works its way loose, I can always get
that shaft out and try something else. Worst case, I'd just have to make a new wheel.
 I found that with the inner tube bandsaw tires stretched over the wheel,
there was a natural inside
pocket that formed between the rubber inner tube pulling over the edge, and the edge of the
rim. This gradually filled with sawdust. The enclosure tends to contain lots of airborne
sawdust, and centrifugal force would force some of it into this pocket.
I found that with the inner tube bandsaw tires stretched over the wheel,
there was a natural inside
pocket that formed between the rubber inner tube pulling over the edge, and the edge of the
rim. This gradually filled with sawdust. The enclosure tends to contain lots of airborne
sawdust, and centrifugal force would force some of it into this pocket.
So I added these little blocks of wood to occupy this cavity, so that I wouldn't get as much sawdust collecting in the wheels.
On later bandsaws, I just made the wheel one disk of the right thickness to avoid this.
Looking for sources of vibration in the saw, I realized that my back pulley did not entirely run true. I had cut this pulley out on the table saw, as opposed to turning it on its shaft.
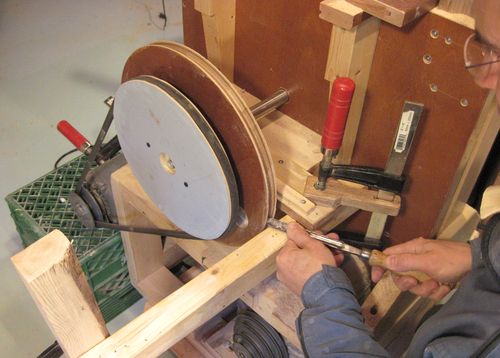 The temporary pulley that I used to true the upper wheel worked
out reasonably well. So I mounted that same pulley to the main pulley. That way,
I was able to spin up the lower pulley without having a belt on it.
This allowed me to use turning chisels to true the lower pulley.
The temporary pulley that I used to true the upper wheel worked
out reasonably well. So I mounted that same pulley to the main pulley. That way,
I was able to spin up the lower pulley without having a belt on it.
This allowed me to use turning chisels to true the lower pulley.
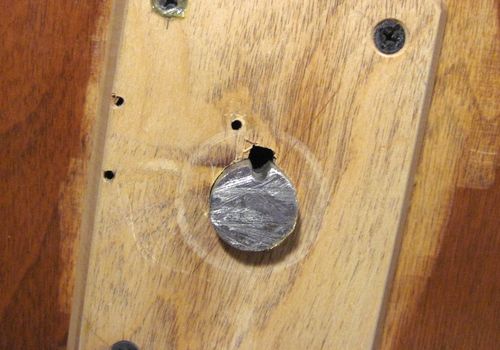
But on turning the pulley, I slipped with the chisel and it caught on the spinning pulley, stopping it instantly. But my lower bandsaw wheel, spinning on the same shaft, acted as a flywheel. The momentum from the lower wheel ended up breaking the screw that I used to protrude from the pulley into a hole in the shaft.
So I figured the solution was to just drill a hole through the shaft
and put a bolt all the way through. Unfortunately, I tried to do that with
a hand drill and broke a drill bit in the process.
So I tried to drill another hole 90 degrees to my first
hole, and broke another drill bit, probably because I hit the remnants of the
drill bit from the first attempt.
 If I wanted to try drilling a third hole through the shaft, I'd have to get a new shaft.
But in my quest to eliminate creaks, I had just glued that shaft into the lower wheel!
So replacing the shaft would entail making a new lower wheel. While this was certainly
an option, I really just wanted to put my bandsaw back together and start using it again.
If I wanted to try drilling a third hole through the shaft, I'd have to get a new shaft.
But in my quest to eliminate creaks, I had just glued that shaft into the lower wheel!
So replacing the shaft would entail making a new lower wheel. While this was certainly
an option, I really just wanted to put my bandsaw back together and start using it again.
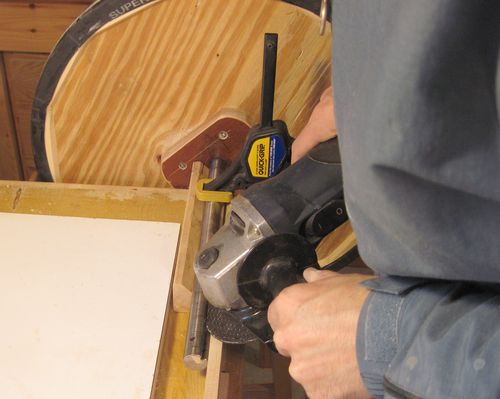
So I ground a keyway into my shaft using an angle grinder. I used a block of hardwood
as a guide, but overall, it was a pretty freehand operation.
 I also filed a keyway into my pulley with a hand file.
 For a key, I just used a big machine screw, which I ground flat on two sides, and
hammered it into the keyway. I left the screw's head on so that I'd be able to
pull it out using a claw hammer.
For a key, I just used a big machine screw, which I ground flat on two sides, and
hammered it into the keyway. I left the screw's head on so that I'd be able to
pull it out using a claw hammer.
On my second bandsaw design, I just put the pulley directly
on the wheel, so that eliminated the whole issue of coupling a wheel to a shaft.
 Finally, after a few weeks of using my bandsaw, I sometimes heard a knocking
sound as the bandsaw was spinning down. By process of elimination, and by carefully
listening in various places, I finally realized that the noise could only be coming
from my lower flange bearing. Other than a slight knock, the bearing was still
functioning perfectly. But it was another thing that I figured would go eventually,
so might as well replace it now.
Finally, after a few weeks of using my bandsaw, I sometimes heard a knocking
sound as the bandsaw was spinning down. By process of elimination, and by carefully
listening in various places, I finally realized that the noise could only be coming
from my lower flange bearing. Other than a slight knock, the bearing was still
functioning perfectly. But it was another thing that I figured would go eventually,
so might as well replace it now.
That bearing has to take the twice the load of the blade tension. Actually, a bit more than that because the lower wheel is cantilevered out from the bearing. So effectively. That bearing gets twice as much load as any of the other bearings in my saw.
Bearings of this size are usually rated for a side load of over 10 kilonewtons,
which works out to over 2000 pounds.
My bandsaw, tensioned to 150 pounds, would only apply just over 300 pounds to the bearing.
So that should be well within the load rating of a good quality bearing.
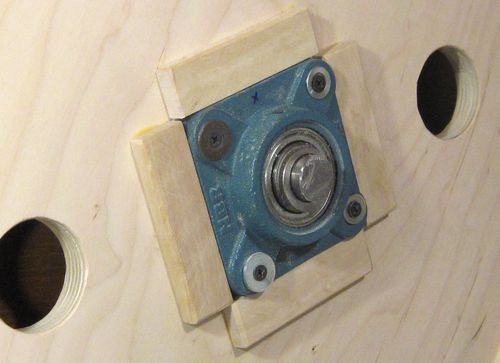
The problem is, I was using cheap Chinese made bearings bought at Princess Auto.
 I wasn't sure if these cheap bearings are all that poor, or if I just managed to get a dud.
So I bought another cheap bearing for $8. I mounted the new bearing in the cast iron
flange I used with the old one.
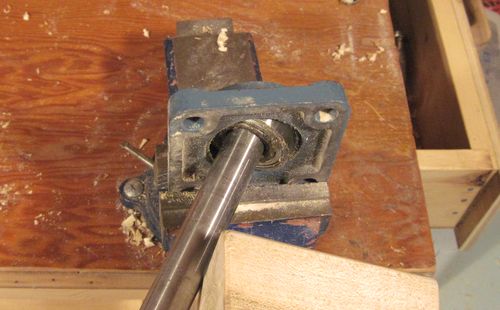
These self-aligning bearings can be removed from their flange or pillow blocks by
turning them sideways by about 30 degrees in just the right direction. This is best
done by holding the flange in a vise, inserting a shaft, and tapping it sideways.
I wasn't sure if these cheap bearings are all that poor, or if I just managed to get a dud.
So I bought another cheap bearing for $8. I mounted the new bearing in the cast iron
flange I used with the old one.
These self-aligning bearings can be removed from their flange or pillow blocks by
turning them sideways by about 30 degrees in just the right direction. This is best
done by holding the flange in a vise, inserting a shaft, and tapping it sideways.
The mating surface between the flange and the bearing is actually spherical, so they fit tightly at any moderate angle.
If the new bearing ends up developing a knock as well, I'll get a good quality bearing from a bearing store. Those cost around $25 each. It's only the lower front bearing that has developed a problem though. The other bearings aren't loaded as heavily.
(Update, three years later: Still using that saw, bearing still good)
More on Building a bandsaw
![]()