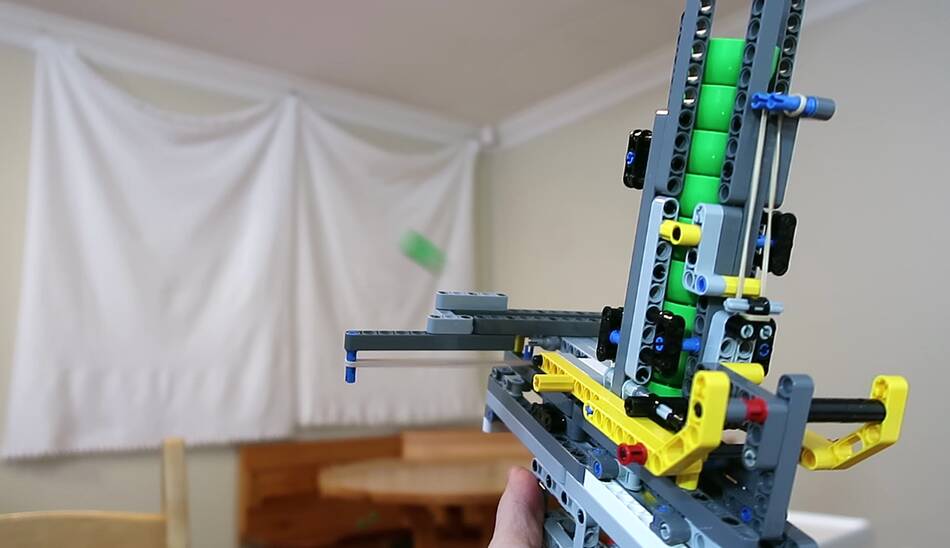
 I built various
Lego contraptions to
shoot the caps from baby food pouches
that our kids like so much. But eventually I took it apart again to reuse
the Lego. But Kurt, our two year old, has been clamoring for the Lego
cap shooter ever since.
I built various
Lego contraptions to
shoot the caps from baby food pouches
that our kids like so much. But eventually I took it apart again to reuse
the Lego. But Kurt, our two year old, has been clamoring for the Lego
cap shooter ever since.
I built various
Lego contraptions to
shoot the caps from baby food pouches
that our kids like so much. But eventually I took it apart again to reuse
the Lego. But Kurt, our two year old, has been clamoring for the Lego
cap shooter ever since.
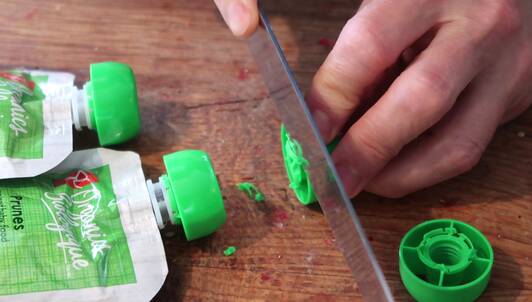
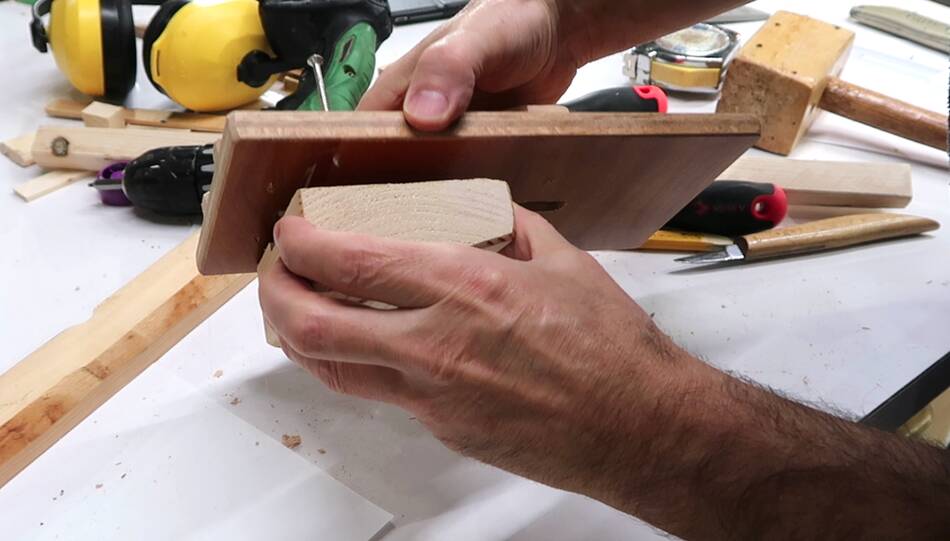
The caps from the baby food pouches end up with a few burrs on the bottom from how they were locked to the puches. These need to be cut off with a sharp knife before they can be shot.
 So I figured I should build a wooden cap shooting device that I won't
take apart again. I tested the concept by clamping a few pieces of wood
together for the right shape, with a piece of coat hanger wire as the release.
So I figured I should build a wooden cap shooting device that I won't
take apart again. I tested the concept by clamping a few pieces of wood
together for the right shape, with a piece of coat hanger wire as the release.
It worked, and from this I established the dimensions for the next one.
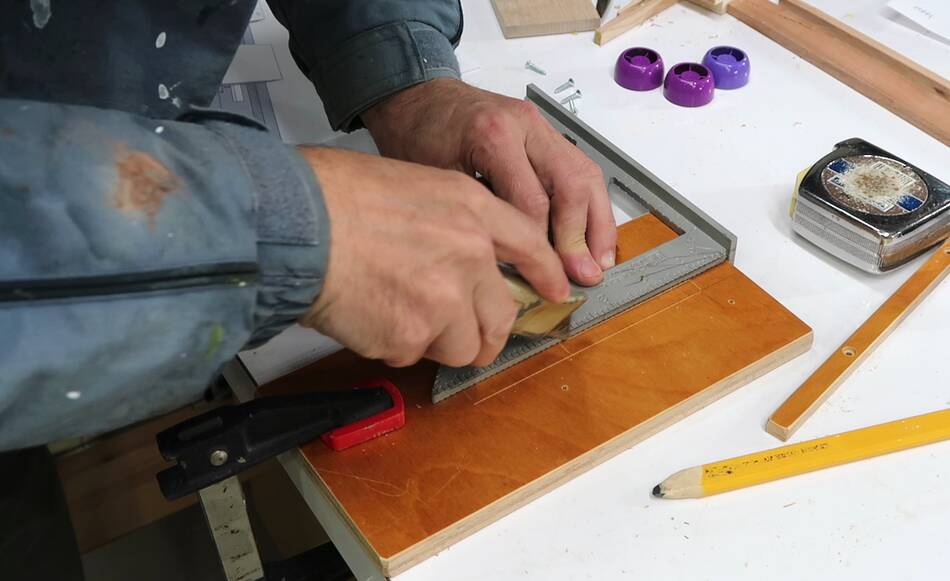
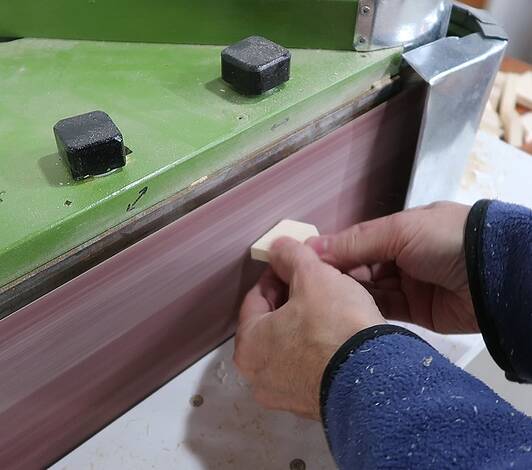
 I used some old varnished plywood so the caps would slide well on it.
I needed to cut a slot in this but without any tear-out for the
caps to get caught on. So I pre-scored the edges where I cut the slot.
I used some old varnished plywood so the caps would slide well on it.
I needed to cut a slot in this but without any tear-out for the
caps to get caught on. So I pre-scored the edges where I cut the slot.
Then I cut the sides of the slot by making a plunge cut on the table saw. I carefully placed the wood on the saw, then raised the spinning blade up through the wood.
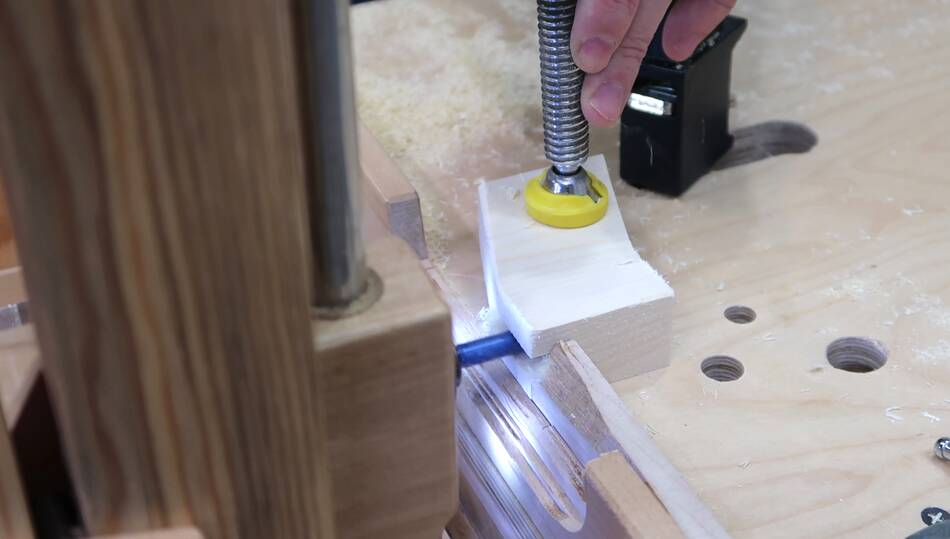
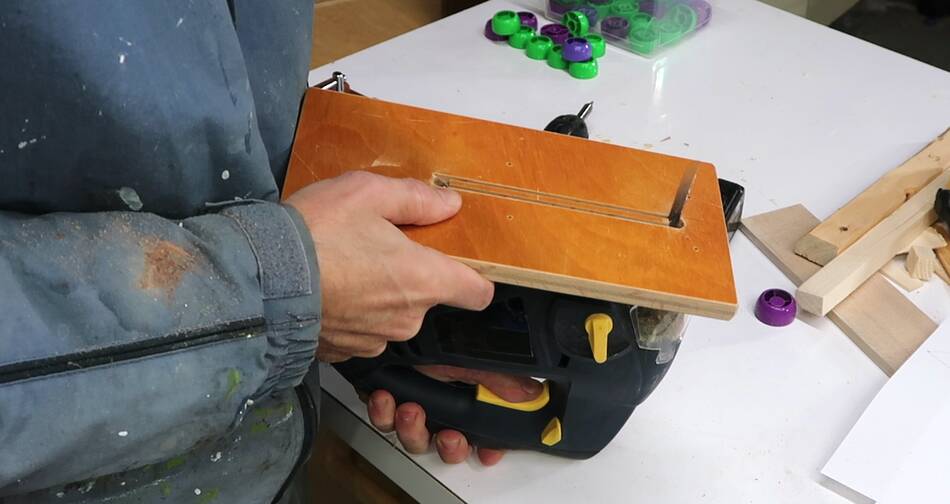 Then I drilled holes on either end of the slot and finished the side
cuts with a jigsaw from below. I cut from below to avoid tear-out on
the top side.
Then I drilled holes on either end of the slot and finished the side
cuts with a jigsaw from below. I cut from below to avoid tear-out on
the top side.
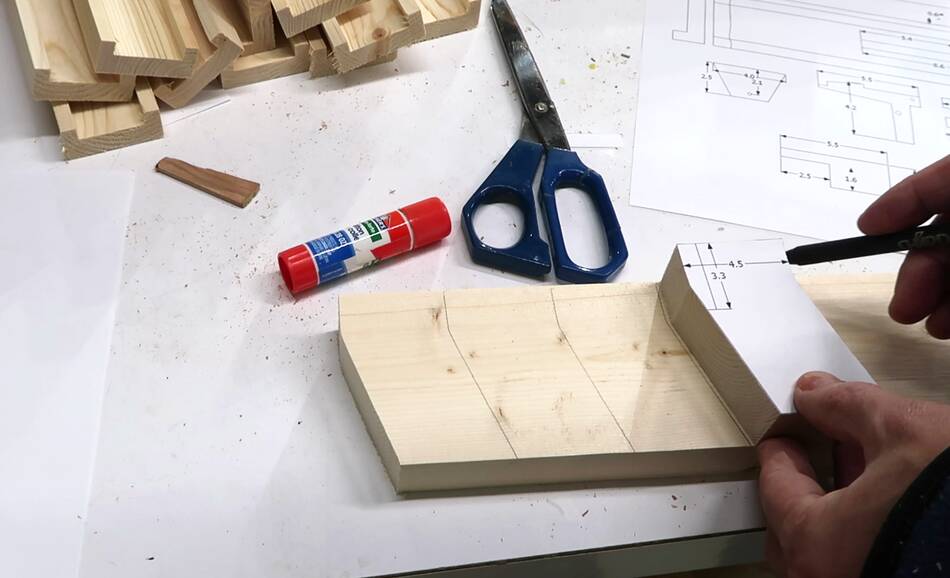
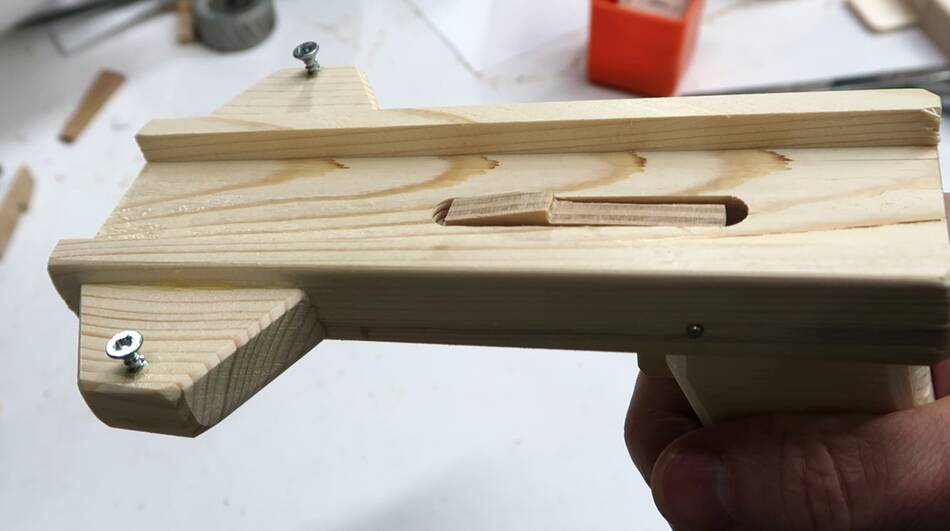
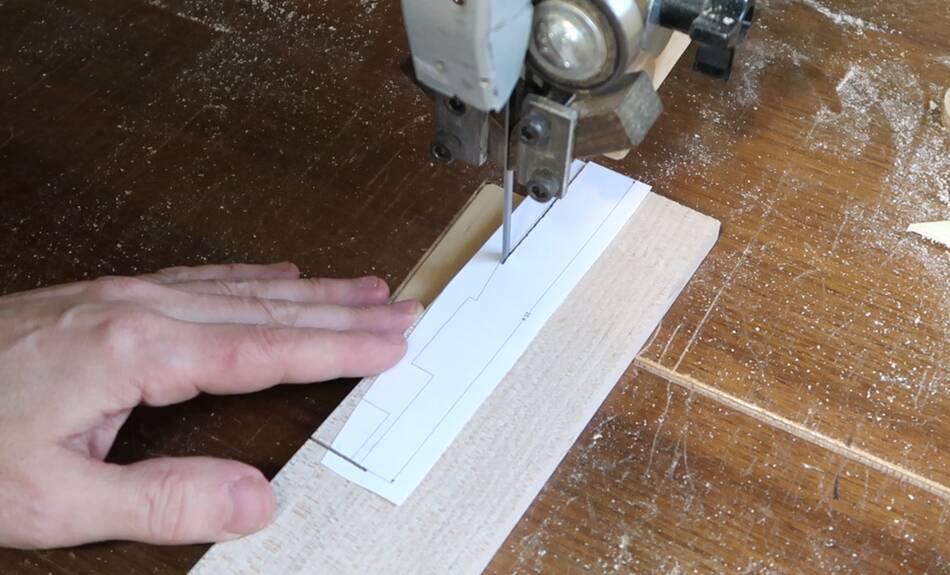 The "trigger" piece is a relatively complicated shape. I modeled
the design in CAD, so I just used my
BigPrint program to make a 1:1 printout of the trigger,
pasted it onto a piece of hardwood and cut it out on the bandsaw.
The "trigger" piece is a relatively complicated shape. I modeled
the design in CAD, so I just used my
BigPrint program to make a 1:1 printout of the trigger,
pasted it onto a piece of hardwood and cut it out on the bandsaw.
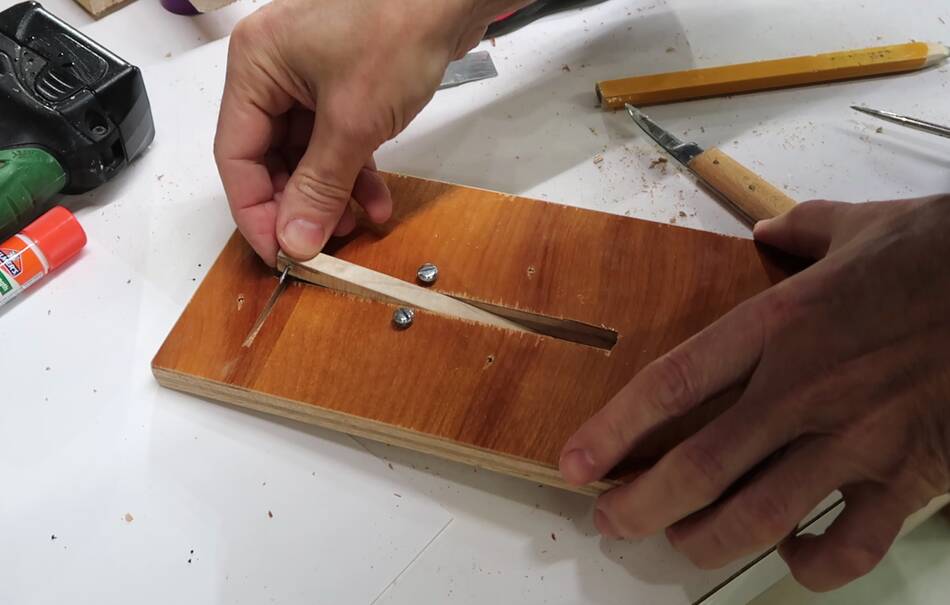
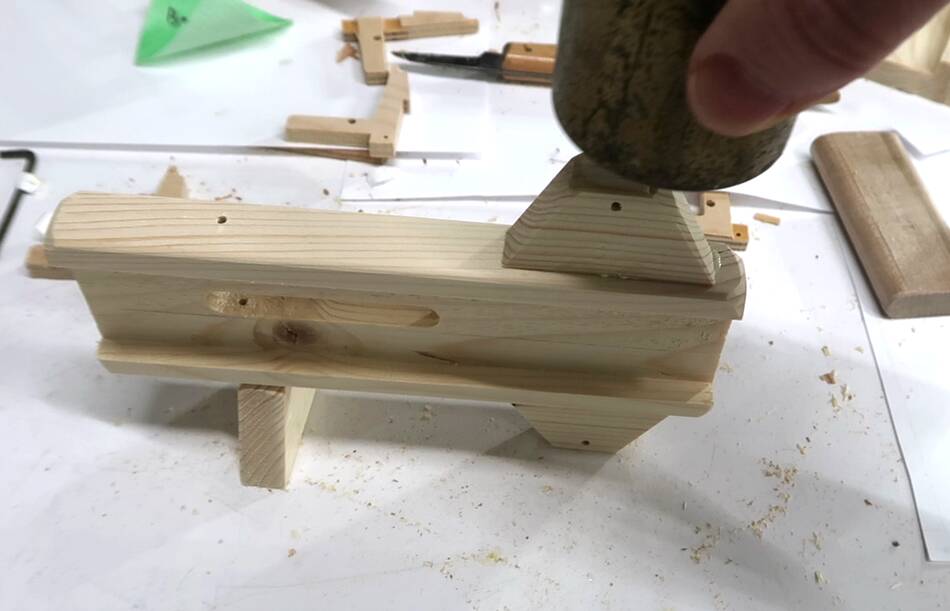
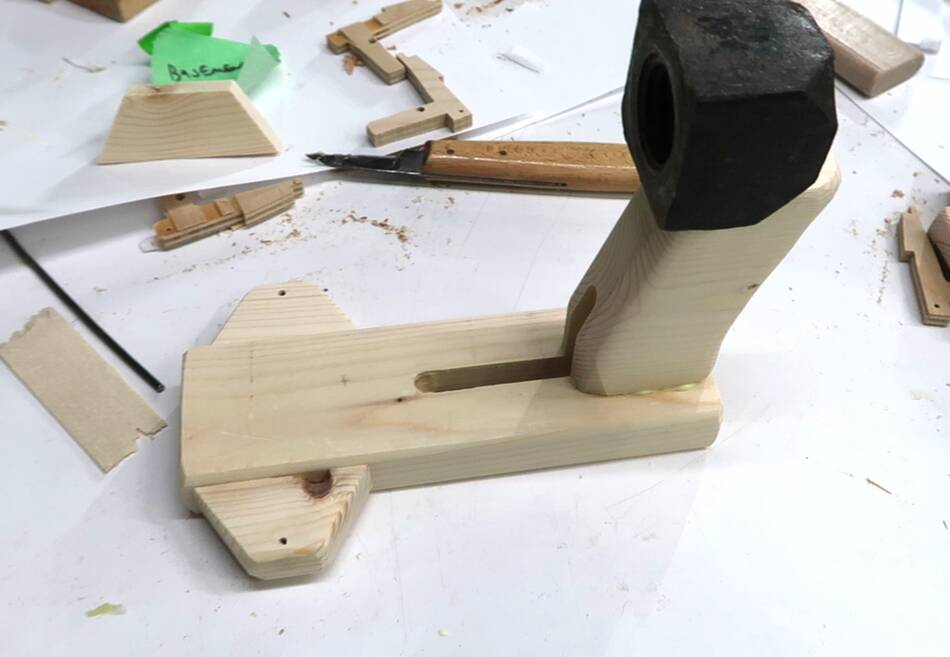
 The trigger fits into the slot I had cut, and pivots on a nail.
This nail fits into slot that I cut on the bottom side, again using
a plunge cut on the table saw.
The trigger fits into the slot I had cut, and pivots on a nail.
This nail fits into slot that I cut on the bottom side, again using
a plunge cut on the table saw.
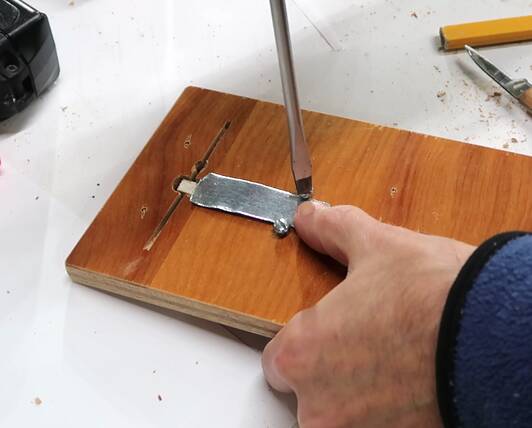
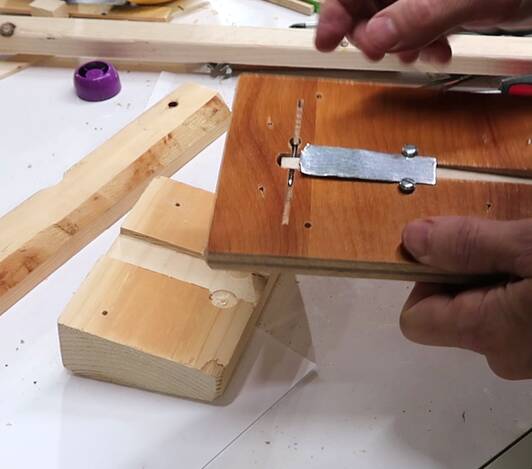
A piece of metal, with a tab bent onto the end of it, screws against the bottom to push the trigger piece into the wood so that it pops up on the other side.
 Testing the trigger piece. the cap is slid back on it until it catches
the hook on the trigger piece.
Testing the trigger piece. the cap is slid back on it until it catches
the hook on the trigger piece.
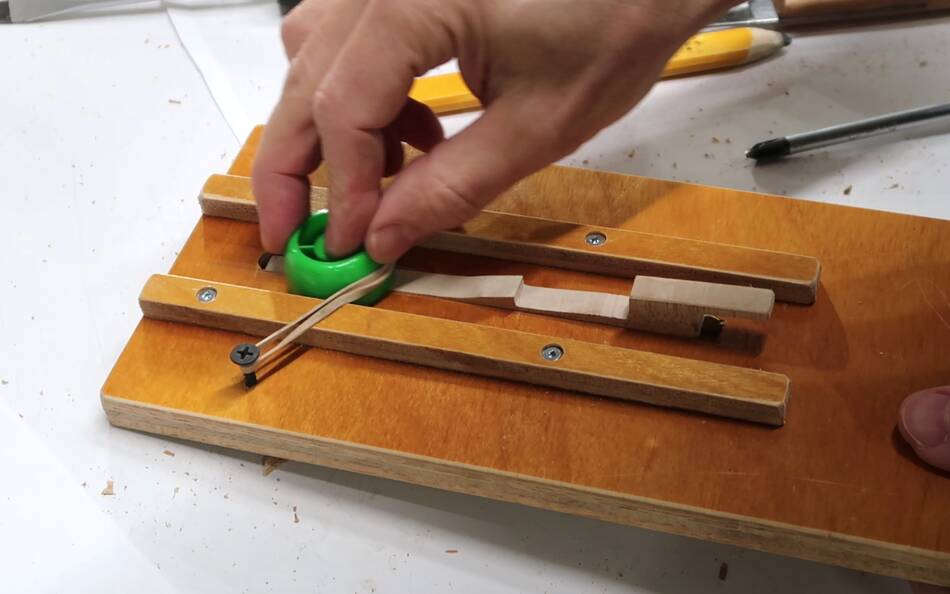
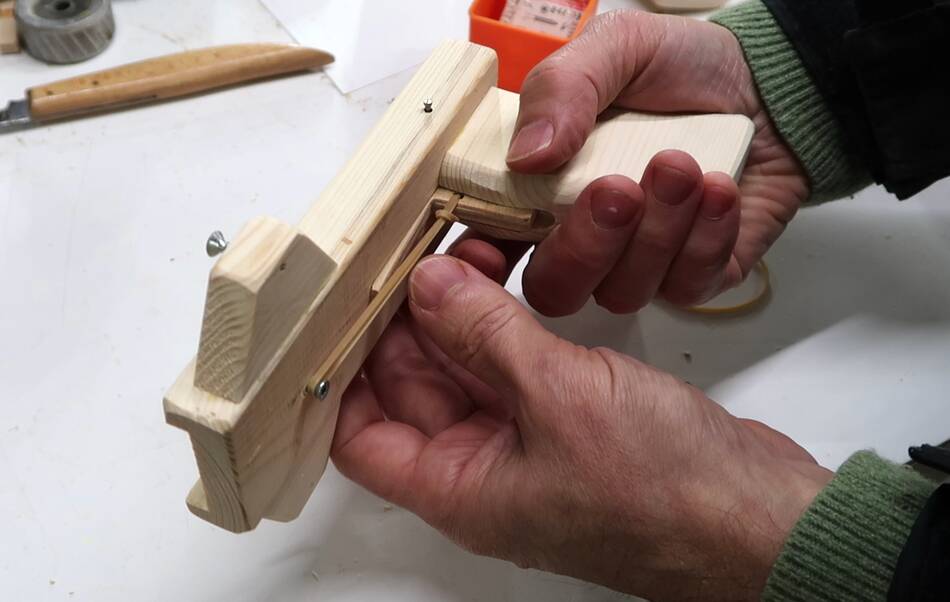
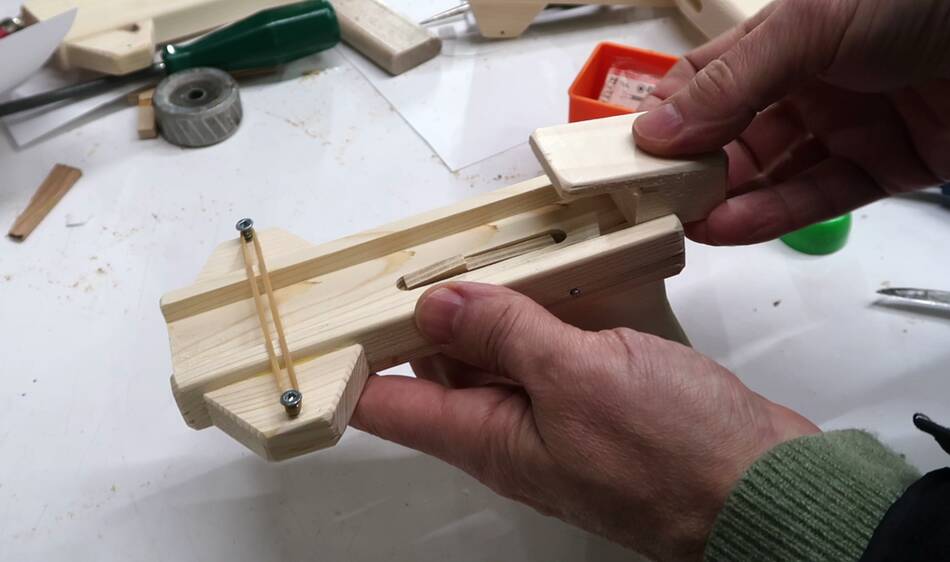
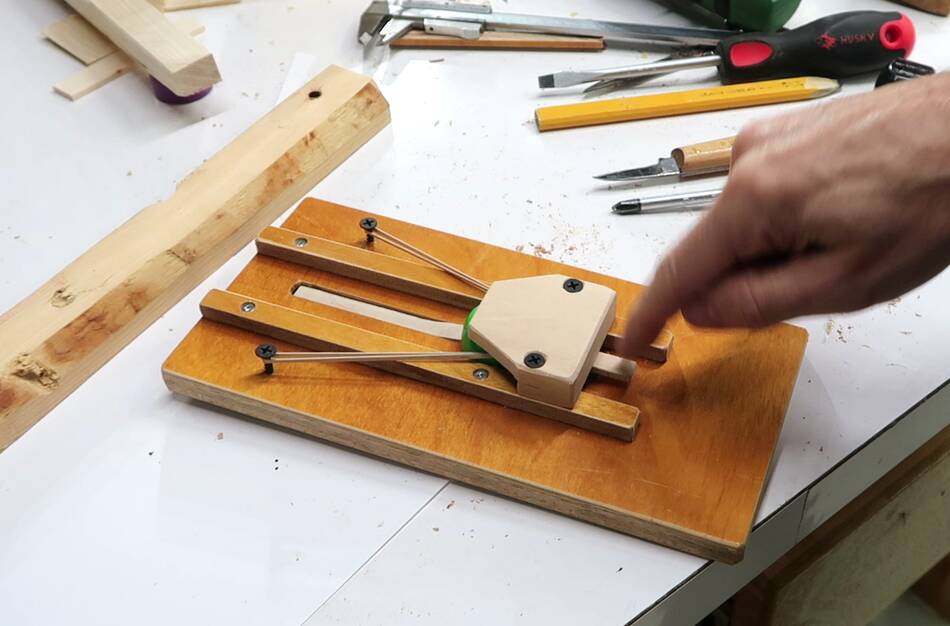 I made another piece to go on to to hold the cap in place. The end
of the trigger piece protrudes out the back, and pushing it down
releases the cap.
I made another piece to go on to to hold the cap in place. The end
of the trigger piece protrudes out the back, and pushing it down
releases the cap.
 The idea is that the kids can play with this, but the spring mechanism
has sharp edges and is easy to mess up, so I made a block of wood
that goes on the bottom of this shooter and covers it up.
The idea is that the kids can play with this, but the spring mechanism
has sharp edges and is easy to mess up, so I made a block of wood
that goes on the bottom of this shooter and covers it up.
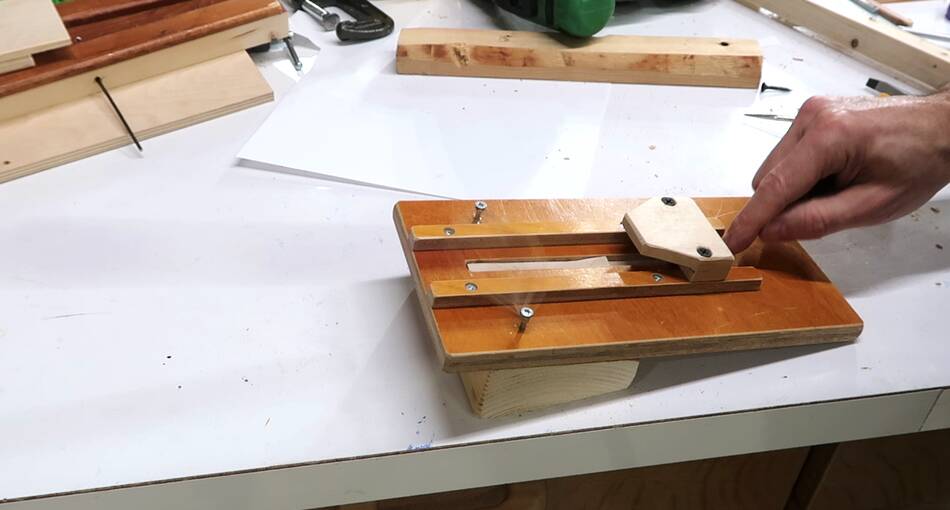 That block of wood also raises the front up a bit to make it shoot up at
a low angle.
That block of wood also raises the front up a bit to make it shoot up at
a low angle.
This photo shows the cap just having been fired. You can see a faint streak to the left of the device from the cap flying away at high speed.
 It didn't take the kids long to figure out how to load it. Here is Harriet
loading it. Even Kurt, at just over two years, was able to load it by himself.
It helps that the contraption sits on the floor, leaving both hands available
for loading.
It didn't take the kids long to figure out how to load it. Here is Harriet
loading it. Even Kurt, at just over two years, was able to load it by himself.
It helps that the contraption sits on the floor, leaving both hands available
for loading.
 With the wooden contraption working well, I figured it should build a
hand held pistol version of it. And such a device would make a good
Christmas present, so I decided to build a batch of ten of these.
With the wooden contraption working well, I figured it should build a
hand held pistol version of it. And such a device would make a good
Christmas present, so I decided to build a batch of ten of these.
Making this many, it was worth it to use a dado blade to cut the channel that the caps are shot out of.
I cut two passes, one from each side, to cut the middle of the slot, them measured its width.
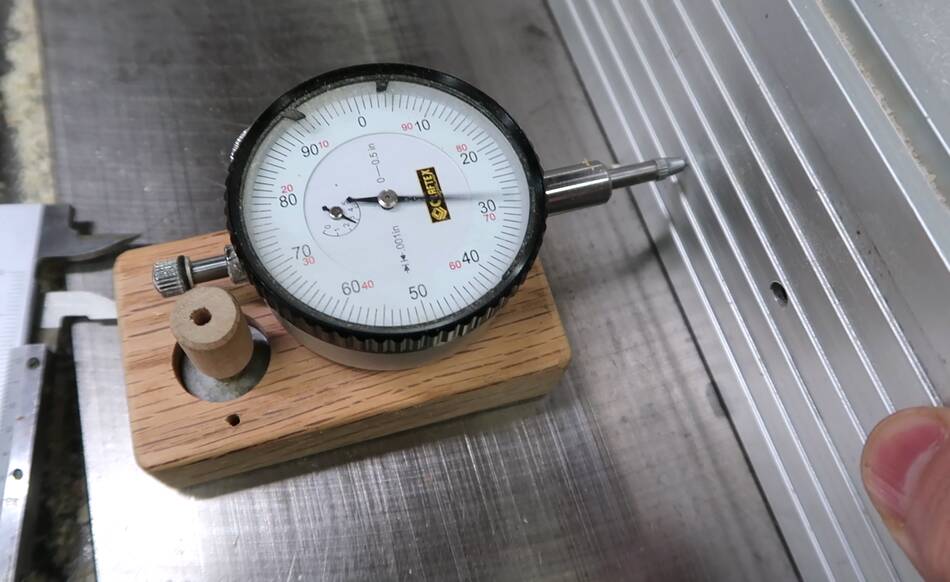 I then subtracted the width I had from the width I needed,
divided that in half, and converted that to inches, and used my inch
dial indictor to move the fence by that much.
I then subtracted the width I had from the width I needed,
divided that in half, and converted that to inches, and used my inch
dial indictor to move the fence by that much.
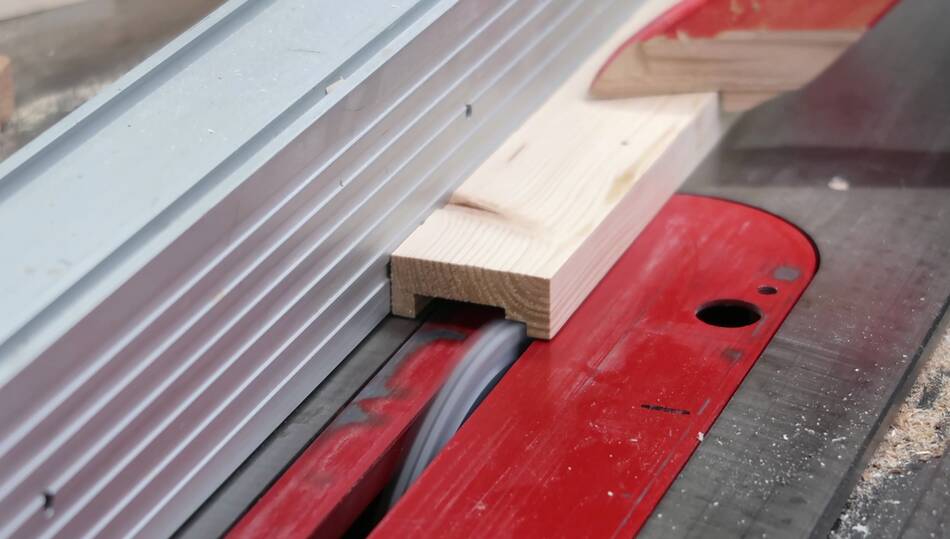
 Then again cutting from both sides to cut the channel to the right width.
 I cut out the handle part from the templates, pasted that to a
block of wood, cut that out, and used that block to mark nine more
copies on a bigger block of wood.
I cut out the handle part from the templates, pasted that to a
block of wood, cut that out, and used that block to mark nine more
copies on a bigger block of wood.
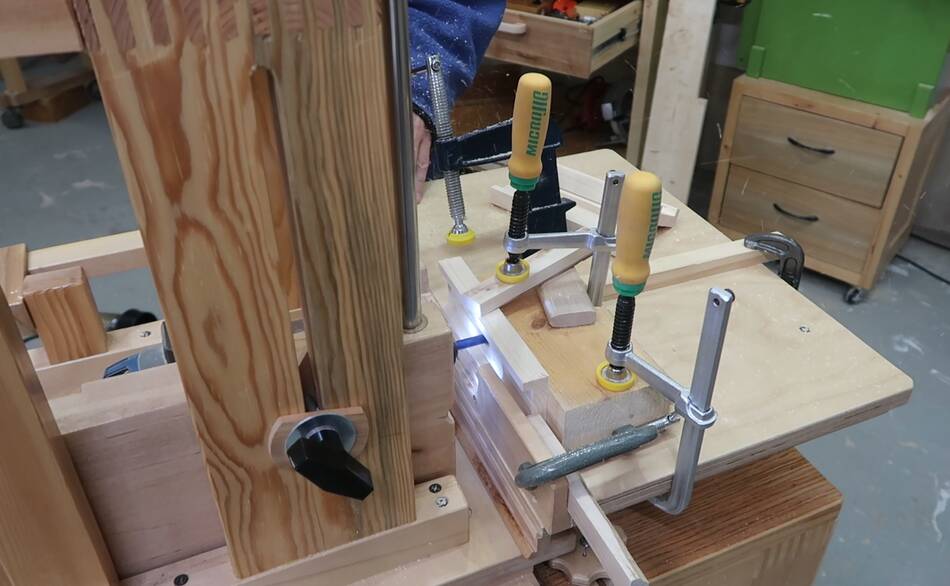
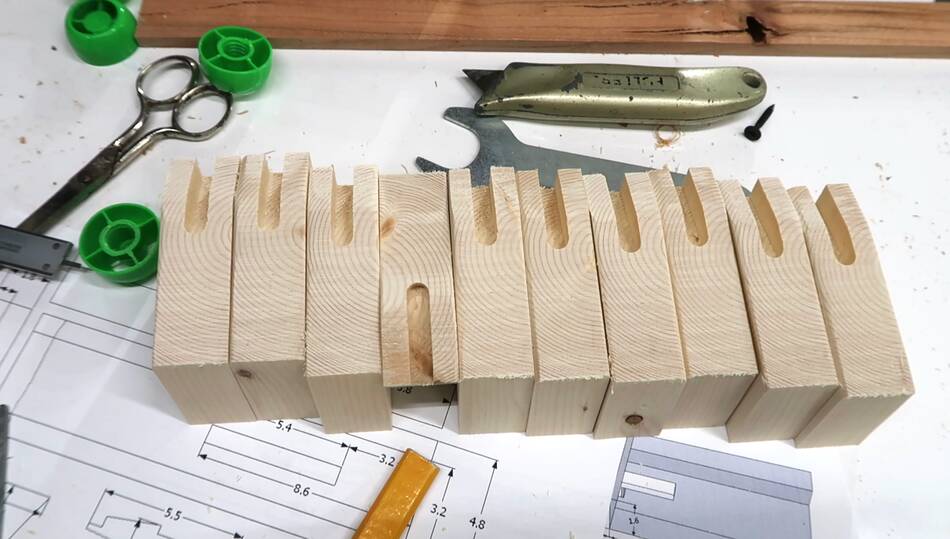
 The channel needs a slot where the trigger fits into. Because I
was making ten of these, it was worth setting up my
slot mortiser to cut these.
The channel needs a slot where the trigger fits into. Because I
was making ten of these, it was worth setting up my
slot mortiser to cut these.
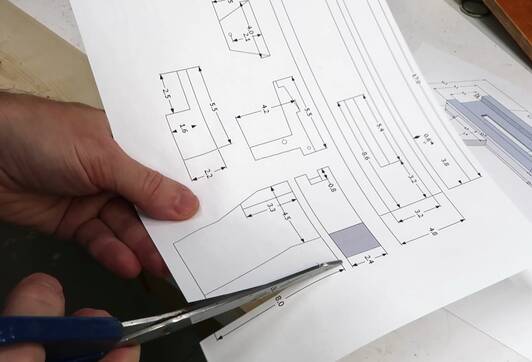
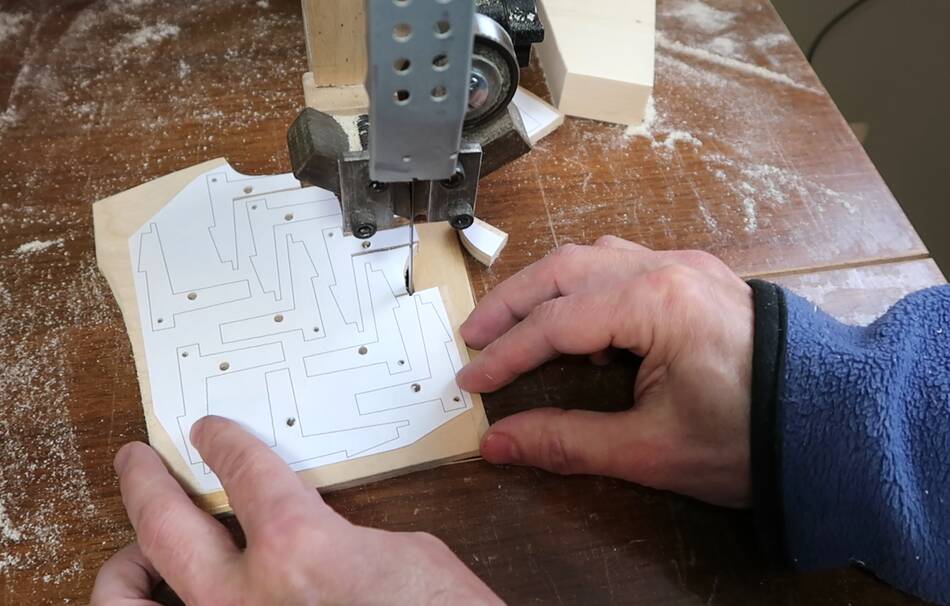 I put ten copies of the trigger shape on a piece of paper, pasted that onto
some plywood, then drilled the holes before cutting them out on the bandsaw.
Though the way I nested the parts together made it difficult to get around
the corners between some of the parts.
I put ten copies of the trigger shape on a piece of paper, pasted that onto
some plywood, then drilled the holes before cutting them out on the bandsaw.
Though the way I nested the parts together made it difficult to get around
the corners between some of the parts.
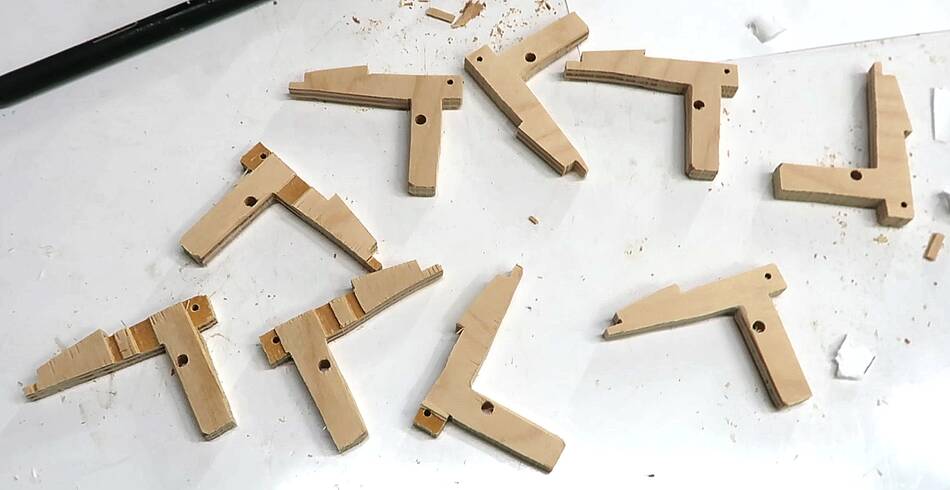 But I had a fair bit of tear-out on some of these.
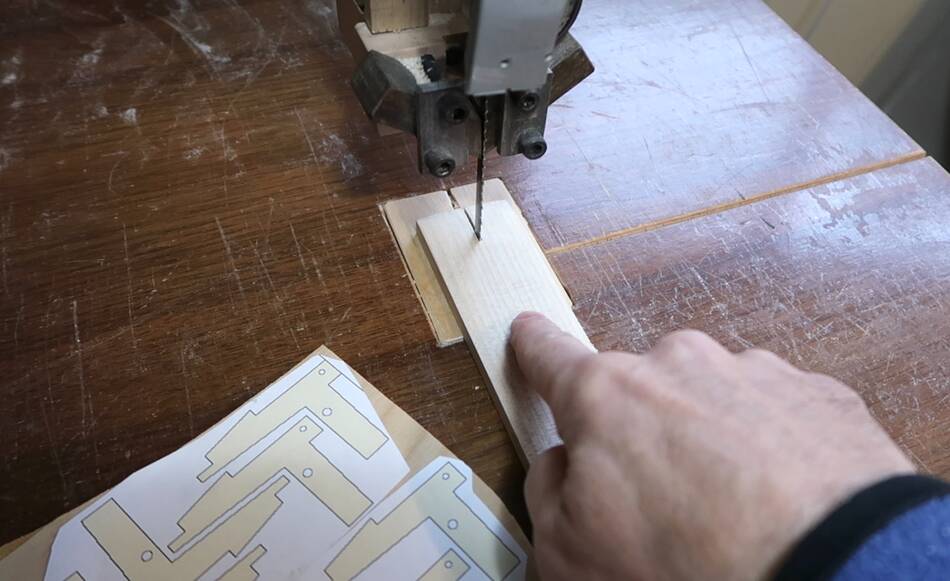
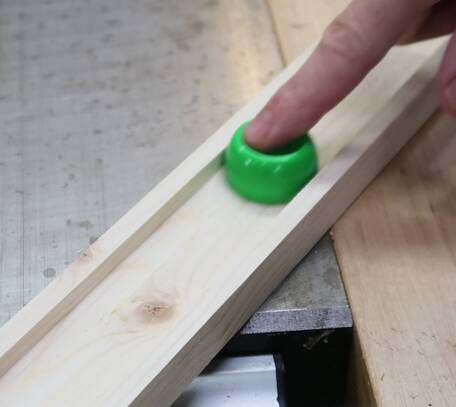
 So I clamped a strip of wood to my bandsaw to act as a sort of zero clearance
insert around the blade.
So I clamped a strip of wood to my bandsaw to act as a sort of zero clearance
insert around the blade.
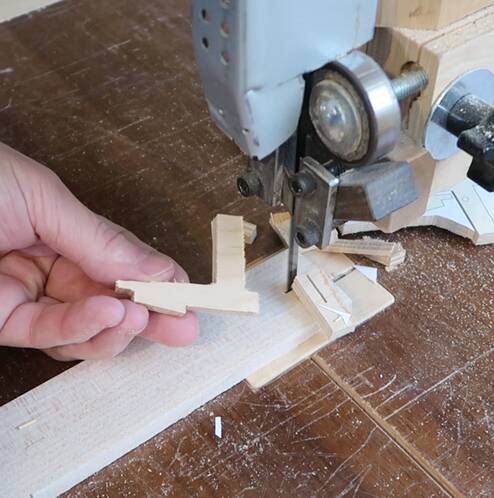
And pressing down on the wood while I cut it ensured that it made good contact with that strip of wood around the blade. That way, the wood was supported near the blade, reducing tear-out on the bottom.
 Since I already had the slot mortiser with the right bit in it from the last
operation, I also used it to cut a slot in each handle.
Since I already had the slot mortiser with the right bit in it from the last
operation, I also used it to cut a slot in each handle.
 Then handles with slots cut. The slot is for the trigger piece to go into.
This reduces the chance that the trigger is broken by banging it to the side.
Then handles with slots cut. The slot is for the trigger piece to go into.
This reduces the chance that the trigger is broken by banging it to the side.
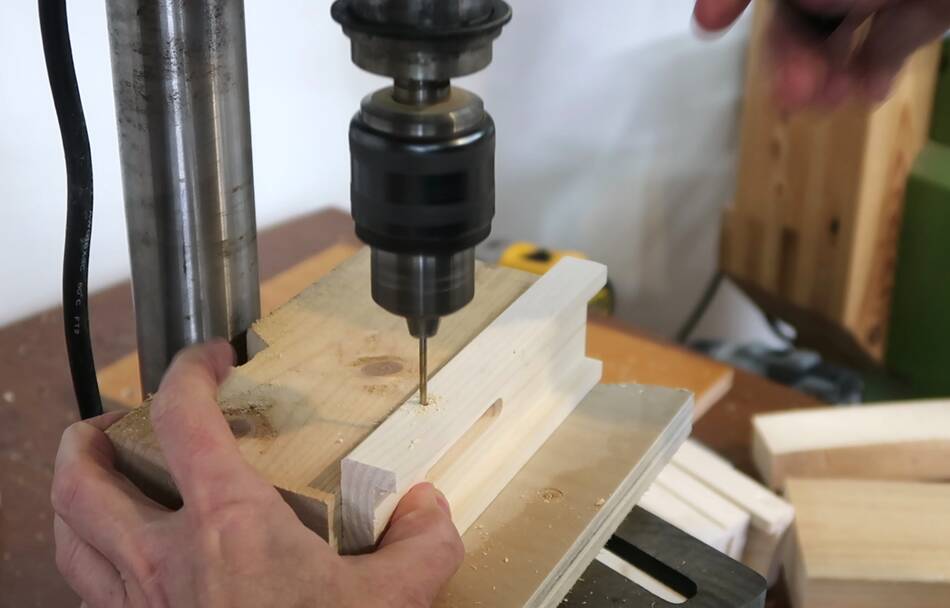 Then drilling holes in the channels for a nail that the trigger pivots on.

 After that, I cut the pieces that hold the caps down before being released.
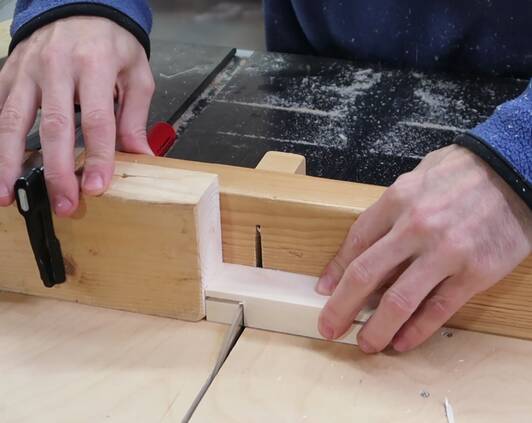
I cut the pieces twice as long as I needed them and cut the notch in either end using my table saw sled. That way I had a bigger piece to hold with my fingers.

 Cutting the trapezoidal pieces that go on either side of the main channel
to hold the rubber band.
Cutting the trapezoidal pieces that go on either side of the main channel
to hold the rubber band.
I sanded the corners of these nice and round on my belt sander before gluing them on.
 For the first two, I glued both sides on at the same time and clamped them,
but getting the pieces lined up and keeping them lined up was difficult.
So for the rest of them, I glued on one side at a time, using just a
weight to clamp them.
For the first two, I glued both sides on at the same time and clamped them,
but getting the pieces lined up and keeping them lined up was difficult.
So for the rest of them, I glued on one side at a time, using just a
weight to clamp them.
I had to use an extra piece of wood to prop it up when gluing on the second piece.
 And I also used the weight as a clap for gluing on the handles.
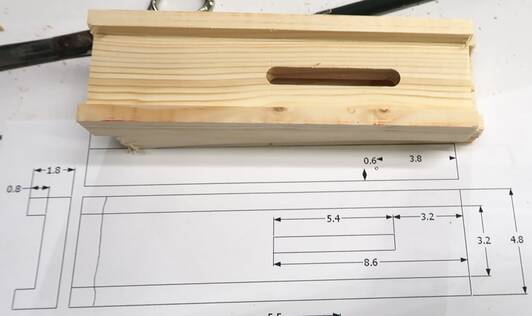
 The trigger can only be inserted from below. Here you can see the slot that
I previously cut out has an extra 5 mm of length at the front that is
only at half depth. The little "tab" at the end of the trigger fits into this,
and that keeps the trigger from pivoting up too far.
The trigger can only be inserted from below. Here you can see the slot that
I previously cut out has an extra 5 mm of length at the front that is
only at half depth. The little "tab" at the end of the trigger fits into this,
and that keeps the trigger from pivoting up too far.
 A rubber band tied to the trigger pulls the trigger up.
 The trigger only comes up far enough to catch the cap, but not so far that
it would catch the cap as it's slid backwards while it's being loaded.
The trigger only comes up far enough to catch the cap, but not so far that
it would catch the cap as it's slid backwards while it's being loaded.
 This is the part that holds the cap down after loading. I tested the
shooter with this part just held in place before gluing it down.
This is the part that holds the cap down after loading. I tested the
shooter with this part just held in place before gluing it down.
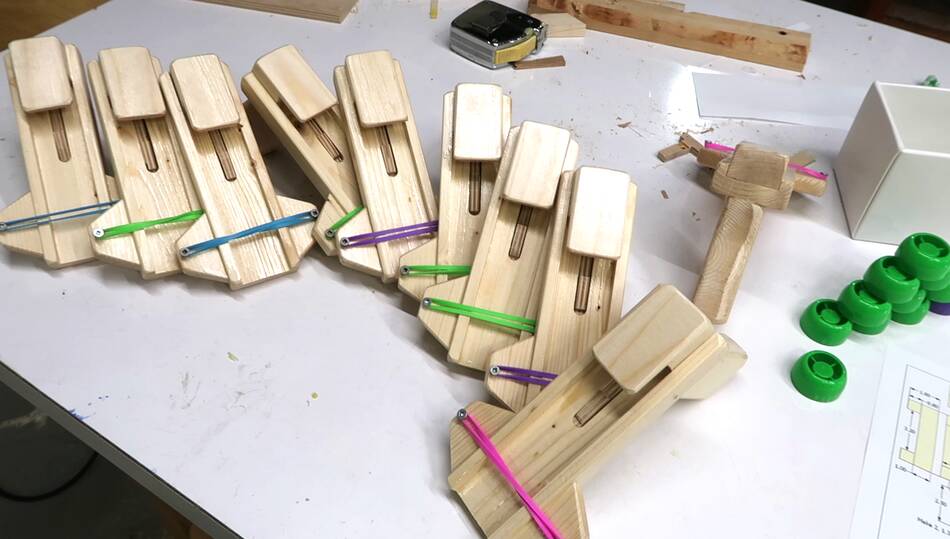 I then varnished all ten of my cap shooters. The varnish helps things slide
better and makes it possible to clean it if it's gotten dirty.
I then varnished all ten of my cap shooters. The varnish helps things slide
better and makes it possible to clean it if it's gotten dirty.
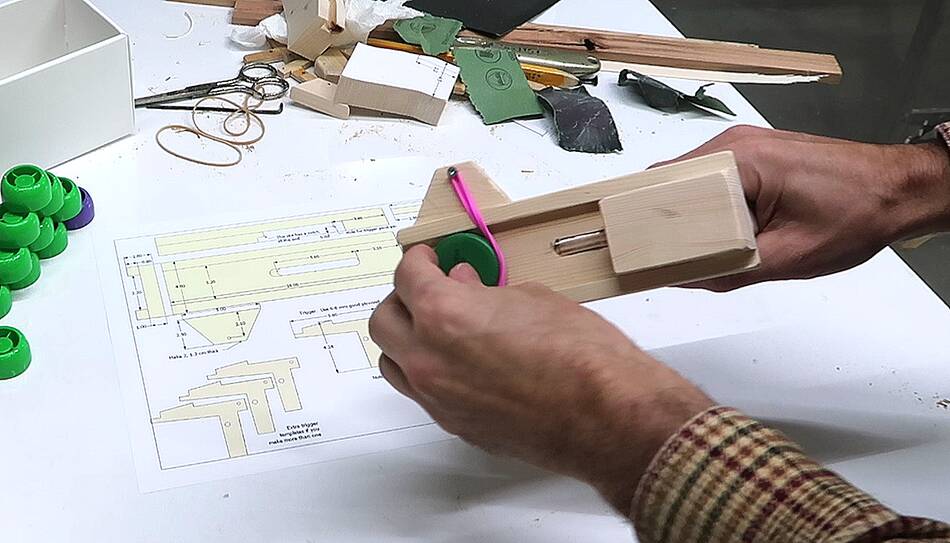 And I have a set of plans available
for this cap shooter. But I realized, not
many people are going to have a lot of caps from baby food pouches, so just to
show it can be done, I built a slightly modified version, without using
fancy tools, that's made to shoot juice bottle caps. I think water bottle caps,
or soft drink bottle caps would also shoot fairly well, but we don't have any
of those around the house.
And I have a set of plans available
for this cap shooter. But I realized, not
many people are going to have a lot of caps from baby food pouches, so just to
show it can be done, I built a slightly modified version, without using
fancy tools, that's made to shoot juice bottle caps. I think water bottle caps,
or soft drink bottle caps would also shoot fairly well, but we don't have any
of those around the house.
I charge a few dollars for the plans. That's how I make a living with this website, rather than trying to sell questionable stuff like VPN services that have been hacked, mail order mattresses, or razors.
And here's "The wood dabbler"'s version of this cap shooter build, based on my plans.
To my Woodworking website.
 Buy plans for this cap shooter
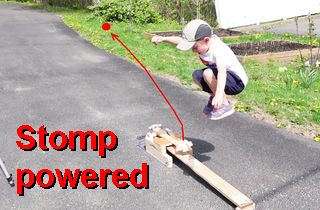 Stomp catapult
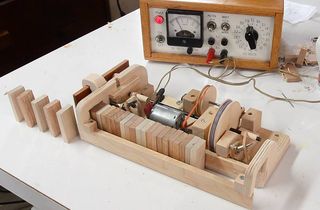 Wooden domino row building machine
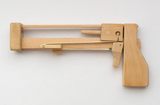 Jenga pistol
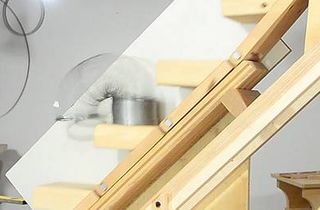 The slinky machine
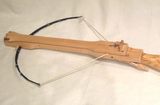 Marble shooting
 Marble machines
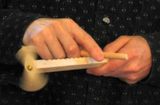 Hui game
 Wood geared baby soothing machine
 Making a wooden pirate sword