Cove cutting on the table saw
For cutting just the occasional cove, feeding a piece of wood over the saw blade at an angle
is really the ideal way to go. Sure, it takes many passes, but it offers a lot of flexibility
and a minimum of set up. So after I wrote my cove cutting table
calculator, I figured I might as well write a companion article about cutting coves
on the table saw.
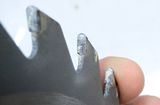
 Cutting a cove on the table saw is a simple matter of feeding the work piece over the
blade at an angle. However, the saw blade is really not designed for this kind of cut,
as it only has teeth at the edges. So you can really only cut about 2 mm of depth with
each pass. A multitude of passes is needed to cut coves of any significant depth.
The trick with getting coves right is to get the fence in the right position. This can
be a matter of trial and error, although my cove cutting calculator helps.
Cutting a cove on the table saw is a simple matter of feeding the work piece over the
blade at an angle. However, the saw blade is really not designed for this kind of cut,
as it only has teeth at the edges. So you can really only cut about 2 mm of depth with
each pass. A multitude of passes is needed to cut coves of any significant depth.
The trick with getting coves right is to get the fence in the right position. This can
be a matter of trial and error, although my cove cutting calculator helps.
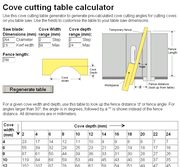 It generates
a lookup table for various coves, so you don't need to go back and forth between your
computer and your workshop.
It generates
a lookup table for various coves, so you don't need to go back and forth between your
computer and your workshop.
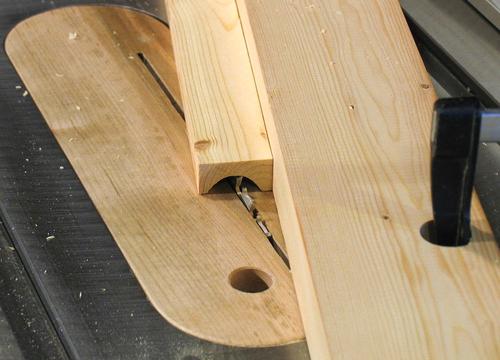
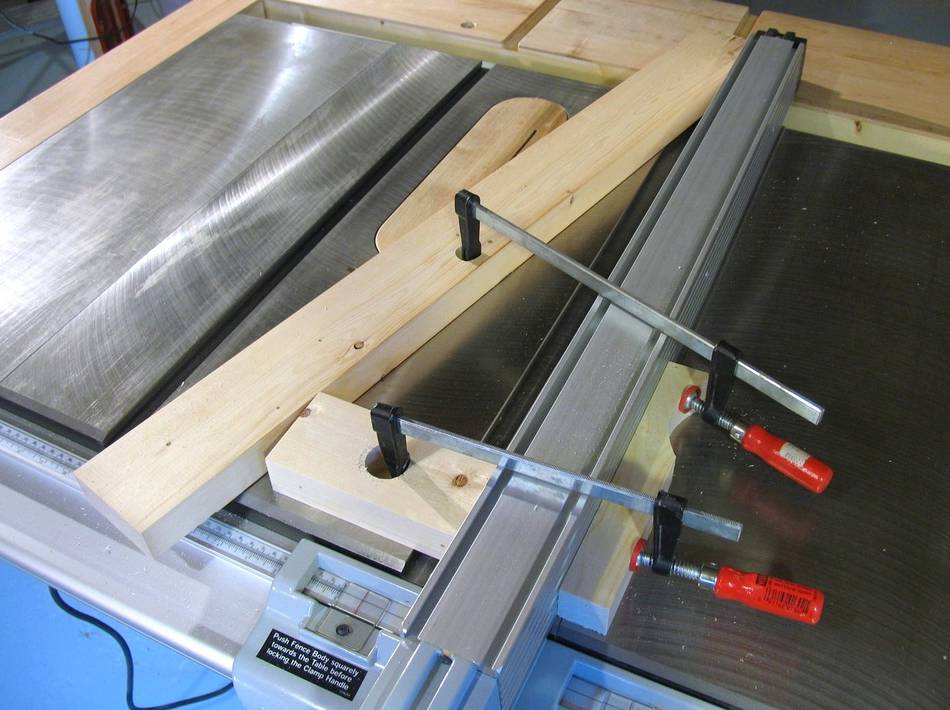
 It helps to clamp your angled temporary fence to the table saw's main fence. This leaves the
flexibility of being able to move the fence parallel, to adjust the cove's lateral position without
changing its overall geometry.
It helps to clamp your angled temporary fence to the table saw's main fence. This leaves the
flexibility of being able to move the fence parallel, to adjust the cove's lateral position without
changing its overall geometry.
Rather than generating an angle, the cove cutting table calculates the distance from the fence that
the temporary fence should have at the near side for smaller angles up to 30 degrees. That way,
there's no need to mess with a protractor.
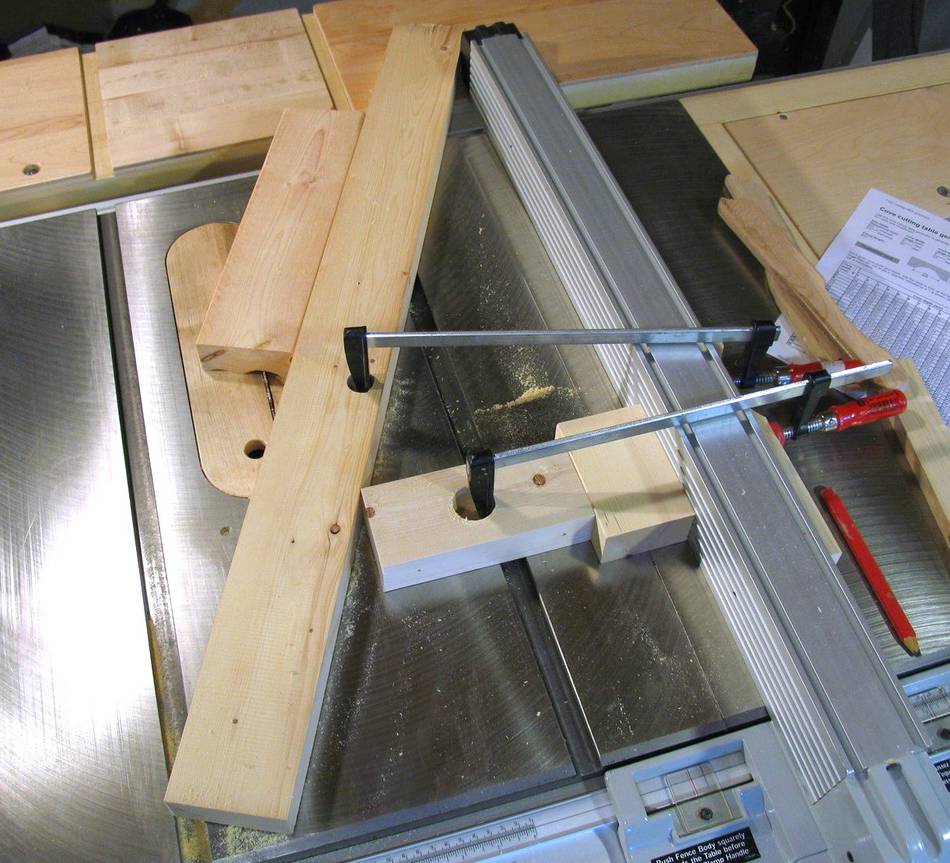
 On cutting the cove, its important to securely push the work piece against the fence.
Commercial cove jigs have a fence on either side. I'm not sure this is a good idea, as it means
the fence will either have play, which results in messy coves, or be too tight, and make it hard to
push the piece through.
On cutting the cove, its important to securely push the work piece against the fence.
Commercial cove jigs have a fence on either side. I'm not sure this is a good idea, as it means
the fence will either have play, which results in messy coves, or be too tight, and make it hard to
push the piece through.
Whatever your do, its best to have the fence angled so that the blade pushes the work piece towards
the fence. Although if you feed the work piece too fast, the angle of the blade relative to
the work piece will push it away from the work piece.
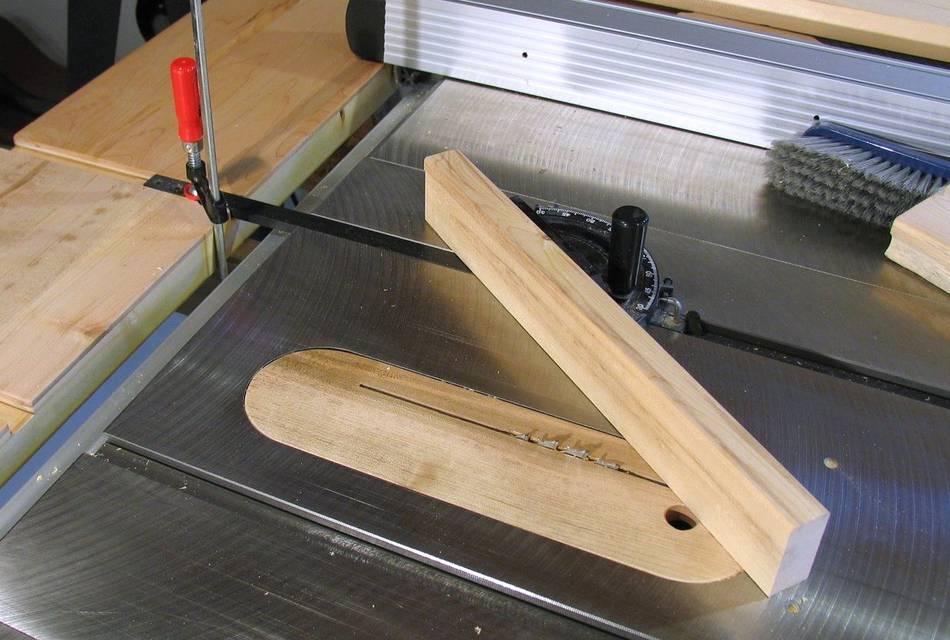
 Attaching the temporary cove cutting fence to the main table saw fence is only practical
to about 30 degrees. After that, it gets a bit awkward.
Attaching the temporary cove cutting fence to the main table saw fence is only practical
to about 30 degrees. After that, it gets a bit awkward.
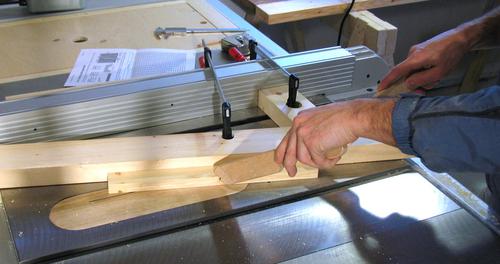
 But at 30 degrees and beyond, most miter gauges can be used, as these will usually go up to
90 degrees from a right angle, which is 30 degrees from the rip fence. Then its just a matter
of securing the miter gauge to keep it from sliding forwards and back. note the clamp at left.
But at 30 degrees and beyond, most miter gauges can be used, as these will usually go up to
90 degrees from a right angle, which is 30 degrees from the rip fence. Then its just a matter
of securing the miter gauge to keep it from sliding forwards and back. note the clamp at left.
My cove cutting calculator outputs angles in degrees for angles larger than 30 degrees for this
reason.
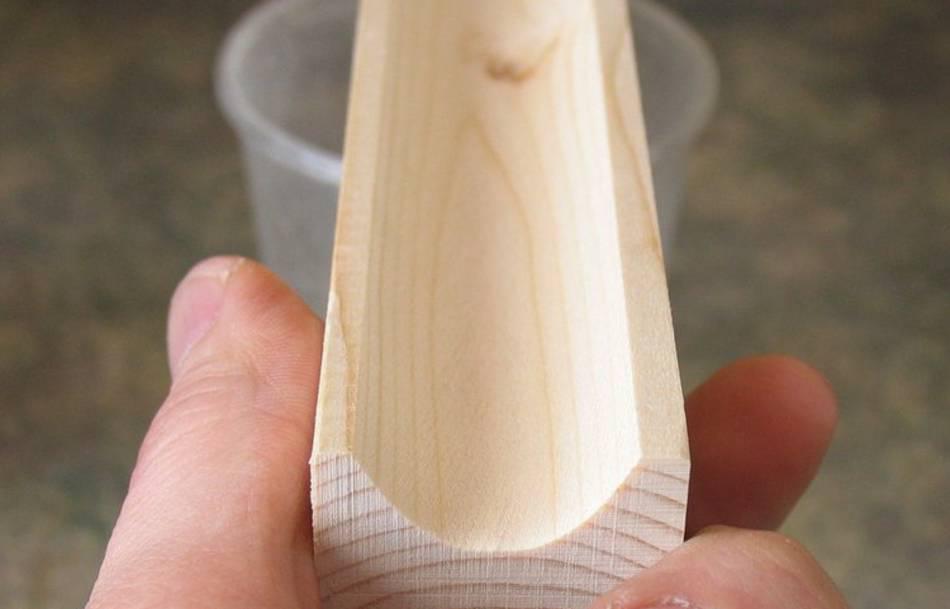
 Here's a relatively small cove cut on the table saw. Note the hands for scale. You can see its
a fairly smooth cut, though not as smooth as a planed surface. Still, quite satisfactory.
Here's a relatively small cove cut on the table saw. Note the hands for scale. You can see its
a fairly smooth cut, though not as smooth as a planed surface. Still, quite satisfactory.
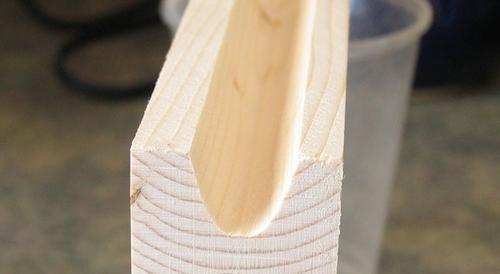 And here's a narrow cove cut on the table saw. Note the double bottom of the cove.
This cove is only 17 mm wide, but 14 mm deep. The fence was only at about a 5 degree angle.
The double peak is because the saw blade doesn't cut as deep in the middle as it does on the
edges because the way the teeth are angled. for coves this narrow, its probably better to use
a 7 1/4" circular saw blade instead. With a 7 1/4" saw blade, a fence angle of 20 degrees would
be used for those dimensions, and the double bottom would be eliminated.
And here's a narrow cove cut on the table saw. Note the double bottom of the cove.
This cove is only 17 mm wide, but 14 mm deep. The fence was only at about a 5 degree angle.
The double peak is because the saw blade doesn't cut as deep in the middle as it does on the
edges because the way the teeth are angled. for coves this narrow, its probably better to use
a 7 1/4" circular saw blade instead. With a 7 1/4" saw blade, a fence angle of 20 degrees would
be used for those dimensions, and the double bottom would be eliminated.
Although really, I'd primarily use a cove that narrow for drawer handles, at which point the double
bottom wouldn't be visible, so it wouldn't matter.
 Cutting a cove on the table saw is a simple matter of feeding the work piece over the
blade at an angle. However, the saw blade is really not designed for this kind of cut,
as it only has teeth at the edges. So you can really only cut about 2 mm of depth with
each pass. A multitude of passes is needed to cut coves of any significant depth.
The trick with getting coves right is to get the fence in the right position. This can
be a matter of trial and error, although my cove cutting calculator helps.
Cutting a cove on the table saw is a simple matter of feeding the work piece over the
blade at an angle. However, the saw blade is really not designed for this kind of cut,
as it only has teeth at the edges. So you can really only cut about 2 mm of depth with
each pass. A multitude of passes is needed to cut coves of any significant depth.
The trick with getting coves right is to get the fence in the right position. This can
be a matter of trial and error, although my cove cutting calculator helps.


 Improvements to the
 Making a large
 Making a pirate sword
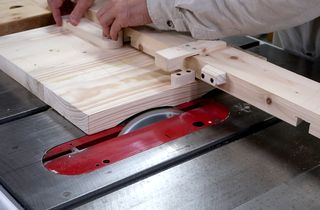 Carving a chair seat on the table saw
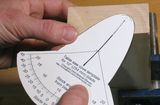 Asymmetric cove cutting
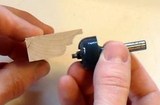 Making
 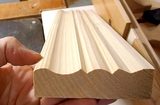 Molding tricks with a
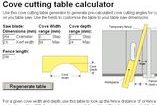 Cove cutting table
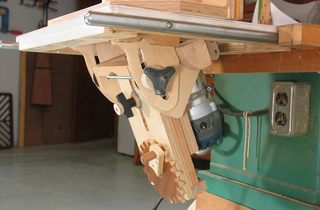 Tilting router lift
 Trammel points compass