Asymmetric cove cutting
How to use the templates from my asymmetric cove template generator
Asymmetric coves can be cut on a table saw by not only passing the stock over the blade at an angle, but also tiling the saw blade. However, getting exactly the shape of cove you want can be a matter of trial and error. This article describes a clever template system I have developed for pre-determining the fence and blade angles for the desired shapes of coves. The nice thing about this system is that no computer, or even a calculator is needed in the workshop when working with the cove templates.
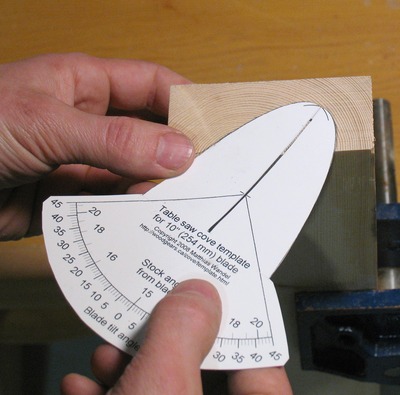 Using a cove template printed out form my Asymmetric cove
template generator, decide where you want to place the cove in the wood.
Its best to print out a whole different set of coves from the template generator for
different widths.
Using a cove template printed out form my Asymmetric cove
template generator, decide where you want to place the cove in the wood.
Its best to print out a whole different set of coves from the template generator for
different widths.
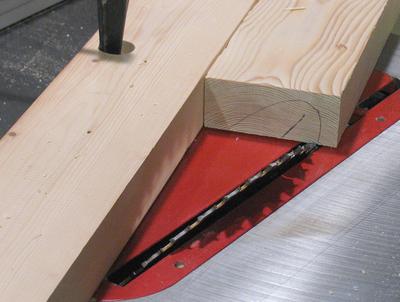
When deciding to place the cove, keep in mind that to be able to cut it on the table
saw, the cove must not be tilted beyond what the protractor on the bottom of the
template can indicate. A line drawn perpendicular to the piece of wood must go through
the protractor pivot and scale.
 Mark the outline of the cove on the piece of wood. The center line can also be a good
reference, though it is not strictly necessary for subsequent steps.
Mark the outline of the cove on the piece of wood. The center line can also be a good
reference, though it is not strictly necessary for subsequent steps.
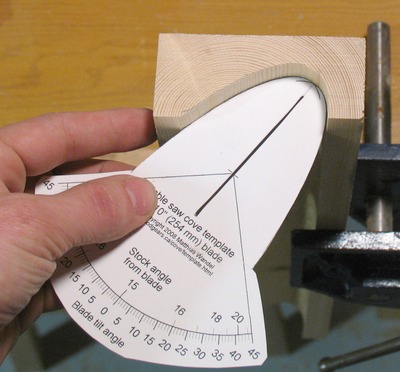
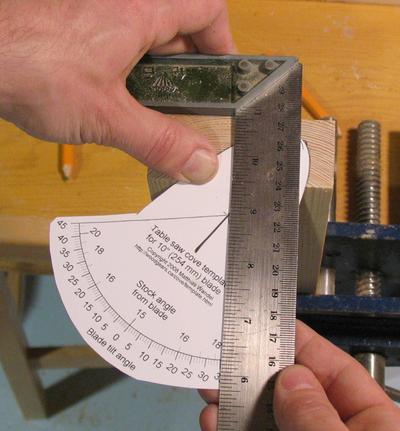 Using a square, line up the square's arm with the cove template protractor's pivot, and
read off the scale to see which angles the fence and blade tilt must be set to.
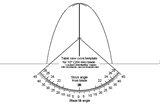
The inside (top) scale indicates the fence angel, while
the outside scale indicates the blade tilt angle. For this particular cove template
and angle, we need to set the fence to 18 degrees from the blade, and the blade tilt
to 35 degrees from vertical.
Using a square, line up the square's arm with the cove template protractor's pivot, and
read off the scale to see which angles the fence and blade tilt must be set to.
The inside (top) scale indicates the fence angel, while
the outside scale indicates the blade tilt angle. For this particular cove template
and angle, we need to set the fence to 18 degrees from the blade, and the blade tilt
to 35 degrees from vertical.
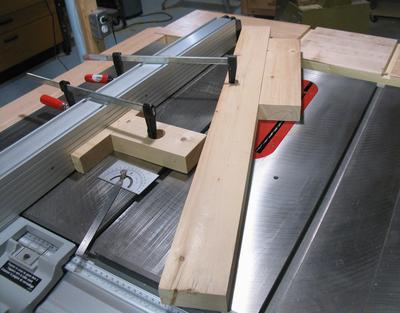 For setting up the fence. Its best to just attach it to the rip fence. That way, side to
side adjustments can still be made without worrying about the fence angle. Also note, for a
right tilt saw, put the fence on the left. For a left tilt saw, put it on the right.
That way, the blade pulls the stock towards the blade, as opposed to away from the blade.
For setting up the fence. Its best to just attach it to the rip fence. That way, side to
side adjustments can still be made without worrying about the fence angle. Also note, for a
right tilt saw, put the fence on the left. For a left tilt saw, put it on the right.
That way, the blade pulls the stock towards the blade, as opposed to away from the blade.
 For American style table saws, where the blade moves up and down via a pivot as opposed
to along tracks, its best to set the blade to the depth of the final cut, and line
up the edge of the blade for the first cut. Then lower the blade to just a few
millimeters above the table and make progressively deeper cuts.
For American style table saws, where the blade moves up and down via a pivot as opposed
to along tracks, its best to set the blade to the depth of the final cut, and line
up the edge of the blade for the first cut. Then lower the blade to just a few
millimeters above the table and make progressively deeper cuts.
For saws where the blade moves along tracks (such as most European saws), you could
align the tips of the blades to the center line with the blade cranked most of the way down.
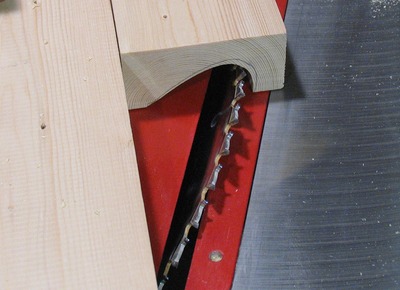 After a number of passes, the cove is almost cut to full depth.
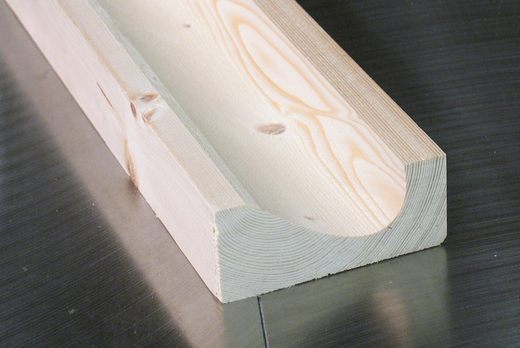
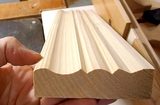
 The finished cove. Checking it against the template, just to be sure everything went as
planned.
The finished cove. Checking it against the template, just to be sure everything went as
planned.
See also:
 Asymmetric cove
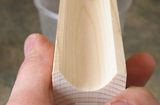 Cove cutting on the table saw
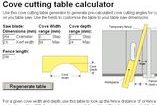 Cove cutting table
 Improvements to the
 Making a pirate sword
out of wood
 Molding tricks with a
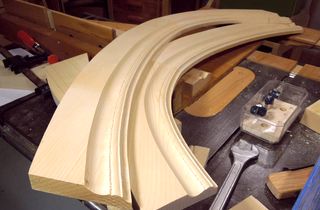 Curved molding with
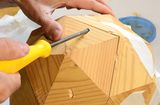 60-sided geodesic
Back to my Woodworking website.