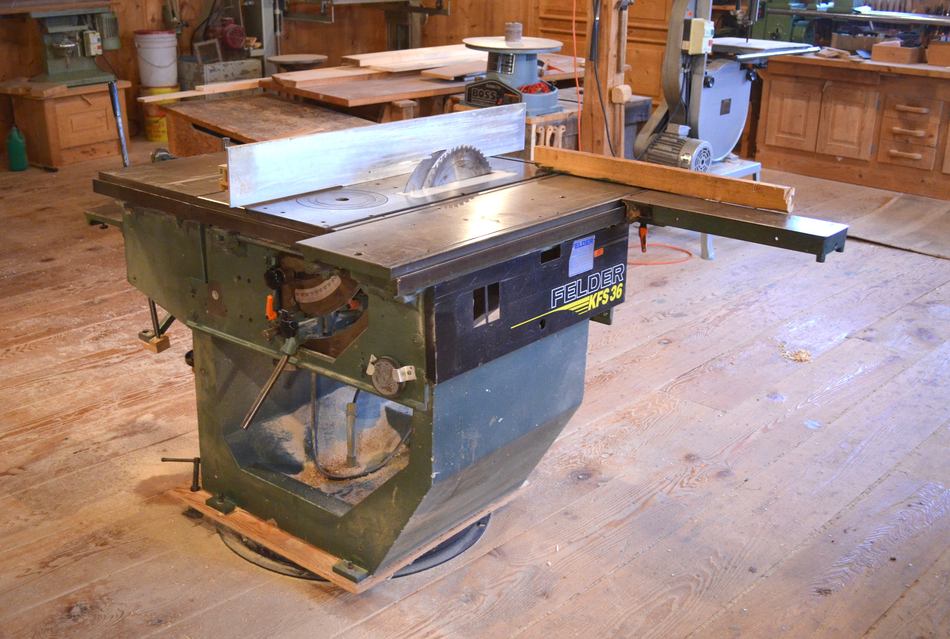
 This is my dad's Felder KFS36 table saw / shaper/ slot mortiser combination machine.
As massive as it is, by European standards, this machine was actually high-end hobby equipment.
This is my dad's Felder KFS36 table saw / shaper/ slot mortiser combination machine.
As massive as it is, by European standards, this machine was actually high-end hobby equipment.
After my dad's old shop burned down in late 1986, he travelled to Europe to order a new European style table saw. At the time, Felder was rapidly expanding, but to my knowledge, they hadn't officially entered the North American market yet.
Even though this saw is now 25 years obsolete, it still has a lot in common with modern European-style table saws. My dad used it to make furniture for many years. When I still lived at home, I would sometimes build stuff in my dad's shop, such as my knock down dresser, student desk, wooden tripods and pipe organ. This article reflects my limited experience with this saw.
 One thing that was new with the KFS 36 at the time was the long sliding table. It looks a bit like a
"format"-style sliding table, but it's not really suitable, or long enough for rip cuts.
My dad said the old rectangular sliding tables of the 1970s were made illegal under new regulations
that forbid protrusions like the long rail that the old sliding tables ran along.
One thing that was new with the KFS 36 at the time was the long sliding table. It looks a bit like a
"format"-style sliding table, but it's not really suitable, or long enough for rip cuts.
My dad said the old rectangular sliding tables of the 1970s were made illegal under new regulations
that forbid protrusions like the long rail that the old sliding tables ran along.
I have the feeling this saw may have been pre-production, at least, when I search for "Felder KFS 36", all the saws I find look similar, but a bit more refined than this one. The saw and shaper controls on this machine more closely resemble the previous "KFS 35" model.
 The original sliding table that came with this saw worked much like a
ball bearing drawer slide, with the balls running
directly against the cast iron. With my dad using it every day, it didn't take long for
that table to develop some serious play.
The original sliding table that came with this saw worked much like a
ball bearing drawer slide, with the balls running
directly against the cast iron. With my dad using it every day, it didn't take long for
that table to develop some serious play.
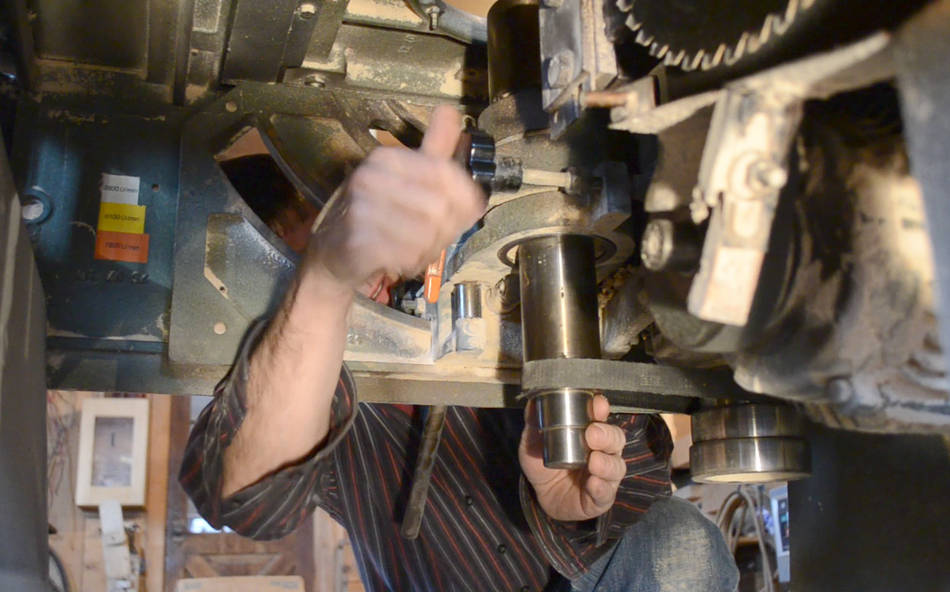
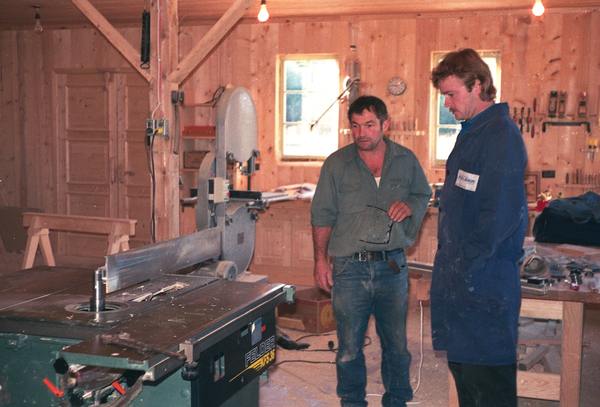 To Felder's credit, they sent a technician (the guy in blue), all the way from Austria, to replace the sliding
table and correct a few other defects we found with the saw.
To Felder's credit, they sent a technician (the guy in blue), all the way from Austria, to replace the sliding
table and correct a few other defects we found with the saw.
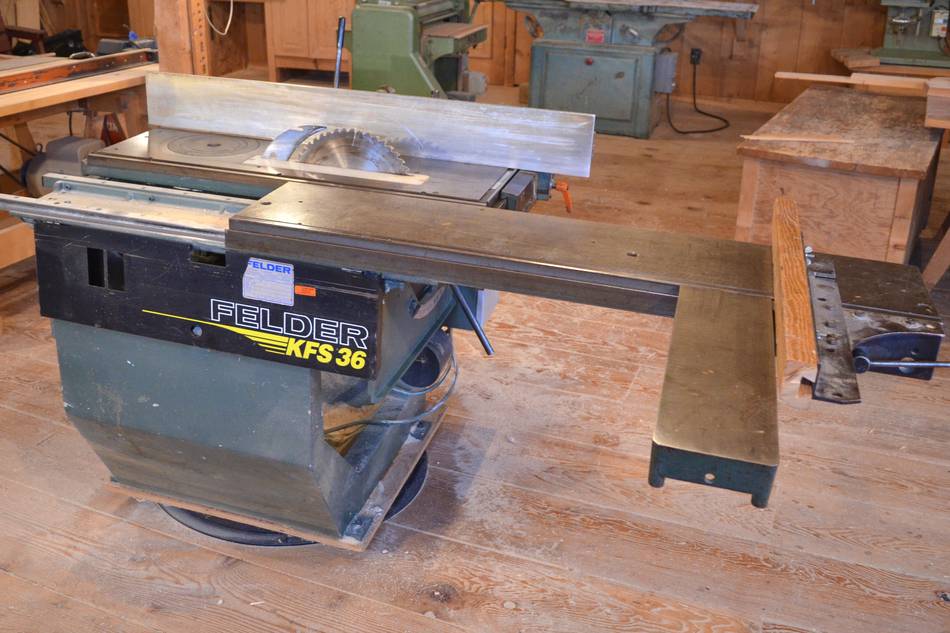
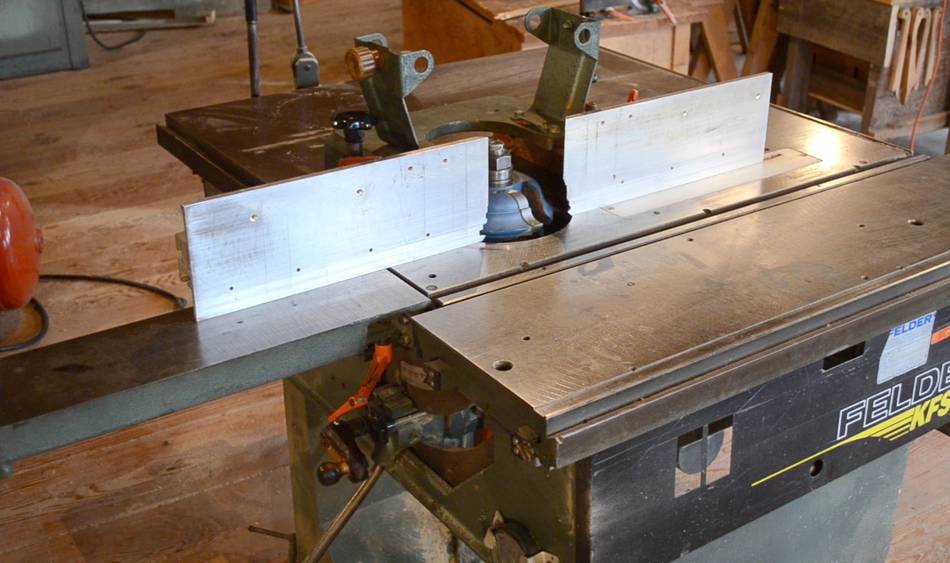
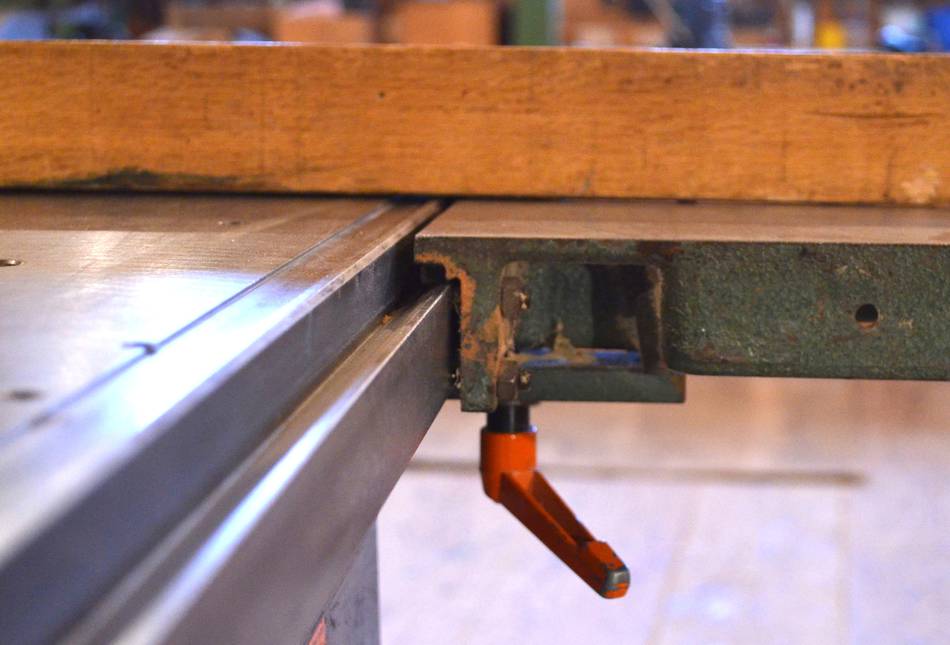 The sliding table is relatively narrow and doesn't have an outrigger.
But Felder has these small extension tables that
you can clamp to the sliding table, as well as the front and back edge of the saw.
The sliding table is relatively narrow and doesn't have an outrigger.
But Felder has these small extension tables that
you can clamp to the sliding table, as well as the front and back edge of the saw.
It's a clever system. The rip fence mounts to the same rails. However, this turns out to be a less than ideal system for manipulating the rip fence. Newer Felder table saws don't have this system anymore.
 The rip fence on this saw can tilt to the side. This is because that fence was also the fence
for Felder's jointer, where tilting the fence is useful. On a table saw, it's not really
that useful. Although it could be useful when cutting a very shallow bevel,
because you can't easily put the fence on the left side of the blade.
The rip fence on this saw can tilt to the side. This is because that fence was also the fence
for Felder's jointer, where tilting the fence is useful. On a table saw, it's not really
that useful. Although it could be useful when cutting a very shallow bevel,
because you can't easily put the fence on the left side of the blade.
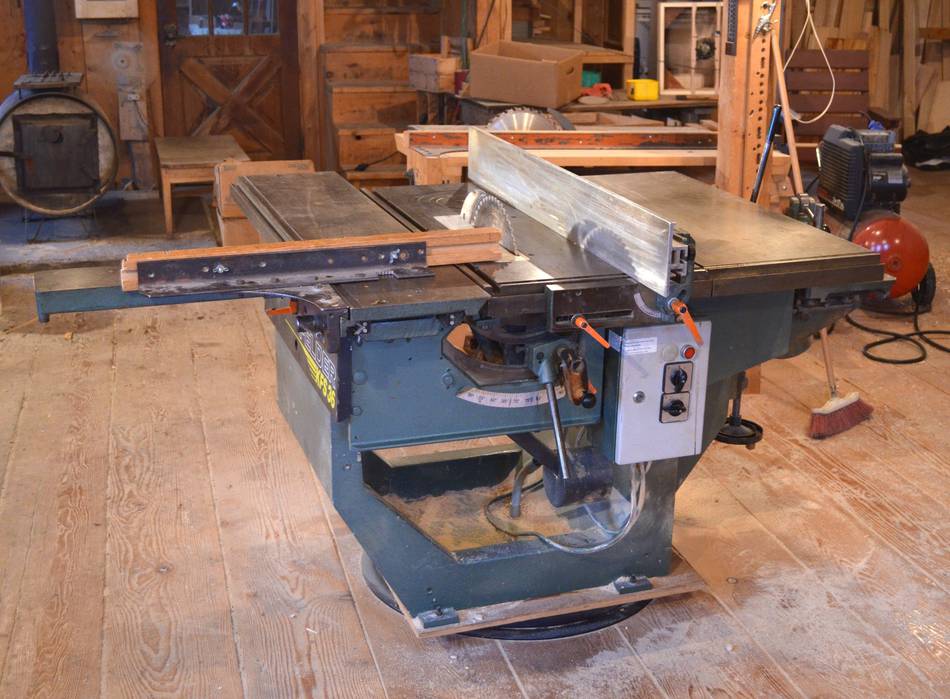
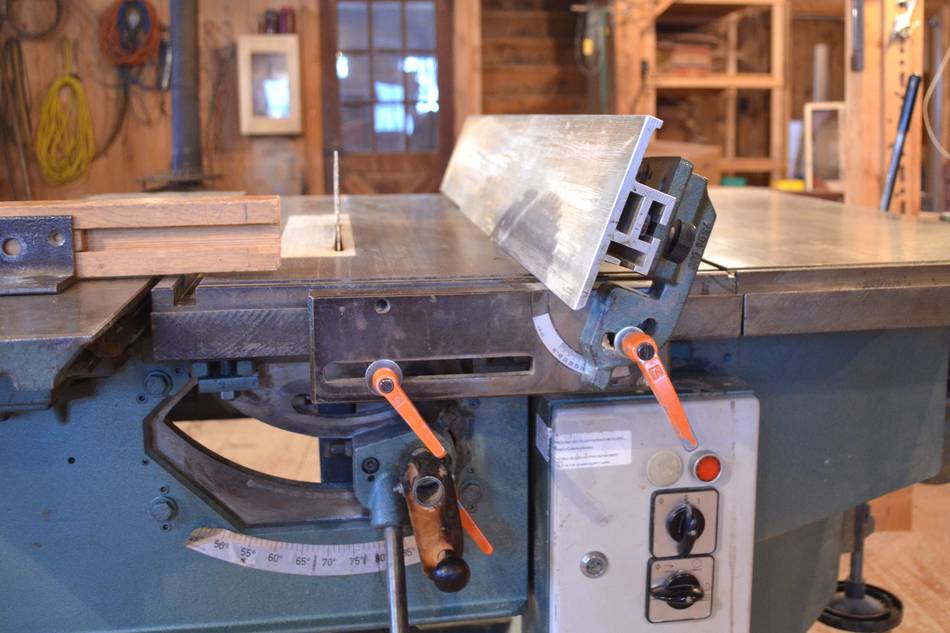
I used to think this fence was ok, but having gotten used to the fence on my Delta hybrid saw, I now find it awkward. It's heavy, has too much flex, and if you try to move it too close to the blade, the part that clamps to the rail hits the sliding table.
The saw controls are also quite hard to adjust. It takes a lot of hard cranking to raise the blade, and tilting the saw is a matter of loosening two knobs, then grabbing the long handle and tilting the saw. No nice worm-gear adjustment like I'm used to.
 The saw uses 300 mm blades (12"). Maximum depth of cut is 90 mm. On my Delta Hybrid saw, with
much easier to obtain and cheaper 10" blades, I can cut about 87 mm deep. Newer
Felder saws are able to cut 100 mm deep with a 300 mm blade.
The saw uses 300 mm blades (12"). Maximum depth of cut is 90 mm. On my Delta Hybrid saw, with
much easier to obtain and cheaper 10" blades, I can cut about 87 mm deep. Newer
Felder saws are able to cut 100 mm deep with a 300 mm blade.
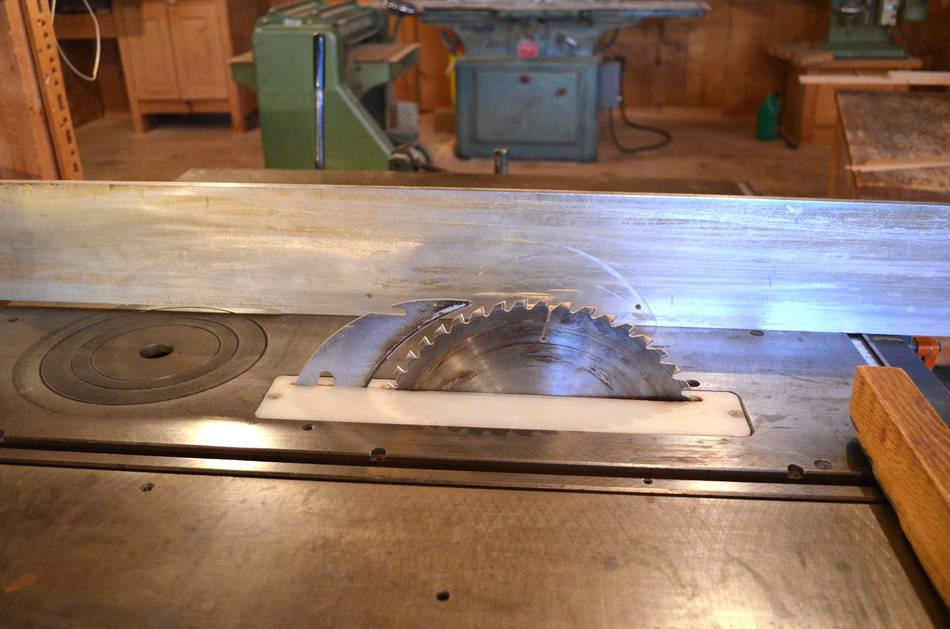
 The saw does have a riving knife. Good for safety.
Though on my saw, I use so many different
size saw blades, I'm not sure if I'd want a riving knife!
The saw does have a riving knife. Good for safety.
Though on my saw, I use so many different
size saw blades, I'm not sure if I'd want a riving knife!
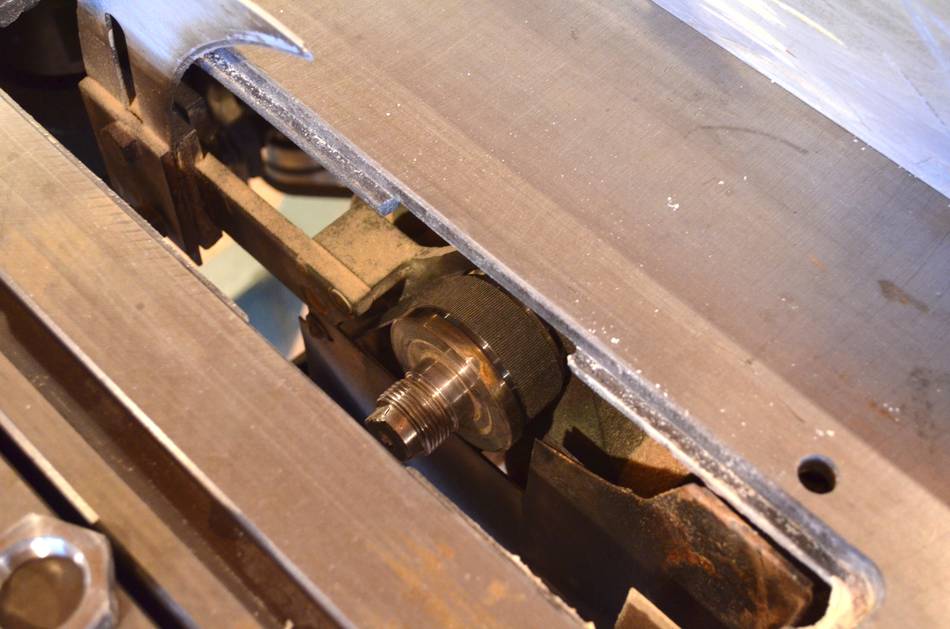
I like how the drive works on Felder table saws. The 64 mm flat-belt pulley is right behind the arbour flange. The 3500 RPM motor has a 96 mm pulley on it, which spins the blade at over 5000 RPM. I think that's a bit fast for a 300 mm blade. My Delta hybrid saw spins its 10" (254 mm) blade at only 3500 RPM.
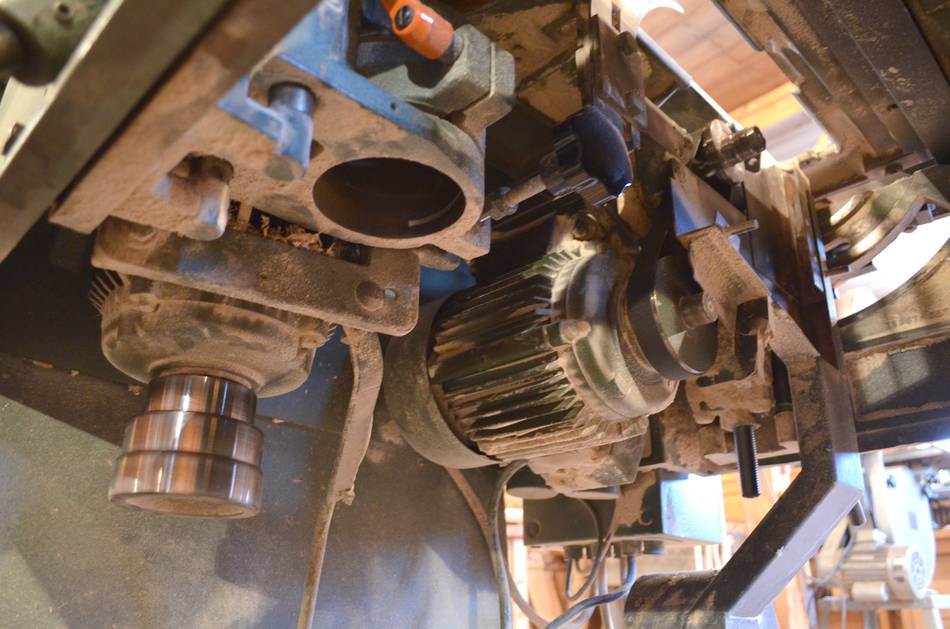 Flat belts require a lot of tension, so the mechanism in most American style table saws
would not be suitable. In the Felder, the motor is rigidly coupled to the arbour assembly, and the
whole assembly moves up and down together on slides. Flat belts are much more efficient,
but a downside is that, unless there is some braking when the saw is turned off,
it takes a long time for the blade to spin down.
I often run out of patience and push something against the side
of the blade to slow it down if I need to set up for another cut. Newer European saws all have
some electric braking to stop the blade, but this feature was not yet mandated in 1986
Flat belts require a lot of tension, so the mechanism in most American style table saws
would not be suitable. In the Felder, the motor is rigidly coupled to the arbour assembly, and the
whole assembly moves up and down together on slides. Flat belts are much more efficient,
but a downside is that, unless there is some braking when the saw is turned off,
it takes a long time for the blade to spin down.
I often run out of patience and push something against the side
of the blade to slow it down if I need to set up for another cut. Newer European saws all have
some electric braking to stop the blade, but this feature was not yet mandated in 1986
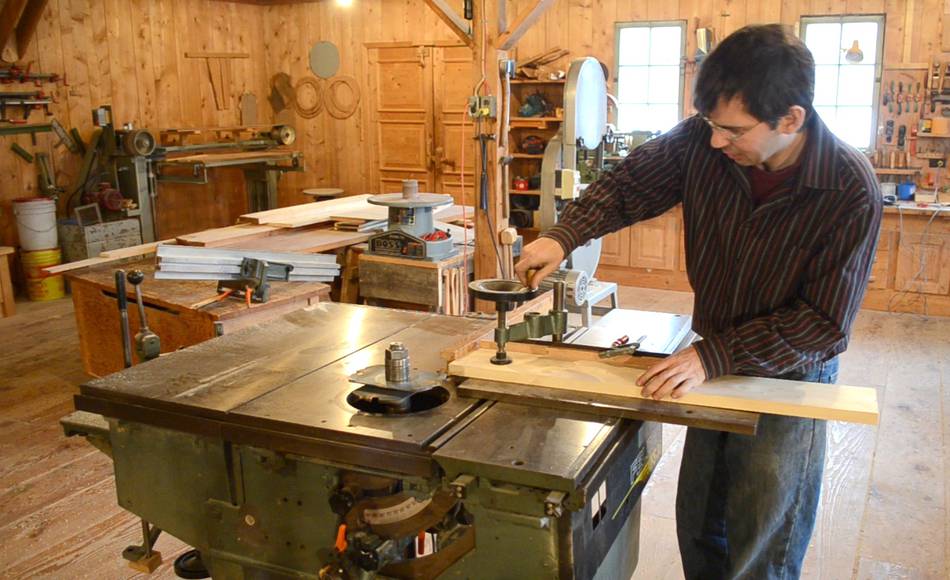
In the photo, at left, you can also see the shaper motor, behind the round hole in which the shaper spindle mounts.
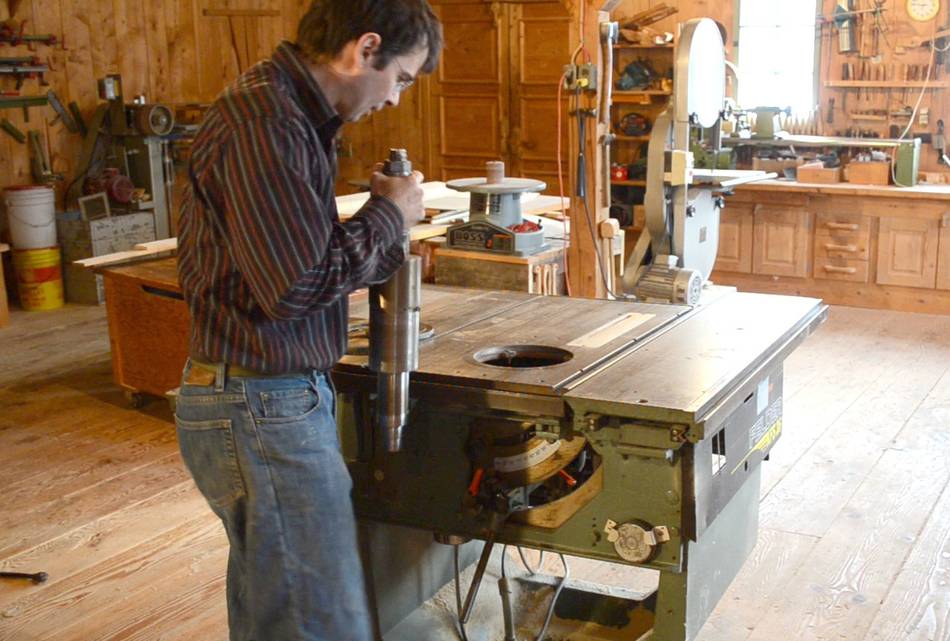 To use the machine in shaper mode, a heavy shaper spindle is inserted in the back part of the saw.
 The spindle fits snugly in a round mounting bracket next to the motor.
It's a bit of a chore getting it in. It's quite heavy (over 10 kg), and needs
to line up precisely with the mount to slide in.
The spindle fits snugly in a round mounting bracket next to the motor.
It's a bit of a chore getting it in. It's quite heavy (over 10 kg), and needs
to line up precisely with the mount to slide in.
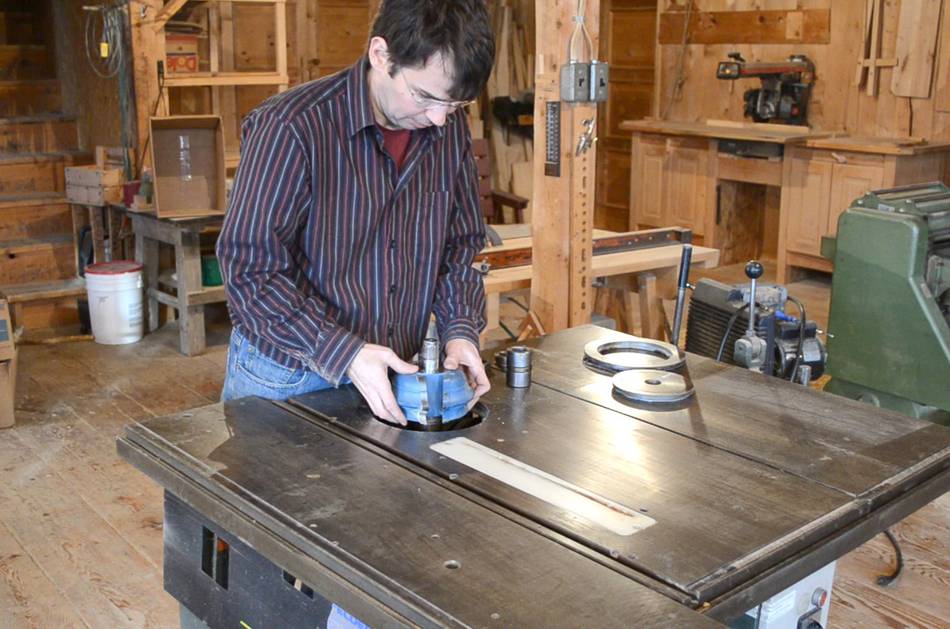
 After the spindle is inserted, a flat belt is installed, and then a knob tightened to
tension the belt. Three speeds can be selected with different belt positions.
After the spindle is inserted, a flat belt is installed, and then a knob tightened to
tension the belt. Three speeds can be selected with different belt positions.
 Installing a shaper head on the spindle.
|
Fence installed.
The hold-down rollers are not installed in this photo, they mount in the holes of the two green parts sticking up on either side of the shaper head. |
| The saw has three 3 HP capacitor-run motors (one for the saw, one for the shaper, and one for the slot mortiser). The run and start "capacitors" are actually condensers, so they are quite large. The condensers are shared between the three motors. Condensers have the advantage over capacitors that they don't wear out over time. |
 The big mode switch on the front panel selects which motor the power switch and condensers are
connected to.
The big mode switch on the front panel selects which motor the power switch and condensers are
connected to.
In configurations with a planer attached, the planer / mortiser motor needs to run forward for planing, and backwards for mortising. In this saw, even though it has no planer, the mortiser motor could be reversed.
When I built my wooden tripod, I found it necessary to mount a shaper head upside-down and tilted to cut the dovetails. This necessitated running the shaper backwards, which I figured would be much more useful than running the mortiser backwards, so I swapped the wiring for the two motors.
 I'm not fond of molding on furniture, so personally I have never
used the shaper as a shaper on this saw.
But a really cool use of the shaper is to make tenons.
I'm not fond of molding on furniture, so personally I have never
used the shaper as a shaper on this saw.
But a really cool use of the shaper is to make tenons.
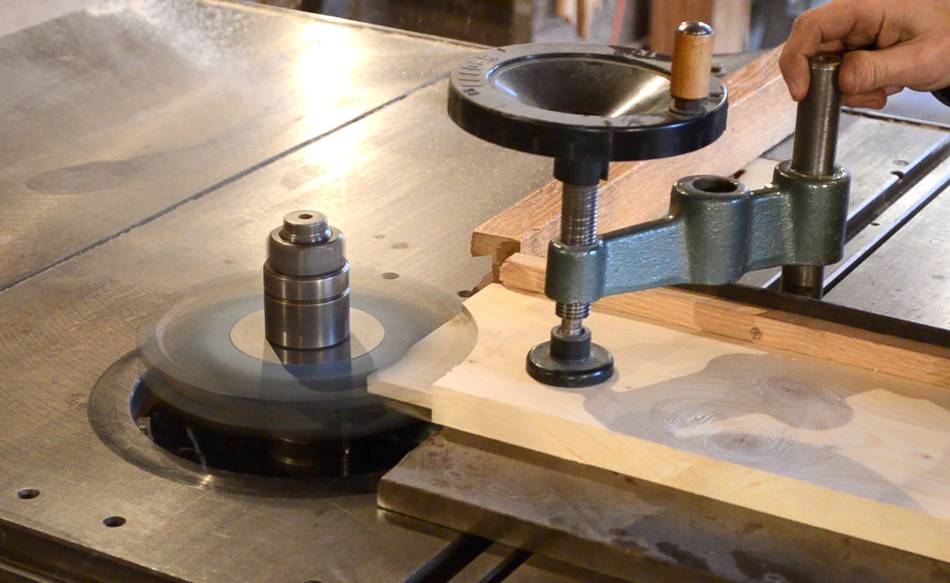
Here I'm installing two cutters, with a spacer in between, for cutting a simple tenon.
 A thick steel plate is screwed to the sliding table for holding the work piece.
On this plate is a homemade fence my dad made for it, with various small
holes for screwing a sacrificial fence to it.
A thick steel plate is screwed to the sliding table for holding the work piece.
On this plate is a homemade fence my dad made for it, with various small
holes for screwing a sacrificial fence to it.
Here I'm installing the crosscut fence on the front edge (same dovetail all around the saw). This fence serves as a stop for positioning the stock.
 Stock clamped on the plate, ready for cutting a tenon.
 The saw makes quick work of cutting a tenon. One pass, clean cut, both sides!
Cutting both sides of the tenon in one pass ensures that the tenon is accurate. No hand-fitting of tenon with this method!
It's the consistency of this set-up that inspired me to come up with the quick-set tenon jig
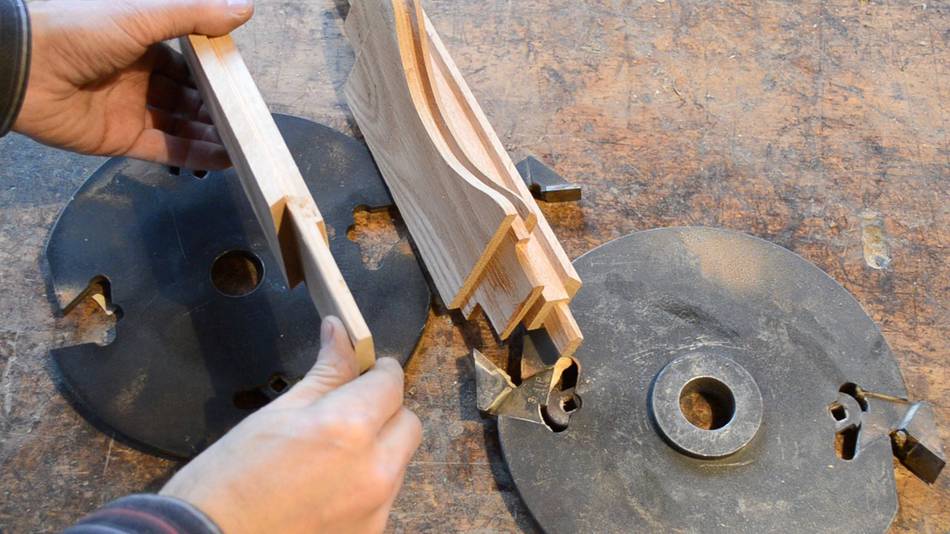 Using different size and angles of cutter heads, It's possible
to cut tenons that would be very difficult to cut with a table saw.
Using different size and angles of cutter heads, It's possible
to cut tenons that would be very difficult to cut with a table saw.
For example, the one I'm holding has the left cheek longer than the right, and the left shoulder is cut at a 20 degree angle. Essentially, this set-up serves as both a tenon cutter and coping sled, with the appropriate profiles cut into the tenon shoulder.
Some of the cutters used for long tenons are quite large and heavy - as large as 300 mm in diameter! Tenons up to 100 mm in length can be cut.
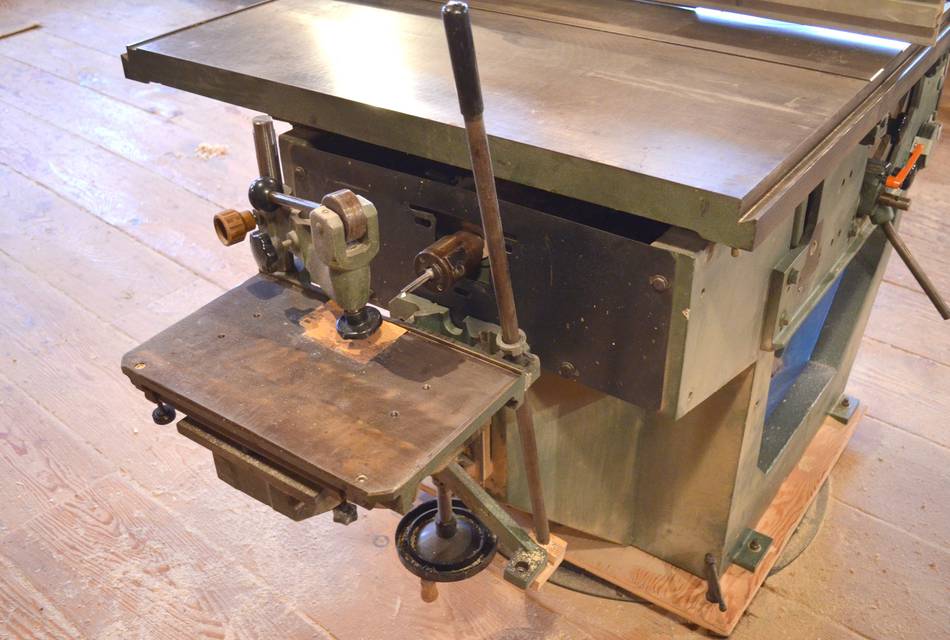 The slot mortising part of the saw is on the very right of the saw.
A motor, with a chuck directly on the shaft sits below the right-side table, and an x-y sliding table is mounted below it.
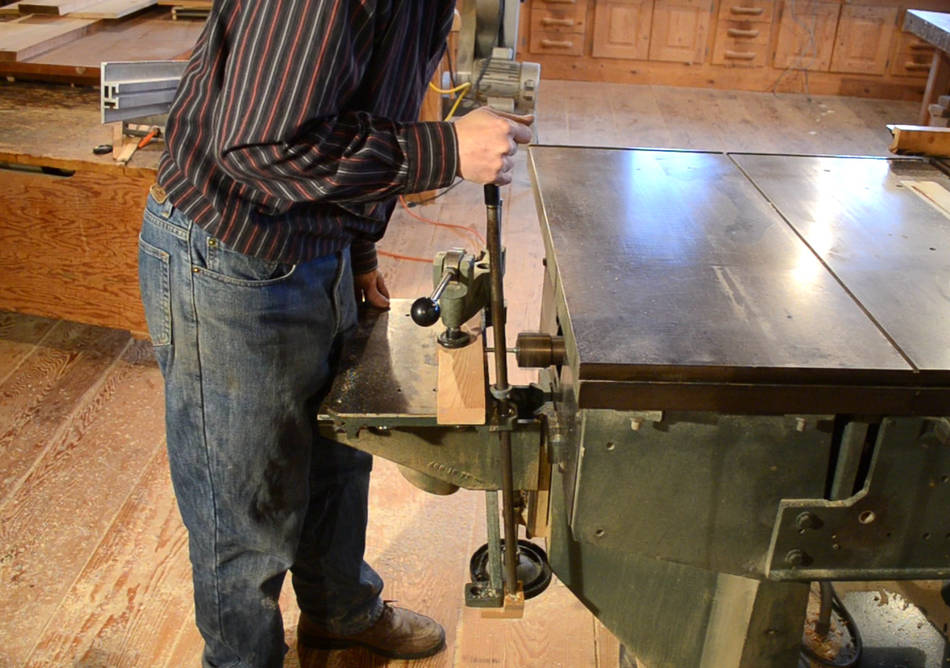 Using the slot mortiser is a bit awkward. The table saw table
gets in the way of getting a good view of the work.
Using the slot mortiser is a bit awkward. The table saw table
gets in the way of getting a good view of the work.
 With the saw as shipped, the single lever for controlling the table kept
bumping up against the saw's table. So my dad made a new pivot point
for the bottom of the lever. With the bottom of the lever close to the saw,
the work table can be moved closer to the chuck before the operating lever
hits the saw table.
With the saw as shipped, the single lever for controlling the table kept
bumping up against the saw's table. So my dad made a new pivot point
for the bottom of the lever. With the bottom of the lever close to the saw,
the work table can be moved closer to the chuck before the operating lever
hits the saw table.
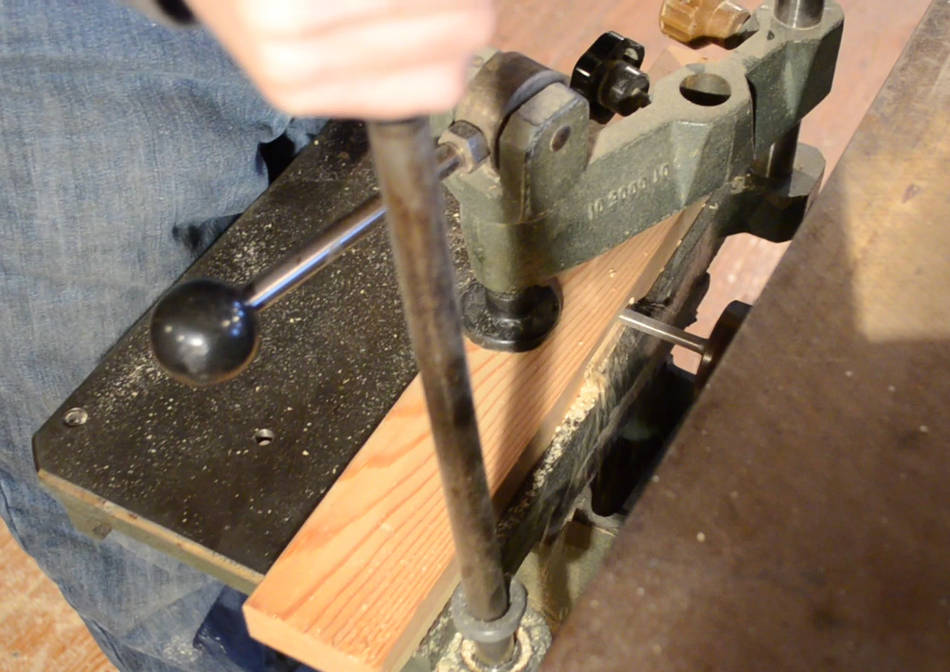 Cutting a mortise. This is not a good viewing angle, but with the
saw table getting in the way, this is the best shot I could get of the
operation.
Cutting a mortise. This is not a good viewing angle, but with the
saw table getting in the way, this is the best shot I could get of the
operation.
It's tempting to take the mortising motor and table off the saw and make a frame for them to make a separate slot mortiser. I'd probably put just a small run-capacitor on the motor, just so it starts. That would de-rate the motor considerably, but for slot mortising, 3 HP is way overkill. 1/2 HP would be plenty.
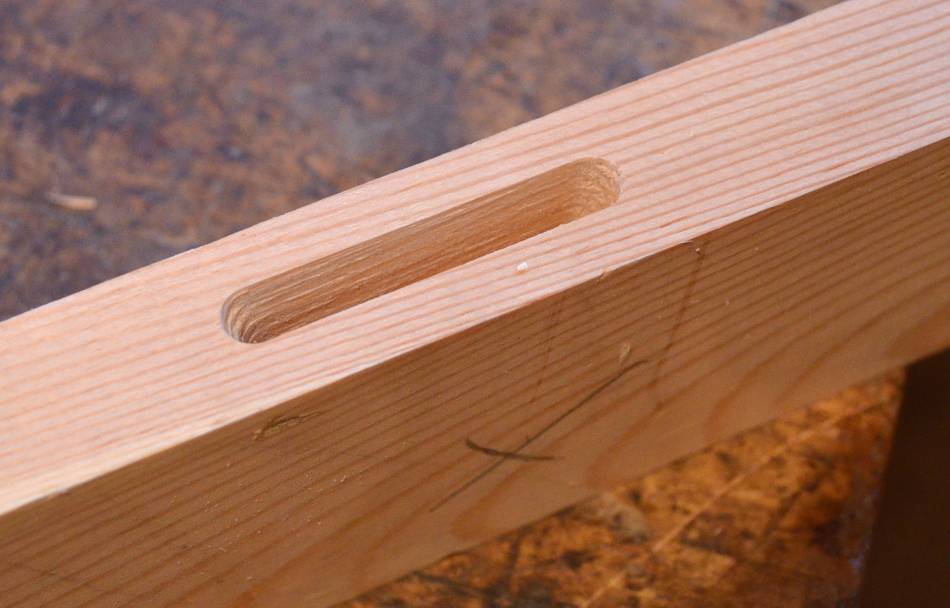 With the slot mortiser running at 3500 RPM, it doesn't cut as fast
as a router, but it's much quieter, less dusty, and can cut deeper than a router.
And it cuts clean enough - cleaner than a hollow chisel mortiser.
With the slot mortiser running at 3500 RPM, it doesn't cut as fast
as a router, but it's much quieter, less dusty, and can cut deeper than a router.
And it cuts clean enough - cleaner than a hollow chisel mortiser.
See also:
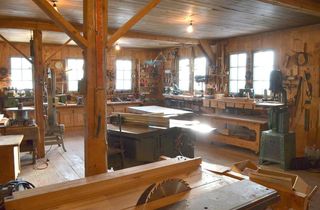 Dad's shop tour, 2013
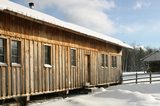 Dad's shop, 2007
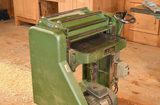 20 inch thickness planer
 Dad's furniture designs
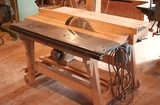 Homemade table saw