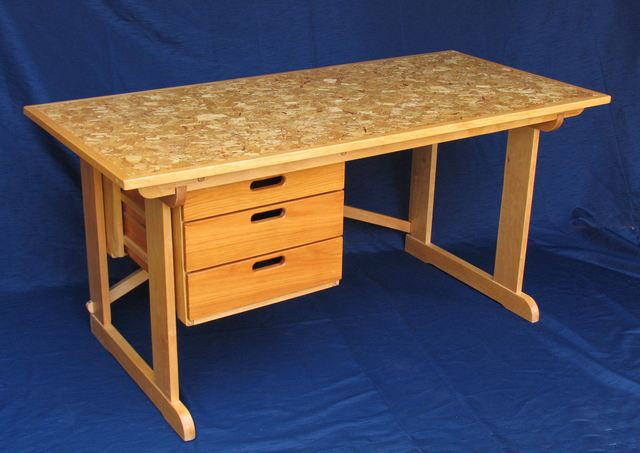

I built this student desk back in 1990 in my dad's workshop while I was still a Co-op student at the University of Waterloo. Being a co-op student involved moving every four months, so my goal was to build a desk that was easy to move, especially with a car.
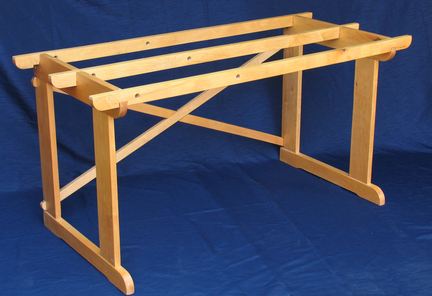
This desk comes apart completely without the use of any tools. It is to some extent just held
together by gravity. But loaded up with enough stuff on top, its quite stable. Its also much
sturdier than the average student desk made out of particle board.
Desk assembly (2017 video)
Desk dissasembly stop motion animation (2007 video)
|
|
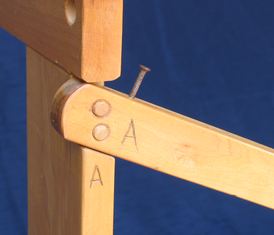
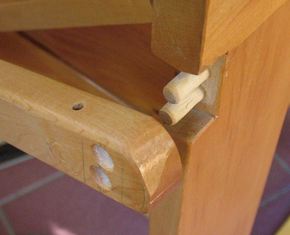
A steel pin is inserted through the crossbrace and into the frame. These pins are inserted from the top on
both top and bottom, so gravity holds them in place. The pins are actually just nails, with the point ground
off.
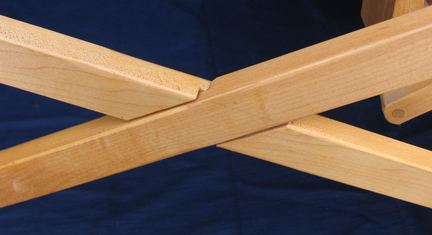
The two crossbraces overlap where they cross in the middle. I just cut out a notch, so they form a sort of lap joint, except that the 'joint' is just loose. There's no attachment where the pieces cross.
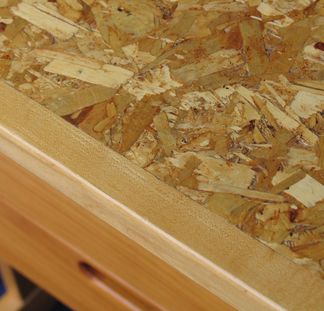
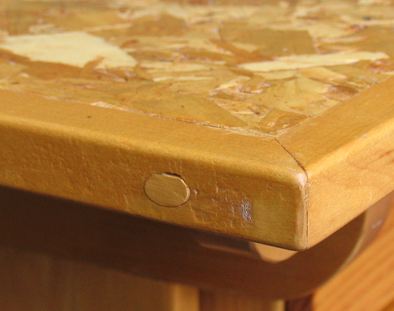
I surrounded the OSB with a frame of maple. The OSB top actually sits in a rabbet in the maple frame, so I had more gluing surface.
After I mounted the trim around the OSB, I reinforced the corners of the frame with a dowel at a 45 degree angle. I wasn't totally happy with how that turned out, but I drilled them from the sides and back, so the dowels can't be seen from the front.
If I was doing it again, I'd cut a slot into the end pieces similar to This technique.
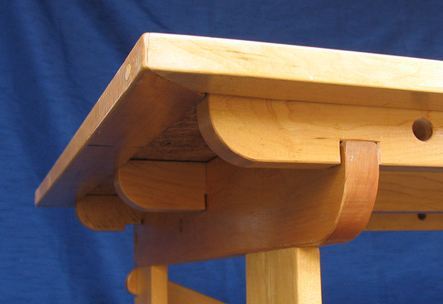
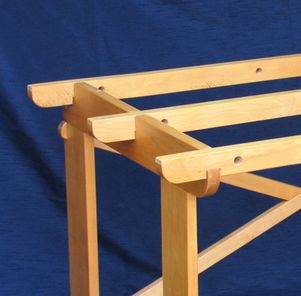
Because the frame around the OSB thicker than the OSB is, there's a 1 cm ridge at the bottom. This ridge
fits exactly over the rungs underneath the desk frame, and also locks the front rung in, so it cannot slide
out. On the back edge, the supporting frames end flush with the frame, and the back-most rung is actually inside
a bit, so that it still fits inside the frame around the OSB. The desk top, with its frame fitting around the rungs
keeps everything aligned square.
Continued... Drawer assembly
See also Plans for this desk
Back to my Woodworking website
![]()