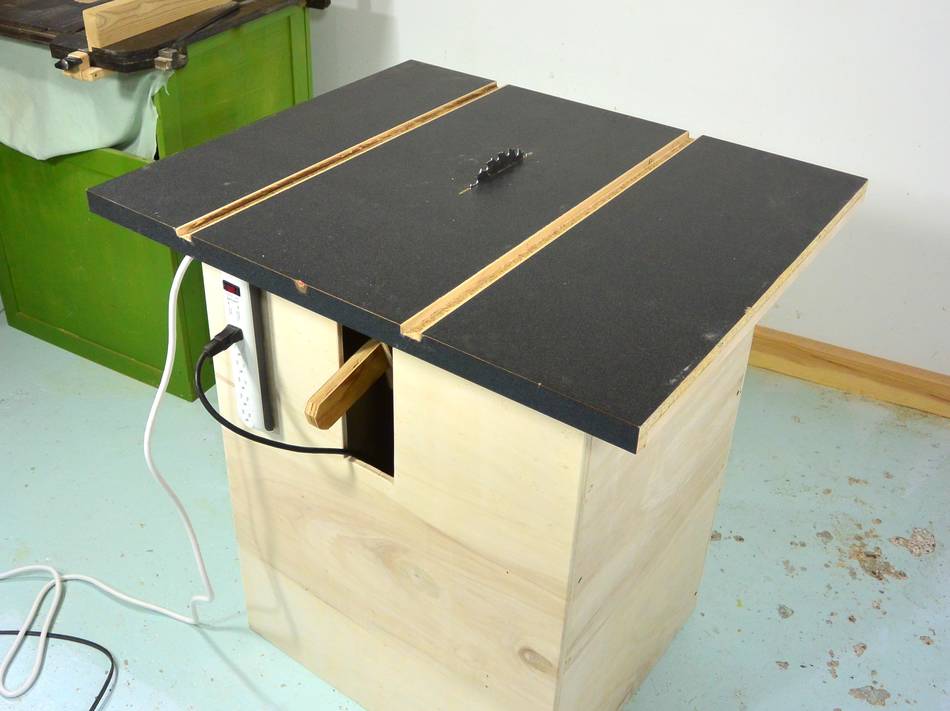
A stand for the homemade table saw
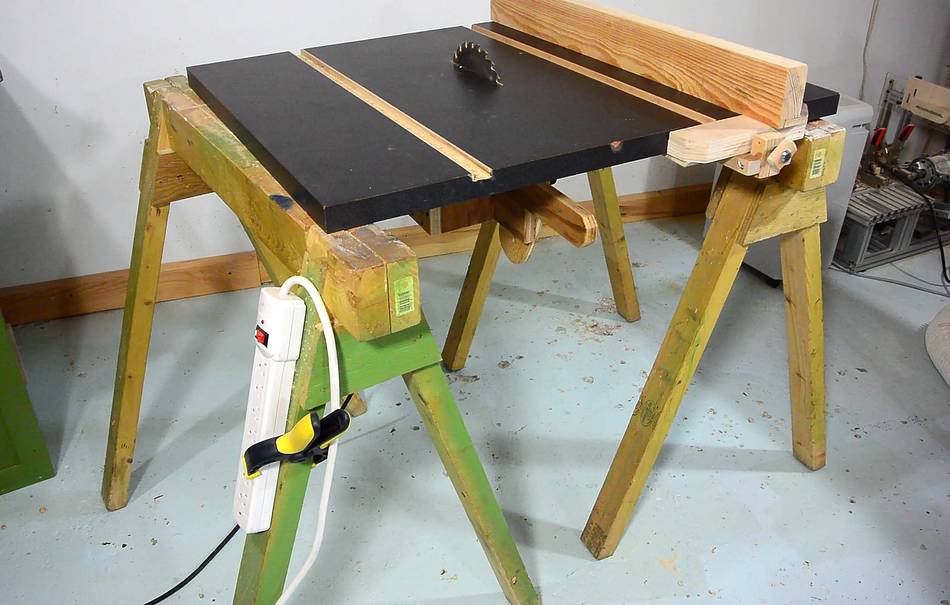 With table, slots, fence and depth adjust mechanism, the homemade table
saw is fully usable. But it still needs a stand.
With table, slots, fence and depth adjust mechanism, the homemade table
saw is fully usable. But it still needs a stand.
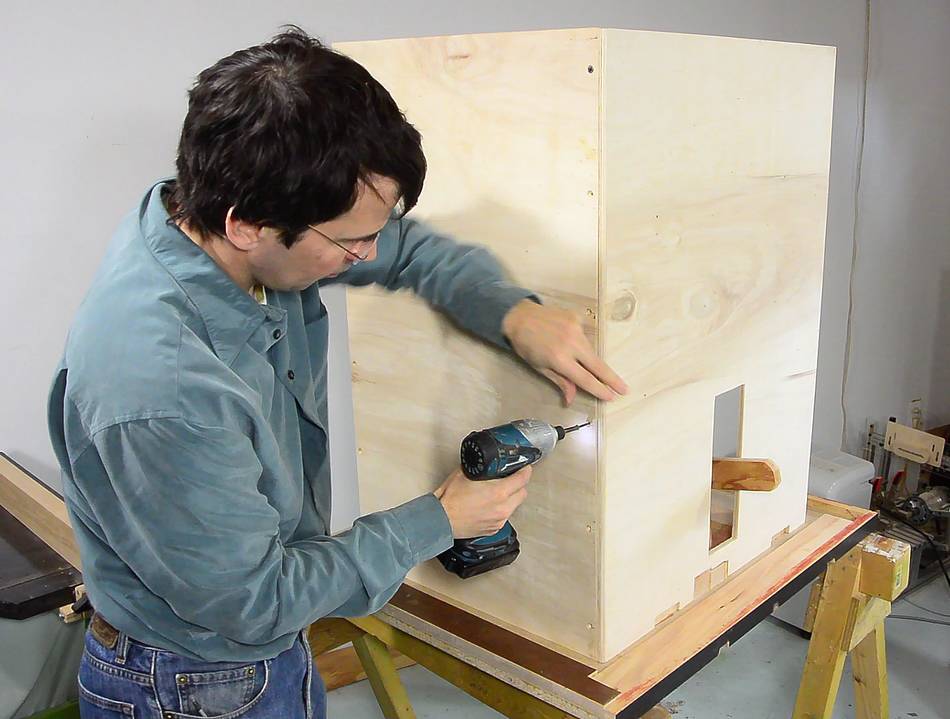 I made the stand from some very low quality 10 mm (3/8") plywood that came
from discarded shipping crates. The front and back panels needed
a few notches cut out to mate with the underside of the table, plus a slot
the depth adjust mechanism.
I made the stand from some very low quality 10 mm (3/8") plywood that came
from discarded shipping crates. The front and back panels needed
a few notches cut out to mate with the underside of the table, plus a slot
the depth adjust mechanism.
The stand is screwed together at the corners. I came up with a fancy folding design for my previous saw, but I opted for simplicity with this one. I may eventually wear out the screw holes if I take it apart too many times, but I could always switch to machine screws and threaded inserts later, or install hinges.
 The front and back panels have rails glued along either side to screw the side
panels into.
The front and back panels have rails glued along either side to screw the side
panels into.
The rails also help keep the really cheap plywood flat. The wood was very rough, and I had to sand it quite a bit to get it even moderately smooth.
A sturdy cardboard box from an appliance like a dishwasher or bar fridge might make a good stand, but didn't come across such a box, and I already had the plywood which I couldn't use for much else.
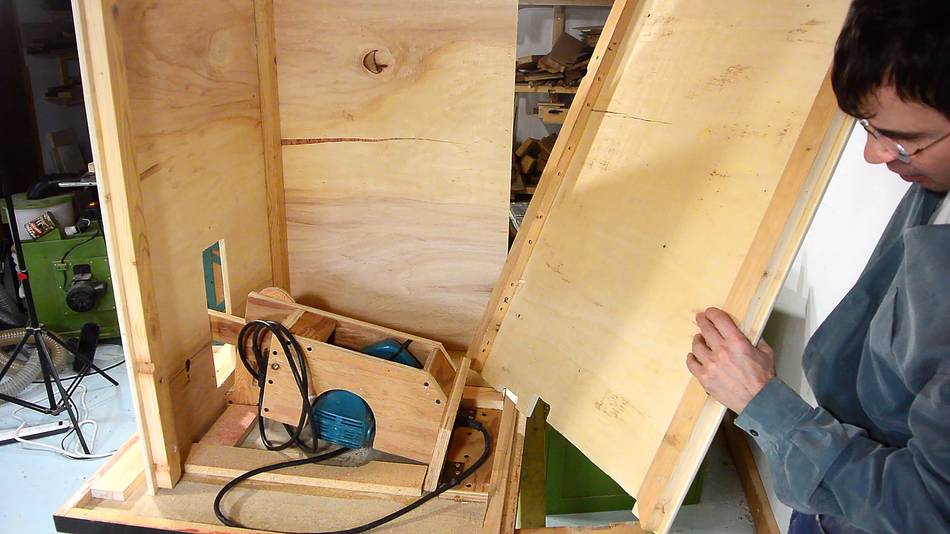
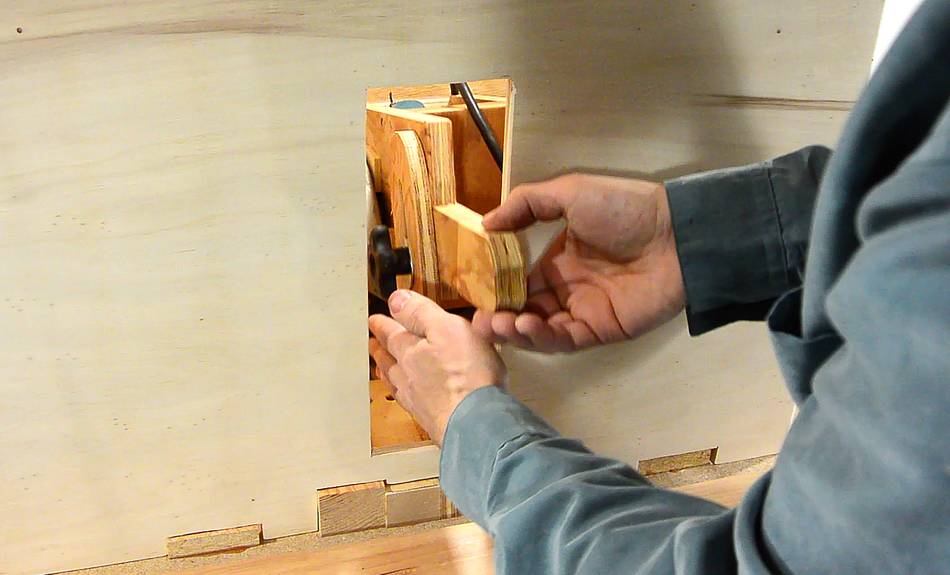 The slot in the front is just barely wide enough to reach in and tighten the
depth locking knob. I wanted it small so less dust gets blown out
the front. I might even add a "curtain" of sorts, like I did with
the much larger opening on my previous homemade table saw.
The slot in the front is just barely wide enough to reach in and tighten the
depth locking knob. I wanted it small so less dust gets blown out
the front. I might even add a "curtain" of sorts, like I did with
the much larger opening on my previous homemade table saw.
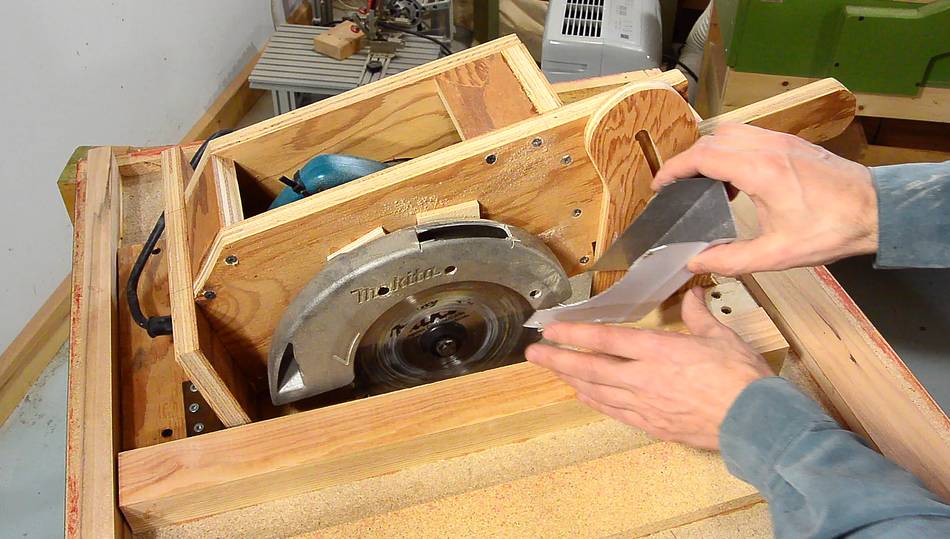
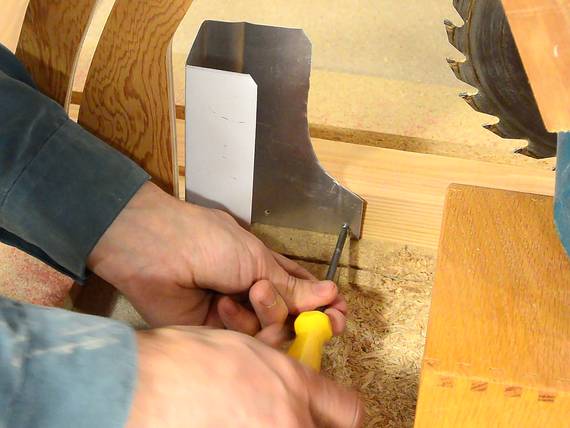 I made a dust deflector to keep sawdust from getting thrown out
of the slot at the front of the saw.
It's made from a piece of aluminium flashing, and screws
into some of the wood on the bottom of the saw.
I made a dust deflector to keep sawdust from getting thrown out
of the slot at the front of the saw.
It's made from a piece of aluminium flashing, and screws
into some of the wood on the bottom of the saw.
I used a box to prop up the saw while I worked on this. Though in retrospect, it would have been smart to remove the blade as well, just in case it came falling down while putting in the screws. So if this happens to you, don't blame me - I warned you!
Blade sizes and blade changes
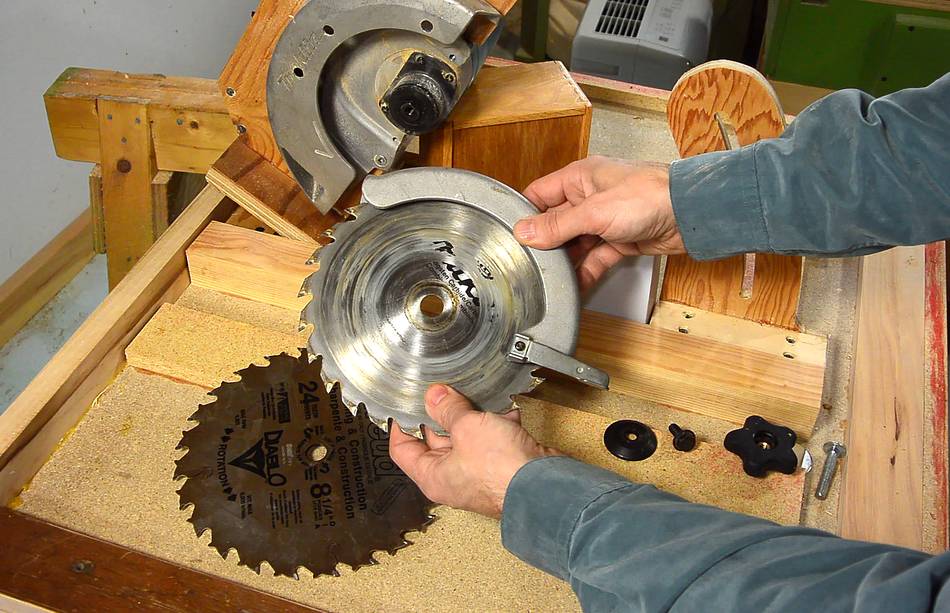
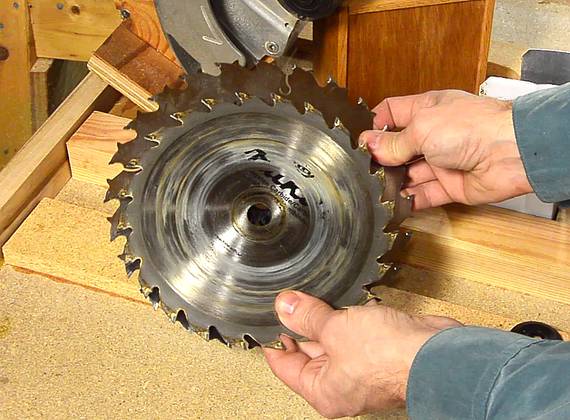 The circular saw was designed to take 7 1/4" blades, which just fit inside
the rotating inner blade guard. But because I got rid of the inner guard
I can fit an 8 1/4" blade in it now.
The circular saw was designed to take 7 1/4" blades, which just fit inside
the rotating inner blade guard. But because I got rid of the inner guard
I can fit an 8 1/4" blade in it now.
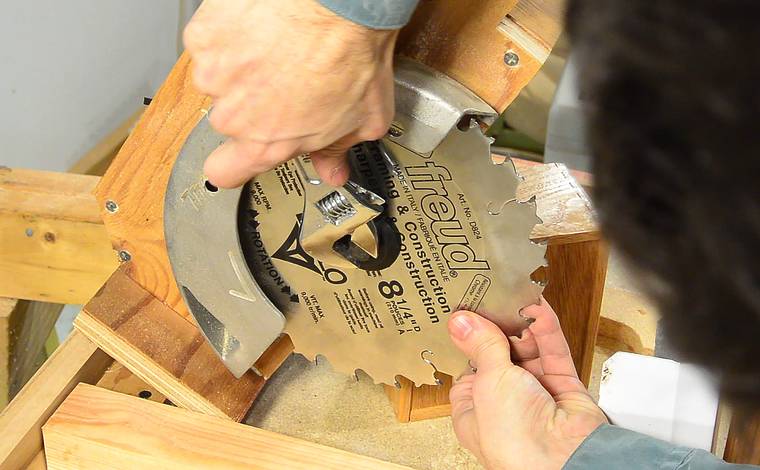 I didn't make a table insert for this saw, so all blade changes need to be done
from below the table or by flipping the top upside down.
I didn't make a table insert for this saw, so all blade changes need to be done
from below the table or by flipping the top upside down.
I may route a slot for an insert plate later if the hole around the saw gets too worn. But that will require a router, and I didn't want building this saw to require that you have a router. If I do add a slot, it will probably be only 2-3 cm wide. With no tilt, and blade changes below the table, it doesn't need to be very large. And a bigger slot would also weaken the table.
If you want to make your saw with an insert, please see making inserts for my previous table saw.
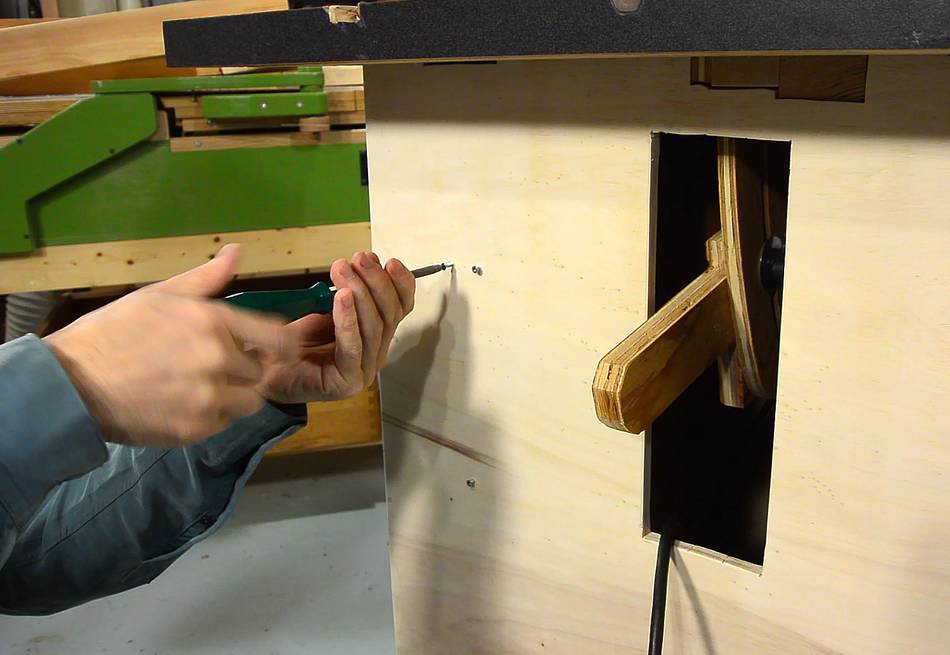
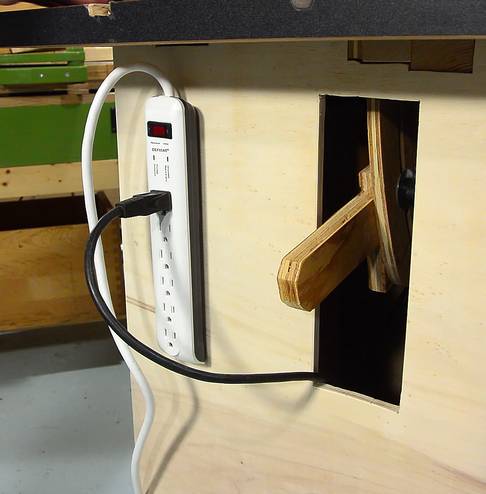 I mounted a power bar on the front of the saw as a power switch.
I carefully measured the screw slots on the back of the power bar, then put
some #5 screws in the front of the case to hang it by.
I mounted a power bar on the front of the saw as a power switch.
I carefully measured the screw slots on the back of the power bar, then put
some #5 screws in the front of the case to hang it by.
I wanted a power bar with a longer cord, and ended up paying $18 for it at The Home Depot. In relation to the rest of this project, that was quite expensive. A decent circular saw costs $100, and I paid I think around $30 for the blade. That puts the cost into perspective - that a power bar should be a significant part of my total build cost!
 Nearly done.
 With the 8 1/4" blade installed I can get a total depth of cut of 68 mm,
or about 2 5/8". Though if I do need to cut something that deep, I will cut
it in multiple passes. The saw isn't powerful enough to cut that deep in
one pass. Mind you, I would cut that in multiple passes on my main table
saw as well, because the motor on it is not that powerful.
With the 8 1/4" blade installed I can get a total depth of cut of 68 mm,
or about 2 5/8". Though if I do need to cut something that deep, I will cut
it in multiple passes. The saw isn't powerful enough to cut that deep in
one pass. Mind you, I would cut that in multiple passes on my main table
saw as well, because the motor on it is not that powerful.
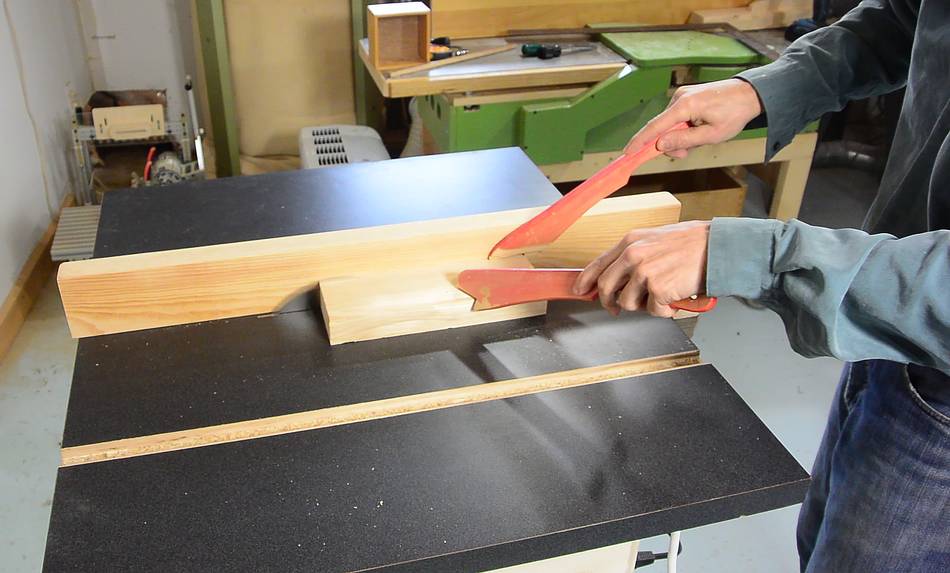
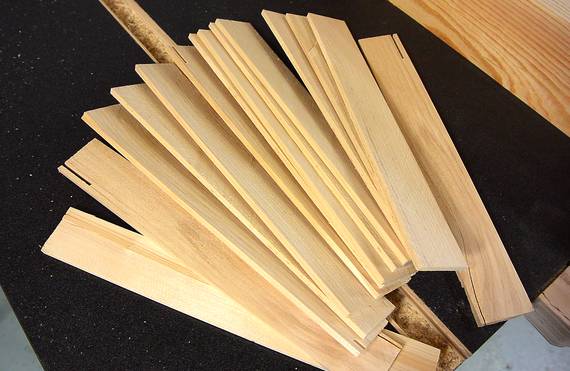 After that, I checked and tweaked the alignment
and tested the saw by ripping a piece of 2x6 into thin strips.
After that, I checked and tweaked the alignment
and tested the saw by ripping a piece of 2x6 into thin strips.
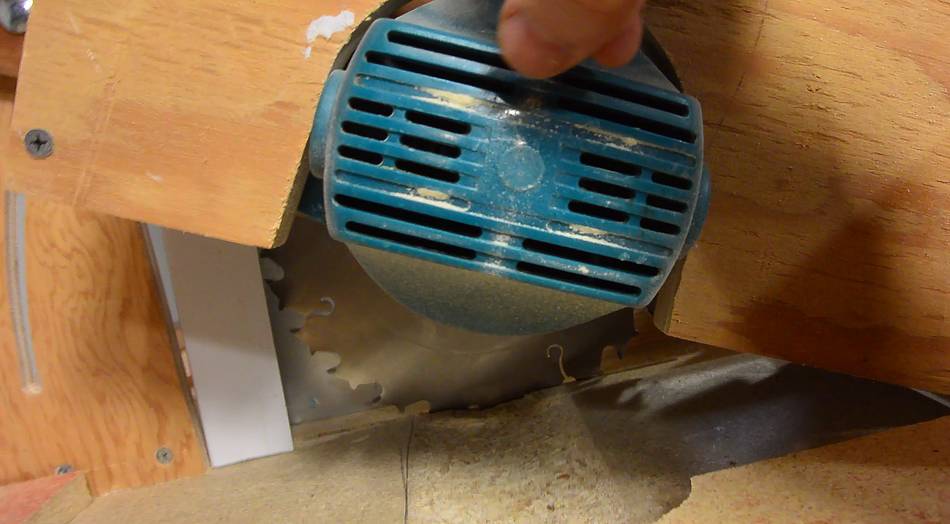 Flipping the top and checking for dust, I saw some dust deposited near
the motor inlet. This is something I will have to monitor to see how bad
it gets.
Flipping the top and checking for dust, I saw some dust deposited near
the motor inlet. This is something I will have to monitor to see how bad
it gets.
It's often been suggested, for my other saw, that I connect the motor inlet to the outside of the case with a short piece of dryer hose. That would solve the problem, but it would be a bother to deal with. Also, by pulling fresh air into the enclosure, it would also force dusty air out.
If you build a saw like this, and you make an enclosed stand for it, this is something you need to check from time to time. Making the enclosure bigger alleviates the problem to some extent.
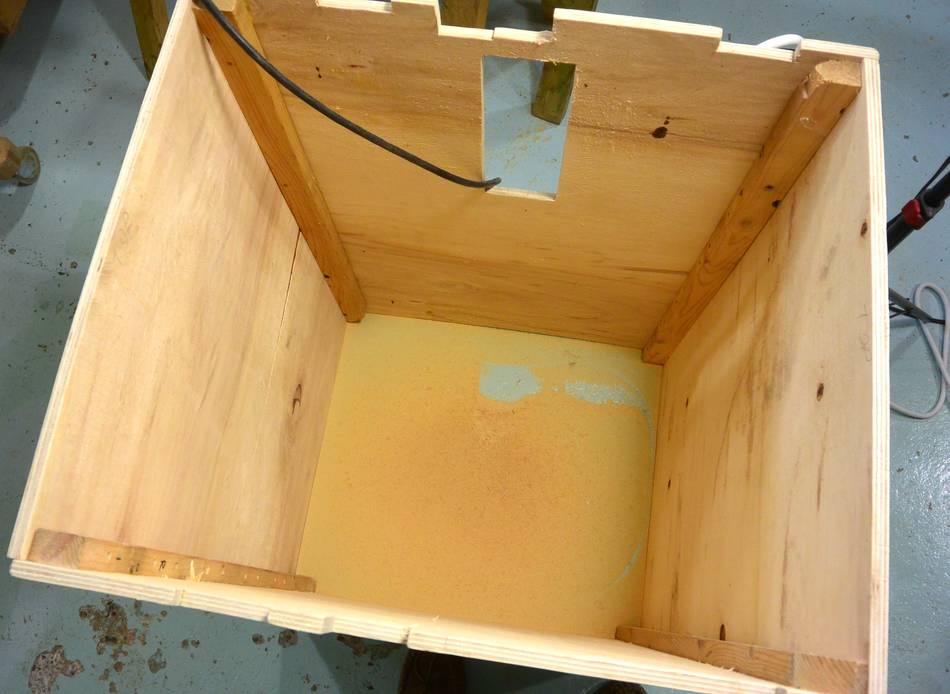 A small amount of sawdust ended up in front of the saw, but
no worse than my main table saw. There was a lot of dust in the bottom of
the enclosure, with a blank spot right below the front of the blade.
A small amount of sawdust ended up in front of the saw, but
no worse than my main table saw. There was a lot of dust in the bottom of
the enclosure, with a blank spot right below the front of the blade.
The chips are deflected straight down by my aluminium deflector and hit the floor at high speed, scattering and bouncing all the sawdust away, leaving that spot with no sawdust.
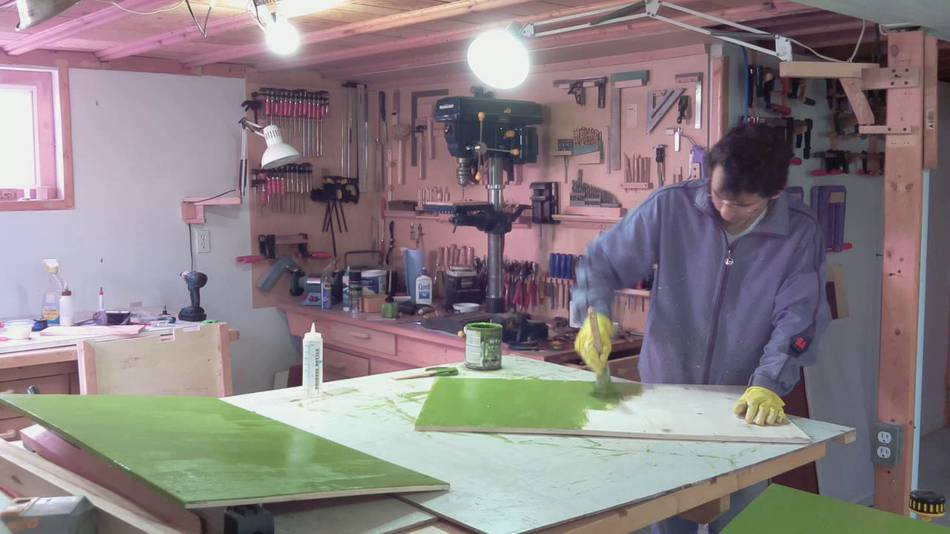 I painted the saw stand with my usual green, left over from when I painted
my homemade dust collector.
I painted the saw stand with my usual green, left over from when I painted
my homemade dust collector.
I also painted the fence bracket black to make it look snappy. I added two coats of clear Varathane diamond floor varnish over the paint to protect it and make it glossy.
 While I need to lift the top off the saw for blade changes, at other times
I just want to be able to pick up the whole saw and move it. The saw and
stand weigh about 70 pounds (32 kg), so lifting it and moving it is still
practical.
While I need to lift the top off the saw for blade changes, at other times
I just want to be able to pick up the whole saw and move it. The saw and
stand weigh about 70 pounds (32 kg), so lifting it and moving it is still
practical.
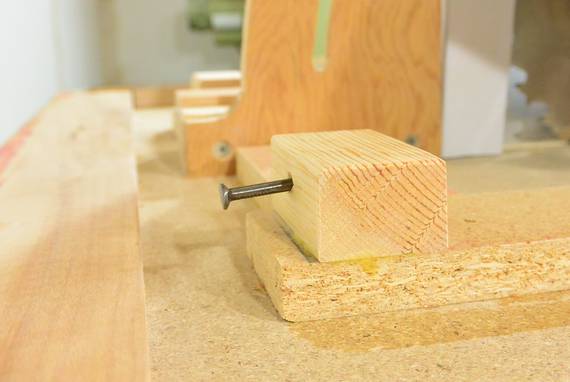
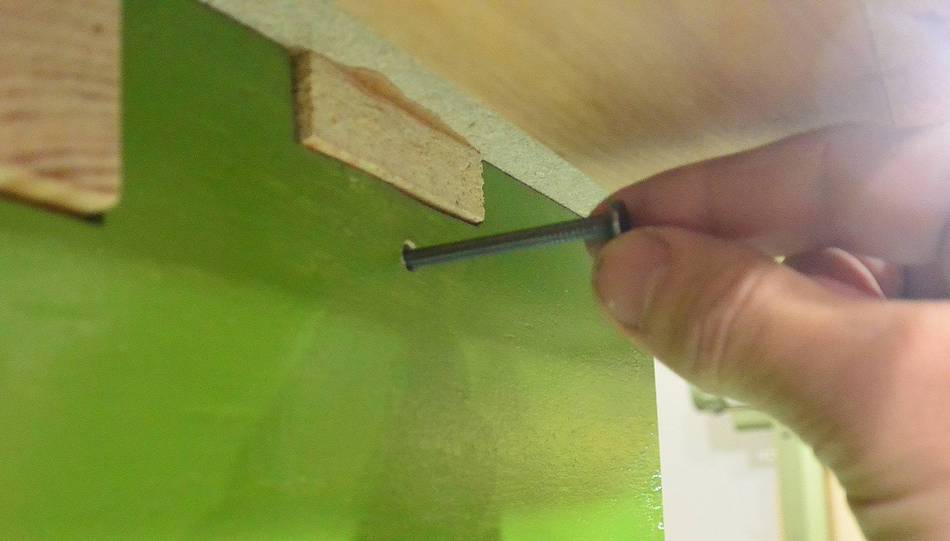
I added some blocks of wood to the bottom of the saw and drilled holes through the stand and saw to insert some pins (nails). These lock the base to the top. The holes are angled downlward slightly, which should keep the pins from coming out with vibration. I used a very long drill bit to be able to drill them without hitting the table. If you don't have a long bit, you could also drill the holes from the inside to get the angle.
Next: Table saw alignment
See also:
 Homemade tablesaw 2
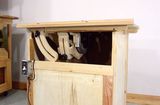 Homemade table saw
Back to my Woodworking website.