Building a house addition
The first house I bought came with a small 11x16 ft (3.3 x 4.8 m) addition on the back. It was in questionable shape, and when I started to repair a few things on it I realized that the whole thing would have to be torn down and rebuilt eventually. Two years later, in 1997, I demolished it and rebuilt a new addition of the same size in its place.Before I could build the addition, I had a contractor build a new foundation.
 After the foundation was done, I started with the framing for the addition.
Although I framed it with regular construction lumber, the approach I used was slightly
unconventional.
After the foundation was done, I started with the framing for the addition.
Although I framed it with regular construction lumber, the approach I used was slightly
unconventional.
I figured the first order of business was to get the roof onto it while the weather was nice. So I framed just enough of the supporting wall to start putting the joists on.
My joists were nailed to the sides of the house's existing joists. My new roof had a 1:6 slope, joining with the 1:3 roof slope of the main house. I stripped the shingles and sheathing off the bottom part of the roof to join it up.
My dad came to help with the construction, and this photo was as far as I got before I had to go and pick him up.
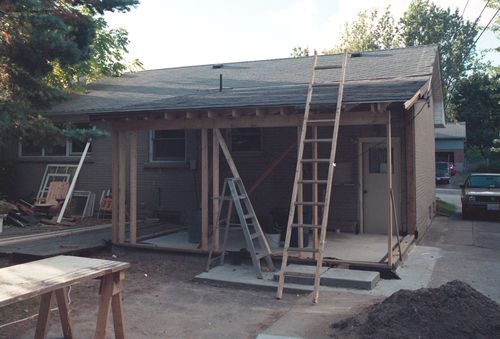 Here's the roof all done. I had stripped
the shingles off the existing roof about half a meter past the point where
the roof slope changed, then shingled up to the old shingles and slid some of
the new shingles under the old ones. With the transition of old shingles
to new shingles slightly further up the roof, it was on the higher
sloped section of the roof and thus less likely to cause me trouble later.
Here's the roof all done. I had stripped
the shingles off the existing roof about half a meter past the point where
the roof slope changed, then shingled up to the old shingles and slid some of
the new shingles under the old ones. With the transition of old shingles
to new shingles slightly further up the roof, it was on the higher
sloped section of the roof and thus less likely to cause me trouble later.
I used individual boards for the roof sheeting. I worked out that that was cheaper than plywood. Most people use OSB for roofing nowadays, but I didn't really consider that option. OSB really doesn't stand up well to getting wet, so if the roof ever leaks, it's not just the shingles that need replacing.
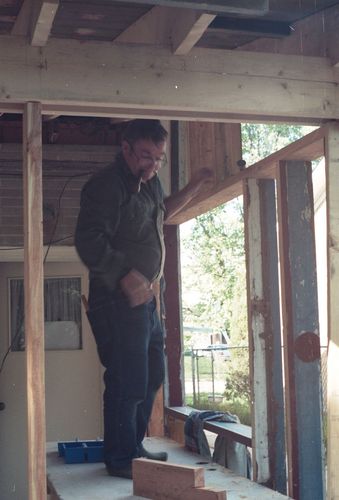 Here's my dad working on the framing. A lot of the studs have different
bits of paint on them. The old roof had 2 x 6 joists, and I reused all of these
as studs in the new construction.
Here's my dad working on the framing. A lot of the studs have different
bits of paint on them. The old roof had 2 x 6 joists, and I reused all of these
as studs in the new construction.
I remember the building inspector making some disparaging remarks about the studs, but really, these old studs were 1 3/4" thick, whereas new ones are only 1 1/2" thick, so beauty aside, the old ones were better than the new ones.
This is looking in through the door opening. Another interesting aspect is how I did the headers above the doors and windows for that wall. With the ceiling coming down to just 7'4", (2.2 meters) where the door is, I didn't have much vertical room between the top of the door and window frames and the rafters.
So the top of my wall consisted of two 16-foot 2 x 10's nailed into notches on either side of the 2x6 studs. That way, I had a continuous header running across the top of the two windows and the door. I cut the notches on the outside side of the studs to be just 1" deep. This left my header 2x10 protruding about 1/2" past the 2 x 6. The sheeting then just ran up to the edge of the header, with my header acting as the sheeting above the windows.
You can also see the joists attached directly to the top of the header. I had to cut another 5 cm off the bottom of my header to make room for the door. But the thinner part of the header was only the width of the door, and it would only have to support the weight of one rafter. By the time everything was done, the trim around the door on the inside was touching the ceiling.
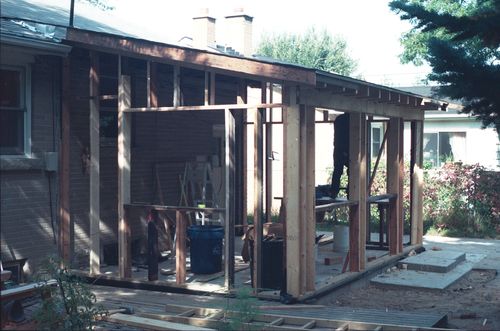 Here's another view of the framing, almost done except for the short studs
under two of the window openings.
Here's another view of the framing, almost done except for the short studs
under two of the window openings.
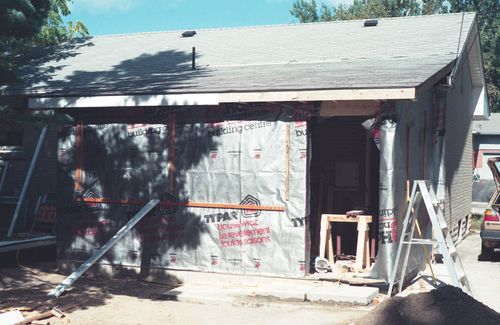 After we put the sheeting on, we immediately covered the outside in house-wrap.
I neglected to take any photos of it before the house-wrap went on.
After we put the sheeting on, we immediately covered the outside in house-wrap.
I neglected to take any photos of it before the house-wrap went on.
I was afraid that the staples might not entirely hold the house wrap around the windows if wind was blowing in the door, so I temporarily nailed a few strips of wood over the house wrap around the window openings.
I was a bit relieved to get to this point. With the house-wrap on, we could continue to work inside even if the weather got wet and windy.
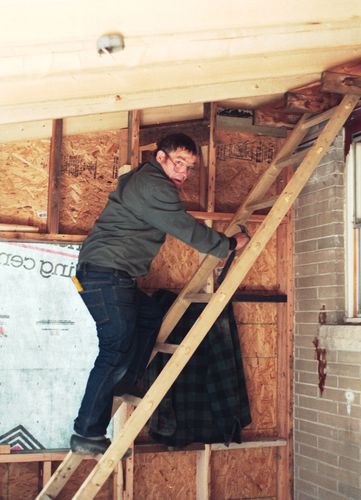 Here's my dad on the ladder, preparing to add some framing to the ceiling.
The ceiling would follow the roof line for about two-thirds of the room
and then level out so that we didn't have to cut away any part of the old rafters.
Here's my dad on the ladder, preparing to add some framing to the ceiling.
The ceiling would follow the roof line for about two-thirds of the room
and then level out so that we didn't have to cut away any part of the old rafters.
The last thing that my dad helped with before he left was drywalling the ceiling. Drywalling a ceiling is nearly impossible to do alone without renting a drywall lifter, which I wasn't about to do.
I had my hands full with working and didn't take any photos of the drywalling. This was way back in 1997, when every photo cost money.
I also got in to a bit of an argument with my dad about the drywalling. I was cringing at the drywall getting scratched up. My dad said "what does it matter if it gets scratched up, you have to cover it with plaster anyway". My response was "No, you don't have to cover it with plaster - not if you don't get it all scratched up!"
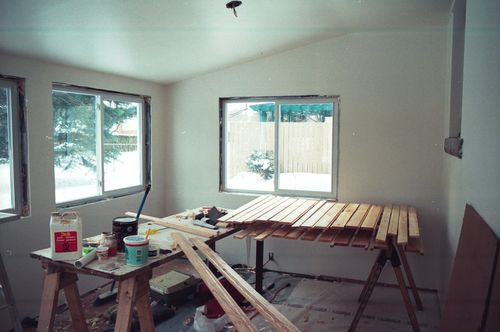
After my dad left, progress slowed down for a while. I was a bit burned out from working on the addition, and it was in a state where it was sufficiently closed off that I could leave it be without worrying too much about it.
 Here's a photo of the siding part-way installed. One of my neighbours had a siding business,
and he gave me a quick tutorial on how siding should be installed.
Here's a photo of the siding part-way installed. One of my neighbours had a siding business,
and he gave me a quick tutorial on how siding should be installed.
The windows are just vinyl-framed windows. I opted for the fancy argon filled glass panes, but the frames were just cheap vinyl. I figured if vinyl is good enough for the siding, it should be good enough for the window frames.
The next better option for window frames would have been vinyl-clad wood. I didn't like the thought of what would happen if water ever got in there, so that wasn't appealing. The next option up from that would have been aluminium frames. Aluminium conducts heat far too well, so I wasn't keen on that either.
 In this photo, the drywall is installed and painted. The boards towards
the center of the photo are the trim pieces for the windows. I had fitted all
those pieces, then took them off again and gave them several coats of clear varnish.
I like the look of natural wood grain, and it was easiest to take the trim off
again for the varnishing.
In this photo, the drywall is installed and painted. The boards towards
the center of the photo are the trim pieces for the windows. I had fitted all
those pieces, then took them off again and gave them several coats of clear varnish.
I like the look of natural wood grain, and it was easiest to take the trim off
again for the varnishing.
The trim also included window sills made out of oak. Real window sills, just like in older houses, although only sticking out about 3 cm from the wall. Such a shame that people don't bother putting window sills on windows anymore.
 I finished it off by tiling the floor with red rust coloured tiles. The tiles aren't
directly on the concrete pad. Instead, I put 1.5" of rigid Styrofoam insulation down on
the pad, then two overlapping layers of 3/4" plywood screwed and glued together, and
then the tiles on the plywood. The plywood sits just on the rigid Styrofoam,
no joists. But the whole combination is quite firm - much more so than any floor
that sits on wood joists.
I finished it off by tiling the floor with red rust coloured tiles. The tiles aren't
directly on the concrete pad. Instead, I put 1.5" of rigid Styrofoam insulation down on
the pad, then two overlapping layers of 3/4" plywood screwed and glued together, and
then the tiles on the plywood. The plywood sits just on the rigid Styrofoam,
no joists. But the whole combination is quite firm - much more so than any floor
that sits on wood joists.
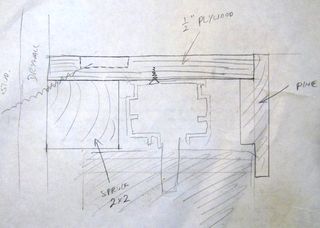
Cross section of casing for blind mechanism
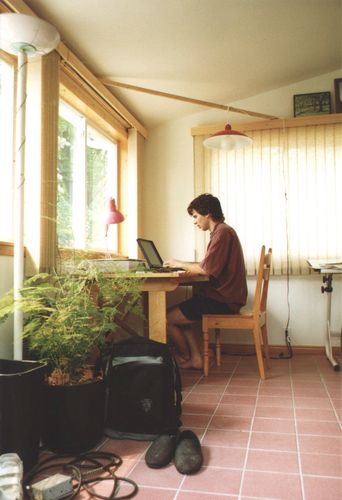
The photo at left was taken a few months after I finished the addition. I liked the plain look of it at first, so I didn't clutter the space up for a while. But clutter is inevitable, I guess. The year after I built the addition I built a daybed to go against the far wall. The desk in the photo is my knock-down student desk, and the chair is one of my dad's, almost the same design as these kitchen chairs
See also:
Demolishing the previous addition
Getting the Foundation for the addition made
More Home Improvement Projects on my Woodworking website