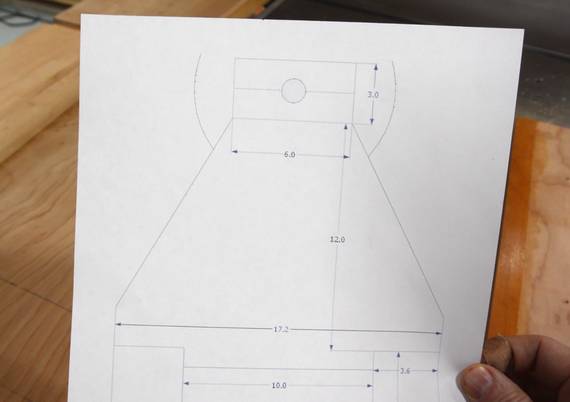
 I started by drawing up a rough SketchUp
model, and printing a 1:1 view looking at the end.
I started by drawing up a rough SketchUp
model, and printing a 1:1 view looking at the end.
I started by drawing up a rough SketchUp
model, and printing a 1:1 view looking at the end.
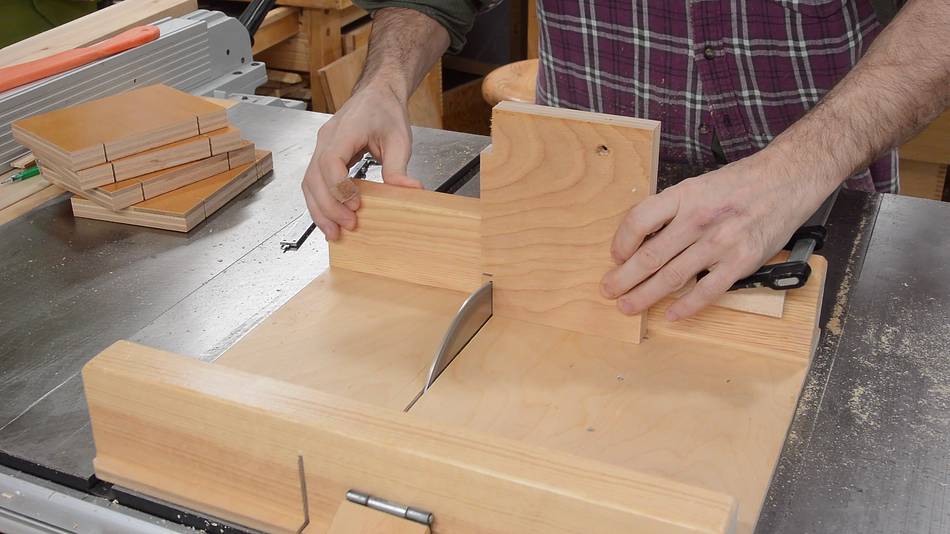
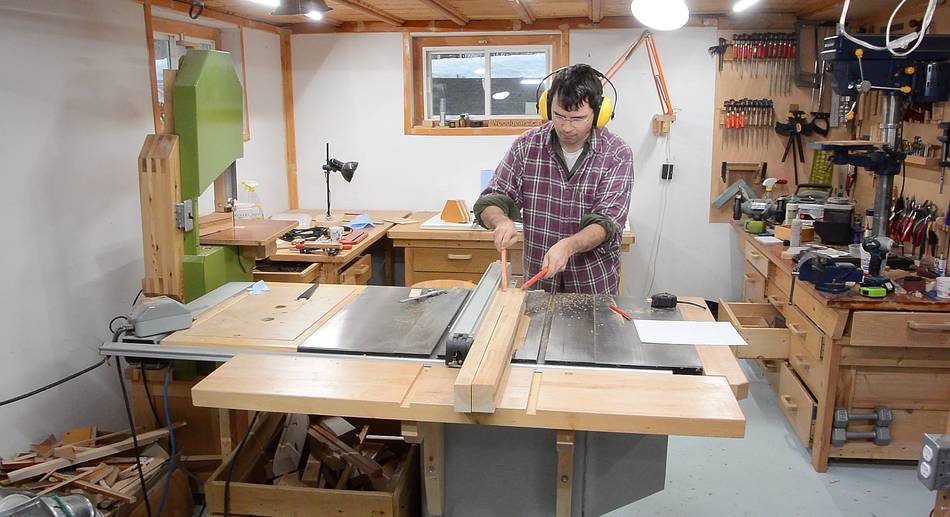
 For much of the material, I used some used high quality 20 mm thick
plywood made of hardwood throughout. Above left, I'm cutting the notches
in the bottom of the trapezoidal pieces that will form the headstock and
tailstock.
For much of the material, I used some used high quality 20 mm thick
plywood made of hardwood throughout. Above left, I'm cutting the notches
in the bottom of the trapezoidal pieces that will form the headstock and
tailstock.
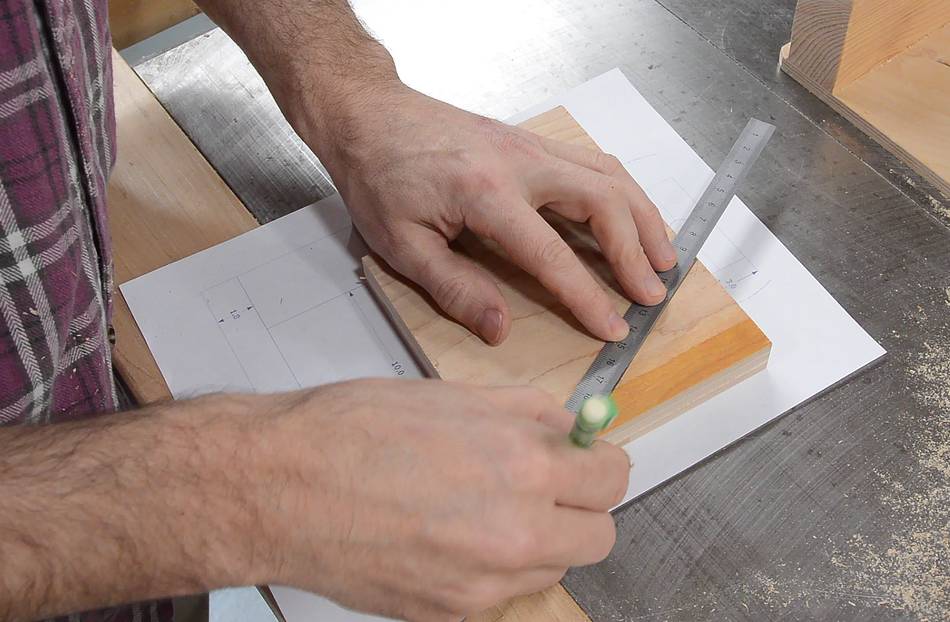
Rather than glue the template to the wood, I'm transferring the measurements with a ruler and pencil.

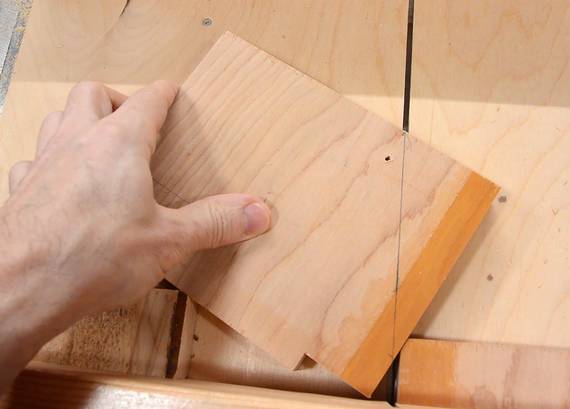 Jigged up for cutting the sloped sides of the trapezoidal pieces,
cutting them on my
small table saw sled.
Jigged up for cutting the sloped sides of the trapezoidal pieces,
cutting them on my
small table saw sled.
 Longer pieces of hardwood will form the bed of the lathe. I'm
cutting this out of some wood that came from some
good quality palettes.
Longer pieces of hardwood will form the bed of the lathe. I'm
cutting this out of some wood that came from some
good quality palettes.
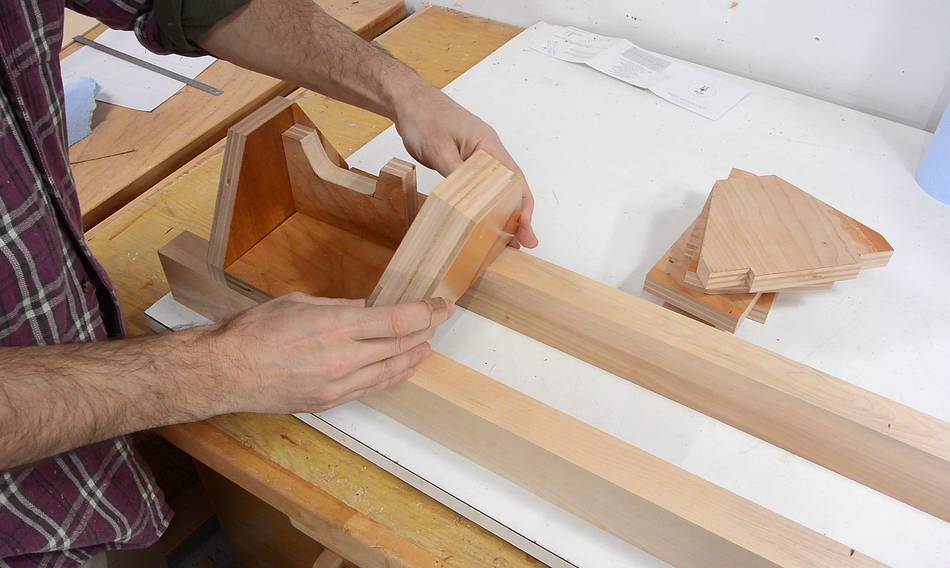
 I glued two of the trapezoidal pieces together for the front of the
headstock before assembling the rest. Here checking how things
fit together.
I glued two of the trapezoidal pieces together for the front of the
headstock before assembling the rest. Here checking how things
fit together.
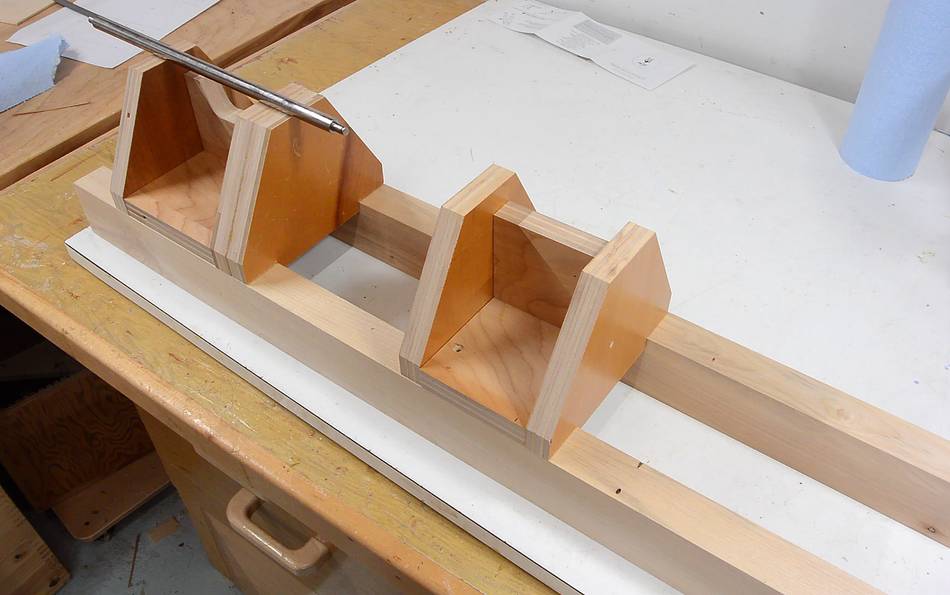 The tailstock is almost the same construction as the headstock.
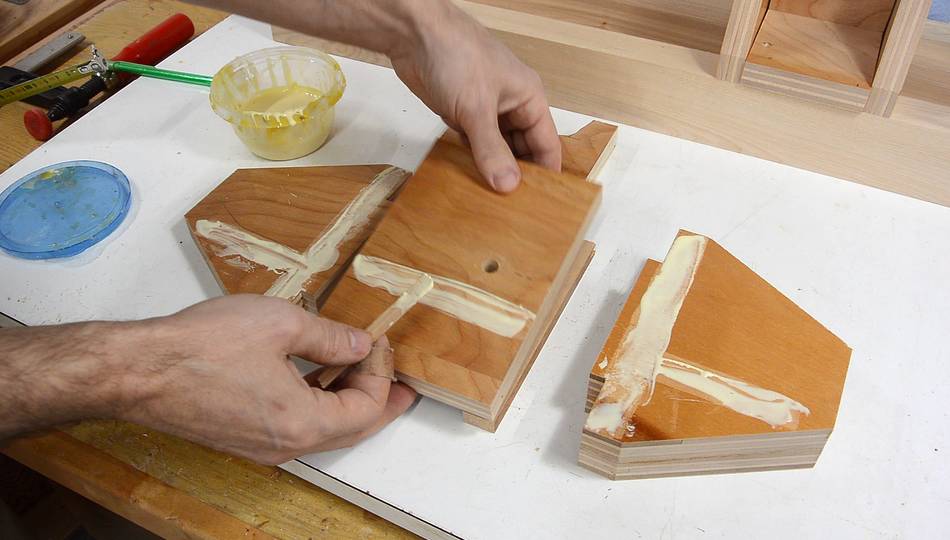
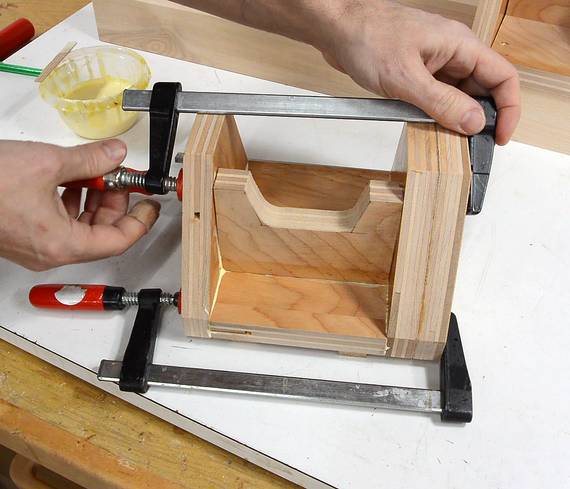 Because I'm using used plywood, I have to scrape the varnish off
where the glue surfaces are. Then applying lots of glue and clamping
it together.
Because I'm using used plywood, I have to scrape the varnish off
where the glue surfaces are. Then applying lots of glue and clamping
it together.
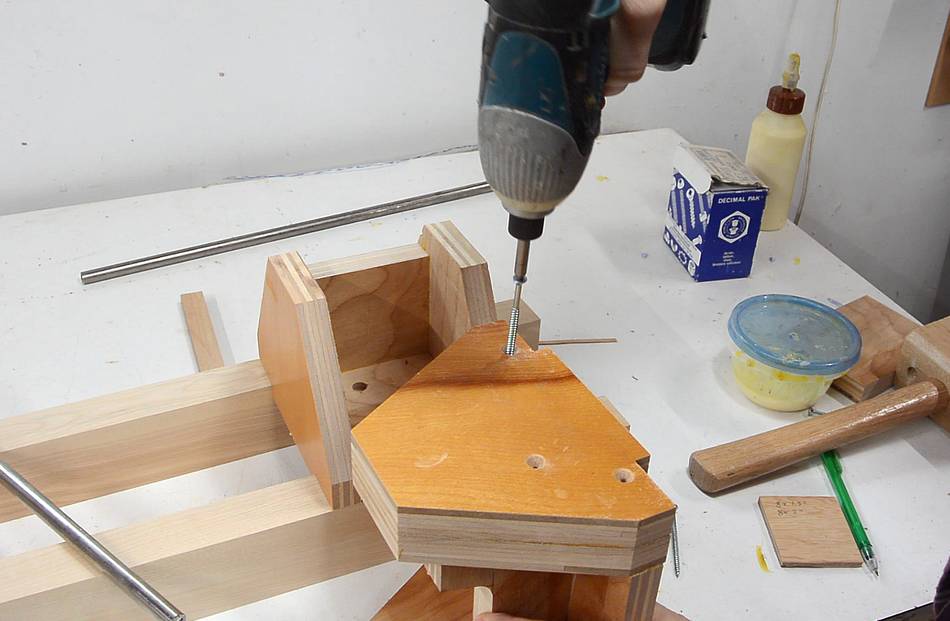 After the glue dried, I drilled pilot holes and added screws,
in case the glue fails.
After the glue dried, I drilled pilot holes and added screws,
in case the glue fails.

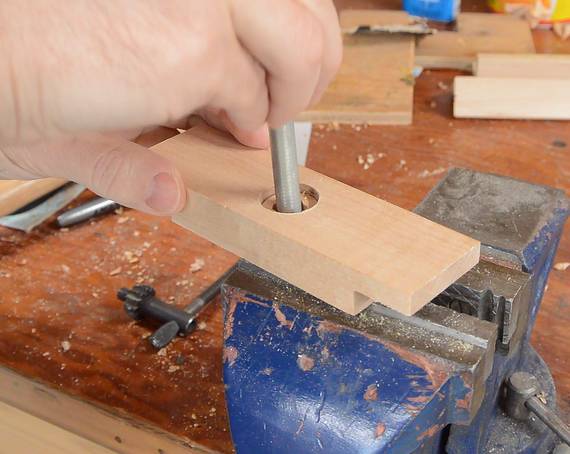 I made three of these brackets that fit between the bed rail on the
bottom. A hole in the bottom allows a carriage bolt to sit flush
without protruding out the bottom.
I made three of these brackets that fit between the bed rail on the
bottom. A hole in the bottom allows a carriage bolt to sit flush
without protruding out the bottom.
I'm using a knife to square part of the hole for the carriage bolt.
 Placing the headstock over the bracket in the lathe's bed...
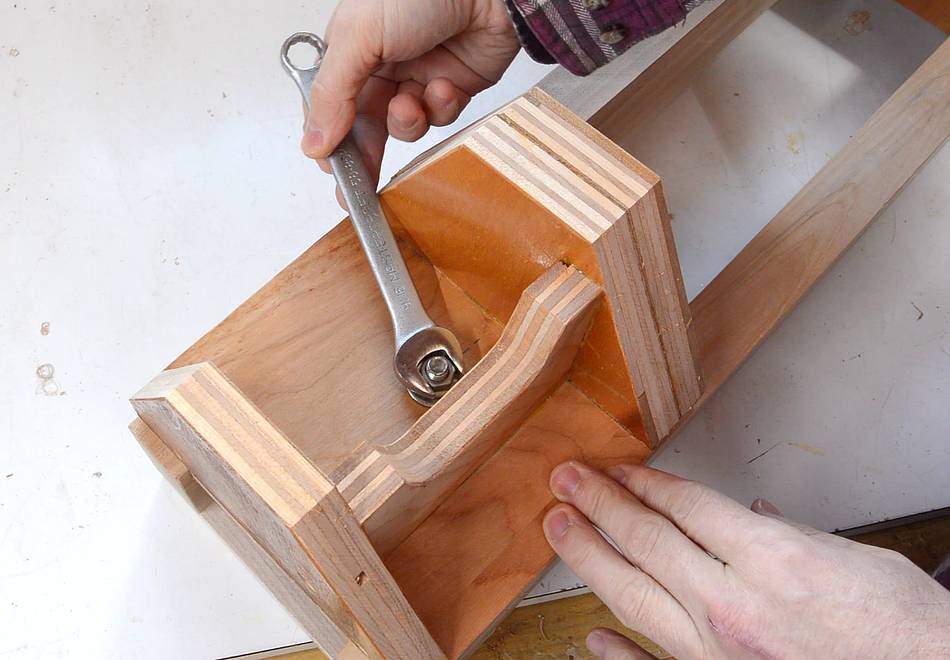 ... then bolting it down with a carriage bolt and the bracket I
just made.
... then bolting it down with a carriage bolt and the bracket I
just made.
I might end up just screwing the headstock straight onto the rails, but that can wait for later.
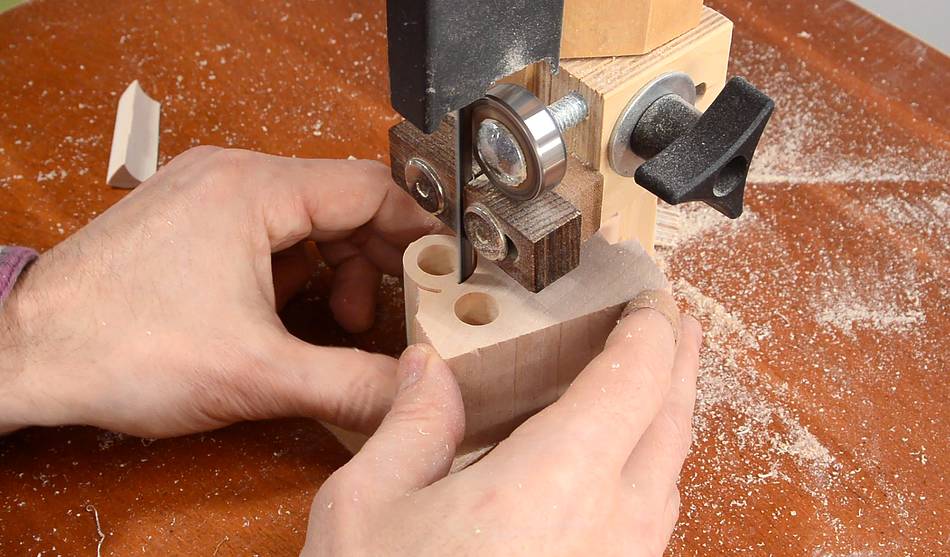
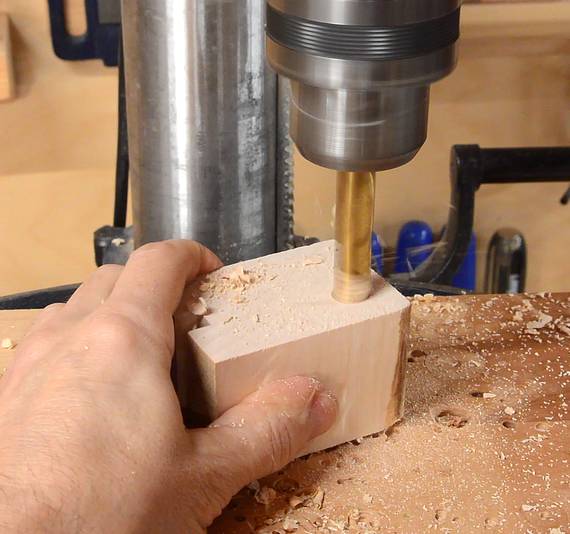
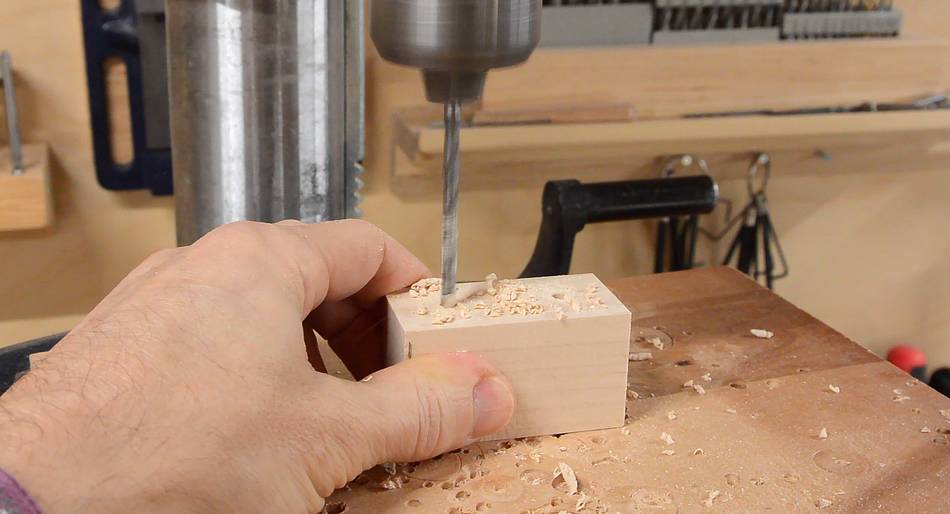 Next making the wooden bearing blocks. I'm using a piece of maple,
first drilling the mounting holes through it.
Next making the wooden bearing blocks. I'm using a piece of maple,
first drilling the mounting holes through it.

 After adding countersinks to the mounting holes, I cut it in
half on the table saw and firmly clamp the two halves back
together.
After adding countersinks to the mounting holes, I cut it in
half on the table saw and firmly clamp the two halves back
together.
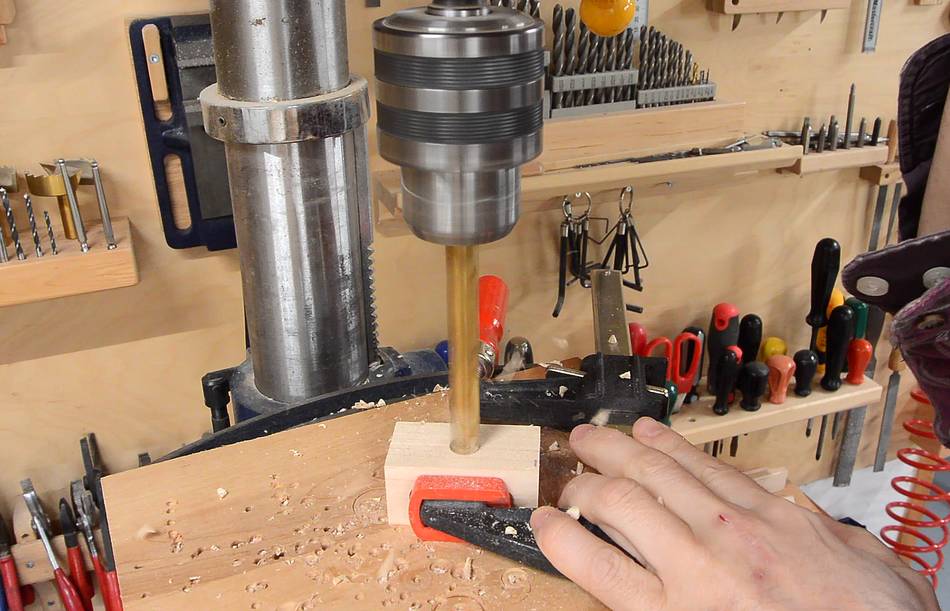 I then drill a hole just a bit larger than the shaft I will use.
The center of the hole is right where the two clamped together
parts meet.
I then drill a hole just a bit larger than the shaft I will use.
The center of the hole is right where the two clamped together
parts meet.
 Some rounding of the edges on my
strip sander,
so I don't scrape my knuckles on the rough edges later.
Some rounding of the edges on my
strip sander,
so I don't scrape my knuckles on the rough edges later.
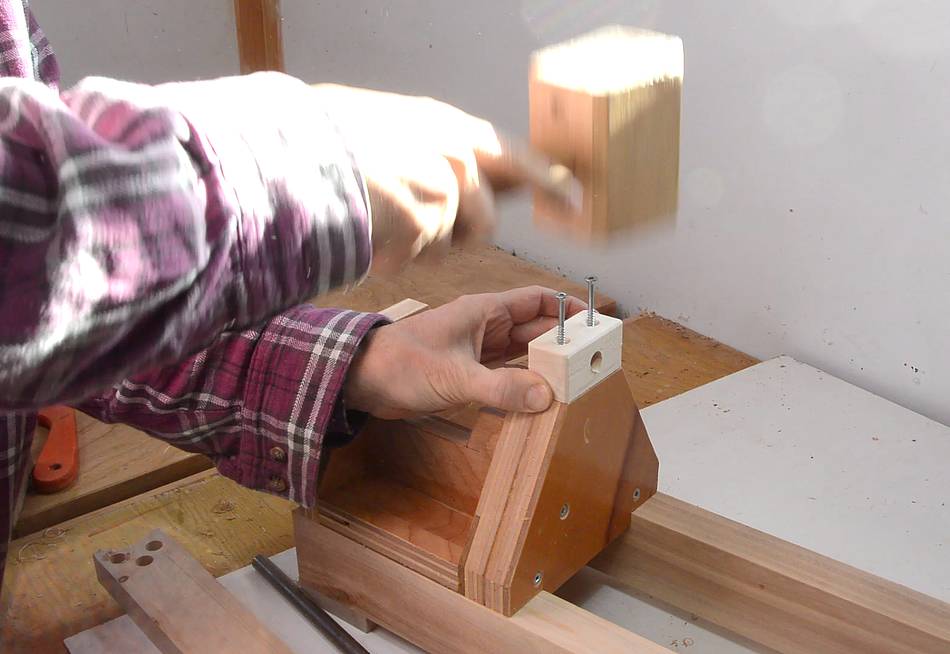 With the bearing block placed on the headstock, I tap the screws to
mark where the screw holes need to go.
With the bearing block placed on the headstock, I tap the screws to
mark where the screw holes need to go.
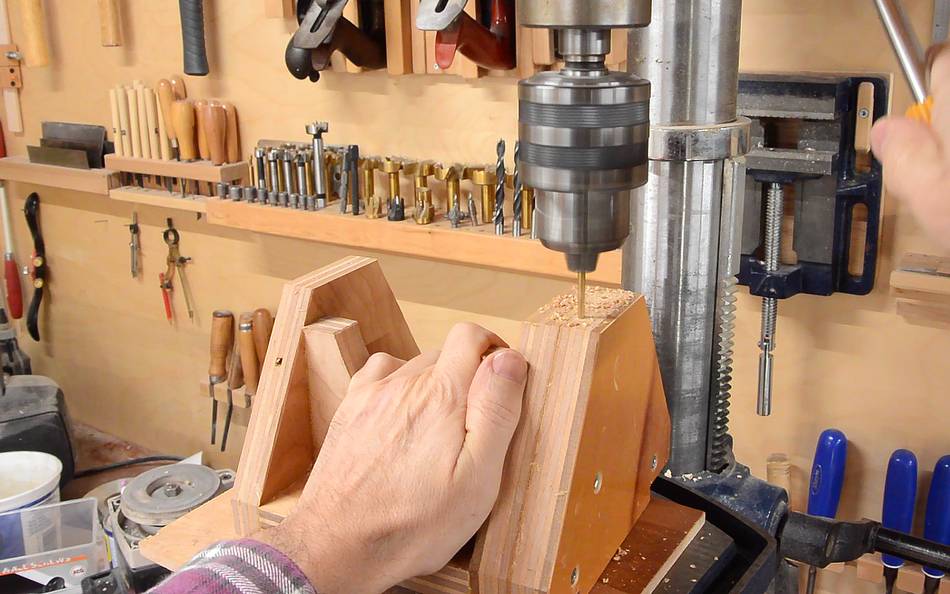 Then drill pilot holes in the headstock.
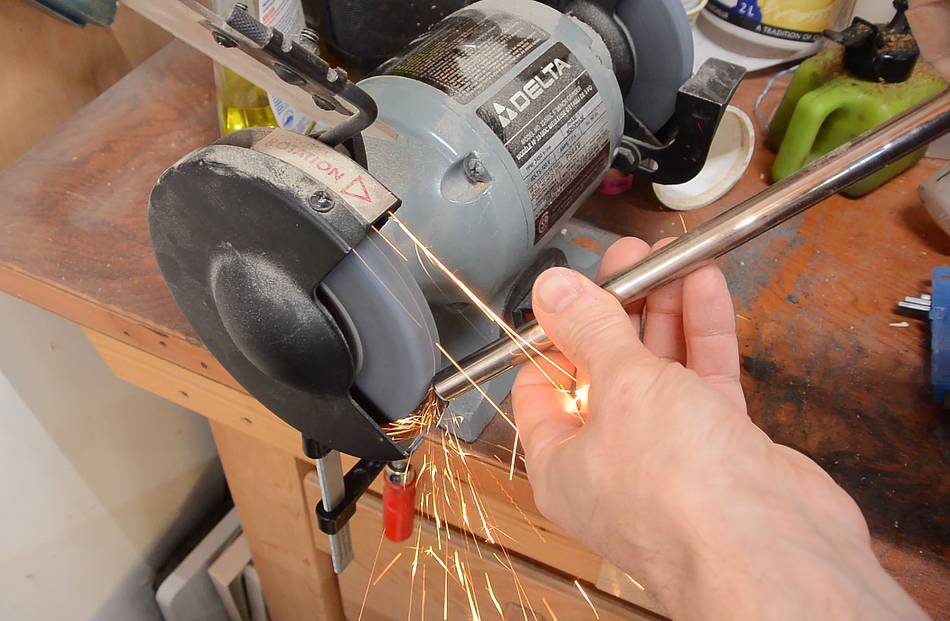
 The drive shaft needs to have a point on the end. I'm grinding
this point on a bench grinder.
The drive shaft needs to have a point on the end. I'm grinding
this point on a bench grinder.
 I drilled a hole slightly smaller than the drive shaft in a disk of
Baltic birch plywood.
I drilled a hole slightly smaller than the drive shaft in a disk of
Baltic birch plywood.
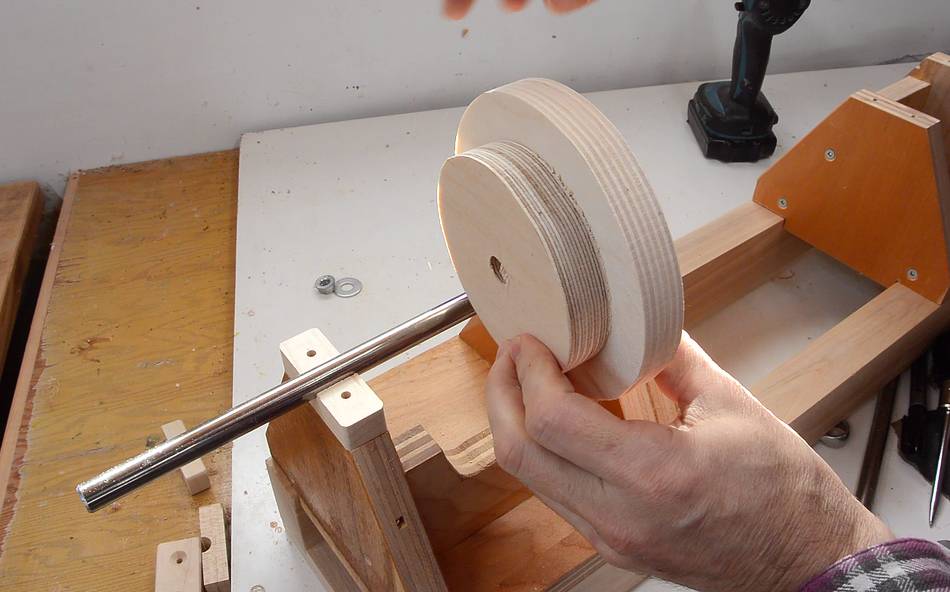 One disk of plywood would not have a stable enough base on the shaft, so
I made two disks to glue together for more stability.
One disk of plywood would not have a stable enough base on the shaft, so
I made two disks to glue together for more stability.
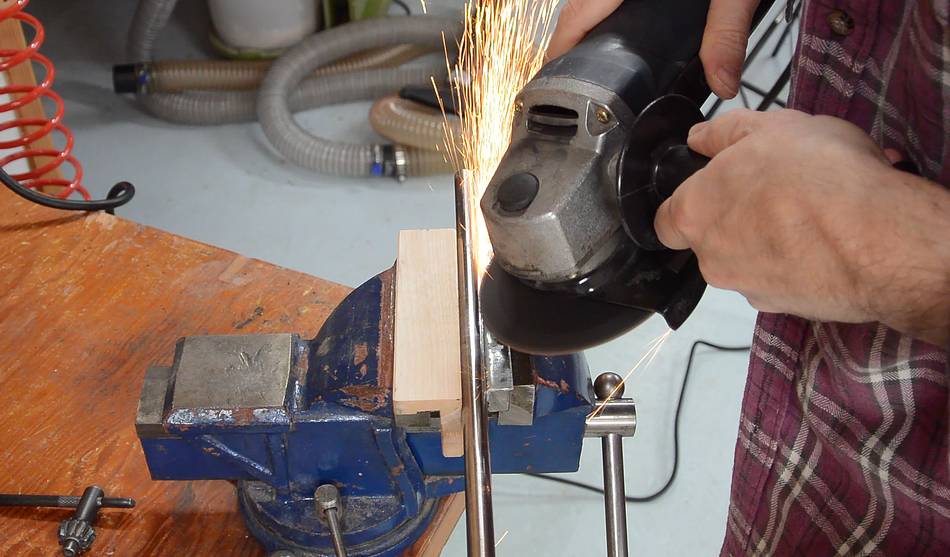
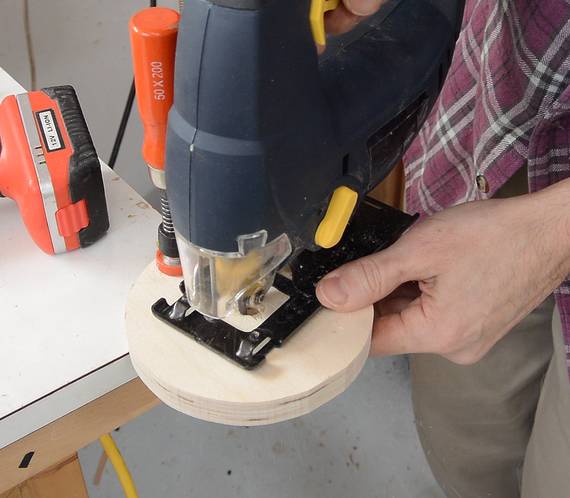 Even though the pulley is a tight fit on the shaft, it needs to
be fixed on to prevent it from slipping when using the lathe.
I ground a key way into the side
of the shaft with an angle grinder and cut a corresponding key in
the pulley disks with a jigsaw.
Even though the pulley is a tight fit on the shaft, it needs to
be fixed on to prevent it from slipping when using the lathe.
I ground a key way into the side
of the shaft with an angle grinder and cut a corresponding key in
the pulley disks with a jigsaw.
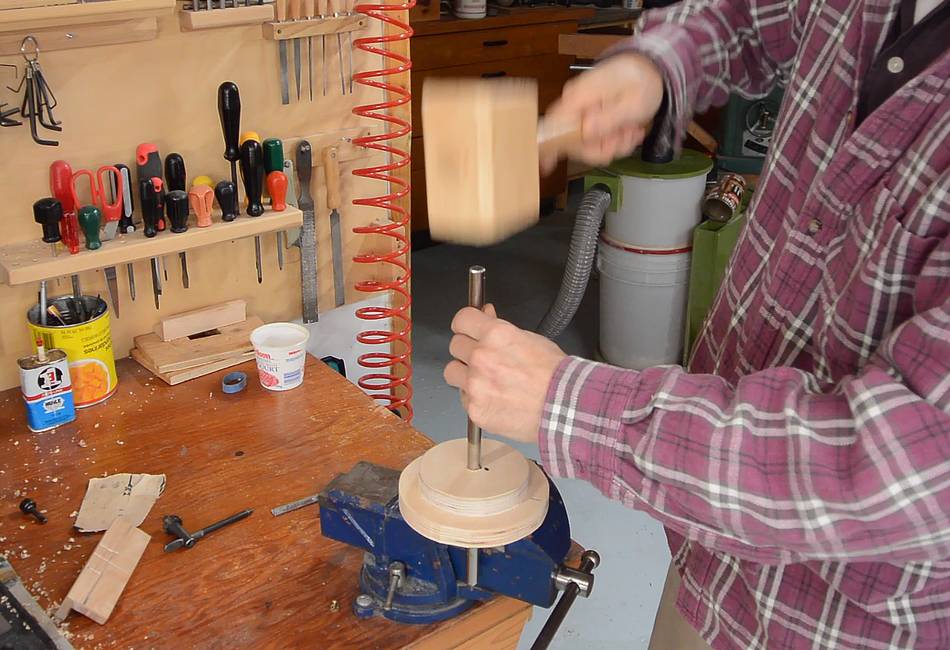 Inserting the shaft. It's deliberately a tight fit. I needed to drive
it in with a mallet.
Inserting the shaft. It's deliberately a tight fit. I needed to drive
it in with a mallet.
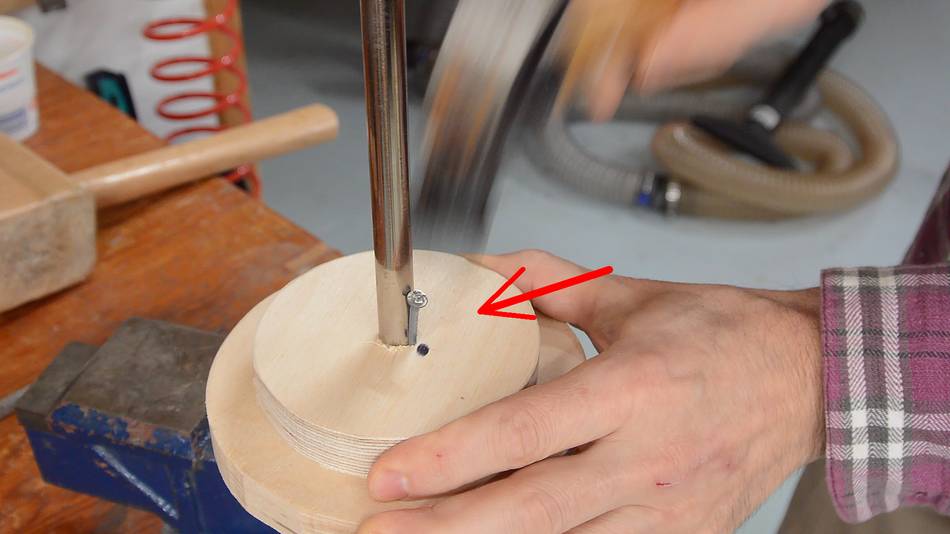 After that, I drive a nail in the space provided by the key ways on
the shaft and pulleys. The nail will act as the key.
After that, I drive a nail in the space provided by the key ways on
the shaft and pulleys. The nail will act as the key.
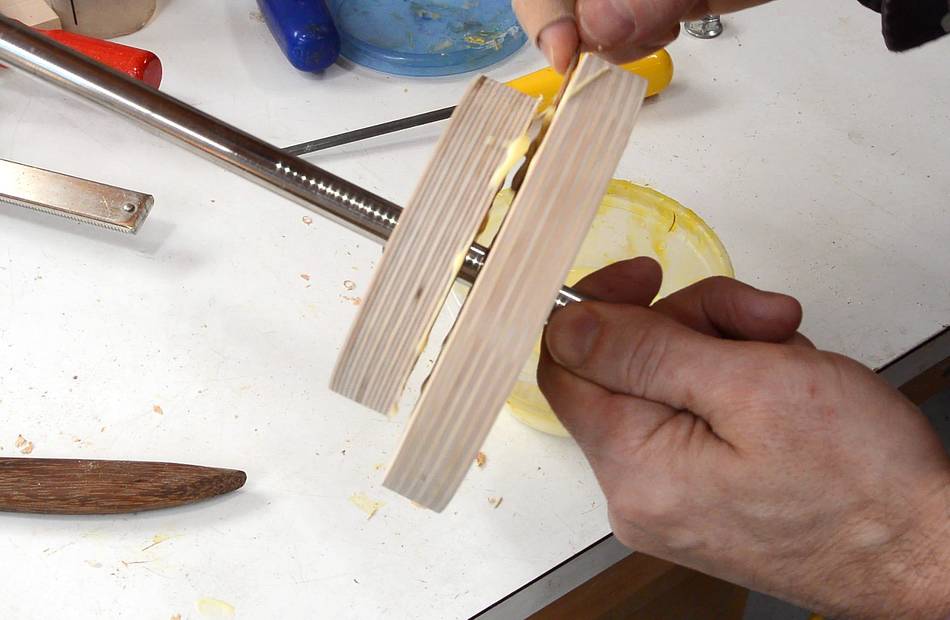
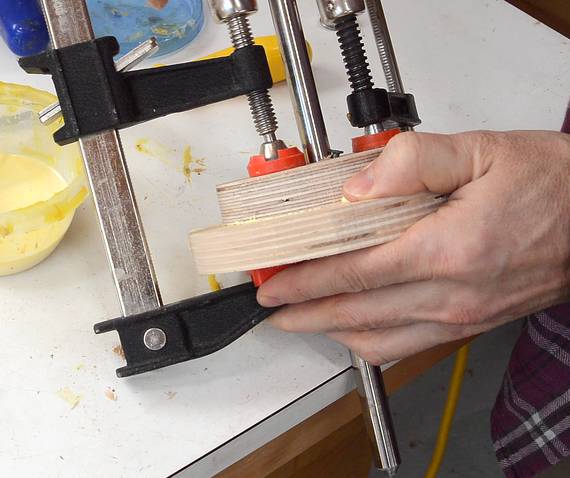 Then I realized I forgot to glue the two disks together. So I pried them
apart a little, added glue, and clamped them back together.
Then I realized I forgot to glue the two disks together. So I pried them
apart a little, added glue, and clamped them back together.
 I needed some spacer sleeves to keep the pulley centered on the
headstock. I made these by drilling some holes in from the end grain in
a piece of hardwood, then cutting out some cylinders around them. These
weren't terribly accurate, but good enough to do the job.
I needed some spacer sleeves to keep the pulley centered on the
headstock. I made these by drilling some holes in from the end grain in
a piece of hardwood, then cutting out some cylinders around them. These
weren't terribly accurate, but good enough to do the job.
 I had to cut some notches in the spacers to let them fit around the ends
of the nail I used as a key. I also put a washer between the spacers
and bearing blocks.
I had to cut some notches in the spacers to let them fit around the ends
of the nail I used as a key. I also put a washer between the spacers
and bearing blocks.
Then screwing the bearing blocks together.
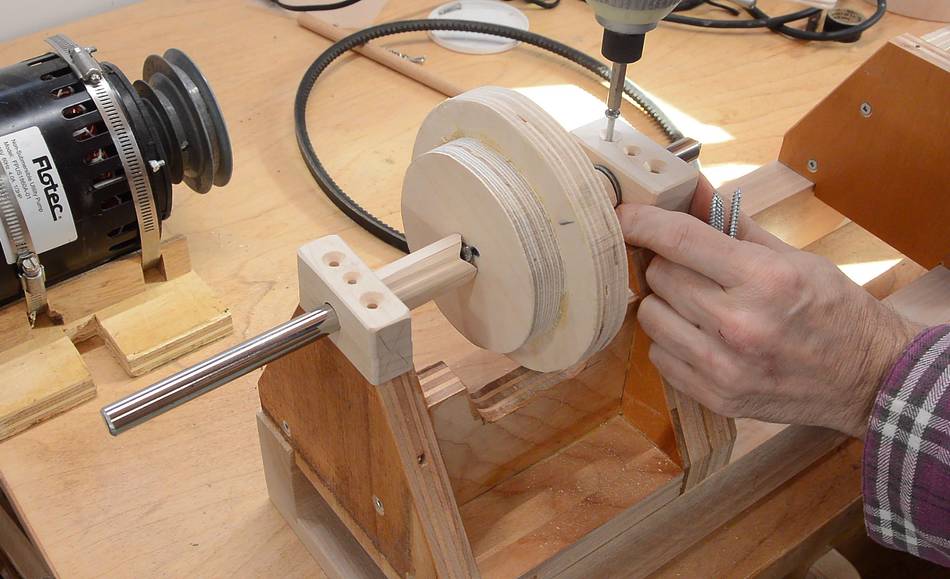
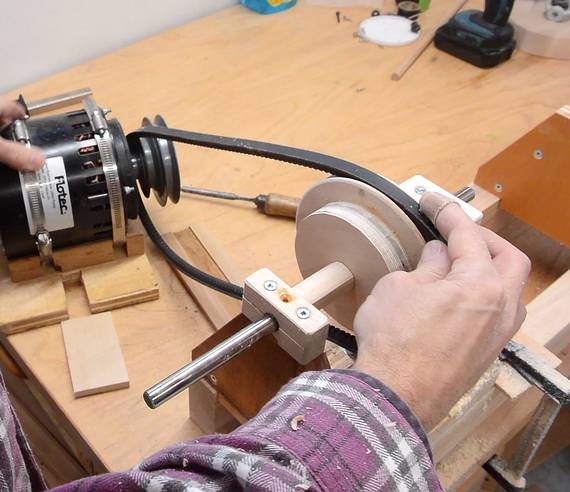
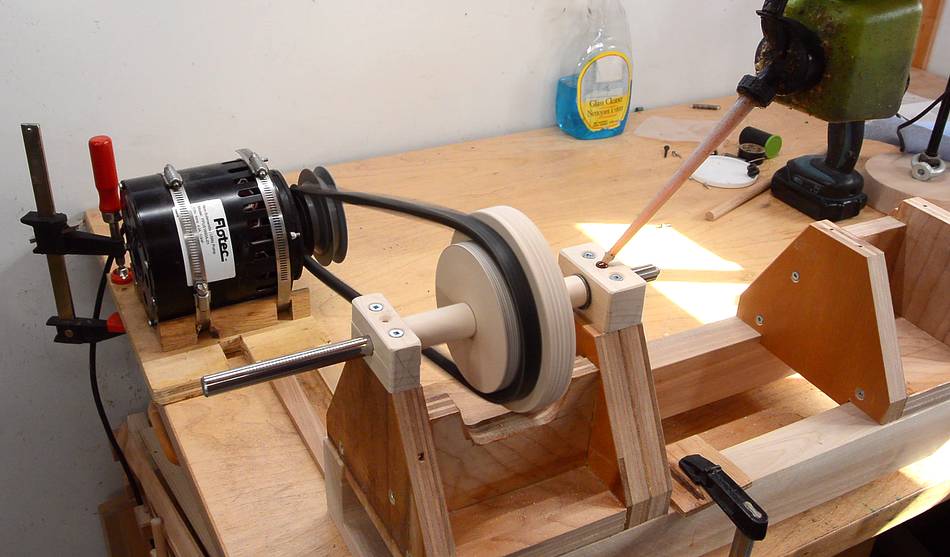 I put the V-belt on the smaller of the two disks, with the motor
positioned so the belt rubs up against the larger disk to
keep it aligned.
I put the V-belt on the smaller of the two disks, with the motor
positioned so the belt rubs up against the larger disk to
keep it aligned.
Now that I'm spinning the shaft with a motor, it's time to add some oil to the wooden bearings.
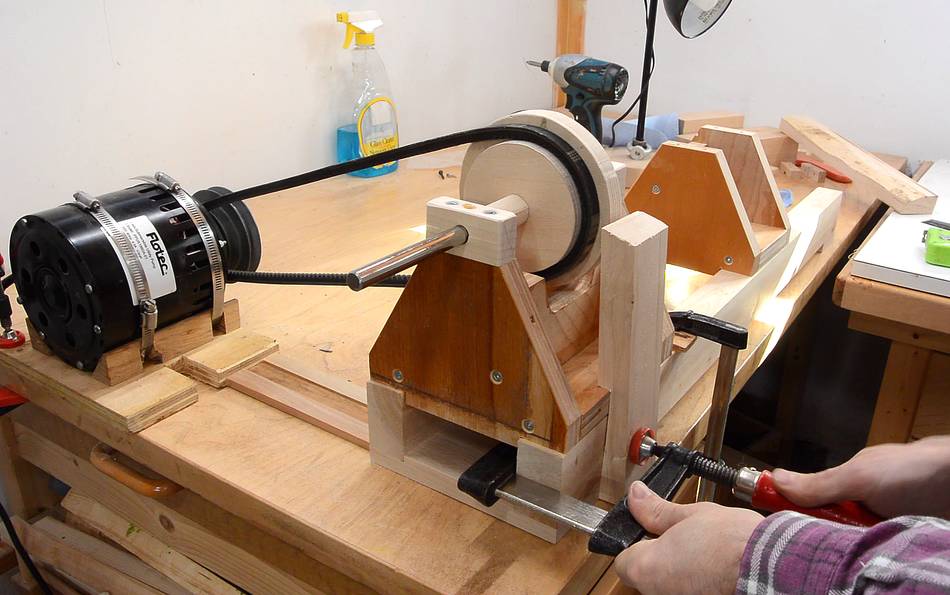 I want to turning a V-groove into the pulleys using turning chisels.
For that, I need a tool rest. I made one out of a piece of hardwood.
It has a notch cut out towards the bottom so it tilts towards the pulleys.
I want to turning a V-groove into the pulleys using turning chisels.
For that, I need a tool rest. I made one out of a piece of hardwood.
It has a notch cut out towards the bottom so it tilts towards the pulleys.

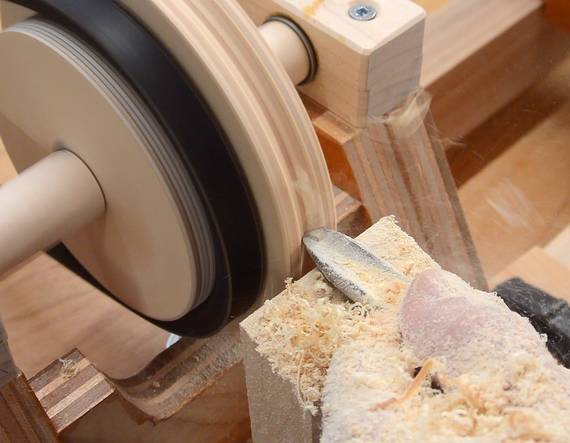 Then turning the V-groove in the larger disk. The chisel often got
caught, stopping the pulley, so it wasn't an optimal arrangement.
Then turning the V-groove in the larger disk. The chisel often got
caught, stopping the pulley, so it wasn't an optimal arrangement.
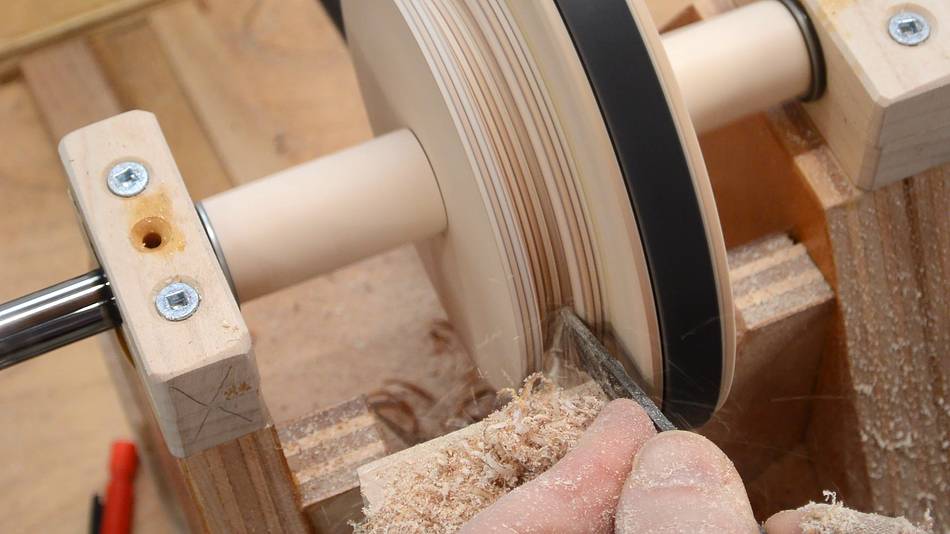
 With the V-groove turned into the larger pulley, I moved the belt onto
that, and then turned the V-groove in the small pulley.
With the V-groove turned into the larger pulley, I moved the belt onto
that, and then turned the V-groove in the small pulley.