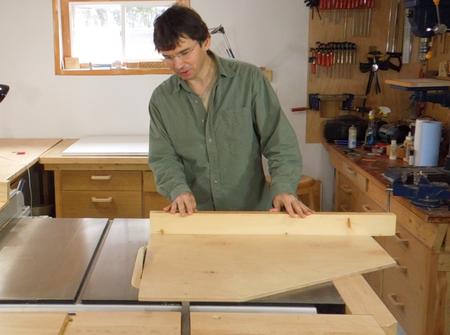
 I have always used a large left-side table saw sled
for making crosscuts, but that sled is not always ideal when working with
smaller pieces.
I have always used a large left-side table saw sled
for making crosscuts, but that sled is not always ideal when working with
smaller pieces.
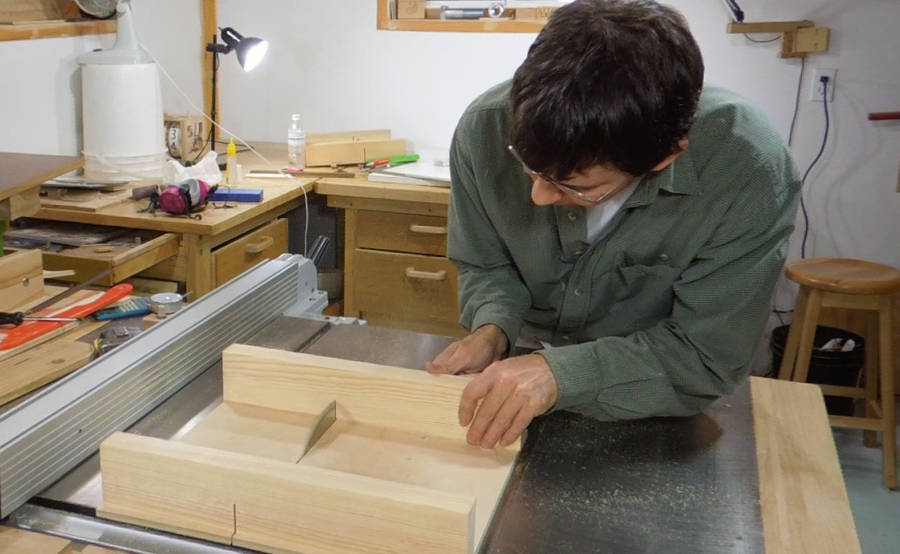
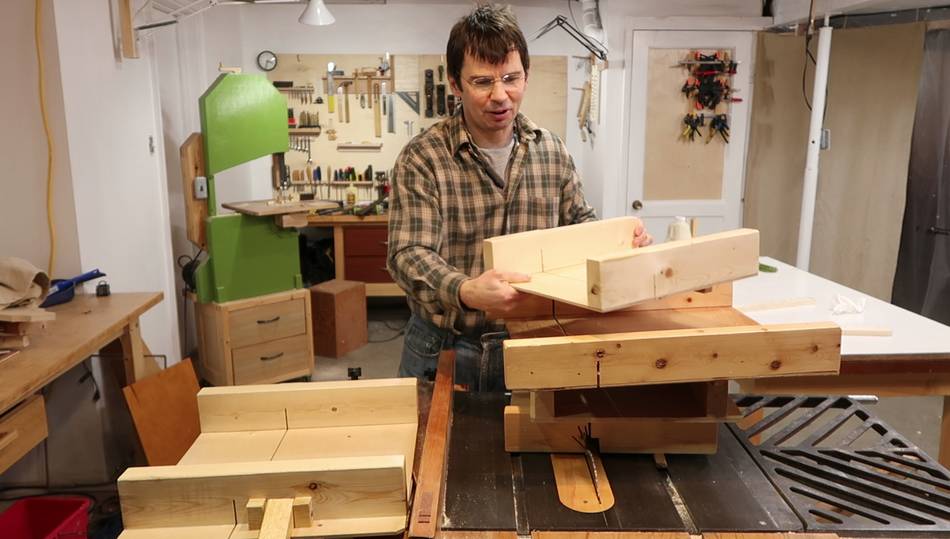
So I built a small table saw sled, which I ended up using quite often. I thought of some minor improvements to the design, and people have expressed interest in how to build one, so I built a second one. This time I documented the process.
 I cut the material for the rails from the hardest wood I have - some
exotic hardwood flooring scrap I found in a dumpster. If you don't
have any exotic hardwoods, just use the hardest wood you have at hand.
I cut the material for the rails from the hardest wood I have - some
exotic hardwood flooring scrap I found in a dumpster. If you don't
have any exotic hardwoods, just use the hardest wood you have at hand.
It also helps to orient the piece so that when it's in it's final position in the slot, the growth rings will be vertical. Wood shrinkage perpendicular to the growth rings is always a bit less, and that way the tightness of fit will not change as much with seasonal changes in humidity.
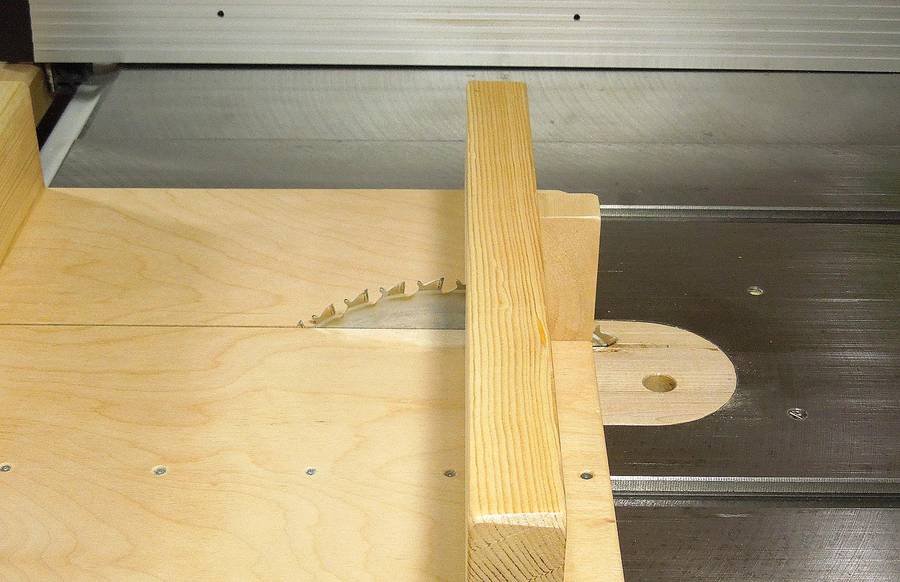
 I cut the rail a little oversized initially.
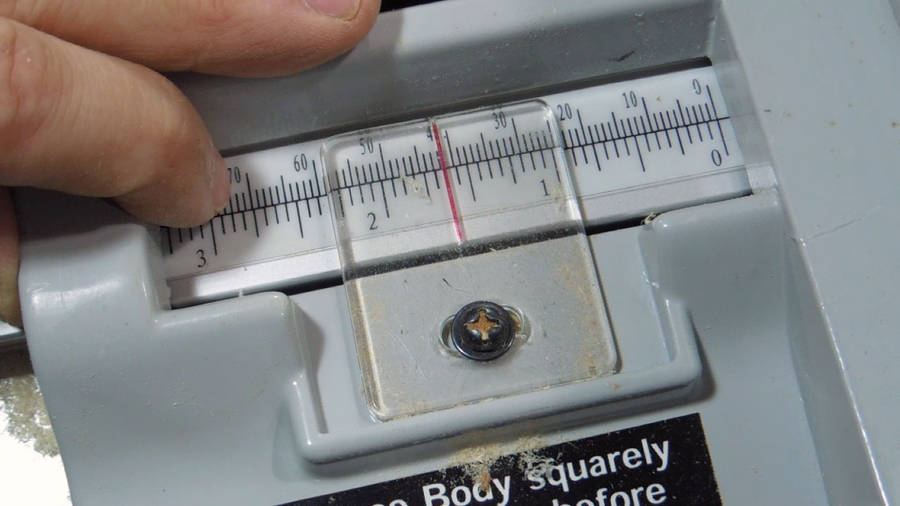
The rail measured 0.805" (inches) wide, and the slot in my table saw is 0.755".
I cut the rail a little oversized initially.
The rail measured 0.805" (inches) wide, and the slot in my table saw is 0.755".
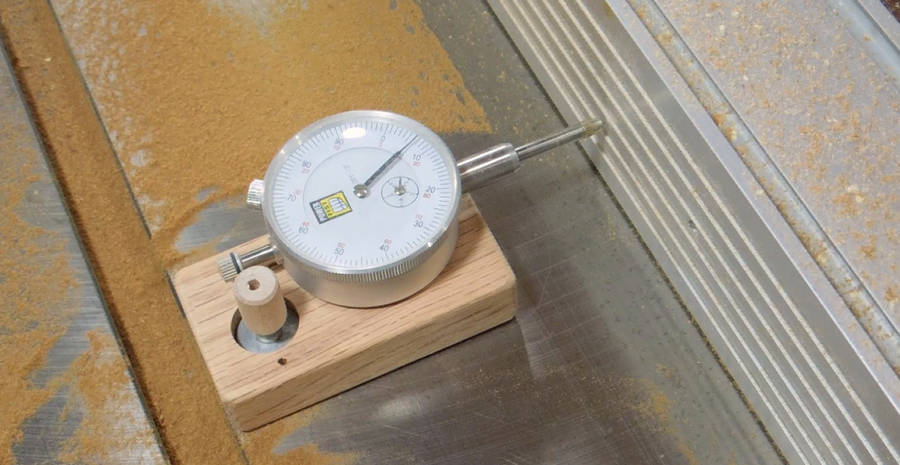 So I need to move the fence in by 0.050" to cut it to size.
I used a dial indicator to move the fence by a precise amount.
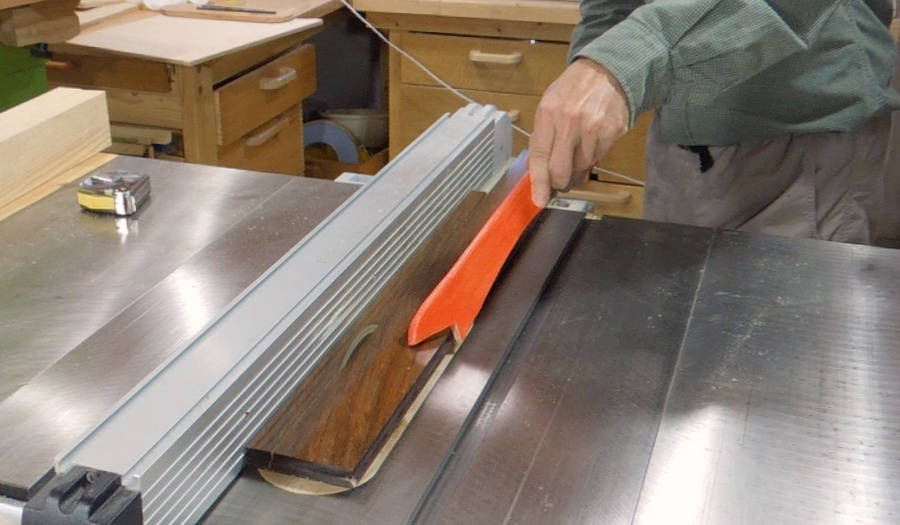
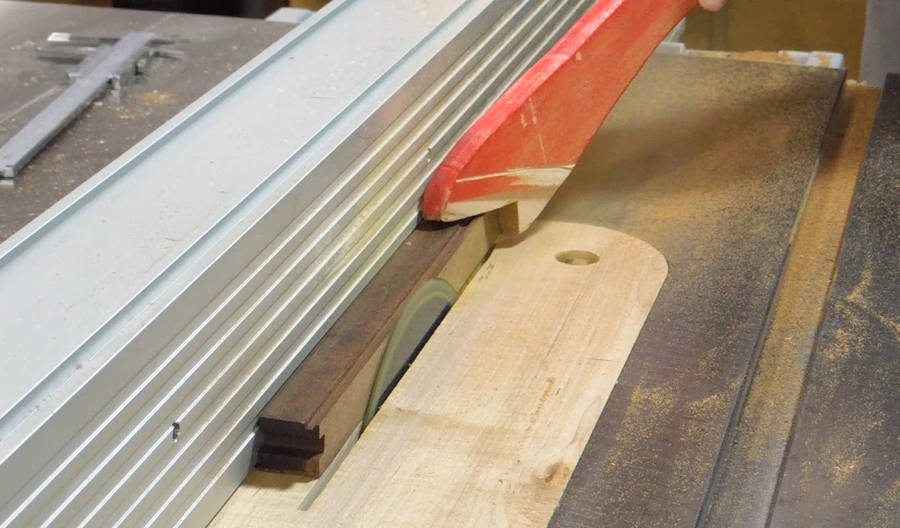 Next ripping the piece again. I'm using a push stick
to keep the piece pressed against the fence.
Next ripping the piece again. I'm using a push stick
to keep the piece pressed against the fence.
After re-ripping, the piece actually measured .0760" wide instead of the expected 0.755". With the blade only cutting on the right side it was deflected left slightly during the cut. So I moved the fence by .006" (to give some slack) and re-ripped again.
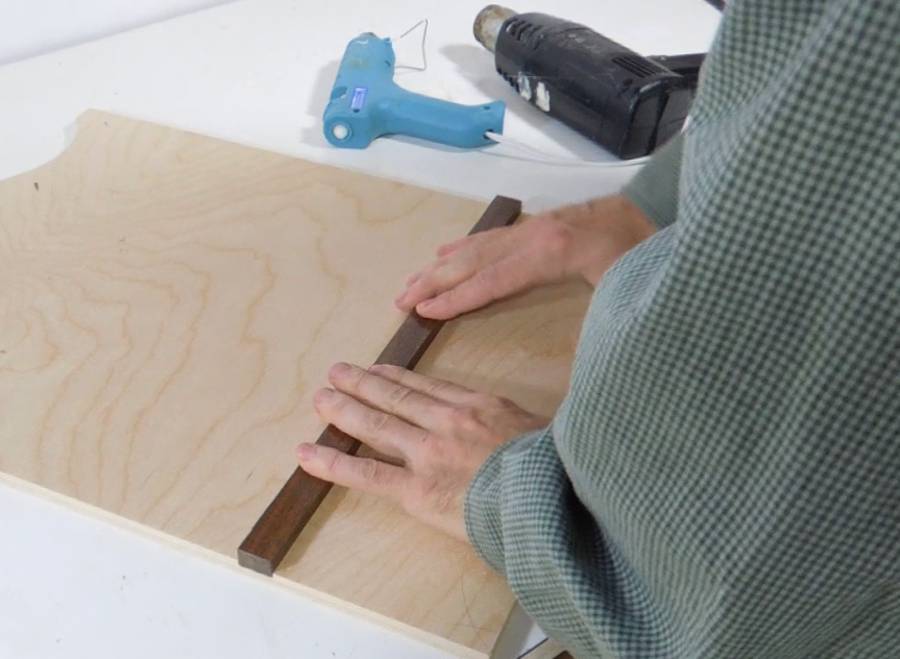
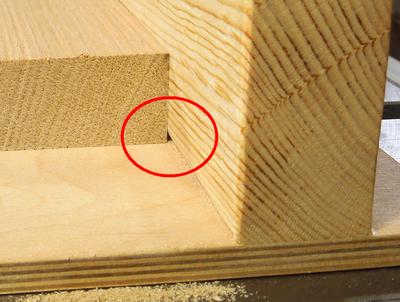
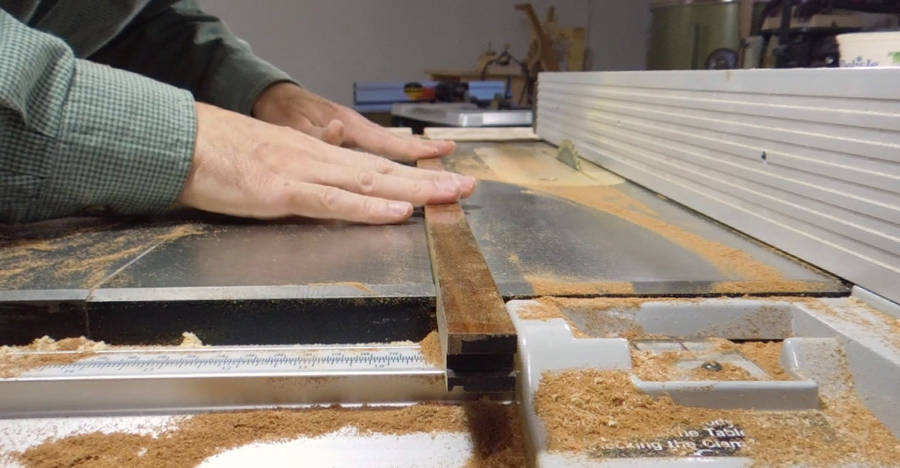 After the third cut, the rail fit in the slot precisely.
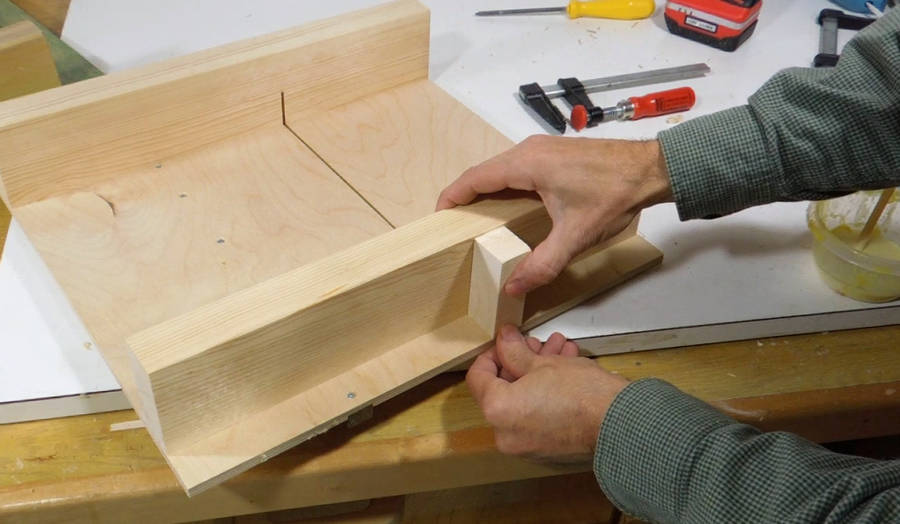
On my previous small sled, I only screwed the rail to the bottom of the sled. This time, I left the rail a bit taller and cut a rabbet into the bottom of the plywood. This makes for a more secure mount of the rail and also leaves the rail a little stronger.
 I cut the dado so that it's just a bit further from the edge than the distance
between the left slot, and the left edge of the blade (11 cm on my saw).
I cut the dado so that it's just a bit further from the edge than the distance
between the left slot, and the left edge of the blade (11 cm on my saw).
 I'm cutting the dado by making a series of cuts on the table saw, using the rip fence
to guide the cut.
I'm cutting the dado by making a series of cuts on the table saw, using the rip fence
to guide the cut.
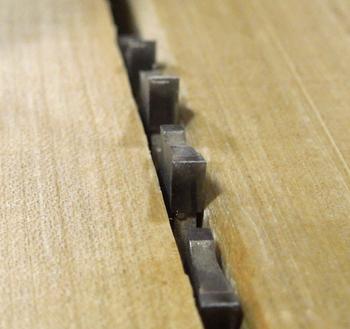 I have a 9" Freud blade where the teeth are all flat at the top (no alternating set),
which is ideal for this work. I bought that blade at Home Hardware (or maybe Home Depot)
some years back. I wasn't even aware the teeth were all flat when I bought it.
I have a 9" Freud blade where the teeth are all flat at the top (no alternating set),
which is ideal for this work. I bought that blade at Home Hardware (or maybe Home Depot)
some years back. I wasn't even aware the teeth were all flat when I bought it.
 Between each cut and the next, I moved the fence by 2 mm.
I hardly ever use that scale on the fence, but for this, it was very practical.
 After cutting most of the width, I started checking against the bar, moving the
fence a fraction of a millimeter at a time until the rail fit in the
slot.
After cutting most of the width, I started checking against the bar, moving the
fence a fraction of a millimeter at a time until the rail fit in the
slot.
Unfortunately, I overshot just slightly, so I had probably about .003" of play in the slot.
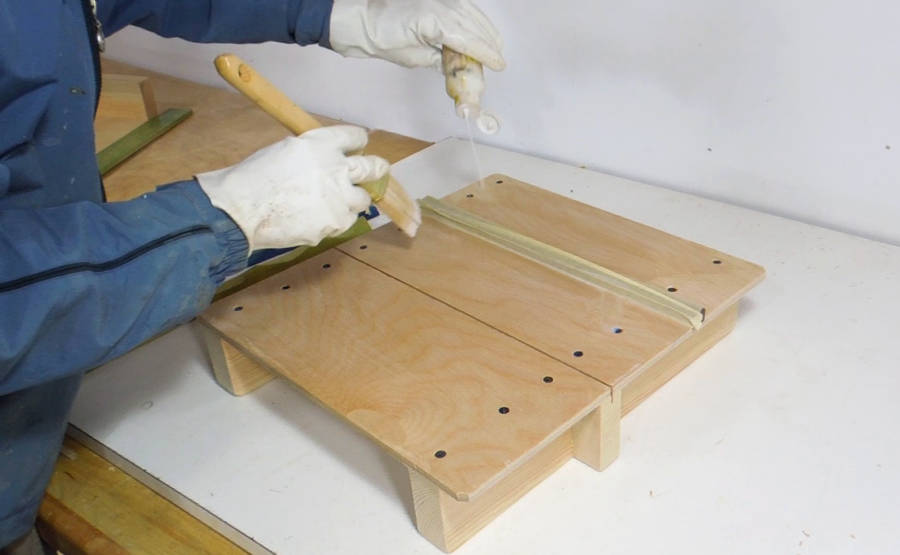
 I hadn't intended to glue the rail in place, but it occurred to me that hot
glue would be good for filling that gap. You can make some very tight and
thin joints with hot glue as long as you pre-heat the work pieces. Hot
parts allow the glue to flow much better.
I hadn't intended to glue the rail in place, but it occurred to me that hot
glue would be good for filling that gap. You can make some very tight and
thin joints with hot glue as long as you pre-heat the work pieces. Hot
parts allow the glue to flow much better.
I added a thin bead of hot glue to one edge of the slot and then pressing the rail into the slot.
This worked out quite well. If I was doing it again, I'd put probably hot glue on both edges to get a tighter hold.
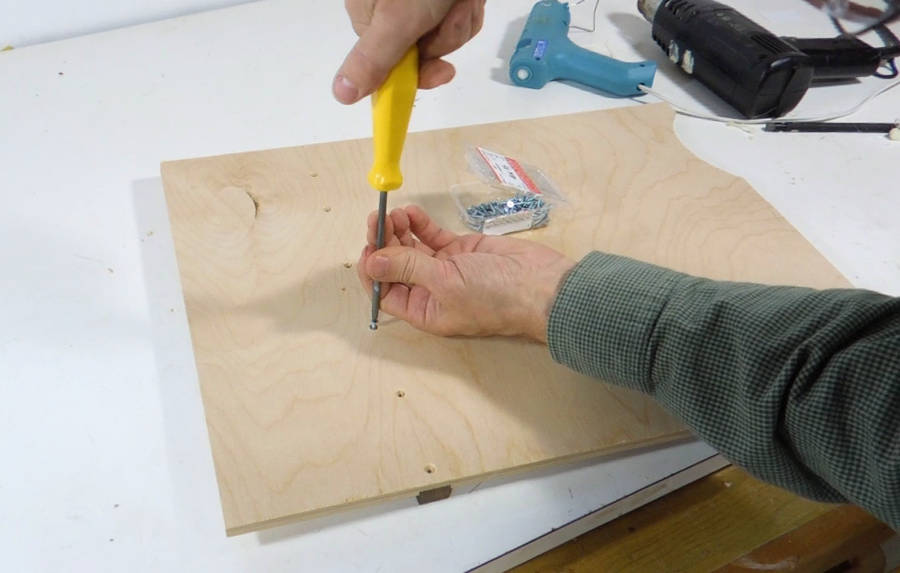 I used some 3/4" long #6 wood screws to screw the rail on. With exotic
hardwoods, it's important to pre-drill to nearly the major diameter of
the screw threads.
I used some 3/4" long #6 wood screws to screw the rail on. With exotic
hardwoods, it's important to pre-drill to nearly the major diameter of
the screw threads.
There is nothing wrong with gluing the bar in place, but I figured this way I could still swap it out if I had to, plus I wasn't sure how well the wood glue would stick to the oily exotic hardwood.
 For the material for fences on the front and back, using
a piece of 2x10.
off a 2x10. Some of the wider pieces of construction lumber are of quite
good quality, and this one was a particularly heavy piece.
For the material for fences on the front and back, using
a piece of 2x10.
off a 2x10. Some of the wider pieces of construction lumber are of quite
good quality, and this one was a particularly heavy piece.
 I also ran the pieces through the thickness planer, and then ran all faces
over the jointer again. My jointer has less snipe than my thickness planer.
I also ran the pieces through the thickness planer, and then ran all faces
over the jointer again. My jointer has less snipe than my thickness planer.

 I also chamfered one edge of the rails. This will be the bottom inside edge
of the front rail, where material is typically pushed against.
Sawdust can get caught in the corner, so by adding a chamfer to the inside,
the sawdust can get pushed out of the way.
I also chamfered one edge of the rails. This will be the bottom inside edge
of the front rail, where material is typically pushed against.
Sawdust can get caught in the corner, so by adding a chamfer to the inside,
the sawdust can get pushed out of the way.
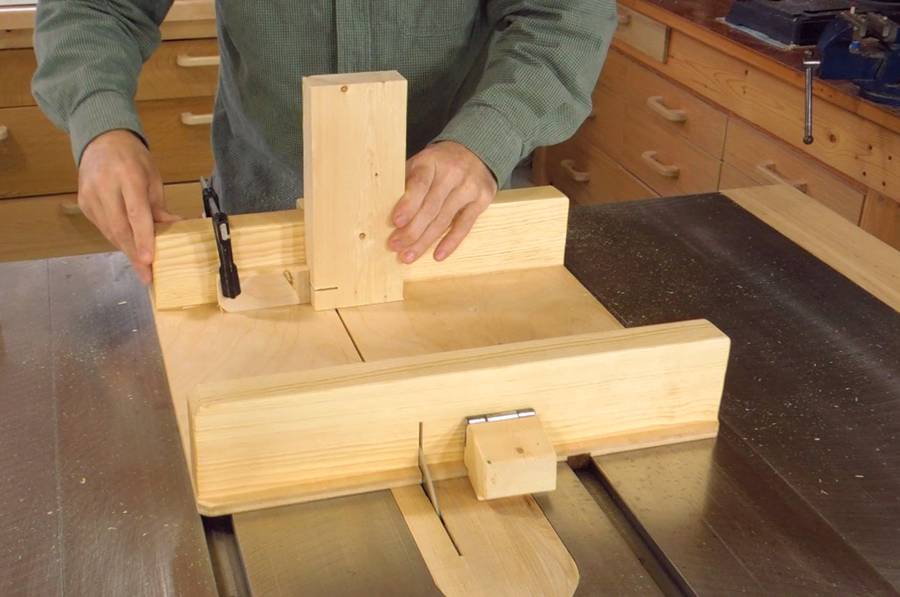
 Now comes the clever part:
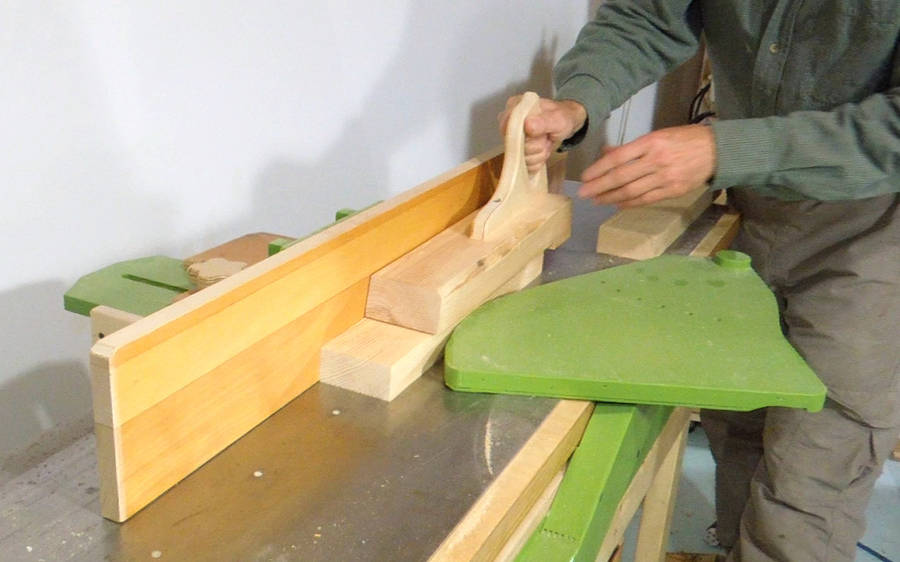
I cut the slot in the base before mounting the front and back rails.
After making that cut, I flipped the part with the rail to cut the other edge of the base as well.
I now have a narrow piece with the rail on it, with two edges precisely parallel to the guide rail.
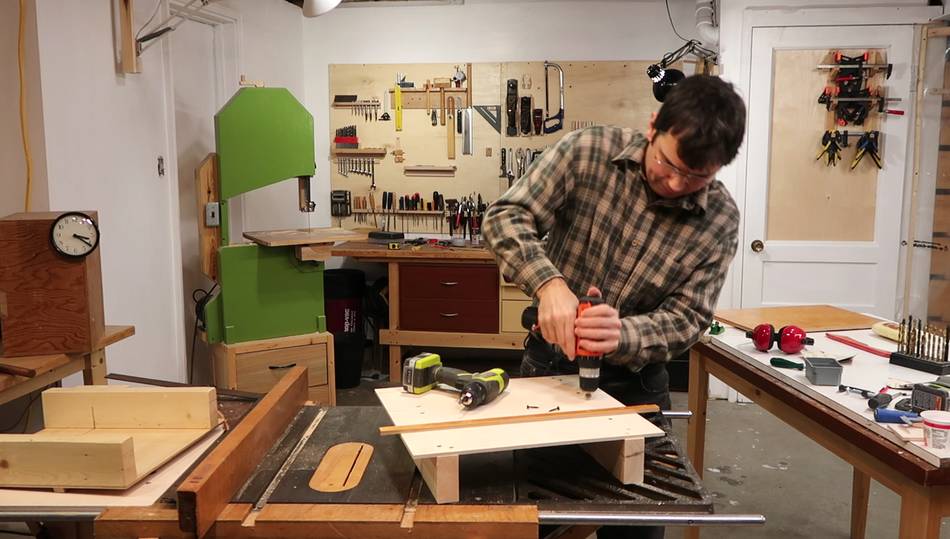
 Next, I use a framing square to position the front rail, and clamp it on
using two bar clamps.
Next, I use a framing square to position the front rail, and clamp it on
using two bar clamps.
Some people consider framing squares untrustworthy, but unlike fancier squares made from two parts, I have never seen a framing square that was out of square --- even beat up rusty ones.
I pushed another piece of wood against the right edge of the wood, which gives me a place to push the framing square up against. I clamp the rail in place on the spot.
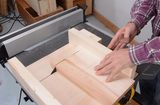
 With the rail still clamped on, I now drill the pilot holes for the screws...
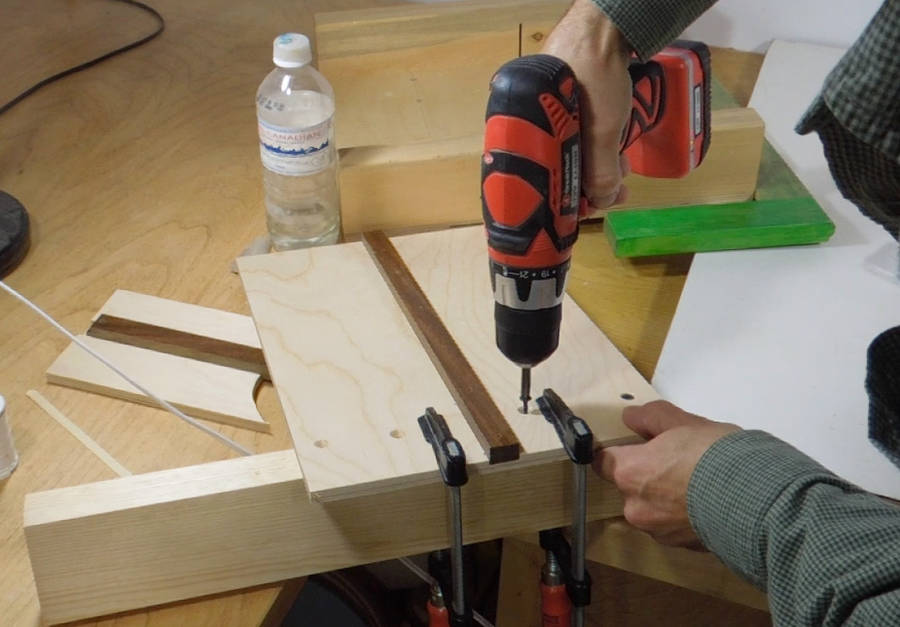 ... and then screw it on with drywall screws. Drywall screws are particularly
well suited for this application because of their relatively flat and wide heads.
... and then screw it on with drywall screws. Drywall screws are particularly
well suited for this application because of their relatively flat and wide heads.
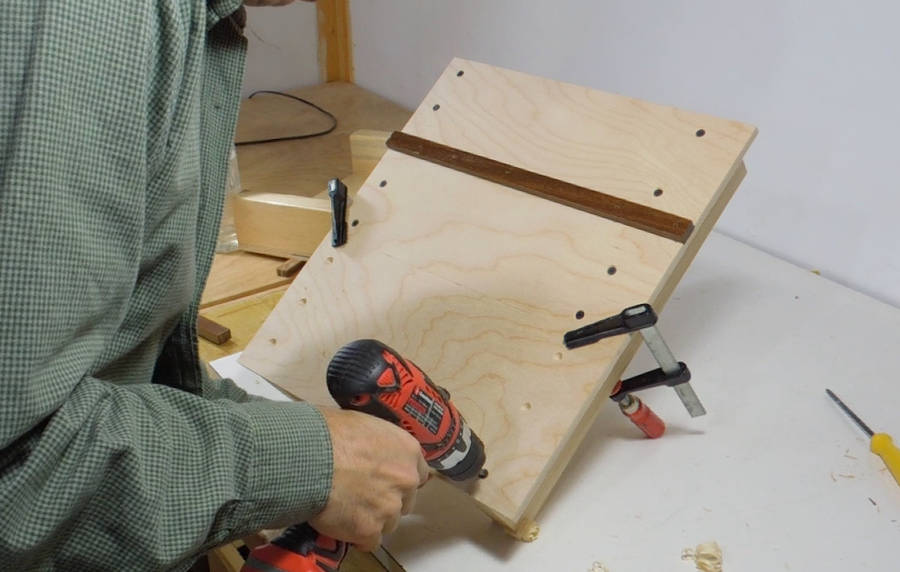 I use the same procedure to ensure the back rail is mounted square, then
screw the rest of the sled's bottom onto both rails.
I use the same procedure to ensure the back rail is mounted square, then
screw the rest of the sled's bottom onto both rails.
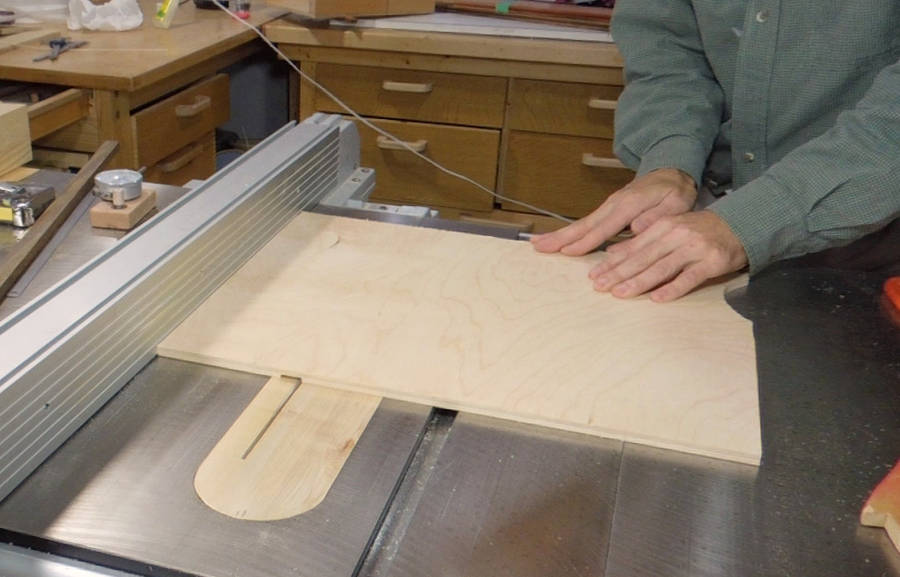
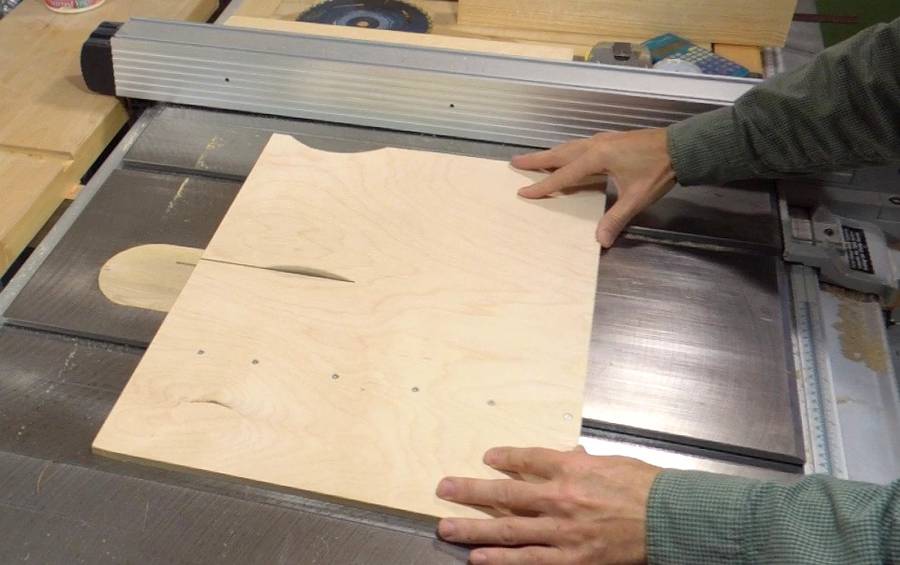
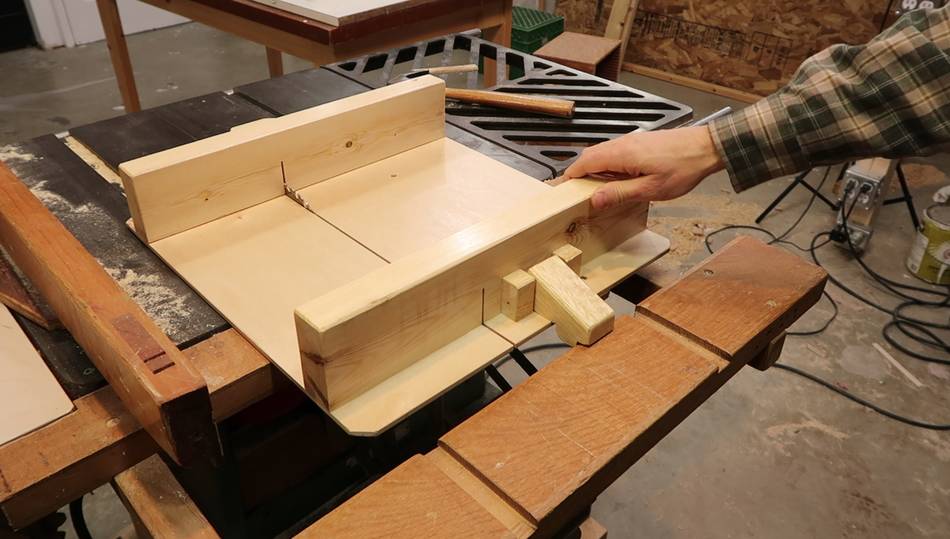
 Then I cut the slot in the sled.
 I glue a small block of wood where the table saw blade comes out of the
sled, as a discouragement to putting my fingers there!
I glue a small block of wood where the table saw blade comes out of the
sled, as a discouragement to putting my fingers there!
I could have made that block larger so the blade never comes out there at all, but I didn't want to add too much bulk to the sled.
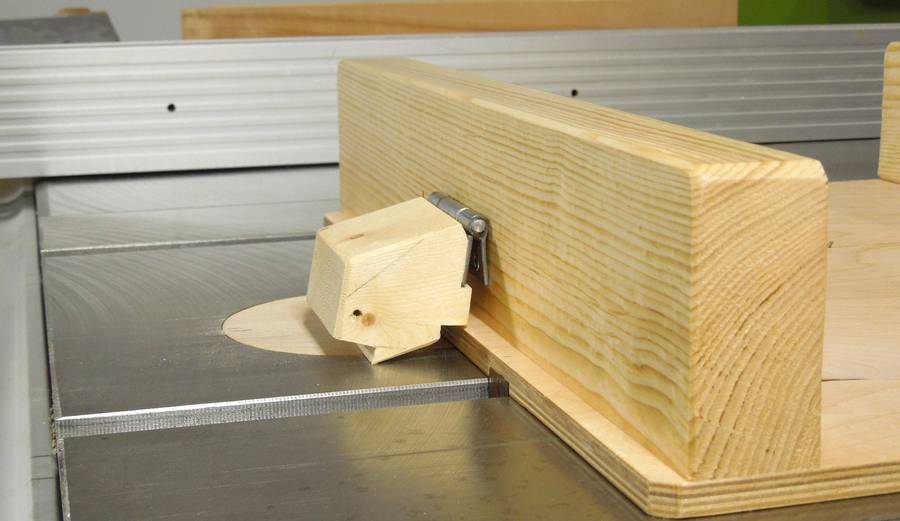 I also added a new "safety feature": A small pivoting block at the back
of the fence that catches on my outfeed extension to keep the sled from
being pushed past the middle of the blade.
I also added a new "safety feature": A small pivoting block at the back
of the fence that catches on my outfeed extension to keep the sled from
being pushed past the middle of the blade.
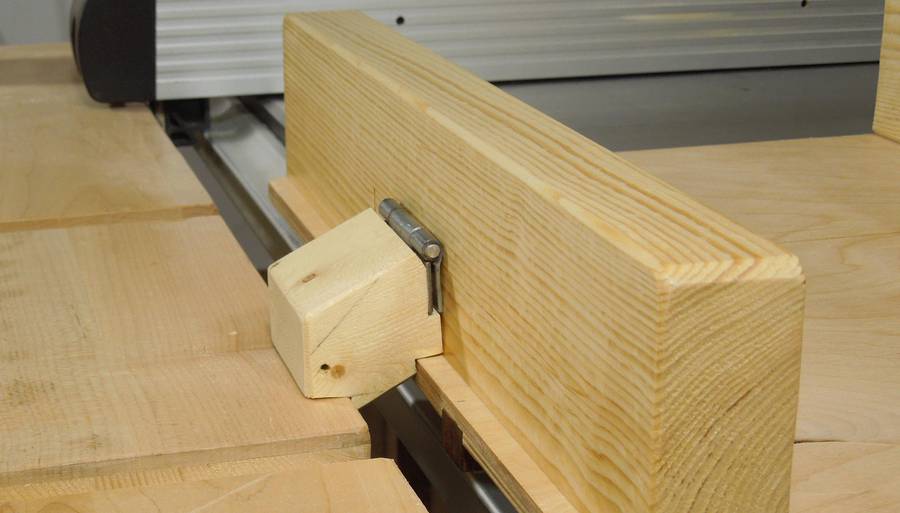 The block catches against my outfeed table extension when the sled
has been pushed just far enough to make a full cut.
The block catches against my outfeed table extension when the sled
has been pushed just far enough to make a full cut.
 That way, the saw blade won't come out too far on the front of the sled.
This further reduces the chance of cutting into my fingers.
My other sled doesn't have this safety feature, and I haven't cut my
fingers yet.
That way, the saw blade won't come out too far on the front of the sled.
This further reduces the chance of cutting into my fingers.
My other sled doesn't have this safety feature, and I haven't cut my
fingers yet.
I came up with the idea for this stop as I built the sled, so I haven't used it much yet. I can't say whether or not I will find this feature annoying.
Update 2018:
I built that sled in 2012. I found that stop very useful, so I also
put one on this sled in 2017.
 Next I varnished the sled.
The varnish makes a harder surface, preventing wear. It also helps keep
the wood clean over time.
Next I varnished the sled.
The varnish makes a harder surface, preventing wear. It also helps keep
the wood clean over time.
I'm putting three coats of varnish on the jig, except for the guide bar (masked off) and the inside, which only gets one coat. With just one coat, the inside won't get too slippery. That Varathane diamond floor varnish I use is quite slippery --- a desirable feature for the underside of the sled.
 You may wonder why I only put one guide rail in this sled.
There are two reasons. Wood will seasonally shrink and expand, but much less along the grain than across it. But even in the grain direction, and even plywood, can shrink and expand by as much as 0.1% seasonally. With the two T-slots about 8" (20 cm) apart, 0.1% shrinkage works out to about 0.008", or about 0.2 mm. With the guide rail fitting as precisely as it does, a movement of 0.008", or even half that much, would cause the sled to jam.
The other reason for just one guide rail is that I can flip this sled over, so I can make much deeper cuts off of one end of the sled without cutting the sled in half. Of course, I could have just made the fence rails taller, but that would make it bulkier, make it harder to hold the workpiece in the sled and harder to use a clamp to hold a stop block in place.
I have free plans for this table saw sled.
 I set up two cameras and just left them running while I built the sled without focusing
on filming it. Unfortunately,
I lost track of time and one camera stopped after 20 minutes (it only ever records
that long), the other camera said it had 46 minutes left at the start, but it stopped after
23 minutes once the video file size hit 4 gigabytes. So I ended up not capturing the whole process.
I set up two cameras and just left them running while I built the sled without focusing
on filming it. Unfortunately,
I lost track of time and one camera stopped after 20 minutes (it only ever records
that long), the other camera said it had 46 minutes left at the start, but it stopped after
23 minutes once the video file size hit 4 gigabytes. So I ended up not capturing the whole process.
The basic sled took about half an hour, but with the material picked out ahead of time. Picking out what material to use often takes longer than it should.
 Like the sled for my delta hybrid saw, it also has a stop to prevent it from getting
pushed too far. It catches on the outfeed support. I quite rely on having such a
stop, being used to just pushing the sled until it hits it, and then I know I pushed
it far enough.
Like the sled for my delta hybrid saw, it also has a stop to prevent it from getting
pushed too far. It catches on the outfeed support. I quite rely on having such a
stop, being used to just pushing the sled until it hits it, and then I know I pushed
it far enough.
 This is actually my fifth sled of this style.
The first one was in 2010, and I made that for just one video: precise cuts to make a puzzle. But I ended up using that sled a lot after that. So in 2012 I made a video about building a small table saw sled like this. Then in 2013, after building my homemade table saw, I made a sled for it, though didn't write about it or make video of it, but the sled appears here in this video and here (18 months later). And in 2017 I built one for a small jobsite saw.
This was built in my new small basement shop, which I set up to use during some winter days when it's -20°C, too cold to heat up the big shop building.
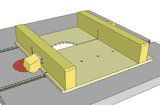 Table saw sled plans
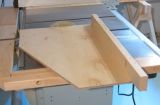
 Making a sled for the DeWalt FlexVolt table saw
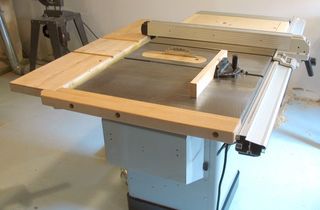
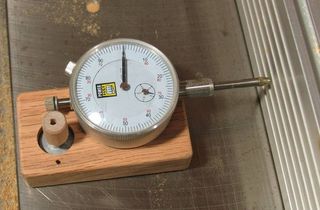
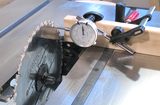 Table saw alignment
 Making push sticks
 Table saw insert
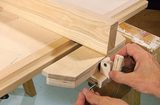 Homemade