The dovetail joint is not my favourite type of wood joint. I consider it to be primarily decorative,
seeing that it's easier and faster to cut box joints
with finer fingers than what is possible with dovetail joints. Fine box joint fingers
make for stronger joints than dovetail joints.
That said, I was keen to experiment with making dovetail joints with the pantorouter.
Designing the joint geometry
The first step was to work out the geometry for my dovetail joint. I wanted to make it as fine as
possible, finer than what is possible with a typical dovetail joint jig.
I also wanted to make the joint a through
dovetail joint, seeing that commercial jigs for that are more expensive.
The minimum size of my joint was determined by my smallest dovetail bit, which is 3/8" (9.5 mm)
wide at the tip with a 14 degree angle. This bit cuts the space between the tails, so that
space has to be at least as wide as this bit. I used 10 mm to give me a bit of margin.
The narrowest I could make the tails at the base was limited by the width of the straight
bit that I'd use to cut the pins. This bit was about 7 mm wide.
I decided to make the tail 8 mm wide at the base to give me a little bit of margin.
With the 10 and 8 mm, that makes for a total of 18 mm tail to tail.
I started by working out the geometry for the pins template. That's the template with the
sloped teeth.
My dovetail bit can cut to a maximum depth of 8 mm, so that would be the maximum thickness
of stock I could use with it. My guide bearing would need to be able to travel 16 mm
up and down in the template, seeing that the pantograph doubles the motion.
I'd need about 2 mm of lateral movement at 16 mm
down, since my 7 mm wide straight cut needs to carve an 8 mm wide cavity
at the narrowest point.
So based on that, I drew some 14-degree lines, leaving about 2 mm space for bearing movement.
These meet at a point further down.
I drew a horizontal line where the two lines met and placed a tick every 36 mm.
Now I just needed to draw the 14-degree lines from each of my tick marks to get the
sides of the template.
I also marked another line across to indicate how far my bearing could possibly come down
into the slots. No point in cutting the template any deeper than the bearing will fit.
Having worked out the geometry, I carefully re-drew it on my piece of wood.
Making the templates
I cut the pins template out on my bandsaw. I figured the bandsaw was the safest bet,
seeing that I could see the cut as I was making it. But with my template about 45 cm wide,
it bumped against the post when I cut the last few cuts, so I had to switch to
my older, bigger 18" bandsaw to finish it up.
The tails template is much simpler, just a matter of making straight notches. Because I was aiming for
10 mm wide cuts with a 9.5 wide dovetail bit, I needed 0.5 mm of lateral movement for the bit,
which translates to 1 mm of play for the bearing on the template.
I put a tick mark on the back of my piece of wood every 36 mm, then lined that up
with the tick marks I put on my table saw sled. With the blade 2.5 mm wide, and
needing a 13.5 mm wide slot, I put two tick marks on the sled 11 mm apart and lined
up my every-36-mm tick marks with either of these for cutting the slots.
After cutting all the slots, I whacked out the pieces in-between with a chisel.
That method I used for the tails template worked really well, and in retrospect I should
have just tilted my table saw blade 14-degrees and used a similar method for my pins template
as well. Except I didn't want to put a 14-degree cut in
my nice sled, so I guess I would have had to use the miter gauge that came with the saw for those cuts.
If you don't have an 18" bandsaw, just make both templates on the table saw.
I'm doing a quick sanity check in the photo - if all the tails and pins are in the right place,
these should fit consistently. This would catch if one of my tick marks had been off by a millimeter.
Cutting the dovetail joint
I first swapped out my guide bearing to the 1/4" guide bearing that
I designed my templates for. I usually use a 3/4" bearing on the pantorouter for most other work.
My tails template clamped to the frame. Setting up the tails template is pretty straightforward.
All I have to do is make sure that my template is positioned such that when the guide bearing is at
the bottom of the slots in the template, my router's axis will be just below the level of the table.
That way, I know the bit has finished the cut.
It sure is nice to actually be able to see the cut being made. Totally unlike a typical dovetail jig!
Next I switched to my straight router bit and mounted the pins template to the template holder.
I really don't have any means of adjusting the shape of the tails, so the pins come first,
and then I cut the tails to match the pins.
The vertical position of the template determines the tightness of the fit. I tried to think of
a simple and foolproof way to calculate where to put the template, but it wasn't easy.
And with all my calculations, my first pins test piece was way too loose. I guess working
that out was too complicated for me!
But then I had one of those "duh... stupid!" moments. Placing my way-too-loose test piece in the tails
part of my stock, I could see I had about a 1.5 mm gap below the pins. Obviously, if I'd made those
cuts 1.5 mm further up, I would have had a good fit. So no need to do any more calculations. I
just had to move my pins template up by 3 mm (remember, everything is 2x bigger on the template side).
I also wrote down how far from the top my pins template now was after moving it, just in case I'd goof up later.
I still needed to make one more adjustment. The center of the cutout between pins needs to be exactly
where the tails are. So, with the bearing at the bottom of one of the triangles on my template, and the
dovetail board on the jig, I had to position it laterally so my bit was centered on a tail. I then moved
my side stop so it was touching the board. That was easy, no need to calculate anything.
Cutting out the pins.
I started each cutout by moving the bit across it to make a climb cut (with the bit cutting into, not
out of the wood). Starting the cutout like this prevents tearout. Although you can see in the video
that I neglected to do this just once, and I promptly had a bit of tearout. Oops!
And here's the finished joint. The left side of the third pin from the right has a bit of a gap to it.
It's a small enough gap that it will easily fill with glue. Or I could figure out which finger on
my template is responsible for this and put a piece of UHMW tape on it to pad it up and tighten
up that one surface on future joints.
Overall, it was a lot of trouble to go through for a dovetail joint. But most of the effort went into
making the templates and working out the alignment. Once I have the templates, the only bit of setup
that is critical is how far from the top I need to put my pins template. I carefully measured that
and noted it down. So the next time I need to cut a joint like this, it's going to be a snap to set up.
I found that fiddling with the bar clamps while adjusting the template position was awkward,
so I also added some slots to the side of the template frame. That way, I can just bolt the template
to the frame.
The pantorouter has a maximum horizontal router travel of 21 cm (8"). If I need to make dovetail joints
wider than this, I can always make the cut and then move my stock sideways. This would best be done
with a spacer between the fence and the stock to get consistent offsets from joint to joint.
A bigger work table would also help. The main
challenge would be setting up stops and clamping. Other than that, the jig has no obstruction
on either side of the stock, so there's no hard limit to how wide the stock can be.
 The dovetail joint is not my favourite type of wood joint. I consider it to be primarily decorative,
seeing that it's easier and faster to cut box joints
with finer fingers than what is possible with dovetail joints. Fine box joint fingers
make for stronger joints than dovetail joints.
That said, I was keen to experiment with making dovetail joints with the pantorouter.
The dovetail joint is not my favourite type of wood joint. I consider it to be primarily decorative,
seeing that it's easier and faster to cut box joints
with finer fingers than what is possible with dovetail joints. Fine box joint fingers
make for stronger joints than dovetail joints.
That said, I was keen to experiment with making dovetail joints with the pantorouter.
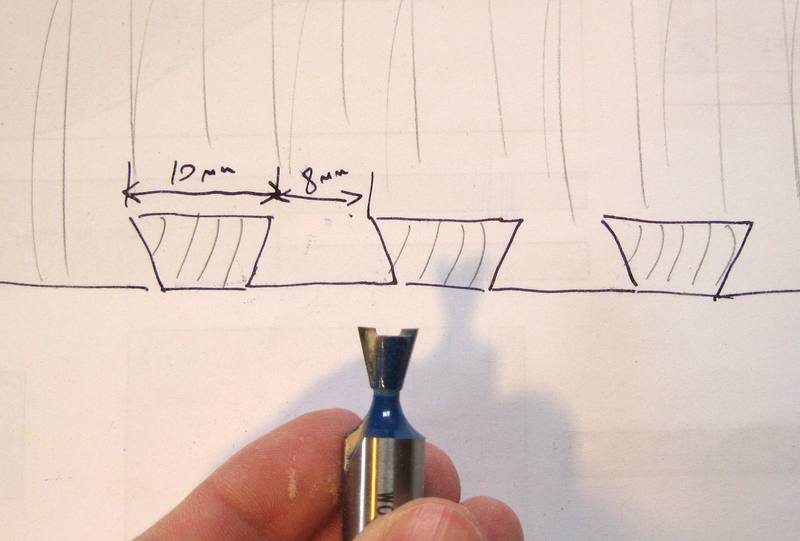
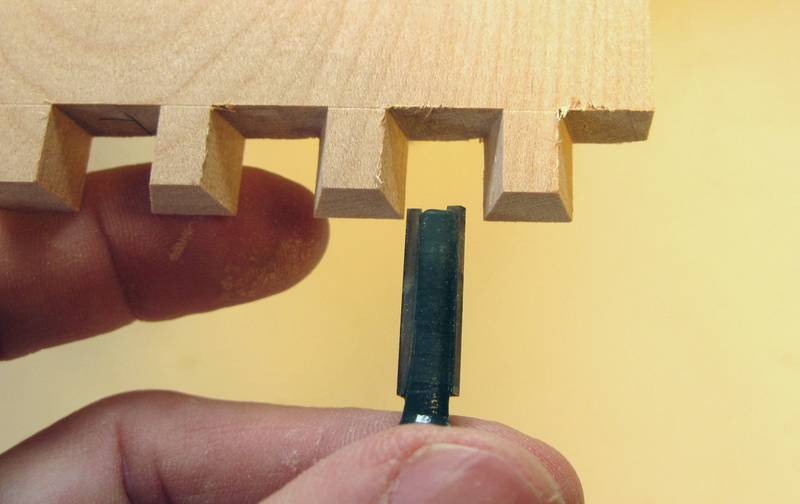
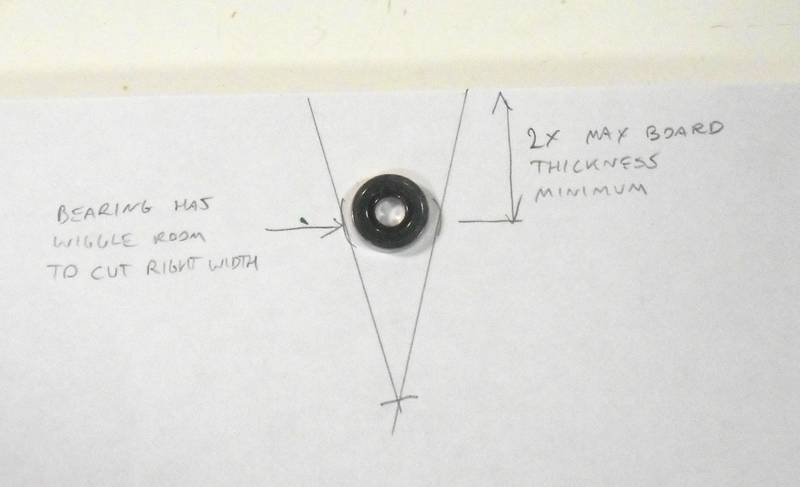


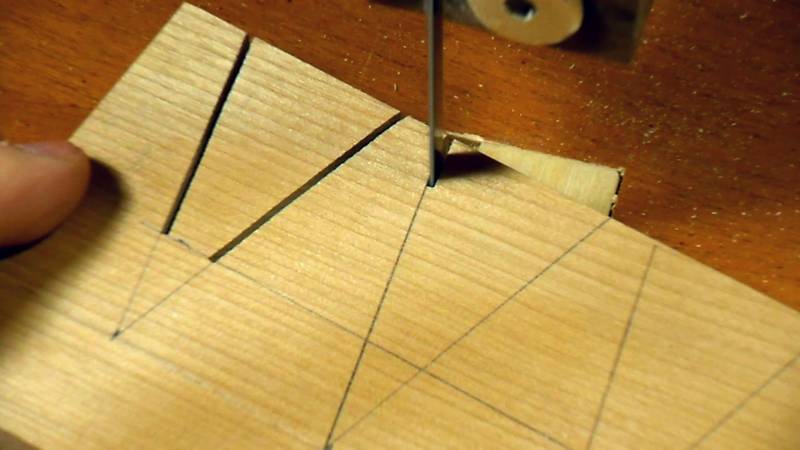
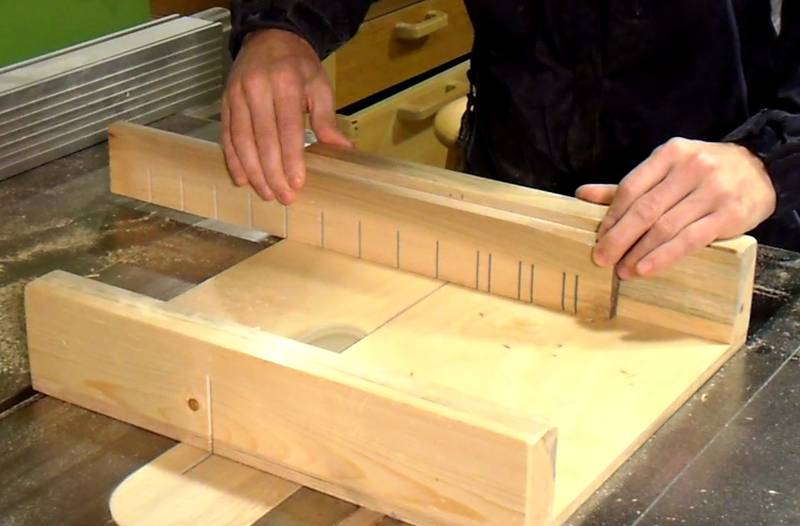
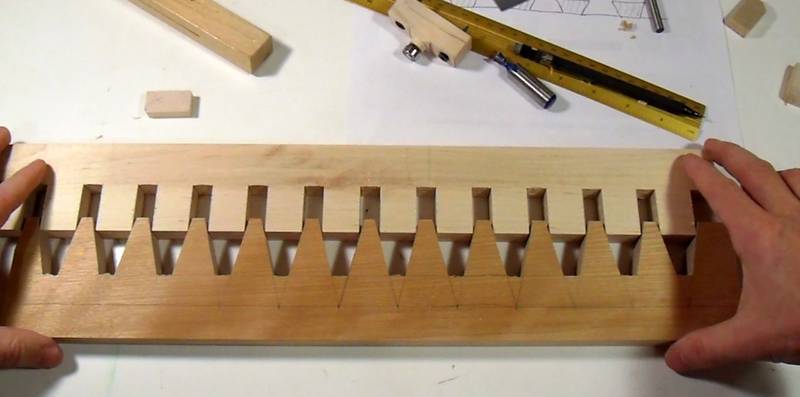
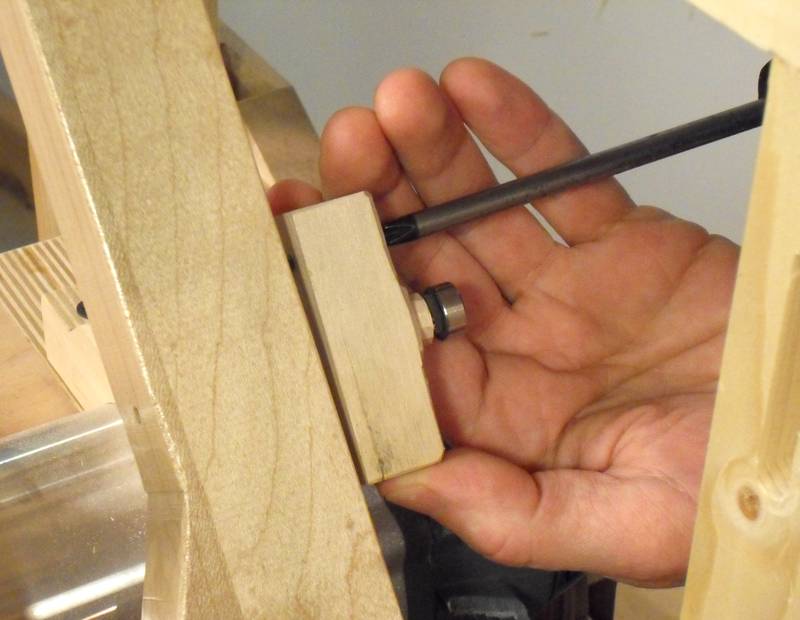
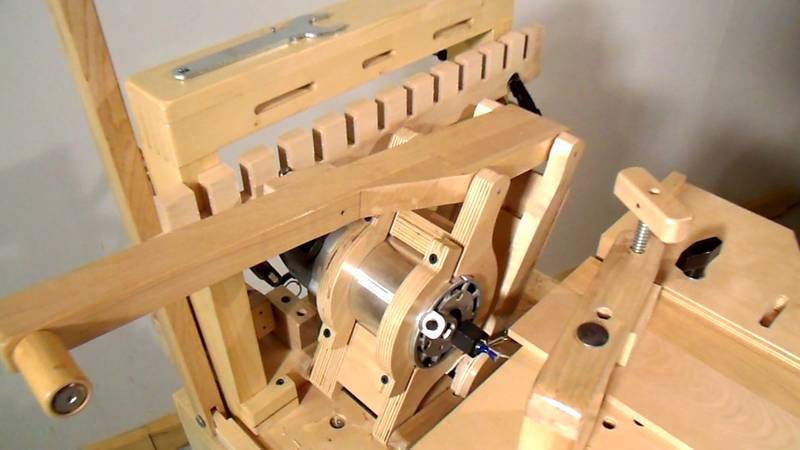


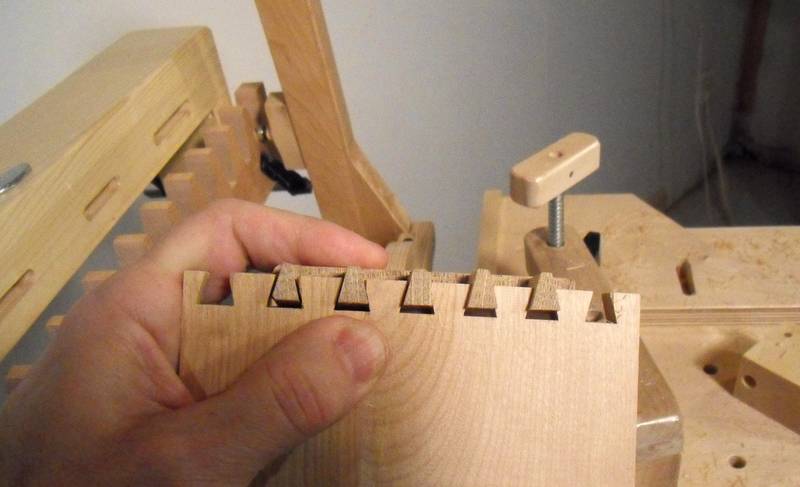
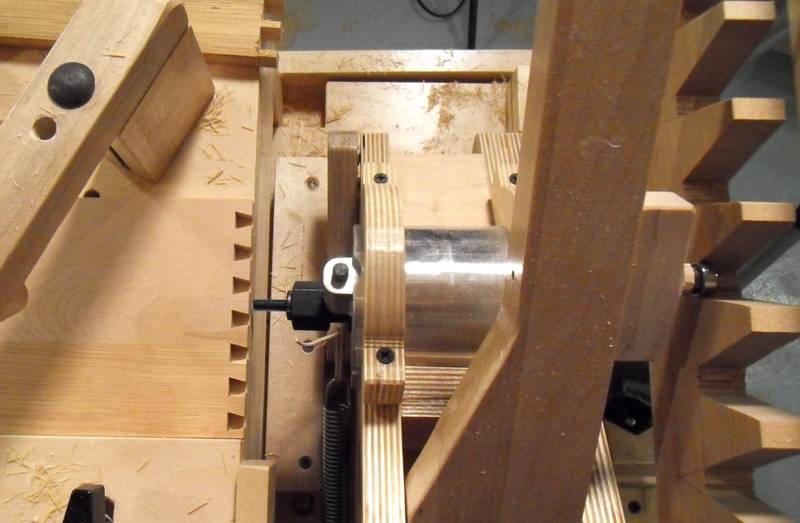
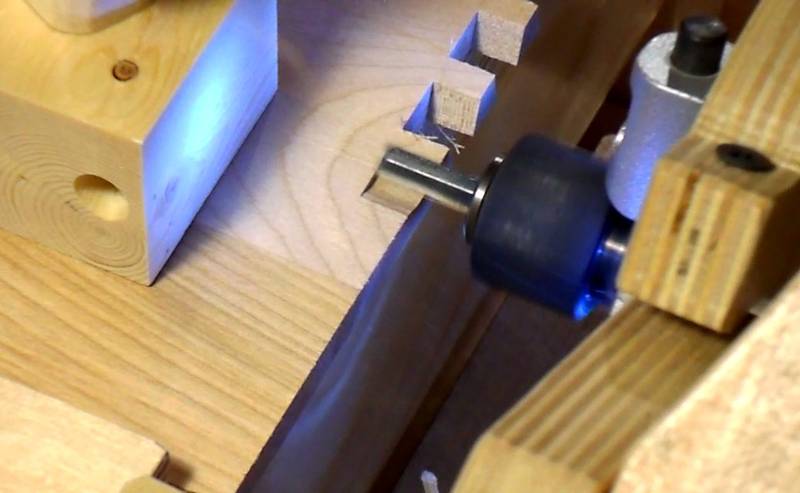
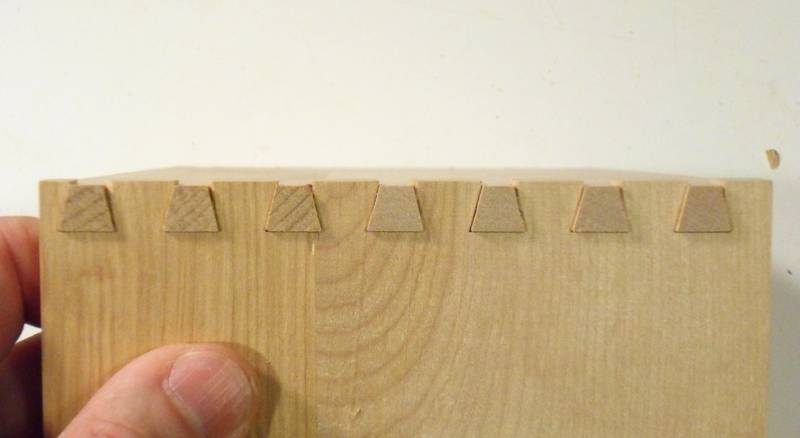

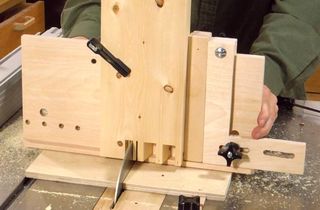 Table saw dovetail jig
 Dovetail vs box joint
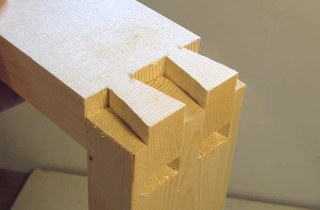 Dovetail joints on the bandsaw
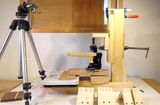 Another dovetail vs.
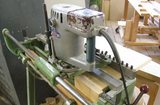 Big old cast iron
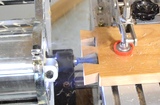 Pantorouter dovetails
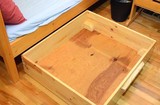 Dovetail joined
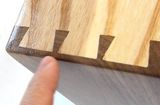 Half blind dovetail joints