Putting the bed together
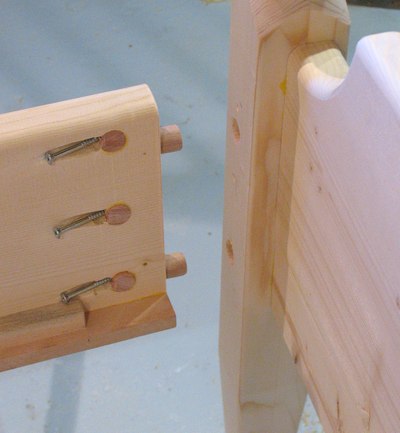 Here you can see how the rails finally meet the post. With the dowels slightly tapered,
and the holes flared out, these insert relatively easily, and should still be manageable
even if there is expansion or contraction in the wood from humidity changes.
Here you can see how the rails finally meet the post. With the dowels slightly tapered,
and the holes flared out, these insert relatively easily, and should still be manageable
even if there is expansion or contraction in the wood from humidity changes.
I used three 3.5" #10 wood screws to screw the rail to the post. This is probably a bit overkill. I'm happy with the results though. Its probably at least as strong as using bed rail clips, as I did for this bed, and less costly too.
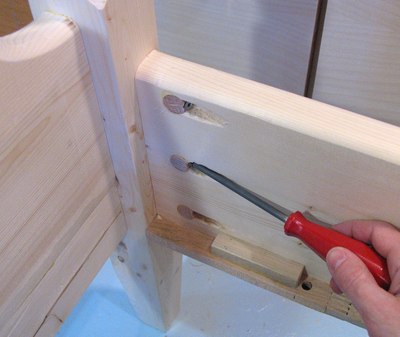 It does unfortunately mean that a screwdriver is necessary to disassemble the bed
for moving. Though the bed rail clips are not without their drawbacks either.
Every time I have had to take the other bed apart, I ended up having to use a
rubber mallet to pop open the hooks.
It does unfortunately mean that a screwdriver is necessary to disassemble the bed
for moving. Though the bed rail clips are not without their drawbacks either.
Every time I have had to take the other bed apart, I ended up having to use a
rubber mallet to pop open the hooks.
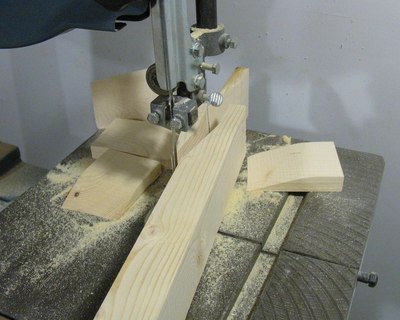 Finally, it was time to make the slats. I cut most of these out of 10' 2x6's,
because four of these could be cut out of one 10' 2x6 without any scrap.
Finally, it was time to make the slats. I cut most of these out of 10' 2x6's,
because four of these could be cut out of one 10' 2x6 without any scrap.
I tapered the ends of the slats, so that they would sit a little lower in the bed. With 13 slats to trim on both sides, I now have 26 of these funny shaped wedges lying behind my bandsaw.
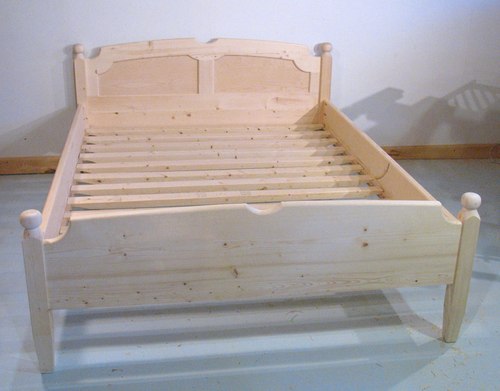 And finally, putting it all together. I'm rather pleased with the result. And all
for less than $100 in materials.
And finally, putting it all together. I'm rather pleased with the result. And all
for less than $100 in materials.
All the equipment in the back of my shop is on mobile bases, so I could roll it out of the way for assembling this bed. My present basement workshop is much better than my old workshop that way.
 I didn't leave it together for long though. The next step was to varnish it.
I made a very short temporary bed rail to hold the head and footboard upright
against each other while varnishing. The bed rails themselves I varnished
separately on workbench. That way, I didn't run the risk of inadvertently
gluing the pieces together with varnish.
I didn't leave it together for long though. The next step was to varnish it.
I made a very short temporary bed rail to hold the head and footboard upright
against each other while varnishing. The bed rails themselves I varnished
separately on workbench. That way, I didn't run the risk of inadvertently
gluing the pieces together with varnish.
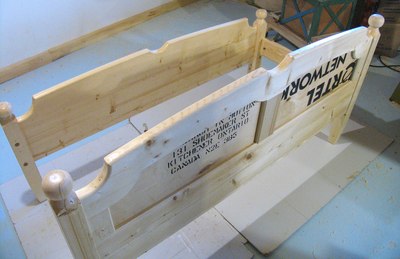
Also note the printing on the back of the headboard. The plywood came from a shipping crate that Nortel had shipped to Research in Motion back around 2002. It was made with some very nice plywood. It's the same plywood I used for this other bed of similar design,
Previous: Making the bed rails
Back to Index
![]()