Making the bed rails
 I made the bed rails from 2x10's. Unfortunately, some of the 2x10's
I bought were noticeably cupped. All the 2x10's in the stack at the lumber store
had flaws in them, and these were the best I could find.
I made the bed rails from 2x10's. Unfortunately, some of the 2x10's
I bought were noticeably cupped. All the 2x10's in the stack at the lumber store
had flaws in them, and these were the best I could find.
In an ideal world, I would just have used my 12" jointer to flatten the board,
but in the real world, I only have a 6" jointer,
so that wasn't an option.
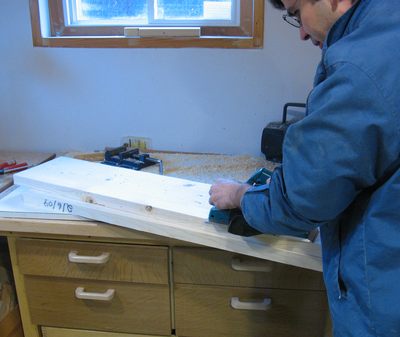 So instead I used a small 3" power planer to plane down the edges a little bit so
that the resulting board was approximately flat, though not a smooth contiguous
surface.
So instead I used a small 3" power planer to plane down the edges a little bit so
that the resulting board was approximately flat, though not a smooth contiguous
surface.
I then passed the boards through the jointer, with the just-flattened side down to
flatten up the other side. After that, I flipped the boards, and planed another
millimeter off the side I had flattened with the hand-held power planer, at which point
I had a continuous smooth and flat surface on both sides.
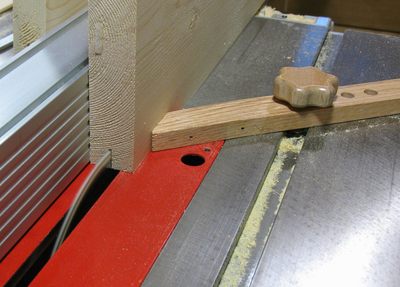 The bed rails need to have a ledge on the bottom edge to hold the slats.
This ledge fits into a rabbet cut into the bottom side of the rails.
I cut this rabbet in two steps.
The bed rails need to have a ledge on the bottom edge to hold the slats.
This ledge fits into a rabbet cut into the bottom side of the rails.
I cut this rabbet in two steps.
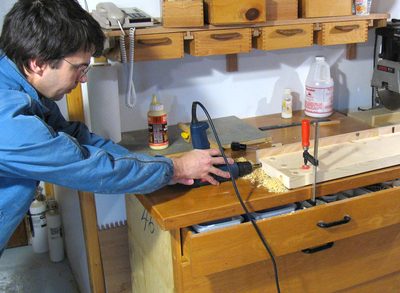
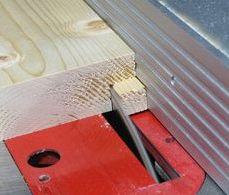 I don't often use a featherboard,
but for this large piece, really helped, because I couldn't always
push the large board against the push stick as I maneuvered it over the saw.
I don't often use a featherboard,
but for this large piece, really helped, because I couldn't always
push the large board against the push stick as I maneuvered it over the saw.
 I glued some blocks of hardwood between the rail and the ledge. These ensure
that the slats of the bed will not slide side to side. They also serve to help
hold the ledge in place because they are firmly glued to both the ledge and the
rail itself.
I glued some blocks of hardwood between the rail and the ledge. These ensure
that the slats of the bed will not slide side to side. They also serve to help
hold the ledge in place because they are firmly glued to both the ledge and the
rail itself.
As further reinforcement, I screwed the ledge in place with some 2" drywall
screws screwed through the ledge from the bottom, and into the bed rail.
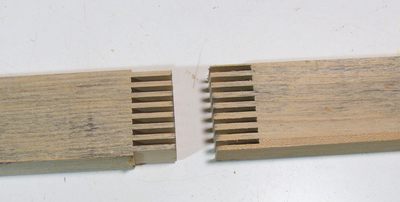 For each the ledge, I a piece of hardwood 4 x 1.8 cm and 2 meters long for.
I didn't have any pieces of hardwood that length lying around and wanted
to make use of some ugly scraps of maple instead. So I finger joined some pieces
end to end using my box joint jig. I spaced
the fingers such that the width of a thin kerf blade was just right
for a tight joints.
For each the ledge, I a piece of hardwood 4 x 1.8 cm and 2 meters long for.
I didn't have any pieces of hardwood that length lying around and wanted
to make use of some ugly scraps of maple instead. So I finger joined some pieces
end to end using my box joint jig. I spaced
the fingers such that the width of a thin kerf blade was just right
for a tight joints.
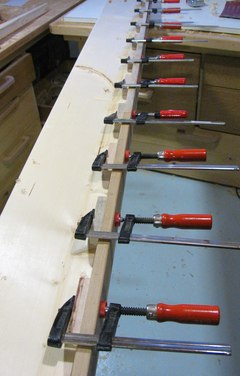
These joints set rigid surprisingly fast on account of the large glue area.
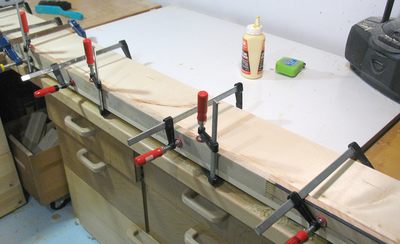 I then glued the strip of hardwood to the bottom edge of the rails, making sure it made
good contact everywhere. That ledge has to hold the weight of whatever is in the bed.
I then glued the strip of hardwood to the bottom edge of the rails, making sure it made
good contact everywhere. That ledge has to hold the weight of whatever is in the bed.
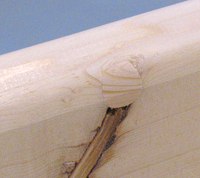
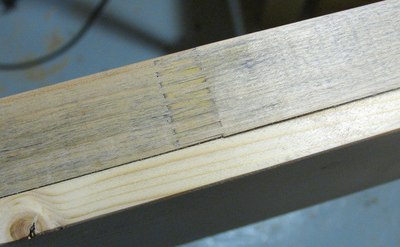 One of the finger joints, as it looks on the bottom of one of the rails. For good
measure, I also put a screw in every 50 cm or so, but didn't photograph that step.
One of the finger joints, as it looks on the bottom of one of the rails. For good
measure, I also put a screw in every 50 cm or so, but didn't photograph that step.
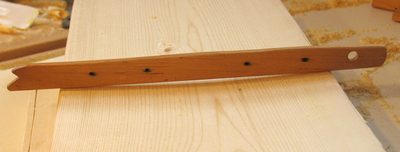
 I drilled two holes into the ends of the rails, where I then glued short pieces of
dowel into the ends of them. These pieces of dowel protrude about 2 cm, and mate with
the holes drilled into the posts. I tapered the dowels a little on the belt sander,
to make them easier to insert into the holes on the posts.
These dowels are meant to transfer the vertical load from the bed rails onto the posts.
I drilled two holes into the ends of the rails, where I then glued short pieces of
dowel into the ends of them. These pieces of dowel protrude about 2 cm, and mate with
the holes drilled into the posts. I tapered the dowels a little on the belt sander,
to make them easier to insert into the holes on the posts.
These dowels are meant to transfer the vertical load from the bed rails onto the posts.
Pocket holes to join the rails
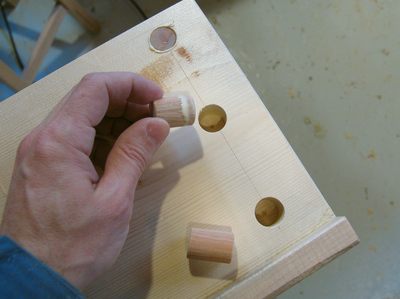 Next I glued some plugs into the rails near the ends. These plugs are positioned
to be at the end of some pocket holes yet to be cut. They are there to help
reinforce the wood where the screw goes.
After gluing in these plugs, I drilled another set of holes just behind the plugs to
be the pocket part of the pocket holes.
Next I glued some plugs into the rails near the ends. These plugs are positioned
to be at the end of some pocket holes yet to be cut. They are there to help
reinforce the wood where the screw goes.
After gluing in these plugs, I drilled another set of holes just behind the plugs to
be the pocket part of the pocket holes.
 To help me align the drill for drilling the screw hole part of the pocket holes,
I made a temporary drill-aiming guide, which I just held against my drill by hand.
The top edge of this drill is flat and parallel with the axis of the drill itself,
so that provided a good reference surface.
To help me align the drill for drilling the screw hole part of the pocket holes,
I made a temporary drill-aiming guide, which I just held against my drill by hand.
The top edge of this drill is flat and parallel with the axis of the drill itself,
so that provided a good reference surface.
 With the aiming guide held to the top of the drill, I can make sure that the drill is aimed
correctly so that it will drill into the middle of the pocket. My aiming guide was really
only good for getting the vertical alignment right, but for horizontal component was easy
enough to eyeball from above.
With the aiming guide held to the top of the drill, I can make sure that the drill is aimed
correctly so that it will drill into the middle of the pocket. My aiming guide was really
only good for getting the vertical alignment right, but for horizontal component was easy
enough to eyeball from above.
 After I drilled the pocket holes, I chiseled open the pockets a bit more, and then used
the tip of a 3/8" drill to form a slight countersink at the bottom of the pockets.
After I drilled the pocket holes, I chiseled open the pockets a bit more, and then used
the tip of a 3/8" drill to form a slight countersink at the bottom of the pockets.
After that, I routed the top edges of the bed rails to the same profile that I used for the headboard and footboard.
 The wood wasn't perfect, and there was one spot where I inserted a plug before
routing the edges. That defect is on the inside, facing the mattress, so only the top
edge of the board is visible when it's assembled. The plug hides the defect rather nicely.
The wood wasn't perfect, and there was one spot where I inserted a plug before
routing the edges. That defect is on the inside, facing the mattress, so only the top
edge of the board is visible when it's assembled. The plug hides the defect rather nicely.
Next: Putting the bed together
Previous: Joining the posts to the headboard
Back to Index