 I wanted to write about building storage shelves, but really didn't
have a need for more shelving myself. But a friend was in need of some,
so I built this shelving unit for him.
I wanted to write about building storage shelves, but really didn't
have a need for more shelving myself. But a friend was in need of some,
so I built this shelving unit for him.
I wanted to write about building storage shelves, but really didn't
have a need for more shelving myself. But a friend was in need of some,
so I built this shelving unit for him.
He has a big two car garage with a high ceiling and lots of extra floor space. So I built the shelf a full 8 feet high and wide, basically making full use of the 8 foot length of the lumber.
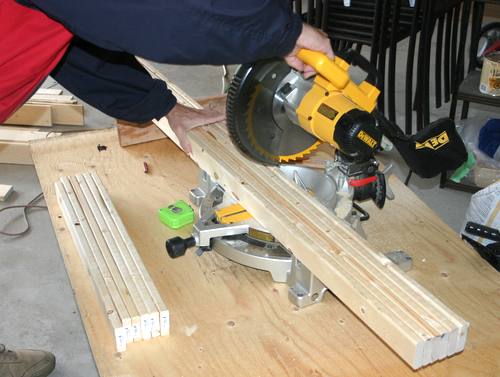 The only cuts I needed to make were to cut the 1x3's (actually 3/4" x 2.5")
into sections 2 feet in length. I cut the boards six at a time. I put a small
clamp on the ends of the boards to keep them all aligned while I did this.
With exactly four 2' pieces coming out of one 8' board, and needing exactly
40 of these pieces, there were no leftover scraps.
The only cuts I needed to make were to cut the 1x3's (actually 3/4" x 2.5")
into sections 2 feet in length. I cut the boards six at a time. I put a small
clamp on the ends of the boards to keep them all aligned while I did this.
With exactly four 2' pieces coming out of one 8' board, and needing exactly
40 of these pieces, there were no leftover scraps.
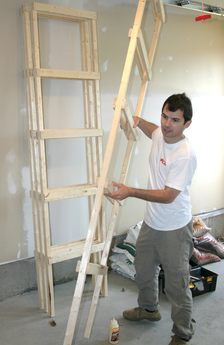
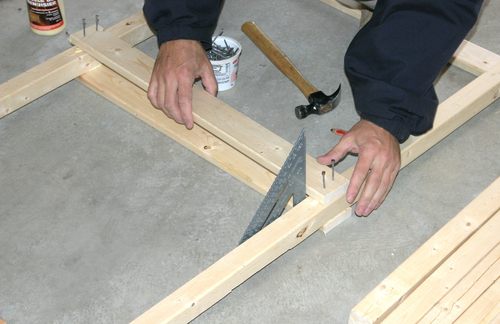
 The shelves consist of four "ladders" that the shelf boards are screwed on to.
In this photo, I'm starting to assemble the first ladder. It's important
to make sure that the ladders start out square, and I'm checking the angle
with a wooden square as I'm starting.
The square looks just like another piece of wood. Shortly after that, I painted
it green.
The shelves consist of four "ladders" that the shelf boards are screwed on to.
In this photo, I'm starting to assemble the first ladder. It's important
to make sure that the ladders start out square, and I'm checking the angle
with a wooden square as I'm starting.
The square looks just like another piece of wood. Shortly after that, I painted
it green.
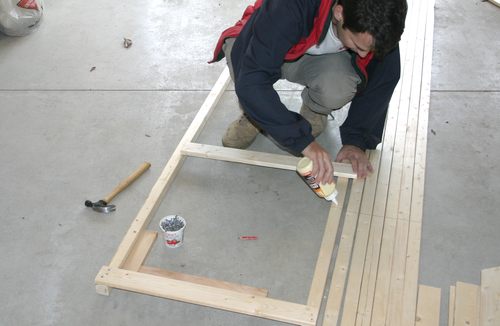
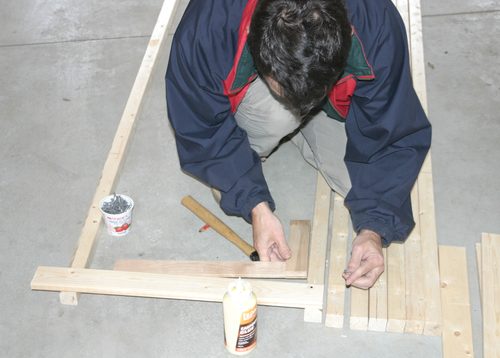
 I nailed and glued all the joints together. Glue is really excellent for
adding stiffness and rigidity. A slight nuisance with nailing a glued joint is
that the wet glue is quite slippery, and it's easy to get the board misaligned
before you get the first nail in. My brother Markus, who was taking the pictures,
had the idea of pre-nailing all the supports for me, so that the nails stuck
a few millimeters out the other side. That kept the boards from slipping around
on the glue, and also really sped up the nailing for me.
I nailed and glued all the joints together. Glue is really excellent for
adding stiffness and rigidity. A slight nuisance with nailing a glued joint is
that the wet glue is quite slippery, and it's easy to get the board misaligned
before you get the first nail in. My brother Markus, who was taking the pictures,
had the idea of pre-nailing all the supports for me, so that the nails stuck
a few millimeters out the other side. That kept the boards from slipping around
on the glue, and also really sped up the nailing for me.
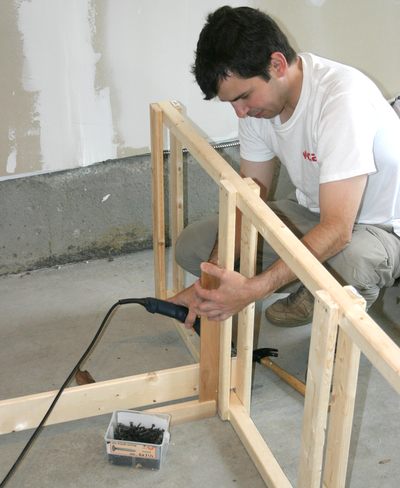
 I nailed support boards to both sides of the posts. This adds strength, and
with the boards attached to both supports, also adds lateral stability - that is,
it keeps the shelf from tipping side to side.
I nailed support boards to both sides of the posts. This adds strength, and
with the boards attached to both supports, also adds lateral stability - that is,
it keeps the shelf from tipping side to side.
To make sure the whole shelf ends up standing straight, it's necessary to make sure that both supports are at exactly the same height. I'm using a square on the floor to line up the support with the one already nailed to the other side.
 With the four 'ladders' assembled, its time to attach the boards.
Before attaching the first boards, I marked them for where the ladders
should go. One ladder on either end, and the other two ladders centered 32" in from
either end. With pencil marks on the boards, I won't have to do any measuring
while I screw the first boards in place. I'm marking a whole stack of boards
at once to speed it up.
With the four 'ladders' assembled, its time to attach the boards.
Before attaching the first boards, I marked them for where the ladders
should go. One ladder on either end, and the other two ladders centered 32" in from
either end. With pencil marks on the boards, I won't have to do any measuring
while I screw the first boards in place. I'm marking a whole stack of boards
at once to speed it up.
 Attaching the shelf boards is easier with the shelf standing
up, but the ladders need the shelf boards to keep them from tipping over.
So I attached the first two boards with the ladders lying on the floor.
Attaching the shelf boards is easier with the shelf standing
up, but the ladders need the shelf boards to keep them from tipping over.
So I attached the first two boards with the ladders lying on the floor.
I'm using a square to make sure that I get it together square. Getting it square for the first few boards is important. Once enough boards are screwed on, the shelf stiffens up, so if you start square, it stays square. But if you build it crooked, there's no way to straighten it later.
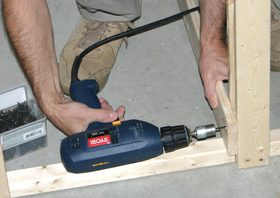 I'm using one of those drywalling screwdriver bits in my drill. It automatically
disengages when the screw is flush with the surface. It was kind of handy for
this job in that I could just run the screw into the wood at full speed without
having to worry about slowing down to avoid driving the screw too deep.
I'm using one of those drywalling screwdriver bits in my drill. It automatically
disengages when the screw is flush with the surface. It was kind of handy for
this job in that I could just run the screw into the wood at full speed without
having to worry about slowing down to avoid driving the screw too deep.
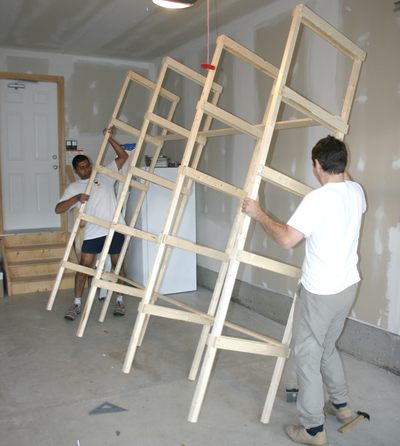 With just two of the shelving boards attached, the shelf held together well enough
that we could stand it up on the floor.
With just two of the shelving boards attached, the shelf held together well enough
that we could stand it up on the floor.
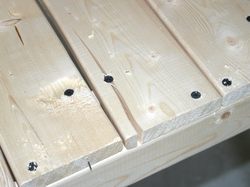
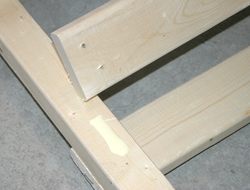
The kiln dried lumber can crack easily. To keep the screws from splitting the
lumber, I ended up pre-drilling all the screw holes near the ends of the boards.
But sometimes even a screw a few inches from the end caused the lumber to split,
as you can see in the photo at right.
 After attaching the first four boards, I noticed the shelf still had a little bit of a
twist to it. Basically, with the top shelf square, the bottom shelf was a slight
parallelogram. This can happen if your lumber has a bit of an average twist all
in the same direction, and the cheap lumber often does.
After attaching the first four boards, I noticed the shelf still had a little bit of a
twist to it. Basically, with the top shelf square, the bottom shelf was a slight
parallelogram. This can happen if your lumber has a bit of an average twist all
in the same direction, and the cheap lumber often does.
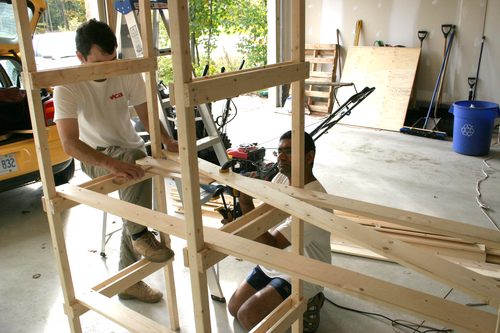
But with a little help, I pulled it square. I clamped another board diagonally against the first two boards. I am holding a wooden square (you can hardly see it) to check square-ness, at the same time pulling on the diagonal to force it square, while Renato is clamping the end of the board, to fix the angle in place.
With the diagonal board clamped in place, I then proceeded to screw down all the shelving boards, which locked the angle in place. After that, I could remove the diagonal board that we clamped in place. I have a better illustration of this in my storage shelf plans
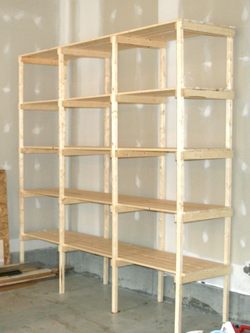
 The whole shelf is an impressively large unit, considering the small pile of lumber we
started out with. Its a full 8 foot (2.4 meters) high and long. The top shelf is as high as
the ceiling is in most rooms. Its 2 feet (60 cm) deep, and 128 cubic feet
(3.6 m3) overall.
The whole shelf is an impressively large unit, considering the small pile of lumber we
started out with. Its a full 8 foot (2.4 meters) high and long. The top shelf is as high as
the ceiling is in most rooms. Its 2 feet (60 cm) deep, and 128 cubic feet
(3.6 m3) overall.
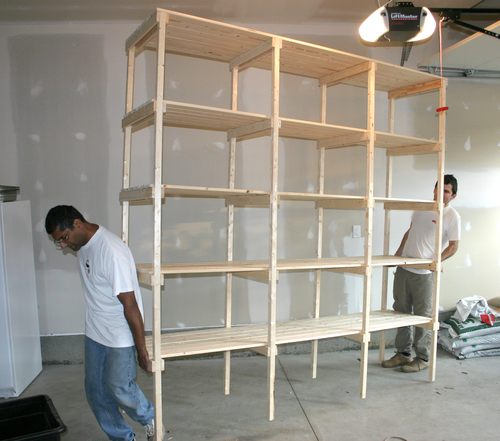
The shelf is still such that it can be picked up by two people, though certainly not as light as when we erected it prior to attaching the shelf boards.
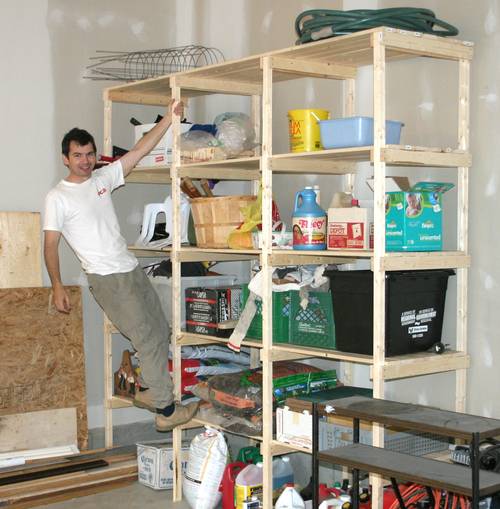 We proceeded to load most of Renato's garage clutter onto the shelf.
With some heavy bags of soil on the bottom
shelves, it really doesn't move, and it's possible to climb up the front of the shelf,
even without it attached to the wall. Of course, vending machine tipping stupidity
comes to mind while doing this, but what the heck.
We proceeded to load most of Renato's garage clutter onto the shelf.
With some heavy bags of soil on the bottom
shelves, it really doesn't move, and it's possible to climb up the front of the shelf,
even without it attached to the wall. Of course, vending machine tipping stupidity
comes to mind while doing this, but what the heck.
I have also drawn up some Storage shelf plans for this shelf.

 I originally wrote the above article in 2009, before I started making videos of my
builds.
I originally wrote the above article in 2009, before I started making videos of my
builds.
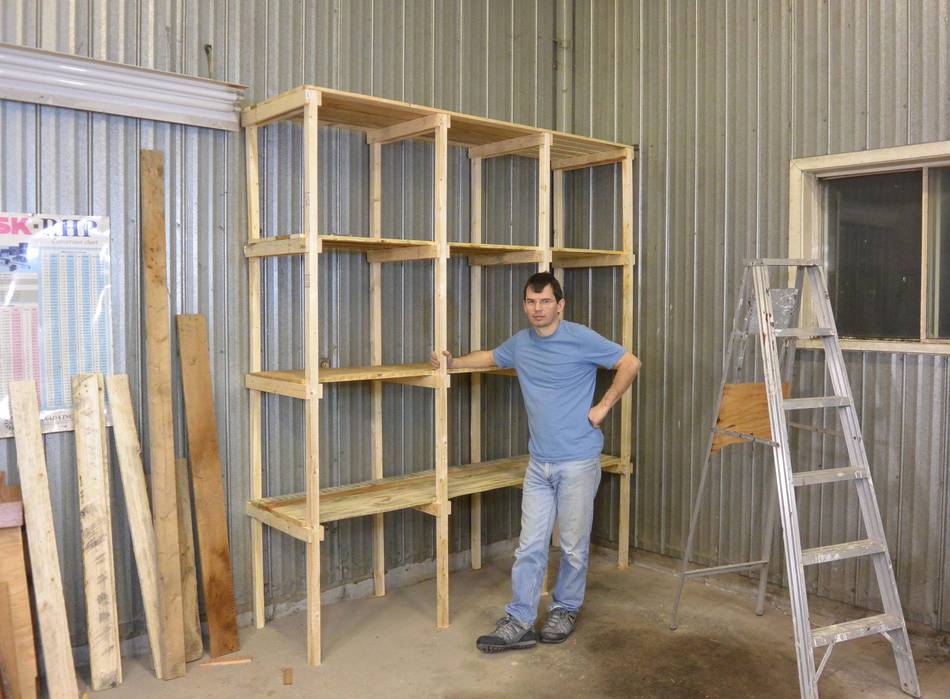
In 2014 I needed a big shelving unit for a big garage, so naturally I built one of these again and filmed it this time.
I just put it all together with a brad nailer and glue, quicker and cheaper than screws. Half the lumber was recycled lumber, so it only cost $50 to build.
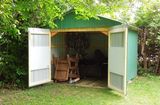 Storage shed (2012)
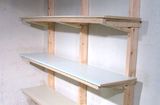 Cantilevered shelves (2008)
 Basement storage solution (1990s)
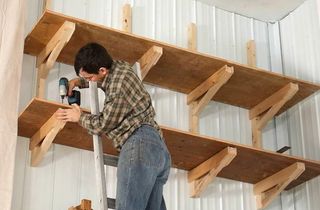 Up-high garage shelves (2015)
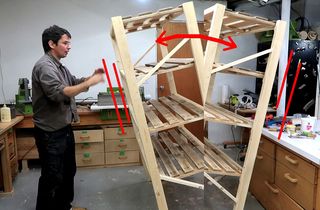 A shelf so stiff it rocks (2021)
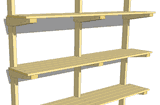 Garage shelf plans
 Storage box on wheels for under shelves