 Starting with the sides bent previously
 Like most guitar makers, and unlike my experiment, Pat uses
an external mold to shape the body of the instrument.
Like most guitar makers, and unlike my experiment, Pat uses
an external mold to shape the body of the instrument.
Here's checking the fit of a side to determine where the ends of the side pieces need to be cut.
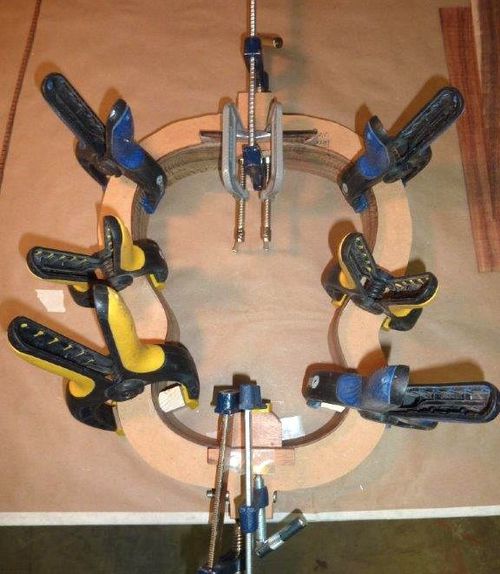 Clamps hold the parts in the form while the neck and tail blocks are glued in place.
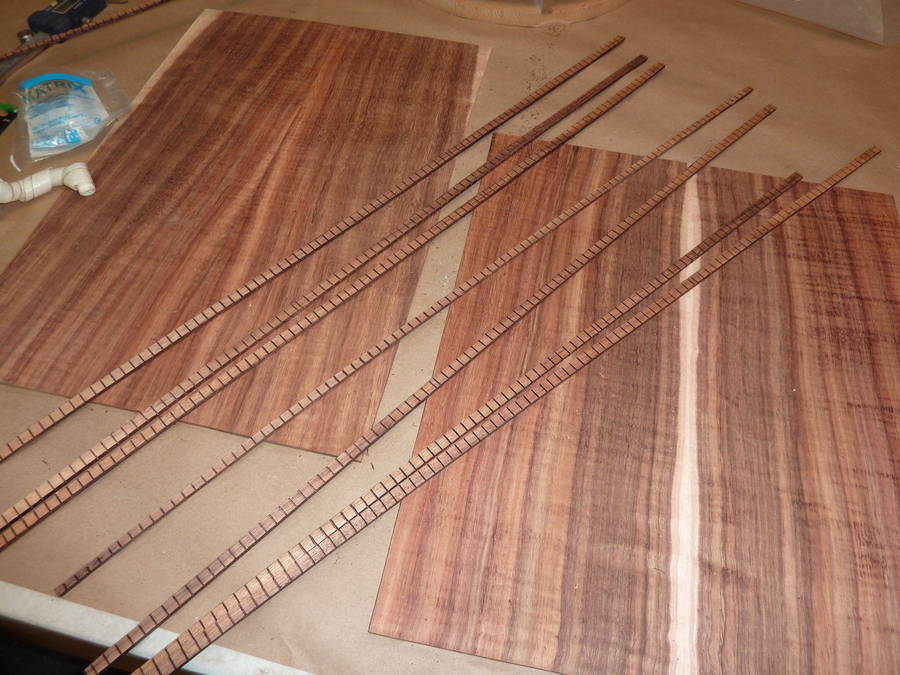 Strips of wood with many small slots cut most of the way through form the "lining"
for the inside edges of the body. The slots allow the lining to be bent
to conform to the shape of the body.
Strips of wood with many small slots cut most of the way through form the "lining"
for the inside edges of the body. The slots allow the lining to be bent
to conform to the shape of the body.
The pieces of lining are shown atop of the glued and thickness-sanded pieces that will later form the front and back of the instruments.
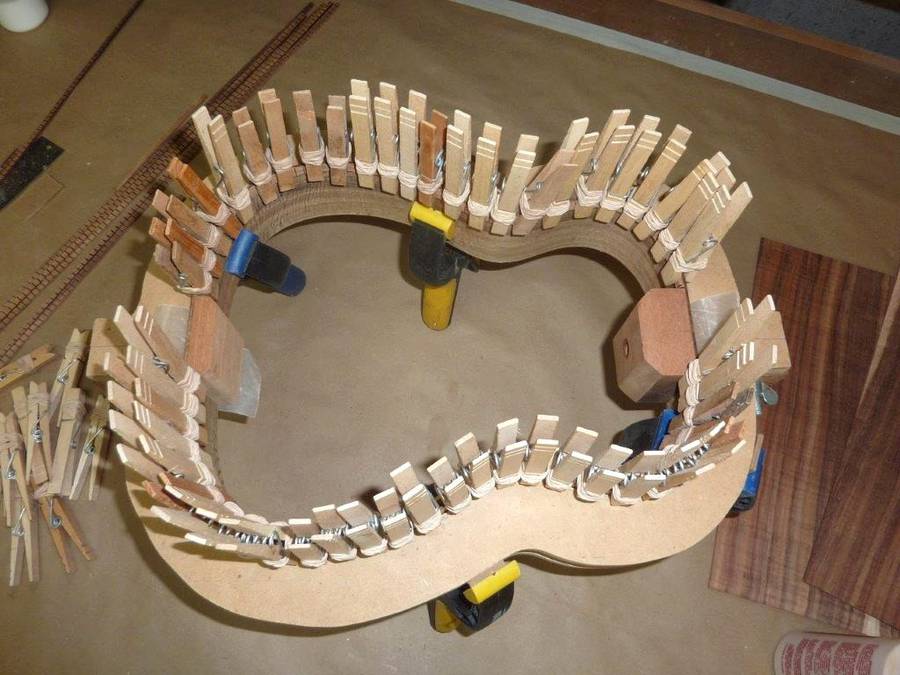 Pat uses many clothespins to hold the lining as it's glued onto the edges of
the sides. The clothespins have rubber bands wrapped around them for extra
pressure.
Pat uses many clothespins to hold the lining as it's glued onto the edges of
the sides. The clothespins have rubber bands wrapped around them for extra
pressure.
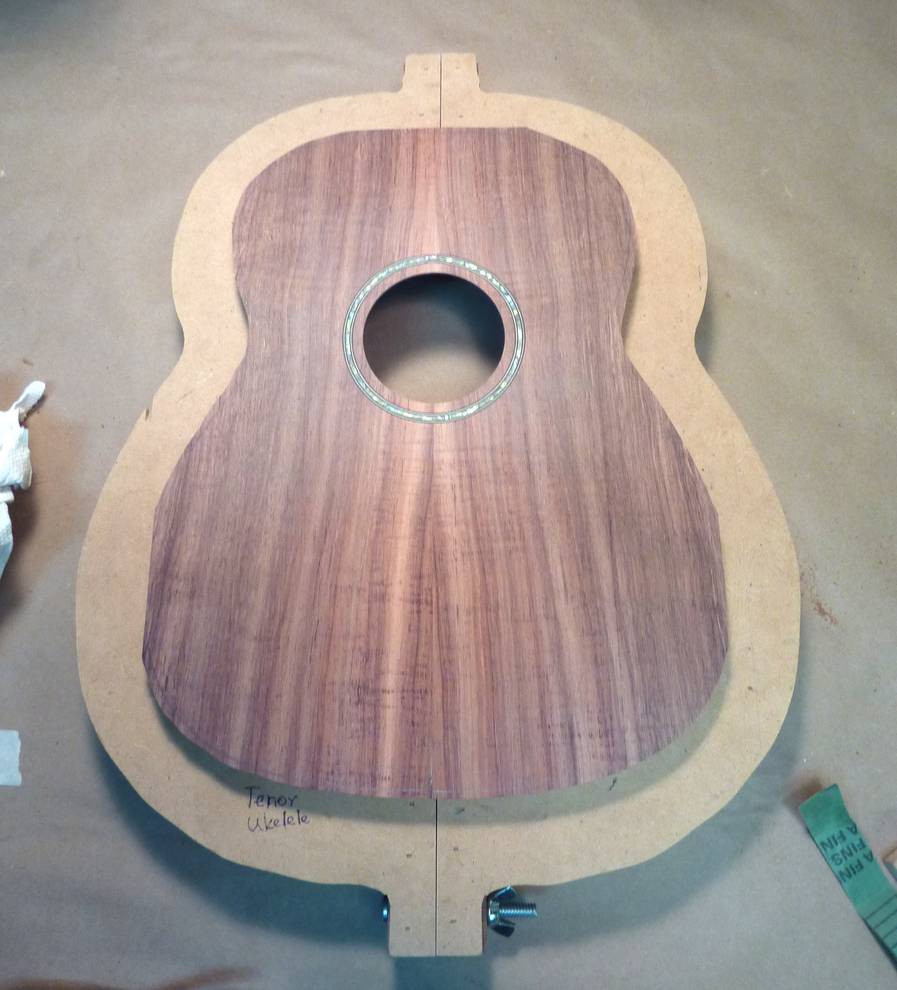
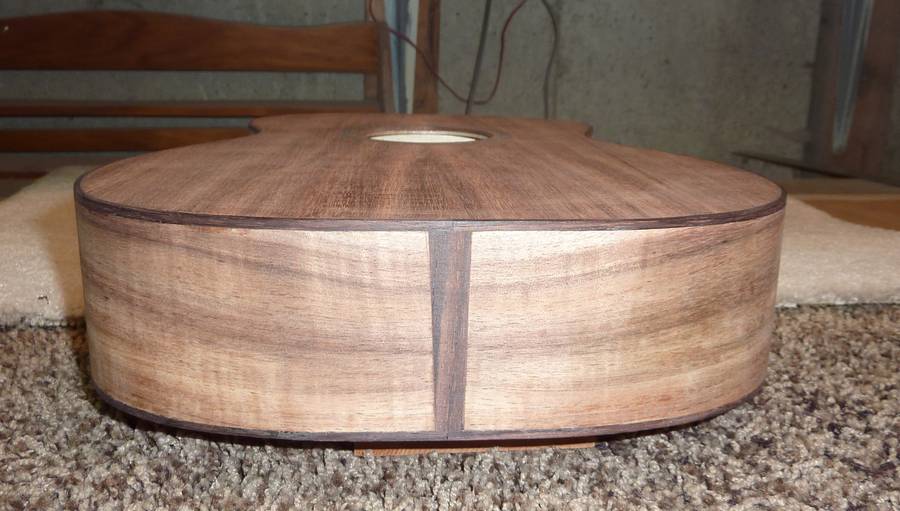
 Front and back lining installed. The body is placed atop of the soundboard to check
the layout. The rosette inlay will be facing outwards in the final instrument.
Front and back lining installed. The body is placed atop of the soundboard to check
the layout. The rosette inlay will be facing outwards in the final instrument.
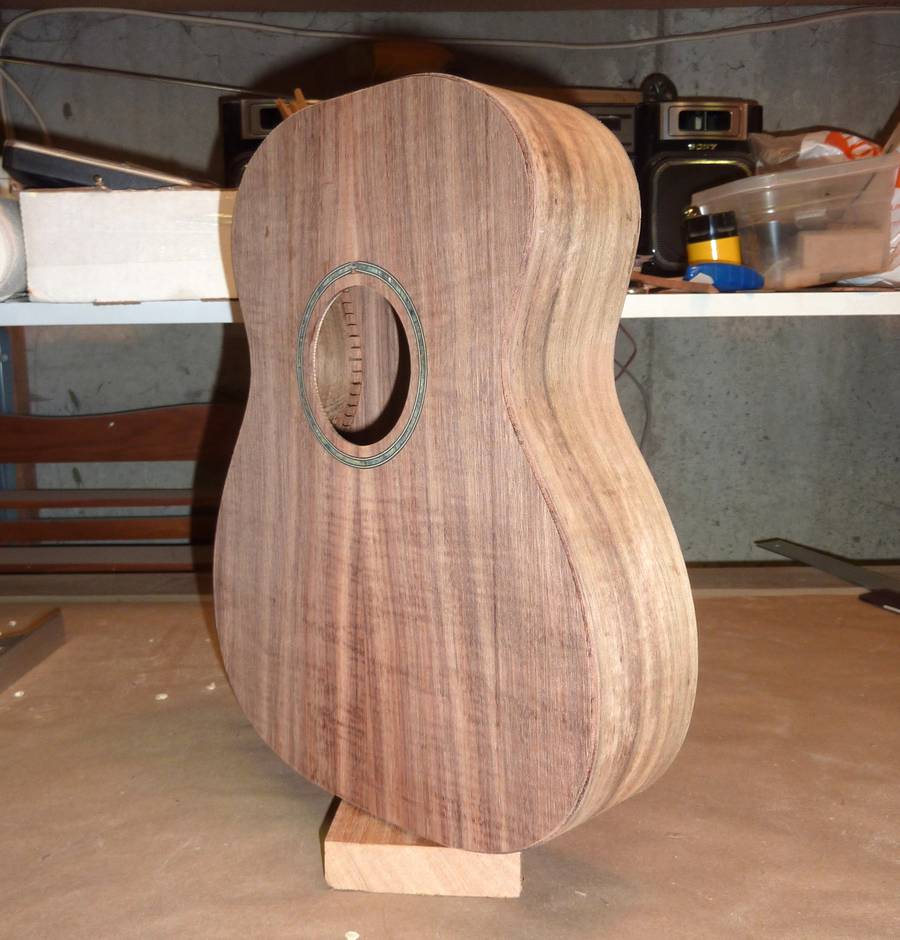
 Sound hole cut, and the soundboard (front side) cut to the approximate shape.
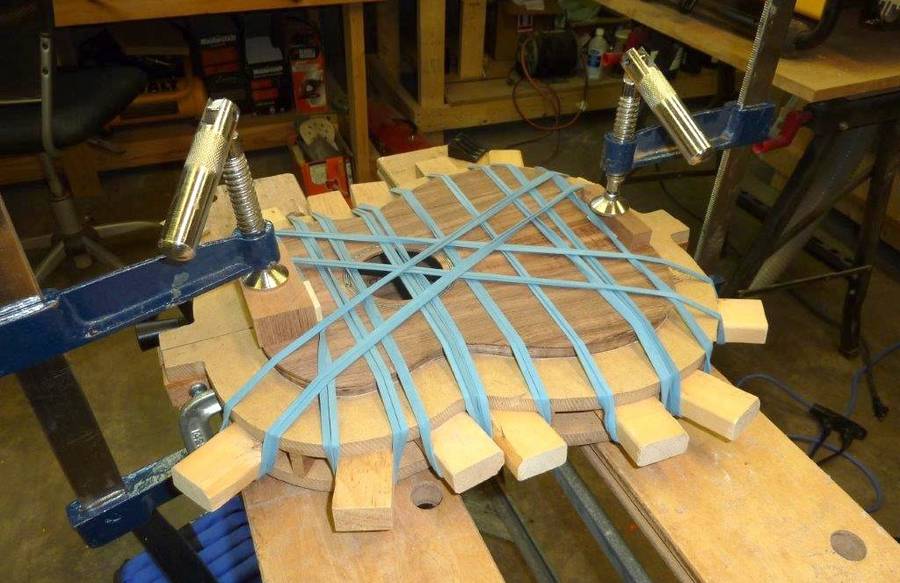
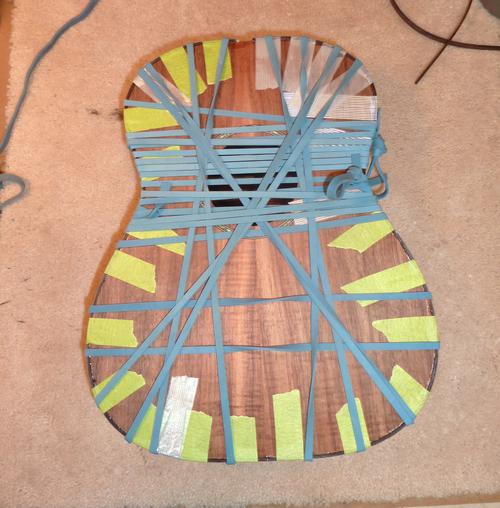
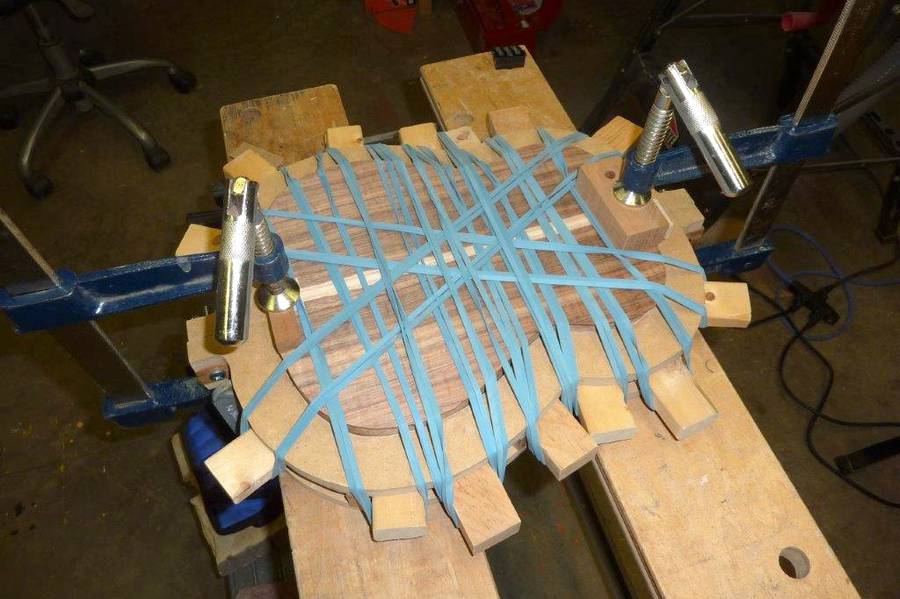 Gluing the back in place. Pat uses a lot of rubber bands, crisscrossed
to press the back on around all the edges.
Gluing the back in place. Pat uses a lot of rubber bands, crisscrossed
to press the back on around all the edges.
Pat prefers to glue the back on first. This allows him to clean up any glue squeeze out on the inside before adding the front (soundboard). You can't see the back of the sound board through the sound hole, so cleaning up squeeze out there is less important.
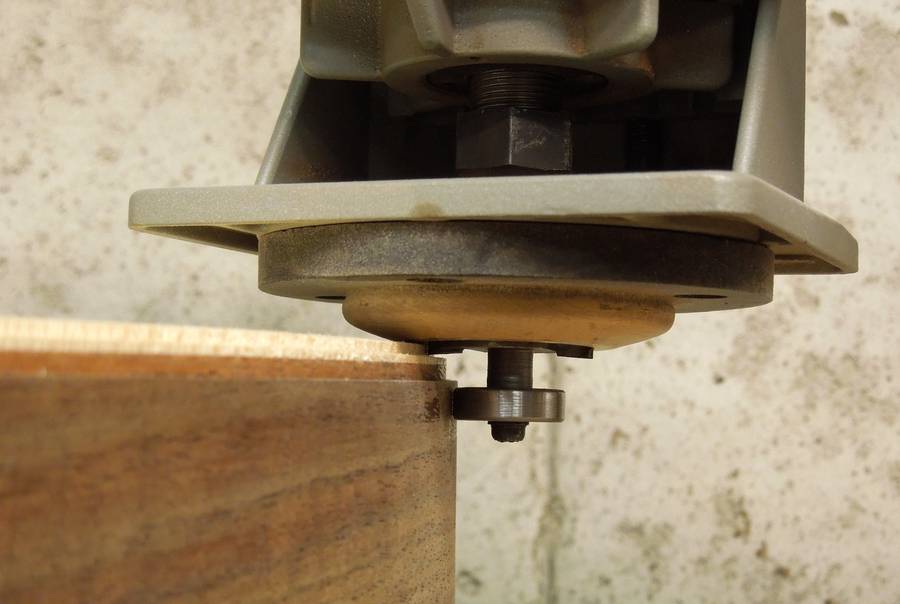
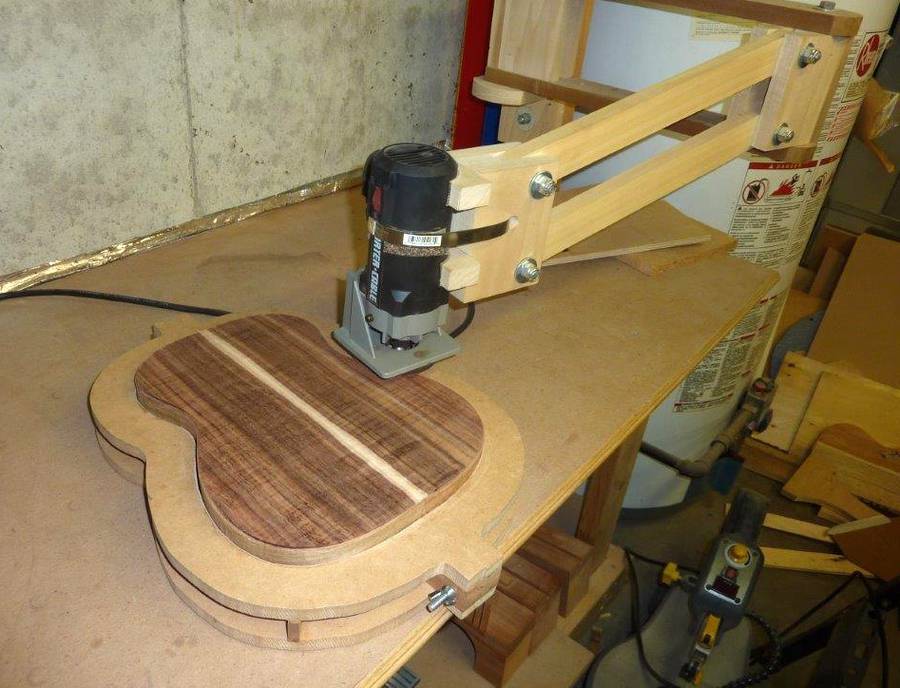 Next, flush trimming the back, using a special router jig that keeps the router
vertical.
Next, flush trimming the back, using a special router jig that keeps the router
vertical.
A jig like that is very important for guitars which usually have a front and back that is slightly convex. For a ukulele with a flat front and back, a regular router or router table could also be used.
 Now gluing on the front, same method.
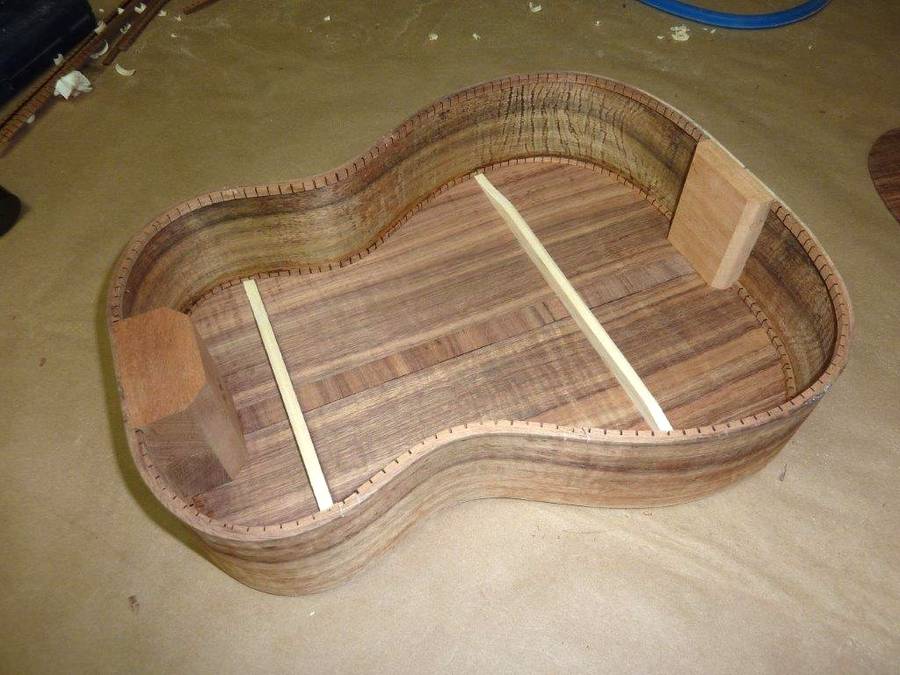
 The ukulele body, before the lining is installed.
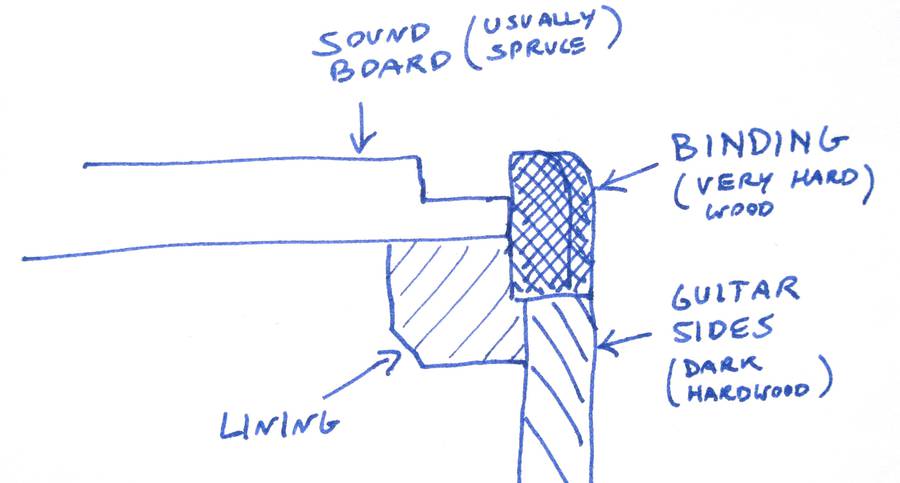 Pat also installs a strip of very hard rosewood around the edges of the instrument. A square
ledge is cut around the edge to place this in. Optionally, if a strip of decorative "purfling" is
added around the edge of the soundboard, another ledge is cut into the soundboard.
Pat also installs a strip of very hard rosewood around the edges of the instrument. A square
ledge is cut around the edge to place this in. Optionally, if a strip of decorative "purfling" is
added around the edge of the soundboard, another ledge is cut into the soundboard.
 The picture at left is from a different instrument, with a spruce soundboard. The main ledge
in the dark wood is for the "binding", and the shallow ledge in the spruce is for
the purfling.
The picture at left is from a different instrument, with a spruce soundboard. The main ledge
in the dark wood is for the "binding", and the shallow ledge in the spruce is for
the purfling.
The router is held vertically for this operation using the same jig shown four pictures back.
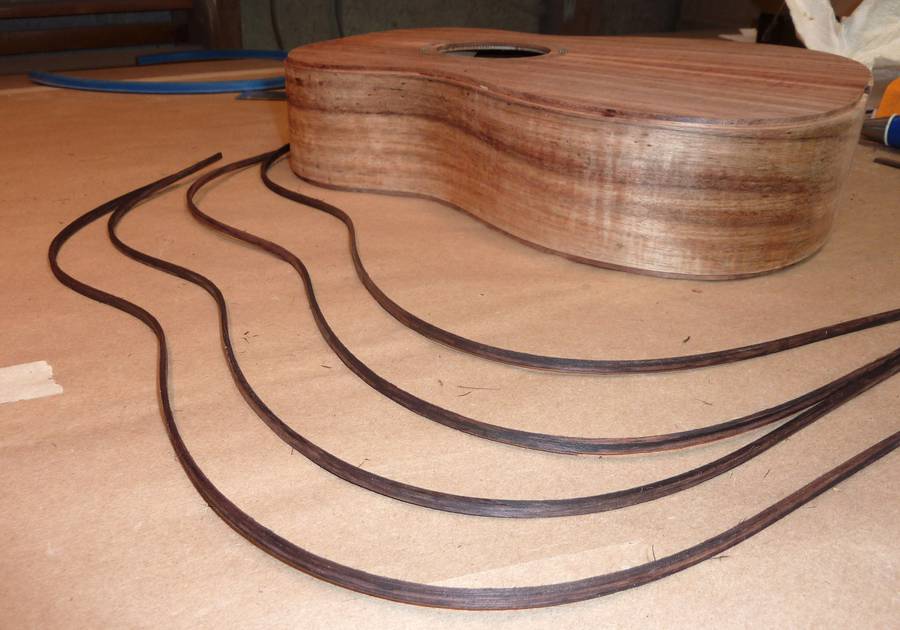
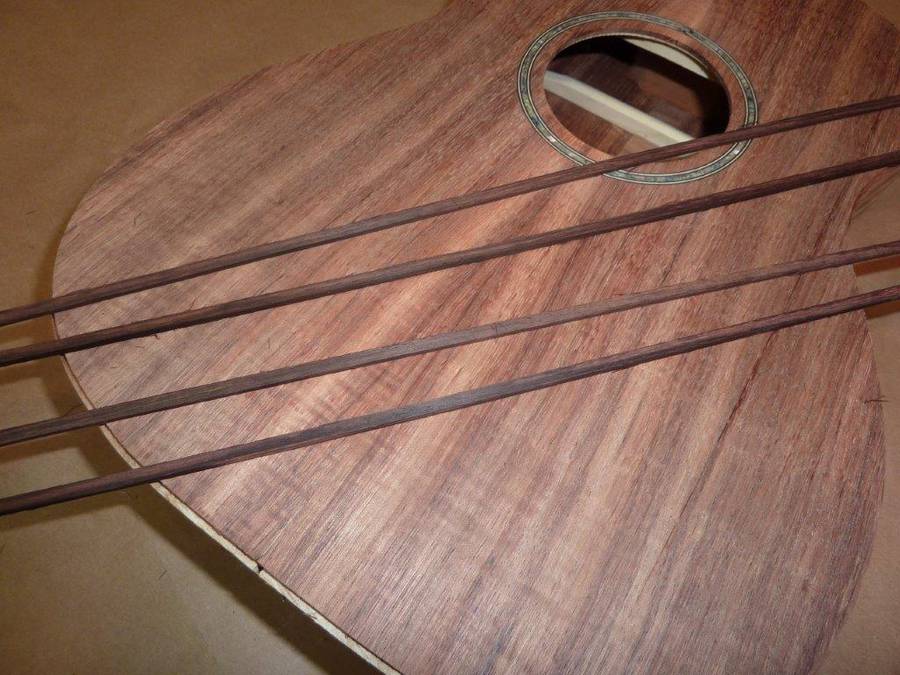 Strips of rosewood to use for the binding.
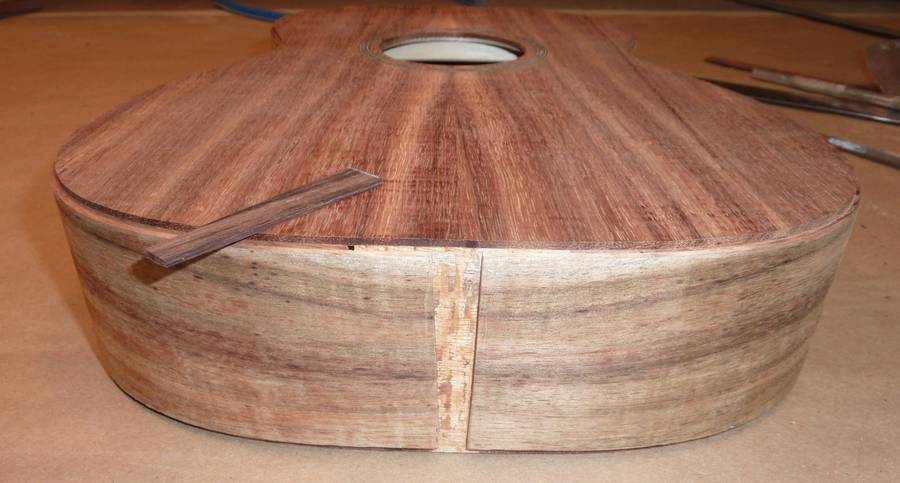
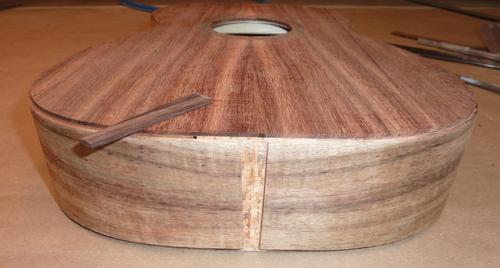 A wedge of wood is also installed at the "tail" where the two side pieces meet.
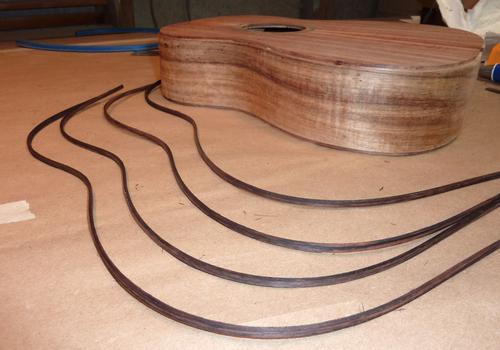 Pat bends the wood for the binding the same way as the sides before applying the binding.
 Pat says about installing the binding:
"When installing bindings I tape them into place then use elastics to bring them in tight to the body. Doing this takes a little time so I use fish glue because it has a open time of over an hour. Fish glue has to be clamped for 12 hours so I can't do the bottom bindings until the next day."
 Scraping the binding flush with the top using a
cabinet scraper.
Scraping the binding flush with the top using a
cabinet scraper.
Binding helps protect the instruments against nicks along the edge and also helps to visually define the edge, but it's not necessary for the instrument to function, so I skipped that step on my ukulele body.
See also: Me making the ukulele body
Next: Making the neck
![]()