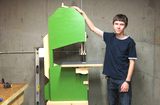
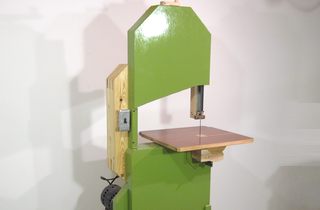
I was given this cheap 7 1/2" bandsaw for free. The previous owner only used it a few times
before the bottom tire broke. He tried gluing it back on, but with no luck.
I was given this cheap 7 1/2" bandsaw for free. The previous owner only used it a few times
before the bottom tire broke. He tried gluing it back on, but with no luck.
I was given this cheap 7 1/2" bandsaw for free. The previous owner only used it a few times
before the bottom tire broke. He tried gluing it back on, but with no luck.
I figured at the very least, I could reuse the motor for something else, but then I started playing around with it.
 With nothing to lose, I tried running the blade directly on the aluminium wheel
(no tire). This seemed to work ok, and after resharpening the blade, the
saw was able to cut. And so I wanted to see how far I could take it.
With nothing to lose, I tried running the blade directly on the aluminium wheel
(no tire). This seemed to work ok, and after resharpening the blade, the
saw was able to cut. And so I wanted to see how far I could take it.
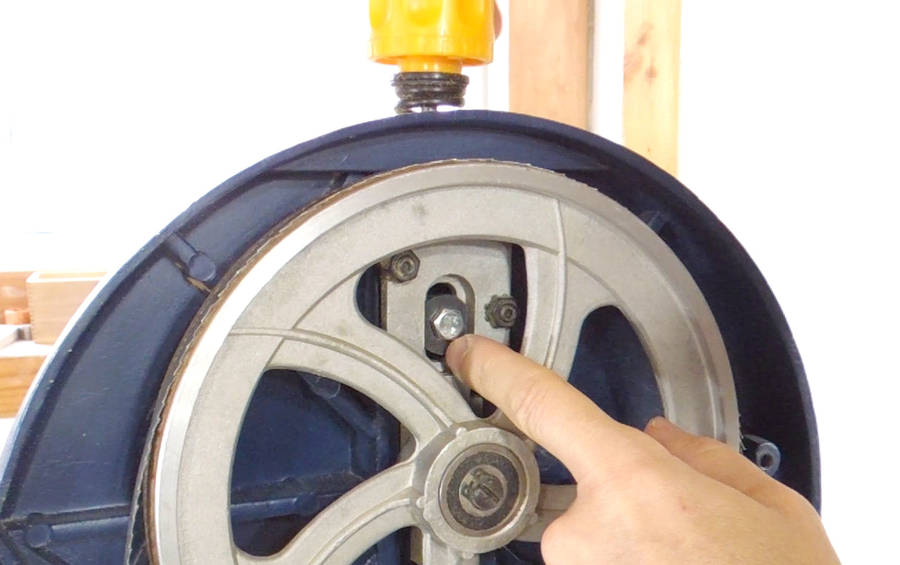 The first annoyance I encountered was the top wheel mount. The tension knob pulls the
wheel mount up, and a cap screw with a washer holds it against the aluminium
frame. But if I tightened that cap screw, the top wheel could no longer slide
up and down. And if I left it loose, there was nothing to stop the screw
from coming out with vibration.
The first annoyance I encountered was the top wheel mount. The tension knob pulls the
wheel mount up, and a cap screw with a washer holds it against the aluminium
frame. But if I tightened that cap screw, the top wheel could no longer slide
up and down. And if I left it loose, there was nothing to stop the screw
from coming out with vibration.
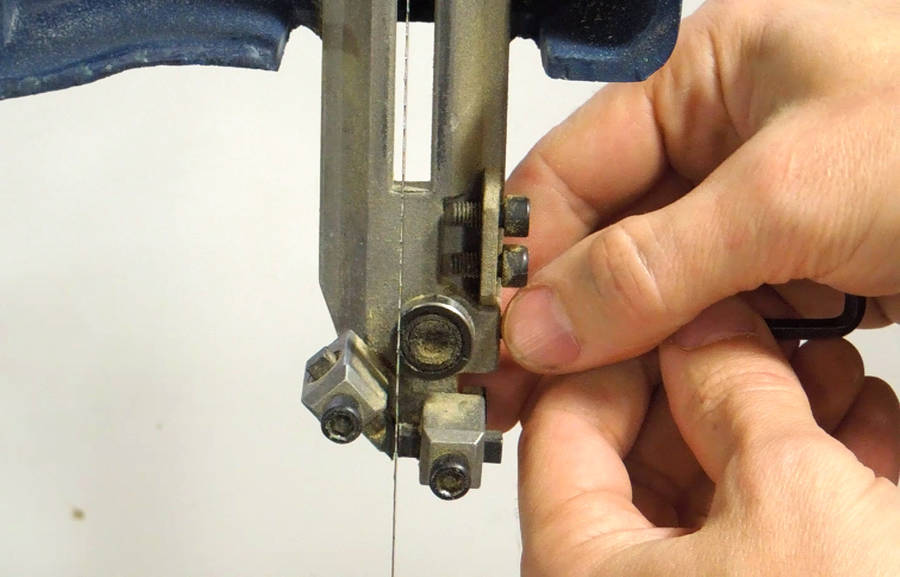
My first thought was to use Loctite or some other glue to fix the screw in place. But then I had the idea of replacing it with a screw long enough to come out the back of the frame ...
 ... and then put a nut on the other end of it to fix it in place.
Problem solved.
... and then put a nut on the other end of it to fix it in place.
Problem solved.
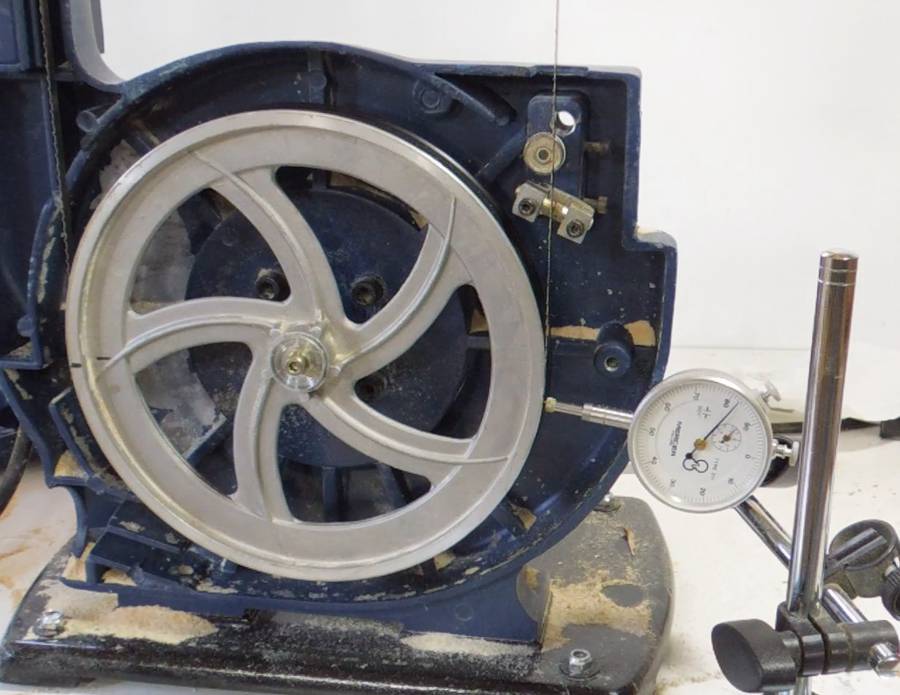
 This bandsaw also had a bit of a wheel wobble - about .006" - a not uncommon
problem for cheap bandsaws.
This bandsaw also had a bit of a wheel wobble - about .006" - a not uncommon
problem for cheap bandsaws.
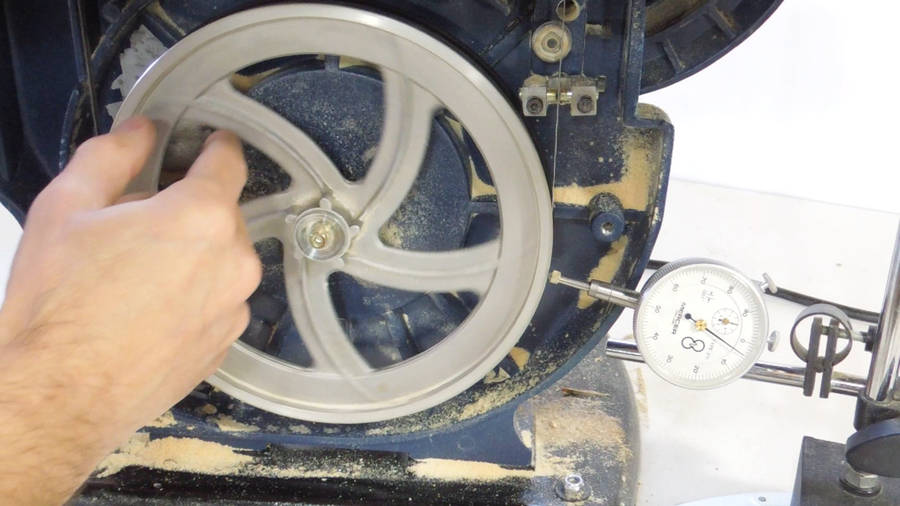
 The wheel also had some sideways wobble to it - about .020"
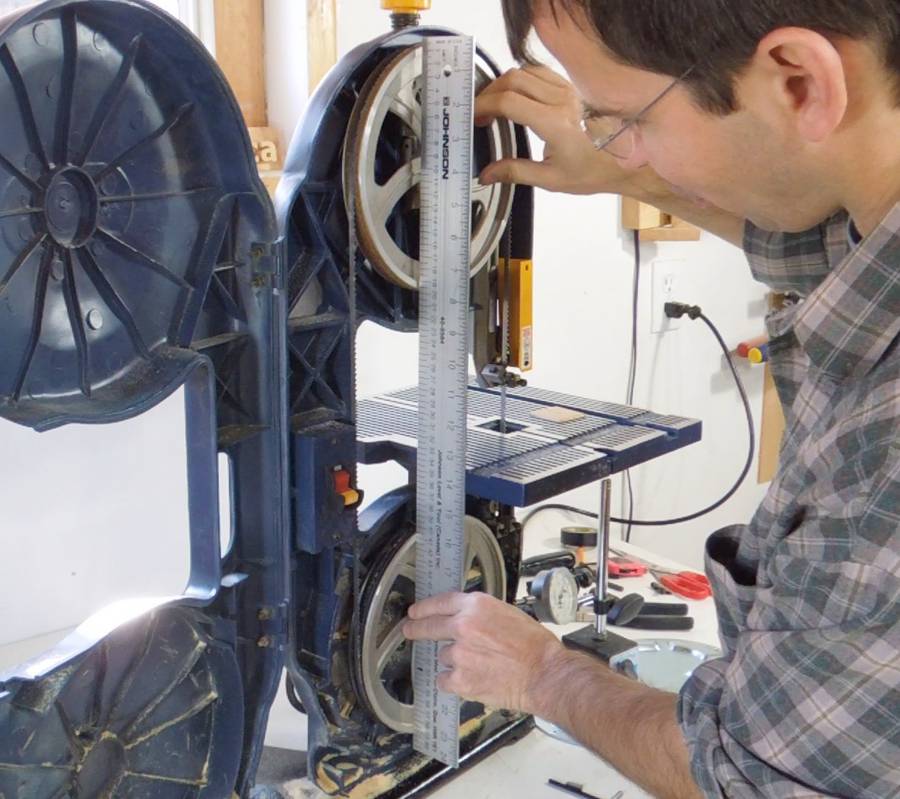 The sideways wobble doesn't matter that much, although it makes it more difficult to
check the wheel alignment. By rotating the lower wheel through various
positions, I was able to establish that the lower wheel was several millimeters
forward of the top wheel. There was a limited amount of adjustment for the top wheel
forward position, but not enough.
I wanted to see if I could correct for this by tilting the lower wheel
to line it up with the top wheel.
I was also curious about the source of the wobble --- was it the wheel or the motor?
The sideways wobble doesn't matter that much, although it makes it more difficult to
check the wheel alignment. By rotating the lower wheel through various
positions, I was able to establish that the lower wheel was several millimeters
forward of the top wheel. There was a limited amount of adjustment for the top wheel
forward position, but not enough.
I wanted to see if I could correct for this by tilting the lower wheel
to line it up with the top wheel.
I was also curious about the source of the wobble --- was it the wheel or the motor?
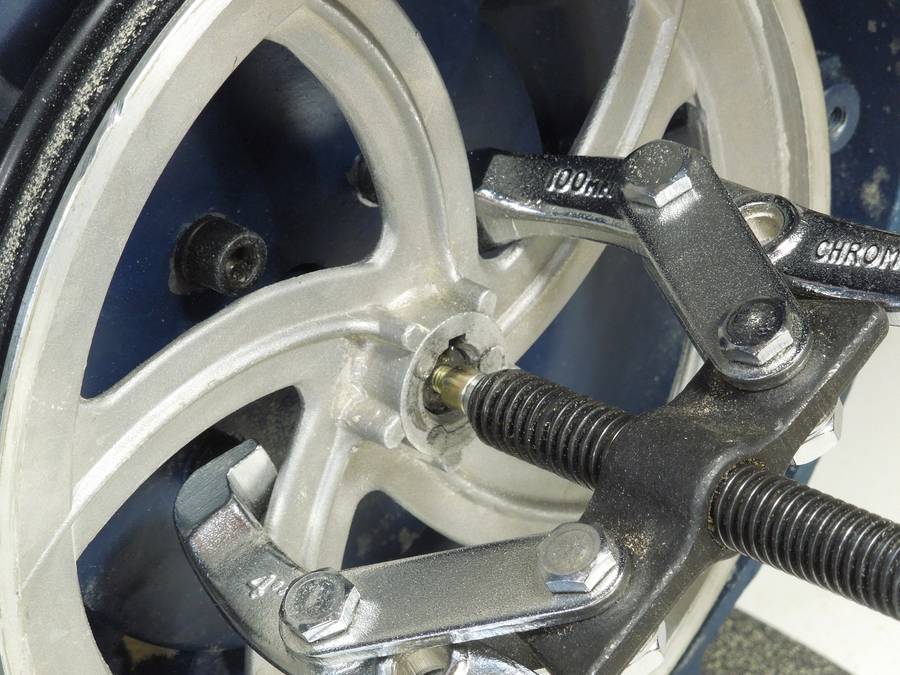 So this necessitated pulling the lower wheel off the motor.
Like many cheap bandsaws, this bandsaw is a direct drive bandsaw. With a 1750 RPM motor directly driving a 7 1/2" wheel, this makes for a blade speed that is much faster than ideal. But direct drive eliminates pulleys and belts, so I assume it's done for cost savings.
The two pronged gear puller wasn't ideal with the five spoked wheel. A three pronged gear puller would probably have been better.
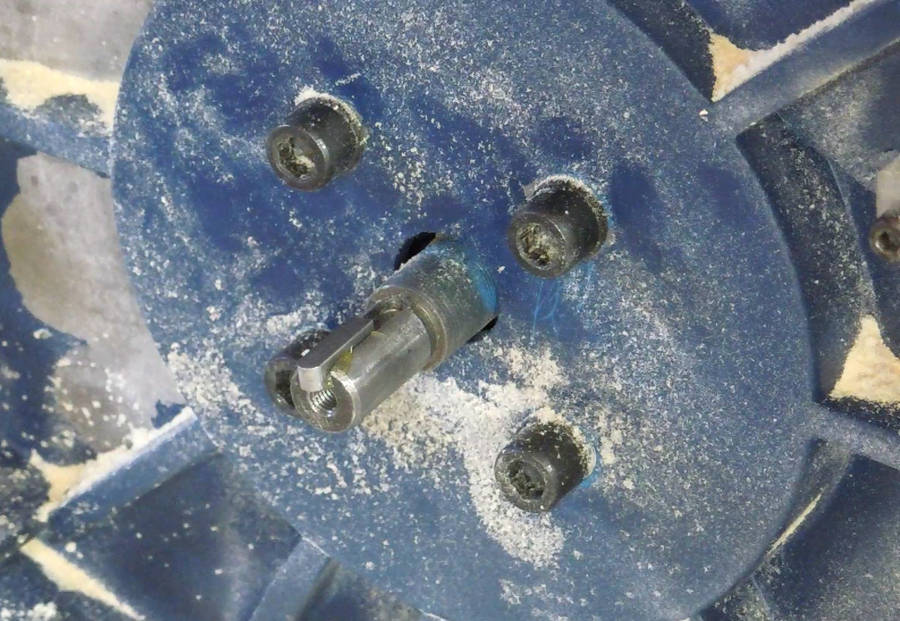
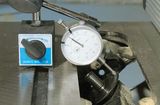
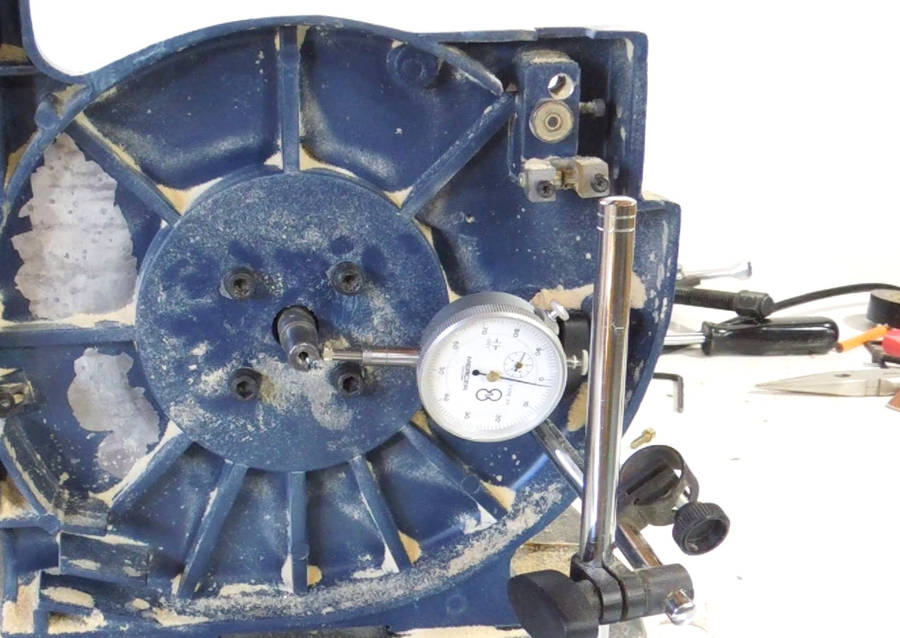 With the wheel removed, checking the shaft. The shaft had .001" variation to it,
so it was off-center by .0005". Not much, and not enough to account for the wheel
wobble, but I would expect a motor shaft to be more precise than that.
With the wheel removed, checking the shaft. The shaft had .001" variation to it,
so it was off-center by .0005". Not much, and not enough to account for the wheel
wobble, but I would expect a motor shaft to be more precise than that.
So most of the wobble is imprecision in the actual wheel. Measuring it with calipers, I found that the hole was indeed off-center with respect to the edge.
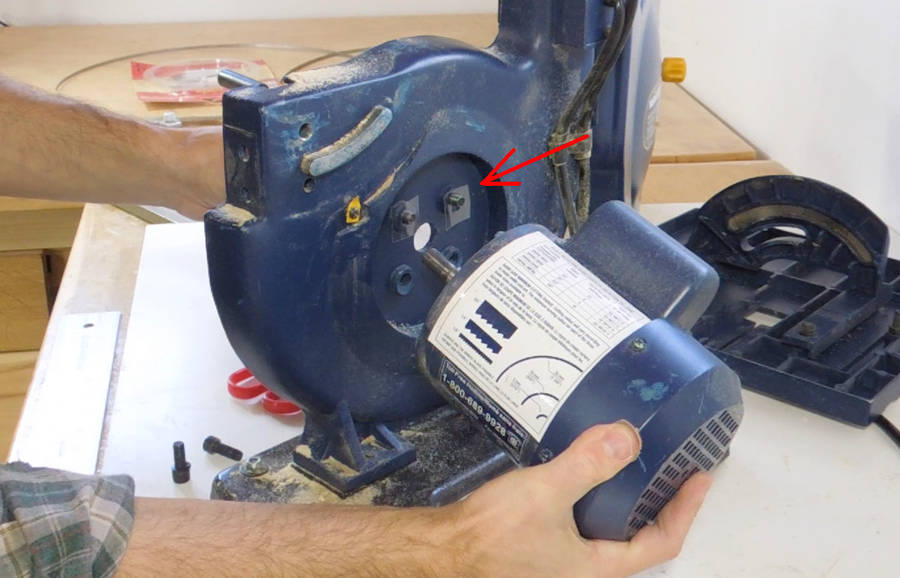
 Next, undoing the four cap screws that hold the motor, then the motor
pops off the back.
Next, undoing the four cap screws that hold the motor, then the motor
pops off the back.
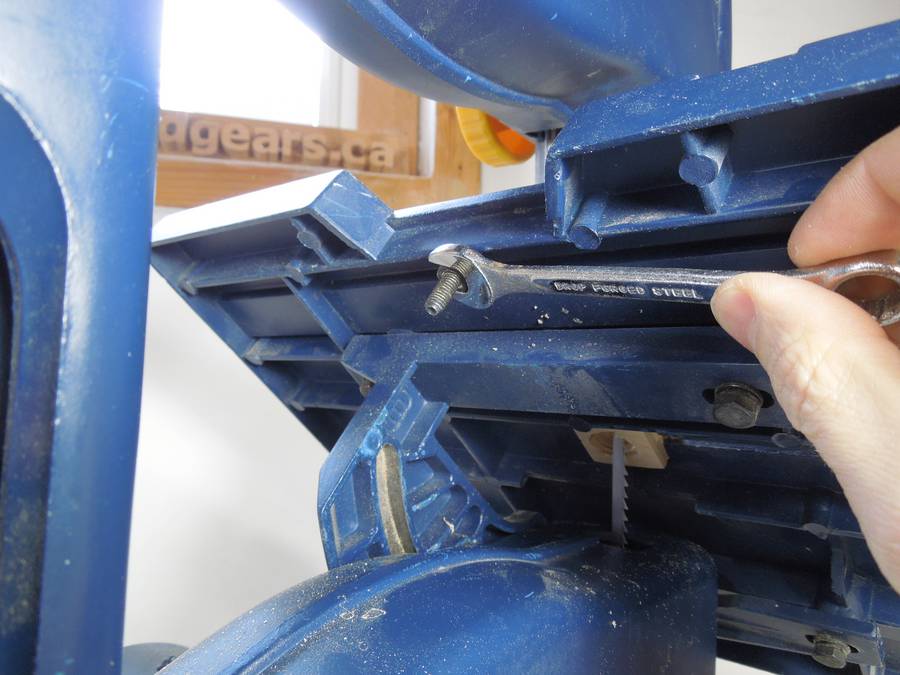
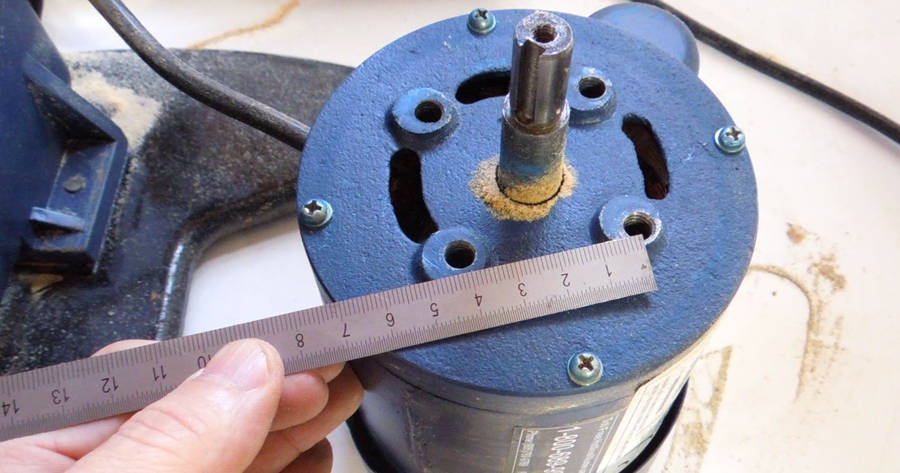 The mounting bolts are just over 4 cm apart. The distance (center to center)
between the wheels is 40 cm. I wanted to adjust for about 3 mm of misalignment
between the wheels, so a spacer one tenth as much in front of two of the
bolt holes should tilt the wheel enough to compensate for it.
The mounting bolts are just over 4 cm apart. The distance (center to center)
between the wheels is 40 cm. I wanted to adjust for about 3 mm of misalignment
between the wheels, so a spacer one tenth as much in front of two of the
bolt holes should tilt the wheel enough to compensate for it.
I only need to shim the bottom wheel. The top wheel has a tilt adjustment knob, so once the motor is tilted by the right amount, I can adjust the top wheel to be co-planar with the bottom one.
 A 2-liter pop bottle has walls that are about 0.3 mm thick, so I made some shims
from one of these bottles. The tricky part is getting these shims in place.
I put the bolts in the saw's frame, put my shim washers on the bolts, and then
put the motor up against them, being careful not to push against the bolts with the
motor before the threads were engaged.
A 2-liter pop bottle has walls that are about 0.3 mm thick, so I made some shims
from one of these bottles. The tricky part is getting these shims in place.
I put the bolts in the saw's frame, put my shim washers on the bolts, and then
put the motor up against them, being careful not to push against the bolts with the
motor before the threads were engaged.
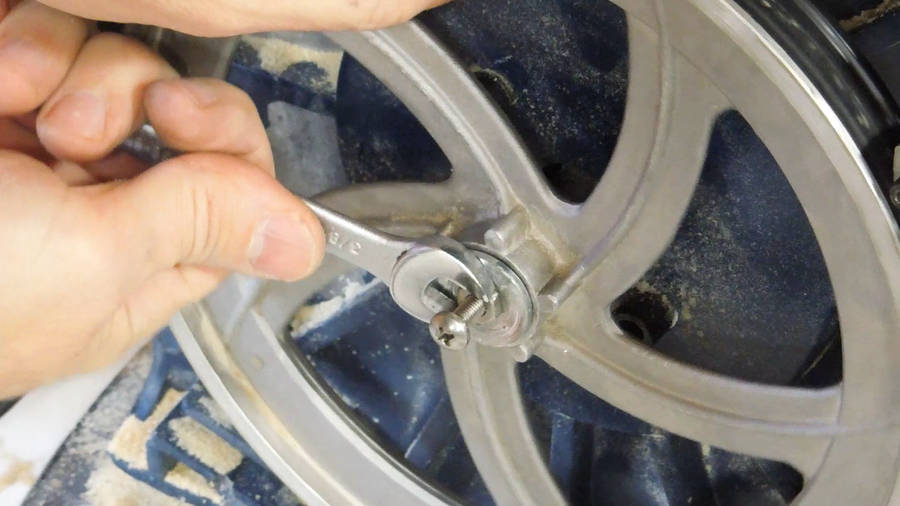
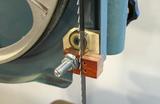
 Here's the key put on the shaft, before putting the lower wheel back on the motor.
Getting that key in there with the wheel on was tricky. Sliding the key forward
in the slot and engaging the wheel's keyway as I put it on the shaft worked best.
Here's the key put on the shaft, before putting the lower wheel back on the motor.
Getting that key in there with the wheel on was tricky. Sliding the key forward
in the slot and engaging the wheel's keyway as I put it on the shaft worked best.
 I started putting the wheel on by tapping it on with a mallet, but then put a long
screw into the end of the shaft, and then slowly turned a nut along the screw until
the wheel was fully pushed onto the shaft. After that, I took out the long
screw and put the original screw back in.
I started putting the wheel on by tapping it on with a mallet, but then put a long
screw into the end of the shaft, and then slowly turned a nut along the screw until
the wheel was fully pushed onto the shaft. After that, I took out the long
screw and put the original screw back in.
The wheel is press fit onto the shaft, so it takes quite a bit of force to get it off and on.
 I thought a bit more about how to correct the wobble, and was thinking of my
crazy way of grinding a wobble out of a
table saw arbor.
I thought a bit more about how to correct the wobble, and was thinking of my
crazy way of grinding a wobble out of a
table saw arbor.
This led me to experimenting with turning the wheel freehand. I used a HSS cutter from a metal lathe, clamped in a pair of vise grip pliers. I used that to turn down the wheels freehand. Surprisingly, it worked.
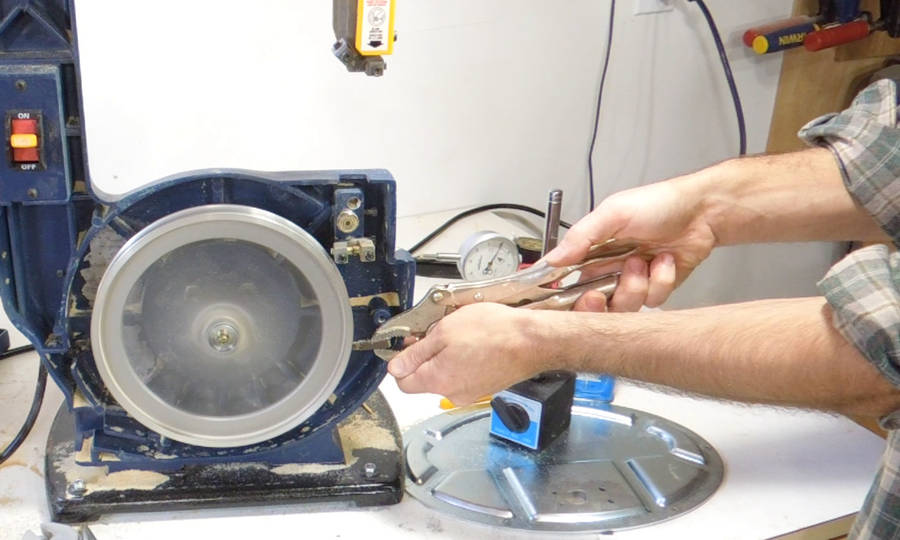 I wanted to make sure the vise grip was jammed up against the frame of the saw while
I was doing this to get a more consistent cut, but my first attempt didn't work out.
As soon as the tool caught the wheel, it twisted down a bit, and got forced further
into the wheel. So I realized, whichever way I position the tool, it has to be in
a way that the cutting force pushes it away from the wheel. After that,
I didn't have any more problems. I also always cut with the vise grip pushed
against the saw's frame to stabilize the tool. Otherwise, vibrations would make
for a messy cut.
I wanted to make sure the vise grip was jammed up against the frame of the saw while
I was doing this to get a more consistent cut, but my first attempt didn't work out.
As soon as the tool caught the wheel, it twisted down a bit, and got forced further
into the wheel. So I realized, whichever way I position the tool, it has to be in
a way that the cutting force pushes it away from the wheel. After that,
I didn't have any more problems. I also always cut with the vise grip pushed
against the saw's frame to stabilize the tool. Otherwise, vibrations would make
for a messy cut.
 After turning, I was left with .002" variation. I didn't actually turn the wheel down
enough to machine the full surface, just machining off the high spot from the wheel.
I figured .002" was good enough for this saw.
After turning, I was left with .002" variation. I didn't actually turn the wheel down
enough to machine the full surface, just machining off the high spot from the wheel.
I figured .002" was good enough for this saw.
 After milling the wheel, I wound three turns of electrical tape onto the wheel
to act as a tire.
After milling the wheel, I wound three turns of electrical tape onto the wheel
to act as a tire.
I'm not entirely sure if this is a good idea. The glue in electrical tape never really hardens and can cause layers of tape to drift, so I'm not sure how permanent this solution will be.
It's important to wind the tape on in the same direction as the wheel turns, so that if the end of the tape should start coming loose, it will just flap around, as opposed to causing the rest of the tape to unwind rapidly.
I also made sure to get exactly three turns on. The tape is .007" thick, so I wanted to have the same number of tape layers all around the wheel. The tape was a little wider than the space between the flanges, and rather than trying to trim the tape to width, I wound it on against the edge of the front flange, but over the back flange.
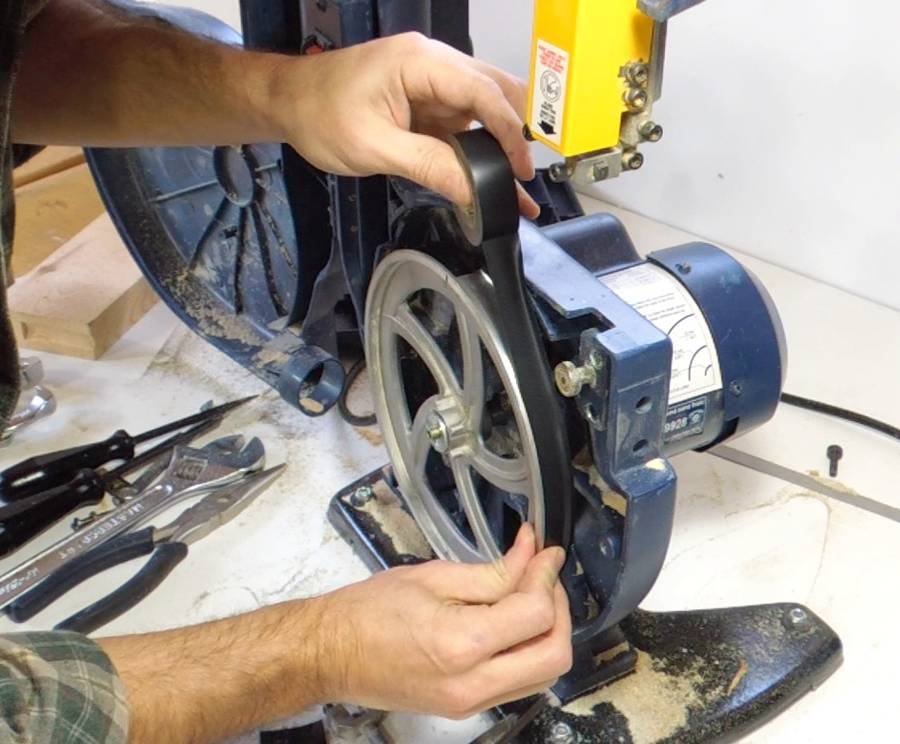
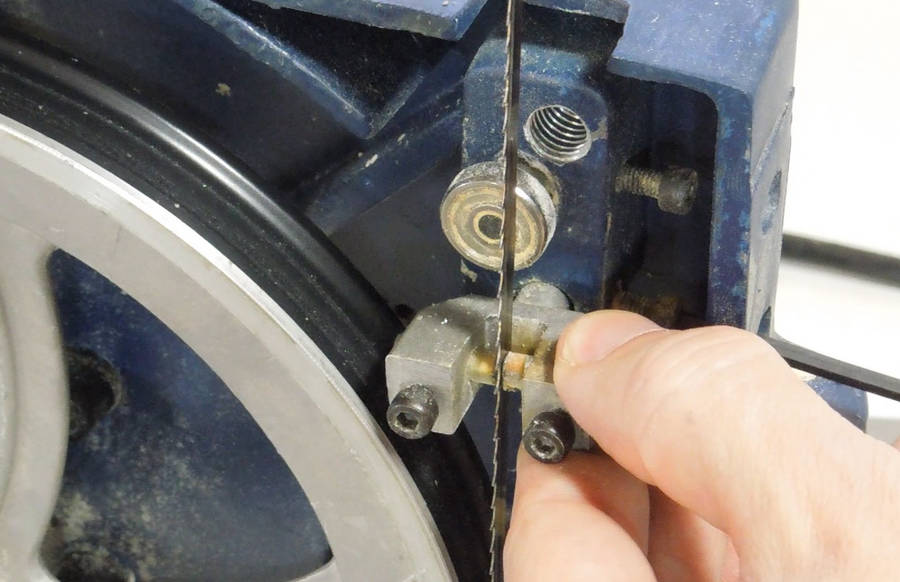
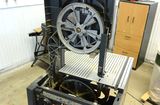
 After that, I put the blade back on. With the lower wheel angle and shape changed,
the alignment needed some readjustment for the blade to track correctly.
After that, I put the blade back on. With the lower wheel angle and shape changed,
the alignment needed some readjustment for the blade to track correctly.
Here I'm measuring wobble of the wheel by measuring against the blade. I had a total variation of .005" (including variations added by the blade and tire), which I figured was reasonable.
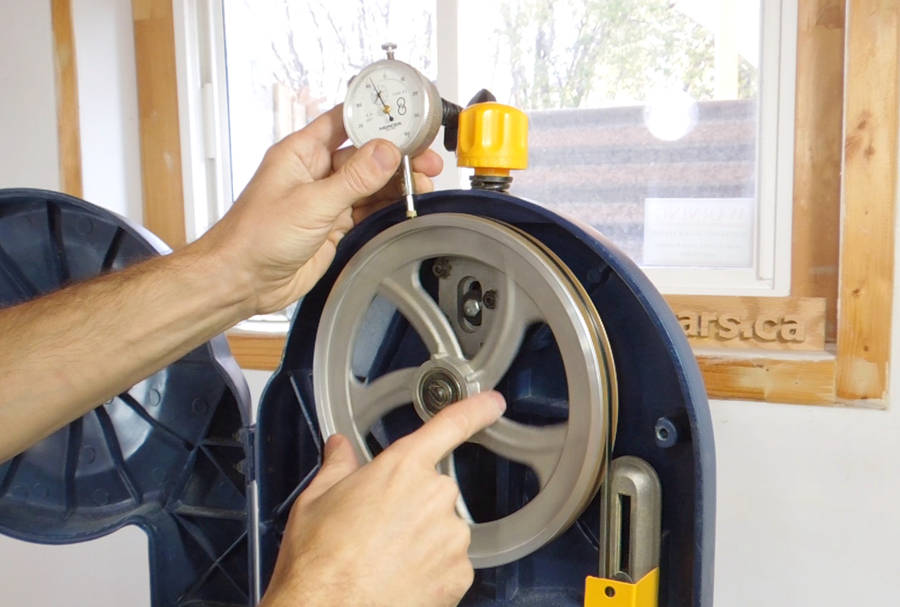 I also checked the variation on the top. It was about the same, though it varied
more randomly, mostly because the tire seemed a bit bumpy.
I also checked the variation on the top. It was about the same, though it varied
more randomly, mostly because the tire seemed a bit bumpy.
From what I have observed on small cheap bandsaws, imprecision of the tire is one of the biggest sources of vibrations.
Canadian tire now sells a 9" bandsaw instead of this 7 1/2" one, and overall, I think that saw is better, but the one I looked at in the store had some very bumpy and imprecise looking tires. Given how well the electrical tape tire has worked so far, if I had that 9" saw, it might be tempting to remove the new tires from a new saw and replace them with electrical tape!
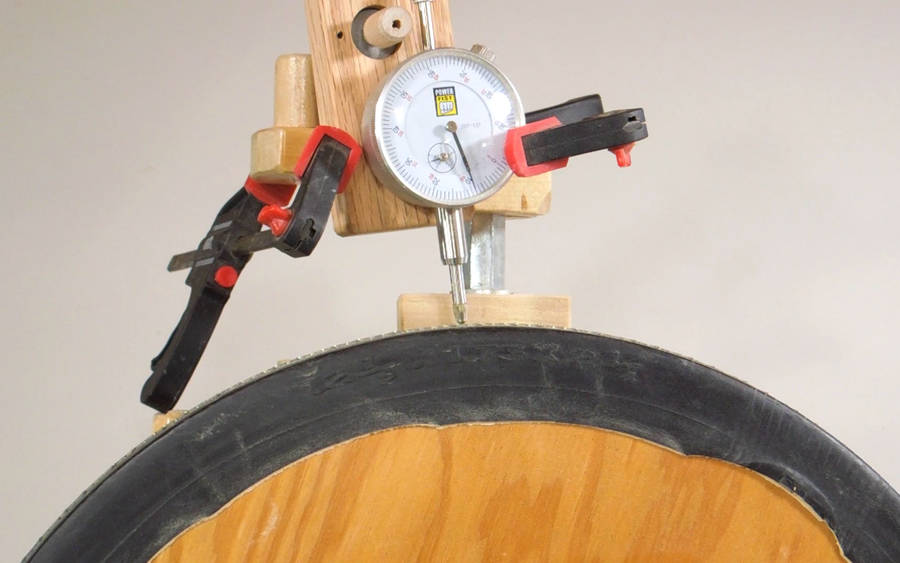 Out of curiosity, I also checked how much variation I had on the top wheel
of my 16" bandsaw. It was also .005", which,
considering the tire is a relatively low precision bicycle inner tube, is not too bad.
Also, that saw is twice as big in every dimension, so in relation to the machine,
it's much less.
Out of curiosity, I also checked how much variation I had on the top wheel
of my 16" bandsaw. It was also .005", which,
considering the tire is a relatively low precision bicycle inner tube, is not too bad.
Also, that saw is twice as big in every dimension, so in relation to the machine,
it's much less.
 Adjusting the blade guides while I still had the table off.
These are very small blade guides, made for relatively small blades.
The thrust bearing is particularly small, but I guess these saws aren't made
for heavy work or long life.
Adjusting the blade guides while I still had the table off.
These are very small blade guides, made for relatively small blades.
The thrust bearing is particularly small, but I guess these saws aren't made
for heavy work or long life.
 A silly design aspect of the saw is that the top and bottom guides need
different sized Allen keys for adjustment!
A silly design aspect of the saw is that the top and bottom guides need
different sized Allen keys for adjustment!
 The table 90 degree tilt stop also needed some adjustment. Easy enough, just loosen the
jam nut on the screw sticking out of the bottom left of the table, and twist the
screw to make adjustments.
The table 90 degree tilt stop also needed some adjustment. Easy enough, just loosen the
jam nut on the screw sticking out of the bottom left of the table, and twist the
screw to make adjustments.
 The original table insert had long gone missing.
The ledge around the insert hole is about 2.5 mm deep, so first I made an insert out of plywood of that thickness. but that insert was too light and sometimes came out on its own. So I made a new insert out of 10 mm plywood. I cut a rabbet around the edge of it to make it fit in the shallow ledge.
 I also drilled out the bottom where the blade goes to give it more clearance. That way,
if you tilt the table without removing the insert, it won't kink the blade.
I also drilled out the bottom where the blade goes to give it more clearance. That way,
if you tilt the table without removing the insert, it won't kink the blade.
 Insert in place. I enlarged the hole in the insert a bit because the
single trunnion on this saw has enough play in it that the table doesn't
position consistently!
Insert in place. I enlarged the hole in the insert a bit because the
single trunnion on this saw has enough play in it that the table doesn't
position consistently!
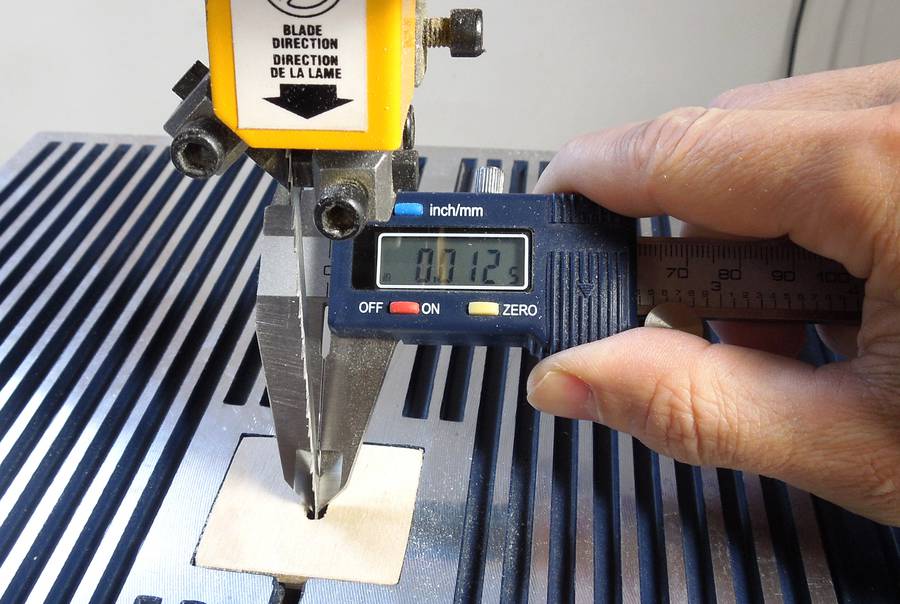
These small bandsaws use very thin blades. This blade measures only about .012" (I read a different number in the video, but I wasn't measuring as carefully). That's only half as thick as the blades for typical 14" or larger bandsaws.
The blades need to be thin to make them flexible. Thicker blades, run over such small wheels, would soon fail from metal fatigue.
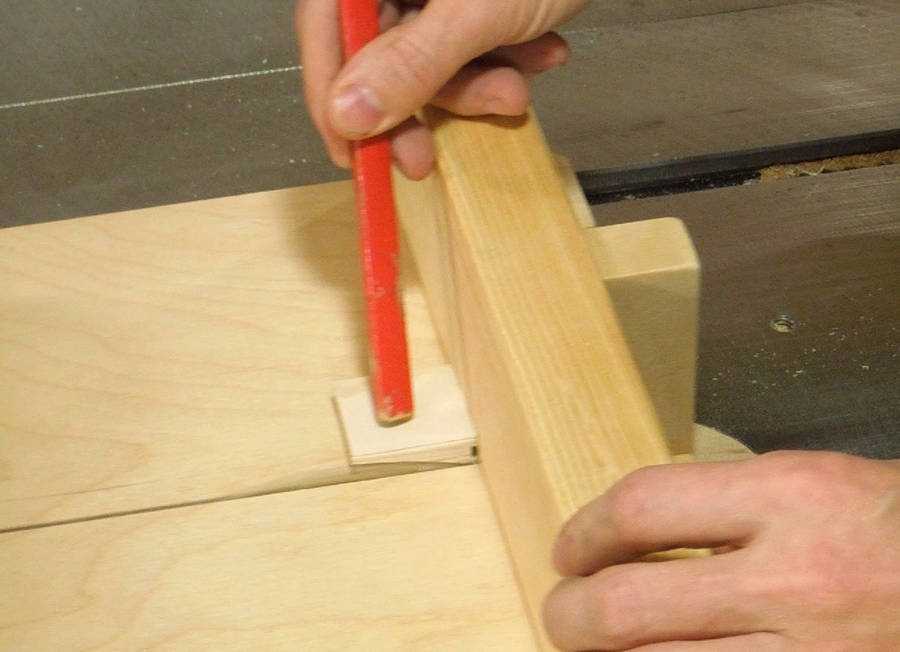
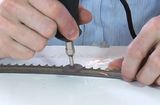
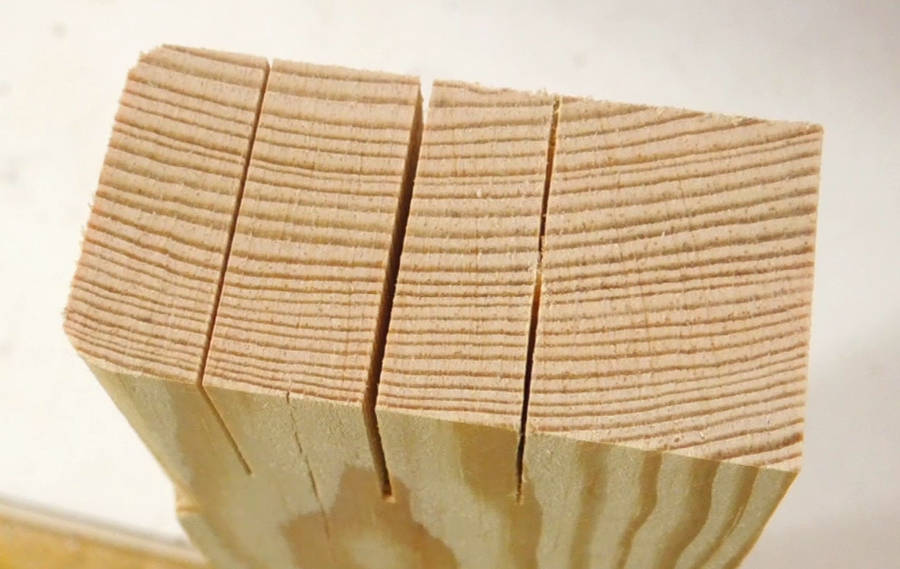 The blade that came with this saw had almost no tooth set to it (tooth set is
the pattern of teeth being bent left or right - see here).
This makes for a very
thin kerf cut. At left, a cut with this saw, middle, a cut with my
16" bandsaw, and at right, a cut made with a Japanese dozuki hand saw.
The blade that came with this saw had almost no tooth set to it (tooth set is
the pattern of teeth being bent left or right - see here).
This makes for a very
thin kerf cut. At left, a cut with this saw, middle, a cut with my
16" bandsaw, and at right, a cut made with a Japanese dozuki hand saw.
 The downside of a blade with almost no set is that it's not very good at cutting curves.
This is as tight a curve as I could cut with that blade!
The downside of a blade with almost no set is that it's not very good at cutting curves.
This is as tight a curve as I could cut with that blade!
I later bought another 1/4" blade for that saw which had more of a set to it, but it turned out to be difficult to control that blade. I ended up stoning the sides of the blade. That stabilized it a fair bit, but after that the tightest radius I could cut was about 6 cm.
Maybe if I got a really narrow blade, I could cut curves, but I didn't want to spend more money on this saw. I also wasn't sure how well my electrical tape as tire would stand up to a narrow blade, so I didn't try.
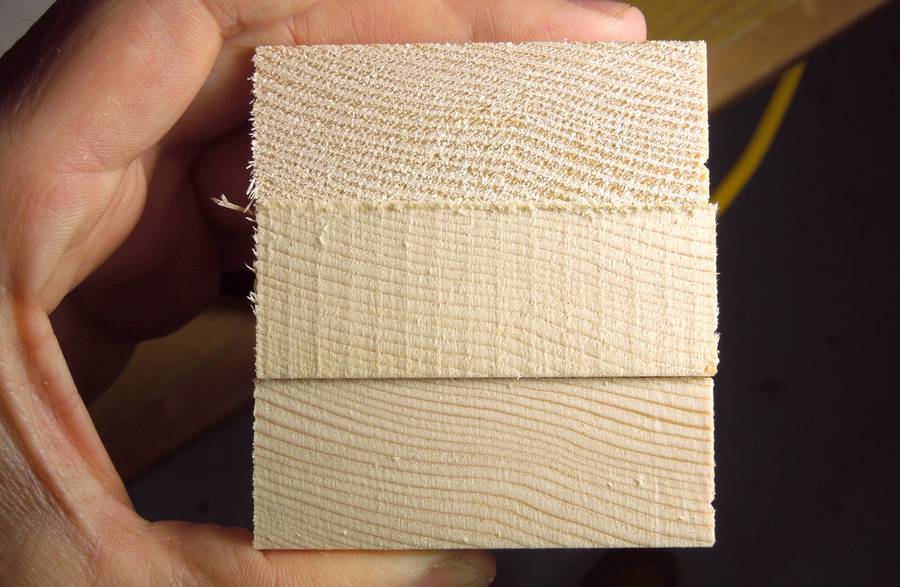 But in the mean time, this saw makes very clean straight cuts, even in softwood.
At left, the top piece was cut on my table saw with a good blade, middle piece was
cut with my 16" bandsaw, and the bottom piece cut with this cheap little saw.
But in the mean time, this saw makes very clean straight cuts, even in softwood.
At left, the top piece was cut on my table saw with a good blade, middle piece was
cut with my 16" bandsaw, and the bottom piece cut with this cheap little saw.
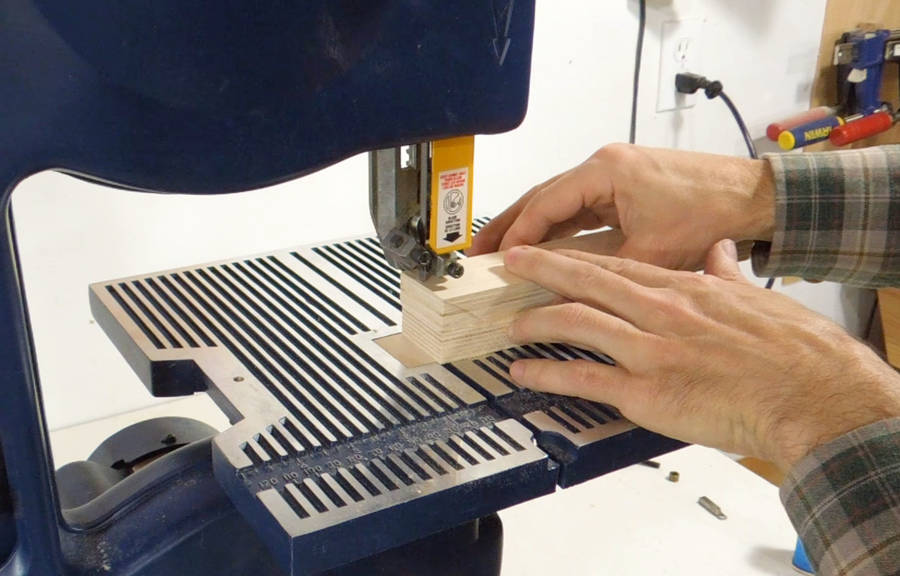 The saw really isn't very powerful, but it will, just barely, with a sharp blade,
cut through two layers of Baltic birch plywood.
The saw really isn't very powerful, but it will, just barely, with a sharp blade,
cut through two layers of Baltic birch plywood.
I figure that's very important - that means you could use one of these cheap little saws to cut out the wheels and trunnions for building a bigger bandsaw!
That said, aside from the low price, these little bandsaws have the advantage of portability.
But working with one of these small bandsaws has something in common with building your own: In both cases, you need to know what you are doing to get it running really well!
You might also enjoy John Heisz's article on modifying his 9" bandsaw. That bandsaw looks just like the one that Canadian Tire now sells instead of this one, although his is from Lowes. I assume that one had better tires than the one I saw in the store, or John would have surely done something about those as well!
 Bandsaw repair fail