![]() I'm a big fan of using push sticks on the table saw, and I usually use two
of them to guide the work past the blade.
I'm a big fan of using push sticks on the table saw, and I usually use two
of them to guide the work past the blade.
I particularly like this design of push stick, so I thought I'd do a short article and video about making some.
What I like about these is the shape of the handle, with a corner to prevent your hand from sliding down towards the blade. They also have a relatively long notch at the front to help hold stock down. They are relatively thin, useful for pushing narrow stock through between the fence and the blade.
 I think one's preference of push stick style, like safety in general, is more a matter
of religious conviction than logic. Some people prefer more of an L-shaped
push stick because it allows you to push the whole workpiece down with one
push stick. With the style I use, I always use a second push stick to help guide
the front of the board near the blade.
I think one's preference of push stick style, like safety in general, is more a matter
of religious conviction than logic. Some people prefer more of an L-shaped
push stick because it allows you to push the whole workpiece down with one
push stick. With the style I use, I always use a second push stick to help guide
the front of the board near the blade.
But with the L-shaped style of push stick shown here, I need to get my hand much closer to the blade. That's not something I'm comfortable with. The same applies for push blocks, even fancy ones like the "gripper". Trying out L-shaped push sticks, I also found that I'm more likely to end up standing directly behind the blade, as opposed to left of it. If you don't believe me, watch This kickback video! (A riving knife helps a lot, but my saw is not equipped for one, and I also use different sized blades)
But most importantly, I think it's best to use two push sticks, because that way, anything you do with your other hand will be with a push stick, which means you are less likely to inadvertently get your fingers too close to the blade.
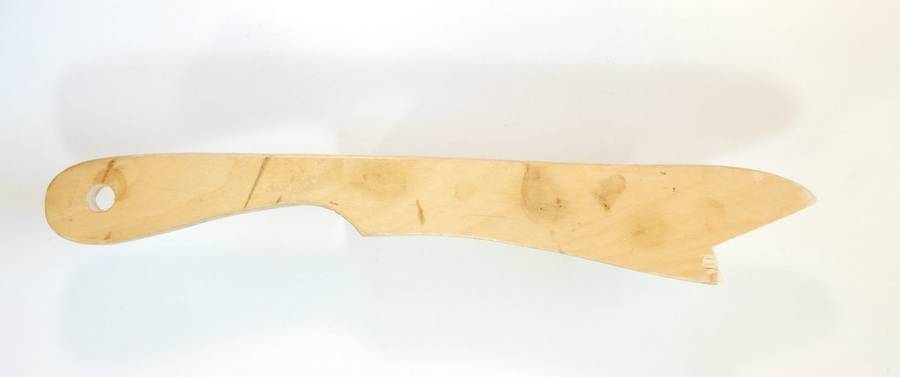
 I got the shape for mine by tracking around an old push stick that came
with my first table saw, which I bought used.
But that won't help you much if you want to make one of these,
so here I'm showing a way to copy something like that without having the physical object.
I got the shape for mine by tracking around an old push stick that came
with my first table saw, which I bought used.
But that won't help you much if you want to make one of these,
so here I'm showing a way to copy something like that without having the physical object.
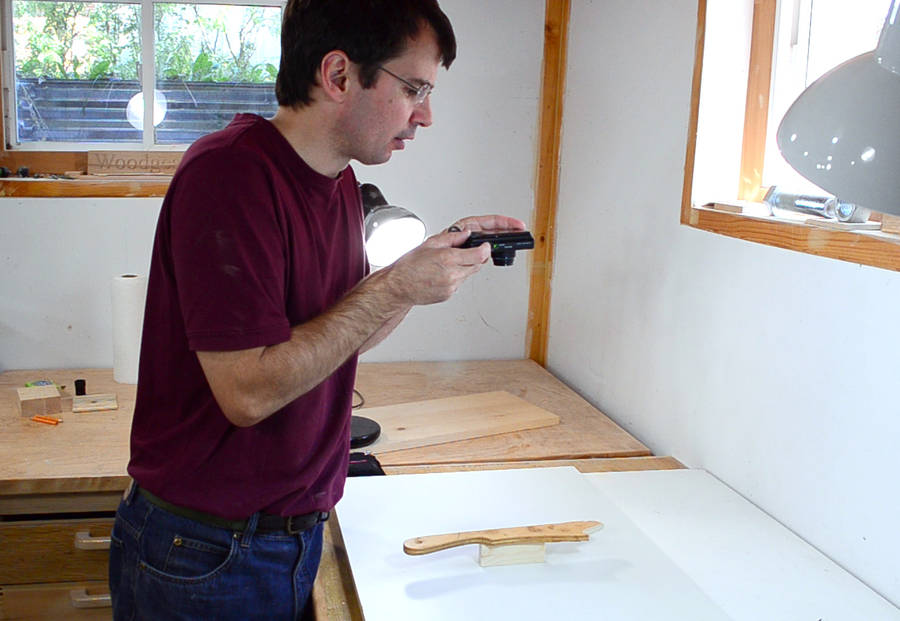
I start by taking a flat-on photo of the object.
 I over exposed the photo by two f-stops to get a reasonably white background.
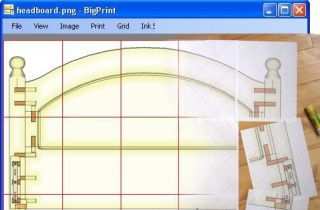
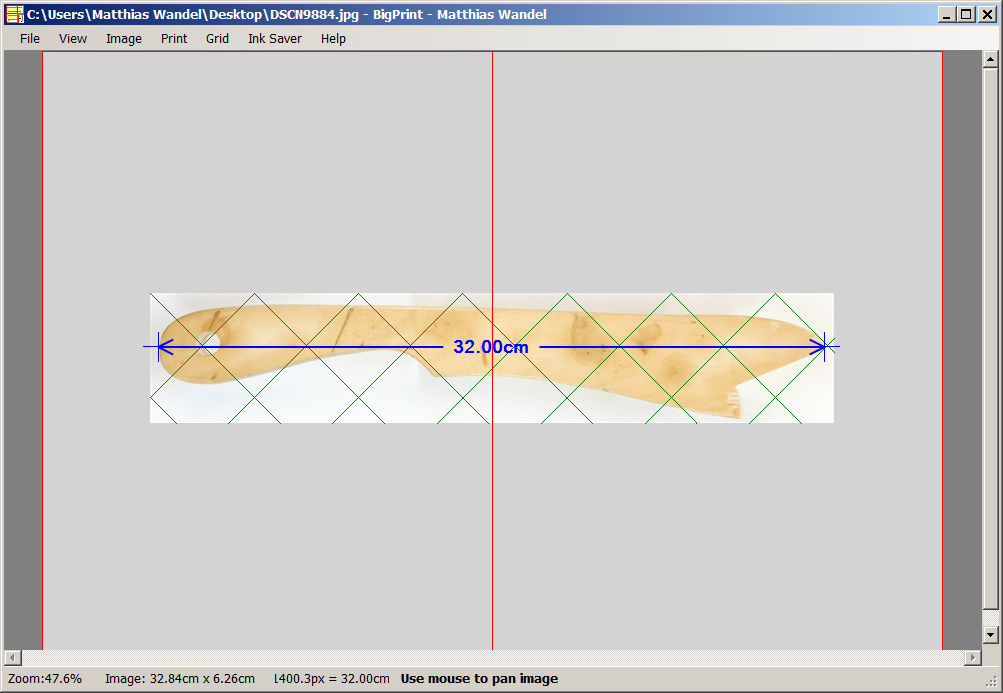 Next I load the photo into my BigPrint
program and use "calibrate scale by distance" to set the scale. The push stick
is 32 cm long, so I select points at either end and enter 32 cm to scale
it to that.
Next I load the photo into my BigPrint
program and use "calibrate scale by distance" to set the scale. The push stick
is 32 cm long, so I select points at either end and enter 32 cm to scale
it to that.
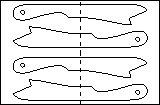
The shape is a bit too long to fit on one page, so it's spread across two.
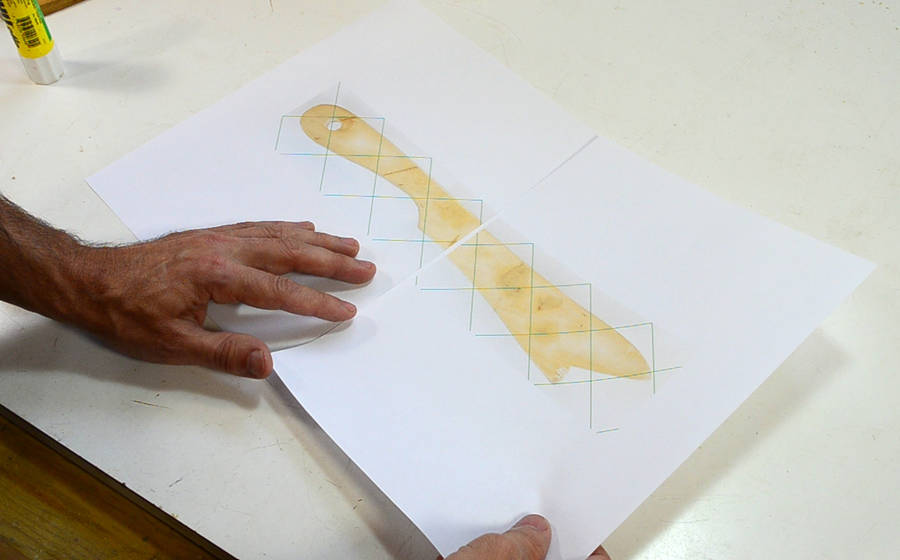 Next I print the pages and glue them together.
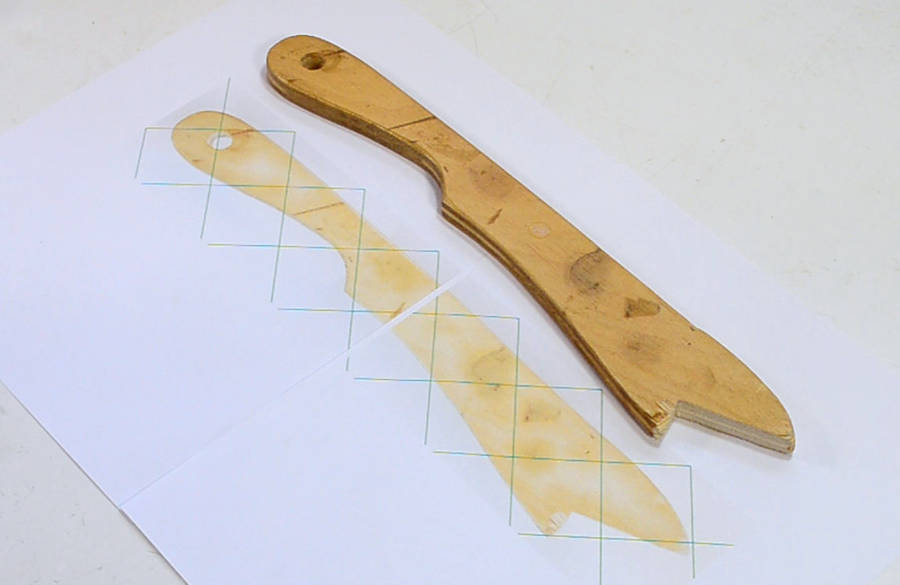 Checking the printout against the original. A 1:1 match.
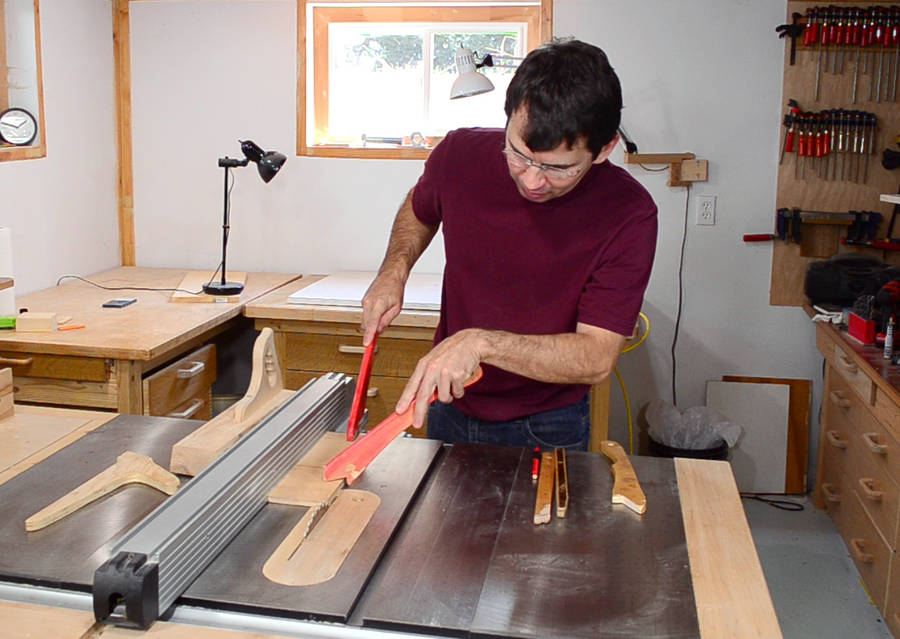
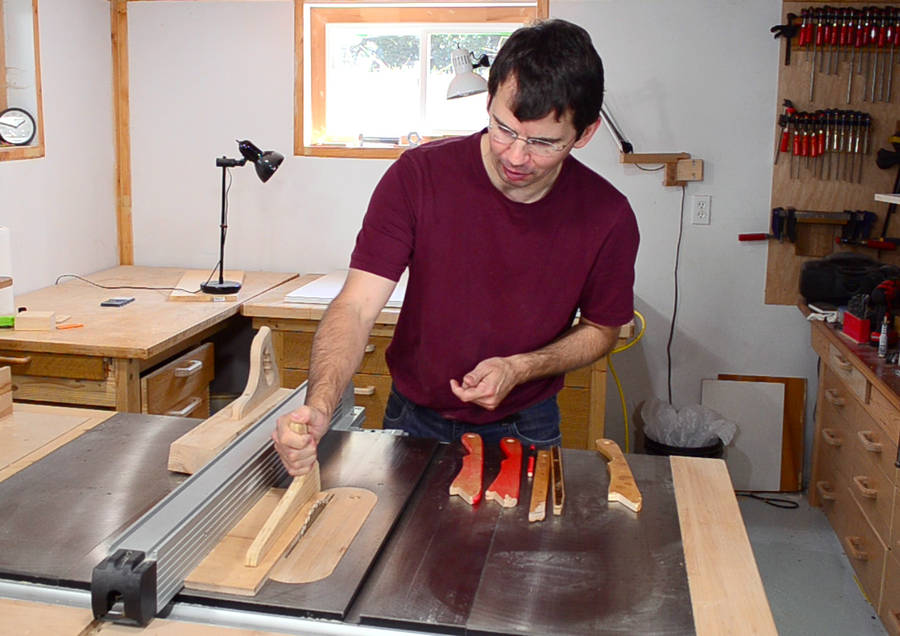
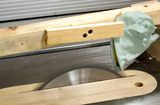
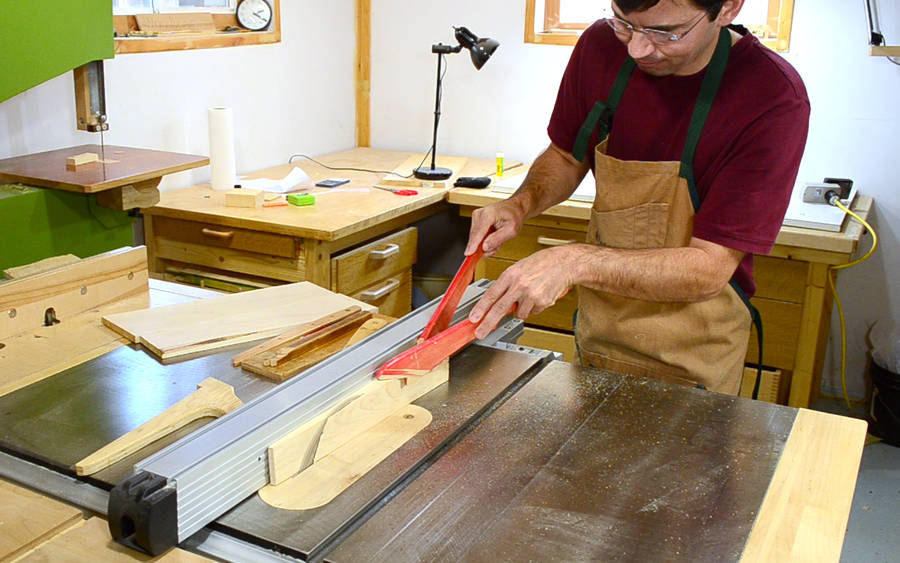 I need some 1 cm thick pieces of wood for my new push sticks. Here's ripping a
board from a wedge shaped scrap. Note the use of my push sticks.
This sort of cut would be very unsafe with an L-shaped push stick, or even
one of those "gripper" push blocks.
I need some 1 cm thick pieces of wood for my new push sticks. Here's ripping a
board from a wedge shaped scrap. Note the use of my push sticks.
This sort of cut would be very unsafe with an L-shaped push stick, or even
one of those "gripper" push blocks.
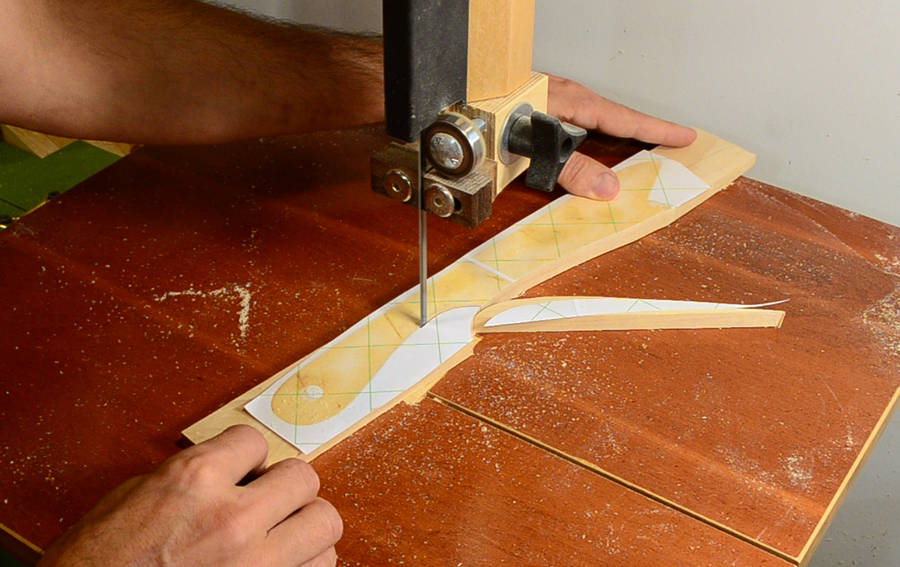 I glued the template onto the wood with a glue stick, and cut it
out on the bandsaw.
I glued the template onto the wood with a glue stick, and cut it
out on the bandsaw.
 I smooth the bandsawed edges on the belt sander.
 Rounding the edges. I'm using my
router lift and small dust collector
Rounding the edges. I'm using my
router lift and small dust collector
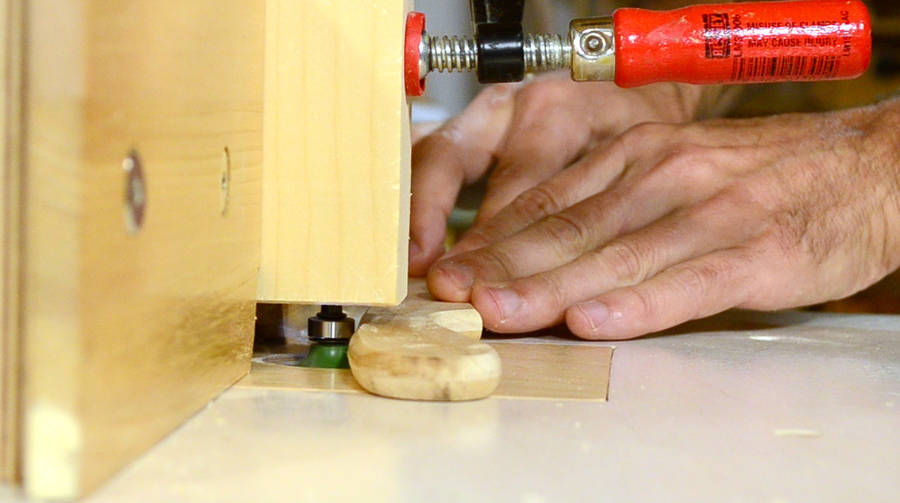 Cutting a 1/4" radius on either side. The push stick isn't thick enough for the full
1/4" radius, so only part of the curvature ends up on the stick.
Cutting a 1/4" radius on either side. The push stick isn't thick enough for the full
1/4" radius, so only part of the curvature ends up on the stick.
I also clamped a block of wood above the bit, trying to optimize it so that the suction is directed more towards the bit. This could also be a safety measure, because it helps keep the fingers away from the bit, but I prefer to be able to see exactly where the bit is. Like driving, it's the unseen car, not the seen one that you are most at risk of colliding with.
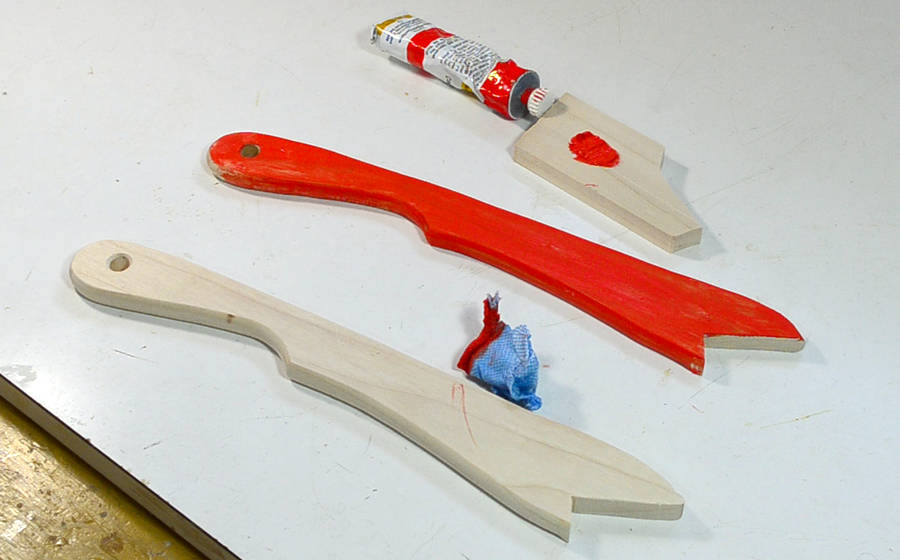 I think it's a good idea to paint push sticks. That way, they stand out from other
pieces of wood and you are more likely to find them, or just plain remember to use
them.
I also put two coats of varnish over the paint to make sure the paint doesn't rub
off onto my workpieces.
I think it's a good idea to paint push sticks. That way, they stand out from other
pieces of wood and you are more likely to find them, or just plain remember to use
them.
I also put two coats of varnish over the paint to make sure the paint doesn't rub
off onto my workpieces.
|
You can download a cleaned up PDF plan Or the photo template I used I also made a SketchUp model (requires Google SketchUp) |
There seems to be two main schools of thought on push sticks. Some people prefer these, others prefer the John Heisz style pushstick, which is used one-handed.
And here's another take on what type of push sticks to use by "krtwood"
And then there is also the big block style push stick, the ridiculous looking Jimmy Diresta style push stick, or the expensive and awkward yellow plastic GRR-Ripper push blocks -- but many YouTubers use those because the company pays them to.
 My BigPrint program
 Table saw sled
 Small table saw sled
 Shirt sucked into
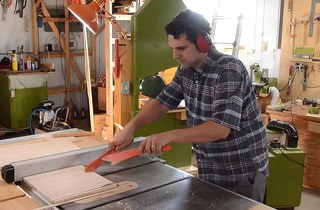 Two beginner table saw mistakes to avoid
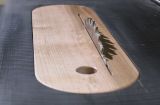 Making a zero clearance
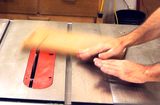 Kickback experiments
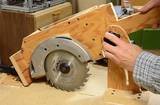 Homemade table saw