
 I started with a regular bucket and cut the bottom section off on the table saw,
then cut the top off, just above the lowest of the three ribs.
I started with a regular bucket and cut the bottom section off on the table saw,
then cut the top off, just above the lowest of the three ribs.
I started with a regular bucket and cut the bottom section off on the table saw,
then cut the top off, just above the lowest of the three ribs.

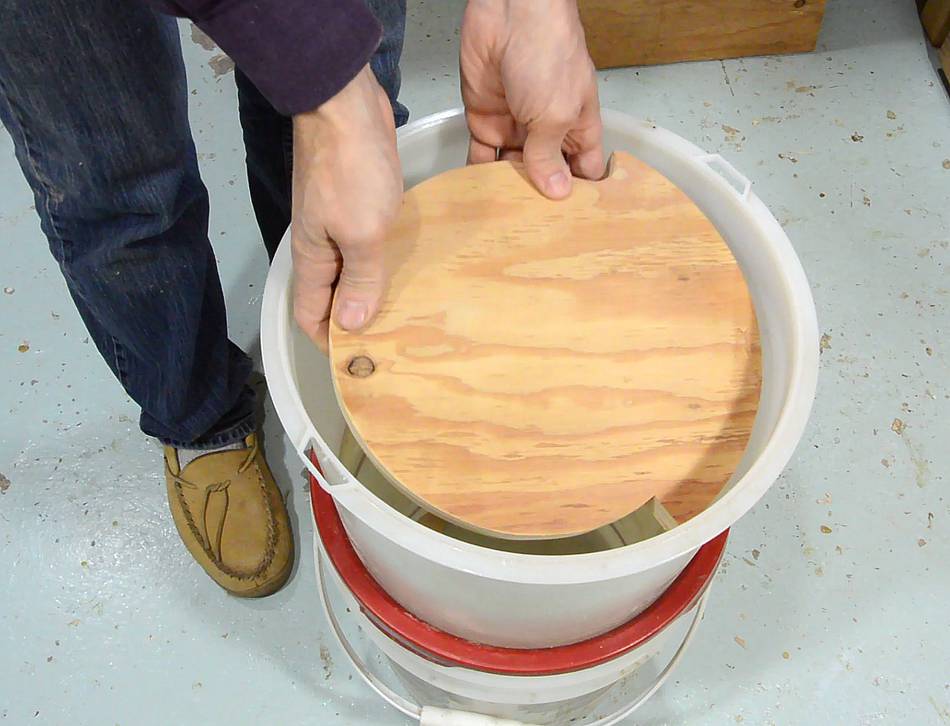
 I made a lid to fit on top of what was left of the bucket. This lid is a disk of
plywood, with a ledge cut to fit just tightly inside the bucket. I cut the ledge
by slowly turning the disk against a spinning table saw blade. The disk turns
around a nail on the table saw sled to get an exact circle. I could have used
a router for this too, but the saw was more convenient.
I made a lid to fit on top of what was left of the bucket. This lid is a disk of
plywood, with a ledge cut to fit just tightly inside the bucket. I cut the ledge
by slowly turning the disk against a spinning table saw blade. The disk turns
around a nail on the table saw sled to get an exact circle. I could have used
a router for this too, but the saw was more convenient.
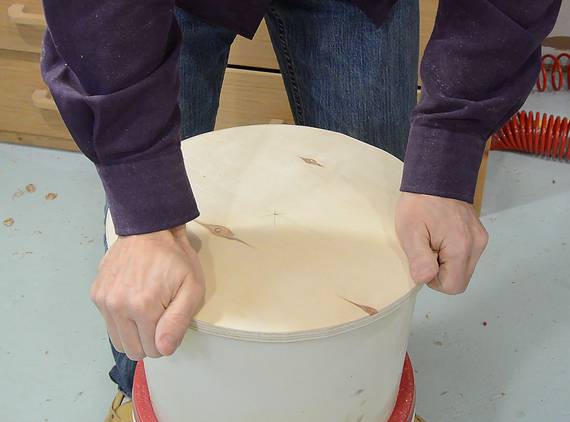
I managed to get the fit just right - it snaps in place with a satisfying pop. If you build one and can't get a good fit, you can always use caulking to seal the lid on.
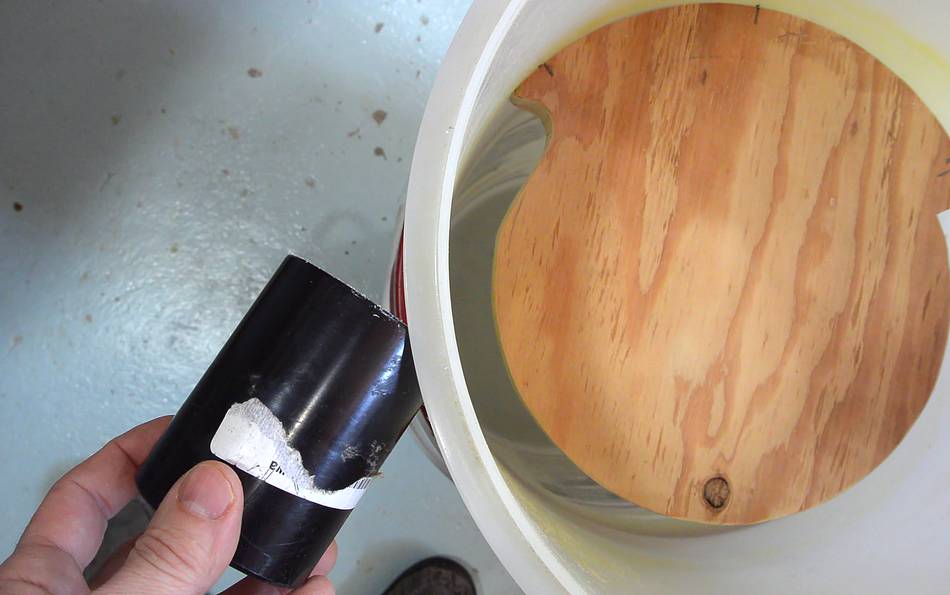
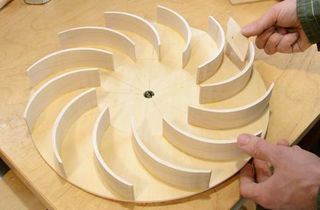
 Here's the Thien-baffle disk, which needs to be mounted inside the bucket.
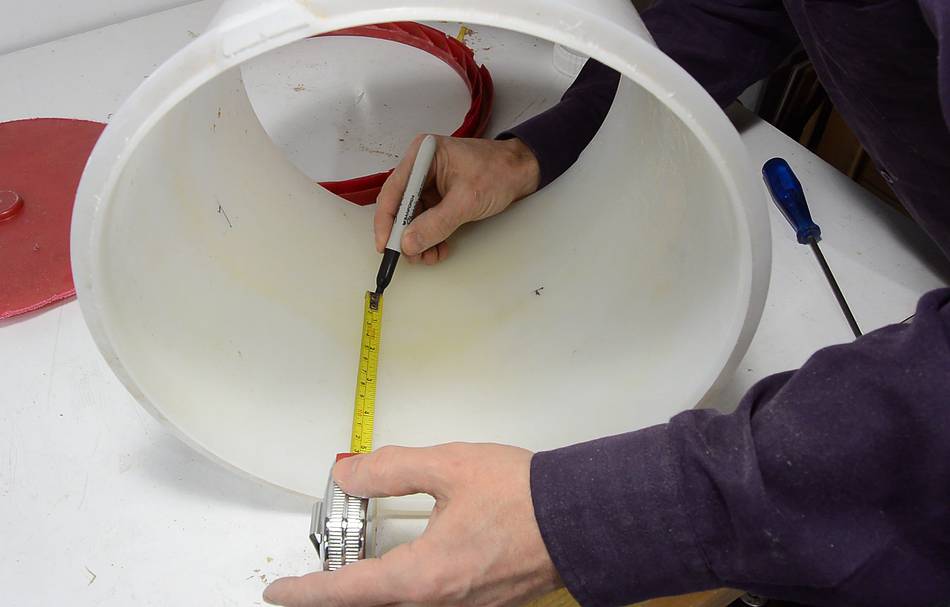
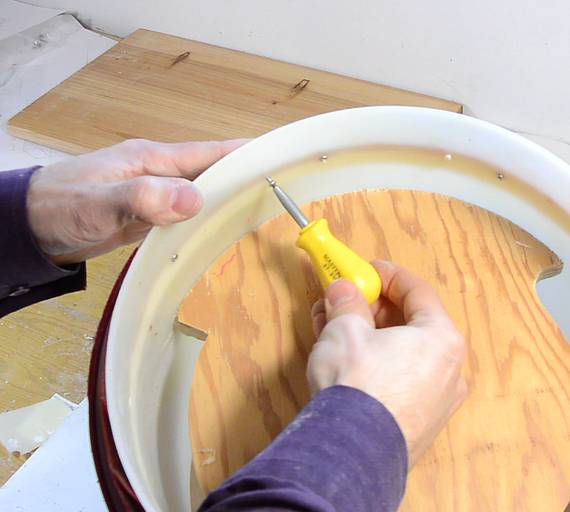
 To make sure the disk mounts level, I pre-drilled three mounting holes in the disk,
then held the disk in the bucket and marked where the holes lined up.
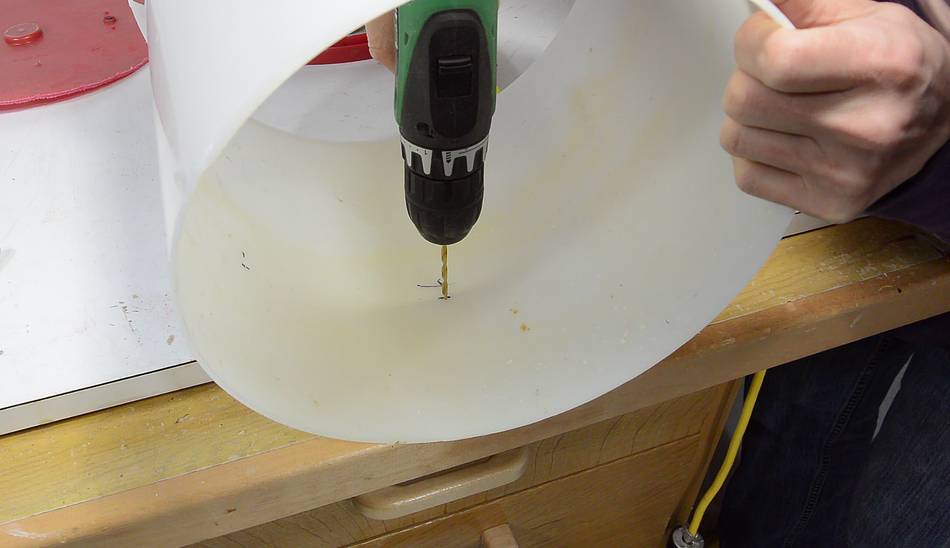
After that, I measured the exact distance down from the edge for each hole and
drilled the mounting holes.
To make sure the disk mounts level, I pre-drilled three mounting holes in the disk,
then held the disk in the bucket and marked where the holes lined up.
After that, I measured the exact distance down from the edge for each hole and
drilled the mounting holes.
 Then screwing the disk on from the outside.
 The next (and biggest) challenge of the build is making the injector
nozzle that connects the inlet pipe to the bucket.
The next (and biggest) challenge of the build is making the injector
nozzle that connects the inlet pipe to the bucket.
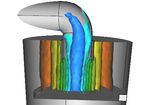
Some people prefer to just inject the air into a Thien-baffle with an elbow, but I prefer to not introduce any obstructions for the air circulating inside. So I prefer the shoot the air in tangentially through a hole in the side.
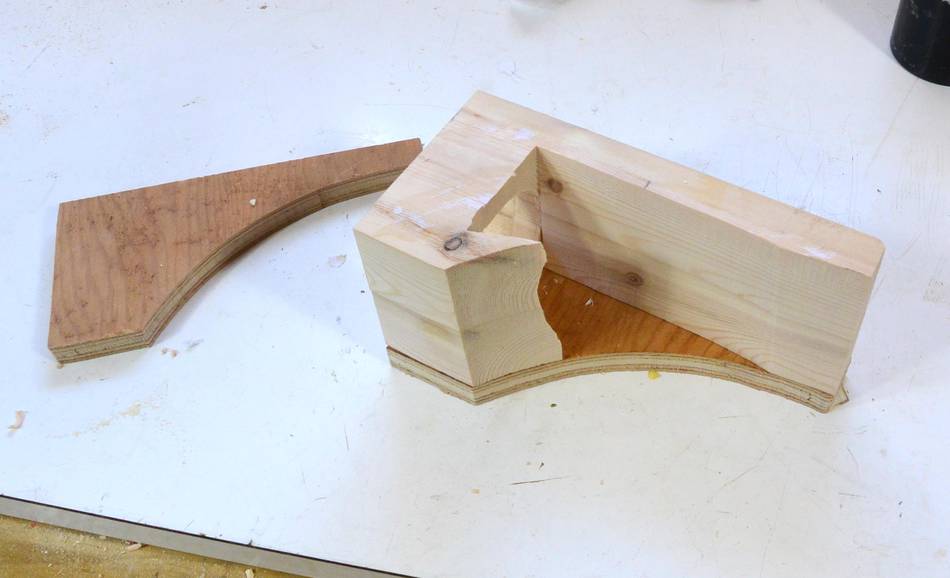
Getting the shape of that block right is tricky, so I designed it in CAD.

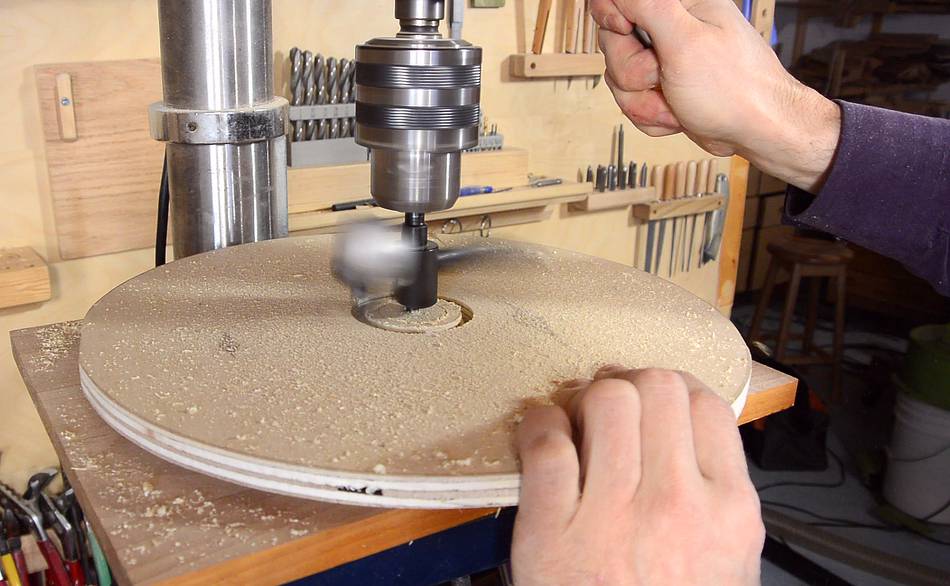
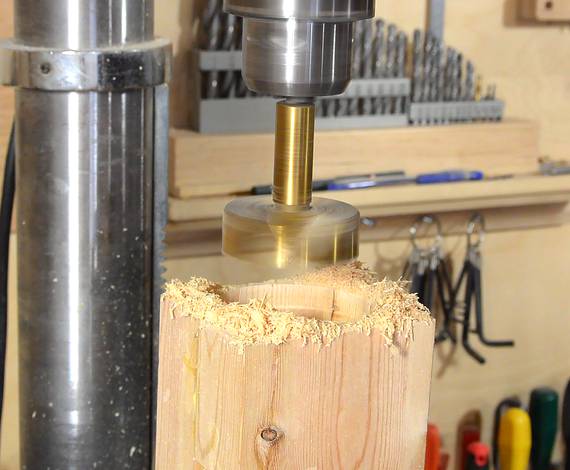 Drilling out the hole for the plastic tube that the hose will
connect to. I used a drill press circle cutter to get the exact
diameter I needed, then used a large forstner bit to hog out what
was left in the middle.
Drilling out the hole for the plastic tube that the hose will
connect to. I used a drill press circle cutter to get the exact
diameter I needed, then used a large forstner bit to hog out what
was left in the middle.
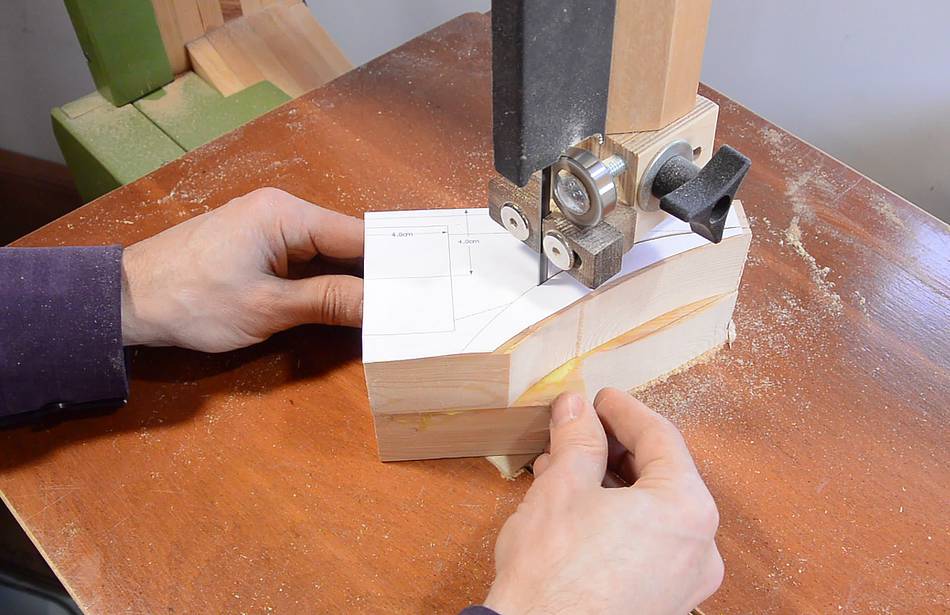
 I then cut the curved side that mates with the bucket.
The bucket is wider at the top than the bottom (slightly conical), so I tilted the bandsaw table by 1.8 degrees, so that the circular arc I cut along would actually produce a cone to match the bucket.

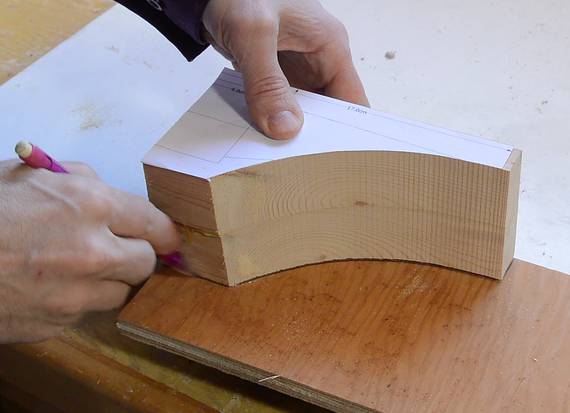 I traced out the shape of either side of this on pieces of plywood before
cutting out the inside of the nozzle.
I traced out the shape of either side of this on pieces of plywood before
cutting out the inside of the nozzle.
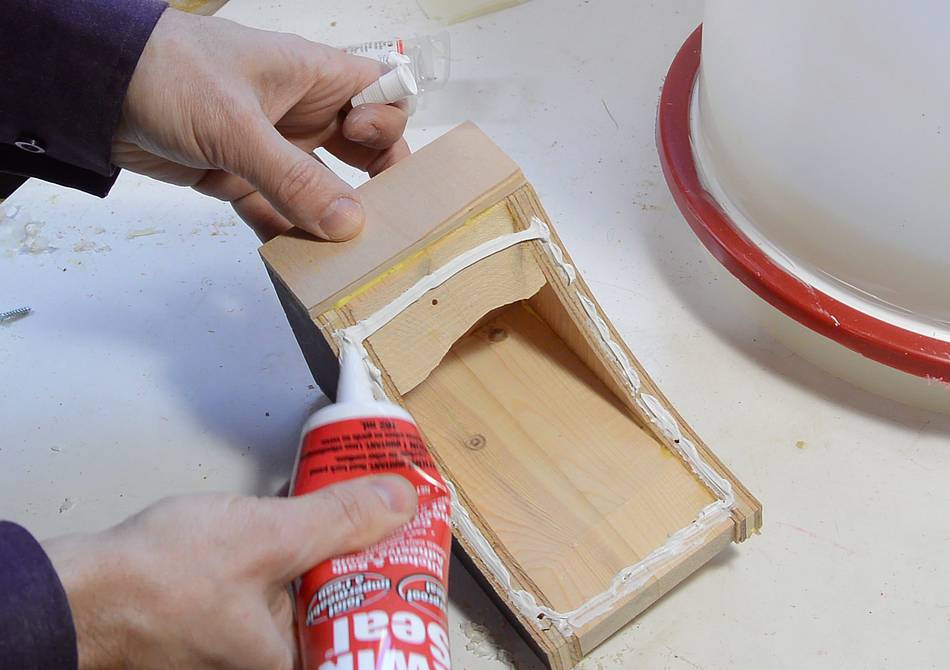
 Injector nozzle pieces ready for glue-up.
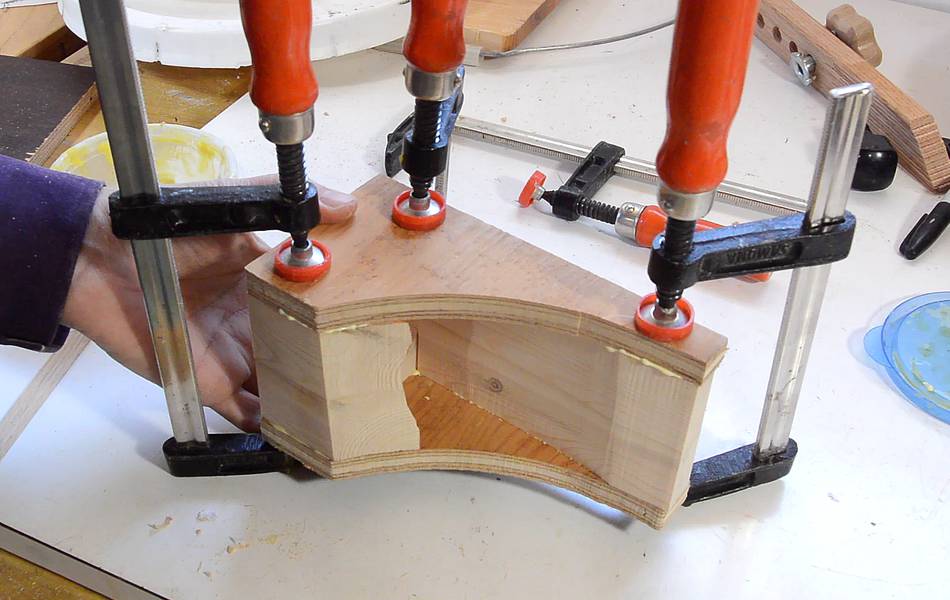
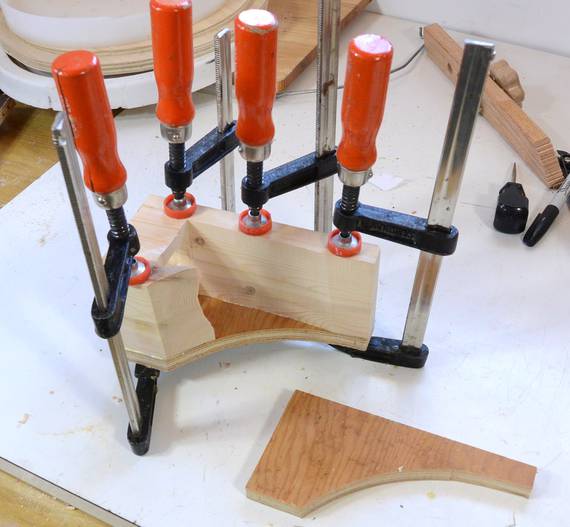 It's tricky to keep everything aligned while gluing, so I glued
each side separately.
It's tricky to keep everything aligned while gluing, so I glued
each side separately.

 I also glued two thin pieces of plywood on the vertical edges, just to make
sure I wouldn't split the block by inserting the plastic pipe too hard.
I also glued two thin pieces of plywood on the vertical edges, just to make
sure I wouldn't split the block by inserting the plastic pipe too hard.
If you don't have a circle cutter and a large forstner bit, you can make the injector nozzle shorter and cut out a piece of plywood with a hole in it to attach to the face of the injector nozzle. I used that technique on my previous cyclone
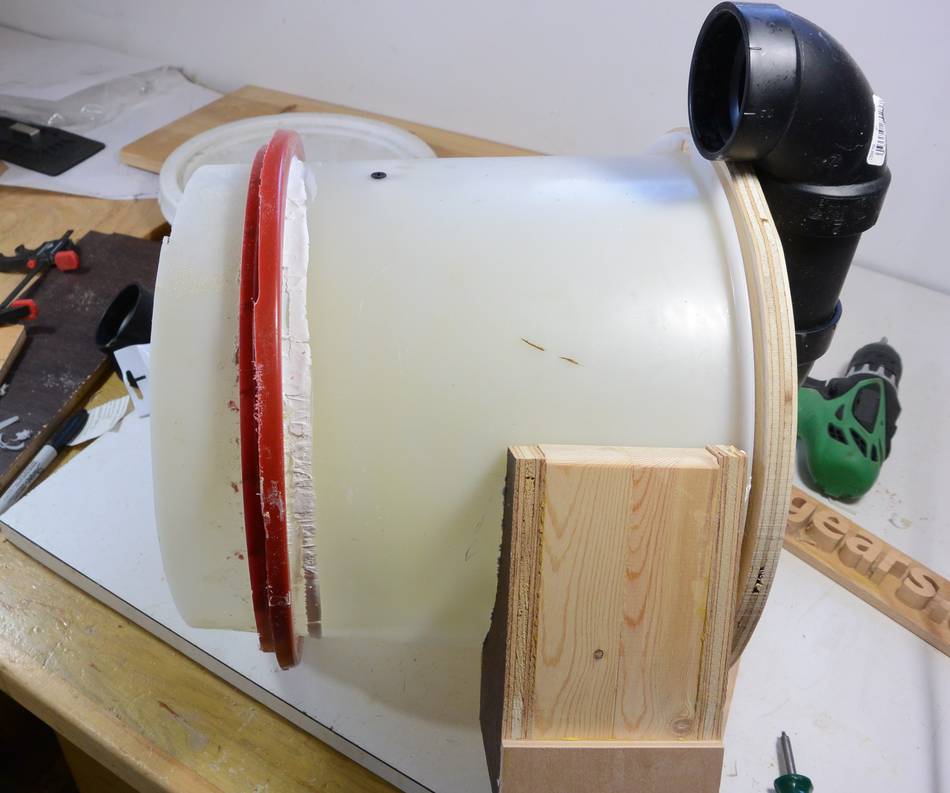
 Cutting a hole in the top lid.
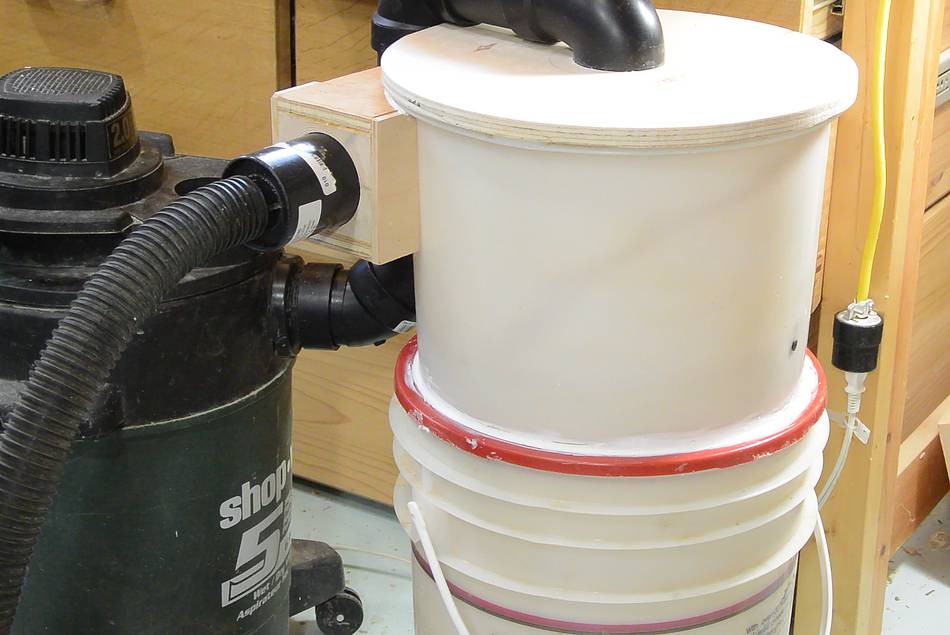
 A 2" ABS elbow fits into the lid. I'm using the style of elbow that
fits straight into another elbow (as opposed to having a flange that
fits onto a pipe). The main advantage of this elbow is that I can push
it in so it rests flat against the lid.
A 2" ABS elbow fits into the lid. I'm using the style of elbow that
fits straight into another elbow (as opposed to having a flange that
fits onto a pipe). The main advantage of this elbow is that I can push
it in so it rests flat against the lid.
The fit ended up very tight, but on the plus side, I didn't have to worry about fastening or sealing that elbow to the lid.
 I'm using a short coupler piece on the inside of the lid to extend
the pipe a little bit into the cyclone chamber.
I'm using a short coupler piece on the inside of the lid to extend
the pipe a little bit into the cyclone chamber.
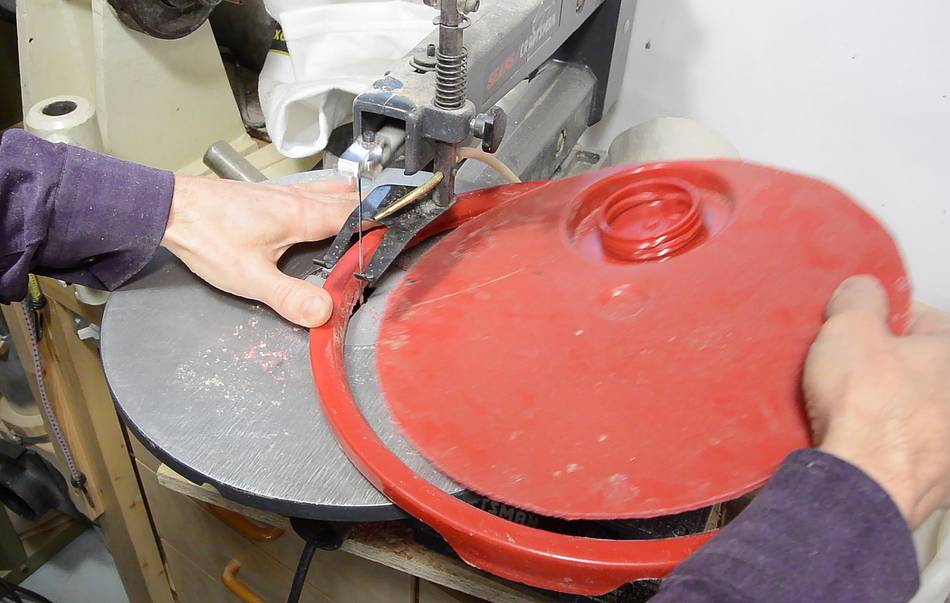 To seal the cyclone onto the collection bucket, I cut the edge of
a plastic bucket lid off on a scrollsaw.
To seal the cyclone onto the collection bucket, I cut the edge of
a plastic bucket lid off on a scrollsaw.
The first lid I cut up had just a rubber coating for the seal, so I found another lid, this one with a compressible hollow O-ring. The compressible O-ring seals much better if precision isn't perfect.
 Ideally, I would glue the lid ring onto the cyclone bucket,
but the semi-transparent buckets are made of polyethylene,
and there's no such thing as a good polyethylene glue.
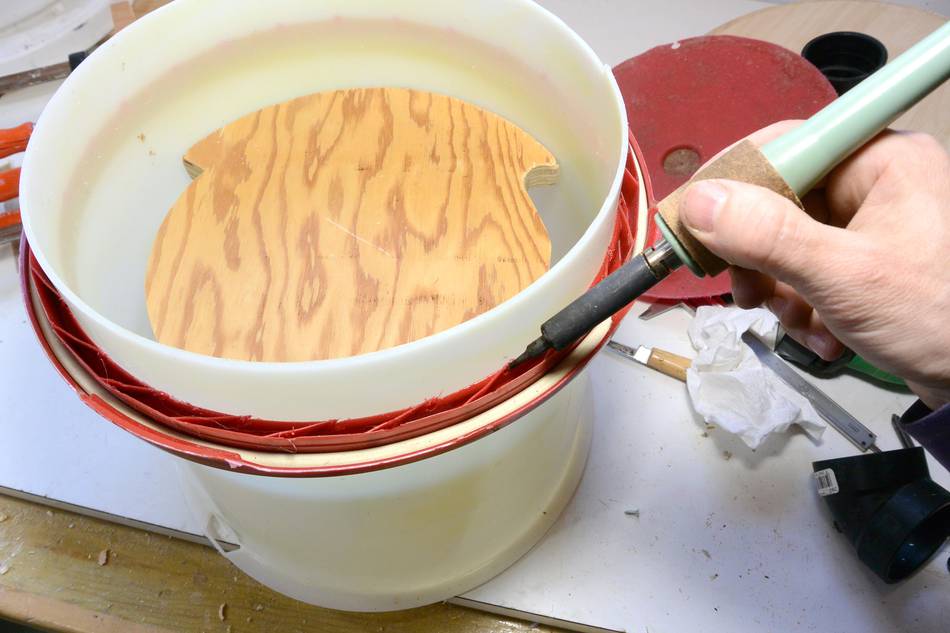
I figured maybe I could melt the bucket and lid together in spots
with a soldering iron. (Hint: don't do this)
Ideally, I would glue the lid ring onto the cyclone bucket,
but the semi-transparent buckets are made of polyethylene,
and there's no such thing as a good polyethylene glue.
I figured maybe I could melt the bucket and lid together in spots
with a soldering iron. (Hint: don't do this)
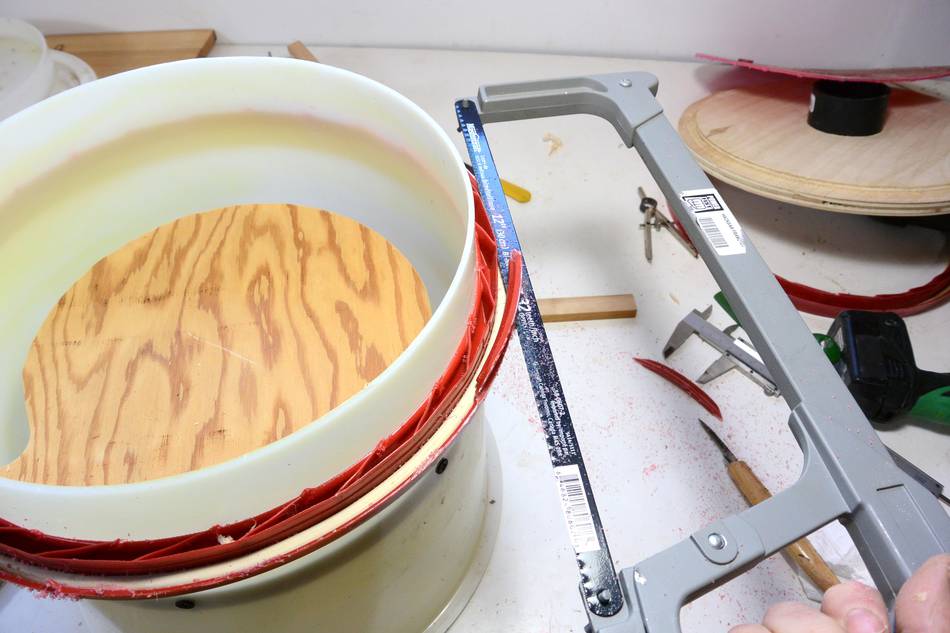 I also cut the tabs for snapping the lid onto the bucket off with a
hacksaw. This will make it much easier to swap collection buckets.
I also cut the tabs for snapping the lid onto the bucket off with a
hacksaw. This will make it much easier to swap collection buckets.
I will rely on gravity and suction from the vacuum cleaner to push the cyclone onto the collection bucket, and if I have a small amount of leakage that's ok too.
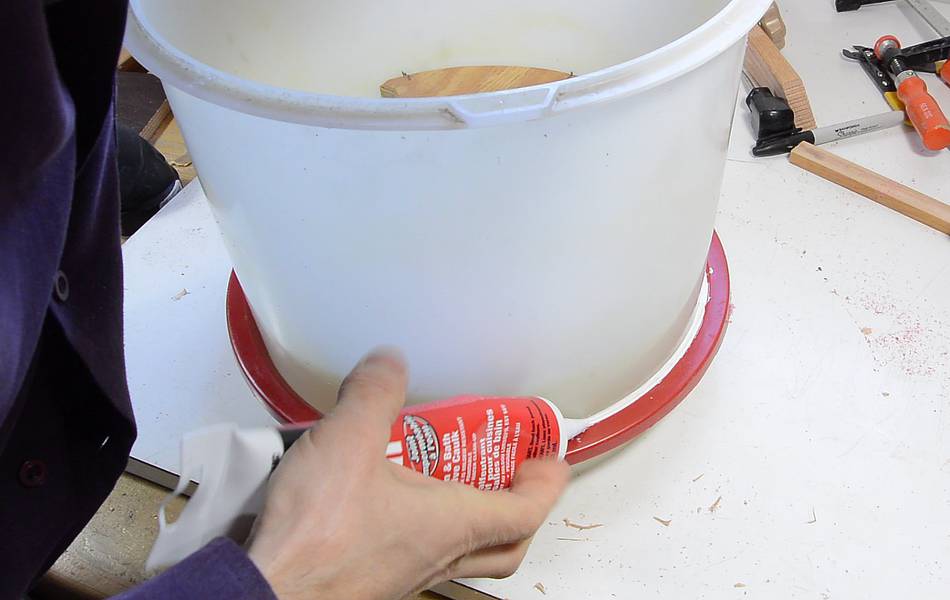 I also added some caulking between the bucket and the lid. In places
I had a gap as large as 1 mm.
I also added some caulking between the bucket and the lid. In places
I had a gap as large as 1 mm.
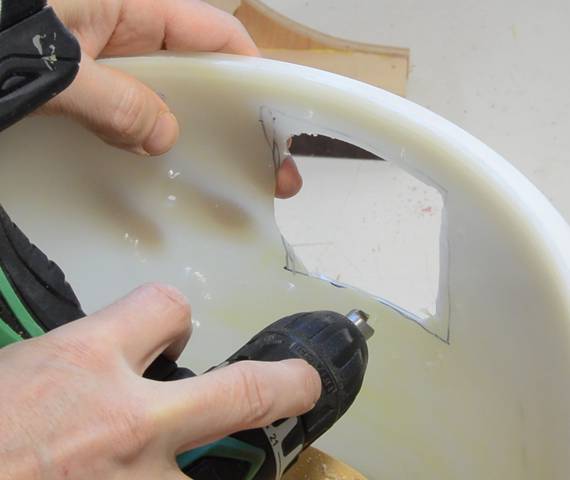
 I needed to figure out where to cut the hole for mounting the injector
nozzle. The easiest solution was to shine a light into the inlet
and use that to trace where the hole needs to be.
I needed to figure out where to cut the hole for mounting the injector
nozzle. The easiest solution was to shine a light into the inlet
and use that to trace where the hole needs to be.

 Then it was a matter of drilling and hacksawing to cut it out.
A coping saw would be better, and I'm sure I have one somewhere, I just can't find it.
 Injector nozzle clamped in place.
In a typical flat style Thien-baffle, the closed part of the baffle (where there is no slot around the perimeter) starts just after the injector, but with a much taller chamber on this one, the jet from the nozzle won't make it down to the baffle for quite a bit of distance, so it makes more sense to offset the closed part of the baffle.

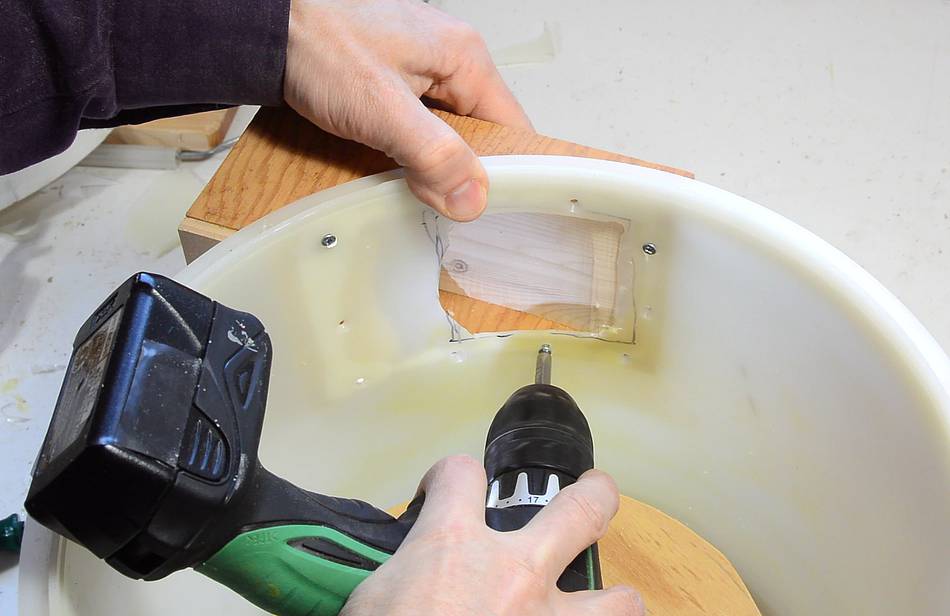
 I started by drilling just one mounting hole and attaching a screw.
Then, with the clamp and one screw holding the nozzle firmly in place,
I drilled the rest of the mounting holes for the nozzle.
I started by drilling just one mounting hole and attaching a screw.
Then, with the clamp and one screw holding the nozzle firmly in place,
I drilled the rest of the mounting holes for the nozzle.
 A bit of caulking to seal the nozzle onto the bucket.
I previously used felt as a sealer, but the problem with felt is that it often winds its way around a screw if you screw through it.
 Finally, screwing on the nozzle.
 Most people use a hose to connect to the ShopVac, but I didn't have a spare
hose. A 2" plumbing pipe, being smooth on the inside and much larger,
is more efficient.
Most people use a hose to connect to the ShopVac, but I didn't have a spare
hose. A 2" plumbing pipe, being smooth on the inside and much larger,
is more efficient.
The hole on the ShopVac is just slightly smaller than the outside diameter of a 2" ABS pipe. But, looking at plumbing fittings in the hardware store, I found a threaded coupler, that, with the threads filed down, just barely fits inside the ShopVac's inlet.
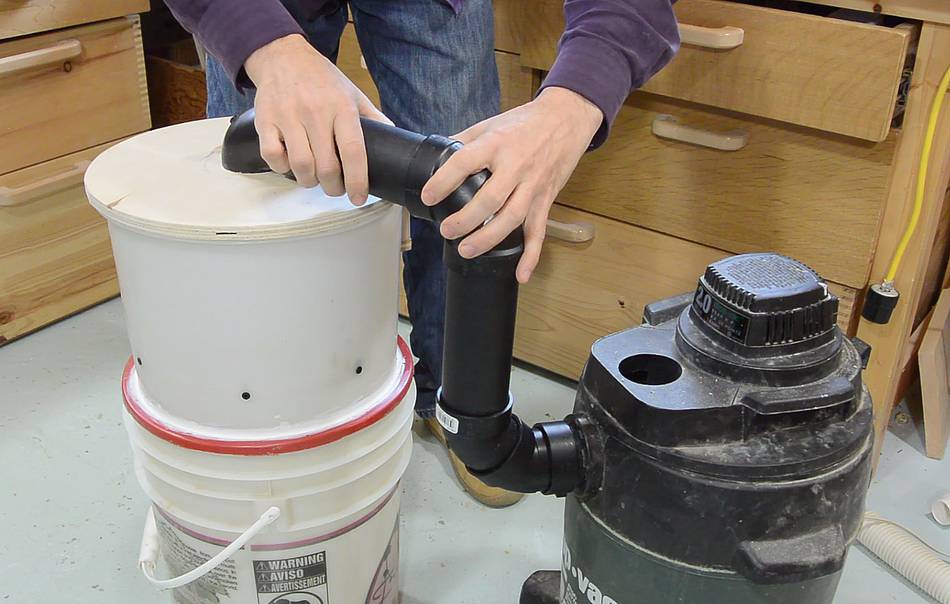
 Plumbing together the connection with the ShopVac.
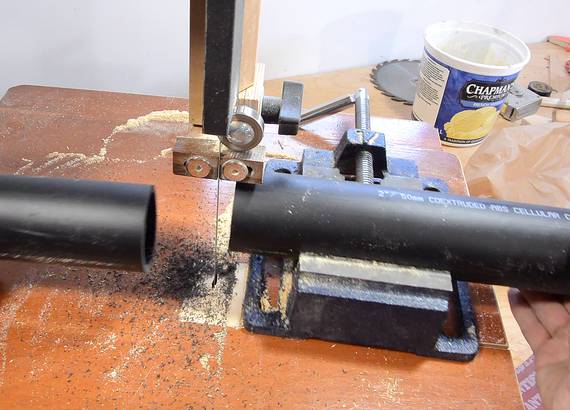
Holding the pipe in a drill press vise allowed me to make a nice square cut on the bandsaw - much more precise than hacksawing it free-hand.
I didn't use any solvent cement to assemble the pieces. They make for a tight enough seal for vacuum cleaning as it is, and that way I can still make adjustments.
 After my first bit of testing, I found the cyclone had gotten partially sucked
into the collection bucket from the vacuum. I guess my plastic welding
experiment wasn't a success. So I attached it with screws instead.
After my first bit of testing, I found the cyclone had gotten partially sucked
into the collection bucket from the vacuum. I guess my plastic welding
experiment wasn't a success. So I attached it with screws instead.
It was tempting to try the plastic welding technique again, but I figured if it failed at first for me it's likely to fail for others too, so I shouldn't encourage the technique.
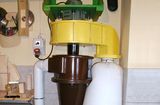
 Testing it, using the rather skinny hose that came with my ShopVac.
That hose quickly plugged up when I tried to suck up the shavings really fast.
Testing it, using the rather skinny hose that came with my ShopVac.
That hose quickly plugged up when I tried to suck up the shavings really fast.
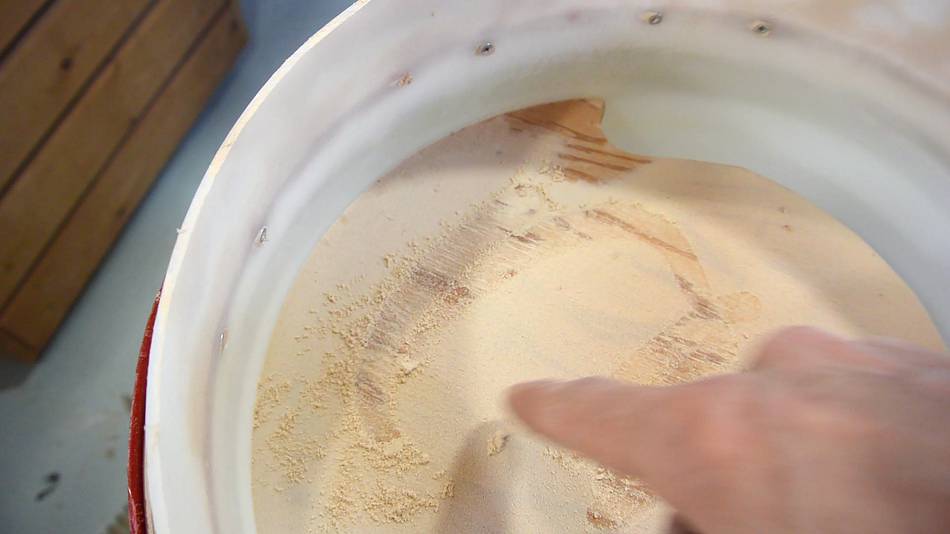
 Looking at the bucket, you could see the dust swirling inside of it, though
in a photo it's hard to see, but there is a darker line from the top right
to the bottom left. That's a stream of dust inside.
Looking at the bucket, you could see the dust swirling inside of it, though
in a photo it's hard to see, but there is a darker line from the top right
to the bottom left. That's a stream of dust inside.

 Next test - using the contents of the sawdust drawer from my
homemade bandsaw
stand. Other than sanders, the bandsaw
produces the finest dust in my shop.
Next test - using the contents of the sawdust drawer from my
homemade bandsaw
stand. Other than sanders, the bandsaw
produces the finest dust in my shop.
I weighed the bucket at 1043 grams empty, 1830 grams with the sawdust. So I had 787 grams of dust in the bucket.
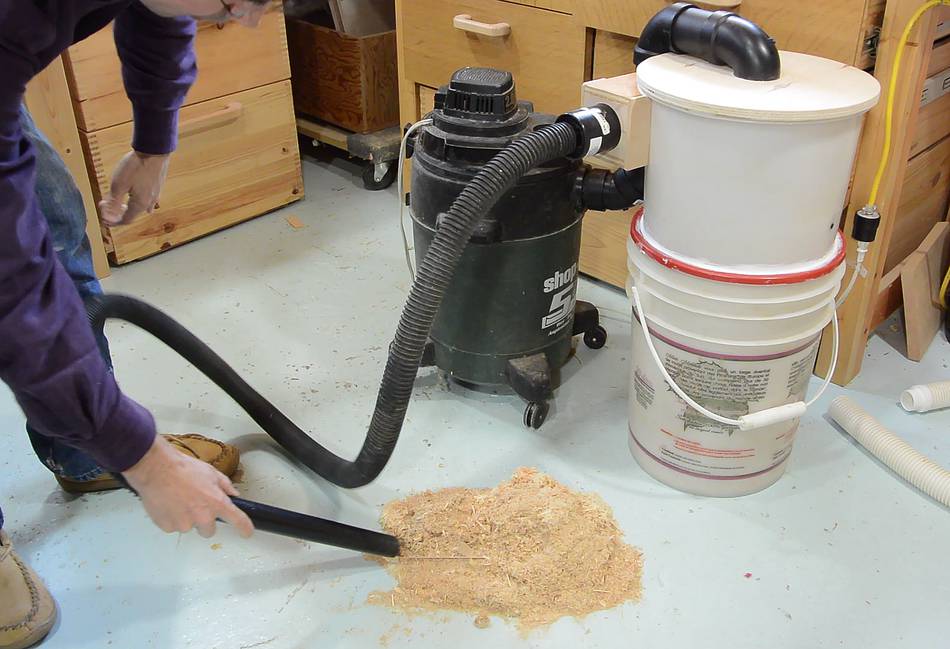
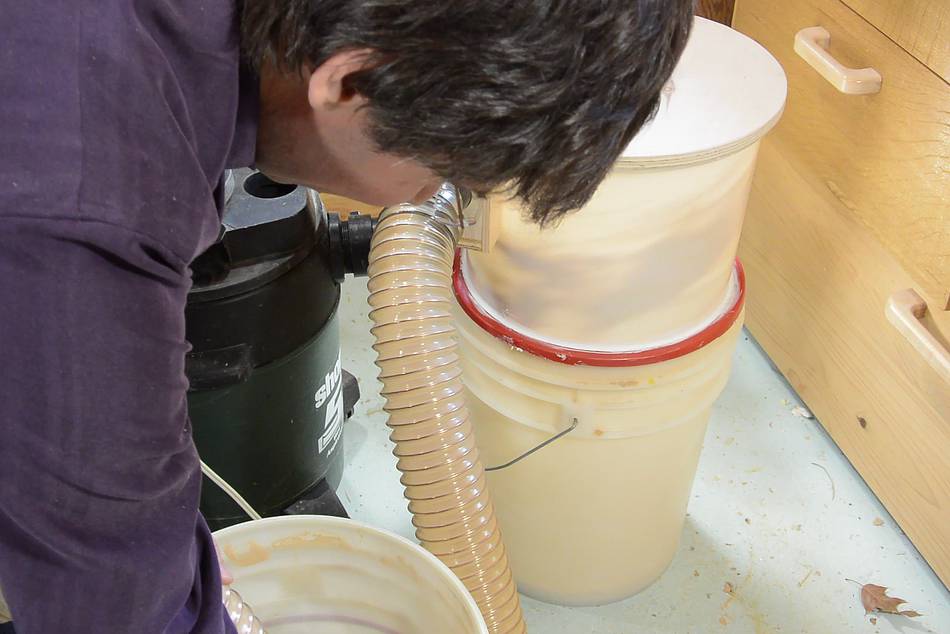 For this test, I swapped the ShopVac hose for the 2" hose from my small dust collector.
This allowed me to suck up the sawdust much faster.
For this test, I swapped the ShopVac hose for the 2" hose from my small dust collector.
This allowed me to suck up the sawdust much faster.
With a lamp behind the dust collector, you can really see dark splotches of dust going around the dust collector. Very satisfying to watch.
I sucked that dust through very quickly. Sucking too much dust through a cyclone at once fast will generally slow down the rotational speed of the air inside, making it less effective. So it's a good stress test.
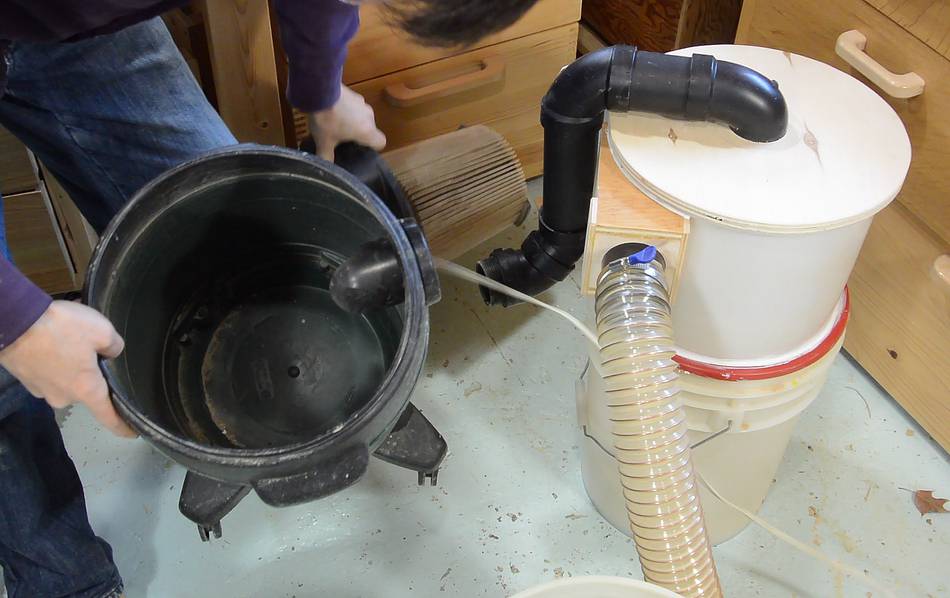
After sucking the contents of the bucket, I put my original bucket under to act as the collection bucket and sucked everything through it a second time.
 Checking the ShopVac - a few wisps inside (I'd given the inside of it a good cleaning
before starting the test). The filter also didn't look noticeably dirtier than before.
Checking the ShopVac - a few wisps inside (I'd given the inside of it a good cleaning
before starting the test). The filter also didn't look noticeably dirtier than before.
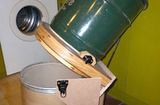
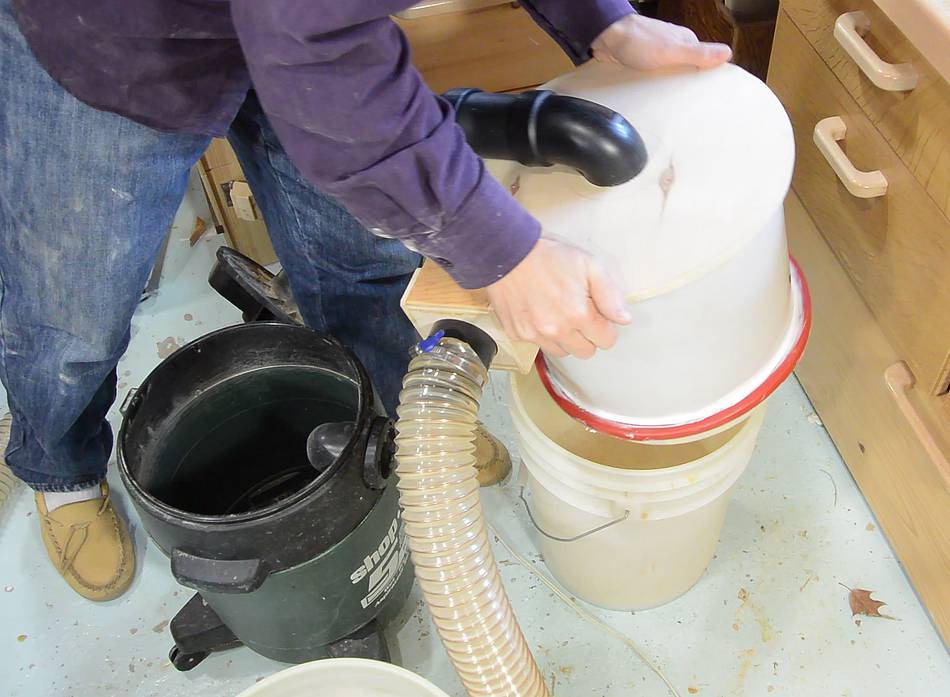 The beauty is, to get the bucket out, I just lift the cyclone right off it.
Weighing the bucket, it weighed 1824 grams. So 6 grams of dust went missing.
The beauty is, to get the bucket out, I just lift the cyclone right off it.
Weighing the bucket, it weighed 1824 grams. So 6 grams of dust went missing.
So after going through the cyclone twice, I lost less than 0.8% of the dust by mass.
Now, where did that dust go?
 Examining the bottom of the cyclone, there was quite a layer of dust, so some
of that missing dust was separated out, but stuck to the cyclone instead of falling
in the bucket.
Examining the bottom of the cyclone, there was quite a layer of dust, so some
of that missing dust was separated out, but stuck to the cyclone instead of falling
in the bucket.
A very small amount of dust ended in the bottom of the ShopVac. I'm assuming the rest ended up embedded in the ShopVac's filter. I should have weighed that before and after.
Next: Building a dust collector blower
 Building a dust collector
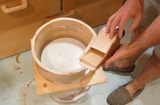 My previous Thien-
 Effect of hoses on shopvacs and dust collector air flow