 I have been going to the Ottawa ArtEngine
Modlab nights from time to time lately.
I have been going to the Ottawa ArtEngine
Modlab nights from time to time lately.
I have been going to the Ottawa ArtEngine
Modlab nights from time to time lately.
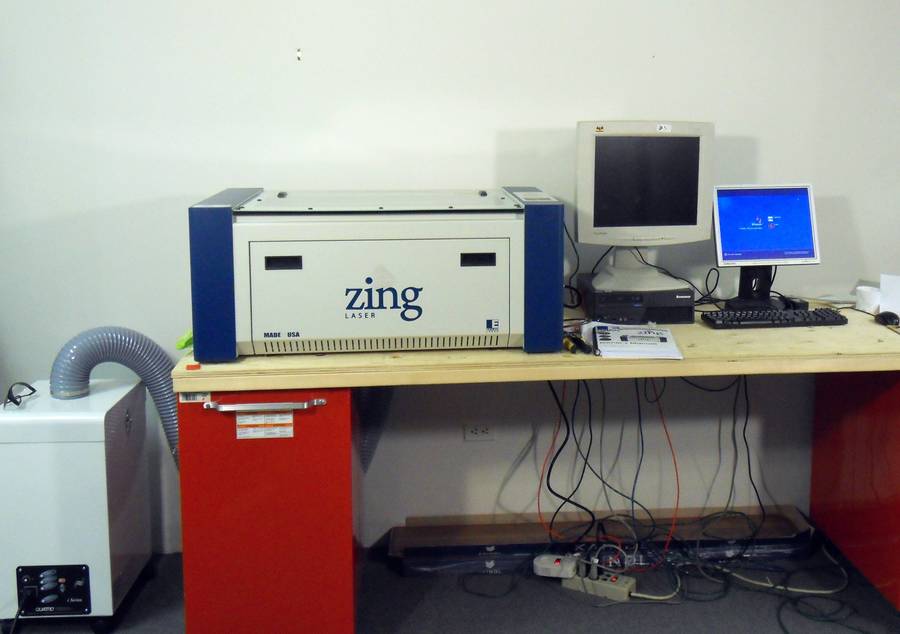
A cool pieces of equipment they have is a laser cutting machine, and I thought it would be neat to try to make some gears on it, and make a video of the process.
I made sure the latest version (3.02) of my gear program has the ability to export PDF that the machine can use directly without any intervening steps.
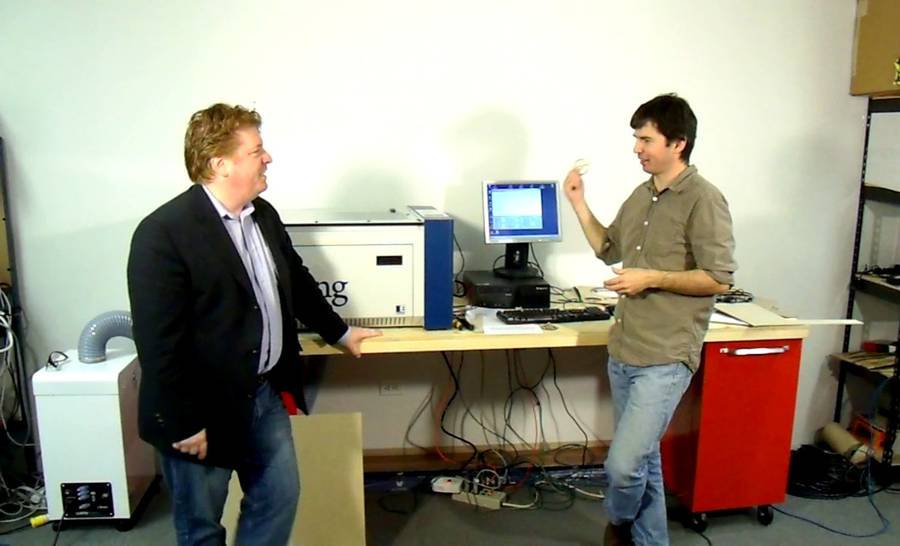 I never used a laser cutter before, but my friend
Darcy has used it extensively, so I worked together
with him on this. In fact, there's more of Darcy in this video than me.
I never used a laser cutter before, but my friend
Darcy has used it extensively, so I worked together
with him on this. In fact, there's more of Darcy in this video than me.
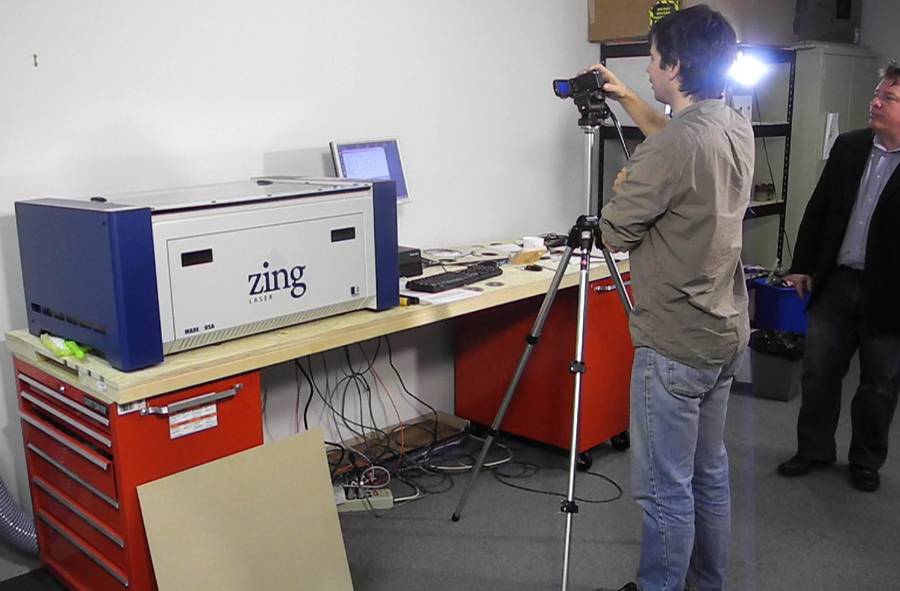
It's amazing how much more complex a video shoot becomes when it's not in my house and involves more than just me. Have to shoot all the scenes and hope they are good.
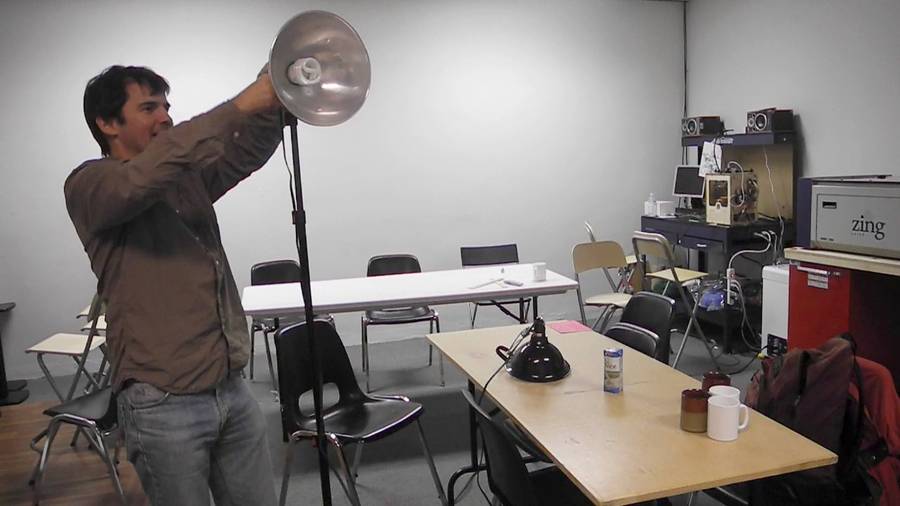 I brought some extra lights. Video quality improves noticeably if you light up
the subject a bit more. Still, my lighting is quite modest. When the
people from CTV were shooting in my workshop, they had about 800 watts of lights. All I used
was about 50 watts of CF bulbs.
I brought some extra lights. Video quality improves noticeably if you light up
the subject a bit more. Still, my lighting is quite modest. When the
people from CTV were shooting in my workshop, they had about 800 watts of lights. All I used
was about 50 watts of CF bulbs.
 For the computer shots, I just aimed my camera at the computer screen. That worked out fairly
well for the bandsaw vs CNC video, but for this one, it didn't come
out very well. Oh well, not going to reshoot that part.
For the computer shots, I just aimed my camera at the computer screen. That worked out fairly
well for the bandsaw vs CNC video, but for this one, it didn't come
out very well. Oh well, not going to reshoot that part.
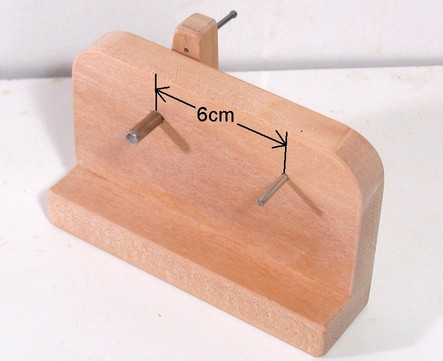 I previously built a wooden frame to mount the gears on, with two shafts 6 cm apart.
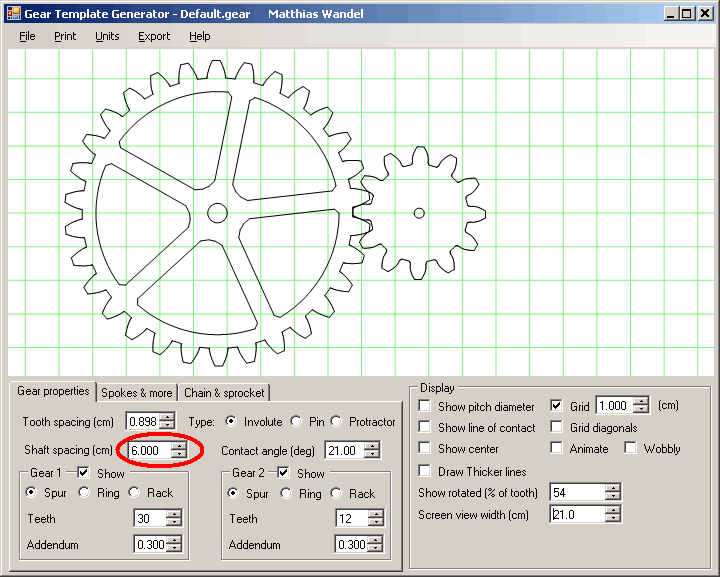
A cool feature of the gear program is that it displays the calculated shaft spacing of the two gears. But you can also use that value as an input value, and the program will adjust the tooth size to produce exactly that shaft spacing. Very handy in this instance.
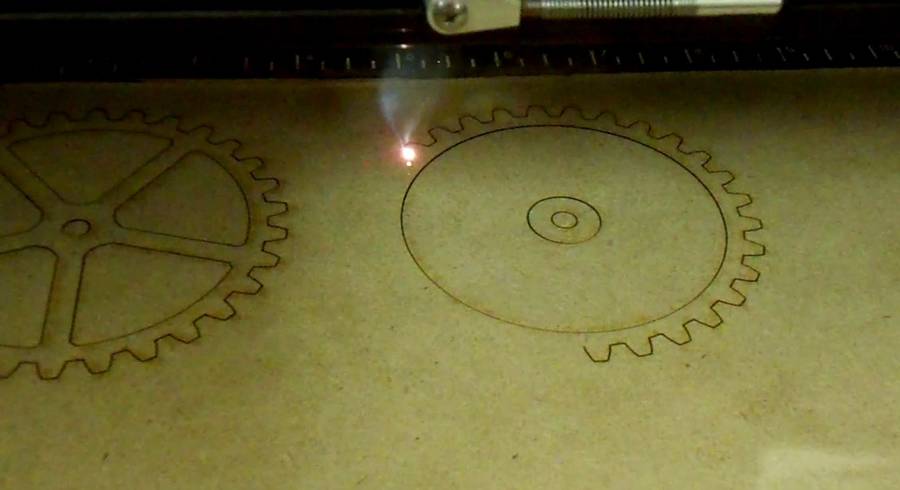 To cut the gears on this laser cutter, we exported the gear as PDF, and then "printed" it to the
laser cutter printer driver.
To cut the gears on this laser cutter, we exported the gear as PDF, and then "printed" it to the
laser cutter printer driver.
The gears are made in three layers. The larger of the two gears has spokes, but only on the middle layer. To make the "no spokes" layers, I turned on spokes, but set the number of spokes to zero. That produced a gear ring and a hub.
 I thought it would be a neat idea to make a video from inside the machine.
The machine produces a lot of smoke, so it has to be operated with the lid closed.
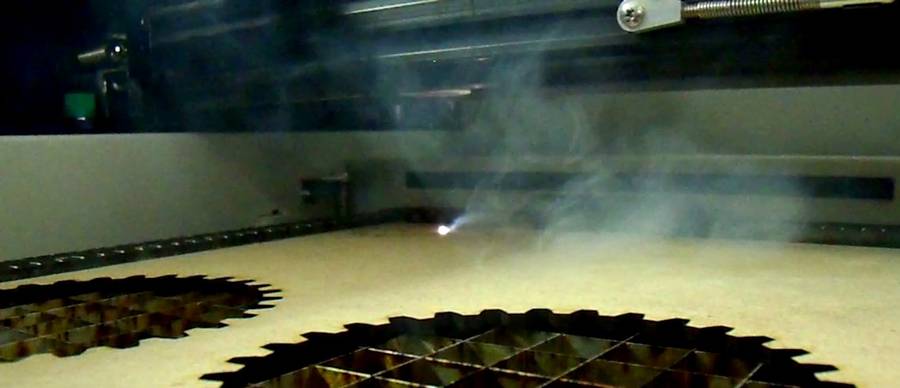 Here's the view inside the machine. Lots of smoke drifting around. Ventilation to clear the
smoke is important, because the smoke will interfere with the laser beam.
Here's the view inside the machine. Lots of smoke drifting around. Ventilation to clear the
smoke is important, because the smoke will interfere with the laser beam.
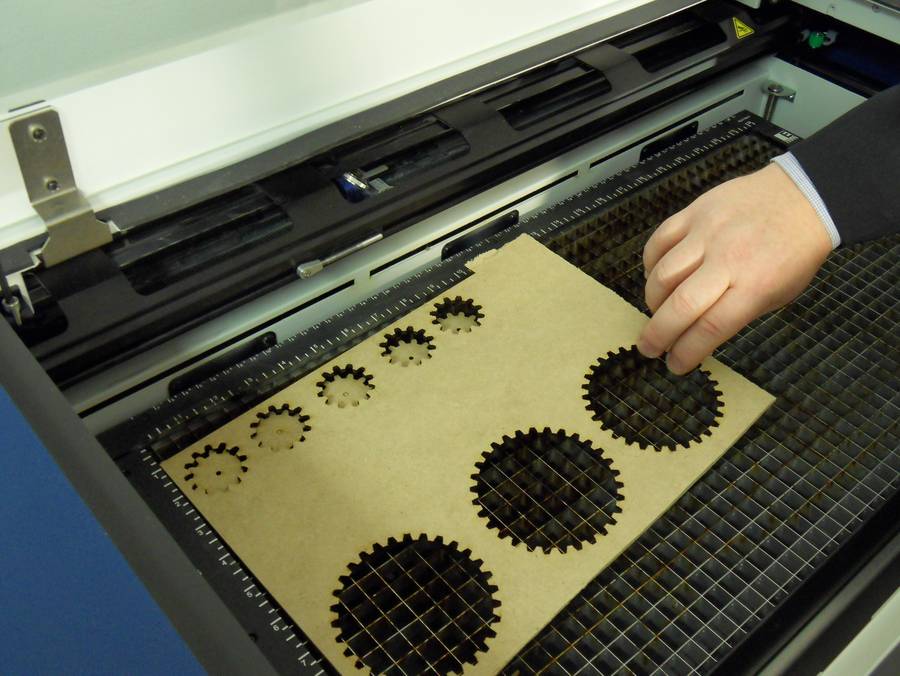 Its so cool how the gears just stay lying on the bed when the rest of the sheet is removed.
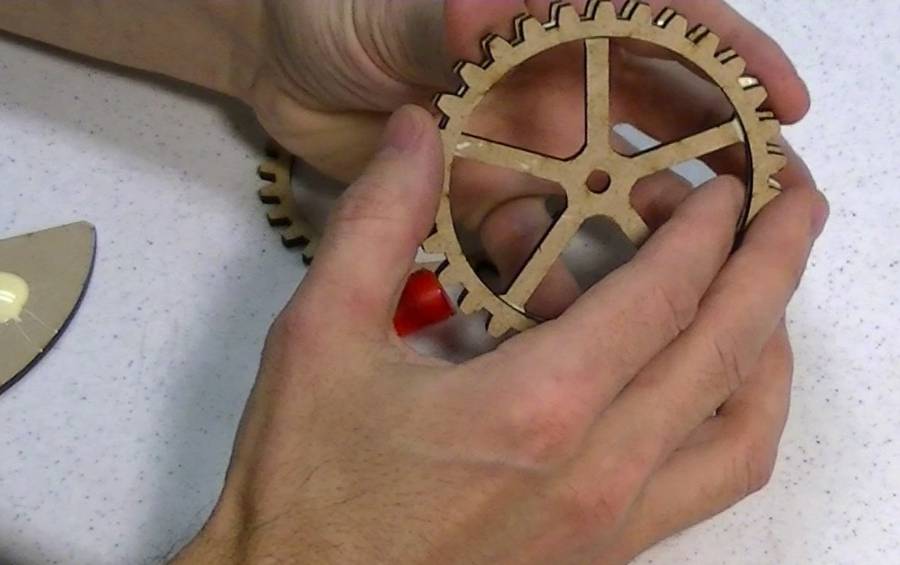 Next gluing the gear layers together, being careful about alignment.
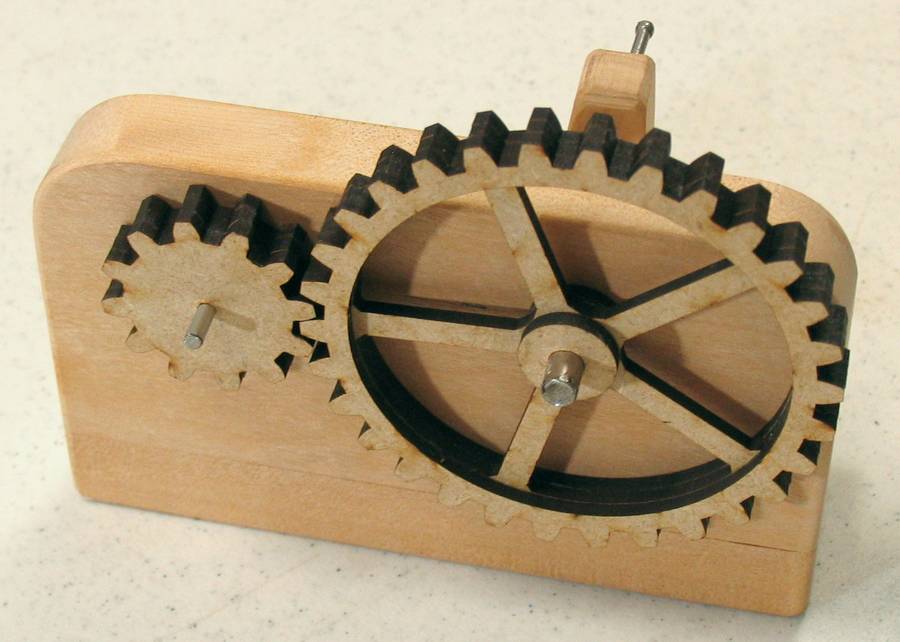 And the finished gear toy. The gears run really smooth and precise.
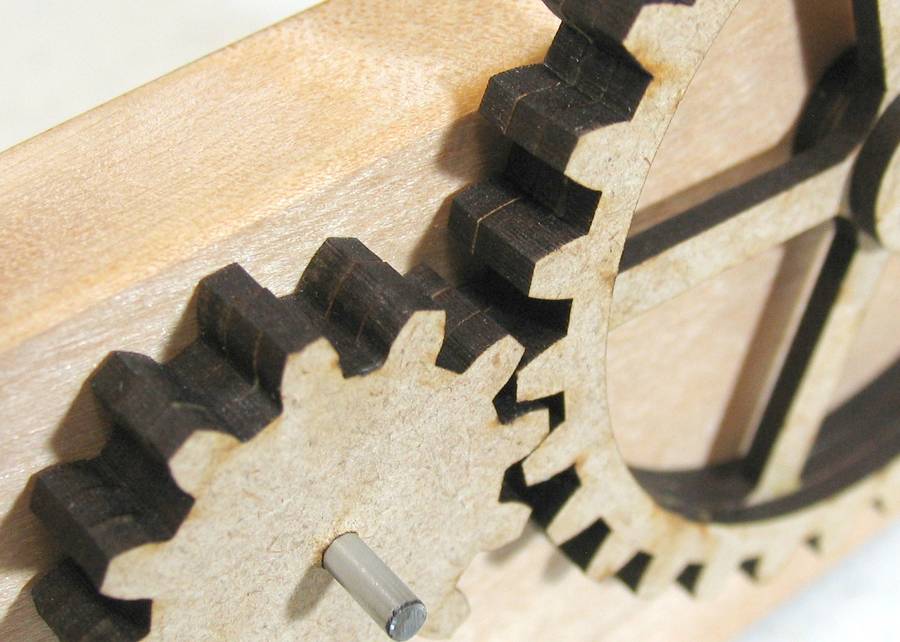 A closer look at the gears. This is what the edges look like straight out of the laser
cutter, no sanding or de-burring needed.
A closer look at the gears. This is what the edges look like straight out of the laser
cutter, no sanding or de-burring needed.
Downsides are that you can only make shapes with charred edges, and that all the parts have a slight burnt smell to them.
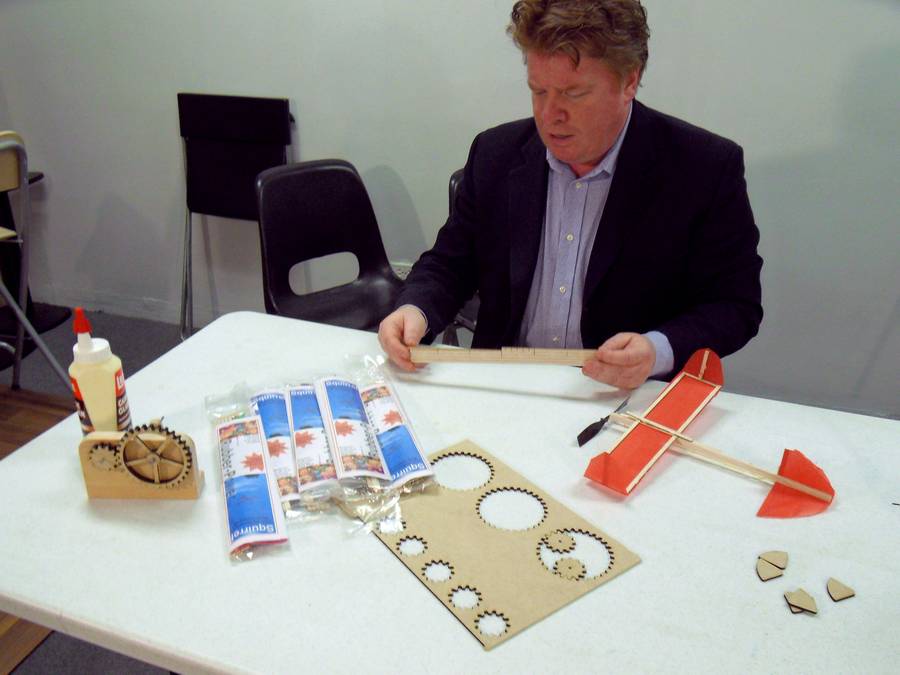 Darcy has been experimenting with using the laser cutter for his model airplane business.
He sells rubber band airplane kits online. An advantage of
cutting the kits on the laser cutter is that he can leave some tabs sticking the finished
pieces together. That means less checking that all the parts are in every kit.
Although at this time, the kits are cut with the aid of some machines he designed himself.
Darcy has been experimenting with using the laser cutter for his model airplane business.
He sells rubber band airplane kits online. An advantage of
cutting the kits on the laser cutter is that he can leave some tabs sticking the finished
pieces together. That means less checking that all the parts are in every kit.
Although at this time, the kits are cut with the aid of some machines he designed himself.
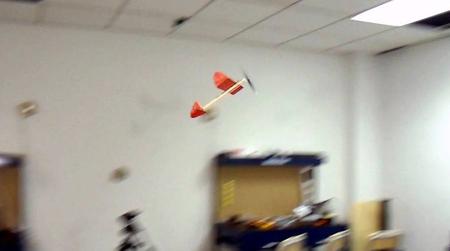 It's actually quite surprising how far one of these little rubber band planes can fly. Of course,
flying it in the lab, it doesn't go far before it hits the wall. Darcy tweaked this one
to fly at a slow near-stall speed, so it didn't hit the wall right away!
It's actually quite surprising how far one of these little rubber band planes can fly. Of course,
flying it in the lab, it doesn't go far before it hits the wall. Darcy tweaked this one
to fly at a slow near-stall speed, so it didn't hit the wall right away!
I have to say, a laser cutter like that is pretty neat. This one only goes to about 3 mm thickness, but I have seen 1/4" (6 mm) laser cut plywood parts. But other than cutting the occasional gear or templates for the pantorouter, I couldn't really use one for most of the stuff that I build. You just can't do very much joinery with a laser cutter.
For a tinkerer like me, figuring out how to do stuff takes far more time than the actual cutting, so overall, lasers and CNC would not speed things up much. But when I do design stuff in CAD, I often print 1:1 paper templates using my BigPrint program and cut those out on the bandsaw. Granted, a CNC machines usually cut faster, but the setup time for 1-off jobs is so much bigger, that I'm probably better off just cutting stuff out on the bandsaw.
 Update March 2015:
Nathan Jones writes:
Hi Matthias,
Just a quick message to say thank you for your gear generator program.
I've used it to cut gears on my laser cutter recently and it has worked
really well. I mounted the gears on some 3 mm clear acrylic, which is
edge lit with LED's. I also found your article on planetary gears really
helpful in this build.
After assembly the gears all meshed perfectly and the only problem I
had was proper alignment of the bearings within the gears. Its all
powered by a 12 volt 10 rpm geared dc motor so it would run off the
power supply with the LED lights. Everything is laser cut from 5 mm
bamboo sheets including the box at the base.
We were planning to use this to attract people to our market stall
where we sell other laser cut things, but I think it will probably end
up in our kids room as a cool night light for them.
Watch it on YouTube
Thanks once again, I really enjoy your projects and always look forward to your videos.
Many thanks
Nathan Jones
Beam Designs
UK
 BigPrint program
 Bandsaw vs CNC
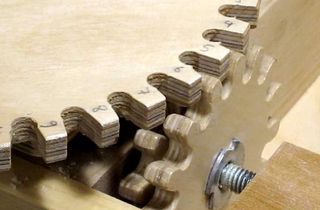 How to make gears
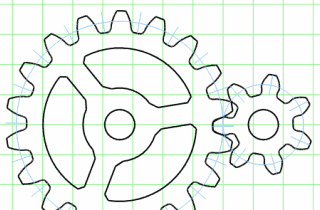 Gear generator
 3D router pantograph
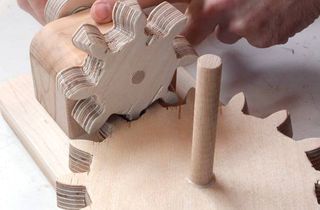 Making right angle gears
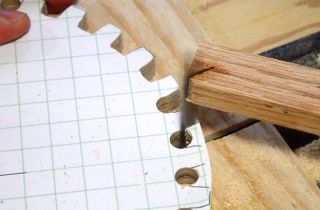 Making gears with