Ken Coulter writes:
Matthias,
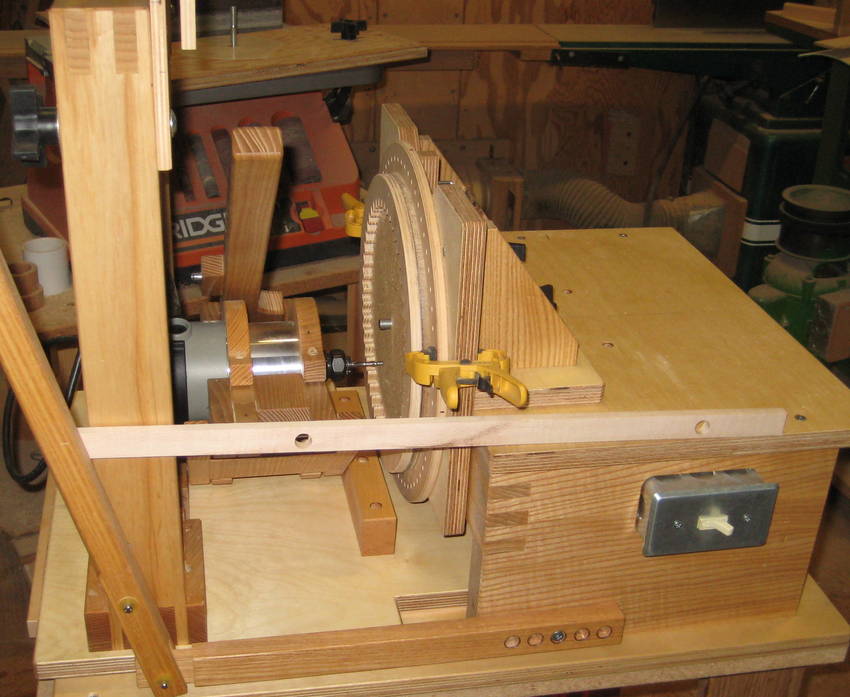
I purchased your pantorouter plans on June 2, 2011; ... I incorporated a few modifications that you probably wouldn't find too outrageous.
I made it bigger, mostly in order to have a longer reach, so I could use it to make gears. Mine, even so, will only make about 48-50 tooth gears at 15mm spacing. That's not so bad, though.
Another thing I incorporated, out of force of habit, which I highly recommend, comes from 30+ years of organ building. We organ builders, have what we call the 20mm rule for screws. To wit, no screw head is allowed to be more than 20mm from the piece it threads into, because of the shrinking/swelling characteristic of wood.
I'm enclosing some photos, the second of which shows a finished 48 tooth ring gear. I didn't ever see any indication that you were using your pantorouter for gear making. That's the main reason I wanted to make one.
I never used the pantorouter for making gears. For me, cutting them on the bandsaw with paper templates is precise and fast enough.
I asked about how difficult it was to align the segments:
I can't cut nice gears on my old, wobbly, beat-up bandsaw, so this was the best alternative.
The skinny stick running horizontally in this photo is a last minute idea as a plunge depth indicator. Especially useful when multiple passes are required, and where the tip of the router bit is not easily visible.
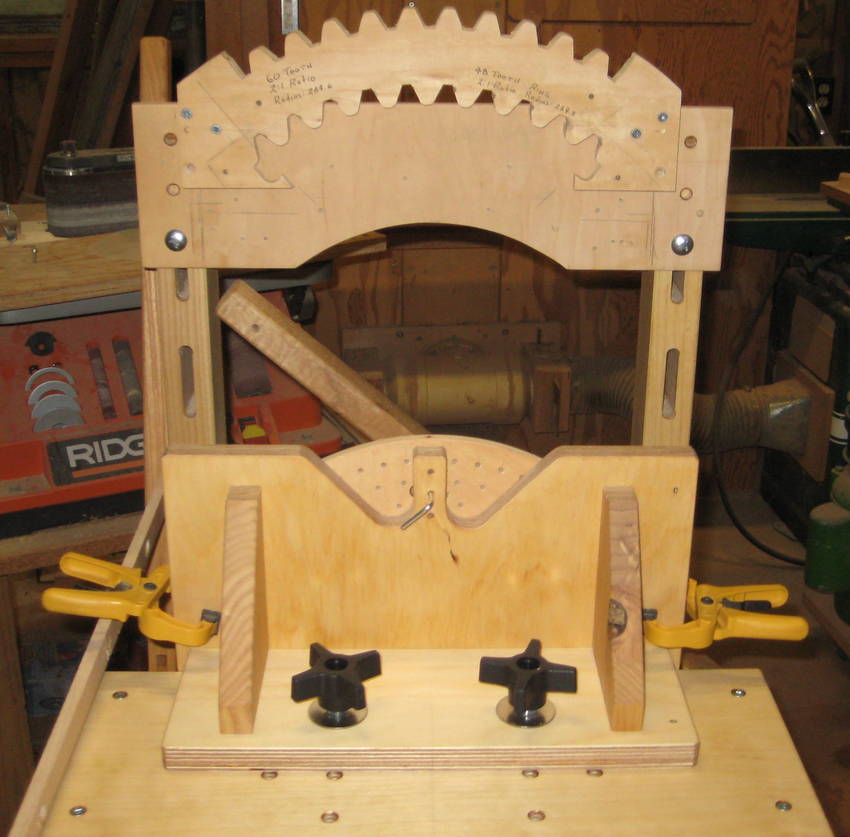
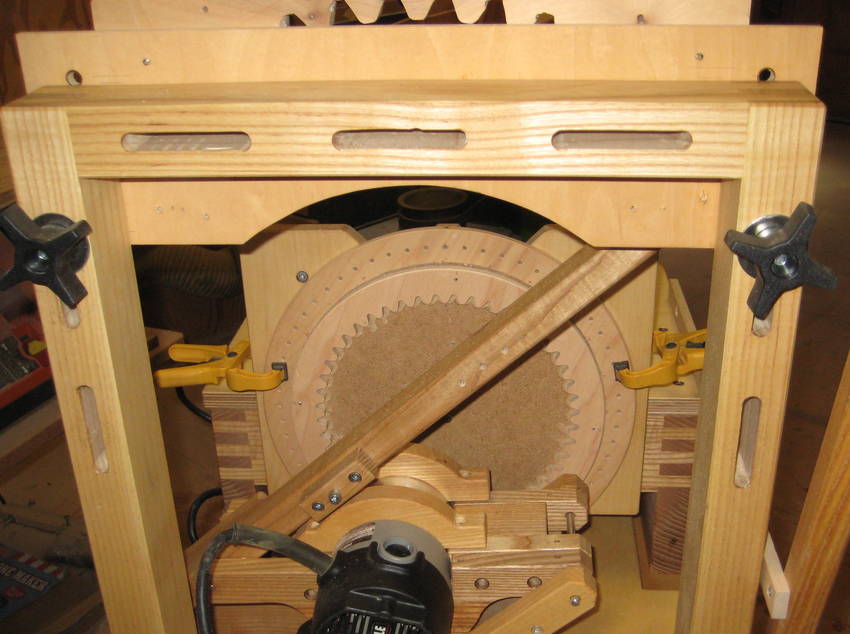
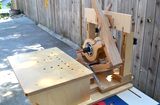
I don't really have to worry that much about aligning the segments; the piece attaches to an indexing wheel. The indexing wheel has three rings of holes: 60, 48 and 36. You can also get a lot of other gear sizes out of that by skipping holes.
The wheel is on a 9.5mm (3/8) center, which just fits into a 3/8 collet. The 2:1 pattern is cut based on its own proper center (hole drilled to fit around the follower bearing), and mounted on the bearing so that both centers agree. It's a one-time alignment, and you just spin the wheel to the next position and lock it in with a pin.
The pattern in the photo shows a 60 tooth involute above a 48 tooth ring. I make the pattern in 2 parts so the bottom can be removed after indexing the center; the center has to be removed once the pattern is locked in place, otherwise there isn't room to accommodate the router body. This would become obvious, at some point, but better to be forewarned.
On smaller gears, you can make the 2:1 pattern from a 4:1 pattern for greater accuracy. I make my tooth cuts with a hand held saber saw.
I have been using a 3/16 down-spiral, carbide router bit, and a 3/8 follower bearing. The bits I get are Whiteside brand, sold by Woodworkers World (http://www.woodworkersworld.net/). I think they are the best quality. 3/16 seems about the best size for the gullet of the tooth, at 15mm spacing.

A recently finished planetary system
More about planetary gears
 Ken Coulter's pantograph
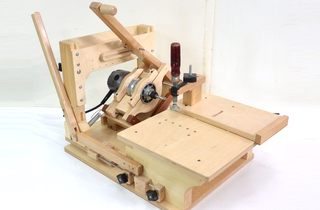 The Pantorouter
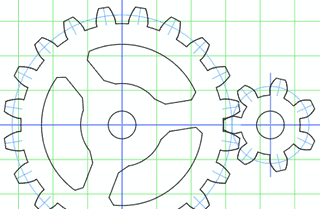 Interactive gear
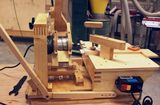 Bob McDermid's
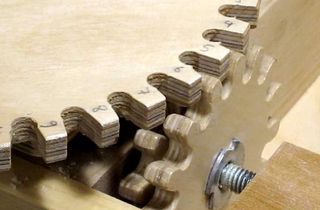 Making gears
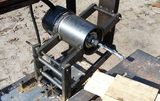
 More reader built pantorouter machines