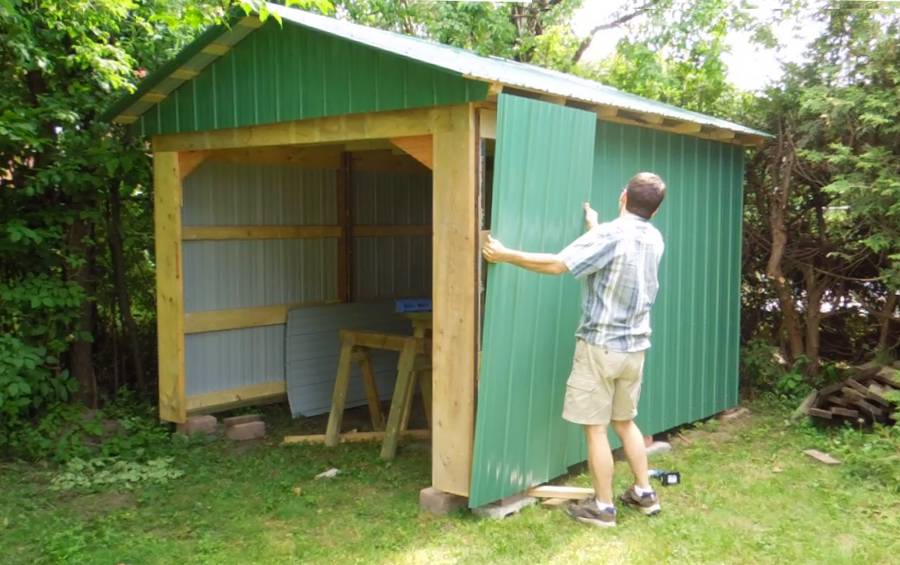
 With the shed erected, I could now put the rest of
the sheet metal on the walls and gables. But I also needed to make some doors
for the front wall.
With the shed erected, I could now put the rest of
the sheet metal on the walls and gables. But I also needed to make some doors
for the front wall.
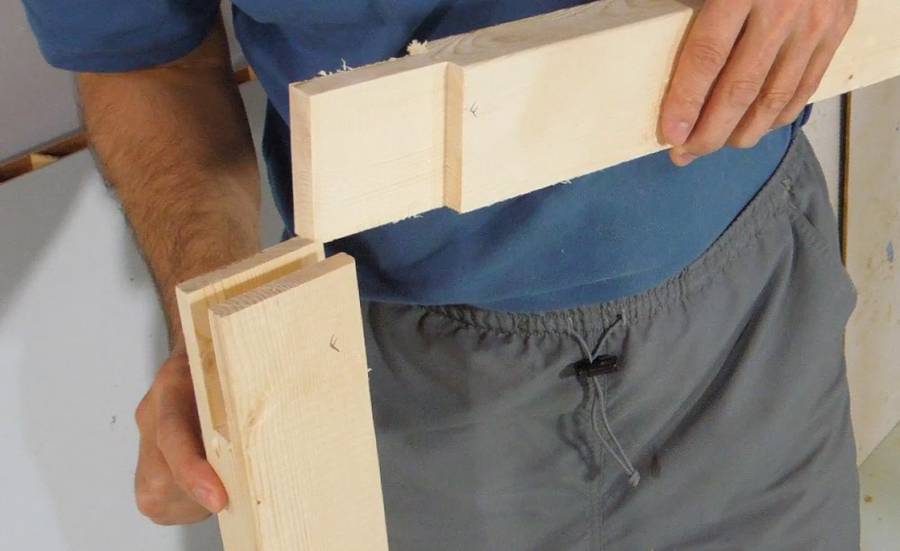 I used bridle joints to connect the corners of the doors. That makes for
a lot of joint surface, which should make for sturdy connections
I used bridle joints to connect the corners of the doors. That makes for
a lot of joint surface, which should make for sturdy connections
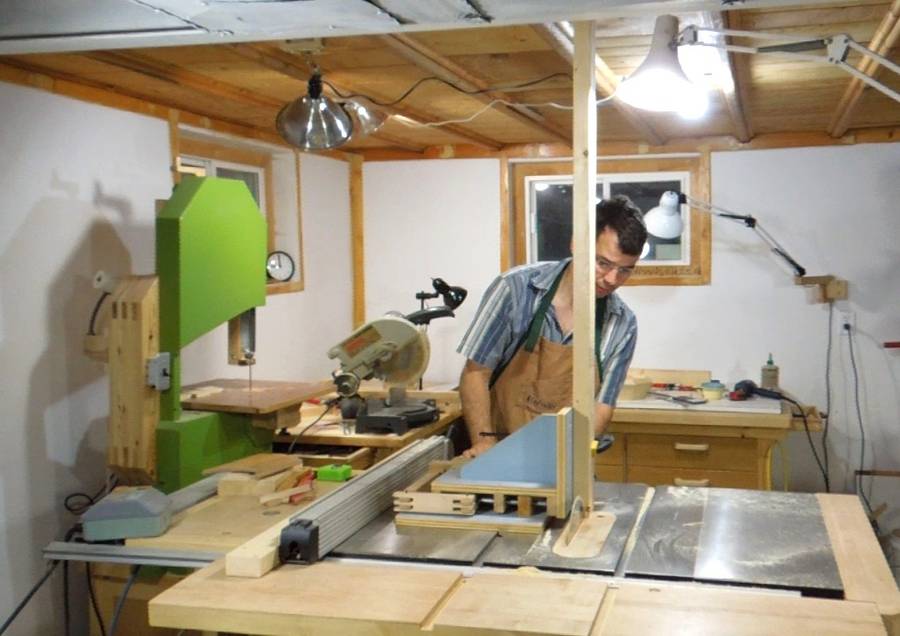 I just barely had enough room above my saw to cut the insides of the
bridle joints using my tenon jig without hitting the ceiling.
I just barely had enough room above my saw to cut the insides of the
bridle joints using my tenon jig without hitting the ceiling.
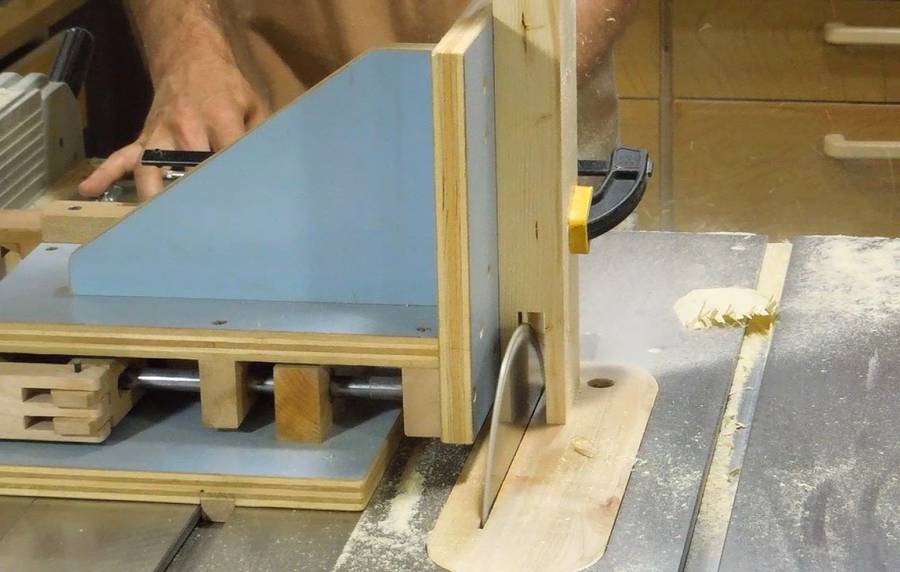 I cleared out the inside of the cut by making a series of cuts with
my quick-set tenon jig, and completely
flattened the top of the cut by moving the piece side-to-side over
the blade afterwards.
I cleared out the inside of the cut by making a series of cuts with
my quick-set tenon jig, and completely
flattened the top of the cut by moving the piece side-to-side over
the blade afterwards.
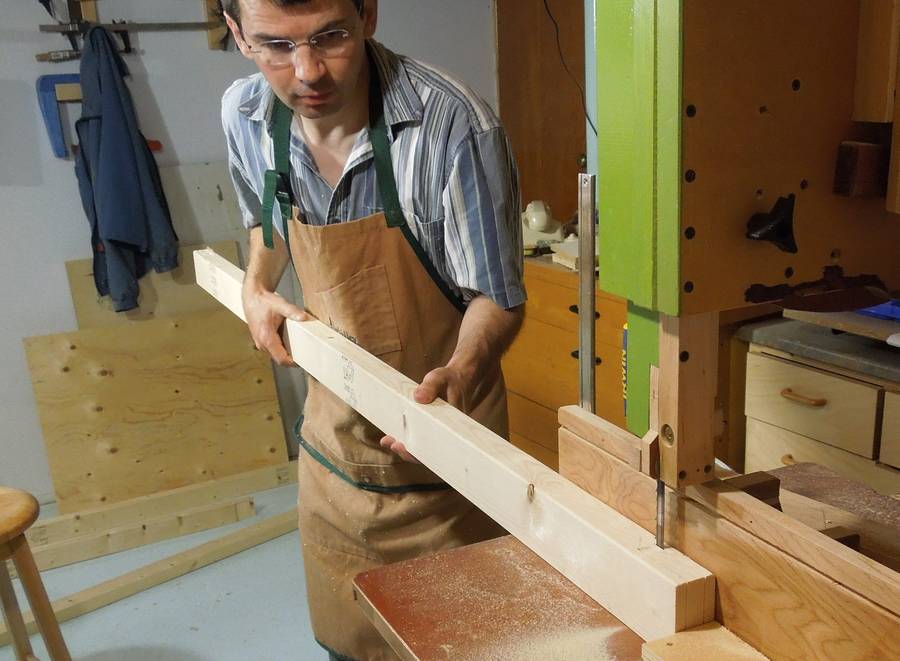 The vertical parts of the doors have a tenon on the end. At about
1.8 meter (6') in length, they were too long to cut upright on my table saw.
I can cut tenons on the end of very long stock
with my pantorouter or my
slot mortiser. But this time
I cut them on the bandsaw...
The vertical parts of the doors have a tenon on the end. At about
1.8 meter (6') in length, they were too long to cut upright on my table saw.
I can cut tenons on the end of very long stock
with my pantorouter or my
slot mortiser. But this time
I cut them on the bandsaw...
 ... and then cut the shoulders on the table saw. This method is definitely
less accurate, and I had to tweak the fit for some of the joints. With my
usual methods of making mortise and tenon joints, I don't need to make any
fit adjustments beyond the initial setup.
... and then cut the shoulders on the table saw. This method is definitely
less accurate, and I had to tweak the fit for some of the joints. With my
usual methods of making mortise and tenon joints, I don't need to make any
fit adjustments beyond the initial setup.
 A major challenge with making wooden doors is making sure they stay flat.
A twisted door just won't close flush, and if any part of the frame
has a tendency to twist, the whole door will develop a twist.
A major challenge with making wooden doors is making sure they stay flat.
A twisted door just won't close flush, and if any part of the frame
has a tendency to twist, the whole door will develop a twist.
Conventional doors, with a wood frame and two layers of plywood are quite stable against twisting. It's not a coincidence that conventional doors, with plywood on either side, and some webbing in between, are like a relatively flat torsion box.
 I was thinking of making something similar for these doors when it occurred to me
to just use an old door I already had kicking around.
I was thinking of making something similar for these doors when it occurred to me
to just use an old door I already had kicking around.
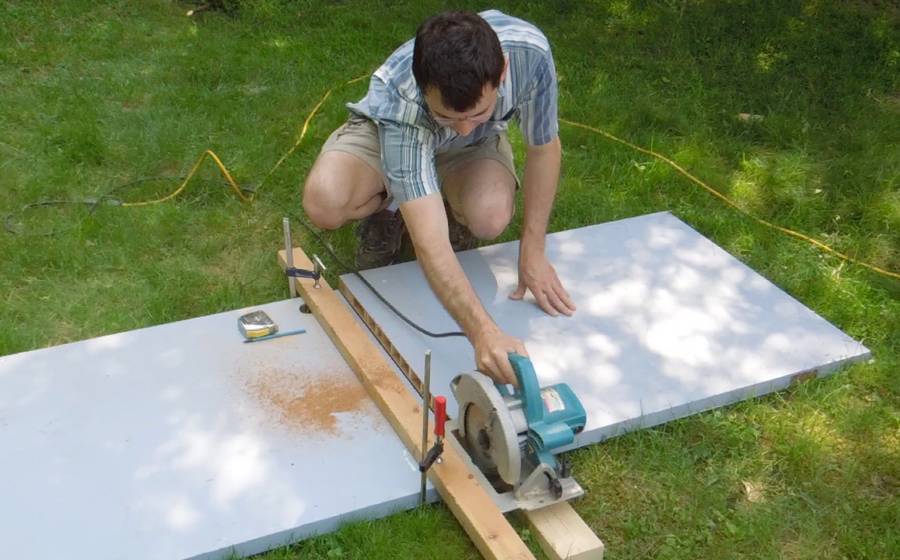
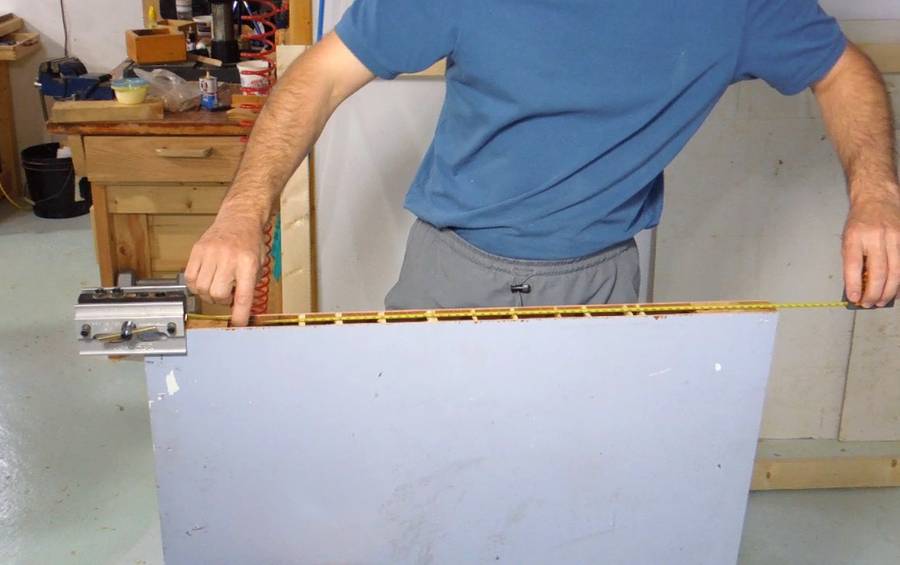
I started by cutting it in half.
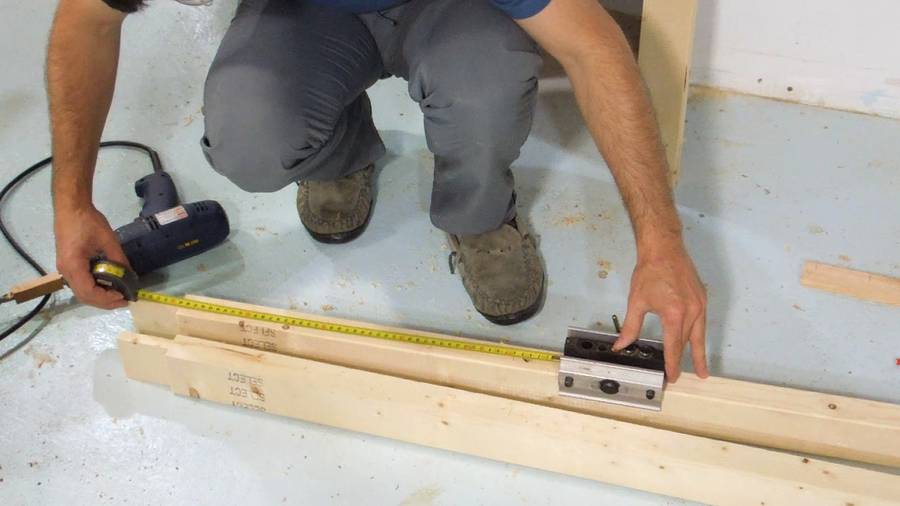
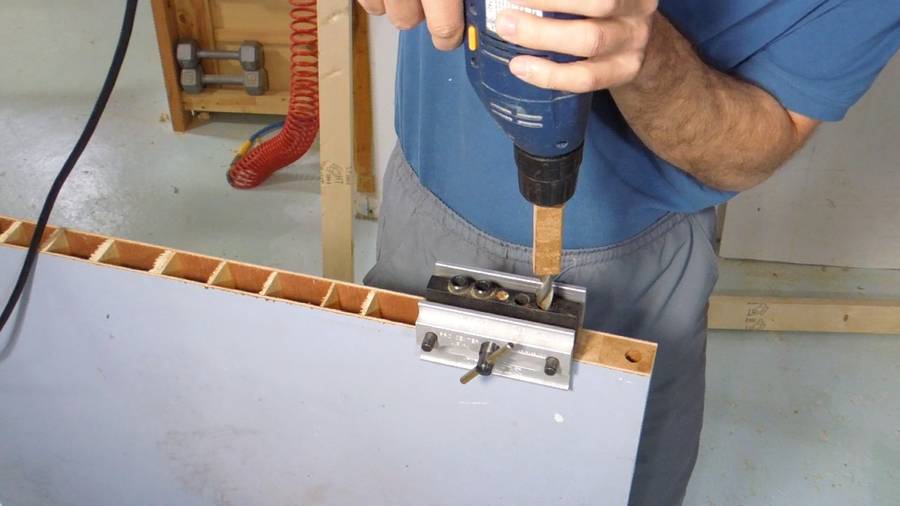 I used dowels to join the old wooden door with to larger door frames. I'm using
one of those self centering dowel jigs and
a hand drill to drill the holes.
I used dowels to join the old wooden door with to larger door frames. I'm using
one of those self centering dowel jigs and
a hand drill to drill the holes.
This jig has just one hole for the 1/2" drill bit, so I need to reposition it for each hole.
 By very carefully measuring the position for each placement of the jig,
I can get the holes for multiple dowels consistent enough for a good fit.
By very carefully measuring the position for each placement of the jig,
I can get the holes for multiple dowels consistent enough for a good fit.
The key is to always measure from the same side. For the last of the four holes in this door it was a bit awkward, but it was still manageable. The last hole would have been easier to drill if I had flipped the jig around, but that would have changed my reference. Although, in retrospect, as long as I also flipped the jig for the last hole in my rails, the measurements would have still been consistent.
 Now using the same measurements, but adding about 45 cm to each, I'm placing the jig for
drilling the dowel holes in the door frame rails.
Now using the same measurements, but adding about 45 cm to each, I'm placing the jig for
drilling the dowel holes in the door frame rails.
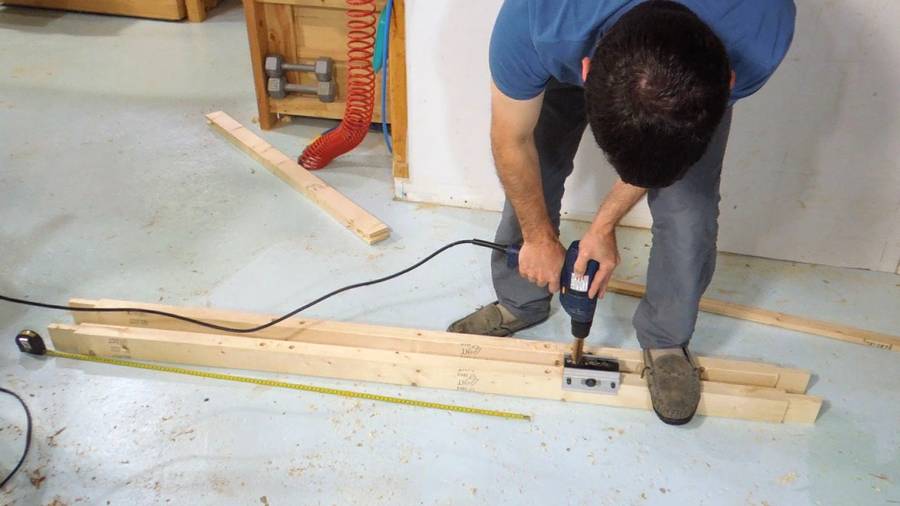 These were much easier to drill than the door!
 Next, gluing the dowels into the rails.
 And with glue applied, ready to attach the door to the rail...
 ... and then add the rail on the other side.
 It was a good fit. But even if it was off a little,
I have a rubber mallet in hand to make it fit regardless!
It was a good fit. But even if it was off a little,
I have a rubber mallet in hand to make it fit regardless!
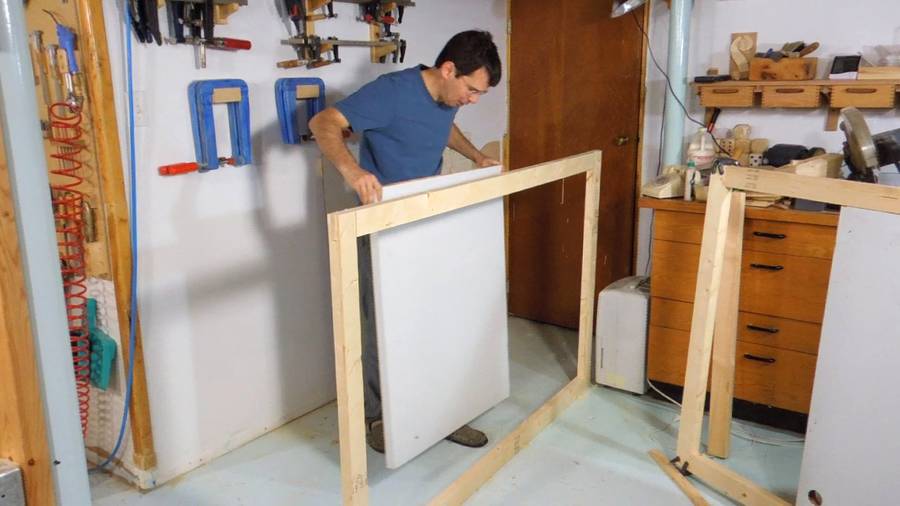
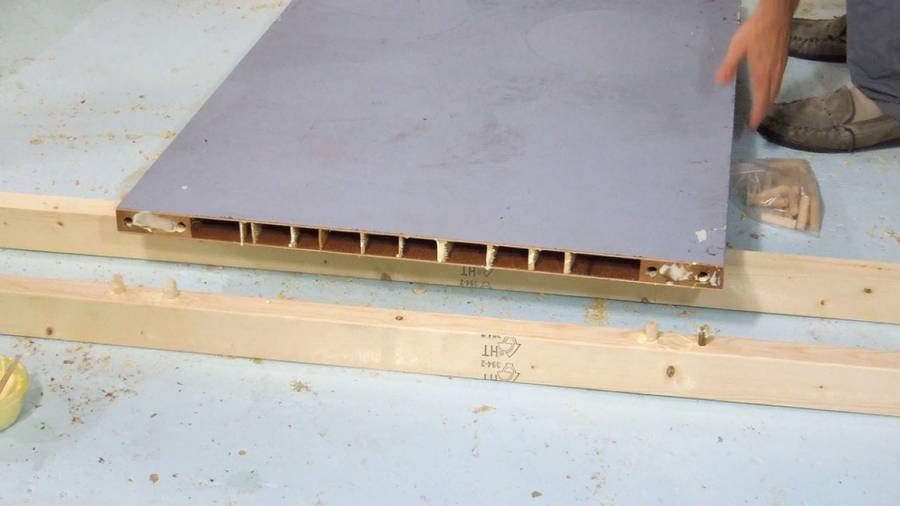
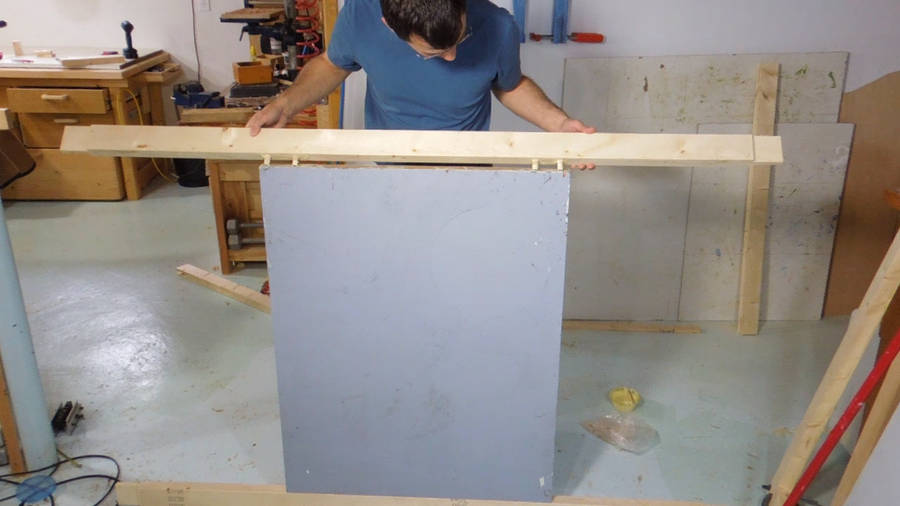
 With the door panels glued in, I can now assemble the rest of the frame around it.
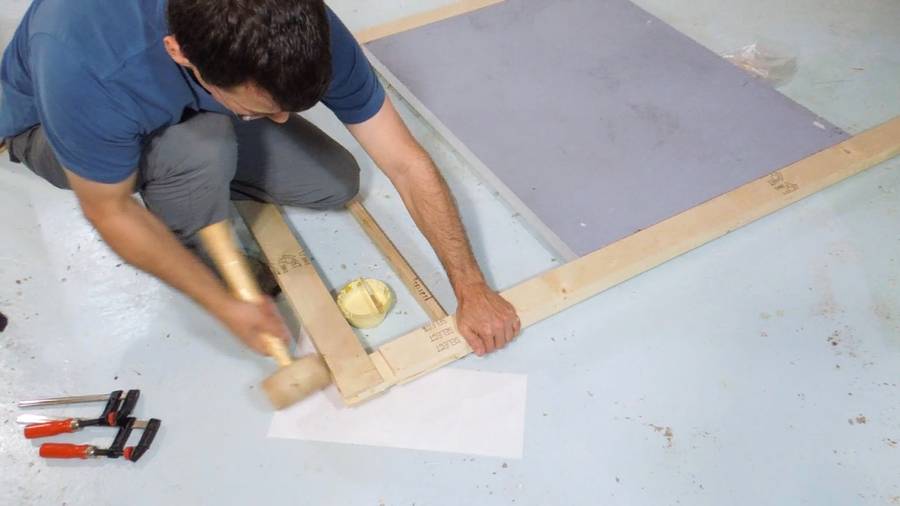
 I always put some clamps around joints like that, just to make sure they are nice
and tight while the glue dries. I also had to hook two clamps to each other to
pull the rails together (right side of picture, click picture to enlarge)
I always put some clamps around joints like that, just to make sure they are nice
and tight while the glue dries. I also had to hook two clamps to each other to
pull the rails together (right side of picture, click picture to enlarge)
I added a few nails to each corner. For outdoor projects, it's best to not rely on glue alone.
 With the doors outside, time to attach some hinges.
 I used a bar clamp and some wooden spacers to clamp the doors in the
right place before screwing the hinges onto the shed.
I used a bar clamp and some wooden spacers to clamp the doors in the
right place before screwing the hinges onto the shed.
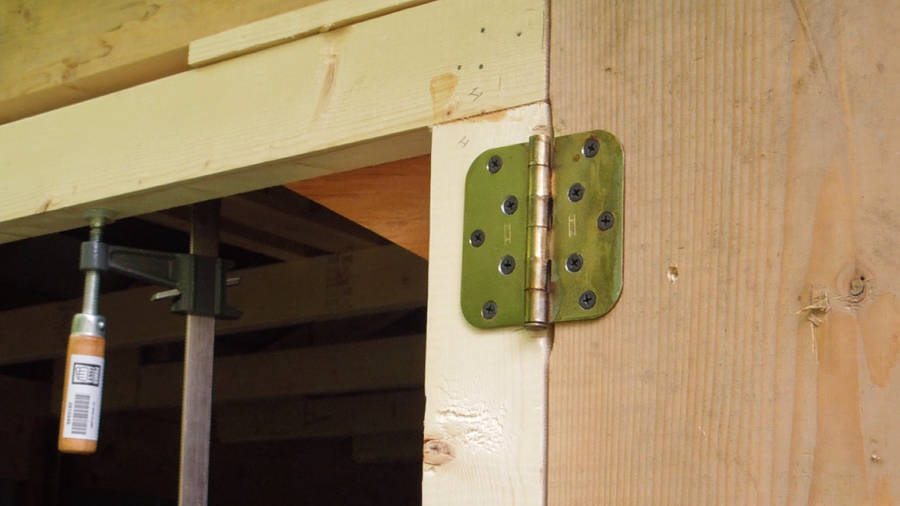 The hinges are just screwed flat onto the wood. These are just ordinary door hinges.
The "hinge" part of these is strong enough, but I was worried about them
possibly bending or pulling the screws out of the wood.
So for good measure, I drilled two extra screw holes nearer to the hinge's pin, first
by drilling a smaller hole through the hinge then using the tip of a
3/8" (10 mm) drill to add a countersink.
The hinges are just screwed flat onto the wood. These are just ordinary door hinges.
The "hinge" part of these is strong enough, but I was worried about them
possibly bending or pulling the screws out of the wood.
So for good measure, I drilled two extra screw holes nearer to the hinge's pin, first
by drilling a smaller hole through the hinge then using the tip of a
3/8" (10 mm) drill to add a countersink.
 Standing on the door while swinging it open. Looks like they hold well enough!
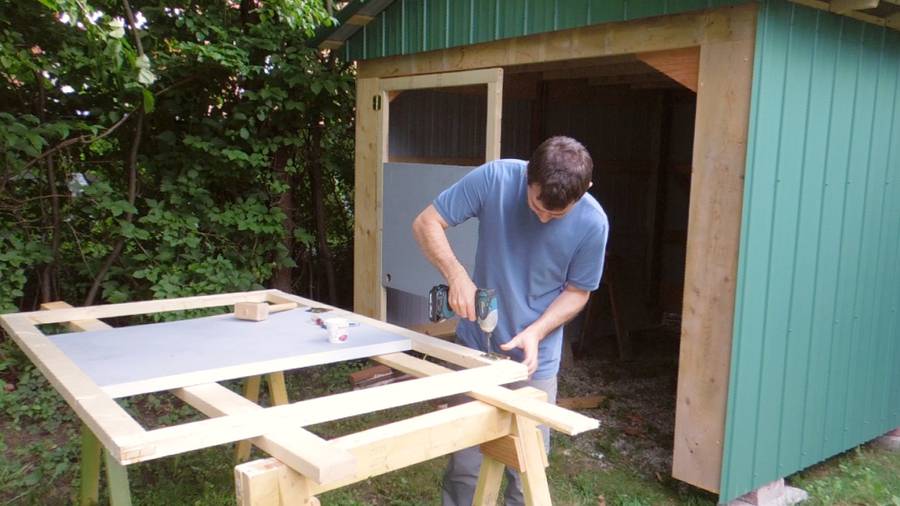
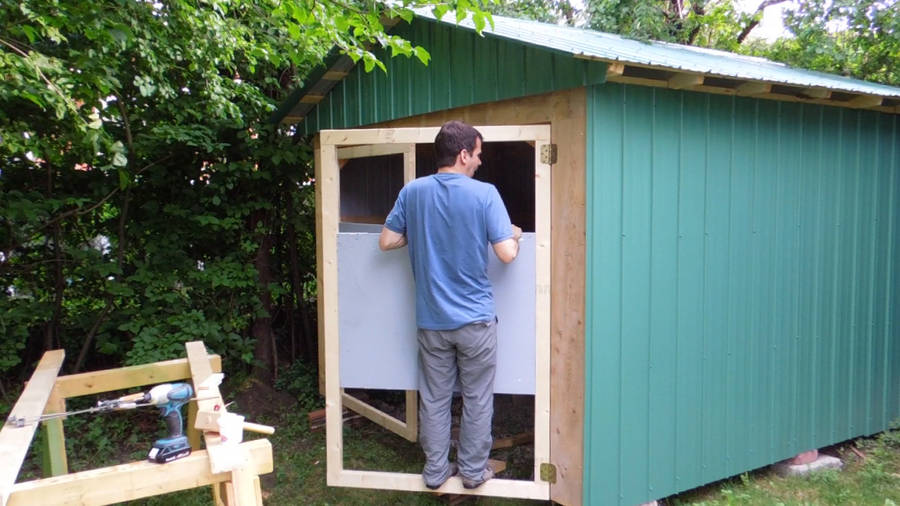
 With the doors in place, I could now work on putting the
metal sheeting on the front of the shed.
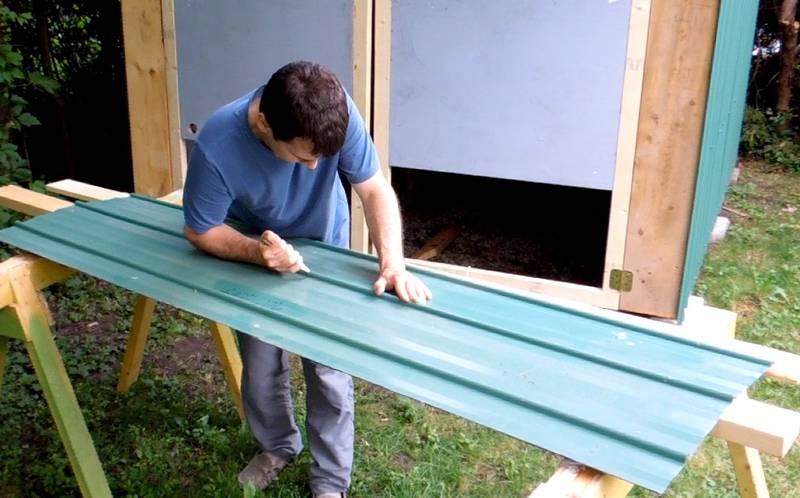
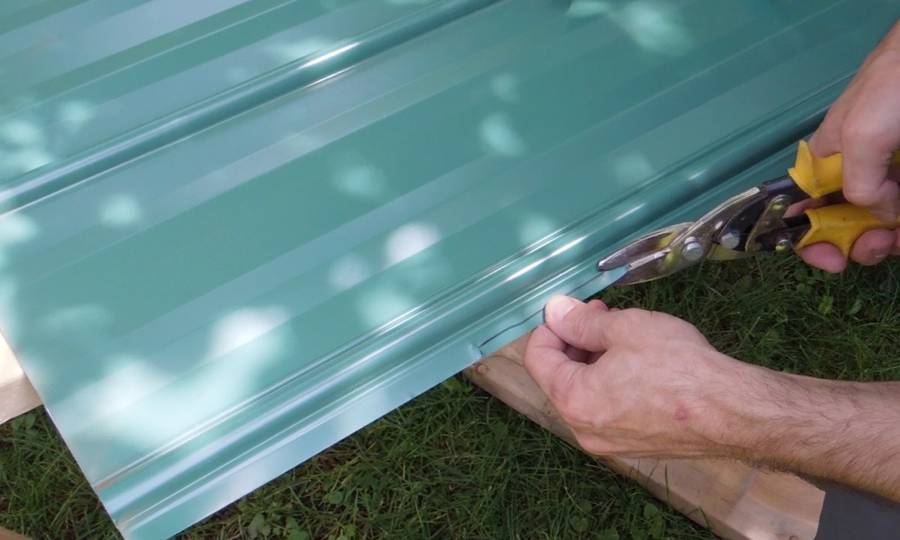
Here I'm making a deep score line with a knife, right next to one of the ribs
of the sheet metal.
With the doors in place, I could now work on putting the
metal sheeting on the front of the shed.
Here I'm making a deep score line with a knife, right next to one of the ribs
of the sheet metal.
 The score line sufficiently weakens the metal so that after bending back and forth
enough times, it will break along that line.
The score line sufficiently weakens the metal so that after bending back and forth
enough times, it will break along that line.
 Checking the fit, especially around the hinges...
 ... and then cutting a notch for the hinges.
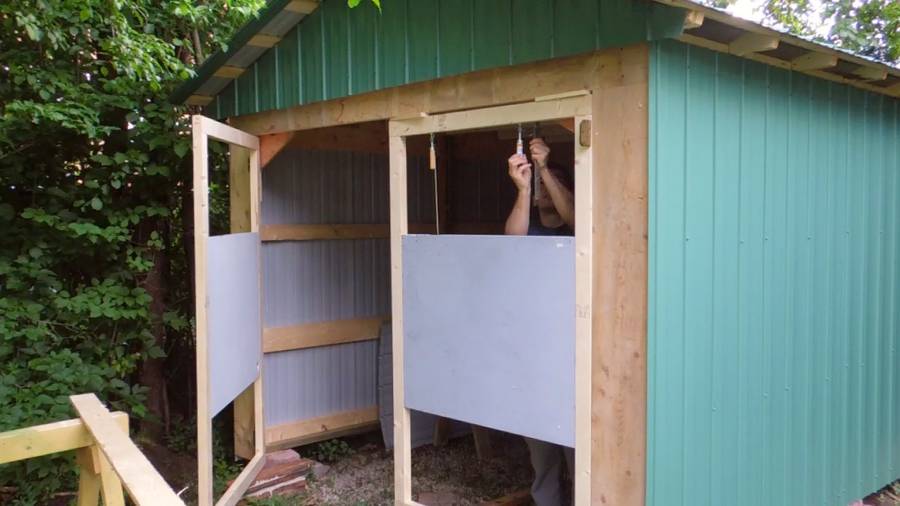
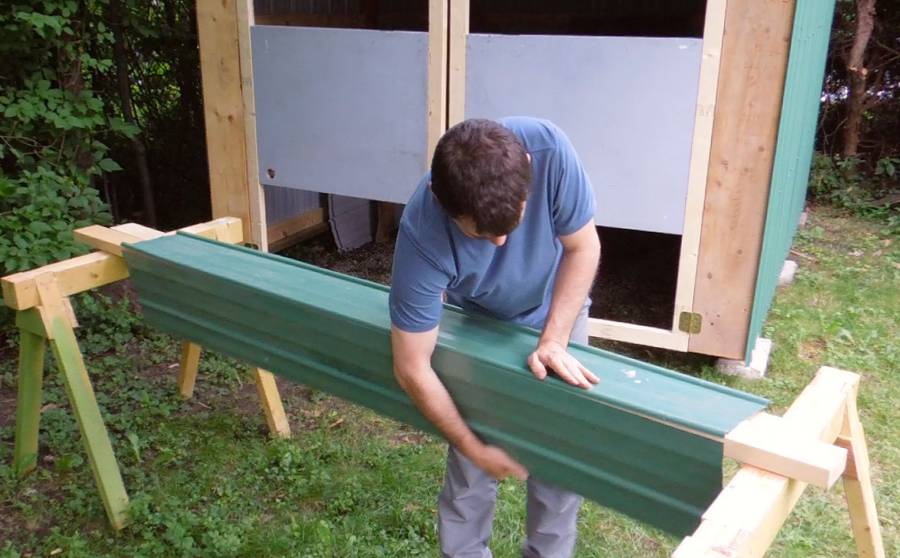
 I'm also covering the doors with the sheet metal.
This makes the shed look like it doesn't actually have doors. Looks
a bit odd that way. I wasn't actually aiming for that effect, but
it was the easiest way to finish it up, and the doors will be as weatherproof
as the walls.
I'm also covering the doors with the sheet metal.
This makes the shed look like it doesn't actually have doors. Looks
a bit odd that way. I wasn't actually aiming for that effect, but
it was the easiest way to finish it up, and the doors will be as weatherproof
as the walls.
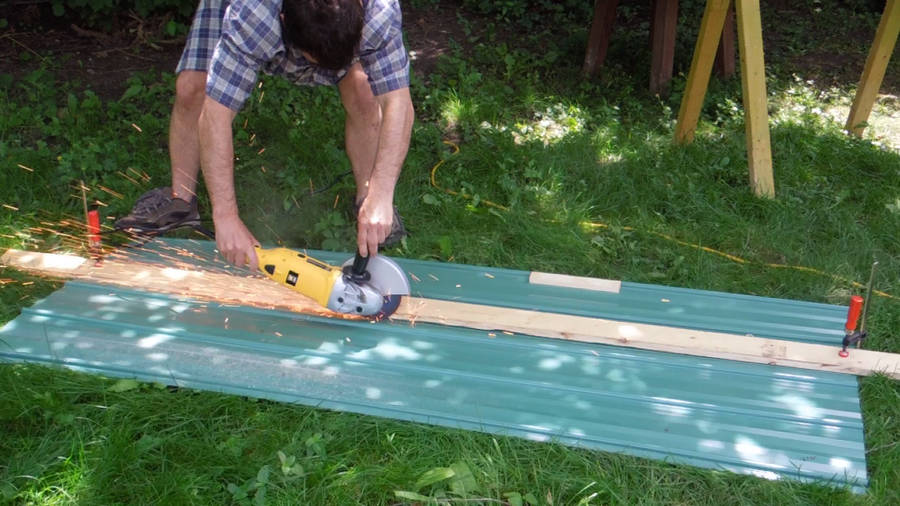 For the last segment of each door, I had to cut the sheets, but not along a ridge
line. I cut one by scoring and breaking it, but I had a hard time making a
score line deep enough without occasionally
slipping out of the groove as I deepened the score line. So I went back to using
my angle grinder to cut the second piece. Much faster!
For the last segment of each door, I had to cut the sheets, but not along a ridge
line. I cut one by scoring and breaking it, but I had a hard time making a
score line deep enough without occasionally
slipping out of the groove as I deepened the score line. So I went back to using
my angle grinder to cut the second piece. Much faster!
I actually cut it in a way that the sparks were mostly deflected down below the sheet metal, but a few times, I had the sparks coming out the top. That makes for a more interesting photo!
People have pointed out that the heat from grinding will damage the finish and lead to more rust than just cutting. But I haven't yet seen any serious problems from sheets cut that way, and, unless the cut is next to a rib, slipping off the score line will also damage the finish! I made the cut in several passes, which helps to keep the metal from getting too hot.
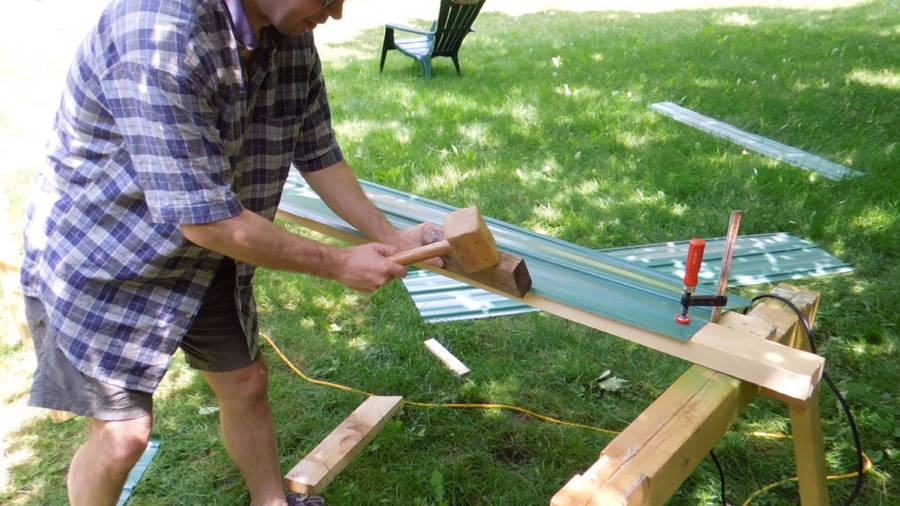
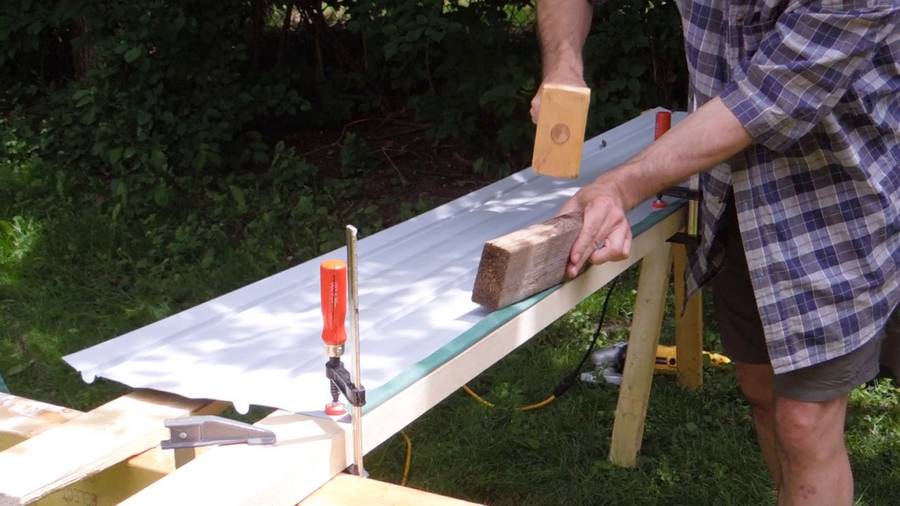
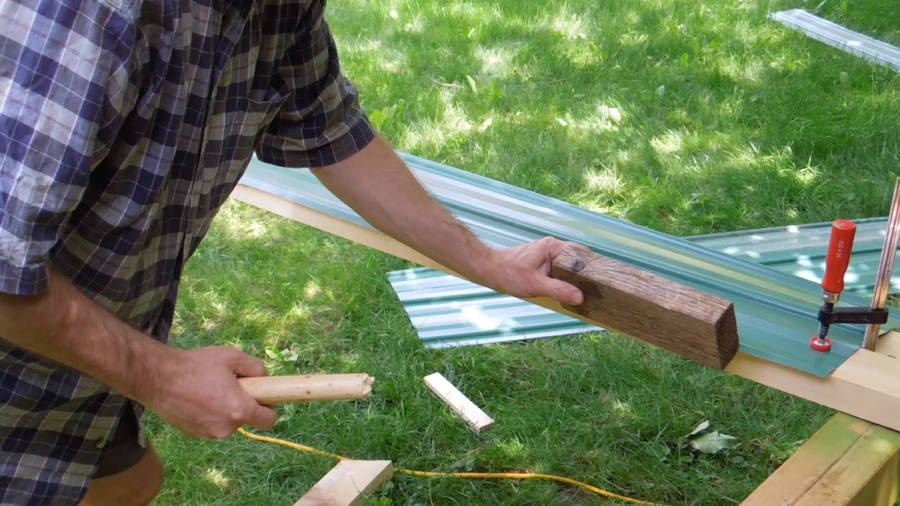 I didn't want a sharp edge on the doors, so I folded over the edge of the sheet
metal. This is normally done with a sheet metal brake, but sheet metal brakes
are large and expensive, so it's not the sort of tool I have. Instead, I clamped
the metal to a 2x4, and used a block of wood and a mallet to fold it down.
This involves quite a lot of vigorous pounding.
I didn't want a sharp edge on the doors, so I folded over the edge of the sheet
metal. This is normally done with a sheet metal brake, but sheet metal brakes
are large and expensive, so it's not the sort of tool I have. Instead, I clamped
the metal to a 2x4, and used a block of wood and a mallet to fold it down.
This involves quite a lot of vigorous pounding.
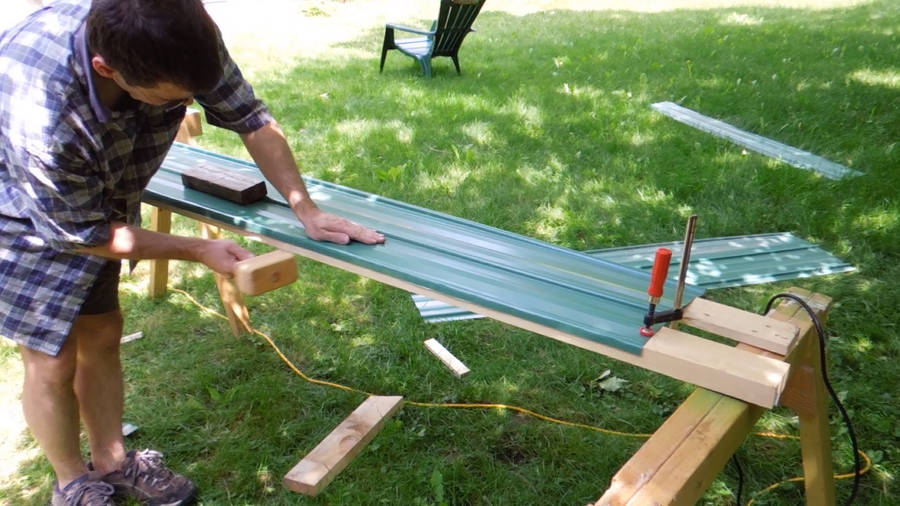
You may notice that I'm only holding a stick in my hand, not a mallet...
 ... That's because the above photo is from a fraction of a second after a blow
that broke the head off my mallet. Oops!
... That's because the above photo is from a fraction of a second after a blow
that broke the head off my mallet. Oops!
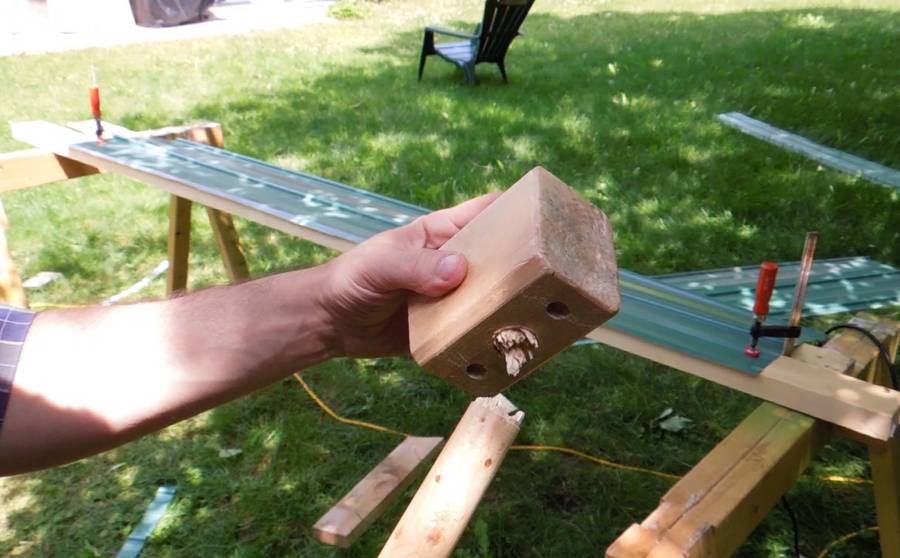
I guess I shouldn't have made that handle out of spruce. I've since drilled out the remainders of the old handle, enlarged the hole, and made a new oak handle for the mallet.
I have since refined this technique a bit
 But for the time being, I switched to my other wooden mallet to finish the job.
 For one of the doors, I only needed a 90-degree fold.
 The sheet metal, with the 90-degree fold installed on the door.
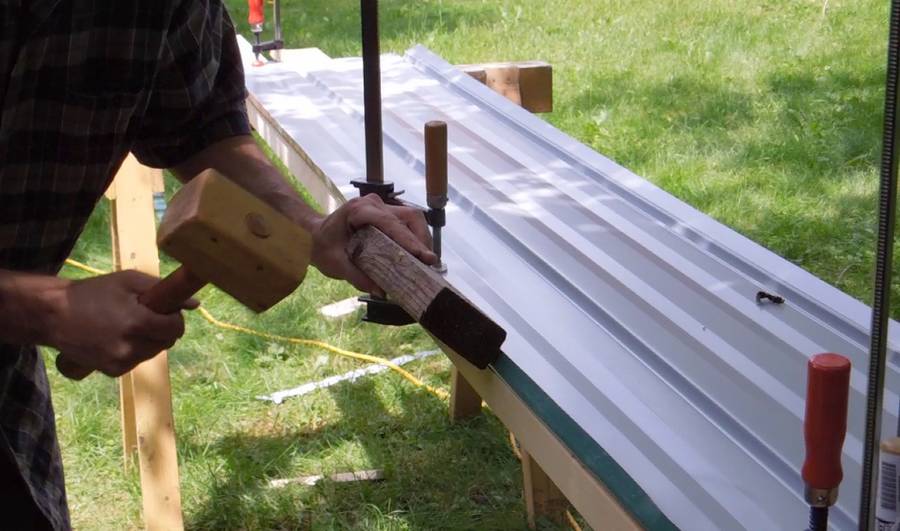 But for the right side door, I wanted to form a lip to overlap with the left door. To avoid
exposing a sharp edge, I needed to fold the metal over a full 180 degrees.
But for the right side door, I wanted to form a lip to overlap with the left door. To avoid
exposing a sharp edge, I needed to fold the metal over a full 180 degrees.
So after bending the metal 90 degrees, I flipped it over, and then used the block of wood and a mallet to fold the metal back onto itself.
 Nearly done...
 ... And finally whacking the fold flat.
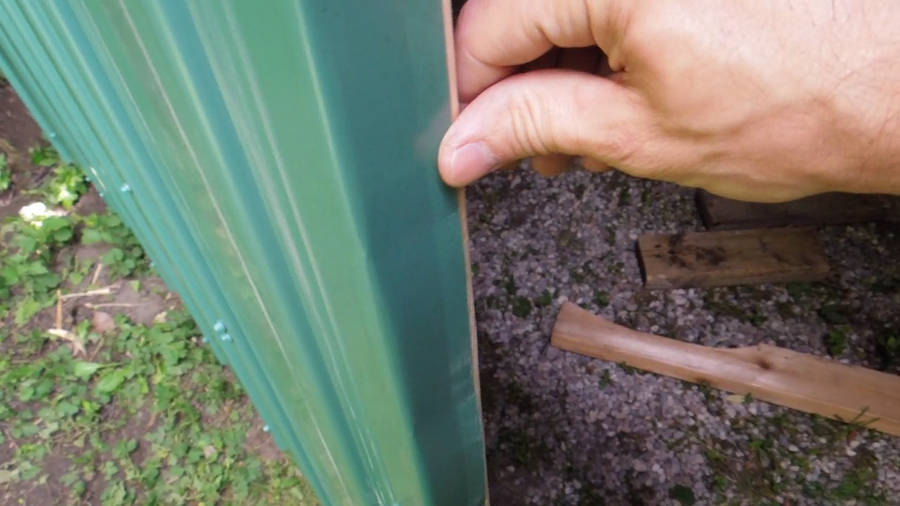
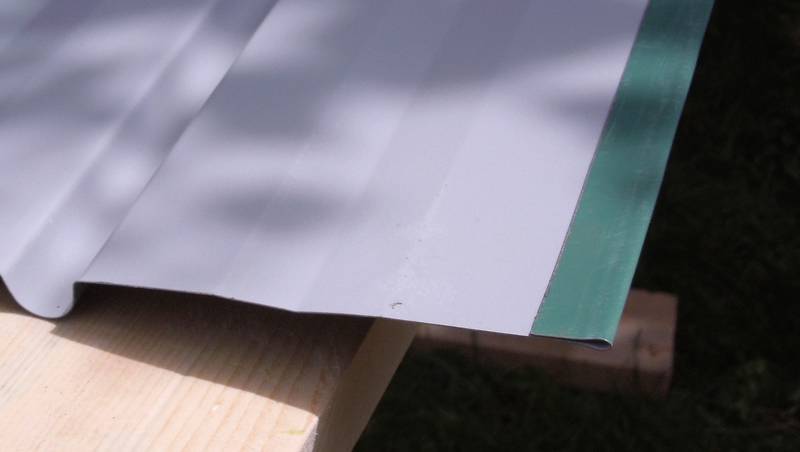 Here's what the finished fold looks like.
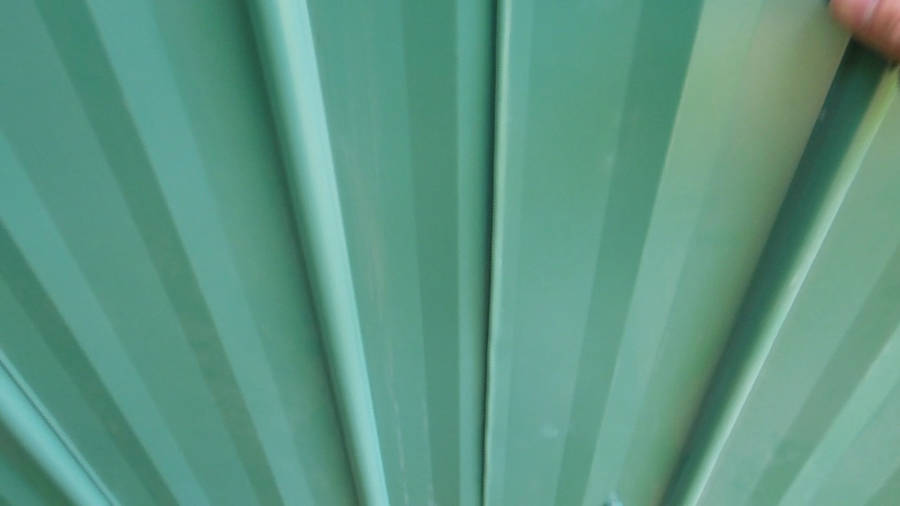 With both doors closed, and the metal overlapping, the edge
of the doors seems to almost disappear.
With both doors closed, and the metal overlapping, the edge
of the doors seems to almost disappear.
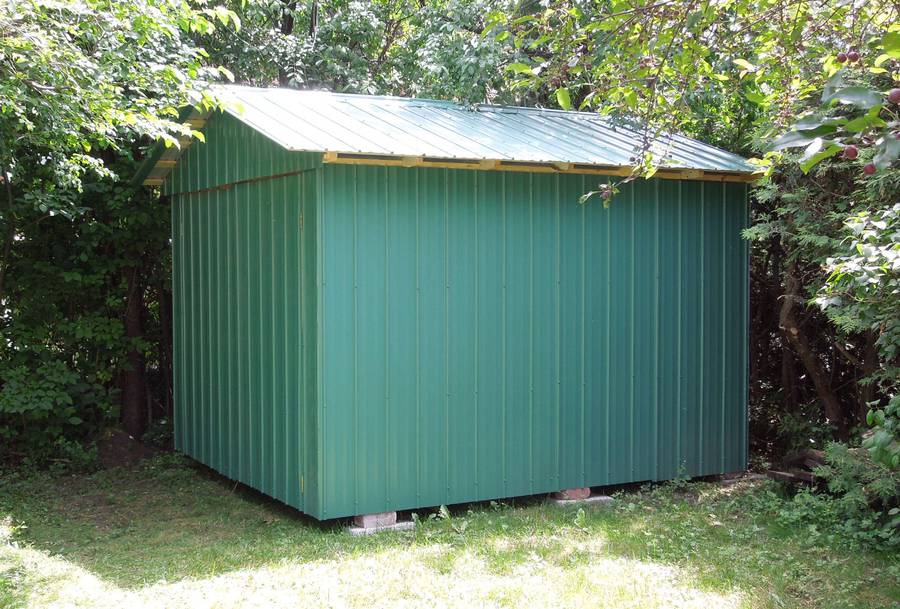 So the shed really looks like it has no doors.
I still need to add some door locking mechanism and handle, which
should help hint at the presence of doors.
So the shed really looks like it has no doors.
I still need to add some door locking mechanism and handle, which
should help hint at the presence of doors.
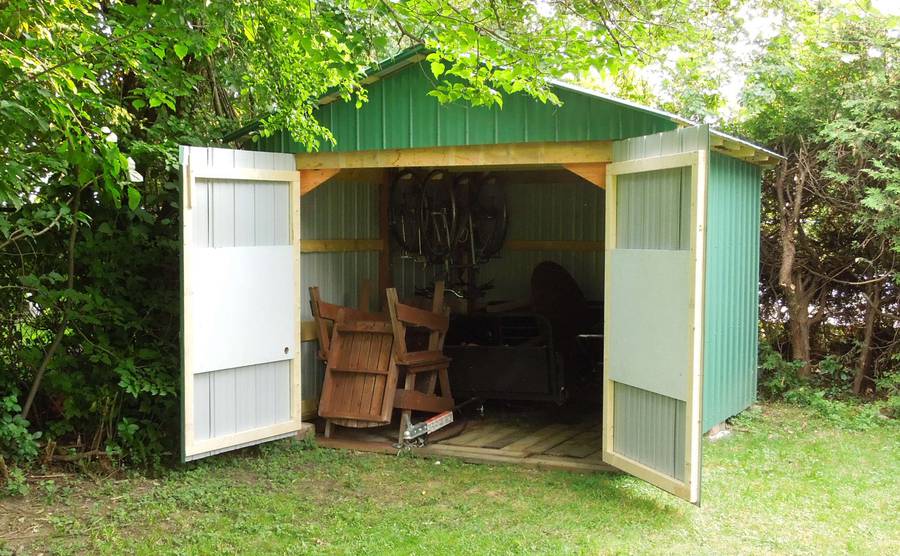 With the doors opened up, I can push my car trailer in there.
The opening would easily be wide enough to drive a car into,
but it would have to be a "Smart Car" because the shed isn't
that deep.
With the doors opened up, I can push my car trailer in there.
The opening would easily be wide enough to drive a car into,
but it would have to be a "Smart Car" because the shed isn't
that deep.