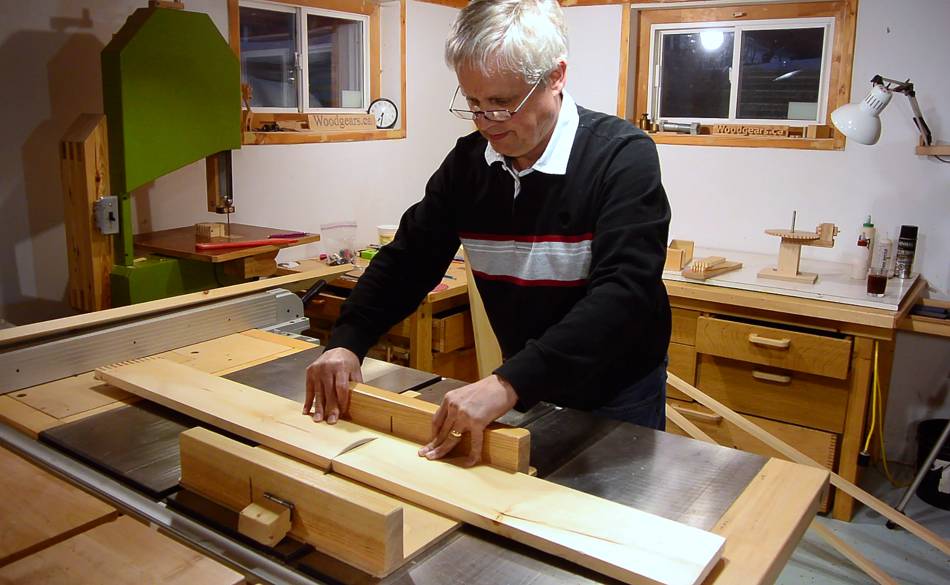
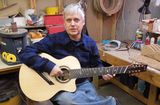
Pat Hawley makes custom guitars like this one
Unlike most store-bought guitars, these all have solid wood tops. With dry winter
air, shrinkage can cause these to crack. So Pat wanted to
experiment with making a humidity controlled guitar display case. Back in March,
he asked me if I could help with some of the joinery for this.
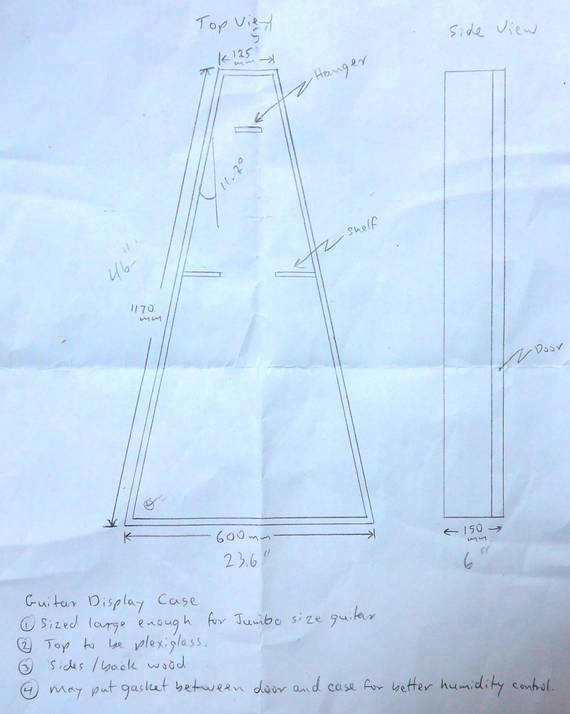
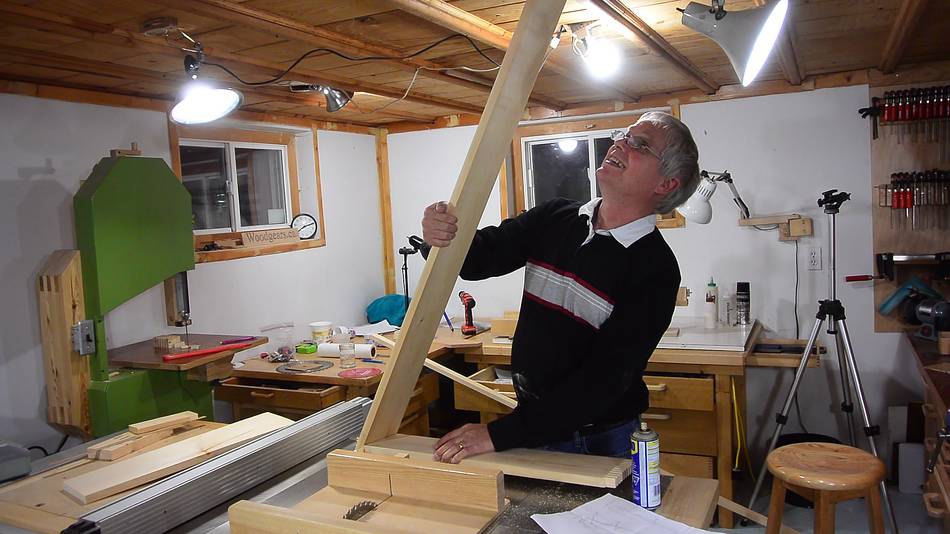
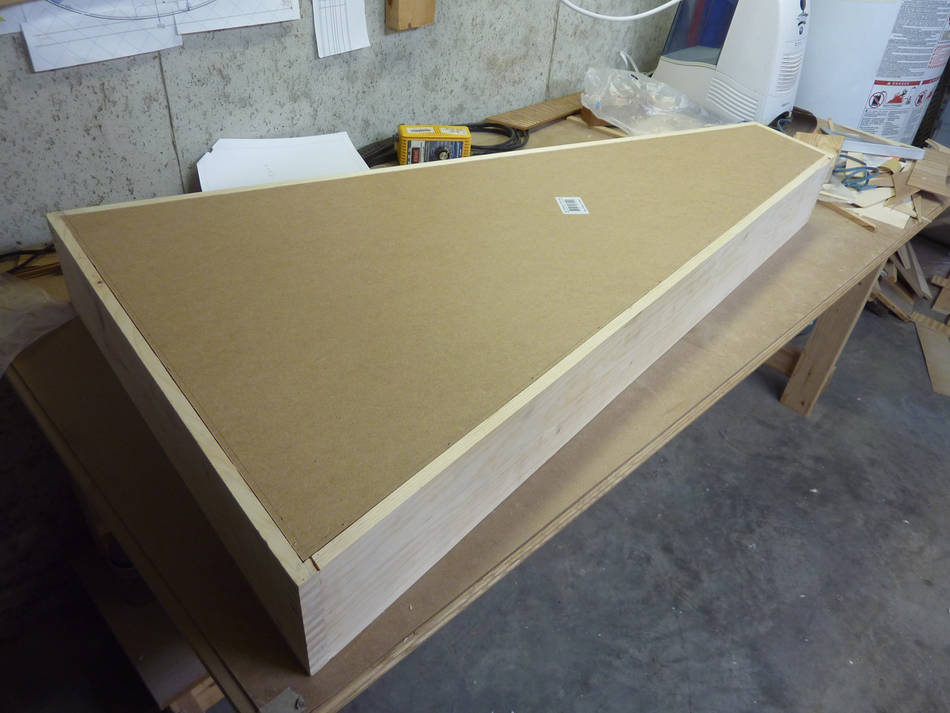
He wanted to make it large enough to accommodate the largest guitars and still
have room for some sort of humidifier inside. This made the sides 4' (120 cm) long.
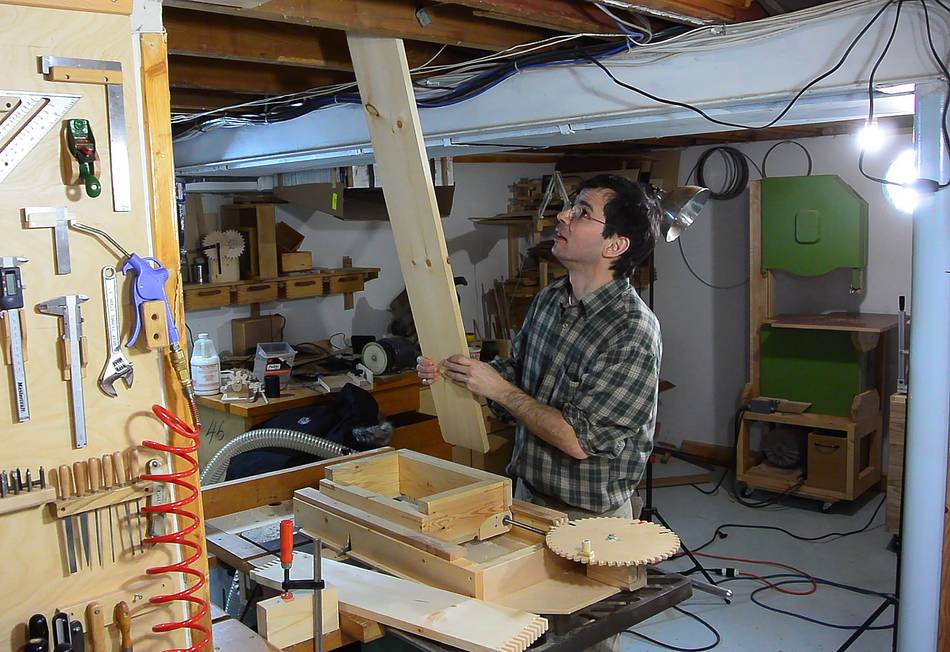
I don't have that much room above my main table saw in my workshop.
However, I was able to wheel my old table saw
into a spot where the space between the joists is not filled in,
so we were just able to put the pieces vertically in my
box joint jig
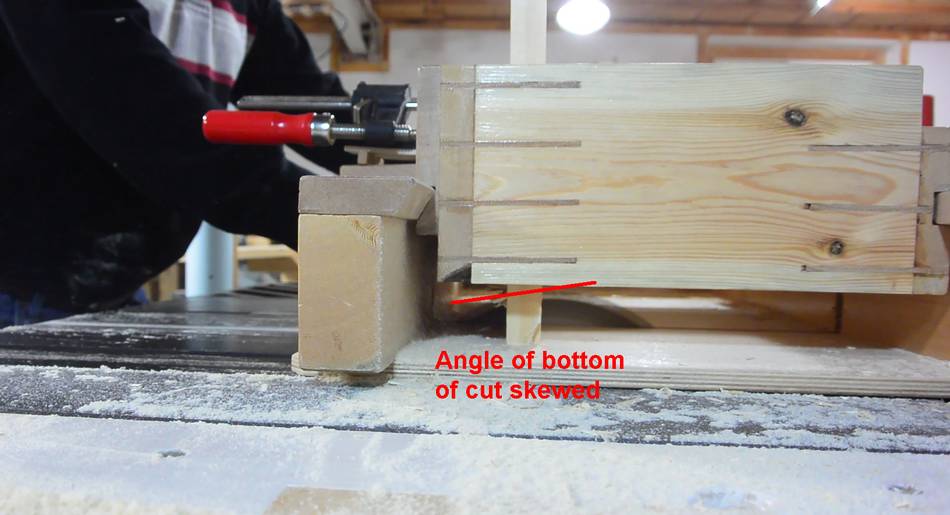
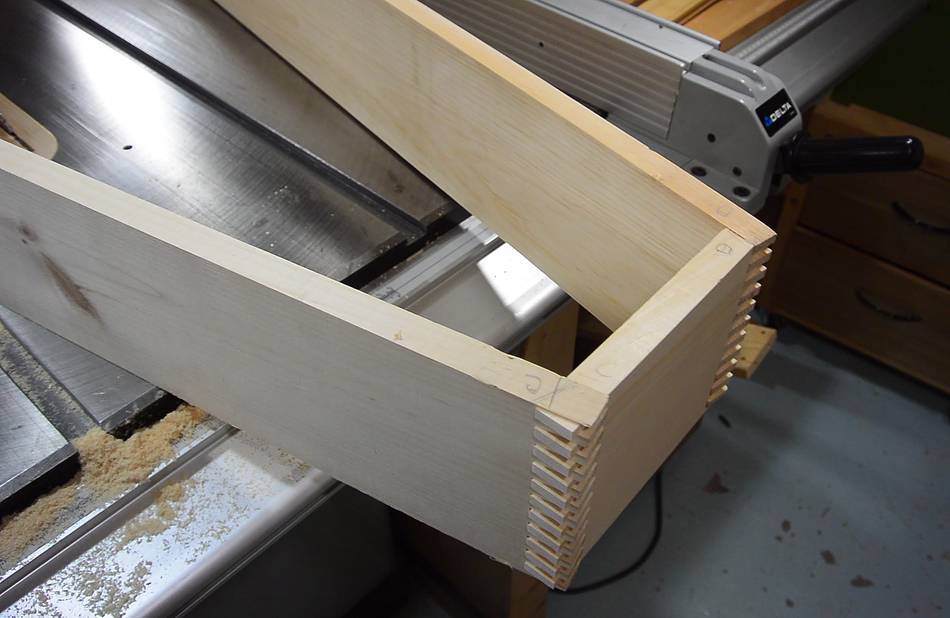
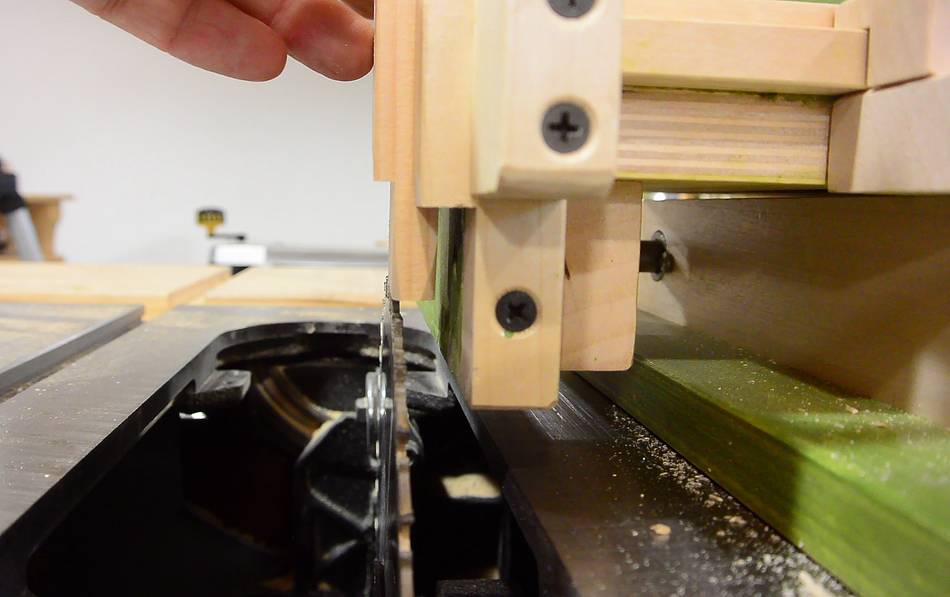
The box's corners are about 15 degrees off square so the joints needed to
be cut at an angle. My first thought was to make a wedge to hold the workpiece
in the jig at an angle. But then I had the idea of cutting only part-way
over the blade, so that the bottom of the cut would be at an angle.
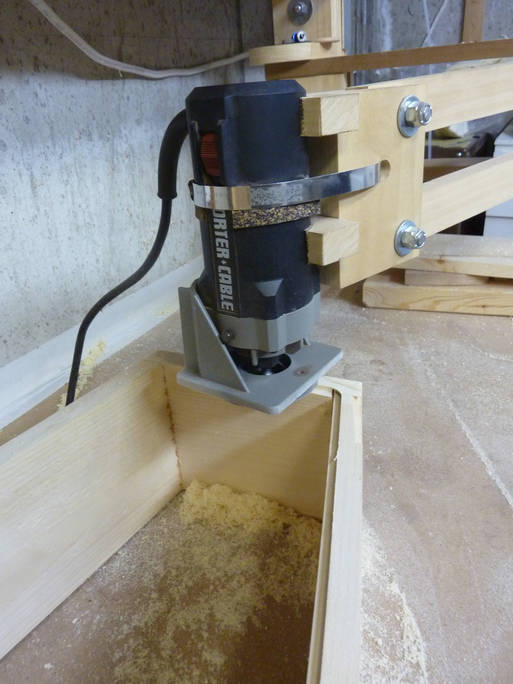
You can barely see the saw blade in the image at left. The red line indicates
the angle of the cut in the end of the board.
I clamped a block of wood to the back of the saw to act as a stop.
The way it fit onto my outfeed extension made sure that it wouldn't move
even after running the jig into it repeatedly.
Pat trying to test fit the box upright on my table saw, but he hit the ceiling.
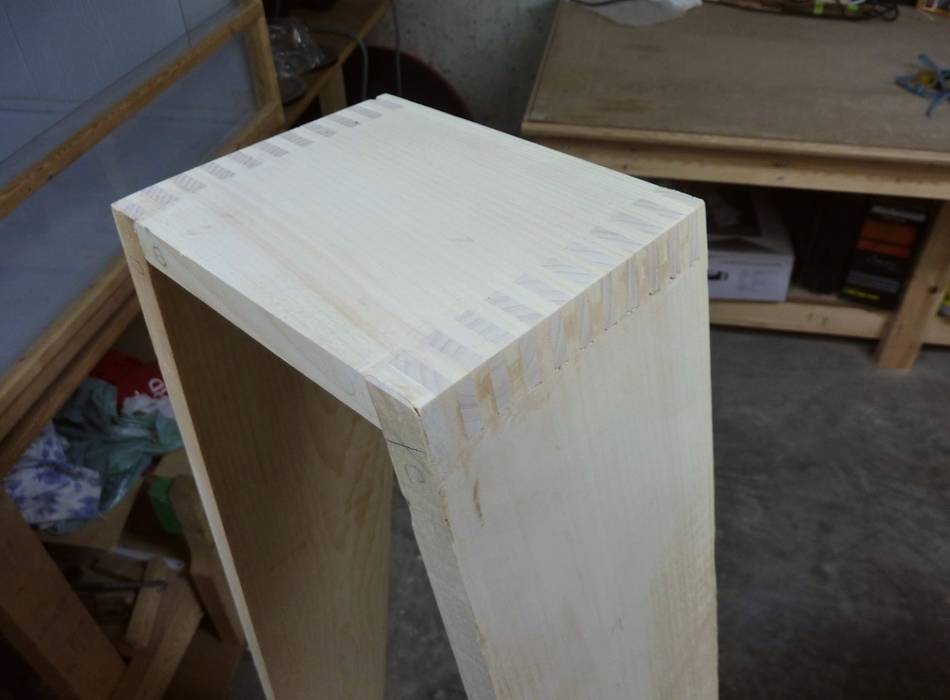
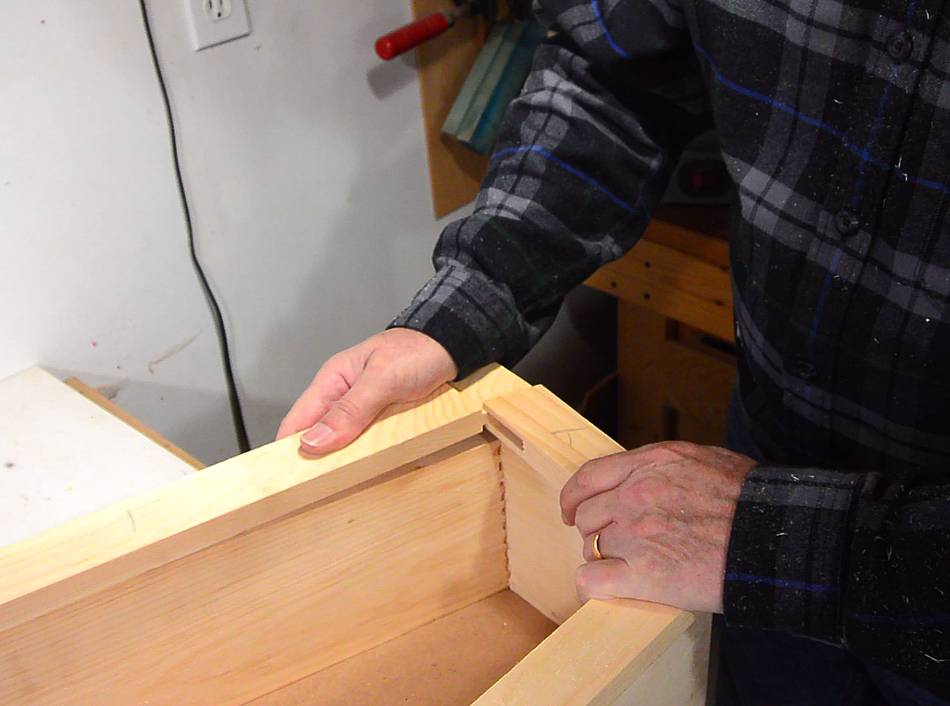
Joints cut. We didn't bevel the ends of the piece of wood.
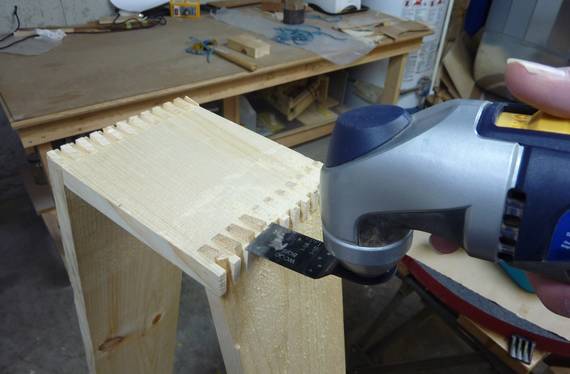
Pat took the pieces back to his shop, glued it up and
used one of those oscillating saws to flush trim the joints. It's
hard to find a good use for those oscillating saws, but this seems
to be a pretty good one.
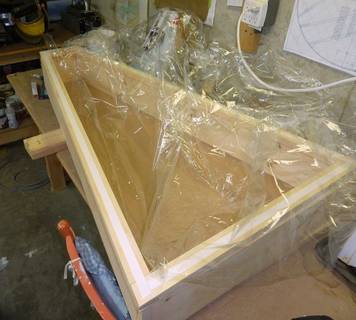
He then routed a groove around the back edge and installed some hardboard
(masonite) for a back panel.
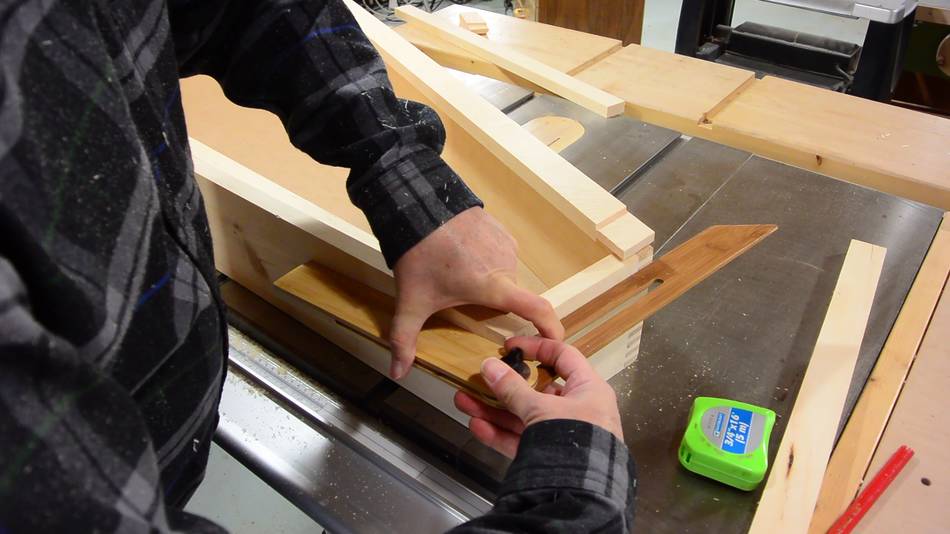
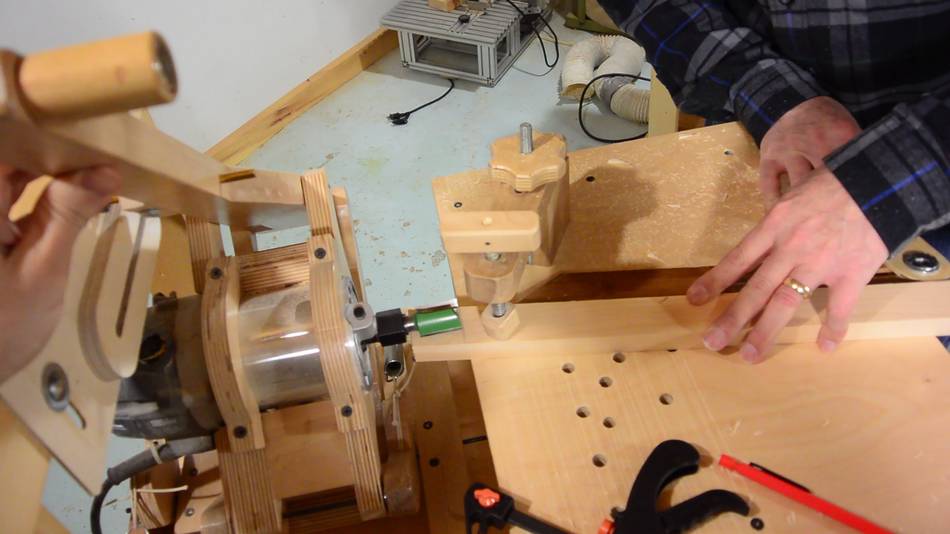
On Pat's next visit, in April, we tackled the joinery for the frame.
I figured bridle joints would be the best for the frame's corners.
Once again, ceiling height was a challenge. So for the long pieces, I cut
the tenon part of the bridle joint on my
pantorouter.
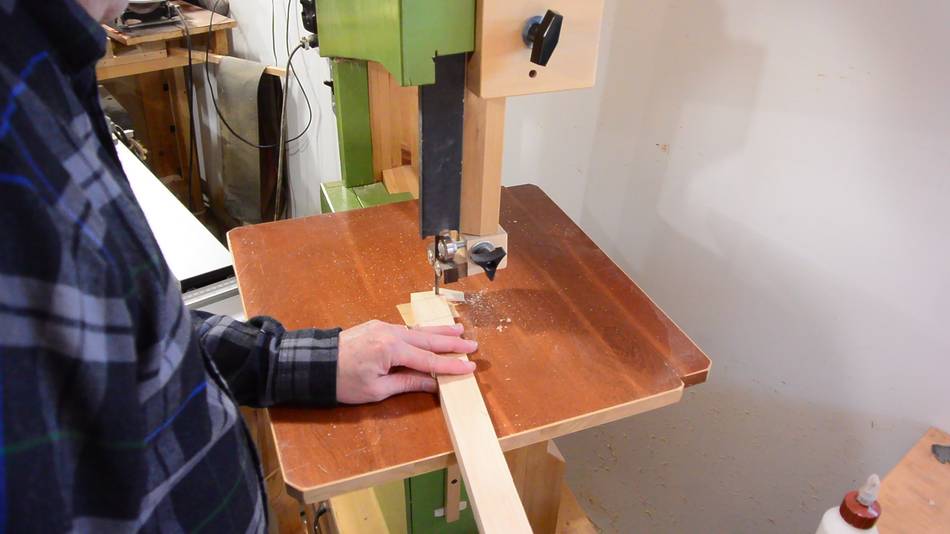
Getting the angle from the case using a bevel gauge
Cutting the angle at the end with a bandsaw.
Setting up the workpiece on the pantorouter, using a bevel gauge to
place it at the correct angle.
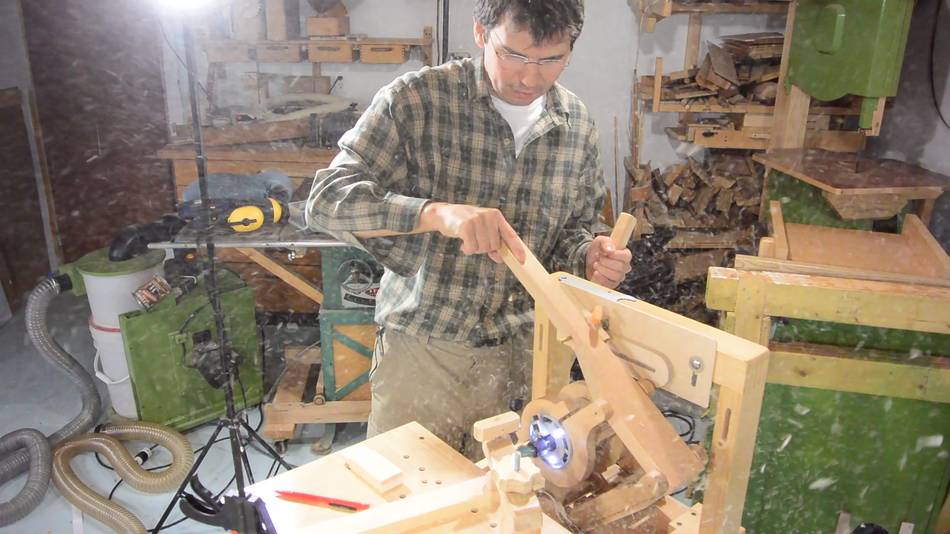
Cutting the tenon. Lots of airborne dust, as usual. Having the light behind
me only helps highlight the dust in the air!
I used a 1" (25 mm) diameter router bit. For cutting tenons, the
larger the bit, the faster I can work.
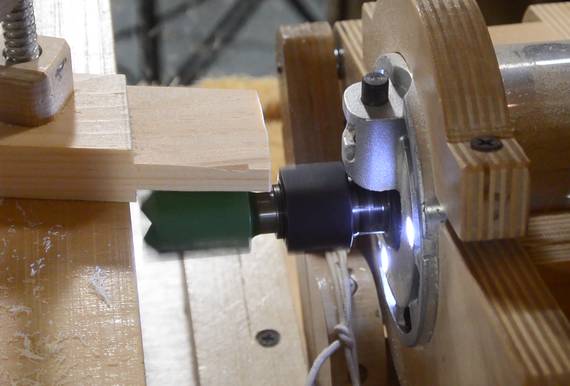
For the next tenon Pat captured most of the sawdust as it came off the router.
This is not as straightforward as it looks because the exhaust
air from the router helps blow the dust all over the place.
Also dust gets thrown in different directions depending on which
surface I'm cutting.
Next we had to cut the outside part of the bridle joint (the part
more like a mortise).
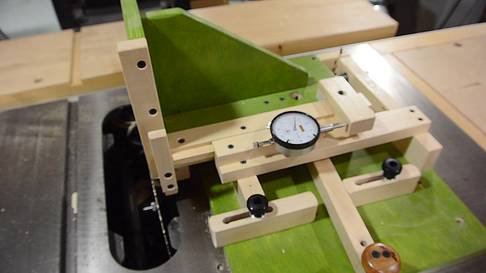
I used my quick-set tenon jig
because it's easiest to set up and fine adjust, and the slots are better
to cut on the table saw. The pieces with the slots are the shorter horizontal
pieces, so I didn't hit the ceiling.
I set it up so that one stop was with the blade flush with one edge of the tenon,
the other stop with it flush against the opposite edge.
I cut these without a table saw insert in the saw. That way, more
air is sucked in around the blade.
I used the adjustment lever to make two more cuts between the edges of the
mortise cut to hog it out, then, while passing the workpiece slowly over the blade,
I move the workpiece side to side (again, with the lever) to make sure the bottom
of the cut is completely flat.
Test fitting the joints. I set the jig such that the joints all hold with moderate
friction without glue.
Lid joinery cut.
The nice thing about helping Pat make this case is that I got to work on all the
interesting joinery without having to do any of the sanding, varnishing and what not.
Pat came to me because I have better machines for cutting the joinery.
Pat then glued the frame together in his workshop.
The lid is supposed to get a Plexiglass panel,
but because Plexiglass is expensive and this is still an experiment,
he opted for heat shrink plastic foil - the type that some people put over
their windows in the winter to block cold drafts.
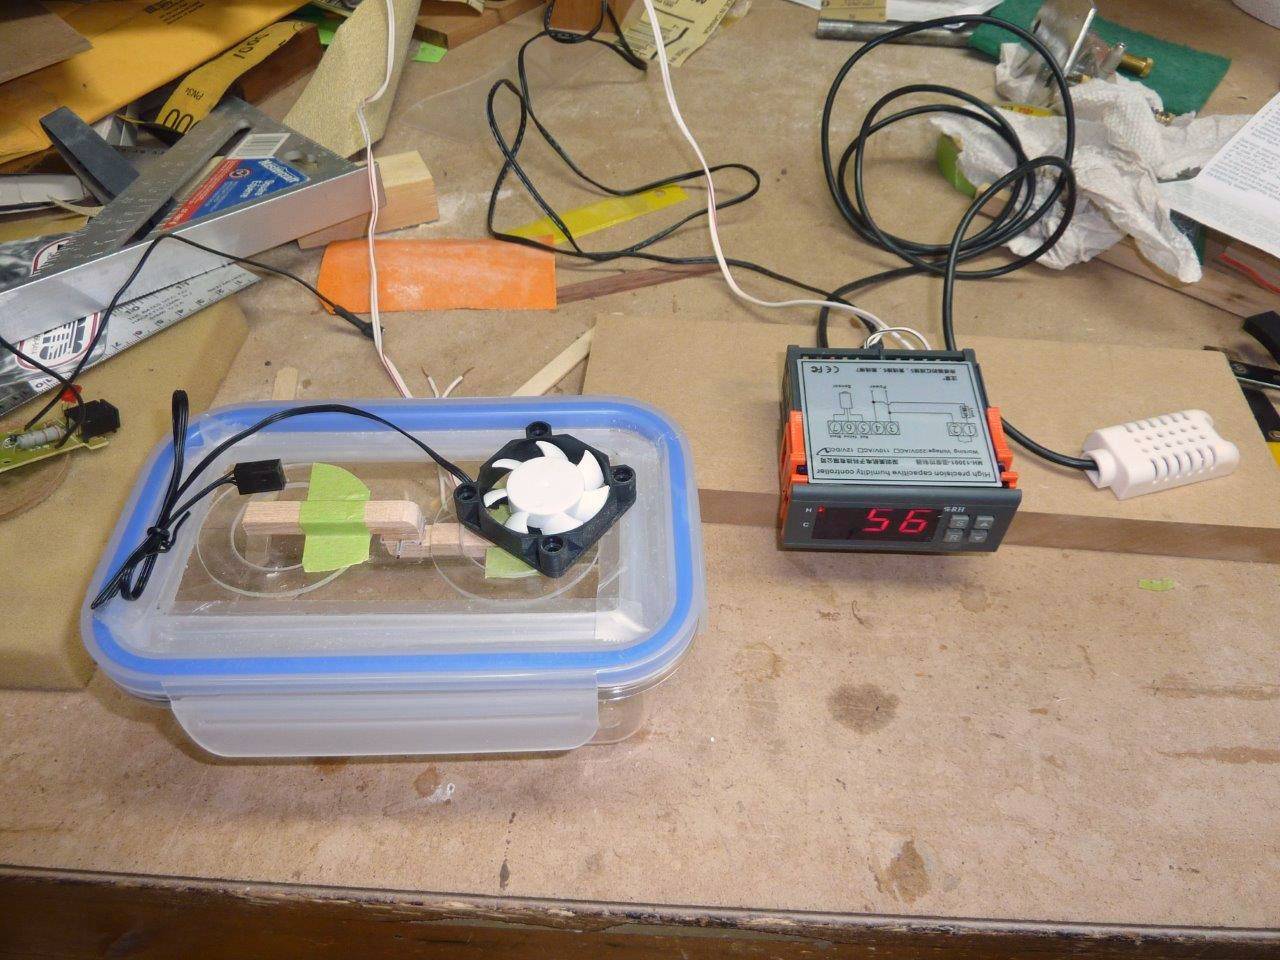
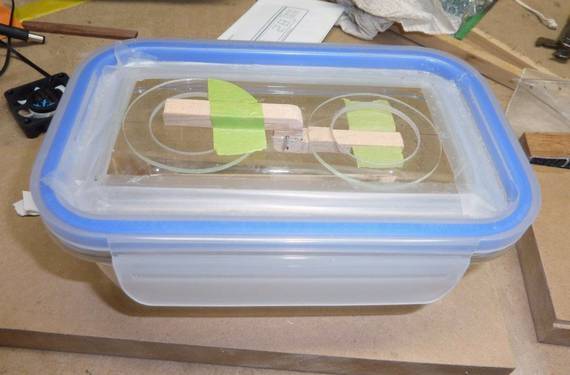
Next for Pat was to experiment with providing a humidity controlled
environment in the case so keep the custom guitars from cracking.
A CPU fan affixed to a small container, with a pivoting closure that opens
from the draft of the fan made for a small humidifier.
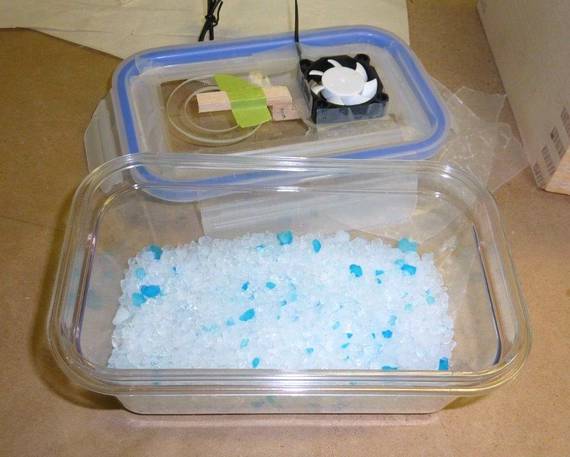
But by this time winter was over and the ambient air was,
if anything, too humid. So Pat experimented with
drying the air using silica gel. But silica gel is much less effective
at drying air than water is at adding moisture and he wasn't able
to decrease the humidity in the case significantly.
In the mean time, it's golfing season, so these experiments
are on hold until the weather turns cold again.
 Pat Hawley makes custom guitars like this one
Unlike most store-bought guitars, these all have solid wood tops. With dry winter
air, shrinkage can cause these to crack. So Pat wanted to
experiment with making a humidity controlled guitar display case. Back in March,
he asked me if I could help with some of the joinery for this.
Pat Hawley makes custom guitars like this one
Unlike most store-bought guitars, these all have solid wood tops. With dry winter
air, shrinkage can cause these to crack. So Pat wanted to
experiment with making a humidity controlled guitar display case. Back in March,
he asked me if I could help with some of the joinery for this.


 Pat's ukulele build
 Inlay experiments
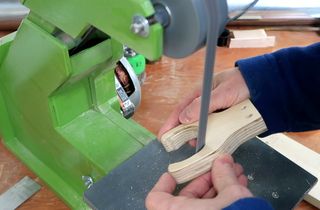 Simple guitar hanger
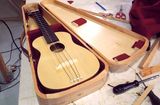 Building an instrument
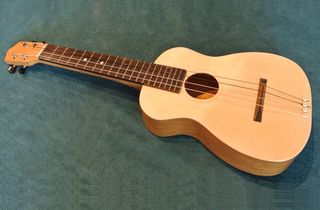 Ukulele build
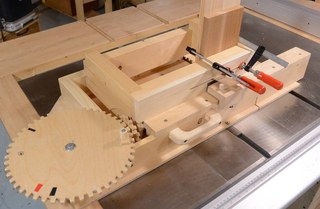 Screw advance
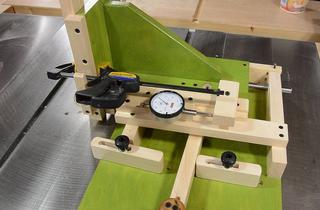 Quick-set tenoj jig
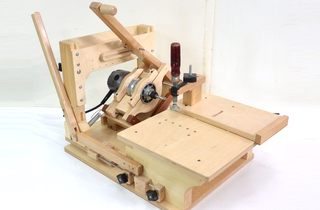 Pantorouter