I had temporarily fastened some horizontal pieces to the bottom
of the bandsaw frame
so I could stand it up. I liked how this worked out
and wanted to put caster wheels on the bottom. But as it was, the saw
would have been too low, so I glued together some thicker pieces
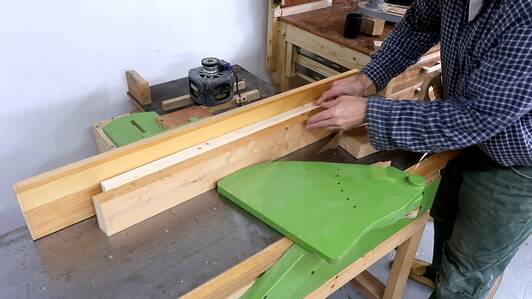
to bring it up to the right height, then squared them
up on the jointer.
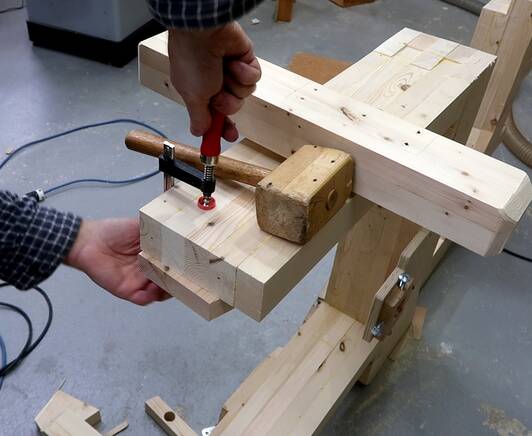
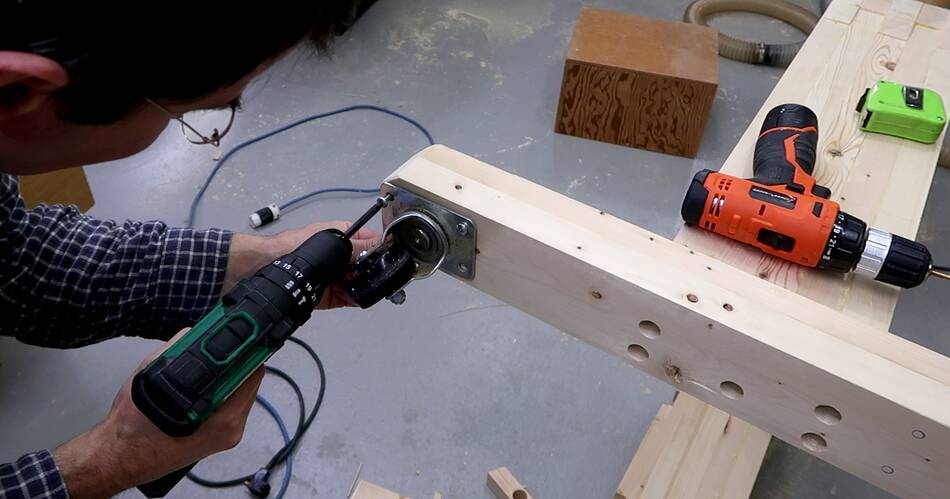
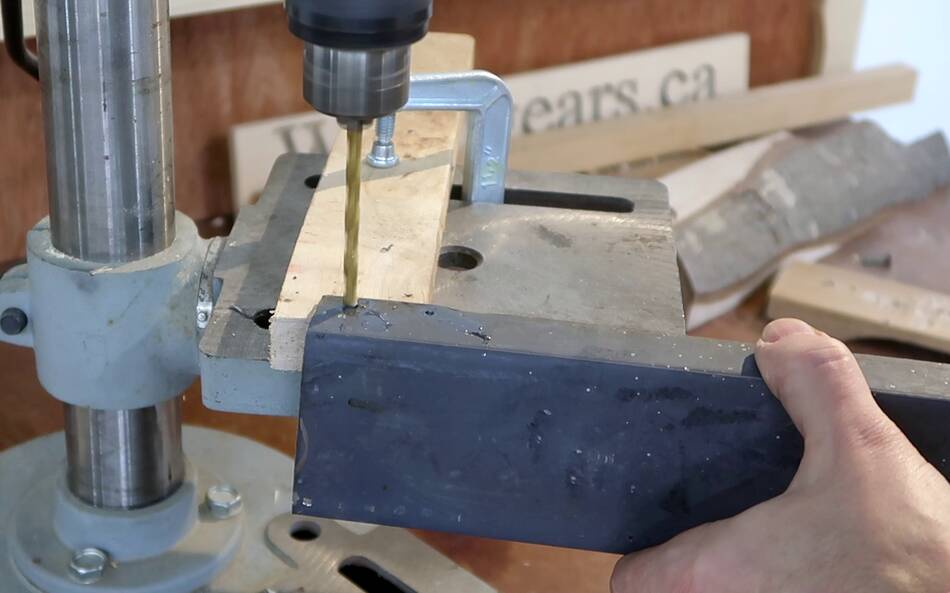
Having drilled the screw holes in the horizontal leg pieces, I positioned them
against the bottom of the bandsaw's legs (by tipping the bandsaw frame on
it's side). I then placed the screws in the holes and hit them wit a mallet
to leave divots where pilot holes need to go in the frame.
I probably could have gotten away without
pilot holes, but didn't want to risk splitting the wood.
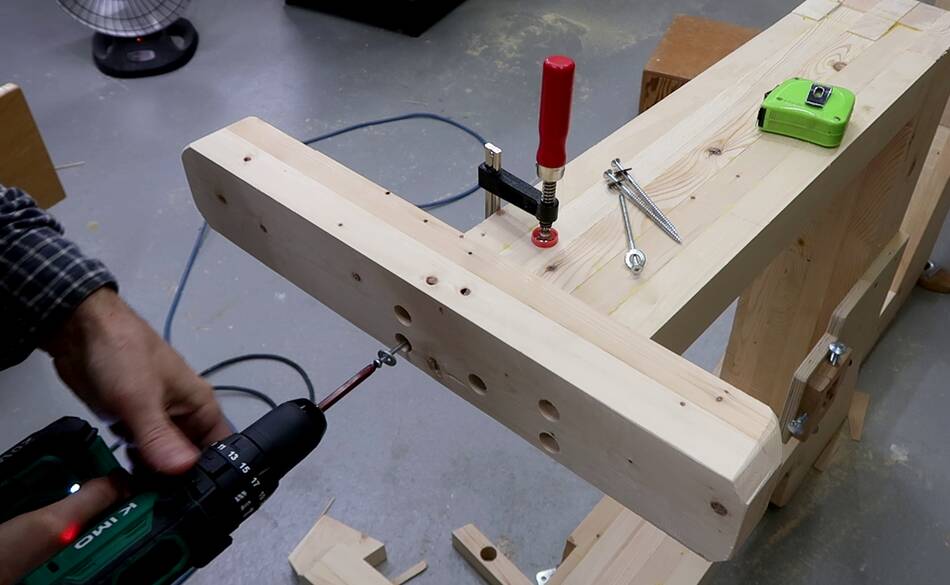
Long wood screws hold surprisingly well in end-grain. The limiting
factor is how well the screw head holds, so I put washers behind
the screw heads.
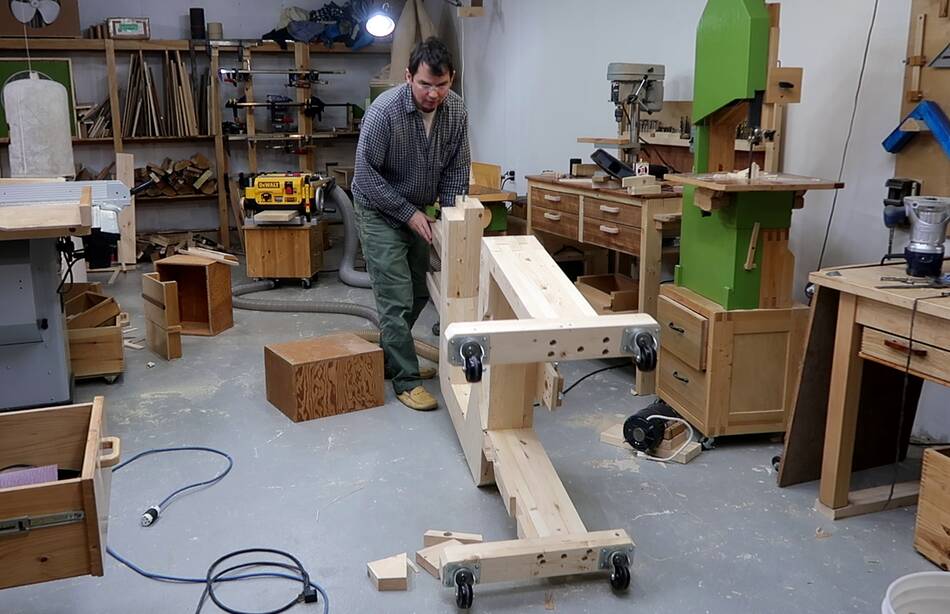
Then screwing castor wheels to the bottom. I also drilled pilot holes
for these screws, as the screws near the end could easily split the wood.
Then tipping the saw frame upright again. I had removed the wheels, table
and motor to lighten it before I tipped it down.
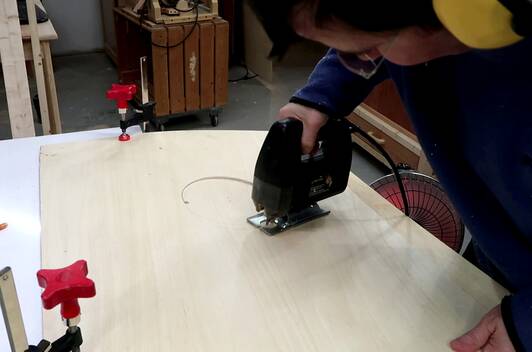
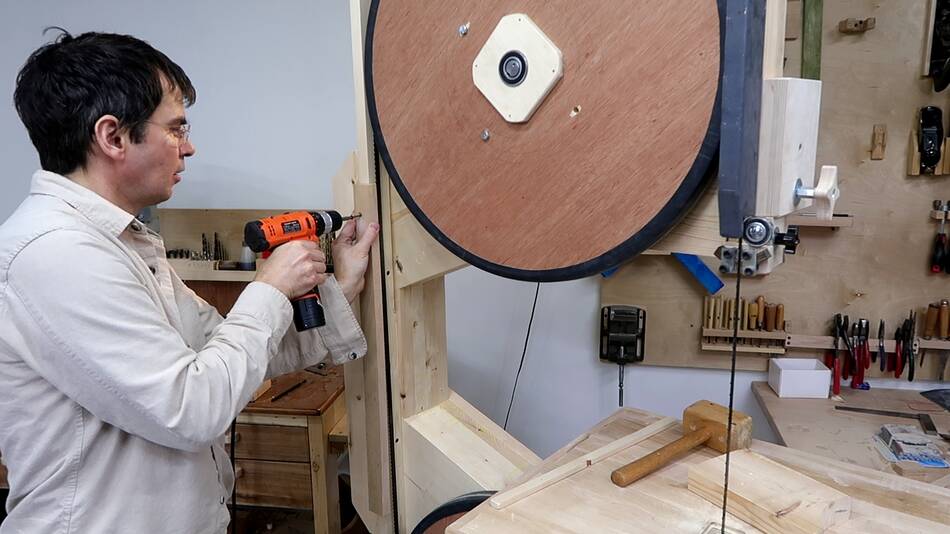
I then cut out a big hole for the cover that goes behind the top wheel,
clamped that in the right spot behind the top wheel, and marked
the wheel and frame outline on that. I'll use that later to work out
the dimensions of the top part of the enclosure. The top part of the enclosure
needs to fit around the blade guard, so I worked on that next.
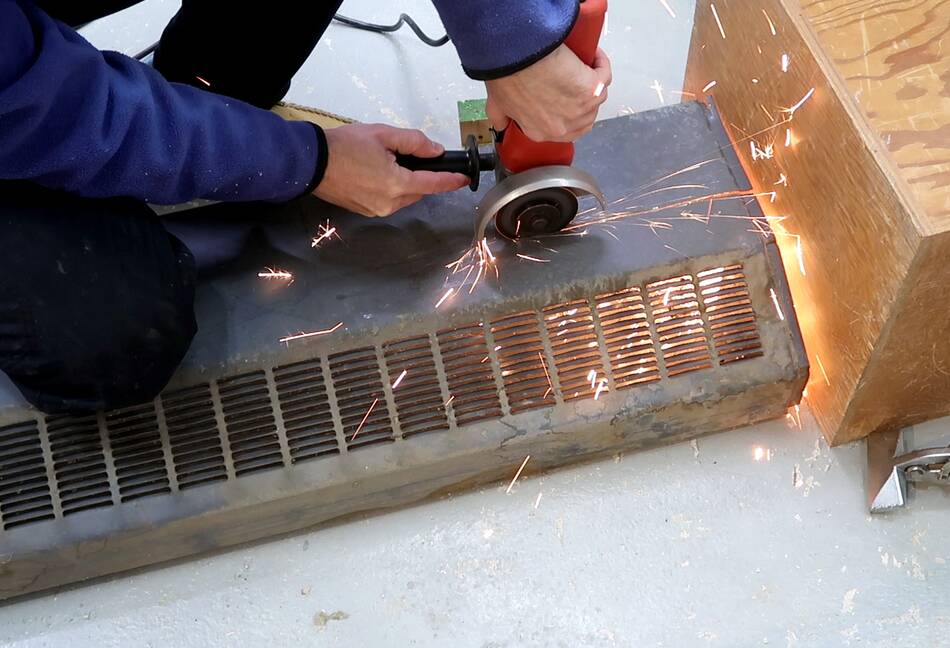
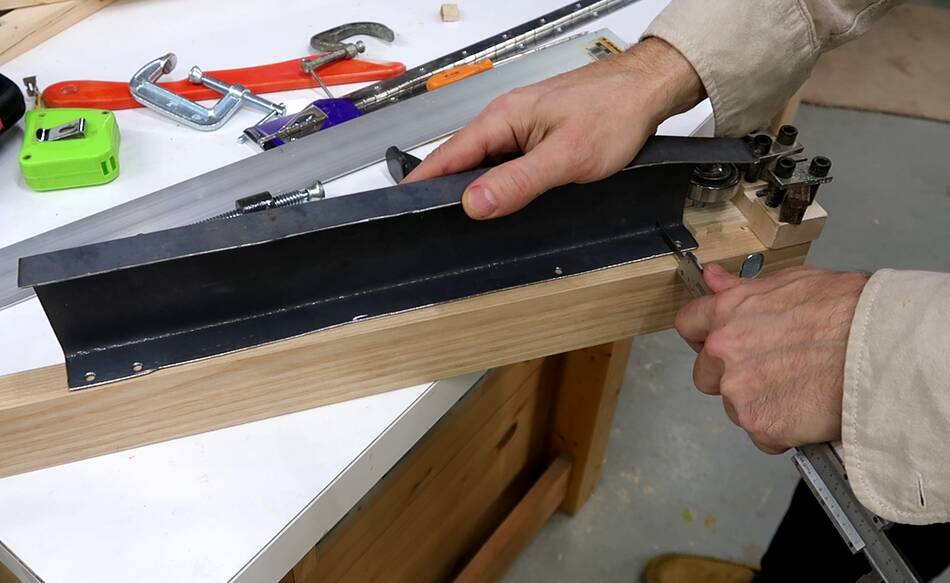
I cut up an old radiator cover for sheet metal for the blade guard.
In the past, I cut up PC cases for this. The corner of a PC case cover
already has a nice sharp bend to it, so only one extra bend would be
needed. But I didn't have any scrap PC cases kicking around.
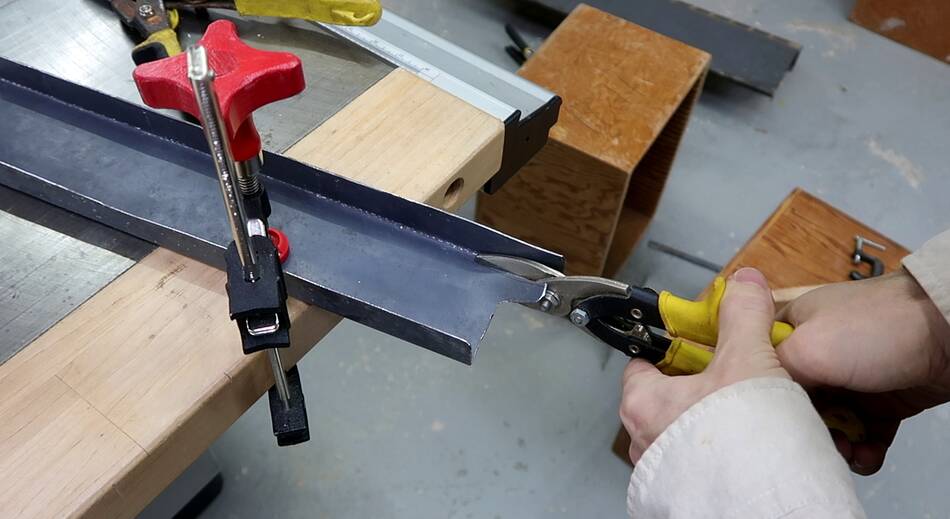
A metal brake would be ideal for making this bend, but I don't have one
and it's not worth making one just for this. So I clamped the metal in
the vise, bent it, then repositioned it sideways, bent some more, working
my way back and forth along the metal, each time adding about 15 degrees
to the bend.
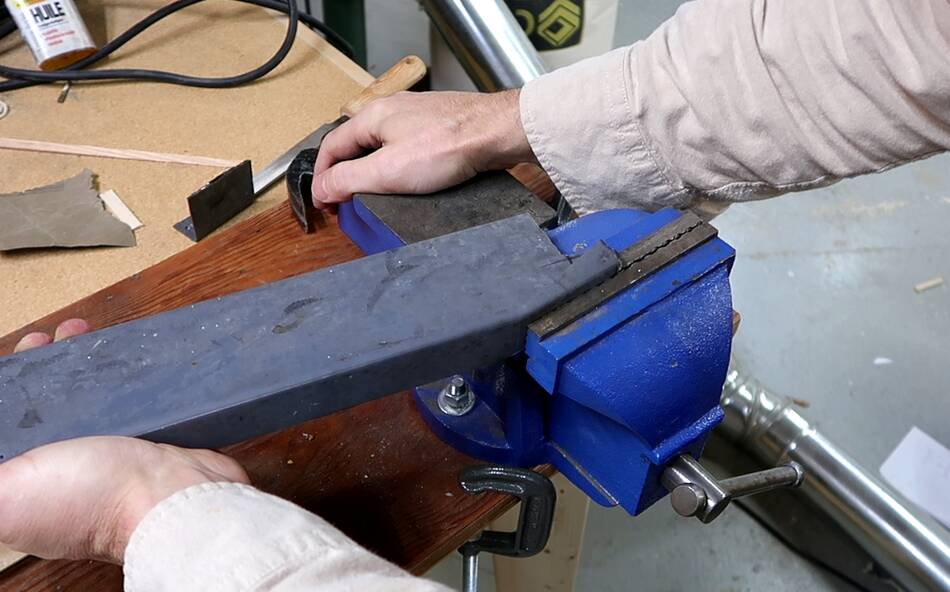
The resulting bend was not as sharp as I hoped. It was
about 3 mm radius, which is adequate.
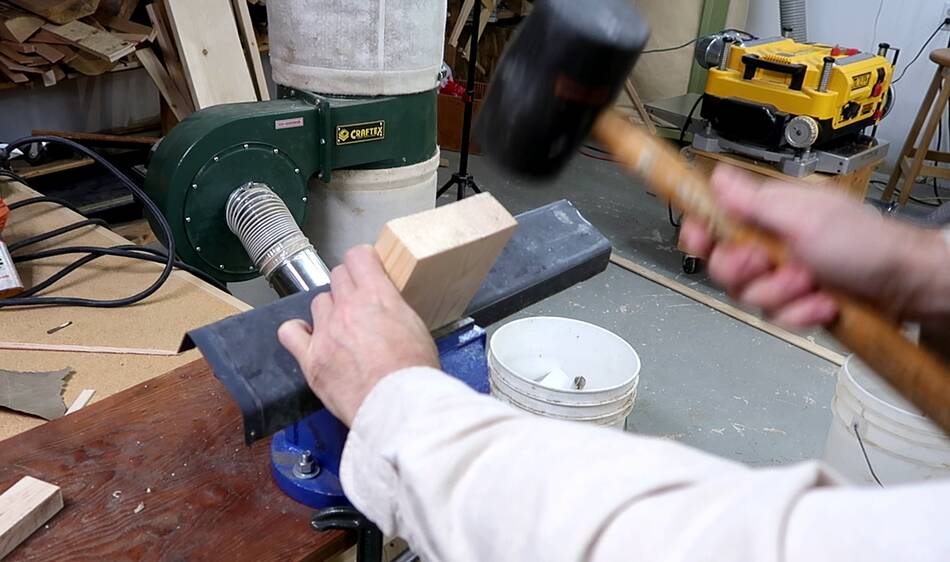
I tried making the next bend by banging a block against the vise.
That works well for thinner metal, but it didn't make
for a tighter bend here.
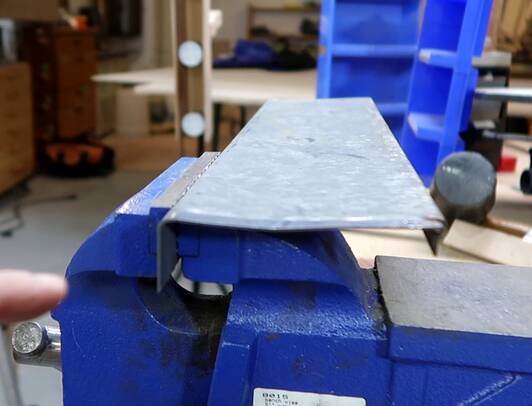
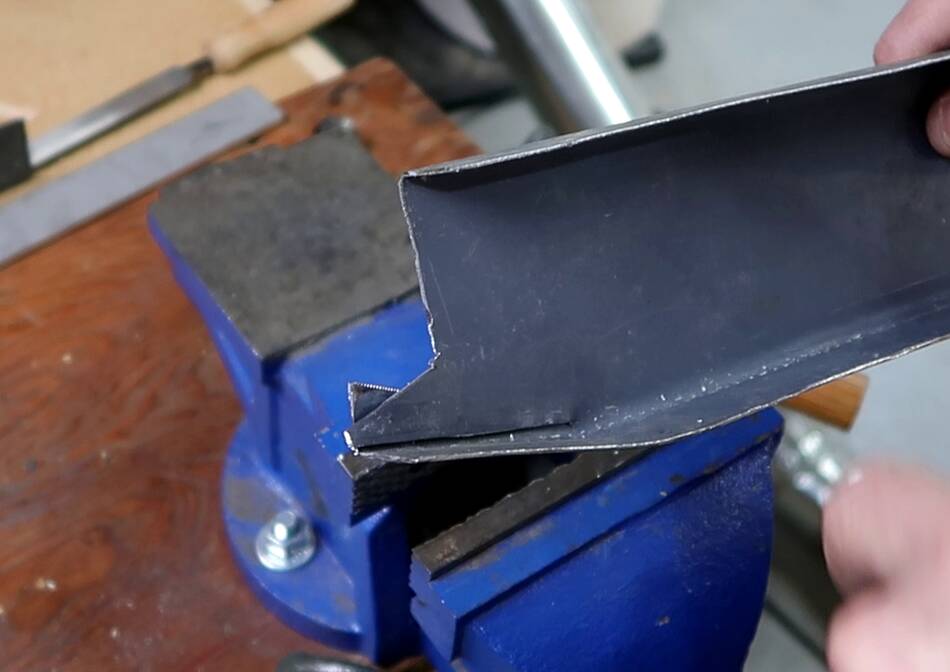
Finally tweaking the shape to make sure it was square.
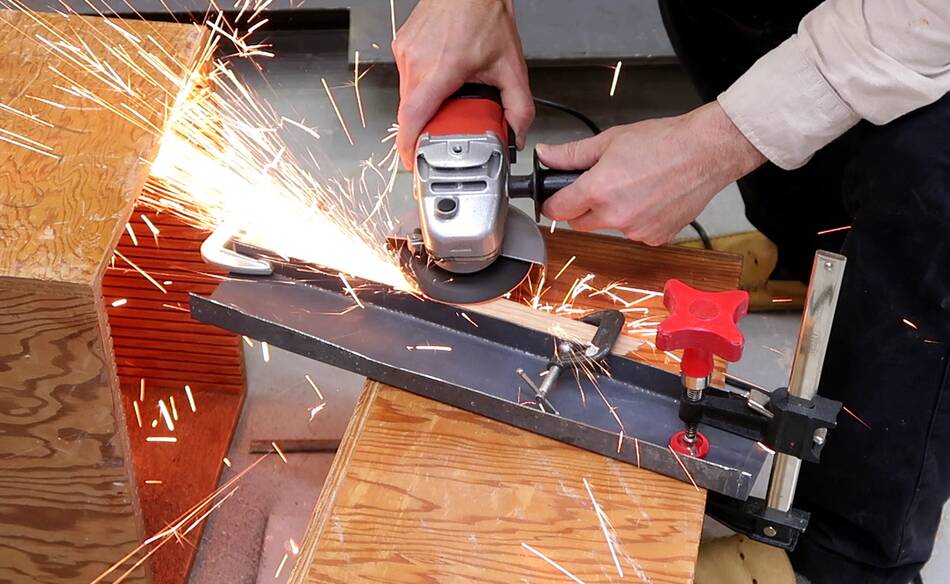
I hadn't used a guide for the angle grinder when I cut out the piece
out, so my cuts weren't that straight.
To make it look less ugly, I straightened out the edge that
will be front-facing. I clamped a piece
of hardwood to the piece and used that as a guide to grind off the parts
that stuck out the most.
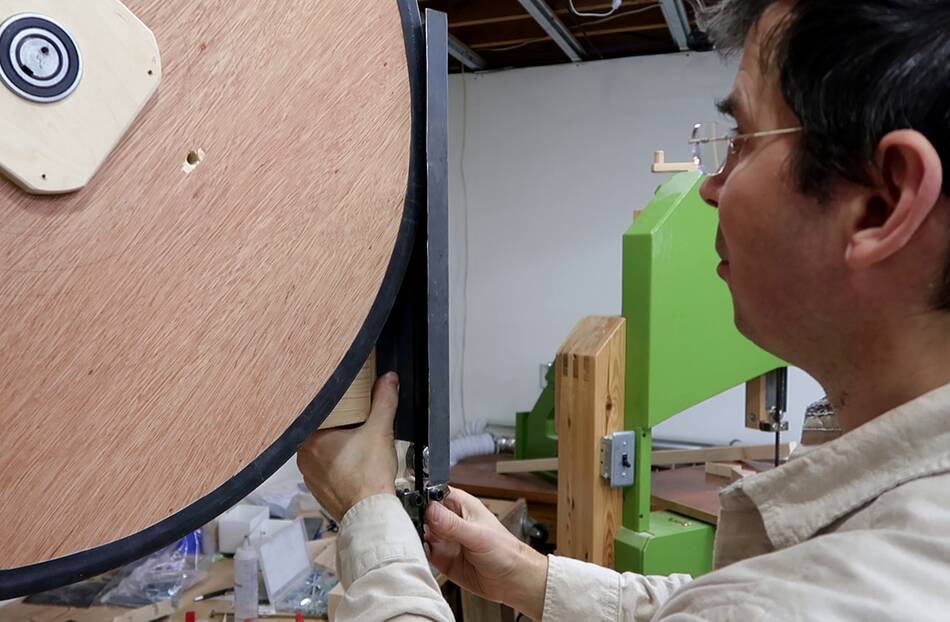
Then cutting the right profile on the end that goes over the blade guide.
And checking how it fits on the saw. The guard needs to fit around
the upper wheel.
I had the idea of tapering the bottom part of the guard back a
bit towards the guide for more visibility. The part near the guides
doesn't need to fit around the wheel, so it doesn't need to come
forward as far. I made a diagonal cut with tin-snips for this bend.
Then bending it in the vise, this resulted in the metal overlapping
a bit.
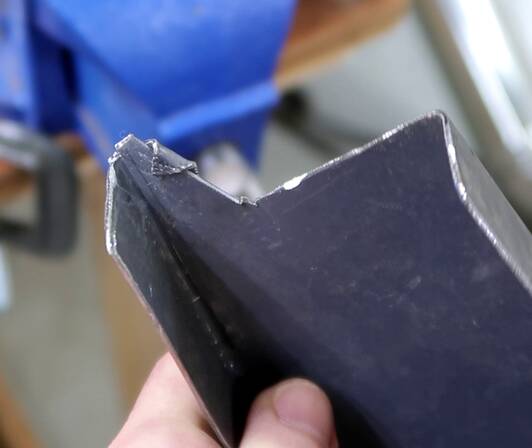
I thought about welding this overlap, or maybe a screw to fasten
it together, but then had the idea of cutting back one part a bit and
then folding the other part over and around to hook the pieces together.
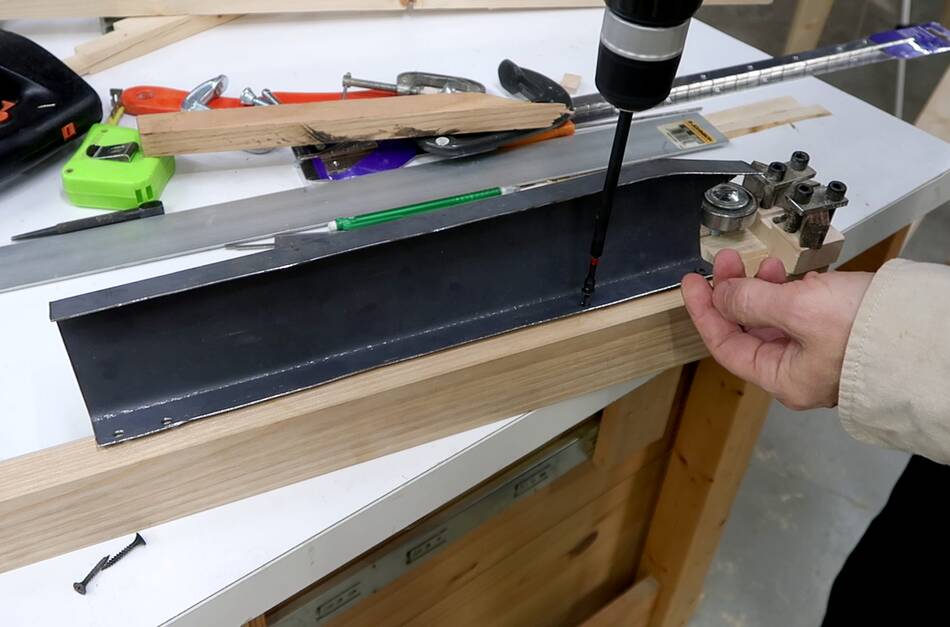
After that, drilling the screw holes. First some small 1/8" (3 mm) pilot
holes, then 3/16" (5 mm), then adding a slight countersink on the inside
with the tip of a larger drill bit.
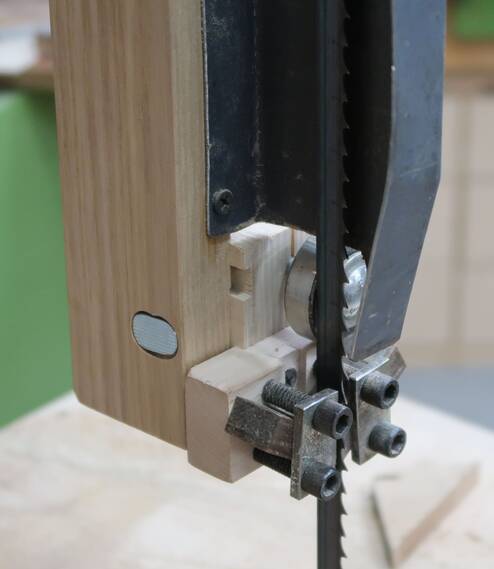
Using callipers to place the guard on the upper guide post.
The guard needs to be about 5 mm to the right of where the blade will be.
I then marked where the holes ended up, drilled pilot holes...
... and screwed it on.
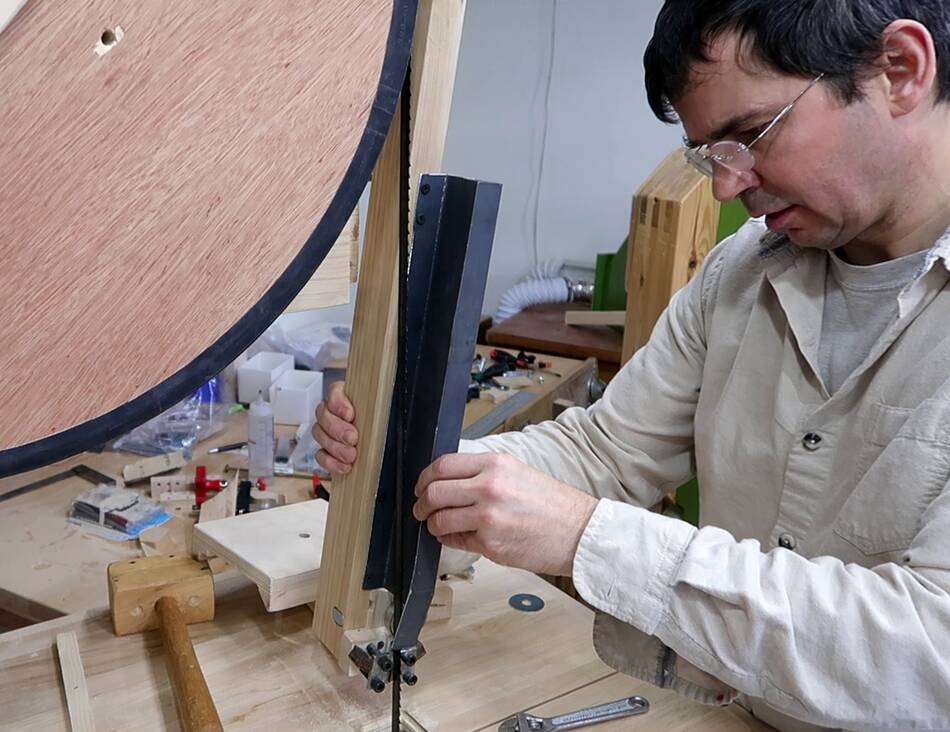
Then fitting the guide post with guard back on the saw.
I also made the long vertical piece that goes to the left
of where the blade goes. I also temporarily attached a long piece
of hardwood to the front of that to act as a guard there.
The dangerous part so far is that this saw has the bandsaw
blade right where I would reach for the switch on my 20" bandsaw.
I was afraid I might reach there for the switch without looking.
With these guards on, the blade couldn't really go anywhere where it could
hurt me. So I wasn't afraid to use a wider (1/2") blade
and try some reasaw cuts.
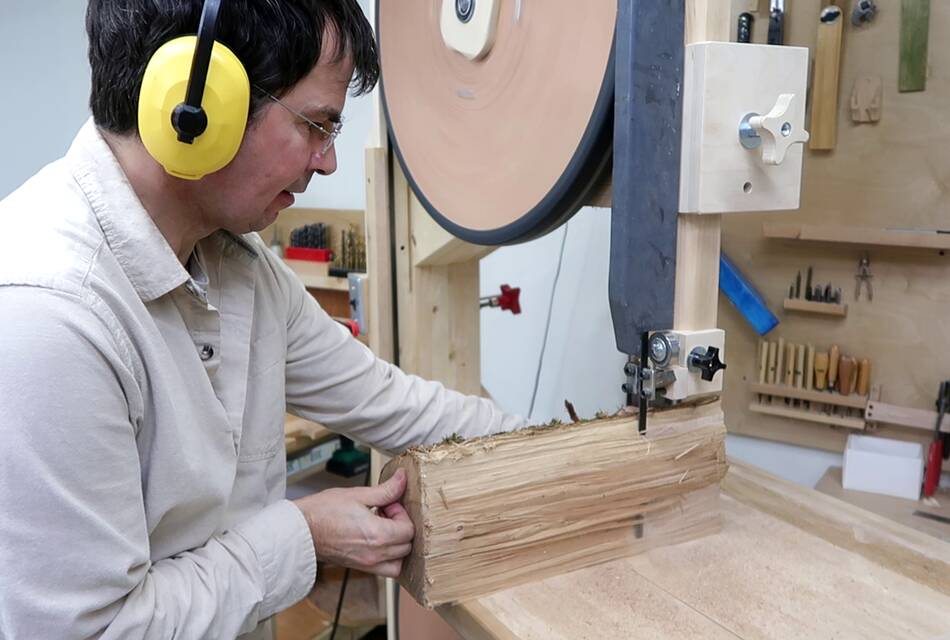
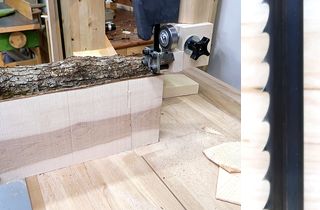
First, squaring up this piece of ironwood.
Then cutting a thick slice off of it. But the blade somehow snagged on the
wood and got stuck. It then came off the wheels. The image at left is
just after the blade came off. Nothing much happened as
a result of this, other than the blade coming off. So now you know what
happens when the blade comes off.
I think after the blade got jammed on the wood, the bottom
wheel kept spinning because I had too little blade tension. With the blade
slipping on the wheel, the crown makes it slide off.
Looking at the blade, the teeth have quite a bit of "hook" to them, which I imagine
can really pull the blade into the wood. That in turn can cause it to
snag on the wood, if it's hard enough. And ironwood (American hophornbeam)
is extremely hard.
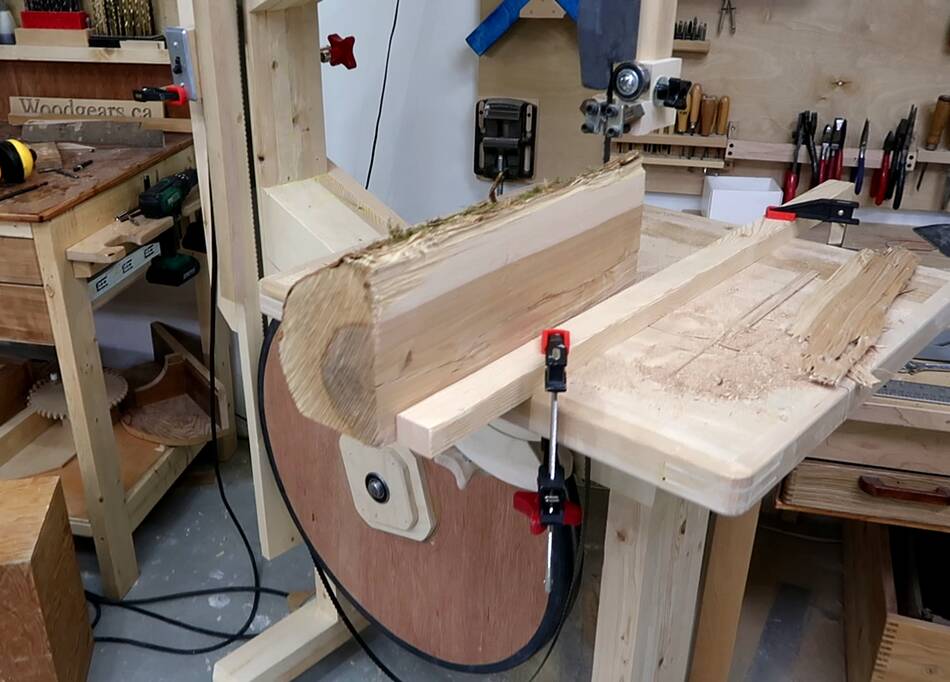
With the blade back on and more blade tension, I cut through this
time. But the 2/3 hp motor I have on the saw is somewhat underpowered for
this kind of resawing. But for resawing, my 20" saw is a better saw anyway.
The larger wheel size doesn't help for resawing -- so long as the wheels
aren't so small to cause metal fatigue in the blades from bending
and un-bending around too-small a radius.
I kept getting the occasional "bang" from the wheel snagging itself on the wood,
but with more blade tension, this didn't cause it to jam or come off the wheels.
After that, I tried resawing the same width of oak, and that went much better.
The ironwood is a very hard and dense wood compared to red oak.
And lots of sawdust on the floor. While I don't feel endangered from using the
saw as it is, I definitely want an enclosure to control where the dust goes!
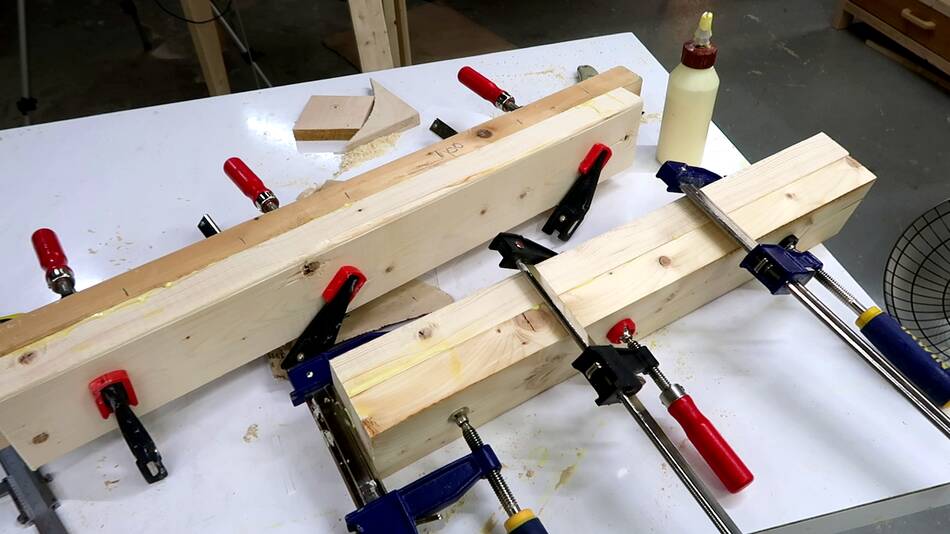
 I had temporarily fastened some horizontal pieces to the bottom
of the bandsaw frame
so I could stand it up. I liked how this worked out
and wanted to put caster wheels on the bottom. But as it was, the saw
would have been too low, so I glued together some thicker pieces
to bring it up to the right height, then squared them
up on the jointer.
I had temporarily fastened some horizontal pieces to the bottom
of the bandsaw frame
so I could stand it up. I liked how this worked out
and wanted to put caster wheels on the bottom. But as it was, the saw
would have been too low, so I glued together some thicker pieces
to bring it up to the right height, then squared them
up on the jointer.


 Chatter and bounce with hard woods and hook tooth blades
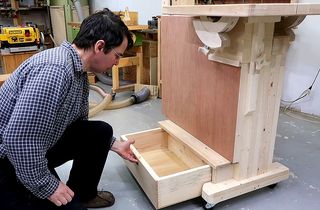 26" bandsaw bottom enclosure and sawdust drawer
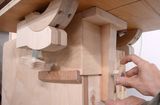 Blade guard and enclosure for my 20" bandsaw
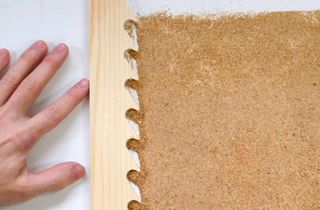 The physics of bandsaw resawing
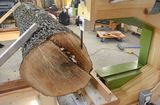 Bandsaw on a dolly sawmill
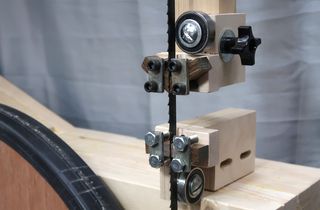 Making the blade guides for this bandsaw
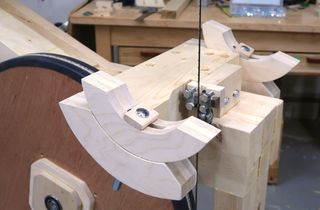 Making the trunnions for this saw
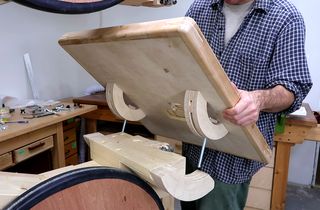 Bandsaw table