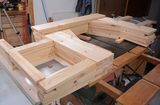
 This is the first part in a series about building a big 20" bandsaw,
the construction of this one will be similar to this 16" bandsaw.
This will be my fourth homemade bandsaw. Previous bandsaws:
one two
and three
This is the first part in a series about building a big 20" bandsaw,
the construction of this one will be similar to this 16" bandsaw.
This will be my fourth homemade bandsaw. Previous bandsaws:
one two
and three
This is the first part in a series about building a big 20" bandsaw,
the construction of this one will be similar to this 16" bandsaw.
This will be my fourth homemade bandsaw. Previous bandsaws:
one two
and three
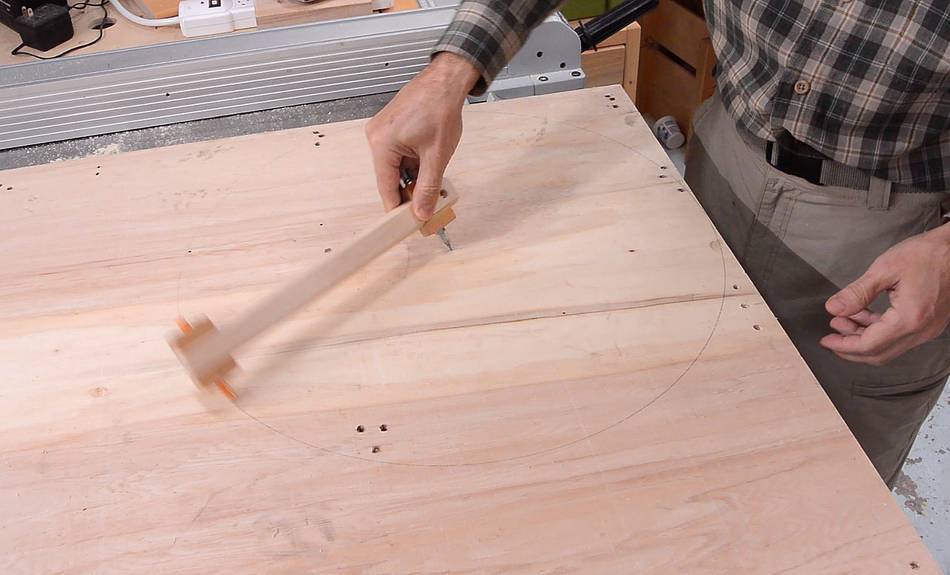
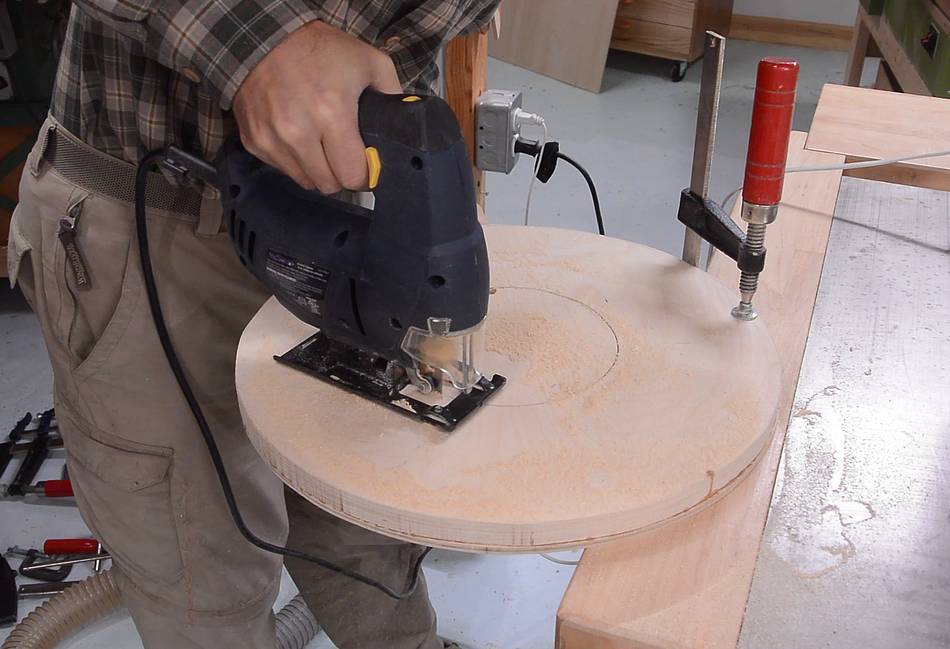
It helps to make the wheels for a bandsaw out of good quality plywood, but I like to make use of old crap I get for free. I'm using some shipping pallet plywood. Here marking it up with my beam compass ...
 ... then starting to cut it out using my jigsaw.
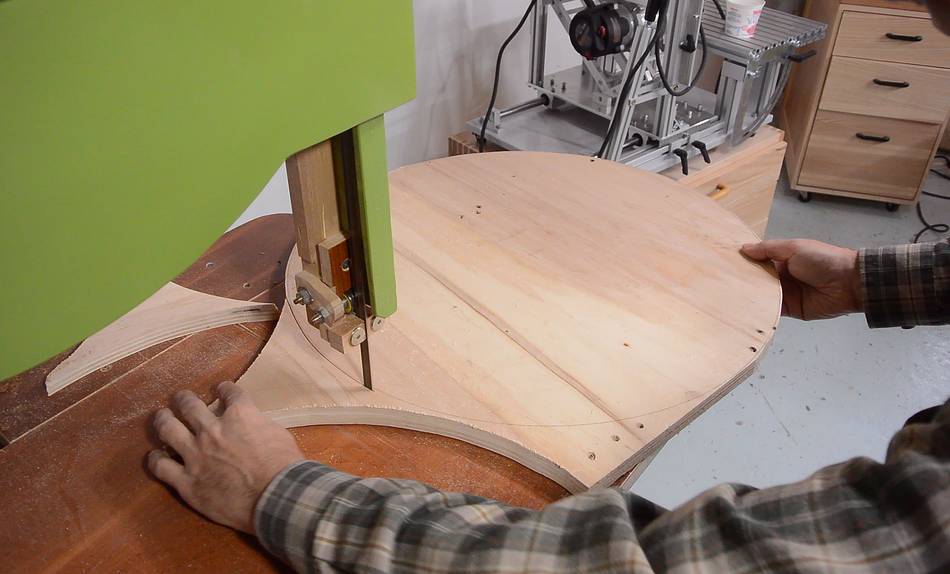 Once I had it broken down into manageable sized pieces, I finished it up on
the bandsaw. Much faster!
Once I had it broken down into manageable sized pieces, I finished it up on
the bandsaw. Much faster!
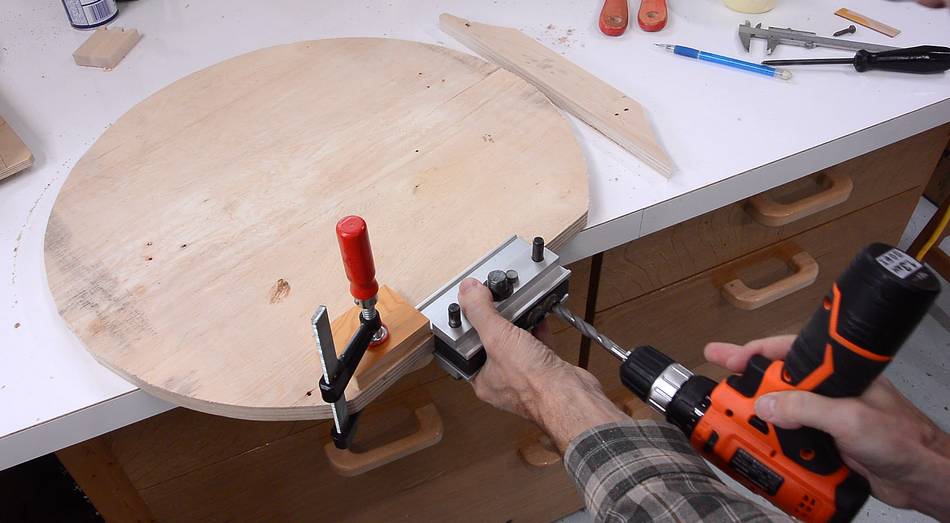 I needed four circles (each wheel has two layers), but unfortunately, the
plywood wasn't big enough to cut four whole circles out of it, so I'm using
my dowel jig to join
the pieces together from multiple parts.
I needed four circles (each wheel has two layers), but unfortunately, the
plywood wasn't big enough to cut four whole circles out of it, so I'm using
my dowel jig to join
the pieces together from multiple parts.
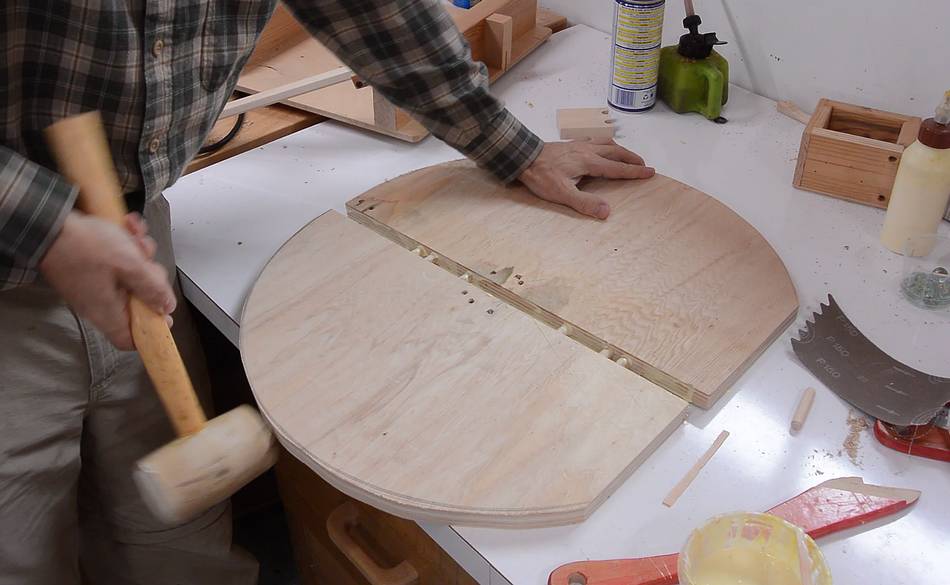
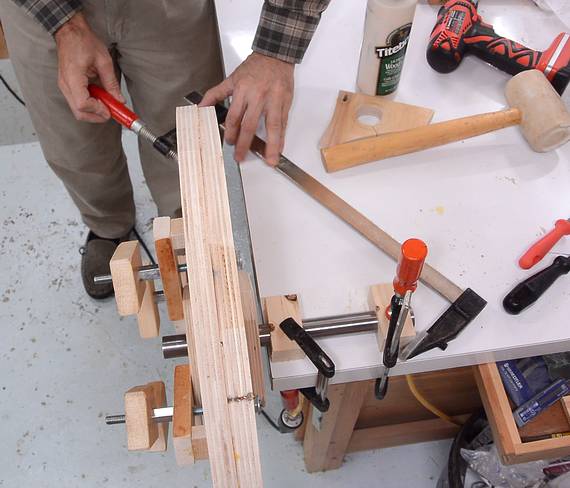
I clamped a stop to my workpiece. That way, by placing the jig against the stop, drilling through, then flipping it over, and drilling again, I can effectively index the position to get consistent dowel spacing.
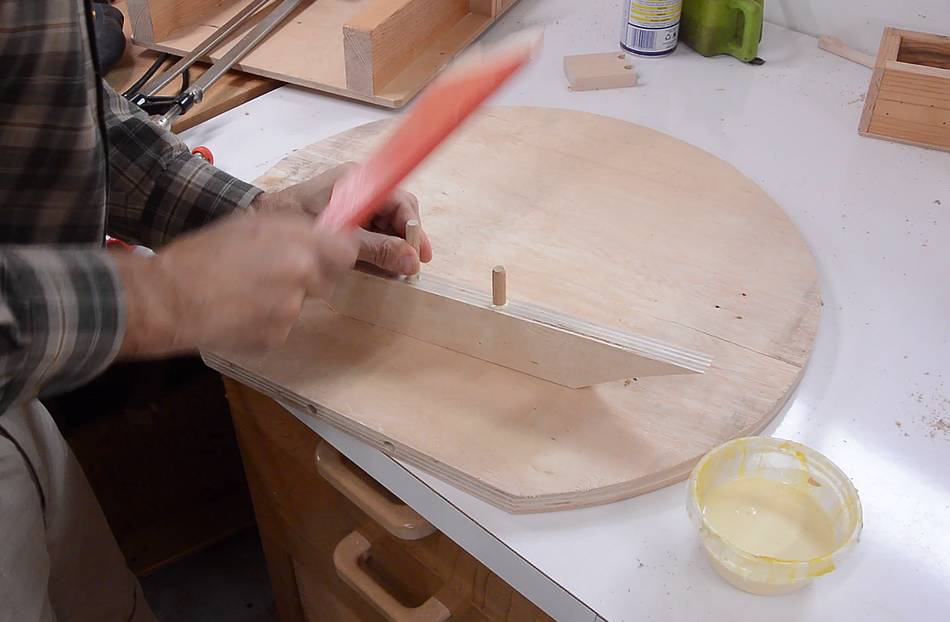
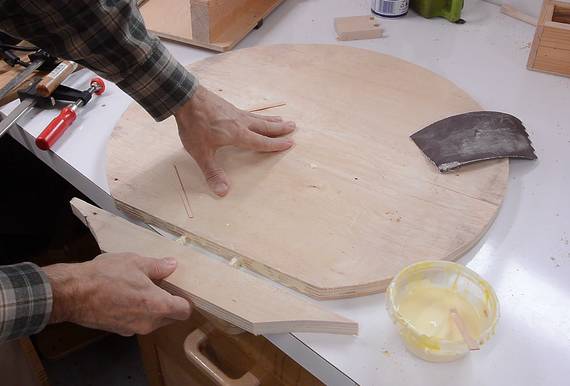 I applied the same method to the piece I'm joining on. Here tapping the
dowels in the holes with a push stick (both the dowel and the hole have
glue applied to them)
I applied the same method to the piece I'm joining on. Here tapping the
dowels in the holes with a push stick (both the dowel and the hole have
glue applied to them)
 A few clamps to force the joint closed.
 Another two pieces, cut near the center, for another disk. I'm using
the same method with the block to index the dowel jig, but this time
indexing off both sides to accurately space six holes (I could have drilled
up to eight holes spaced this way).
Another two pieces, cut near the center, for another disk. I'm using
the same method with the block to index the dowel jig, but this time
indexing off both sides to accurately space six holes (I could have drilled
up to eight holes spaced this way).
 A tight but precise fit!
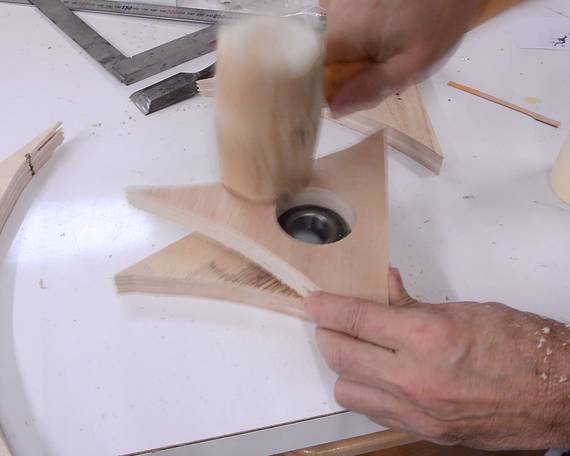
 Before gluing layers of old plywood together, it's always a good idea
to sand the surface to expose fresh wood. Over time, the surface can
get all kinds of microscopic grime deposited onto it, which makes for
poorer glue adhesion, even if it looks clean.
Before gluing layers of old plywood together, it's always a good idea
to sand the surface to expose fresh wood. Over time, the surface can
get all kinds of microscopic grime deposited onto it, which makes for
poorer glue adhesion, even if it looks clean.
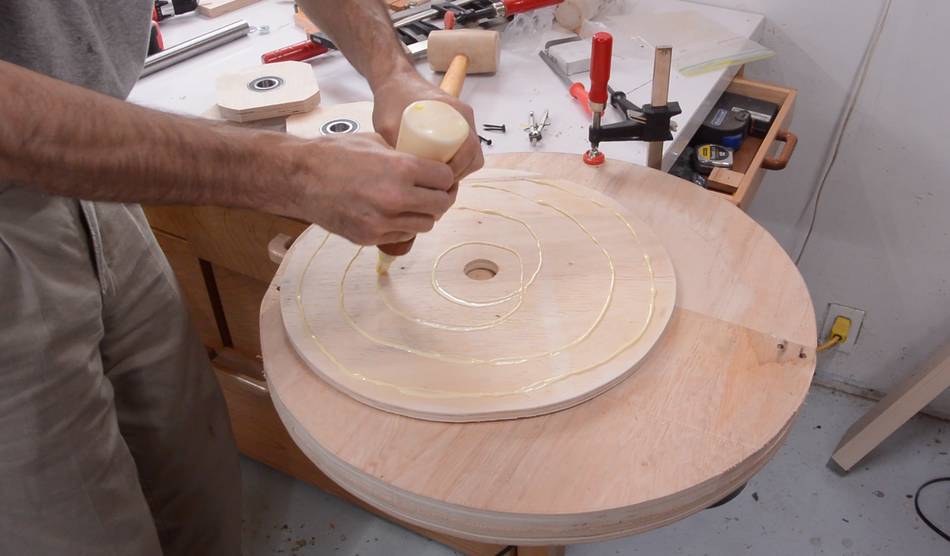
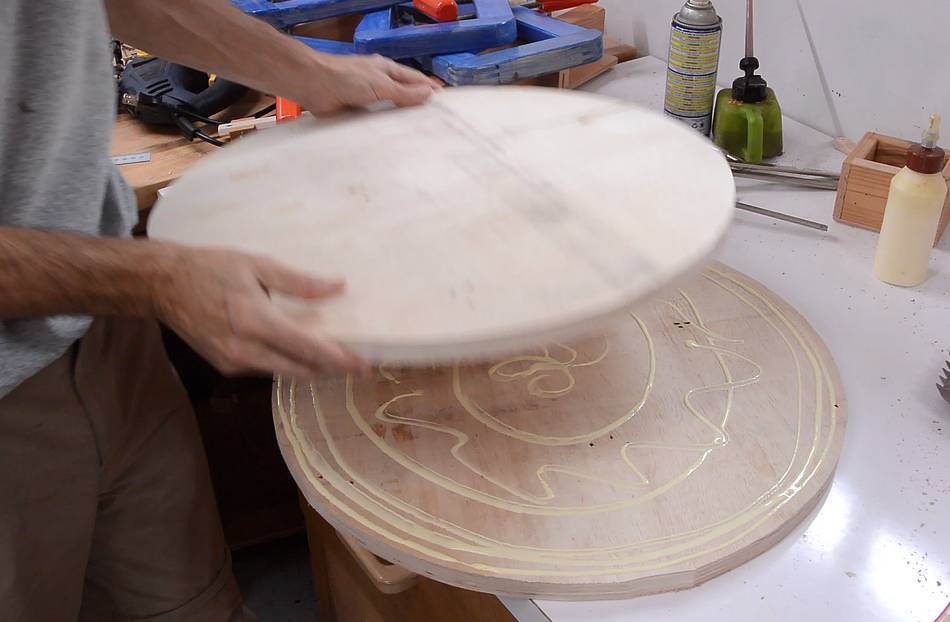 Glue applied.
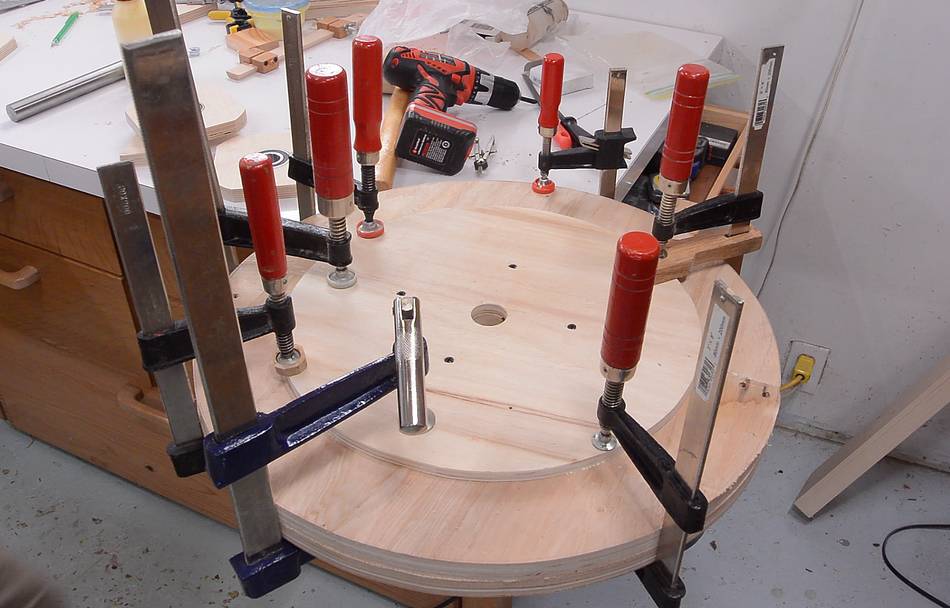
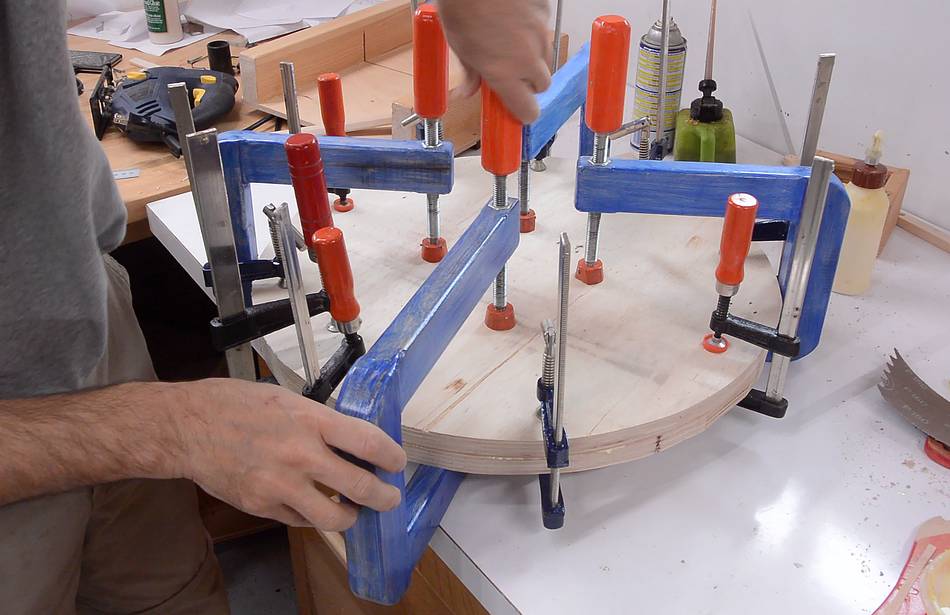 I put a lot of clamps around the perimeter, plus my
long reach clamps
to clamp near the middle. You could also use some wood screws
to clamp it together near the middle, or use some clamping cauls.
I put a lot of clamps around the perimeter, plus my
long reach clamps
to clamp near the middle. You could also use some wood screws
to clamp it together near the middle, or use some clamping cauls.
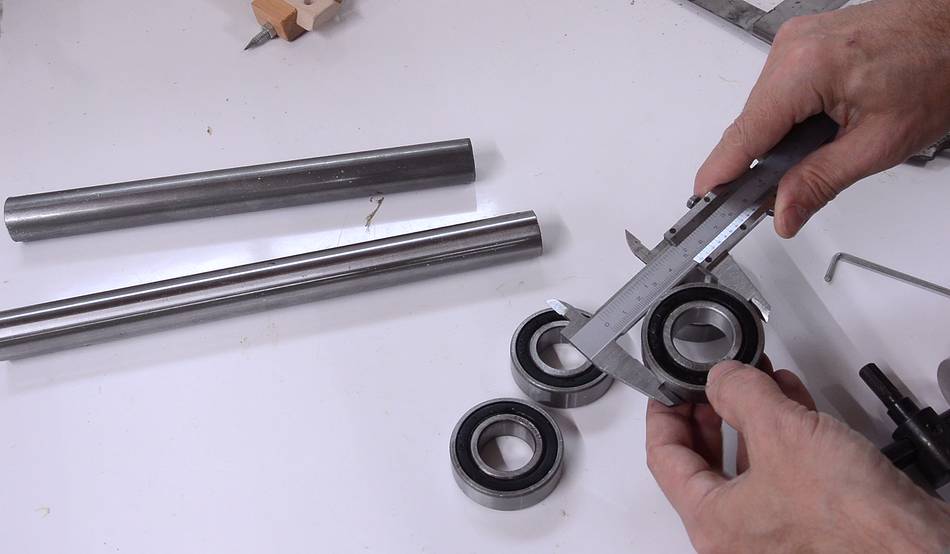 I then went shopping for shafts and bearings: some 1" shafts and bearings with
a 1" hole and 52 mm outer diameter. These are the same bearings I
used on my 16" bandsaw
six years earlier, and they have served me well.
I then went shopping for shafts and bearings: some 1" shafts and bearings with
a 1" hole and 52 mm outer diameter. These are the same bearings I
used on my 16" bandsaw
six years earlier, and they have served me well.
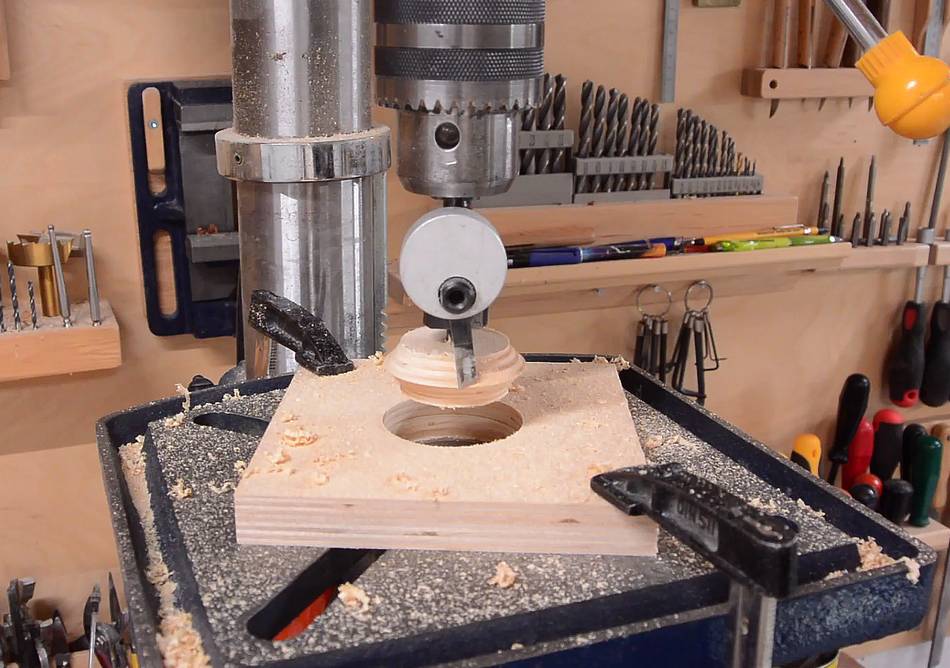
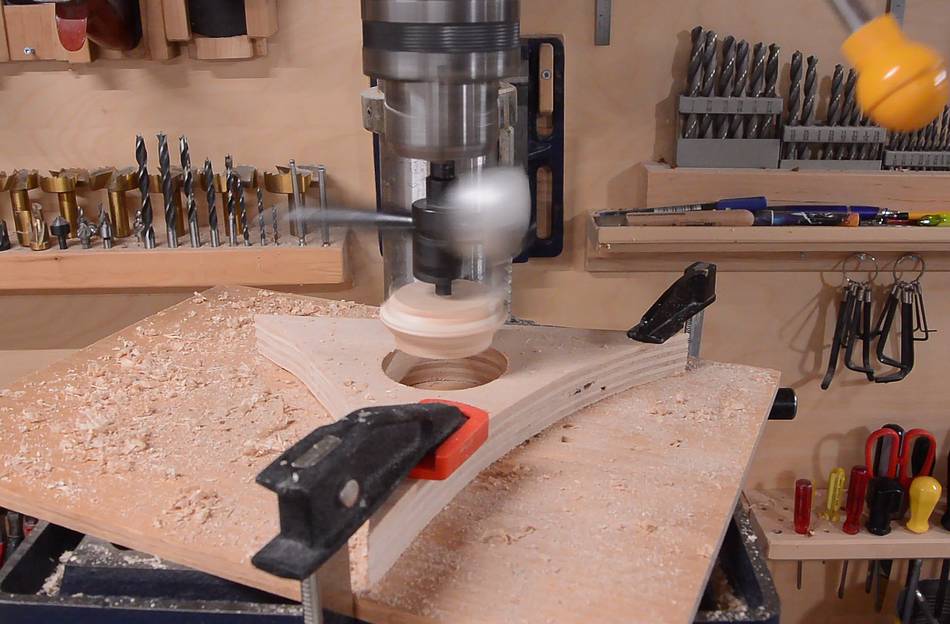 I needed to make some holes just slightly smaller than the bearings for
a tight press fit. I'm using a drill press circle cutter, cutting from
both sides, to make a test hole in some scrap.
I needed to make some holes just slightly smaller than the bearings for
a tight press fit. I'm using a drill press circle cutter, cutting from
both sides, to make a test hole in some scrap.
Note that the workpiece is clamped down. When the circle cutter breaks through, the pilot bit in the center no longer holds the workpiece, so it has a tendency to get thrown around if not clamped down.
 Checking the hole size. The first try was considerably too small.
A circle cutter like this is difficult to adjust to a precise value.
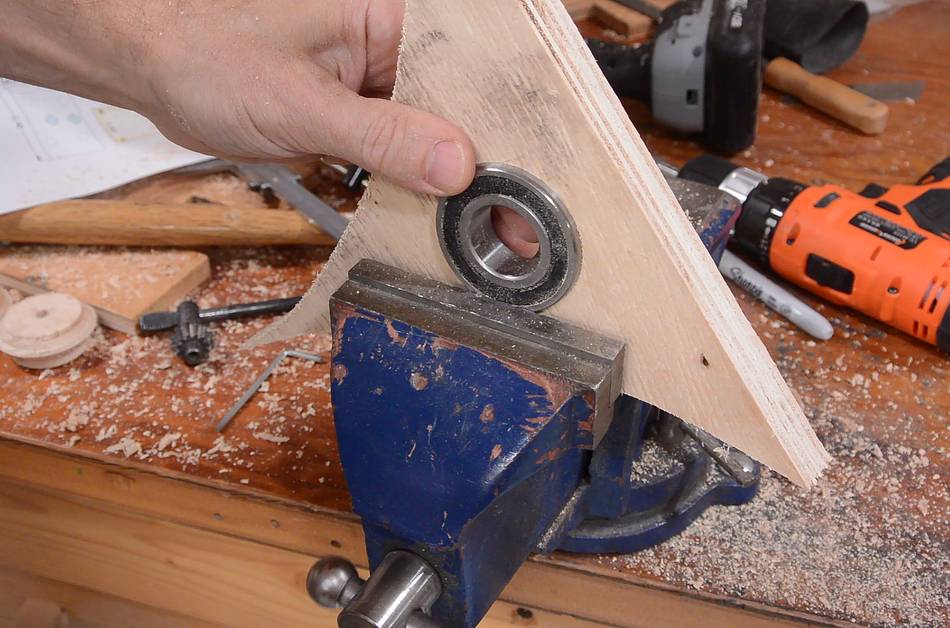
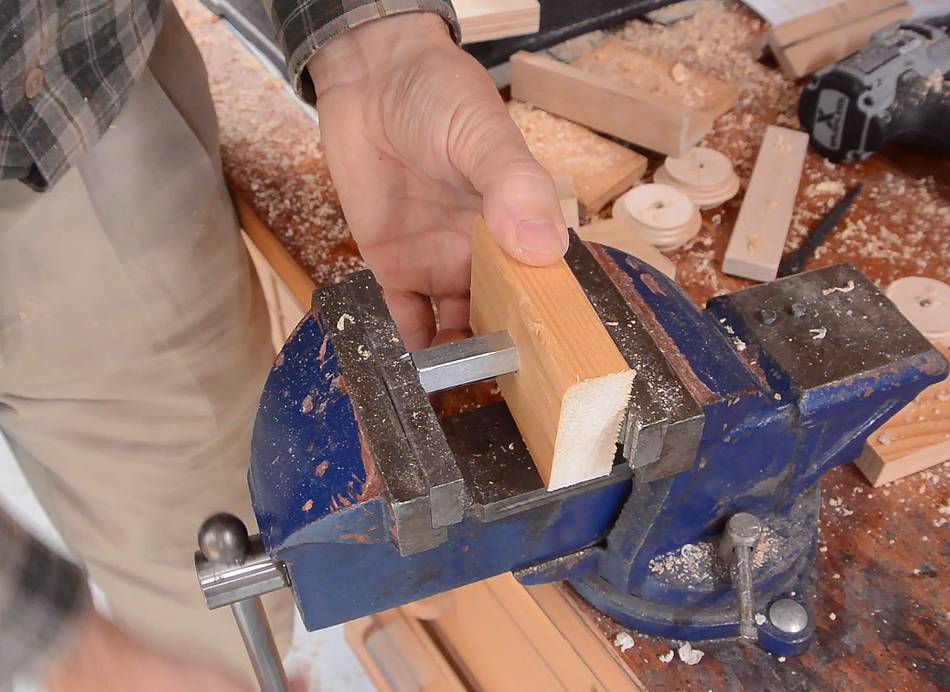
 After several tries I had a hole that was a fraction of a millimeter smaller
than the bearing. I was barely able to get the bearing part-way into the hole
with a mallet. I then used a vise, pushing the bearing in a millimeter at a time
on one side, then rotating the workpiece, pressing again, and so forth until
the bearing was flush with the wood.
After several tries I had a hole that was a fraction of a millimeter smaller
than the bearing. I was barely able to get the bearing part-way into the hole
with a mallet. I then used a vise, pushing the bearing in a millimeter at a time
on one side, then rotating the workpiece, pressing again, and so forth until
the bearing was flush with the wood.
Having successfully inserted a bearing in the test piece, I was satisfied with the fit. The fit needs to be very tight.

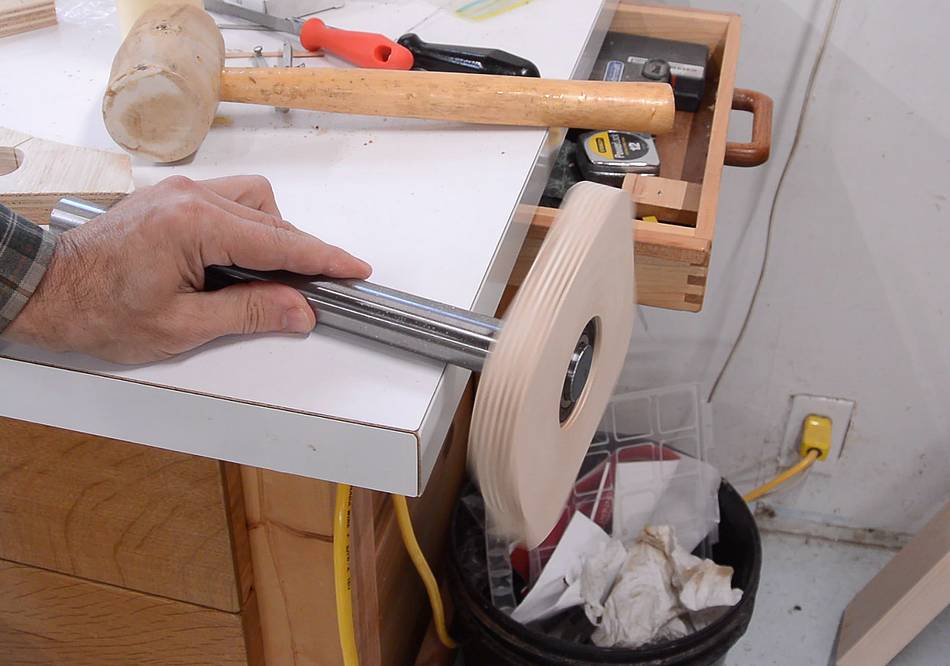
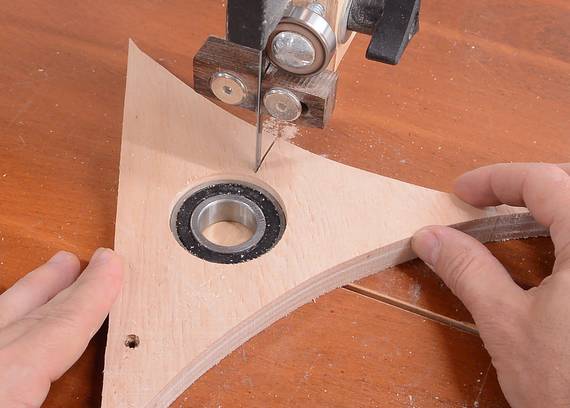 The only way to get the bearing back out of the test piece was to cut the
test piece apart.
The only way to get the bearing back out of the test piece was to cut the
test piece apart.
I cut four bearing flanges out of Baltic birch plywood. Then marking the center in each one by drawing a line a fixed distance from each edge with my beam compass. I prefer this method of establishing the center because it's less error prone than trying to draw a line exactly to the corners. It also helps to check the size of every piece.
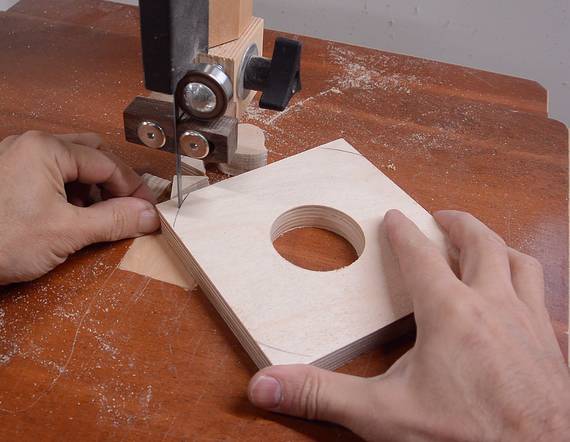 Then cutting the holes in the final flanges, as previously, drilling half way
from each side. I also cut off the corners. I figured
sharp corners on the wheel flanges could lead to injury later.
Then cutting the holes in the final flanges, as previously, drilling half way
from each side. I also cut off the corners. I figured
sharp corners on the wheel flanges could lead to injury later.
 Then pressing the bearings in with a vise.
Some caution about mounting bearings like this. When the bandsaw is running, twice the blade tension pulls on the bearings. As the wheel turns. the direction of pull of the blade changes with respect to the wheel. So it's like the wheel is continuously yanked back and forth and side to side against the bearing. The bearings need to be in the flange considerably tighter than the forces they will encounter or they will work themselves loose eventually.
If you make the holes too small, and you use a spindle sander to open them up slightly, unless you are very consistent about it, you may mess up the bearing. The bearing outer ring is only so stiff, so, if forced into a not-quite-round hole, it will assume that shape.
 Spinning the flange on the shaft to make sure it doesn't wobble.
 Then rounding the edges on my
edge belt sander
Then rounding the edges on my
edge belt sander
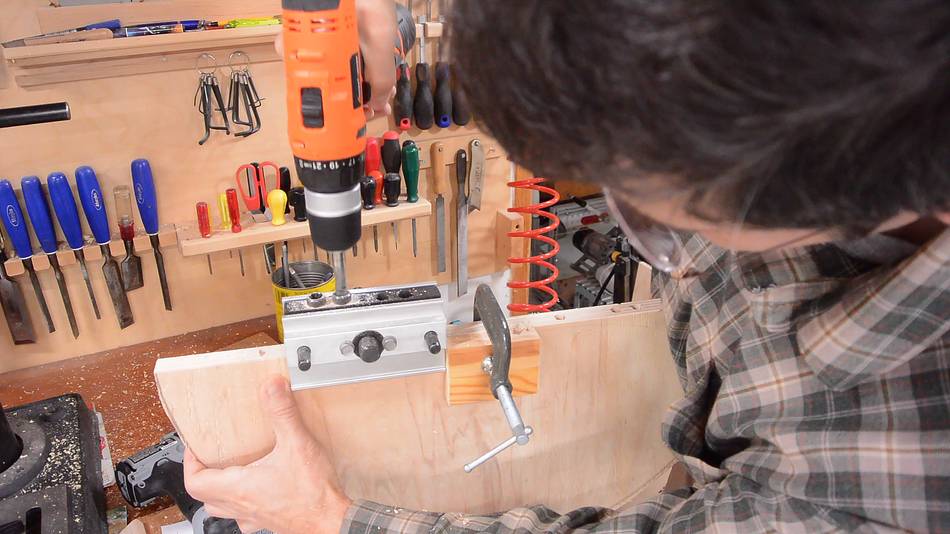
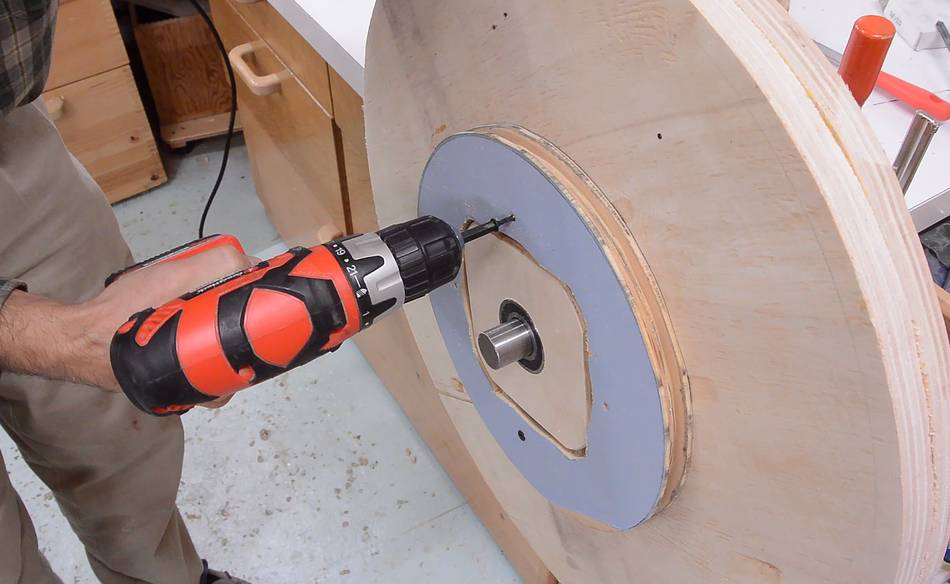
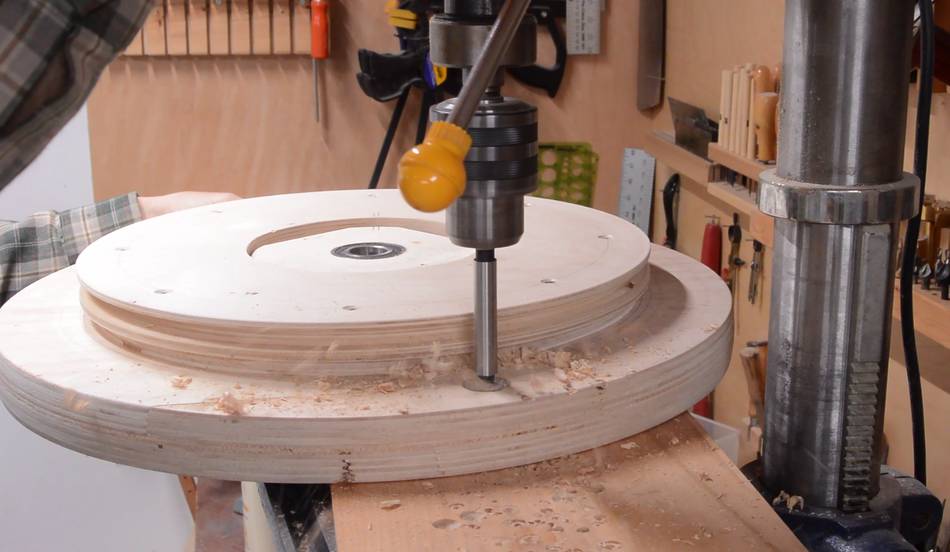
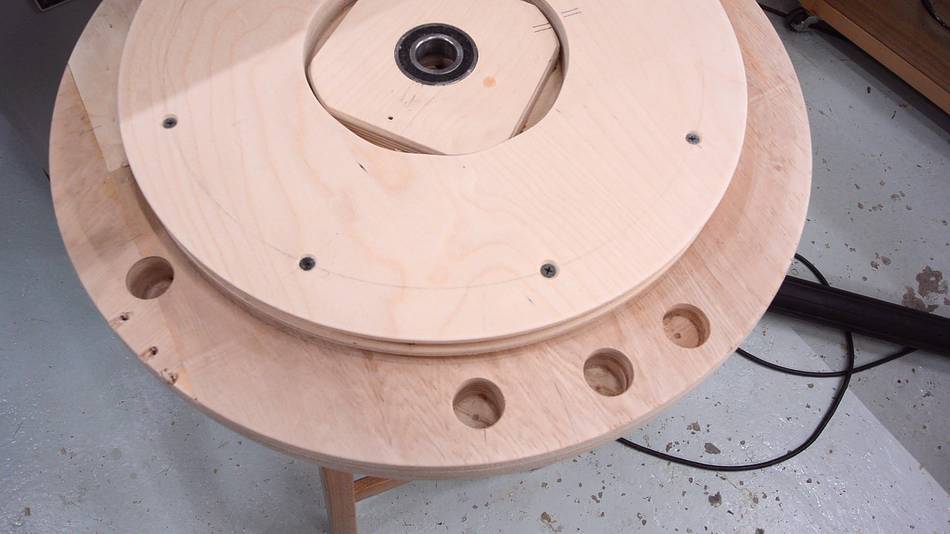
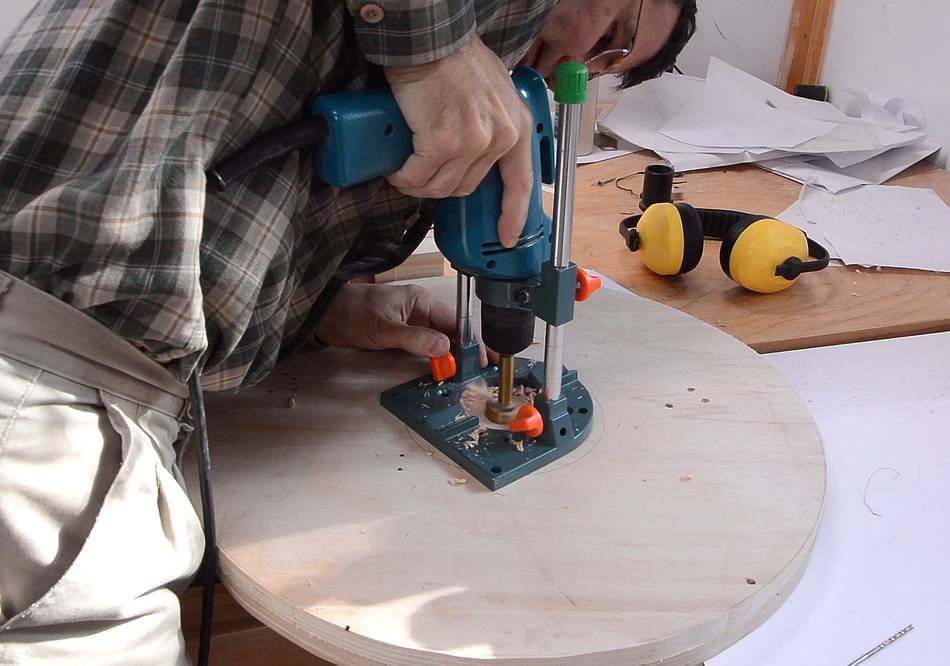 Drilling a 1 1/4" (30 mm) hole in the middle of the wheels. This hole provides
clearance for a 1" (25 mm) shaft. I'm using a drill guide to get this square
(the wheel is too big to fit in the drill press). This hole, having several
millimeters of clearance to the shaft on all sides, is not that critical, so
this could also be drilled freehand.
Drilling a 1 1/4" (30 mm) hole in the middle of the wheels. This hole provides
clearance for a 1" (25 mm) shaft. I'm using a drill guide to get this square
(the wheel is too big to fit in the drill press). This hole, having several
millimeters of clearance to the shaft on all sides, is not that critical, so
this could also be drilled freehand.
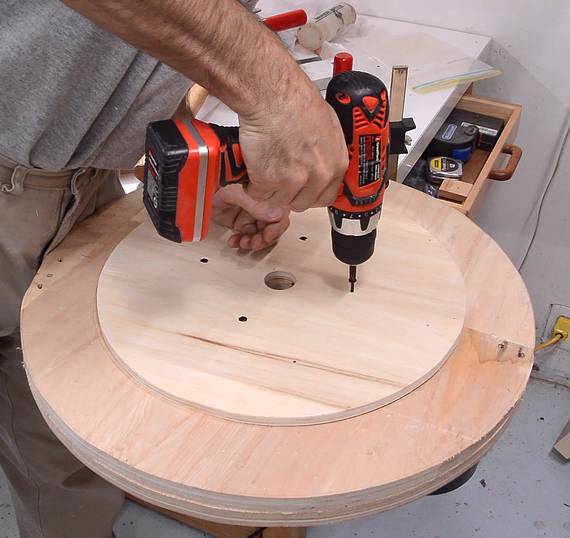
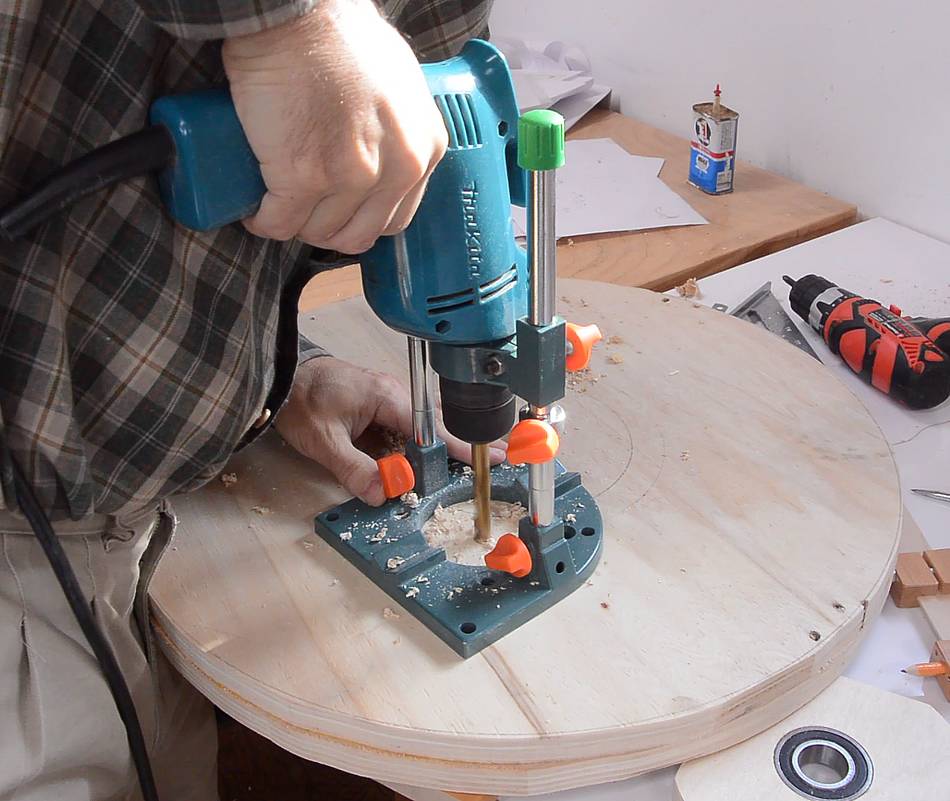 Then drilling four 7/32" (11 mm) holes in the wheels, which I'll use for clamping
the flanges later. Again, these are not critical so they could be drilled
freehand.
Then drilling four 7/32" (11 mm) holes in the wheels, which I'll use for clamping
the flanges later. Again, these are not critical so they could be drilled
freehand.
 I also need four threaded knobs with a 3/8" thread. Such knobs are hard to find,
so I'm using some 3/8" coupler nuts and pressing them into slightly undersized
holes in pieces of wood. (3/8" is roughly 10 mm).
I also need four threaded knobs with a 3/8" thread. Such knobs are hard to find,
so I'm using some 3/8" coupler nuts and pressing them into slightly undersized
holes in pieces of wood. (3/8" is roughly 10 mm).
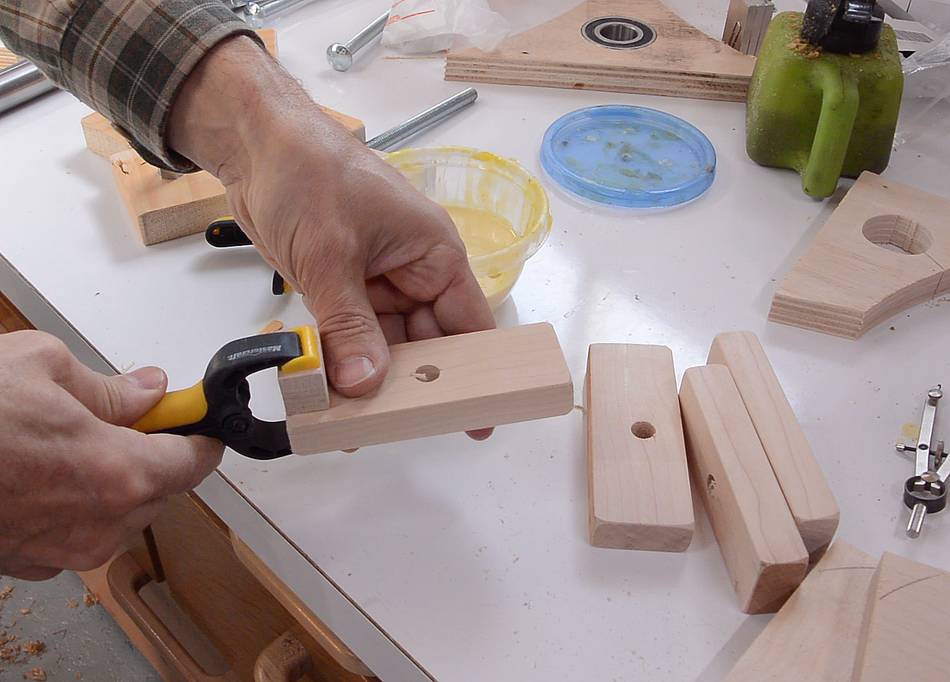 I also need four blocks to use as hold-downs for clamping the flanges. I'm making
these by gluing a small bock of wood to the end of a longer block with 7/32"
(11 mm) holes in them.
I also need four blocks to use as hold-downs for clamping the flanges. I'm making
these by gluing a small bock of wood to the end of a longer block with 7/32"
(11 mm) holes in them.
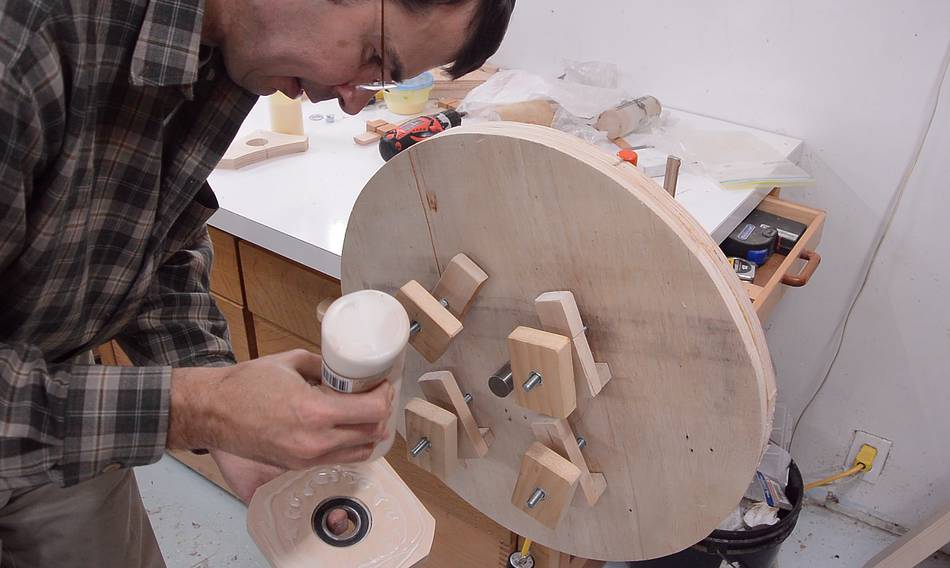
 Assembling the hold-downs on the wheel.
 Then applying glue and clamping it on.
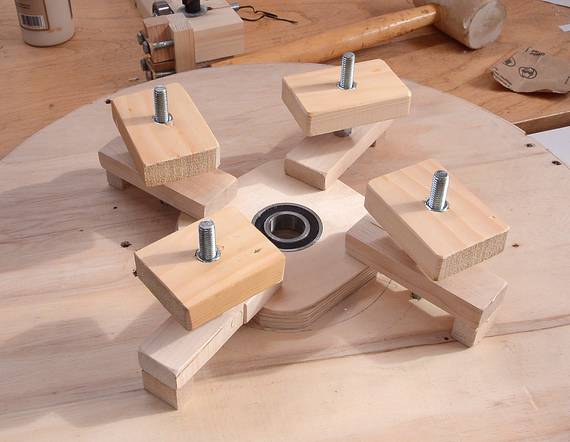
I drew a circle on the wheel before drilling the center hole to help guide where the flange needs to go.
In previous bandsaw builds, I drilled much larger holes and inserted bar clamps through the holes in the wheels, but the bar clamps had a tendency to push the flange off to the side slightly as they were tightened. These hold-downs avoid that problem.
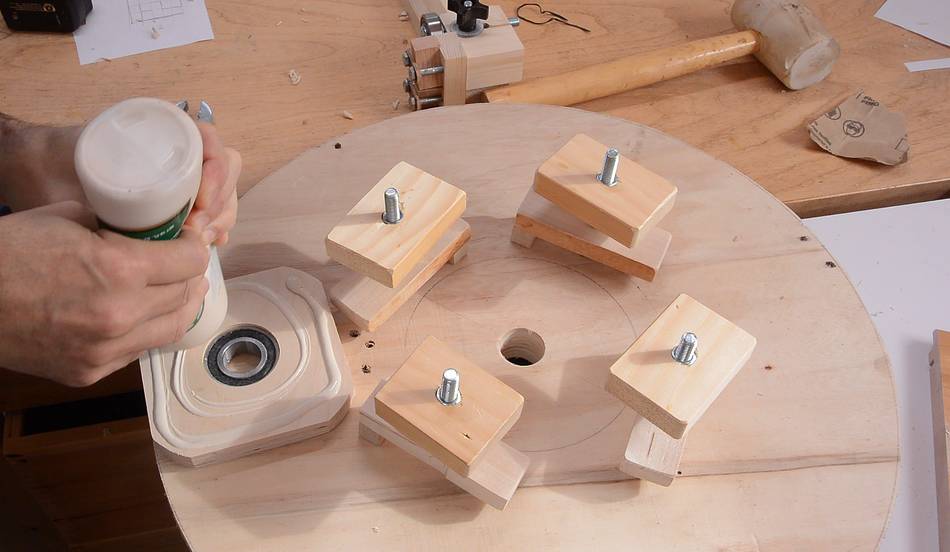
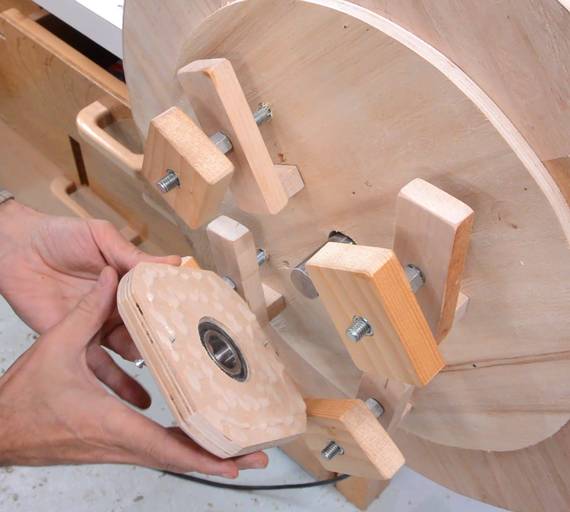
 With the shaft mounted to the workbench, I put the wheel on it with one flange
on, then apply the second flange, with glue.
With the shaft mounted to the workbench, I put the wheel on it with one flange
on, then apply the second flange, with glue.
 There was much less of a problem with the clamps pushing the flange off center
than I had with bar clamps on previous bandsaw builds.
There was much less of a problem with the clamps pushing the flange off center
than I had with bar clamps on previous bandsaw builds.
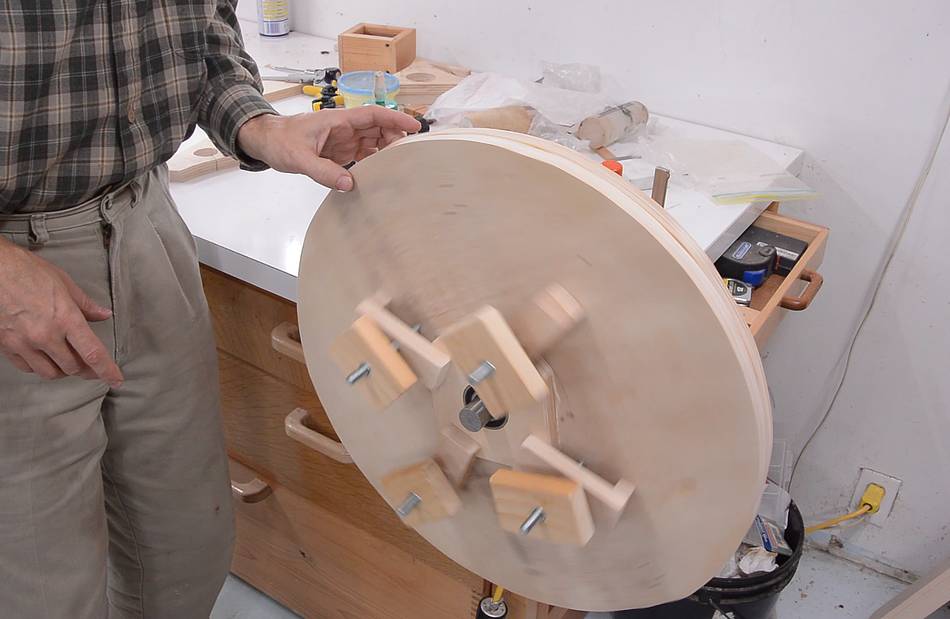
 Checking wheel wobble by holding a piece of wood near the rim while it spins.
Unfortunately, the glue set firmly before I had a chance to tweak it to my
satisfaction. I still had about 1 mm of lateral wobble. A bar clamp at an
angle wasn't enough to overcome the glue.
Checking wheel wobble by holding a piece of wood near the rim while it spins.
Unfortunately, the glue set firmly before I had a chance to tweak it to my
satisfaction. I still had about 1 mm of lateral wobble. A bar clamp at an
angle wasn't enough to overcome the glue.

 For the second wheel, I clamped and tweaked the flange position without
applying any glue. I then drilled pilot holes and added two screws to
fix the flange position, removed the flange, added glue, then used the screws
to get the flange back in the same place. This procedure was much less
stressful.
For the second wheel, I clamped and tweaked the flange position without
applying any glue. I then drilled pilot holes and added two screws to
fix the flange position, removed the flange, added glue, then used the screws
to get the flange back in the same place. This procedure was much less
stressful.
 Checking this one, by spinning the wheel and holding something fixed
near the rim, it had almost no lateral wobble.
Checking this one, by spinning the wheel and holding something fixed
near the rim, it had almost no lateral wobble.
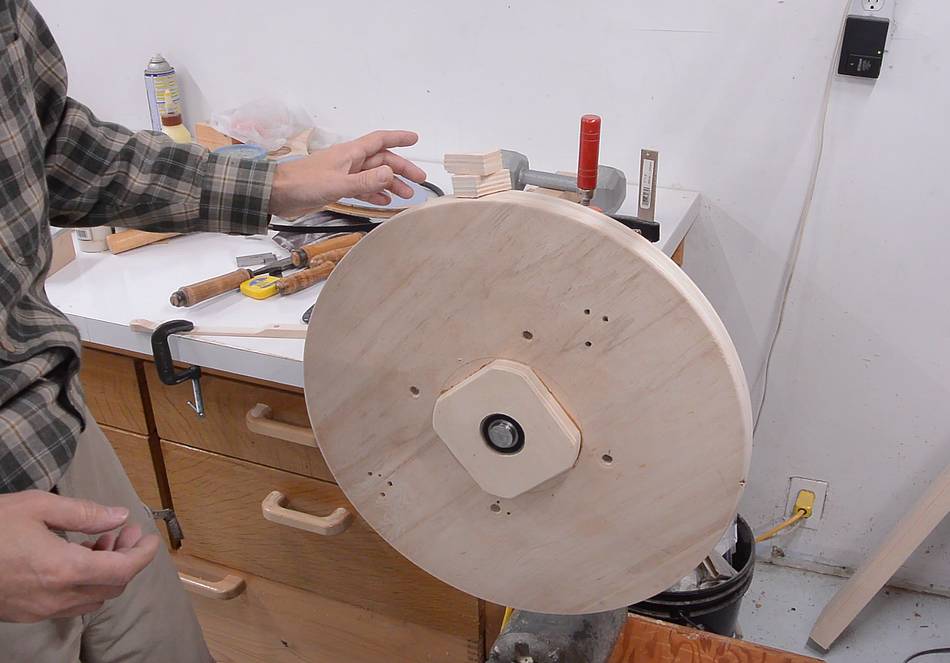
 I screwed on a temporary pulley for spinning the wheels.
This is a temporary pulley I used during my
first bandsaw build, though I cut a hole in it to fit around the flange.
I screwed on a temporary pulley for spinning the wheels.
This is a temporary pulley I used during my
first bandsaw build, though I cut a hole in it to fit around the flange.
I made the pulley by cutting a round disk out of plywood, then using the table saw to cut a slot around the circumference. I didn't bother bevelling the sides of the slot — it's only a temporary pulley.
If you are not comfortable cutting the slot around the perimeter on the table saw, you could also use a router with a slot cutter bit, or glue together three thinner layers of plywood.
 I drilled a hole the size of the shaft in a block of wood, cut a slot in it,
and clamped it to the end of the shaft to make sure the wheel can't slide off.
I drilled a hole the size of the shaft in a block of wood, cut a slot in it,
and clamped it to the end of the shaft to make sure the wheel can't slide off.
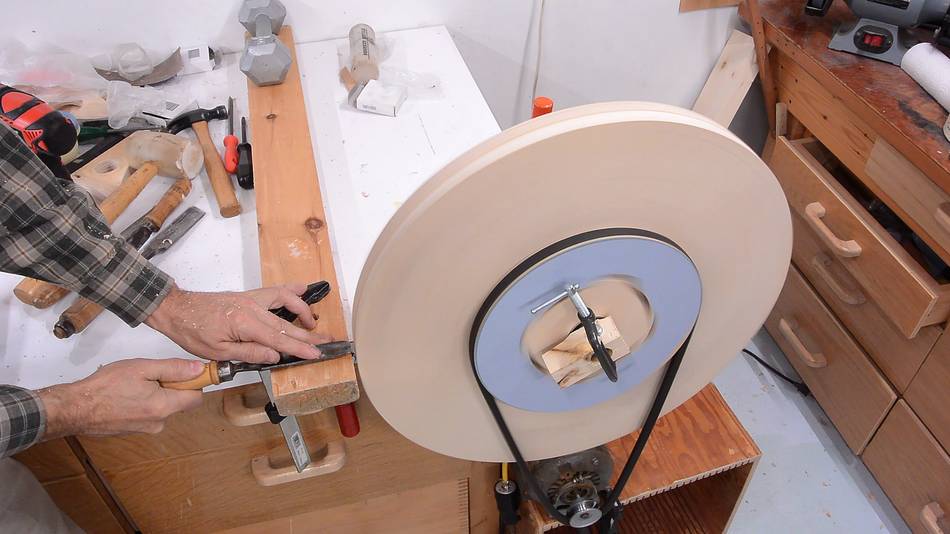
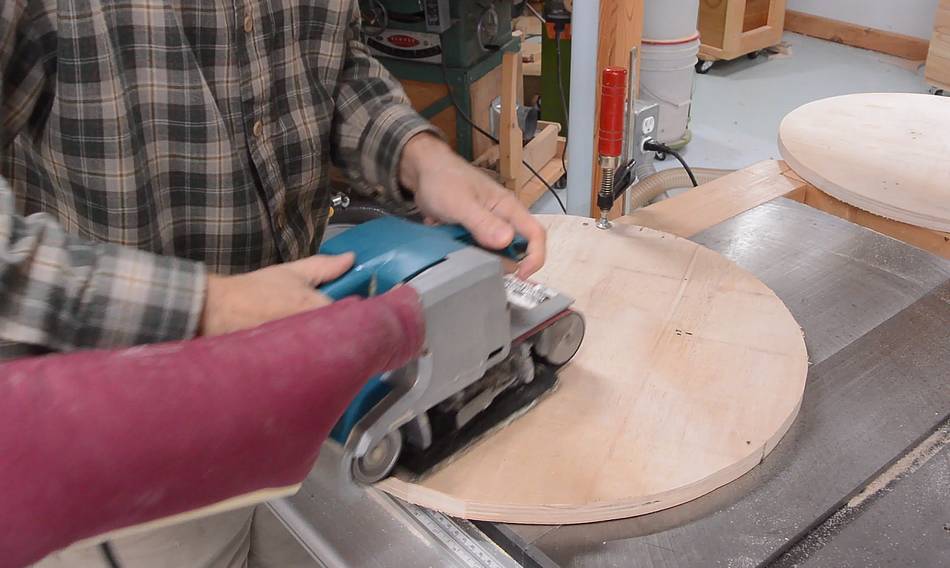
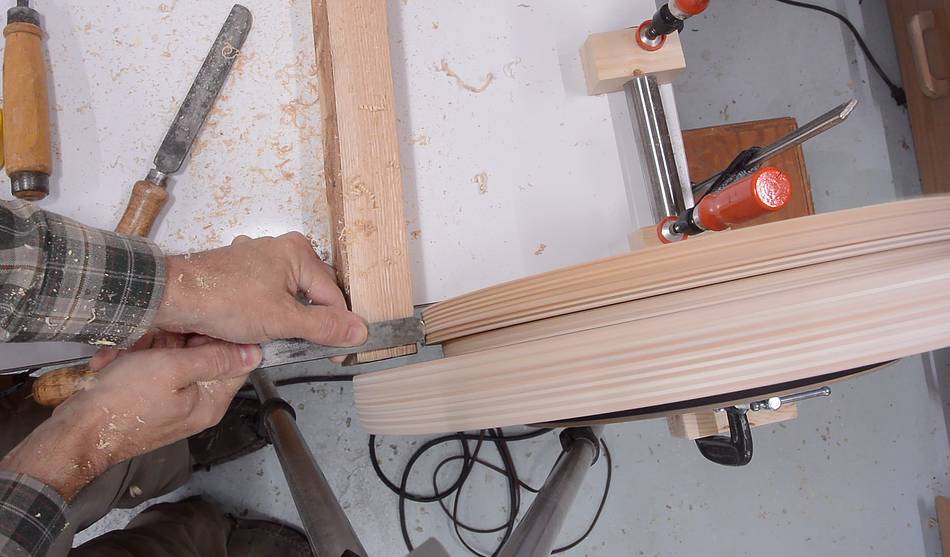
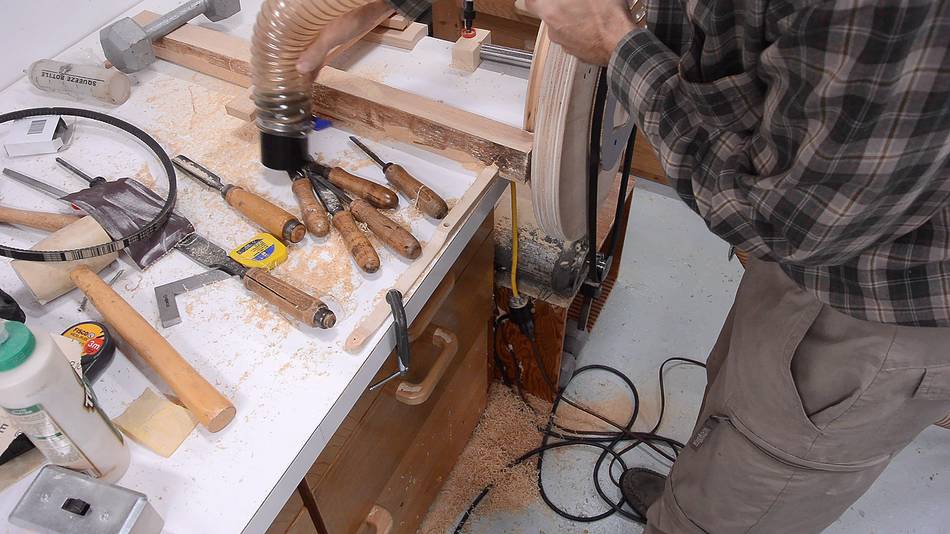
 Then using a small 1750 RPM utility motor with a 2" pulley on it, I spun up
the wheel. A piece of wood clamped to the bench serves as a tool rest
so I can turn the wheel down like it was on a lathe.
Then using a small 1750 RPM utility motor with a 2" pulley on it, I spun up
the wheel. A piece of wood clamped to the bench serves as a tool rest
so I can turn the wheel down like it was on a lathe.
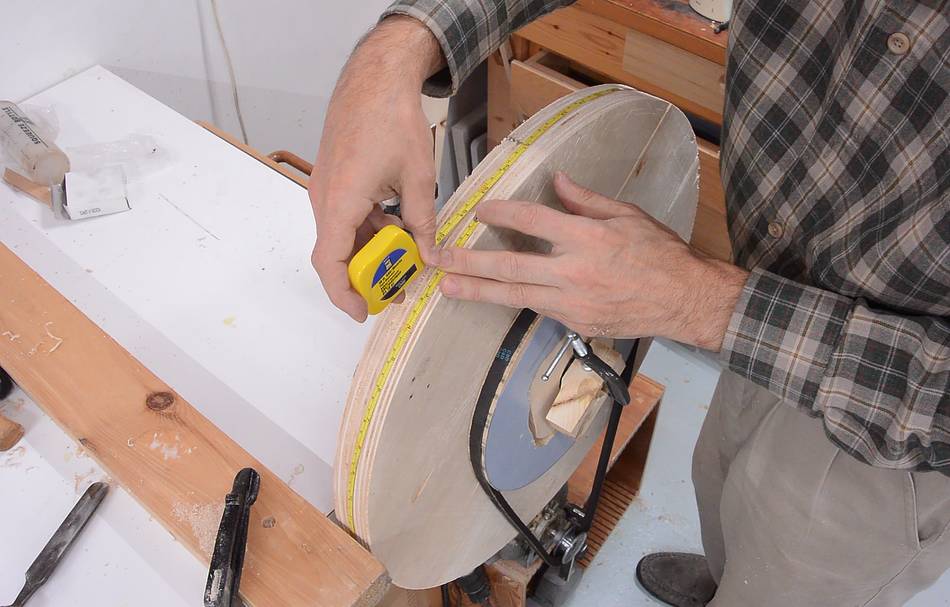
 Checking the size. I'm using a flexible tape measure (not the sort that extends
straight out) to measure the circumference. I want a diameter of 50 cm, minus
1 mm tire thickness, so 49.8 cm diameter. That works out to a circumference of 156.4
cm. With a floppy tape measure, circumference is easier to measure accurately.
Checking the size. I'm using a flexible tape measure (not the sort that extends
straight out) to measure the circumference. I want a diameter of 50 cm, minus
1 mm tire thickness, so 49.8 cm diameter. That works out to a circumference of 156.4
cm. With a floppy tape measure, circumference is easier to measure accurately.

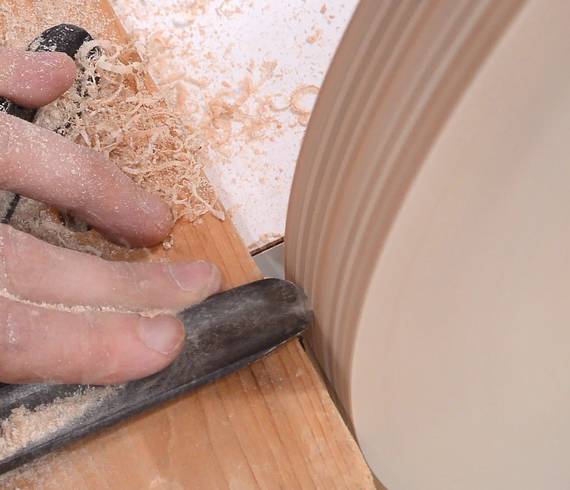
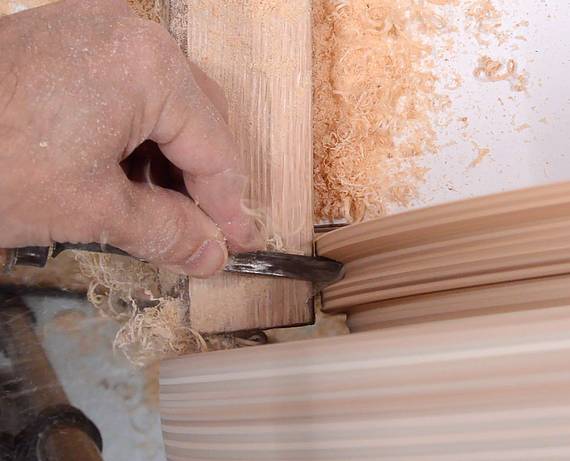
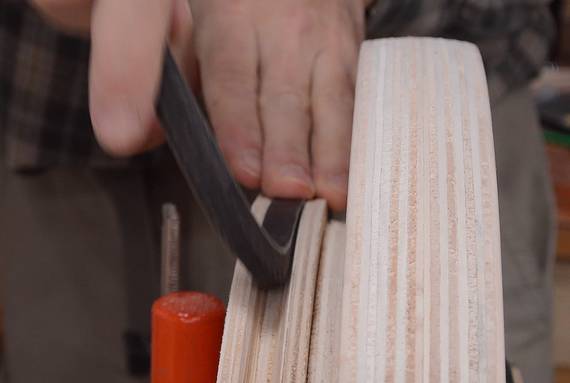
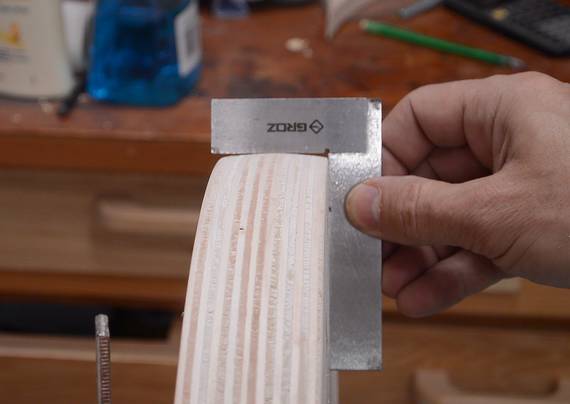 After getting it down to the right diameter, I turned a "crown" on the wheel.
Basically, a peak in the middle of the wheel. This helps
keep the blade tracking on the wheels.
After getting it down to the right diameter, I turned a "crown" on the wheel.
Basically, a peak in the middle of the wheel. This helps
keep the blade tracking on the wheels.
 The lower wheel will have a large drive pulley attached to one side.
To offset the drive pulley a little, I'm gluing on a disk of plywood.
The lower wheel will have a large drive pulley attached to one side.
To offset the drive pulley a little, I'm gluing on a disk of plywood.
I put four screws on it near the middle to help clamp that disk in place.
 Then adding lots of clamps around the perimeter to help glue it on.
After the glue dried, I removed the screws
 Then making the wheel for the pulley. This wheel is 24 mm thick, consisting
of 18 mm Baltic birch plywood and 6 mm Baltic birch glued together. I'm cutting
a hole in the middle to fit around the wheel's bearing flange.
Then making the wheel for the pulley. This wheel is 24 mm thick, consisting
of 18 mm Baltic birch plywood and 6 mm Baltic birch glued together. I'm cutting
a hole in the middle to fit around the wheel's bearing flange.
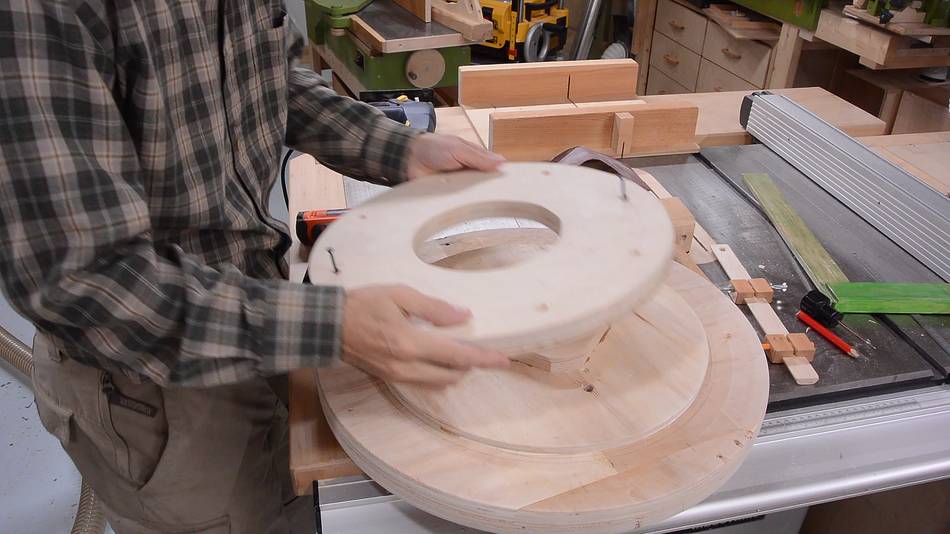 Attaching the pulley blank to the lower wheel...
 ...then turning the pulley perfectly round and turning a V-groove in it
to match a 1/2" wide V-belt.
...then turning the pulley perfectly round and turning a V-groove in it
to match a 1/2" wide V-belt.
 Checking the fit of the V-belt. The belt should fit flush with the surface
(or lower), but not touch the bottom of the V-groove.
Checking the fit of the V-belt. The belt should fit flush with the surface
(or lower), but not touch the bottom of the V-groove.
After that, sucking up all the shavings with my dust collector.
 The next step was to balance the wheels. After all the turning, the bearings
ended up spinning freely enough that I could just put the wheel on the shaft
and watch which side tended to move down.
The next step was to balance the wheels. After all the turning, the bearings
ended up spinning freely enough that I could just put the wheel on the shaft
and watch which side tended to move down.
I used some scraps of the plywood I made the wheels with, stacking them on the top rim of the wheel to get a sense of how much wood I had to remove.
 Then drilling some holes, from what will be the back of the wheel. I drilled these
holes most of the way through the wheels.
Then drilling some holes, from what will be the back of the wheel. I drilled these
holes most of the way through the wheels.
 For the bottom wheel, I had to remove quite a bit of material to get it balanced.
For the top, I only had to drill out one hole.
For the bottom wheel, I had to remove quite a bit of material to get it balanced.
For the top, I only had to drill out one hole.

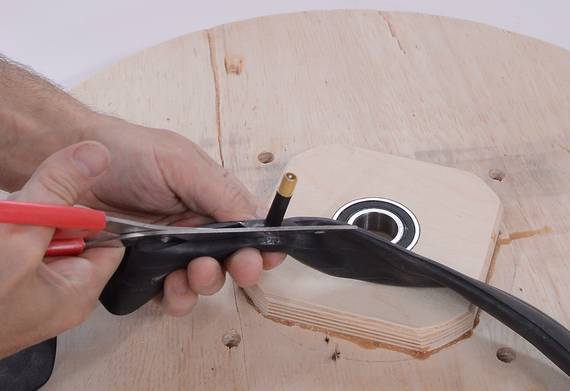 Bandsaw wheels have a rubber "tire" on them to prevent the blade's teeth
from wearing away the wheel over time. I'm using a 16" bicycle inner tube as
my tire. I slice it open along the inside-most part of the tube, also carefully
cutting around the valve.
Bandsaw wheels have a rubber "tire" on them to prevent the blade's teeth
from wearing away the wheel over time. I'm using a 16" bicycle inner tube as
my tire. I slice it open along the inside-most part of the tube, also carefully
cutting around the valve.
Inner tubes typically have powder on the inside to keep the rubber from sticking to itself. But we want the rubber to stick to the wheel as much as possible, so after slicing them open, I washed them with soap and warm water.
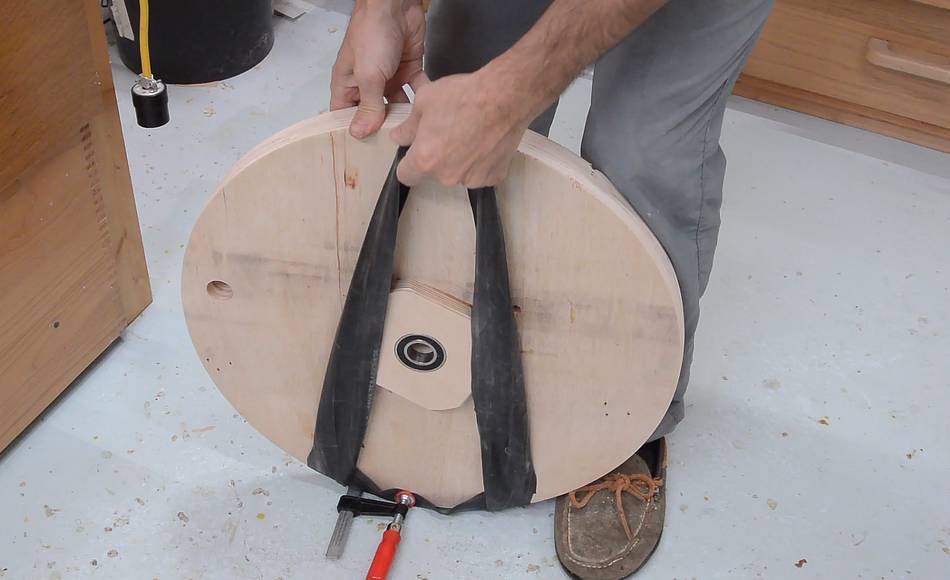
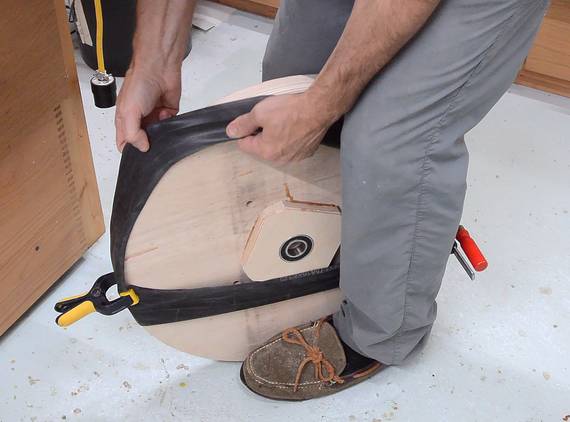 Stretching the tube on can be tricky. I clamped the inner tube to one side, then
stretched it across to the other side and clamped it there. Then, turning
the wheel by one quarter turn, I can pull one side of the tube up and around the
wheel at a time. After that, I removed the clamps and adjust the position.
Stretching the tube on can be tricky. I clamped the inner tube to one side, then
stretched it across to the other side and clamped it there. Then, turning
the wheel by one quarter turn, I can pull one side of the tube up and around the
wheel at a time. After that, I removed the clamps and adjust the position.
I'm still planning on adding a few coats of varnish to the wheel, so the inner tube will have to come off again for that. I'll varnish the wheels when I varnish the frame, so that will come later.
Next: Making the bandsaw frame
 Big bandsaw frame
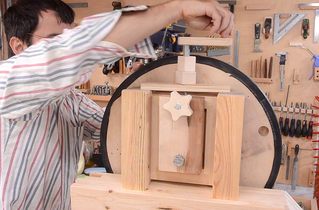 Wheel mounts, tension, tracking, first cut
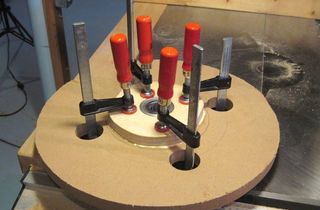 Making the wheels
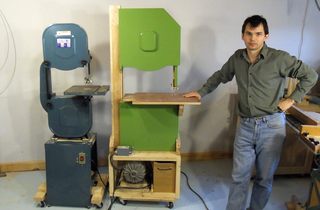 My 18" bandsaw (the
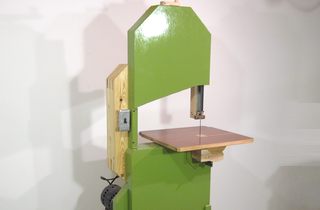 My 16" bandsaw (my second bandsaw)
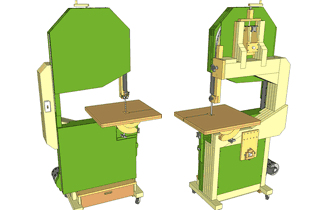 Buy plans for the 26" bandsaw