Carving canoe paddles on the bandsaw
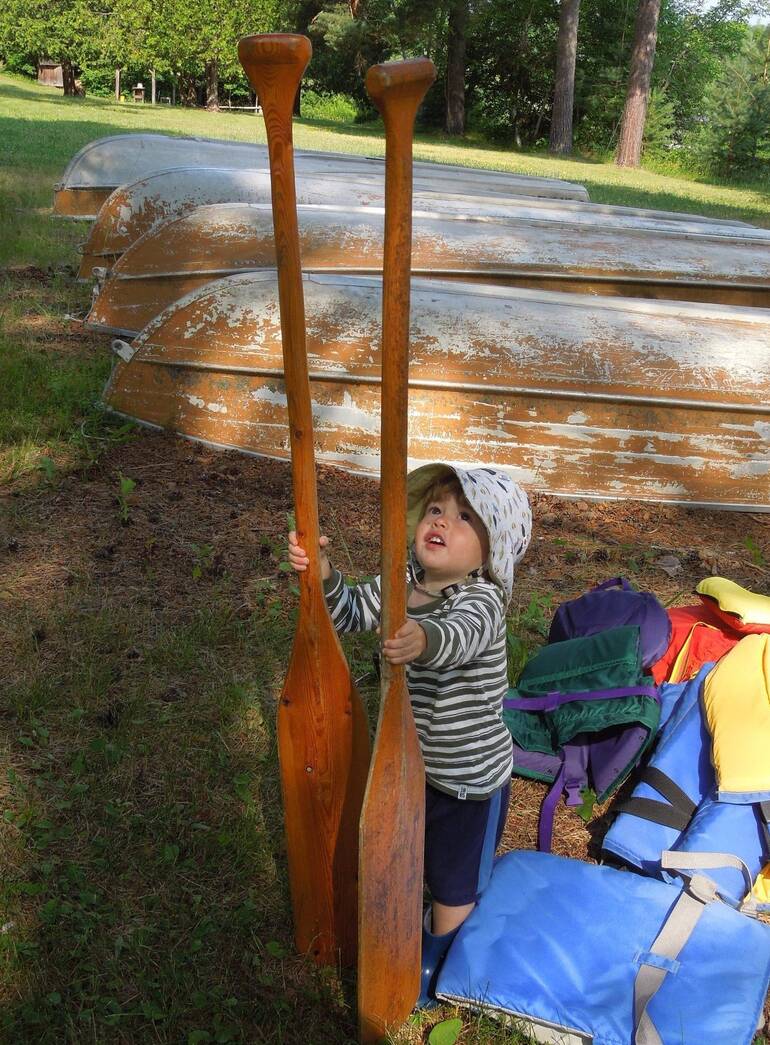
Recently, I took part in a short canoe trip down Barron Canyon in Algonquin Park. We were using some nice "Grey Owl" straight wooden canoe paddles. During all the paddling, I started contemplating the shape of the paddle, and realized that its shape was something that could mostly be cut with a bandsaw. What I realized was that the cross-section of the paddle could easily be approximated by a series of straight lines along the whole length of the paddle's blade. You can see how the edge of the profile consists of just two straight line segments in the photo at left.
The question was - how to guide a bandsaw to cut that very shape?
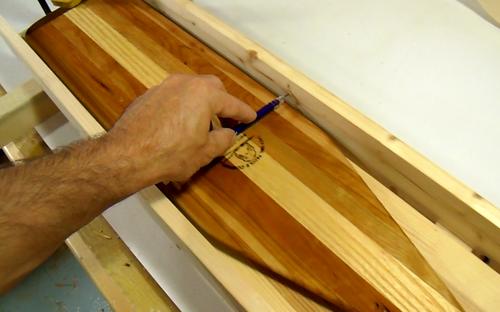 So I came up with this idea for a jig. The jig is essentially a sort of channel
that the original paddle can be placed into. Then I take a pencil and drag
it along one of the faces of the paddle. I pull it along so that
the pencil shaft is always flat against part of the paddle profile while
at the same time drawing a line on the edge of my jig. I repeat this with
the pencil facing the opposite direction, but still dragging it along
the same surface as before. These two lines now define the path that the
pencil took along the surface of the paddle.
So I came up with this idea for a jig. The jig is essentially a sort of channel
that the original paddle can be placed into. Then I take a pencil and drag
it along one of the faces of the paddle. I pull it along so that
the pencil shaft is always flat against part of the paddle profile while
at the same time drawing a line on the edge of my jig. I repeat this with
the pencil facing the opposite direction, but still dragging it along
the same surface as before. These two lines now define the path that the
pencil took along the surface of the paddle.
 And now I take the sides off my jig and cut along the lines with the bandsaw.
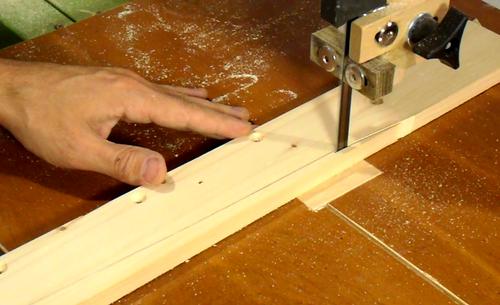
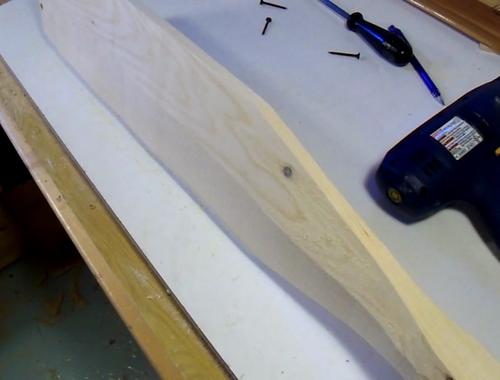
 But before I get too far, it helps to cut the basic flat shape of the paddle.
This is pretty easy, just a matter of placing the paddle on a piece of wood,
tracing the outline, and then cutting that out on the bandsaw.
But before I get too far, it helps to cut the basic flat shape of the paddle.
This is pretty easy, just a matter of placing the paddle on a piece of wood,
tracing the outline, and then cutting that out on the bandsaw.
That said, I didn't set the screws deep enough one time and cut into them,
so I had to resharpen the blade
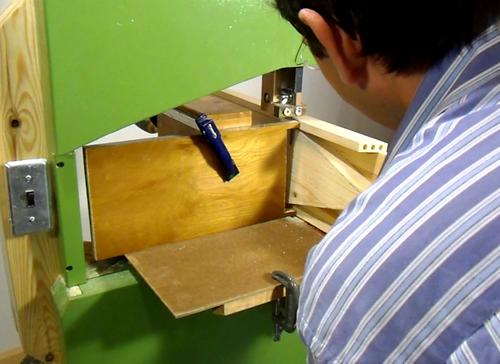
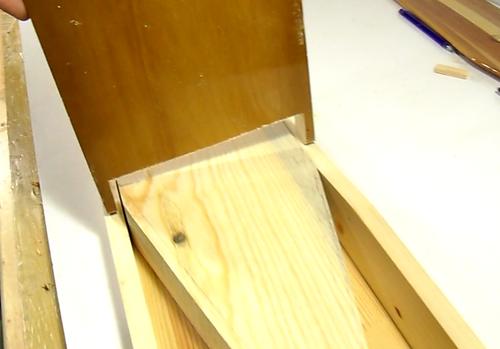 And here's where the clever part comes in. I made a board with a big cutout
on the end to use as my fence. The two remaining "prongs" of the board
ride against the edges of my jig, while the middle cutout leaves room for
my unshaped paddle blank.
And here's where the clever part comes in. I made a board with a big cutout
on the end to use as my fence. The two remaining "prongs" of the board
ride against the edges of my jig, while the middle cutout leaves room for
my unshaped paddle blank.
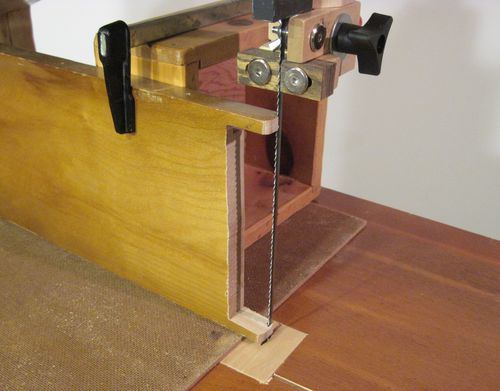 I rigidly mounted this board on my bandsaw. The prongs of the board are
just in front of the blade, and protrude right just past the blade.
The sides of my jig ride against these prongs, and away from the blade.
But my paddle blank sticks out further than the jig's sides,
so it will get cut by the bandsaw blade.
I rigidly mounted this board on my bandsaw. The prongs of the board are
just in front of the blade, and protrude right just past the blade.
The sides of my jig ride against these prongs, and away from the blade.
But my paddle blank sticks out further than the jig's sides,
so it will get cut by the bandsaw blade.
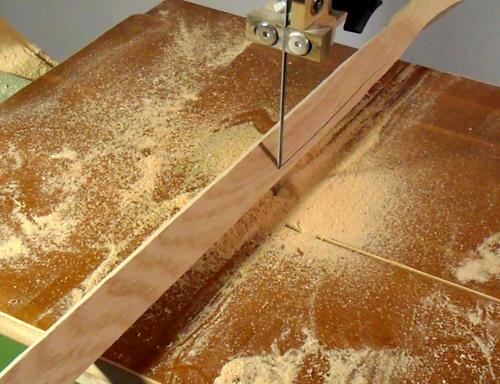
I used a 1/4" bandsaw blade. Not ideal for this deep a cut, but my cut will actually
have a slight bit of twist in it as it goes along, and I figured a narrower
blade would make that easier.
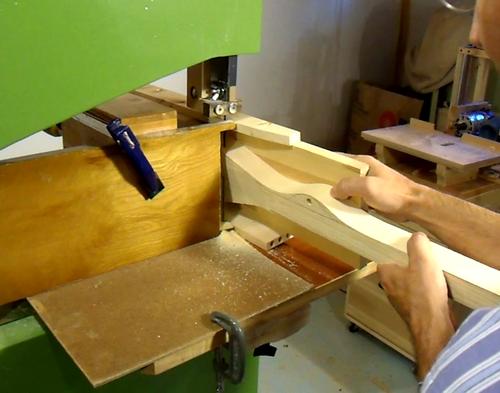
 This photo was taken near the end of the first cut. My jig and paddle blank
tilt progressively further to the right as I get to the end.
This photo was taken near the end of the first cut. My jig and paddle blank
tilt progressively further to the right as I get to the end.
 After making the first cut, I swapped the boards on either side of my jig.
Now the narrow side is at the top and the wide one at the bottom. So this
cut tilts towards the left as it finishes up.
After making the first cut, I swapped the boards on either side of my jig.
Now the narrow side is at the top and the wide one at the bottom. So this
cut tilts towards the left as it finishes up.
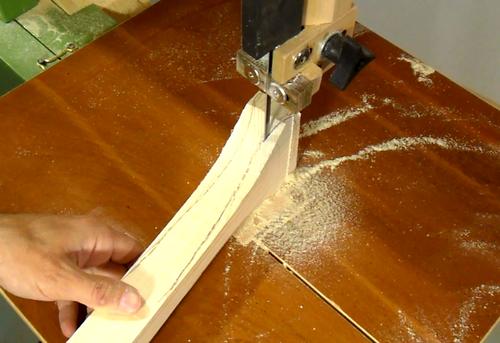
 So with two curved cuts, I can shape one side of the paddle blade.
Next I flipped the paddle over and repeated the same procedure
to cut the other side of the blade.
So with two curved cuts, I can shape one side of the paddle blade.
Next I flipped the paddle over and repeated the same procedure
to cut the other side of the blade.
 I sketched the profile of the "pear" handle onto my blank and cut that out
with the bandsaw as well.
I sketched the profile of the "pear" handle onto my blank and cut that out
with the bandsaw as well.
 I also chamfered the edges of the shaft to make it roughly
octagonal. I did that with a freehand cut.
I also chamfered the edges of the shaft to make it roughly
octagonal. I did that with a freehand cut.
 This is as far as I could take the paddle with the bandsaw. Time to finish
it up with some hand tools.
This is as far as I could take the paddle with the bandsaw. Time to finish
it up with some hand tools.
 I thinned and smoothed the blade with a spokeshave.
I tried using a hand plane, but I couldn't really follow the curved bandsaw cuts with a plane very well. The spokeshave worked pretty good.
I also used the spokeshave to shape the handle to have a round cross-section.
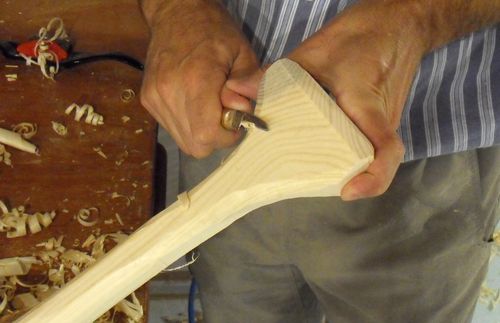 I used a carving knife to shape the handle...
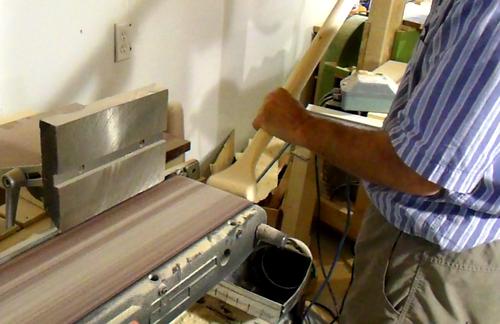 ... plus a little work with the belt sander.
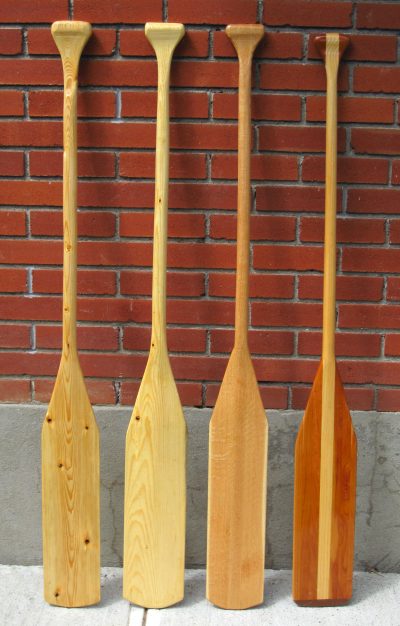 All in all, I made three paddles. Two out of spruce (more for practice than anything),
and then one out of oak. The paddle on the right is the original "Grey Owl"
brand paddle.
All in all, I made three paddles. Two out of spruce (more for practice than anything),
and then one out of oak. The paddle on the right is the original "Grey Owl"
brand paddle.
I actually like the second practice paddle I made the best (second from left). It's the lightest, but I think it's still strong enough for paddling because I made it a bit thicker than the hardwood one. It will be more likely to get nicked because the wood is soft, but I probably won't be abusing it that much. Spruce also rots faster than the ash and cherry of the Grow Owl or the oak I used for my third paddle. But rotting is something that takes years of continuous moist conditions. I put three coats of an oil based varnish the paddles, so the wood itself should stay dry unless it were to go on a really long canoe trip.
The spruce paddles are cut from one piece, but the hardwood one is laminated from three pieces. I used Titebond 3 to glue the strips of oak together. The manufacturers make great claims about how waterproof Titebond 3 is. I'm hoping the claims are true.
I found a "how i'ts made" episode on
making canoe paddles
on YouTube. Interestingly enough, they are making "Grey Owl" paddles in the
video, the same brand that I copied. I was really keen on seeing how
they shaped the profile of the blade, but
that step was skipped over. Maybe that step is a "trade secret". But
when you look at how low-tech the operation is, I wouldn't be surprised if
they used something very similar to my method to shape their paddles!
| I shot video of much of the process. In fact, a lot of the photos in this article are extracted from the video because I neglected to take photos of every step. |
 And here are the canoe paddles, nine years later, in 2019. The paddles only get
used a few times each summer. The varnish on the oak paddle is a bit banged up.
The spruce paddle (the left one) is less banged up. Possibly the varnish gets
less scraped with the softwer wood?
And here are the canoe paddles, nine years later, in 2019. The paddles only get
used a few times each summer. The varnish on the oak paddle is a bit banged up.
The spruce paddle (the left one) is less banged up. Possibly the varnish gets
less scraped with the softwer wood?
 If you are wondering about the bandsaw that I'm using - this is my
second homemade bandsaw.
Numerous people have been asking about buying plans for
my first homemade bandsaw, but I didn't
want to sell plans for that one because I had some ideas for how to build
an even better one. Soon after I wrote about that bandsaw, I started
playing around with CAD designing a more refined 16" bandsaw.
I finished that saw about a month ago (mid July), but putting together a plans
package takes a huge amount of time, so I have refrained from writing
about it (although you can see a few more glimpses of it in my
kids table article and video).
If you are wondering about the bandsaw that I'm using - this is my
second homemade bandsaw.
Numerous people have been asking about buying plans for
my first homemade bandsaw, but I didn't
want to sell plans for that one because I had some ideas for how to build
an even better one. Soon after I wrote about that bandsaw, I started
playing around with CAD designing a more refined 16" bandsaw.
I finished that saw about a month ago (mid July), but putting together a plans
package takes a huge amount of time, so I have refrained from writing
about it (although you can see a few more glimpses of it in my
kids table article and video).
More about this homemade bandsaw here. I also have a very comprehensive set of plans for sale for this bandsaw.
More about bandsaws
See also:
 Pirate sword
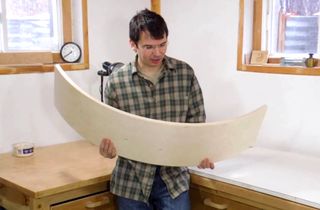 Curvy board
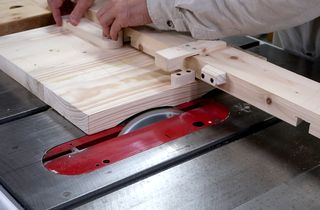 Carving a chair seat on the table saw
 Lawn chair build
 Corner shelf for a barbecue
 Kid's wagon
 Building a sandbox
 Balancing board
Back to my woodworking website