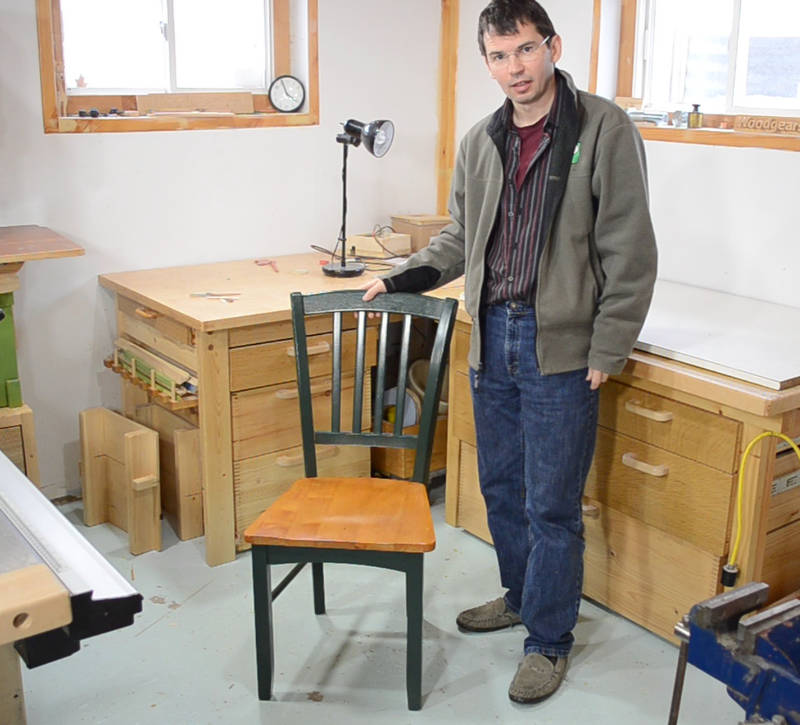
 My brother has this set of kitchen chairs that he quite likes, but over
time, they have gotten a little loose and wobbly.
My brother has this set of kitchen chairs that he quite likes, but over
time, they have gotten a little loose and wobbly.
My brother has this set of kitchen chairs that he quite likes, but over
time, they have gotten a little loose and wobbly.
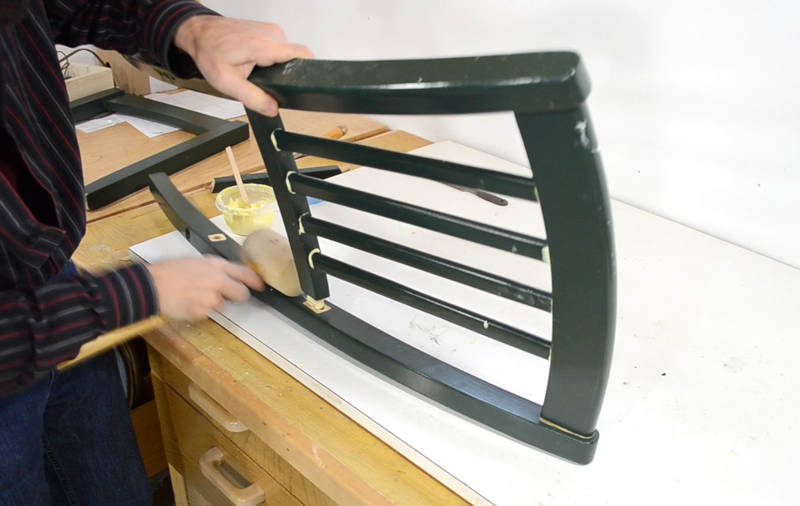
 On this one you can really see some of the joints on the back
starting to come apart.
On this one you can really see some of the joints on the back
starting to come apart.
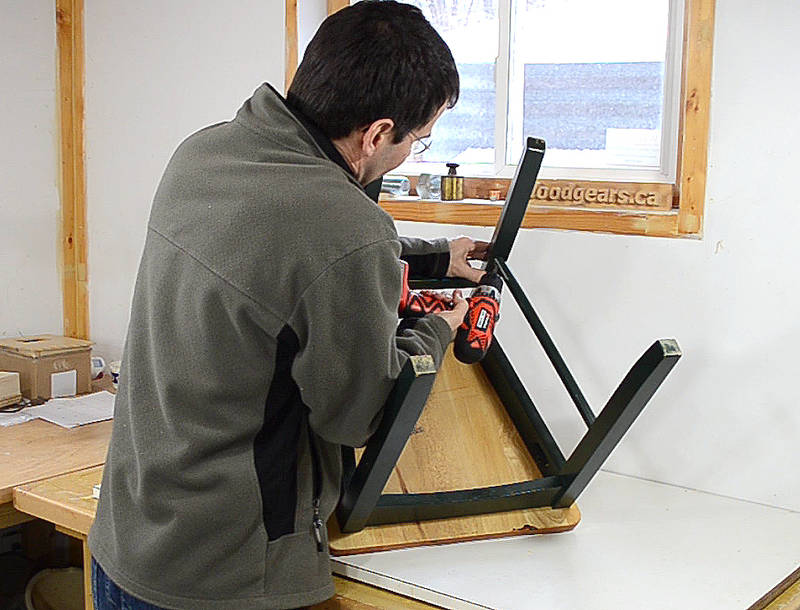 Flipping it over, the chair seems to be put together with a lot of screws,
so I start by taking those out.
Flipping it over, the chair seems to be put together with a lot of screws,
so I start by taking those out.
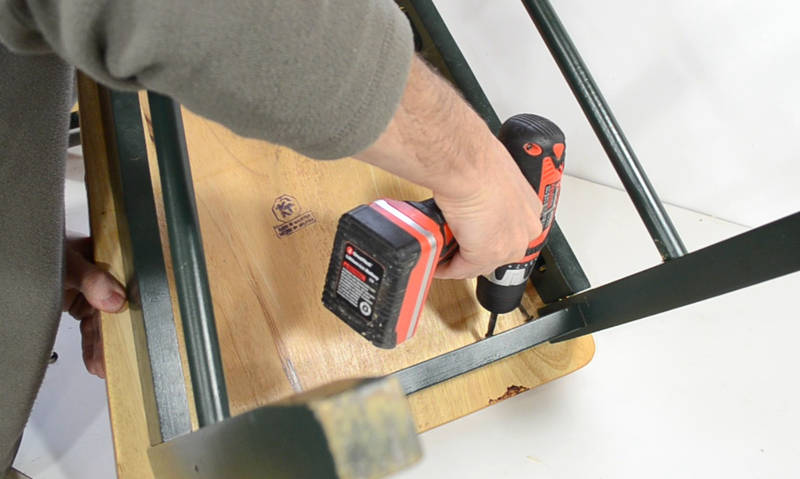 The seat is held on with pocket holes.
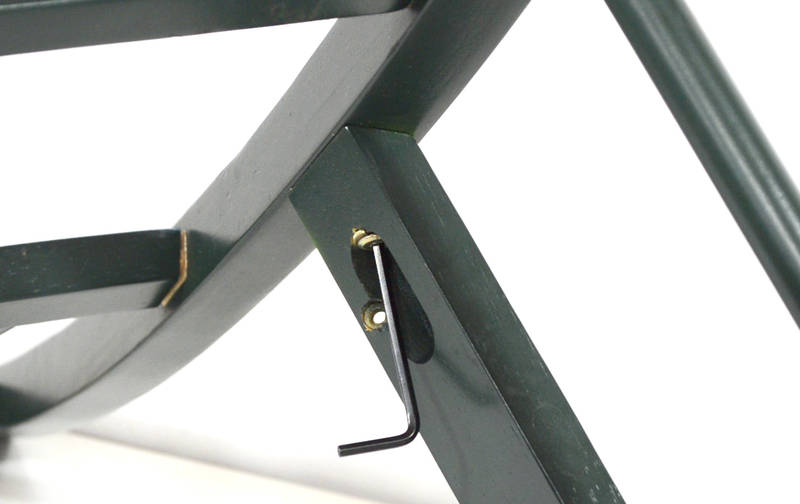 The rails under the seat seem to be held on with these knock-down type
screws. These still held quite well, quite a bother to remove. The lock washer
under the head of the screw really gripped it tight, so it was hard to
undo those screws.
The rails under the seat seem to be held on with these knock-down type
screws. These still held quite well, quite a bother to remove. The lock washer
under the head of the screw really gripped it tight, so it was hard to
undo those screws.
One of the screws, however, was missing. That may explain why this chair was worse than the others.
 With the screws removed, the back of the chair just popped right off! no effort at all!
 Looking at the joints, it looks like the dowels were inserted, and then the
individual parts were painted. There was no glue on either end of the dowel.
The dowel's only function was to serve as a sort of alignment pin.
All the "hold" of the joint was by the screw which went through the hole between
the two dowels. The screw was an M6 machine screw (about 1/4") screwed
into a metal threaded insert in the leg.
Looking at the joints, it looks like the dowels were inserted, and then the
individual parts were painted. There was no glue on either end of the dowel.
The dowel's only function was to serve as a sort of alignment pin.
All the "hold" of the joint was by the screw which went through the hole between
the two dowels. The screw was an M6 machine screw (about 1/4") screwed
into a metal threaded insert in the leg.
 The remaining two segments of the chair were, however, glued together.
My guess is that the chair was designed to be shipped in a flat package, with final assembly by screwing it together to be done in the store or by the customer. Kind of a neat way to do it, and the single screw between the two dowels had, all things considered, held the chairs together surprisingly well.
 The joints between the two front legs were still good, but the back of
the chair was all loose, so I knocked those joints apart with
a rubber mallet.
The joints between the two front legs were still good, but the back of
the chair was all loose, so I knocked those joints apart with
a rubber mallet.
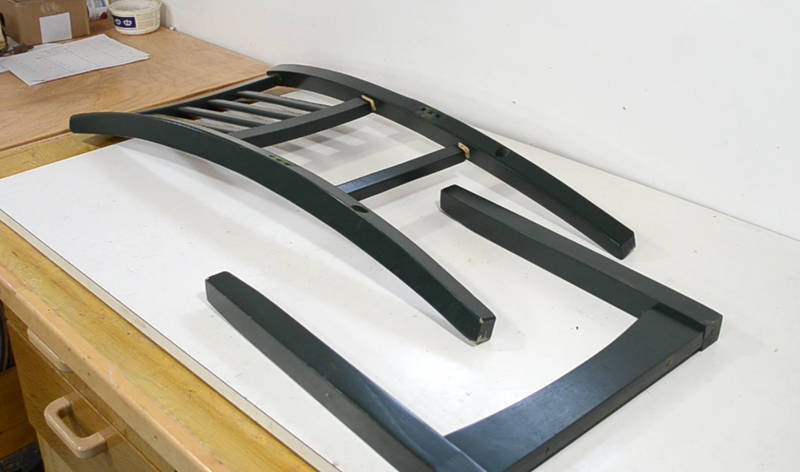
 All apart. A smart thing to do would have been to mark which pieces go where,
so they'd be easier to reassemble. As it was, it was more of a puzzle.
All apart. A smart thing to do would have been to mark which pieces go where,
so they'd be easier to reassemble. As it was, it was more of a puzzle.
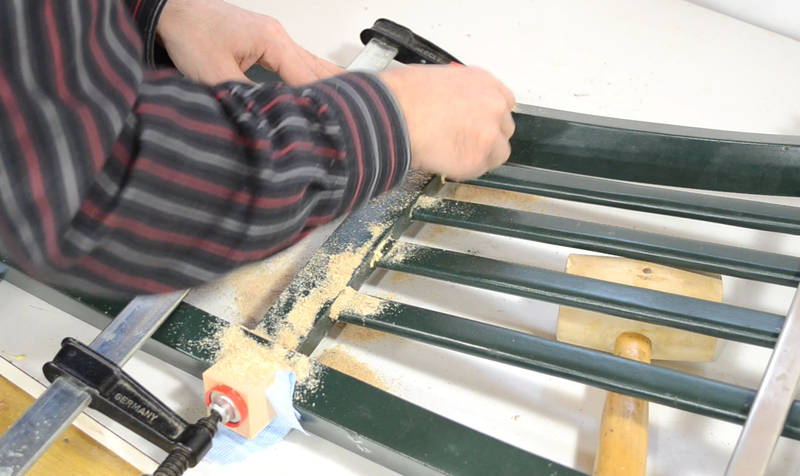
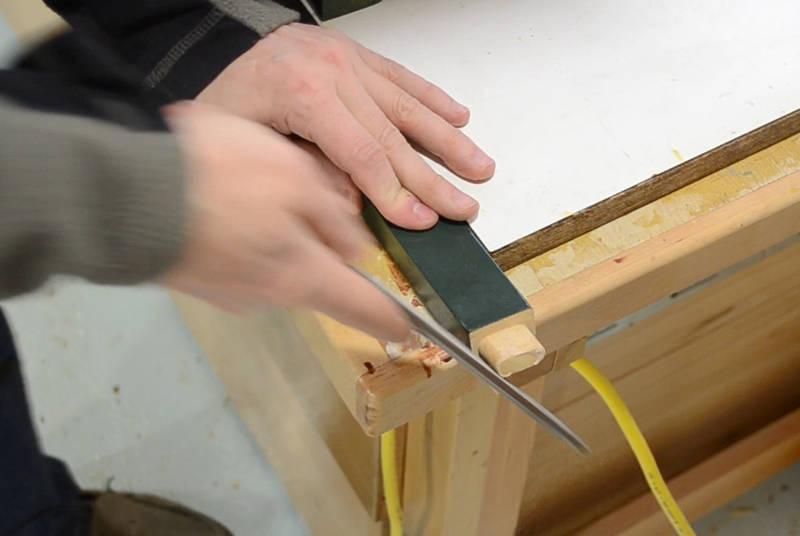 Cleaning up the glue residue on the tenons with a file.
I also scraped the glue residue out of the mortises with a chisel
as best as I could.
Cleaning up the glue residue on the tenons with a file.
I also scraped the glue residue out of the mortises with a chisel
as best as I could.
 Now reassembling, with lots of glue. The glue in my glue container had
gotten a bit thick because I'd left it open too much (too much water evaporated),
but for this application, that was perfect. Yellow carpenter's glue is a
surprisingly good gap filler
Now reassembling, with lots of glue. The glue in my glue container had
gotten a bit thick because I'd left it open too much (too much water evaporated),
but for this application, that was perfect. Yellow carpenter's glue is a
surprisingly good gap filler
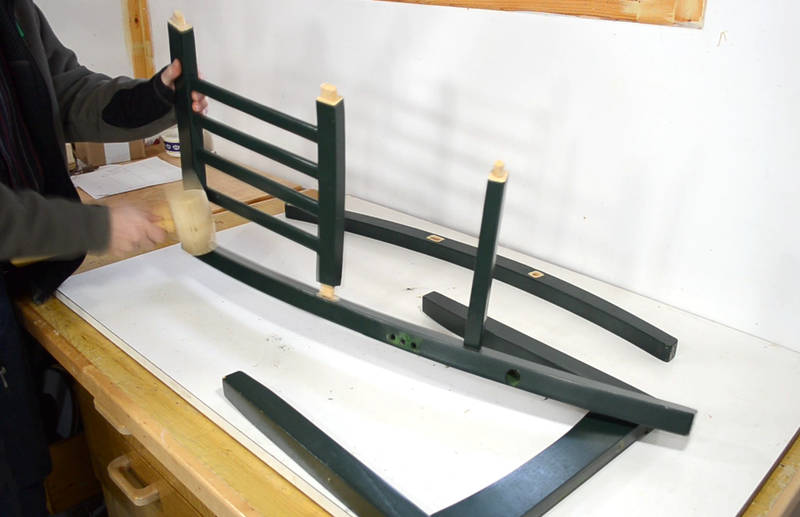
 The whole back needs to be assembled all at once, otherwise, once the glue has set
on the vertical slats, it would be impossible to align the tenons with the
back leg mortises.
The whole back needs to be assembled all at once, otherwise, once the glue has set
on the vertical slats, it would be impossible to align the tenons with the
back leg mortises.
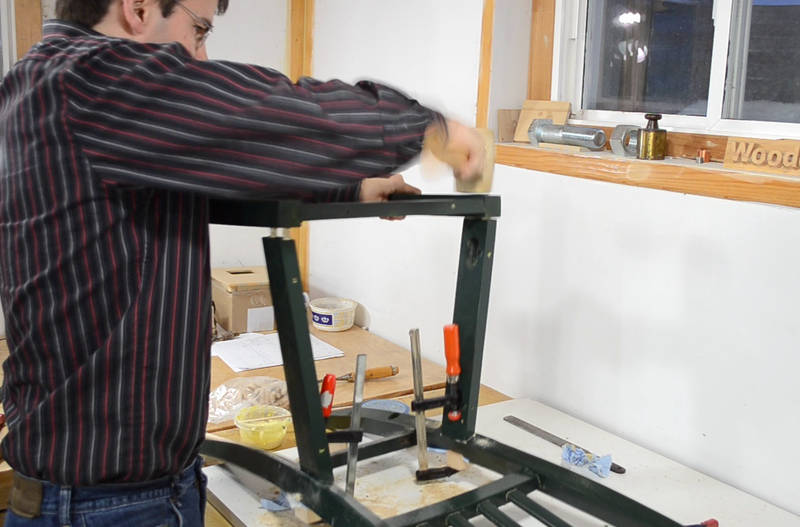
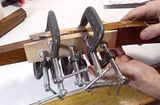
 Clamping it together. My bar clamps proved less than ideal because the
back legs are at an angle. The swiveling pad on the screw end of the clamp kept
tilting and slipping off the corner. So I cut some angle blocks
on the bandsaw. These provide a flat surface to apply the clamp to.
Clamping it together. My bar clamps proved less than ideal because the
back legs are at an angle. The swiveling pad on the screw end of the clamp kept
tilting and slipping off the corner. So I cut some angle blocks
on the bandsaw. These provide a flat surface to apply the clamp to.
 A band clamp would probably have worked better. I have a band clamp, but by
the time I thought of using it there was no time left to start looking
for it. That's always the problem with specialty tools. When the perfect
application for it arises you forget to use it or just can't find it!
A band clamp would probably have worked better. I have a band clamp, but by
the time I thought of using it there was no time left to start looking
for it. That's always the problem with specialty tools. When the perfect
application for it arises you forget to use it or just can't find it!
 With the back assembled, time to clean up the glue squeeze out with sawdust.
Cleaning up on painted parts is not overly critical - the glue won't soak into the paint, so a wet rag is sufficient to clean off any residual glue.
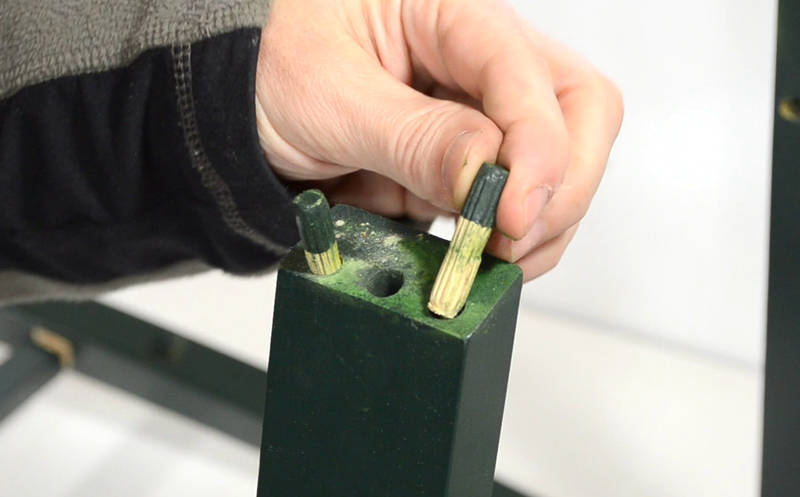
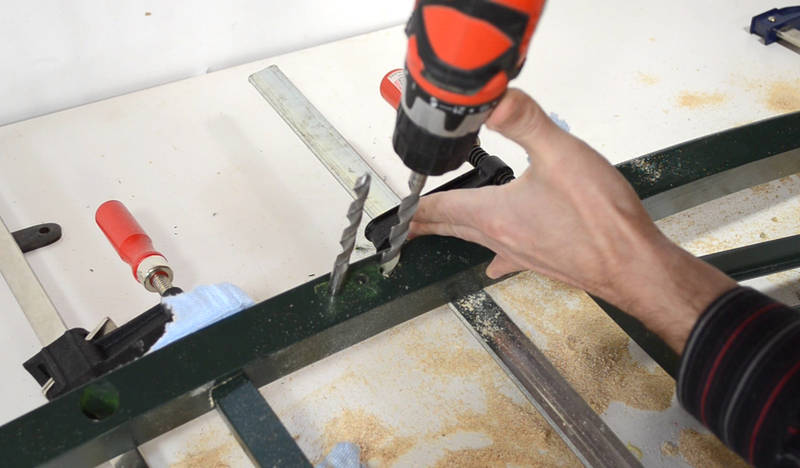 Those original dowels were about 8 mm. I assume they were metric
because the screws are metric.
They were too loose in the holes to be much of a "joint". Also,
the insides of the holes on the legs were painted! So to get a good glue
surface, I decided to drill all the holes out to 3/8" (9.5 mm).
I inserted a drill bit in the hole
next to the one I'm drilling as a visual guide to help me hold the drill
at the correct angle for the hole. I would say right angle, but
that would imply 90 degrees, which these weren't.
Those original dowels were about 8 mm. I assume they were metric
because the screws are metric.
They were too loose in the holes to be much of a "joint". Also,
the insides of the holes on the legs were painted! So to get a good glue
surface, I decided to drill all the holes out to 3/8" (9.5 mm).
I inserted a drill bit in the hole
next to the one I'm drilling as a visual guide to help me hold the drill
at the correct angle for the hole. I would say right angle, but
that would imply 90 degrees, which these weren't.
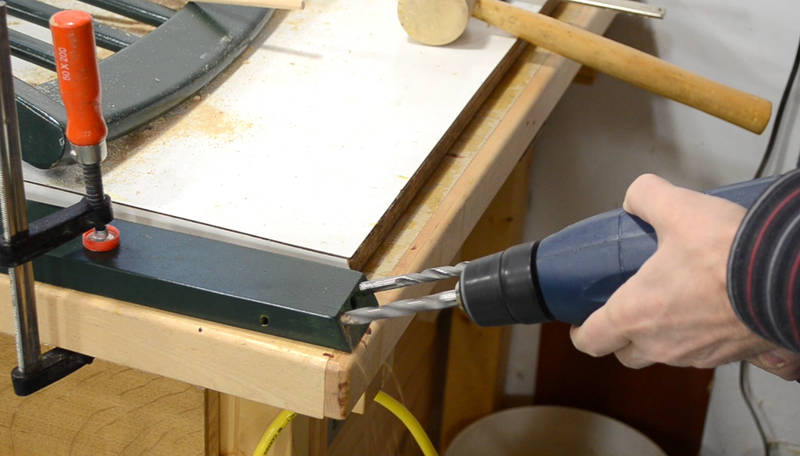 Drilling out the holes in the rails.
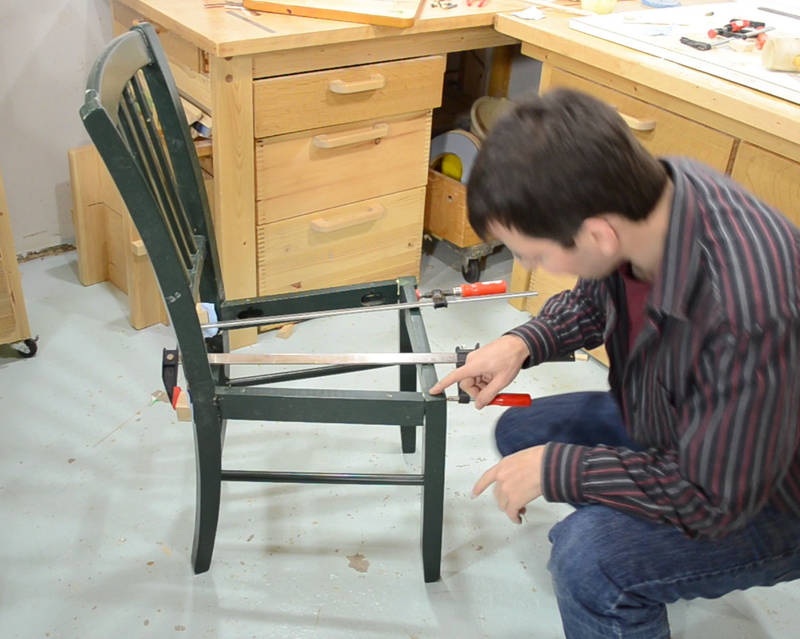
 With larger dowels, and lots of glue both on the dowels and in the hole,
time to put it back together.
With larger dowels, and lots of glue both on the dowels and in the hole,
time to put it back together.
 As with the back, the whole trapezoid that forms the seat needs to be
assembled at once, otherwise it would be hard to line up the joints.
As with the back, the whole trapezoid that forms the seat needs to be
assembled at once, otherwise it would be hard to line up the joints.
 I finished assembling on the floor, just to make sure I assembled
it in such a way that all four legs touch the floor.
I finished assembling on the floor, just to make sure I assembled
it in such a way that all four legs touch the floor.
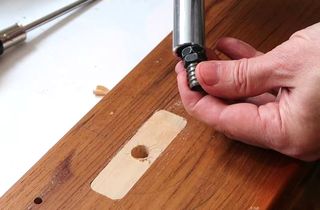
 I bought the right size screw, but this being Canada the selection of metric
screws is limited. So my replacement screw had a hex head. I'm using
a nut driver to screw it in.
I bought the right size screw, but this being Canada the selection of metric
screws is limited. So my replacement screw had a hex head. I'm using
a nut driver to screw it in.
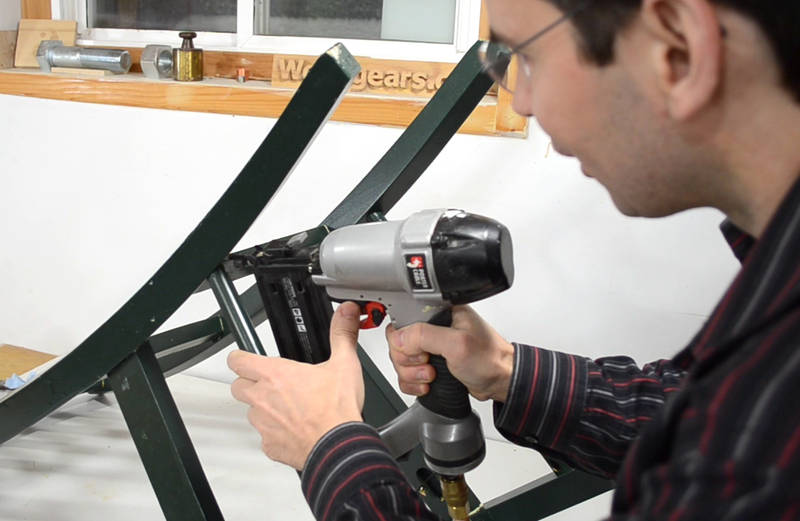 I also added a few brad nails to the dowels between the legs. I didn't have that
much faith in the single pocket hole screw that held each of these. Gluing them
would have been better, but with paint on both parts, that would have been
a lot of work to prepare and would have made the gap in the joint
even bigger.
I also added a few brad nails to the dowels between the legs. I didn't have that
much faith in the single pocket hole screw that held each of these. Gluing them
would have been better, but with paint on both parts, that would have been
a lot of work to prepare and would have made the gap in the joint
even bigger.
 I finished off by mixing some paint of the right colour using some artist paints,
and rubbing that in the lines around the joints. My artist paints are getting
old because I haven't done any
paintings in years. I may end up buying more paints just for cases like
this though.
I finished off by mixing some paint of the right colour using some artist paints,
and rubbing that in the lines around the joints. My artist paints are getting
old because I haven't done any
paintings in years. I may end up buying more paints just for cases like
this though.
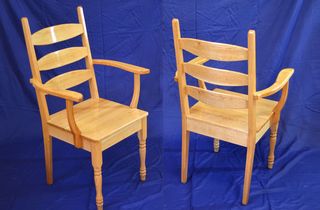
The chair is now very stiff. The catch with that is it will now rock back and forth if the floor is uneven!
This was the worst of my brother's chairs, and I was going to re-glue the other ones too, but he ended up not liking this chair being so stiff. I guess some give can be nice, so long as it doesn't fail completely.
 Splicing broken
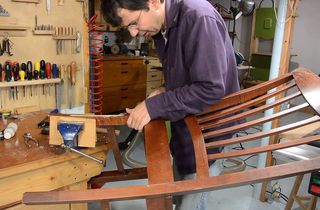
 Fixing a couch: Inlays for torn out threaded inserts
 Building stools
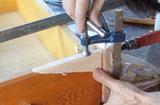 Drawer repair
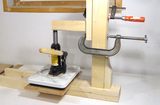 Wood joint strength
 Repairing plastic parts
 Fixing squirrel damaged cabinet doors
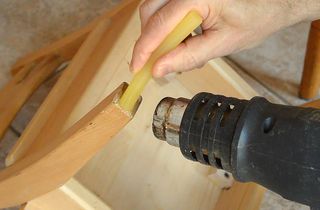 Stick felt pads to chairs with hot glue so they won't come off