A lot of furniture I build utilizes mortise and tenon joints. I love them for their strength, but also because, in my experience, its seems to be easier to get a mortise and tenon joint precise than it is with dowels.
Nowadays, I cut all my mortises with a home made slot mortising machine. But if you just want to cut a few mortise and tenon joints, building a fancy machine may be more than you want to do. So I experimented to figure out a simple way to rig up something to cut slot mortises with.
Really, all I need to do is to put the router horizontally, and have something that facilitates it moving in X and Y in a horizontal plane fairly precisely.
I had the idea of using my table saw sled already provided motion in one direction, and sliding against its fence could provide good sliding in in the other direction. It just makes sense to build one of these regardless.
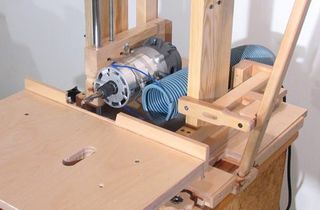
 The jig is a simple piece of plywood, which hooks over the fence on my sliding table sled.
I mount the router by passing a steel shaft through one of the holes in the base. The other attachment
point is a strip of wood to run under the router, just to support it so that the shaft of the router
runs exactly horizontal. As nothing ever pulls on the router, that's all the support it needed.
The jig is a simple piece of plywood, which hooks over the fence on my sliding table sled.
I mount the router by passing a steel shaft through one of the holes in the base. The other attachment
point is a strip of wood to run under the router, just to support it so that the shaft of the router
runs exactly horizontal. As nothing ever pulls on the router, that's all the support it needed.
The lever on the right is for moving the router in and out of the wood. Basically, moving it in the plunge direction. The router I used is actually already a plunge router, but like most routers, the plunge slides have some play to them, so I was suspicious of the precision I'd be able to get from that. Also, I would have had to either work against the springs, or remove them. That, I figured, would have been alltogether too much bother.
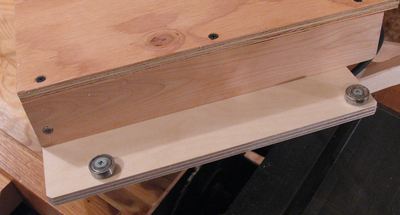 The piece of plywood on the side of the jig overhangs the crosscut fence of the table saw sled, and has two ball bearings
attached to the bottom of it. I'm sure a piece of wood to slide against would have worked too, but I had
some ball bearings around, so I used those.
The piece of plywood on the side of the jig overhangs the crosscut fence of the table saw sled, and has two ball bearings
attached to the bottom of it. I'm sure a piece of wood to slide against would have worked too, but I had
some ball bearings around, so I used those.
 Initially I figured on just sliding the jig in the side to side motion without a lever, because
for normal table saw cuts, I just slide the sled by pushing on it. But with the router on the sled,
and with the need to be able to move the sled in a controlled manner, I found I needed a lever to push
the sled as well.
Initially I figured on just sliding the jig in the side to side motion without a lever, because
for normal table saw cuts, I just slide the sled by pushing on it. But with the router on the sled,
and with the need to be able to move the sled in a controlled manner, I found I needed a lever to push
the sled as well.
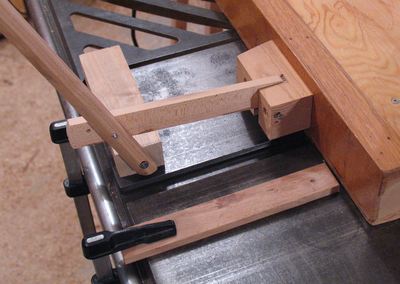
Also note the strip of wood on the nearer side of the picture. This provides a discrete stop for the sled, and is one of the stops to control the width of the mortise. I also put a clamp on the other side of the sled, so it bangs against a stop on either side, so that my mortises end up of consistent preset width without me having to worry about it while I operate the jig.
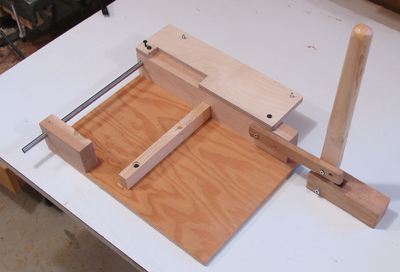
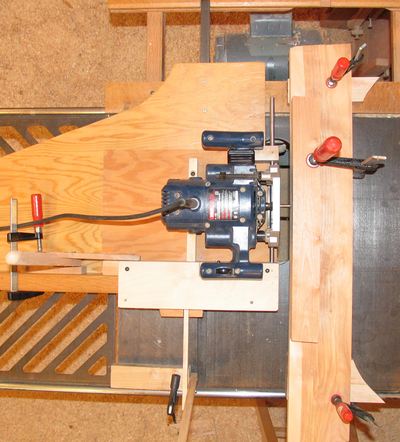 And a top view. Hopefully, this makes it more clear.
I clamped a large piece of lumber to the right, for holding the work piece. The piece of lumber is on two spacers on either end about 3 cm thick, so that I can still get a bar clamp under it, to clamp the work piece on top of the piece of lumber.
This setup does use a lot of clamps, but it is a temporary jig after all.
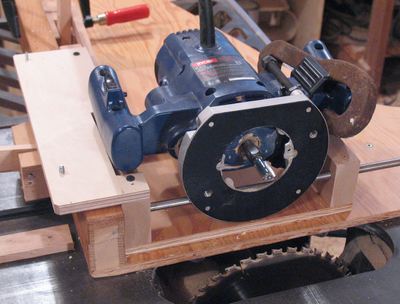 And yet another view. Note that I'd removed the table saw insert. The blade is cranked
all the way down, so does not actually protrude out of the saw. With my dust extractor running,
this sucked some of the shavings into the hole. Although I still ended up with
plenty of shavings in my face.
And yet another view. Note that I'd removed the table saw insert. The blade is cranked
all the way down, so does not actually protrude out of the saw. With my dust extractor running,
this sucked some of the shavings into the hole. Although I still ended up with
plenty of shavings in my face.
Also note the chunk of steel resting on the right side of the router. This to weigh it down a little bit. Although, as I started using the jig, I found this extra weight to be unnecessary.
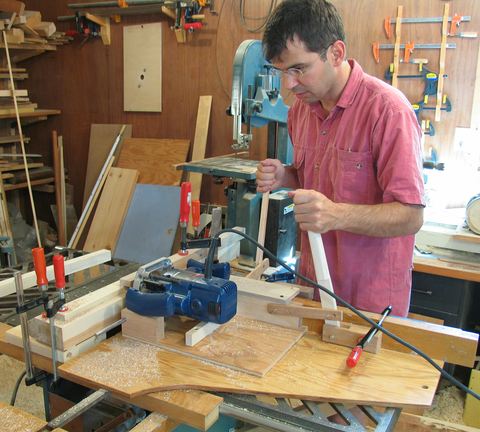
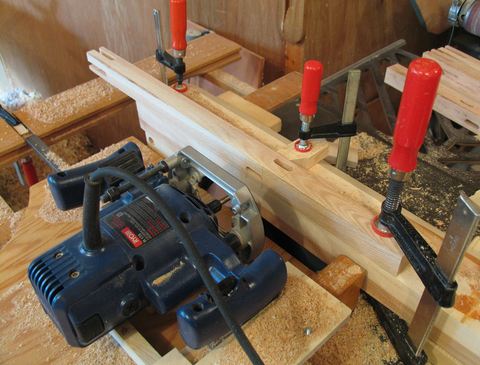 And here's the jig in use. Lots of shavings everywhere, of course.
To test out the jig, I decided to build some stools, which involved 16 mortises for each stool. I found the jig to work much better than I had anticipated. The trick is to move the router side to side, and only advance it by less than half a centimeter for each pass, so that the forces don't get too strong.
I had experimented with cutting with a larger bit, and cutting faster, which didn't produce such clean results, because this setup just doesn't have the rigidity that my mortising machine has. But overall, for the stools, I was quite satisfied with the results.
And the beauty of the jig was that it only took two hours to build.
 A square drill for round holes
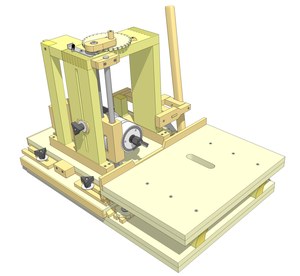
 Home made slot
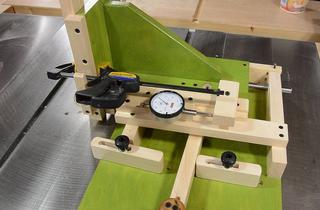 Quick set tenon jig
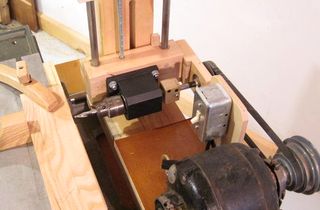 Horizontal boring
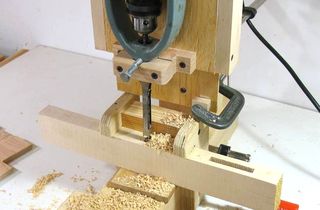 Hollow chisel mortiser
 Joining with dowels
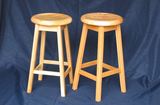 Building stools
 Mortise and tenon