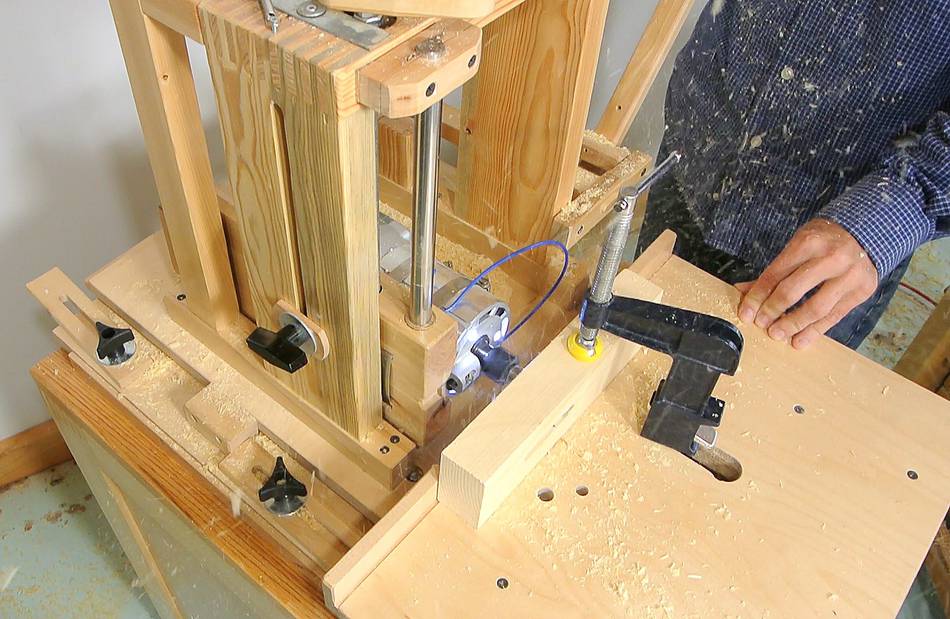
 The pantorouter cuts a tenon by tracing around the shape of it with a
router bit. Large router bits work best.
The pantorouter cuts a tenon by tracing around the shape of it with a
router bit. Large router bits work best.
The pantorouter cuts a tenon by tracing around the shape of it with a
router bit. Large router bits work best.
To get a tenon shape that is rounded on each end, the router bit needs to trace a semicircle at each end.
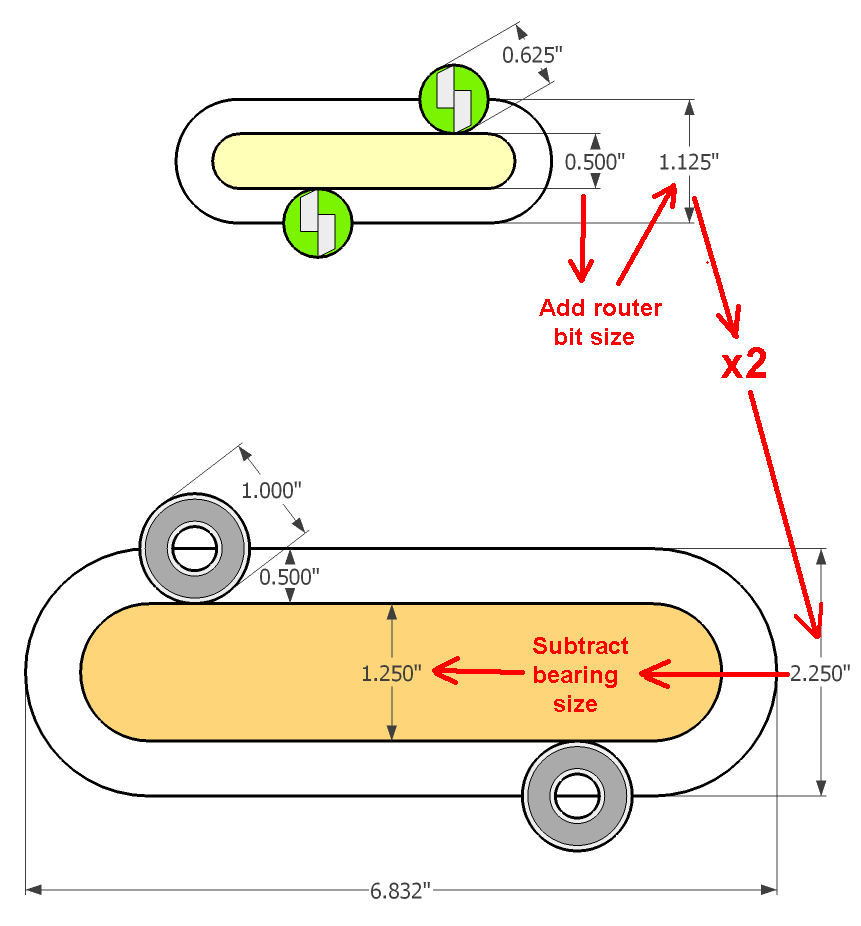 The path the router bit takes needs to be offset
by half the router bit's diameter on all sides. That makes the total size of the
path that the router follows one router-bit-size wider than the desired tenon.
0.5" + 0.625" = 1.125".
The path the router bit takes needs to be offset
by half the router bit's diameter on all sides. That makes the total size of the
path that the router follows one router-bit-size wider than the desired tenon.
0.5" + 0.625" = 1.125".
The pantograph has a 2x reduction built in, so the template needs to be twice that size. So the path that the guide bearing must take on the template is twice as big. 1.125" x 2 = 2.25"
To get the correct path, the template needs to be smaller by half the bearing size on each side. Subtracting half the bearing size twice, the thickness of the tenon template now needs to be reduced by the bearing size. 2.25" - 1" = 1.25"
And that's all there is to it.
So, in summary, we add the router bit size and tenon thickness together, double that, then subtract the bearing size to get the template thickness. For the width of the template (and tenon) the calculations follow the exact same steps.
If the guide bearing is twice the diameter of the router bit, the template ends up exactly twice the size of the tenon, which makes things even easier.
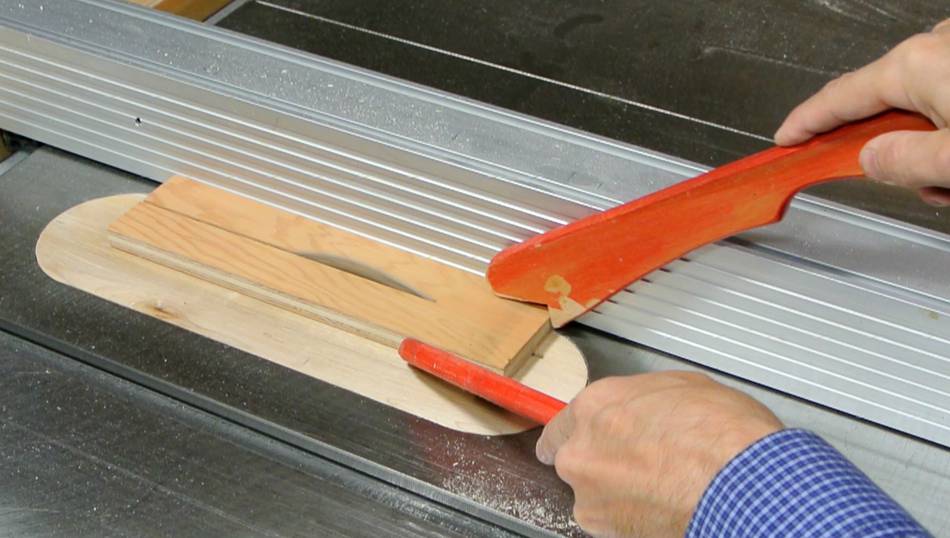 Having worked out how wide the tenon template needs to be, I cut a strip of wood that
width on the table saw.
Having worked out how wide the tenon template needs to be, I cut a strip of wood that
width on the table saw.

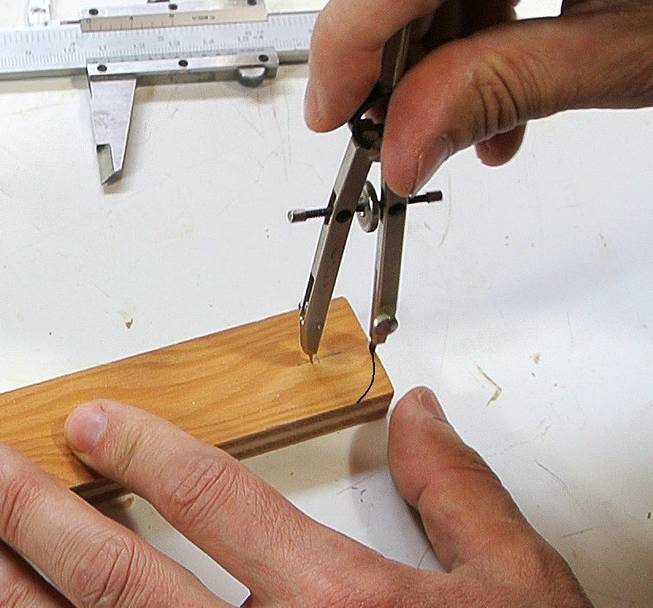 Next, I use a compass, set it to half the width of the strip of wood and mark the rounds
on the ends. I run the point of the compass along the edges and end of the workpiece
to mark where the center of the semicircle needs to be.
Next, I use a compass, set it to half the width of the strip of wood and mark the rounds
on the ends. I run the point of the compass along the edges and end of the workpiece
to mark where the center of the semicircle needs to be.
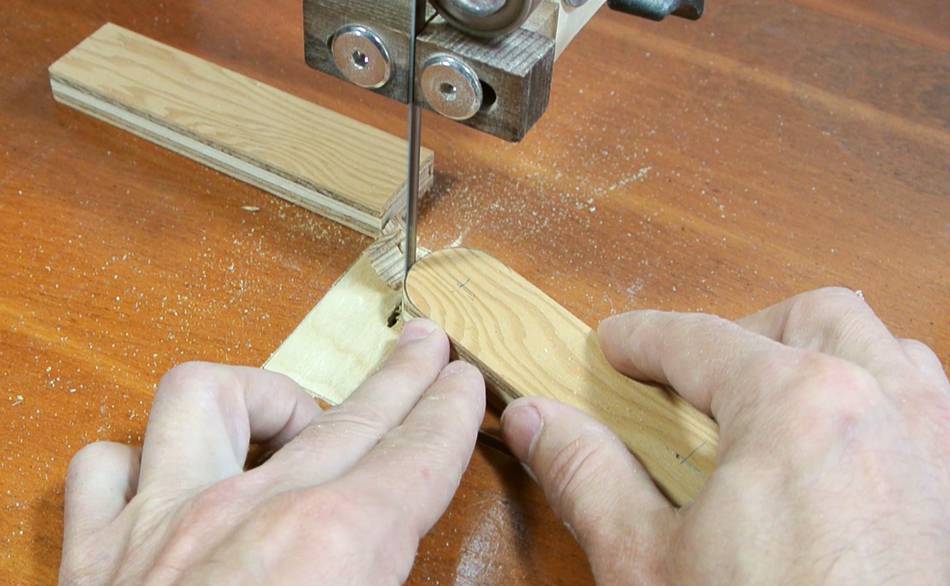 Next, cutting the rounded end on the bandsaw.
A disk sander is great for getting right up to the line, but I just graze the edge with the side of the bandsaw blade to finish up (that works better with a bandsaw blade where the edge of the teeth have been stoned)
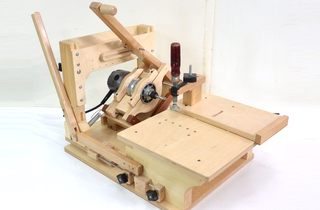
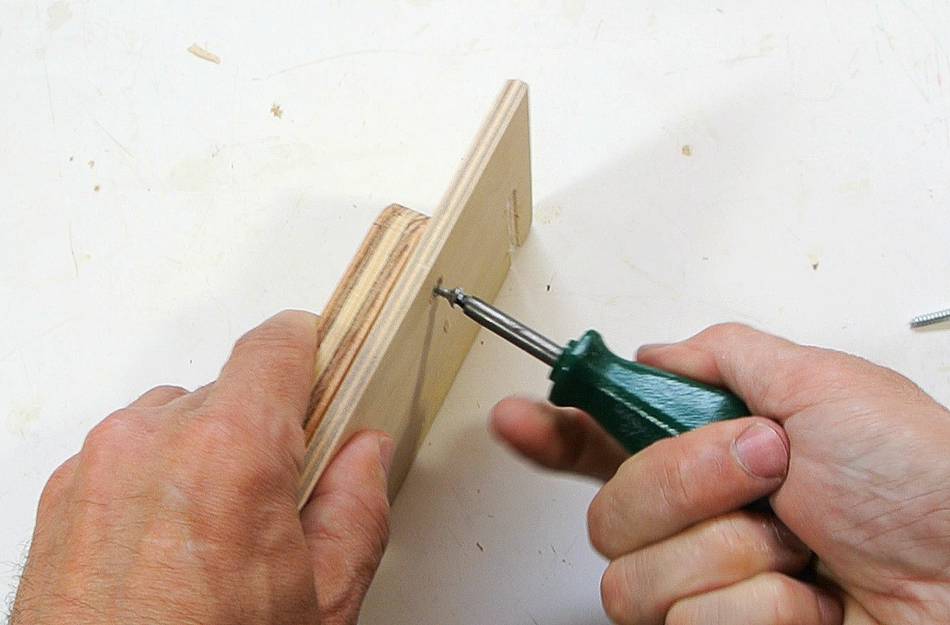 I then screw the plywood template onto another piece of plywood to mount it on the
pantograph. That way, I can take it off again if I need to tweak it.
I then screw the plywood template onto another piece of plywood to mount it on the
pantograph. That way, I can take it off again if I need to tweak it.
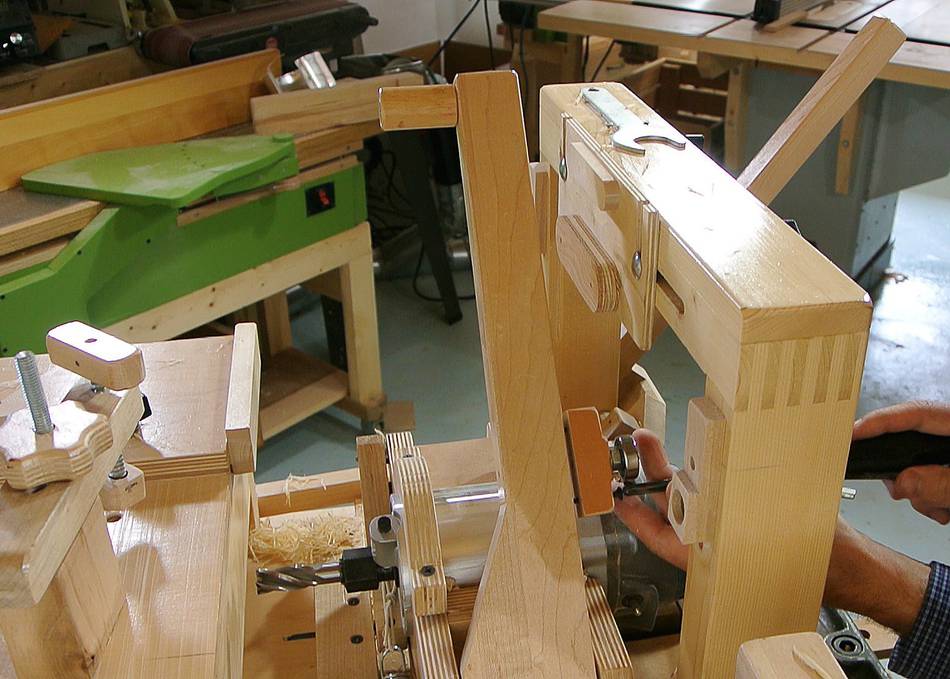 Template mounted.
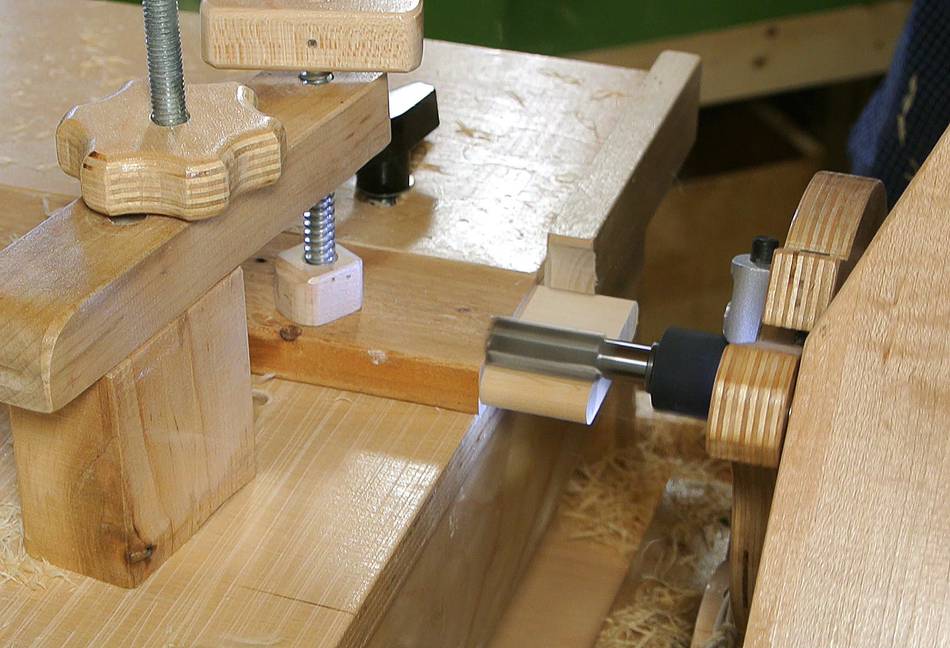
Here, I'm screwing on the appropriate size guide bearing. The first tenon I cut ended up just 3/8" in size, not the 1/2" it was supposed to be. Then I realized I still had the 3/4" guide bearing on, not the 1" one that my template is designed for. Oops!
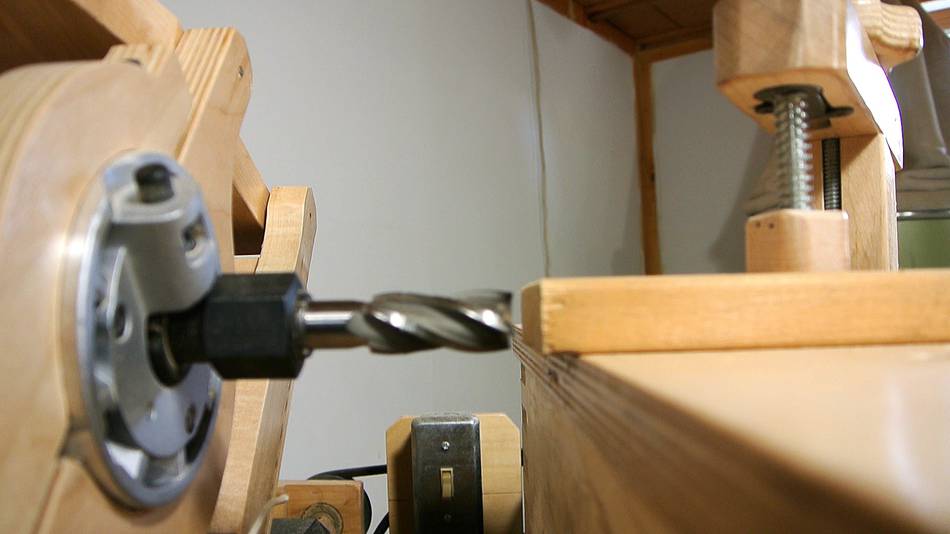 To line up where the tenon goes, I line the bit up to be vertically centered with
the workpiece, then make sure that the guide bearing is at the same height
as the center of the template.
To line up where the tenon goes, I line the bit up to be vertically centered with
the workpiece, then make sure that the guide bearing is at the same height
as the center of the template.
 It's definitely a bit more work to set up than a tenon jig,
but once set up, it produces tenons that have the shoulders perfectly cut, with a round
on both ends, all in one step. And if you cut around it clockwise (from the view in this
photo) the bit will always cut into the wood on all sides, so there is no tearout.
It's definitely a bit more work to set up than a tenon jig,
but once set up, it produces tenons that have the shoulders perfectly cut, with a round
on both ends, all in one step. And if you cut around it clockwise (from the view in this
photo) the bit will always cut into the wood on all sides, so there is no tearout.
 The pantorouter is also capable of cutting mortises, but because I also have a
slot mortising machine,
I just use that to cut the corresponding mortises.
The pantorouter is also capable of cutting mortises, but because I also have a
slot mortising machine,
I just use that to cut the corresponding mortises.
If you use the same size bit for the mortise and the tenons, it may make sense to mount the mortise template right next to the tenon template, so you don't have to worry about realigning the templates when switching between mortising and tenoning.
To calculate the track length for a mortise template, take the width of the tenon, subtract the router bit size, then double that, and add the guide bearing size.
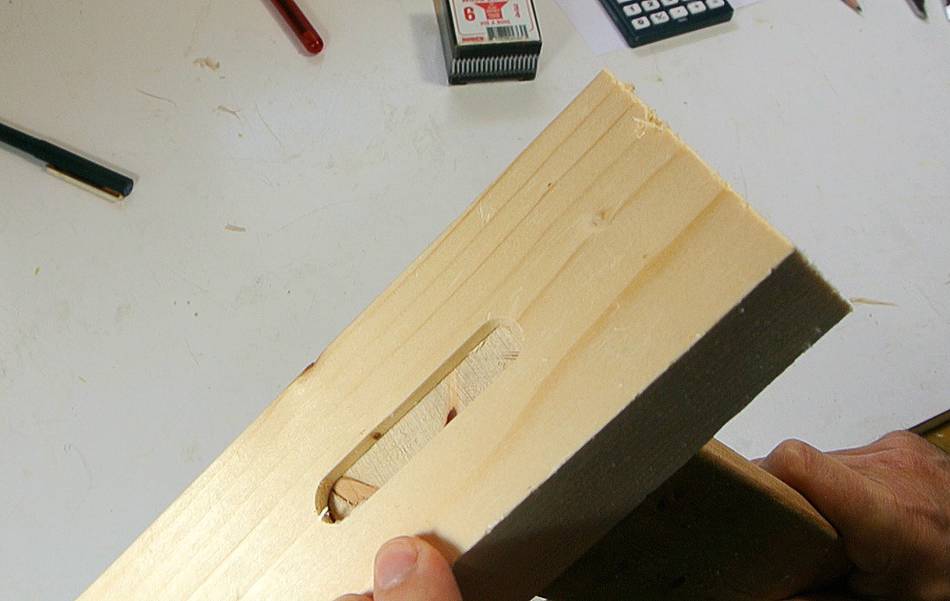 A nice fit!
I made this tenon template to cut the shelf supports for some shelves for my brother's basement
 Mortised shelves (2013)
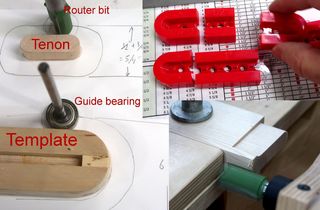 Making and setting up pantorouter tenon templates
 How the pantorouter works (2010)
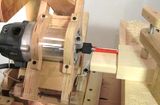 Big mortise and tenons with the pantorouter
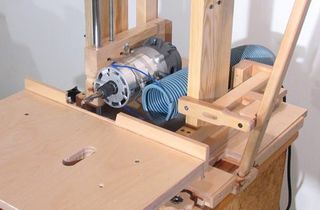 Slot mortiser
 More about
 Upgrading the template system