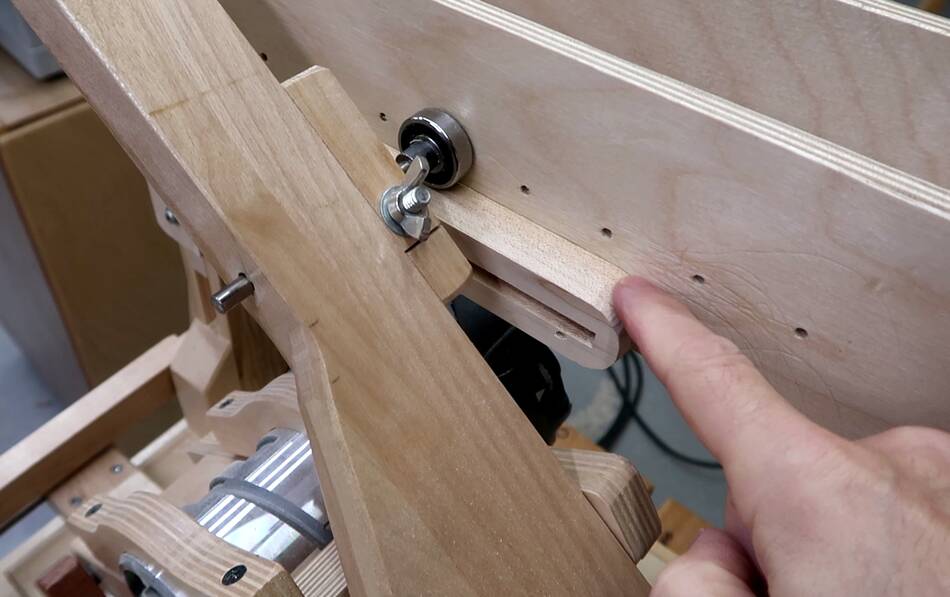
 The pantorouter needs a template for the guide bearing to roll around,
guiding the router bit so that it can cut away everything but the tenon from
the end of a piece of wood.
The pantorouter needs a template for the guide bearing to roll around,
guiding the router bit so that it can cut away everything but the tenon from
the end of a piece of wood.
The pantorouter needs a template for the guide bearing to roll around,
guiding the router bit so that it can cut away everything but the tenon from
the end of a piece of wood.
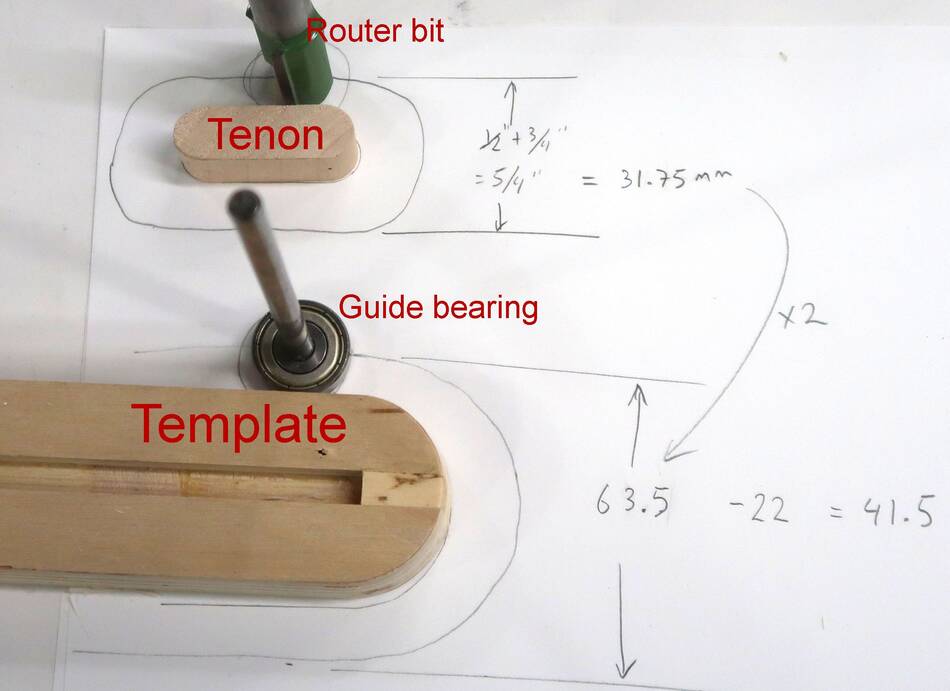 Calculating the tenon template size is best done by calculating the size of the arc that
the router bit has to move around to leave a tenon of the right thickness.
Calculating the tenon template size is best done by calculating the size of the arc that
the router bit has to move around to leave a tenon of the right thickness.
In this case, I want to use a 3/4" router bit to cut a 1/2" tenon. The center of the router bit needs to pass the tenon half of its diameter away from the edge of the tenon on either side. So twice half its diameter, or just add the router bit diameter.
So 1/2" + 3/4" = 5/4" here, or 31.75 mm. I switch to Metric for calculations.
Since the pantograph scales down by 2x from the path of the guide bearing, the center of the guide bearing needs to sweep around a diameter twice as large, or 63.5 mm. I want to use a 22 mm guide bearing, so I need to subtract that the same way I had to add the router bit diameter, so the template needs to be 41.5 mm wide.
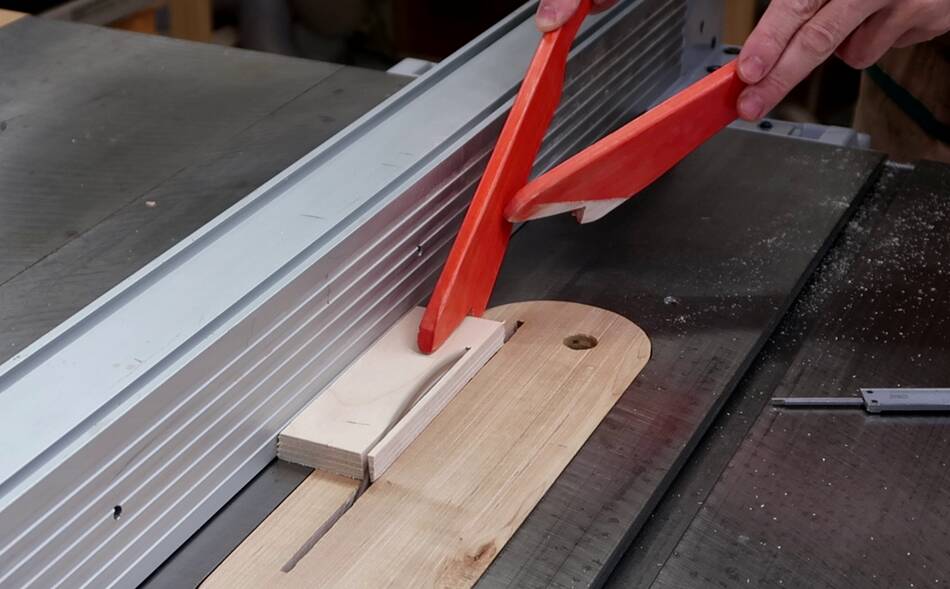
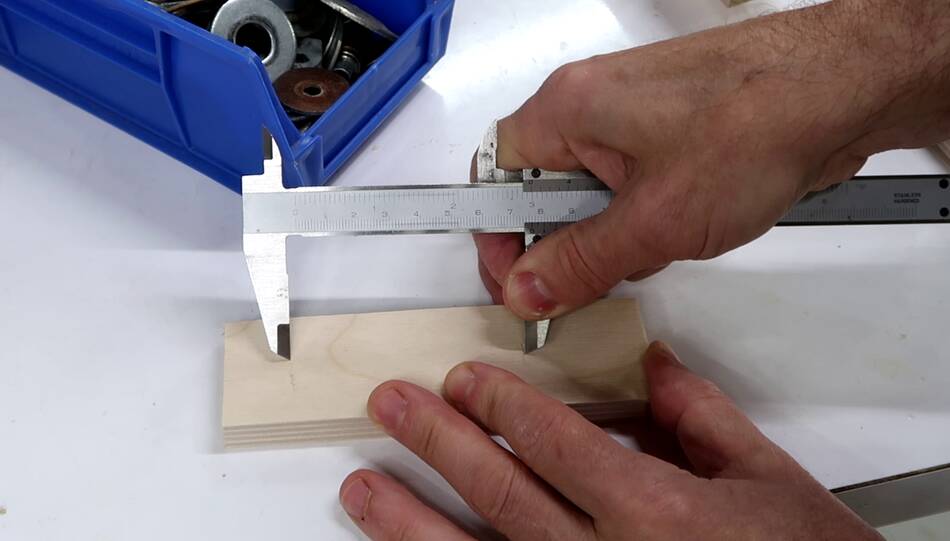
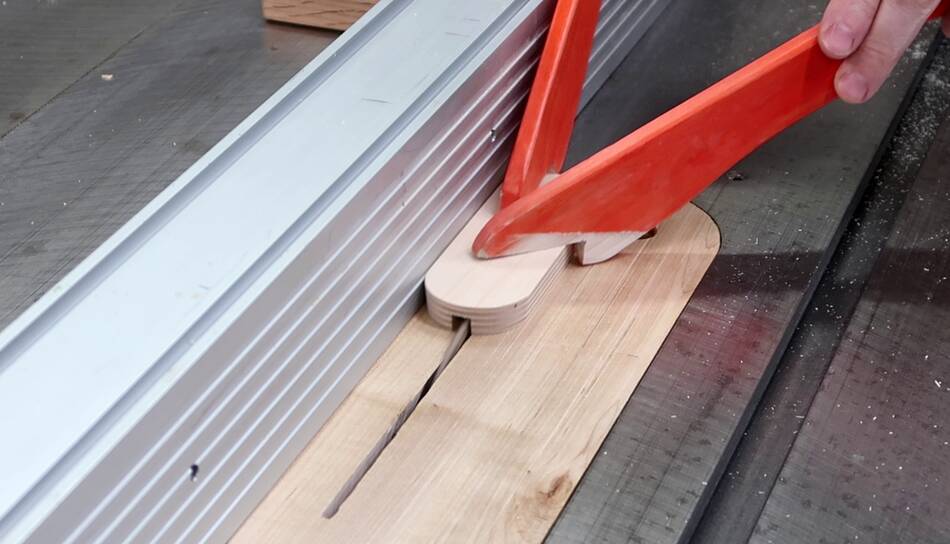
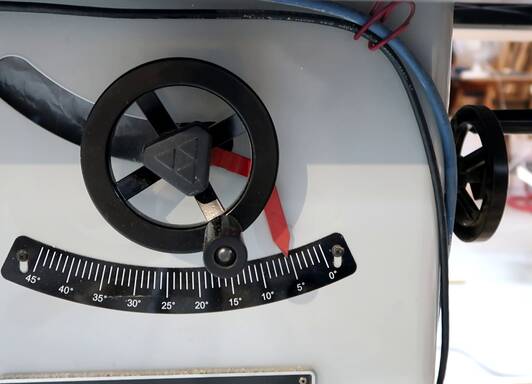 I like to make templates with a 5 or 6 degree taper to them for fine adjustment,
so the next step is to cut the sides of the tenon template on the table saw,
with the blade tilted.
I like to make templates with a 5 or 6 degree taper to them for fine adjustment,
so the next step is to cut the sides of the tenon template on the table saw,
with the blade tilted.
I cut it to a width so that the template has the desired width at the middle of it's
slope. That way, I can adjust the size of the tenon up or down from the calculated
width depending on how high on the taper I run the guide bearing.

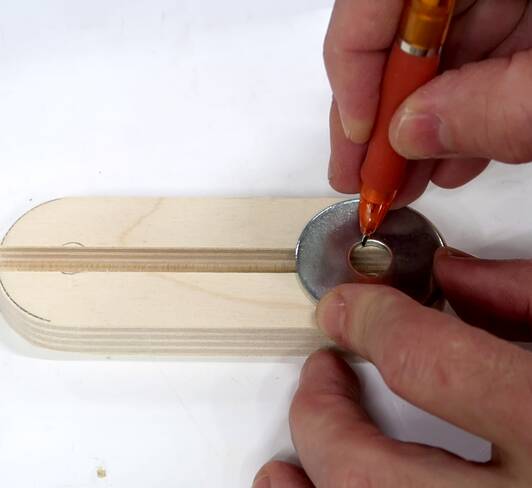
 Next I mark the center-to-center distance for the rounds on each end.
I always work that out separately. For a tenon 2" wide, with a 1/2" bit,
the center-to-center distance is 1/2" less than the 2" width, or 1.5".
Then double that because the pantograph divides by two, and that's the
center to center distance of the semicircular ends of the template.
Next I mark the center-to-center distance for the rounds on each end.
I always work that out separately. For a tenon 2" wide, with a 1/2" bit,
the center-to-center distance is 1/2" less than the 2" width, or 1.5".
Then double that because the pantograph divides by two, and that's the
center to center distance of the semicircular ends of the template.
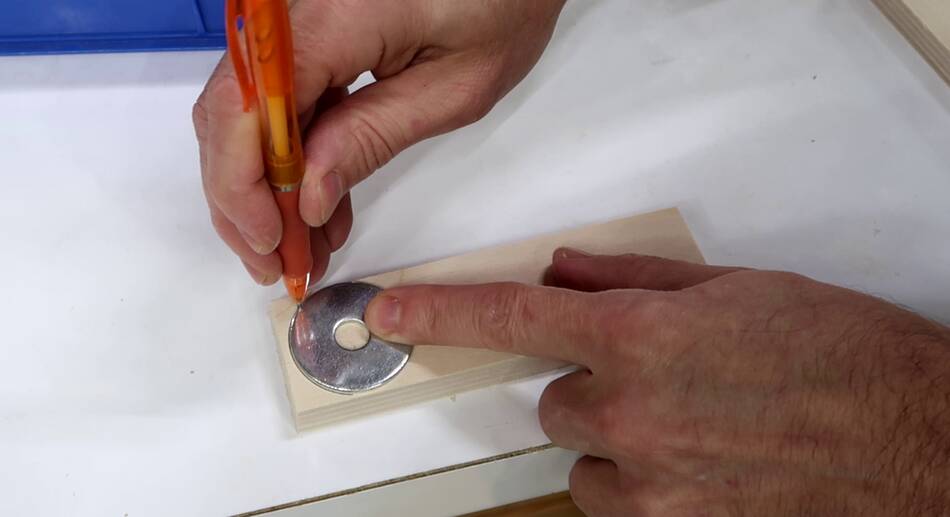 I could draw the semicircles with a compass, but a washer of
the right size is more convenient.
I could draw the semicircles with a compass, but a washer of
the right size is more convenient.
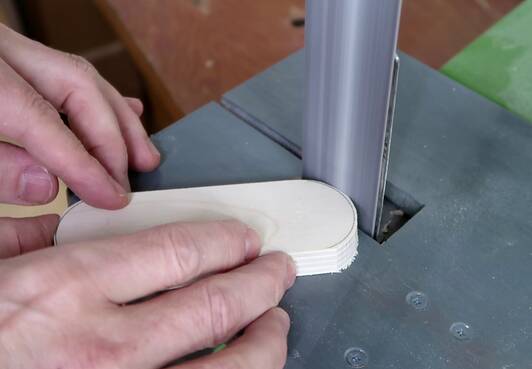
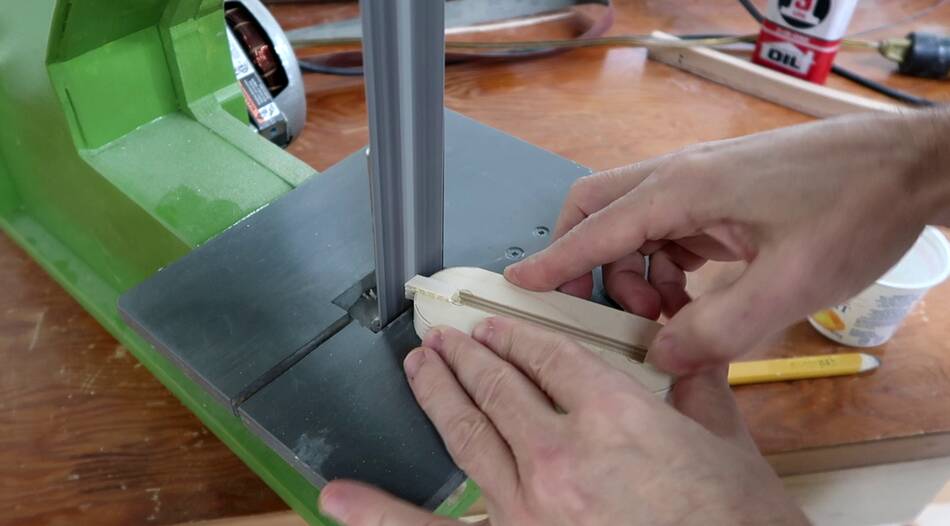
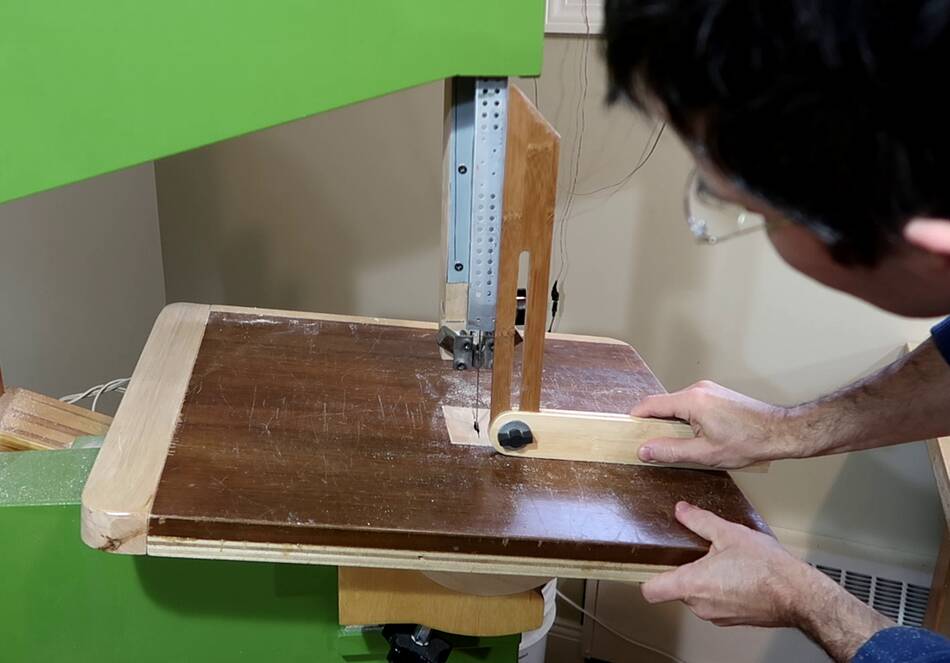 Then I tilt the bandsaw table by the same angle as I tilted the table saw...
 .. and cut the semicircles on either end. The template
is on the left side of the blade so that the cut is wider
on the bottom.
.. and cut the semicircles on either end. The template
is on the left side of the blade so that the cut is wider
on the bottom.
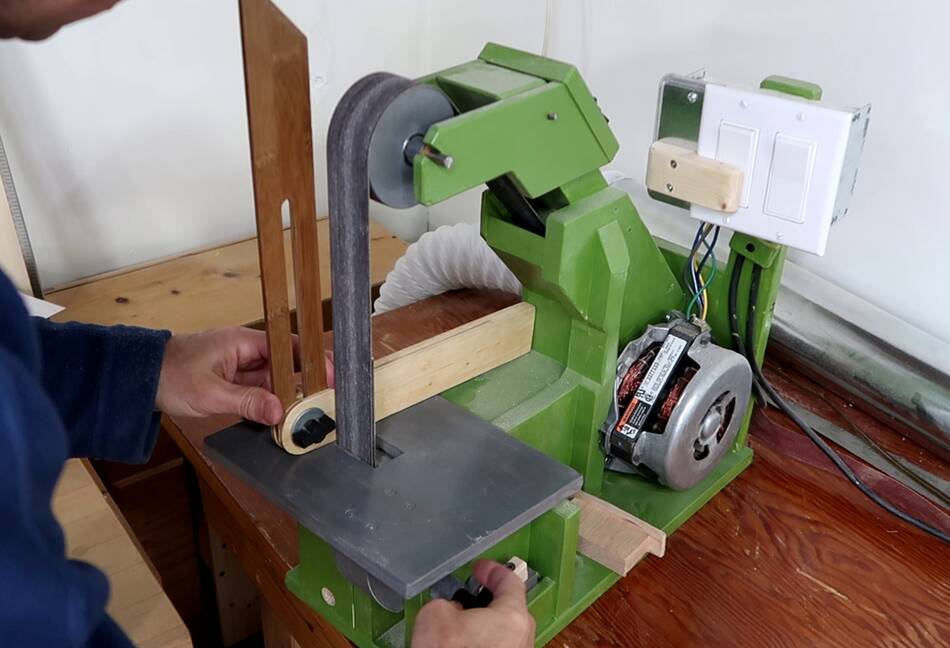
 Then I tilt my belt sander table towards the sanding belt and
sand up to the arc that I just drew.
Then I tilt my belt sander table towards the sanding belt and
sand up to the arc that I just drew.
If I want to use this template for cutting the tenons only then it's already done. But if I want to also use it as a corresponding mortise template, I still need to add a slot in the middle.
 This slot is easiest to cut my making a series of cuts on the table saw,
cutting from both sides, gradually making it wider until it's the width
of the follower pin.
This slot is easiest to cut my making a series of cuts on the table saw,
cutting from both sides, gradually making it wider until it's the width
of the follower pin.
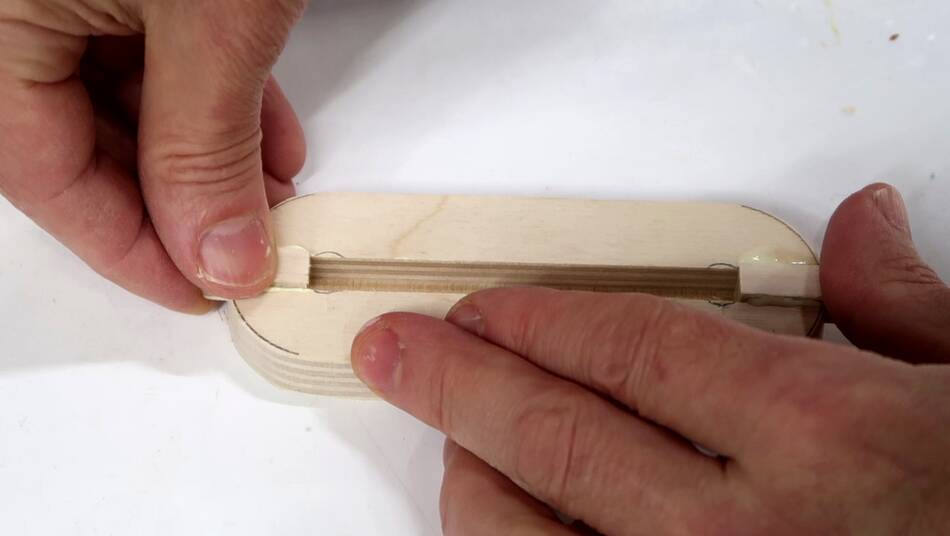
 Now I need to fill the ends of the slot to make it the right length.
I use my same washer to mark how far from the ends the slot needs to go,
then glue in some pieces of wood to fill it. The important thing is that
the follower will be able to move side-to-side by a tiny bit more than
the center-to-center distance of the semicircles at the ends.
Now I need to fill the ends of the slot to make it the right length.
I use my same washer to mark how far from the ends the slot needs to go,
then glue in some pieces of wood to fill it. The important thing is that
the follower will be able to move side-to-side by a tiny bit more than
the center-to-center distance of the semicircles at the ends.
 Once the glue dries, I sand the glued in pieces flush with the ends and
the top.
Once the glue dries, I sand the glued in pieces flush with the ends and
the top.

 I still need to drill some mounting holes. The template holder on my pantorouter
has holes on a 3 cm grid. The further apart I put the holes on the template,
the easier it is to mount it without an accidental slant.
I still need to drill some mounting holes. The template holder on my pantorouter
has holes on a 3 cm grid. The further apart I put the holes on the template,
the easier it is to mount it without an accidental slant.
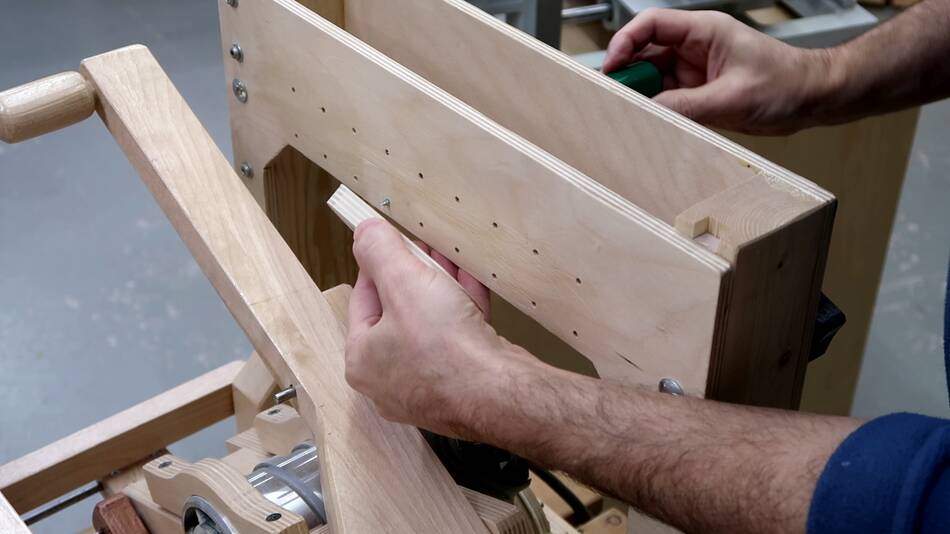 Then mounting the template on the template holder.
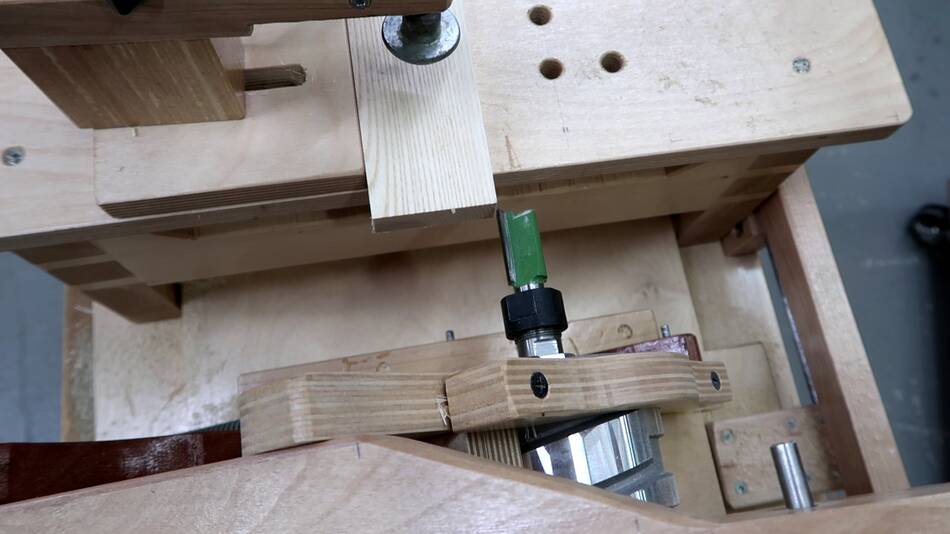
 Using the slot in the template to route out a mortise in a scrap of wood.
I already had a 1/2" straight fluted bit in the router, so I just used that.
I have to sweep side-to-side to cut the slot with a straight bit.
With a spiral bit, it's best to remove most of the material by making a series
of plunge cuts.
Using the slot in the template to route out a mortise in a scrap of wood.
I already had a 1/2" straight fluted bit in the router, so I just used that.
I have to sweep side-to-side to cut the slot with a straight bit.
With a spiral bit, it's best to remove most of the material by making a series
of plunge cuts.
 Then switching to the 3/4" bit that I picked for cutting the tenon.
Larger bits do a better job of cutting tenons, and because I usually cut my
mortises with my slot mortiser, I don't need to use the same size bit for
the mortise and tenon.
Then switching to the 3/4" bit that I picked for cutting the tenon.
Larger bits do a better job of cutting tenons, and because I usually cut my
mortises with my slot mortiser, I don't need to use the same size bit for
the mortise and tenon.
I set the vertical alignment by checking how the bit overlaps with the stock top and bottom. If I want the tenon in the middle, I adjust the template up or down until the bit overlaps the wood by the same amount on both sides.
 Checking side to side alignment. For side-to-side, I move the workpiece.
If I want it centered, I make sure the bit overlaps by the same amount on
each side.
Checking side to side alignment. For side-to-side, I move the workpiece.
If I want it centered, I make sure the bit overlaps by the same amount on
each side.
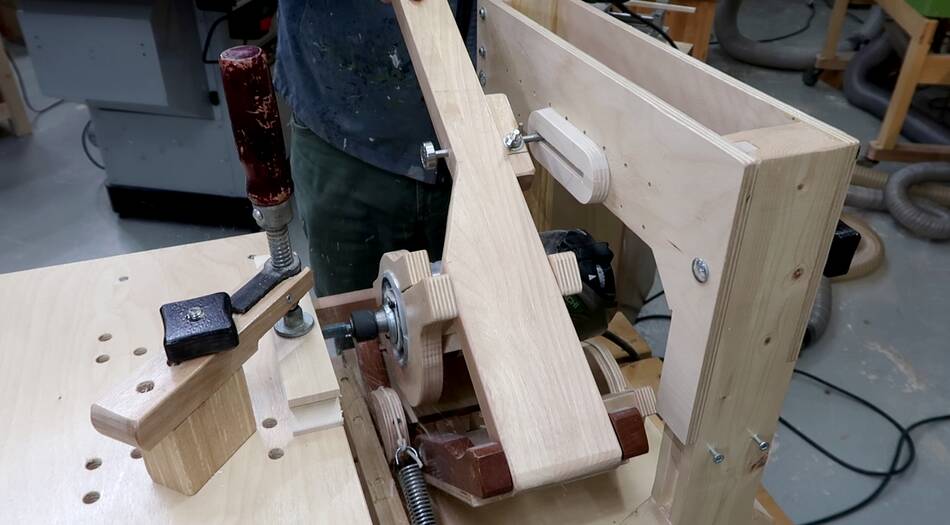
 Then setting the depth stops. I set the forward depth stop so that the bit
can't hit the table.
Then setting the depth stops. I set the forward depth stop so that the bit
can't hit the table.
 I then set the back stop such that the distance that the router can travel
forwards and back is the same as the length of tenon I want to make.
I then set the back stop such that the distance that the router can travel
forwards and back is the same as the length of tenon I want to make.
 With the router fully back, I move the workpiece forward until it hits the
front of the router bit.
With the router fully back, I move the workpiece forward until it hits the
front of the router bit.
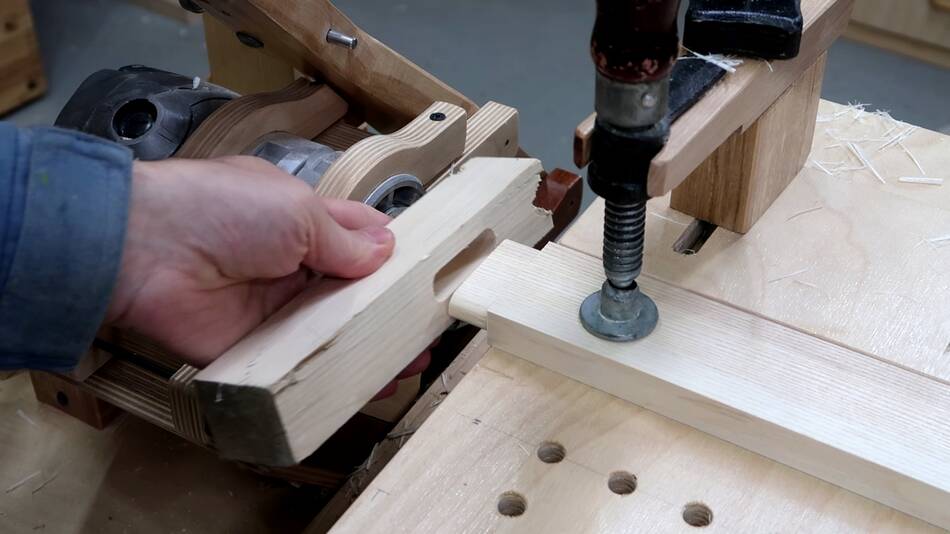
 Then, moving the router forward, I route around the workpiece, leaving
the tenon.
Then, moving the router forward, I route around the workpiece, leaving
the tenon.
If I make a long tenon, I sometimes only move the router forward half way, cut around, then move it the rest of the way. This especially if the tenon is longer than the cutting depth of the router bit.
 Then checking the fit. Surprisingly, the fit was jut right, even though I had,
set the guide bearing to roll around the widest part of
the template for a first pass, leaving a slightly larger tenon.
I can always take another pass to make it smaller, but I can't make it bigger.
Then checking the fit. Surprisingly, the fit was jut right, even though I had,
set the guide bearing to roll around the widest part of
the template for a first pass, leaving a slightly larger tenon.
I can always take another pass to make it smaller, but I can't make it bigger.
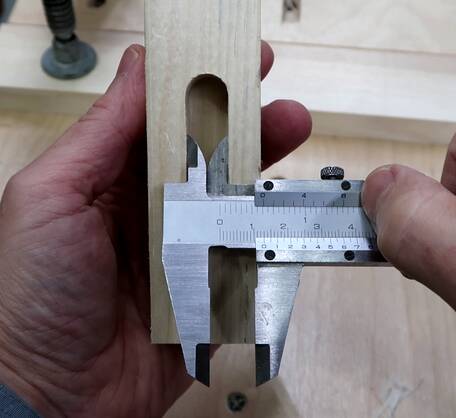
Checking the mortise, it turns my bit cut slightly more than 1/2" wide, so the tenon also needed to be a bit larger than 1/2"
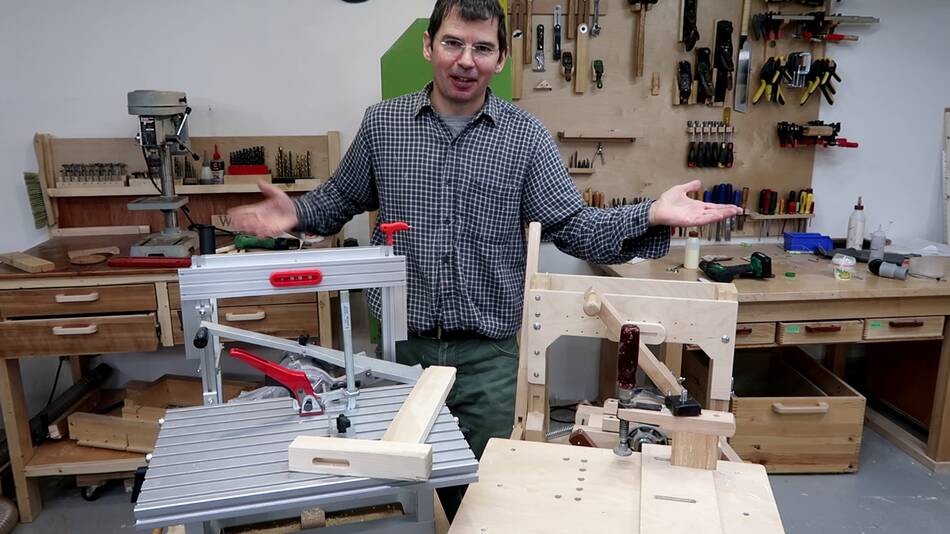
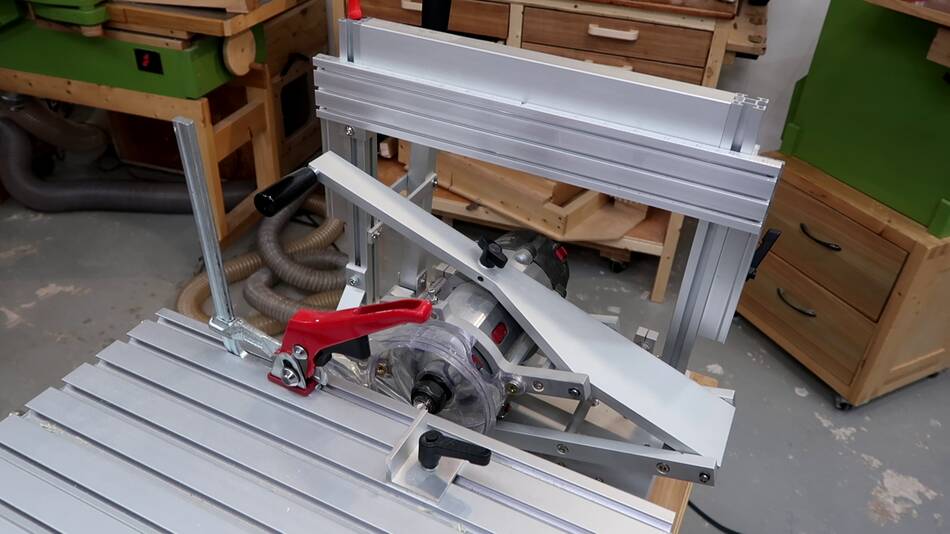 Now lets do the same procedure on the metal pantorouter.
I could make wooden templates to mount on the aluminium template holder, but I'll show using the new segmented tenon templates.
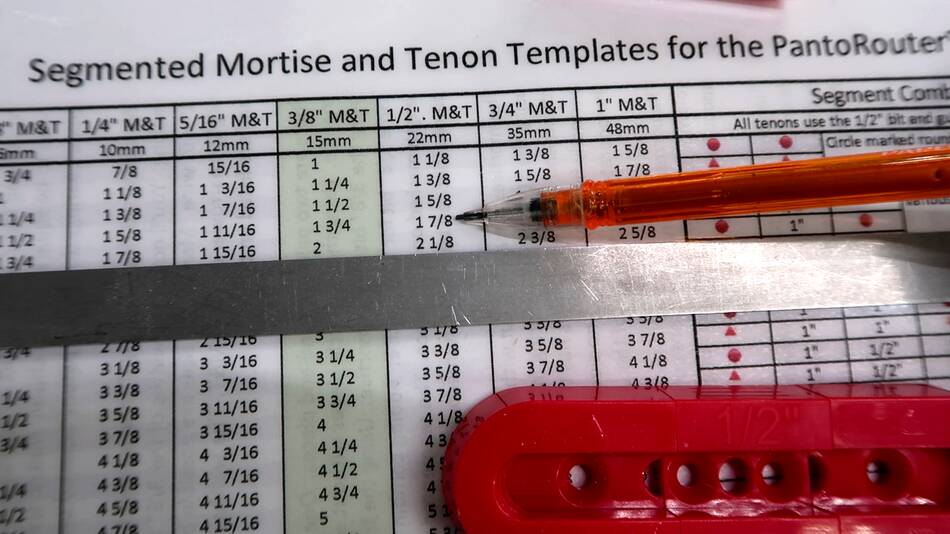 I start by looking up the appropriate row and column on the table that comes
with the segmented tenon templates. I have the option of making the tenon 1 7/8"
wide, or 2 1/8" wide. With my stock 2" wide, the widest I can make the tenon
is 1 7/8".
I start by looking up the appropriate row and column on the table that comes
with the segmented tenon templates. I have the option of making the tenon 1 7/8"
wide, or 2 1/8" wide. With my stock 2" wide, the widest I can make the tenon
is 1 7/8".
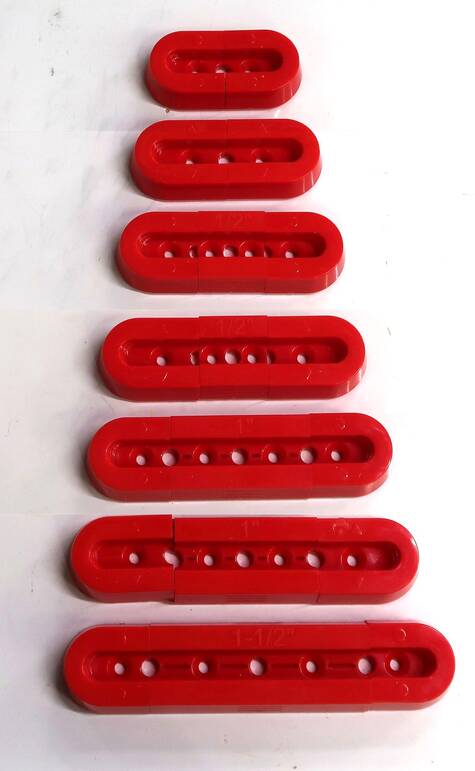 With the segmented tenon templates, I can piece together templates for tenons
from 1" wide to about 5".
With the segmented tenon templates, I can piece together templates for tenons
from 1" wide to about 5".
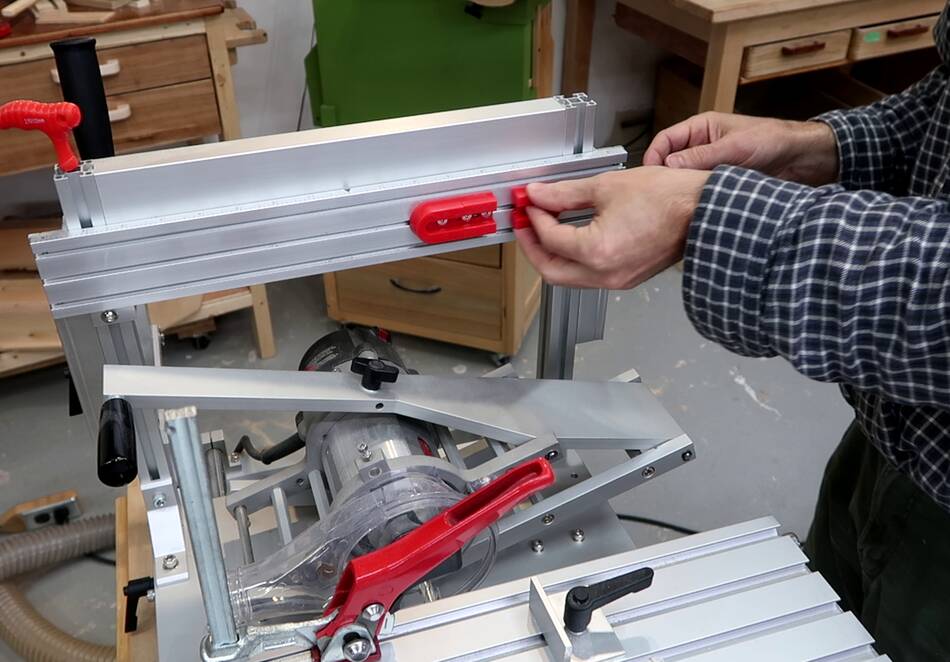 Looking up with segments to use on the table, I mount these on the tenon
template holder.
Looking up with segments to use on the table, I mount these on the tenon
template holder.
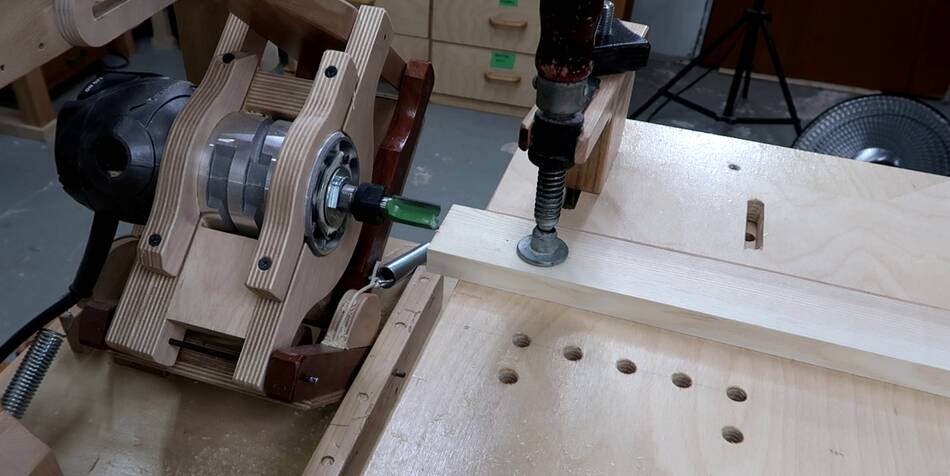
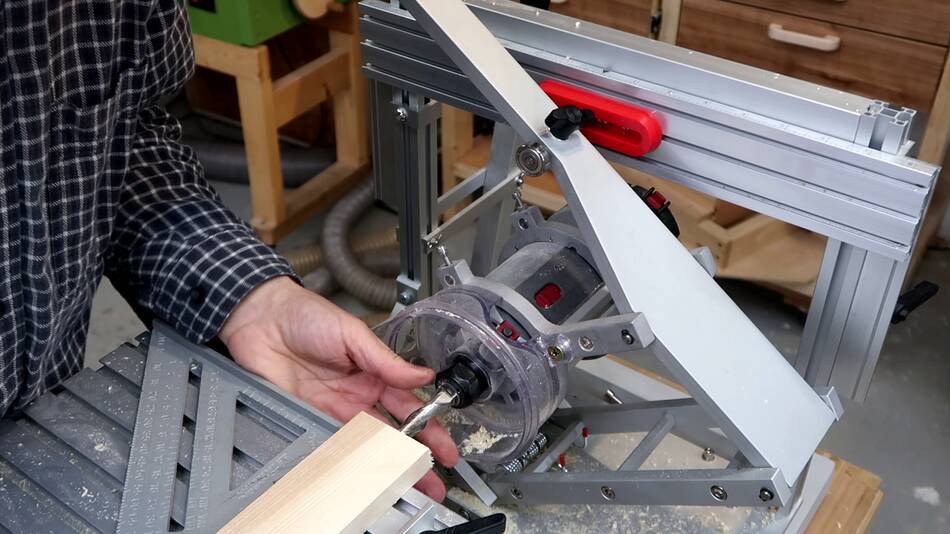
 The metal pantorouter has this convenient feature where, placing the stock between
the horizontal part of the template holder and a stop on the vertical support
will set the template vertical position so that the mortise or tenon ends up in
the middle of the stock.
The metal pantorouter has this convenient feature where, placing the stock between
the horizontal part of the template holder and a stop on the vertical support
will set the template vertical position so that the mortise or tenon ends up in
the middle of the stock.
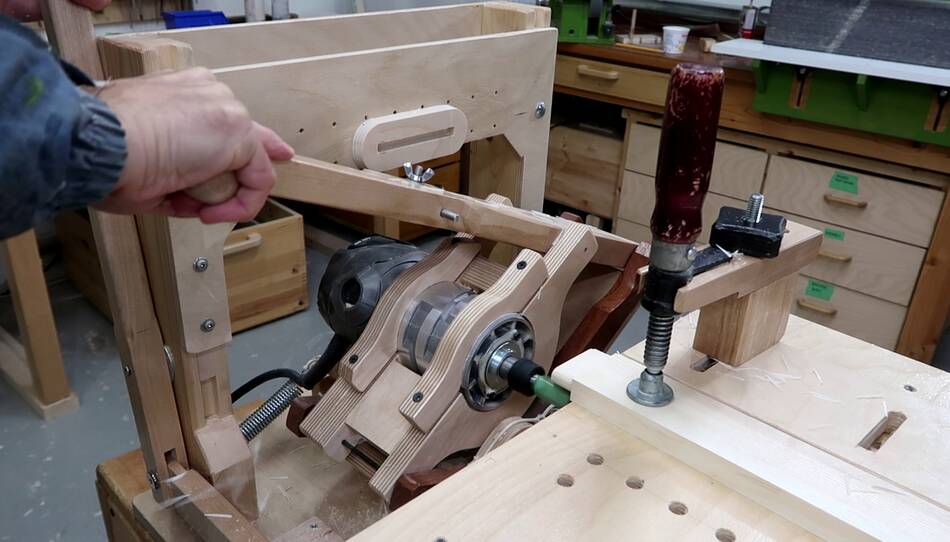
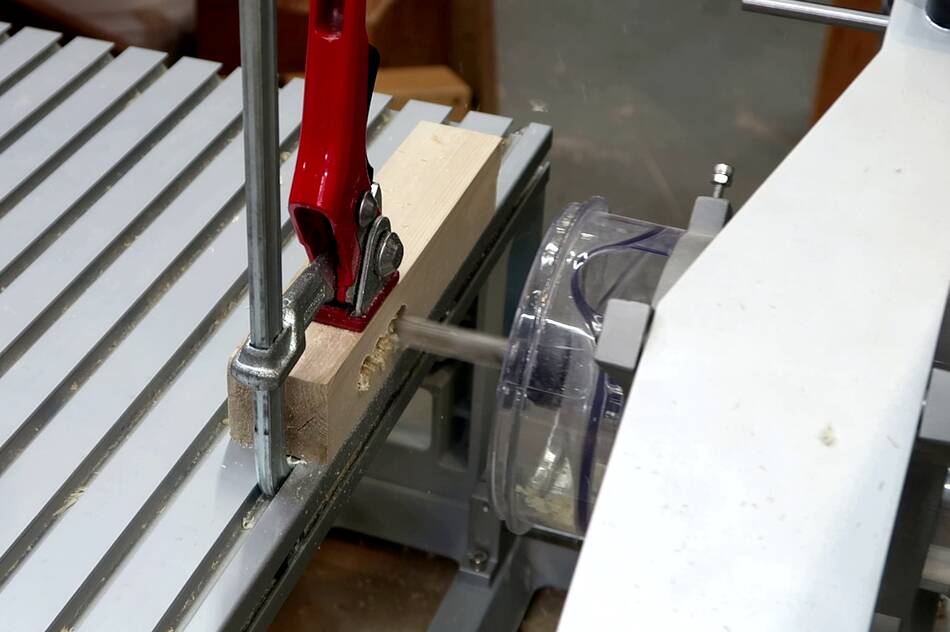 Then cutting the mortise, with a series of plunge cuts. I have a spiral bit in
the router, so I can clear most of the material for the mortise with a
series of plunge cuts.
Then cutting the mortise, with a series of plunge cuts. I have a spiral bit in
the router, so I can clear most of the material for the mortise with a
series of plunge cuts.
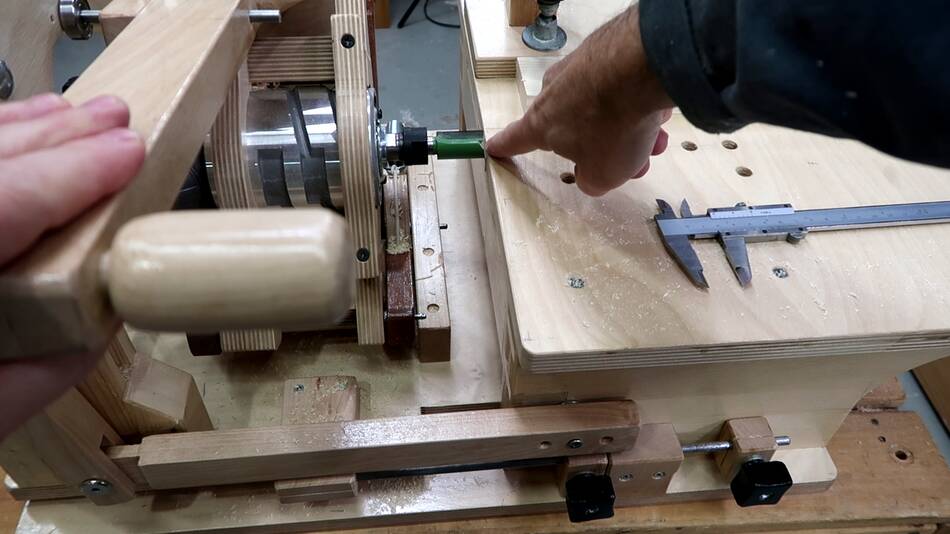
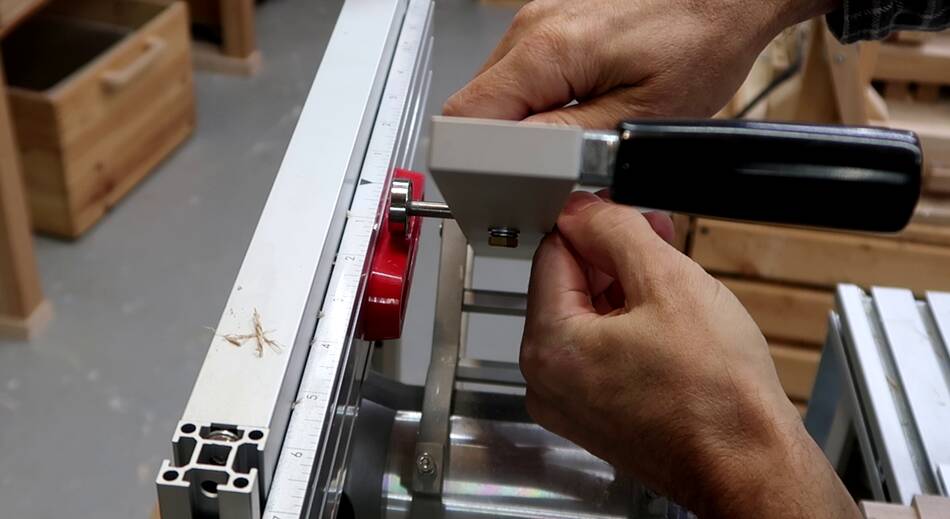
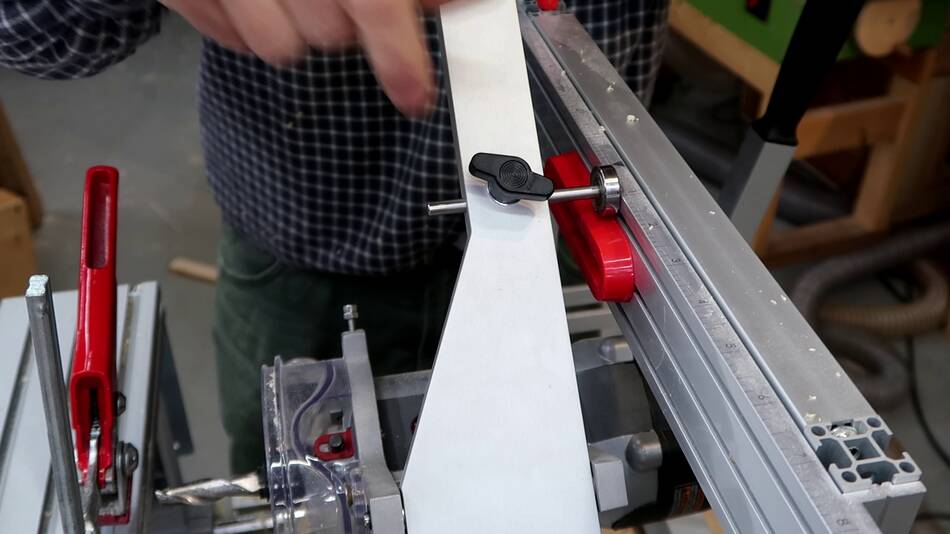 Then switching to the 22 mm follower bearing and positioning it so it's on the
widest part of the template...
Then switching to the 22 mm follower bearing and positioning it so it's on the
widest part of the template...
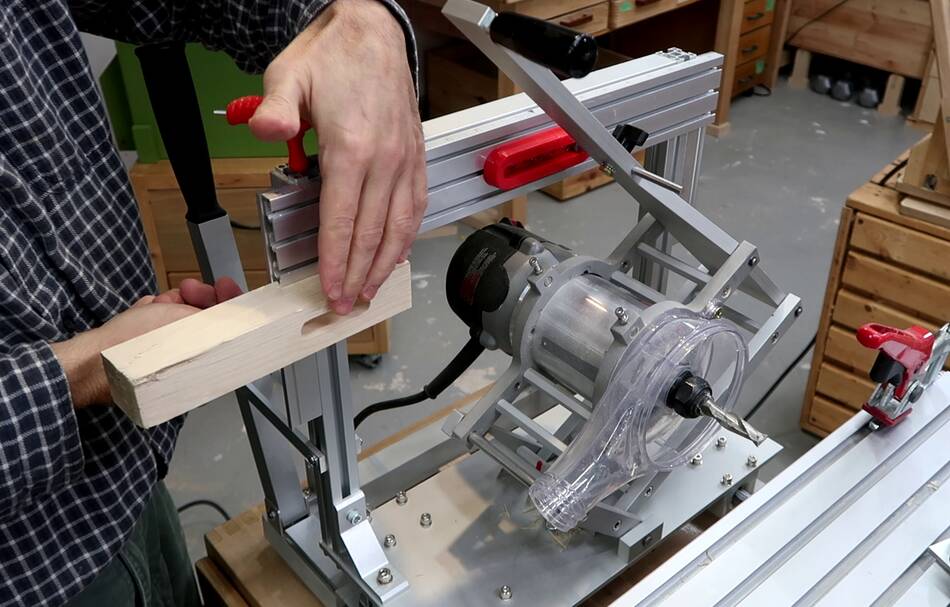
 ... and again adjusting the template vertical position by placing the stock between
the stop and the horizontal part of the template holder. This feature is really handy
for getting the tenon centered in a piece of wood.
... and again adjusting the template vertical position by placing the stock between
the stop and the horizontal part of the template holder. This feature is really handy
for getting the tenon centered in a piece of wood.
 There is a new fence available for the pantorouter with a half-sized scale for
setting the stock on center on the pantorouter. I don't have one of these.
There is a new fence available for the pantorouter with a half-sized scale for
setting the stock on center on the pantorouter. I don't have one of these.
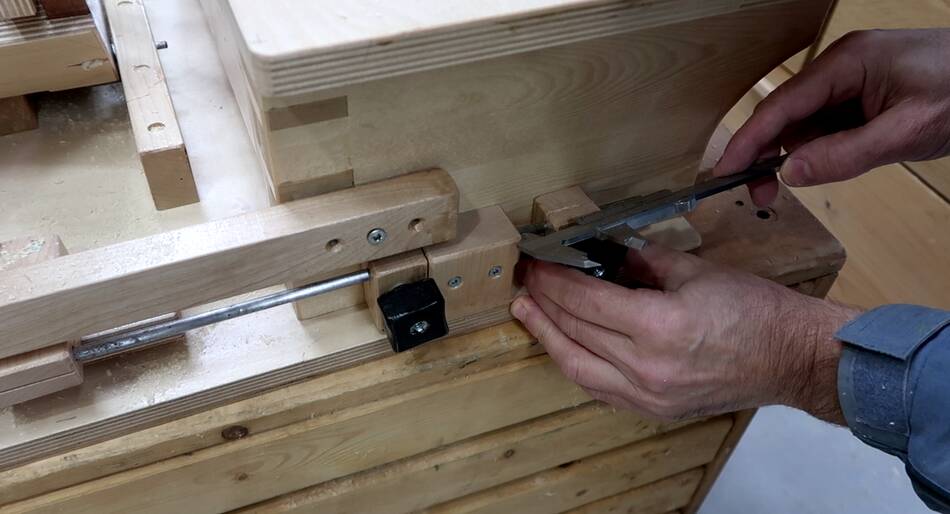
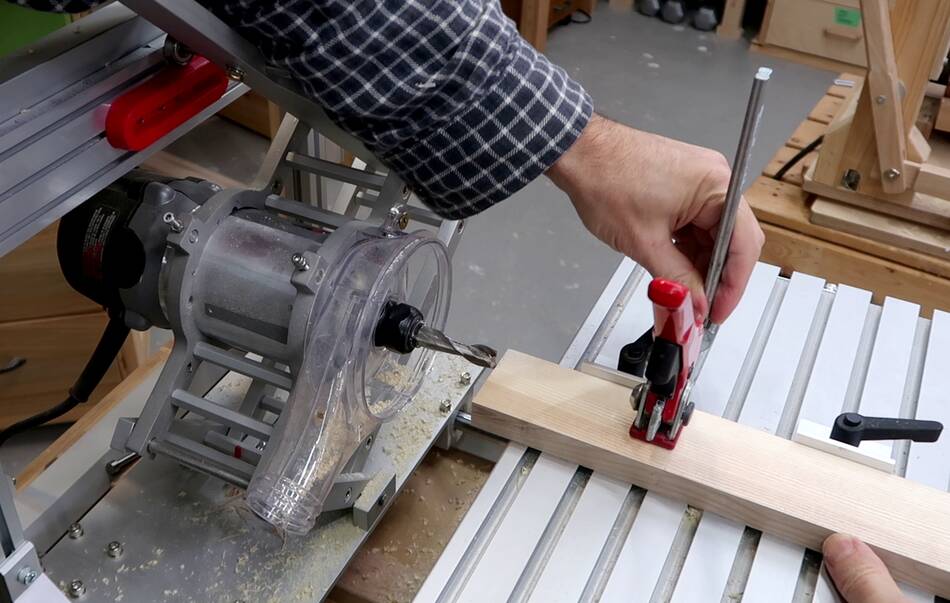
So I just placed the follower so it goes in the center hole of the template and position the stock centered against the bit, then set the fence stops against my workpiece.
 Next setting the depth stops. As with the wooden pantorouter, the front stop
is set so the router bit still clears the table.
Next setting the depth stops. As with the wooden pantorouter, the front stop
is set so the router bit still clears the table.
 And the back stop is set so the distance between the stops corresponds to
the desired tenon length.
And the back stop is set so the distance between the stops corresponds to
the desired tenon length.
 And, as with the wooden one, I use the front of the router bit as a
stop for positioning the workpiece.
And, as with the wooden one, I use the front of the router bit as a
stop for positioning the workpiece.
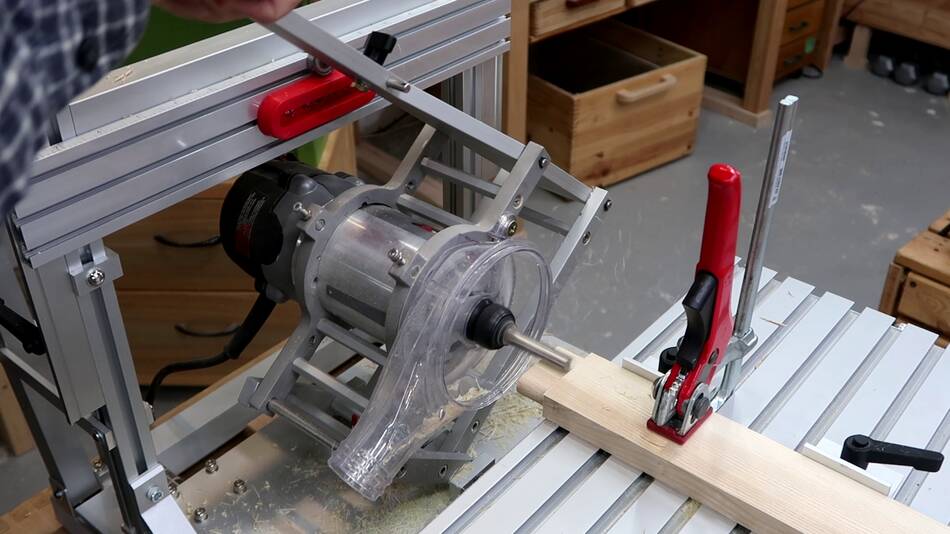 Then routing the tenon.
 And checking the fit while the workpiece is still clamped
on the pantorouter. As expected, it's too tight because I started with
the guide bearing on the largest part of the template.
And checking the fit while the workpiece is still clamped
on the pantorouter. As expected, it's too tight because I started with
the guide bearing on the largest part of the template.
 So I move the guide bearing forward a bit, and with the workpiece still clamped
I sweep around it again, and check if it fits the mortise. It's best to
approach the final fit by small increments because if the tenon is too small,
you can't just add to it.
So I move the guide bearing forward a bit, and with the workpiece still clamped
I sweep around it again, and check if it fits the mortise. It's best to
approach the final fit by small increments because if the tenon is too small,
you can't just add to it.
 I don't usually do sponsored content, but I have to say that covering
these new segmented tenon templates is sponsored in a way.
I don't usually do sponsored content, but I have to say that covering
these new segmented tenon templates is sponsored in a way.
I don't get paid directly for this, but I get a small royalty for each metal pantorouter sold (having invented the machine), and better templates help to sell more machines.
At the same time, I sell plans for the wooden pantorouter. The metal machine and homemade wooden machines don't really compete with each other. Buying a metal pantorouter is not cheap. If you buy tools from SawStop or Festool, then it's in your price range, but its too expensive for people who like to improvise and build their own machines. And building a pantorouter is a fairly involved process, and if you aren't inclined to build machines, it's not for you.
And if you aren't skilled at building one, and its too expensive to buy, consider other alternatives, like pocket hole joinery :)
 More about the pantorouter (2010)
 Big mortise and tenons (2010)
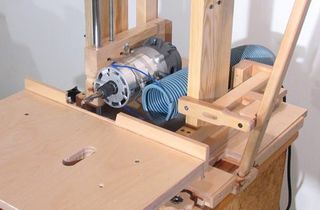 Slot mortiser (2009)
 Dave Tenney making tenon templates (2014)
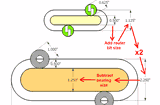 A previous article on this topic
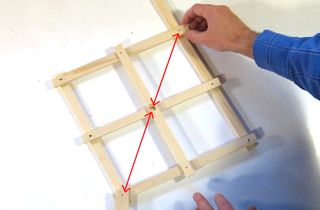 How the pantorouter works (2010)
 Upgrading the template system
 Shelves with double mortise and tenon joints