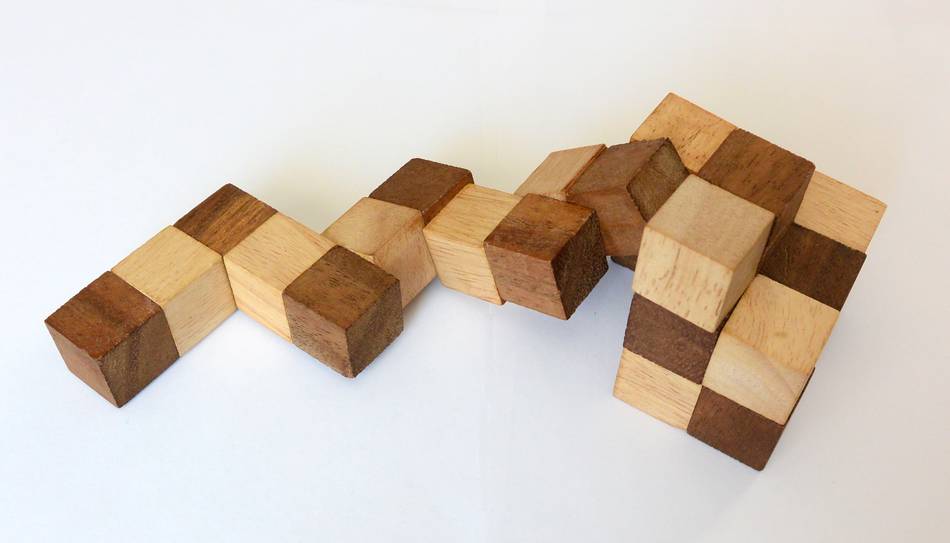
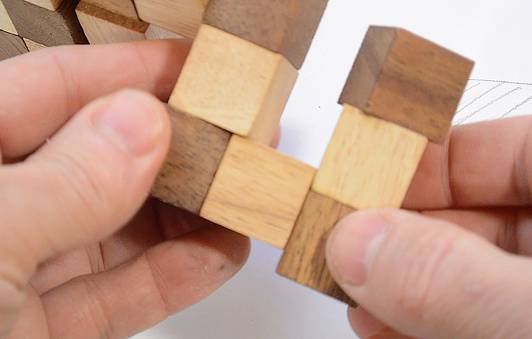
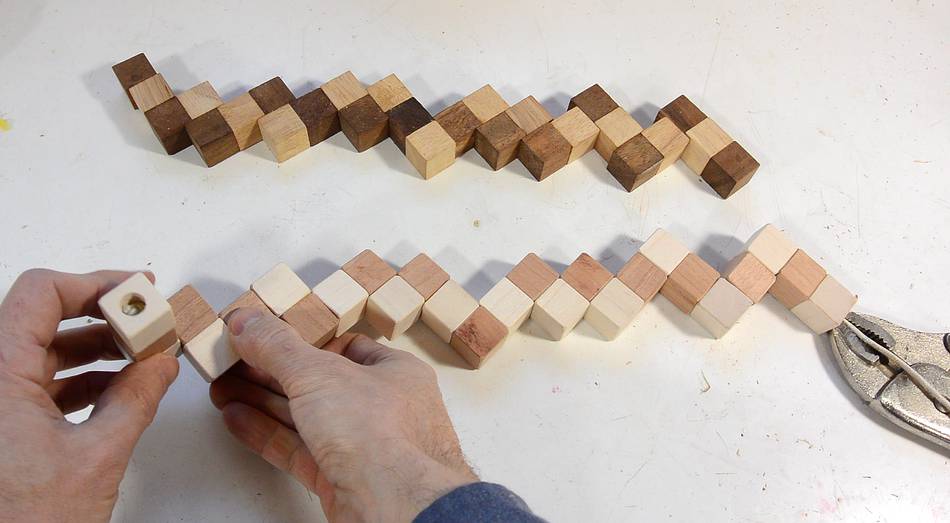
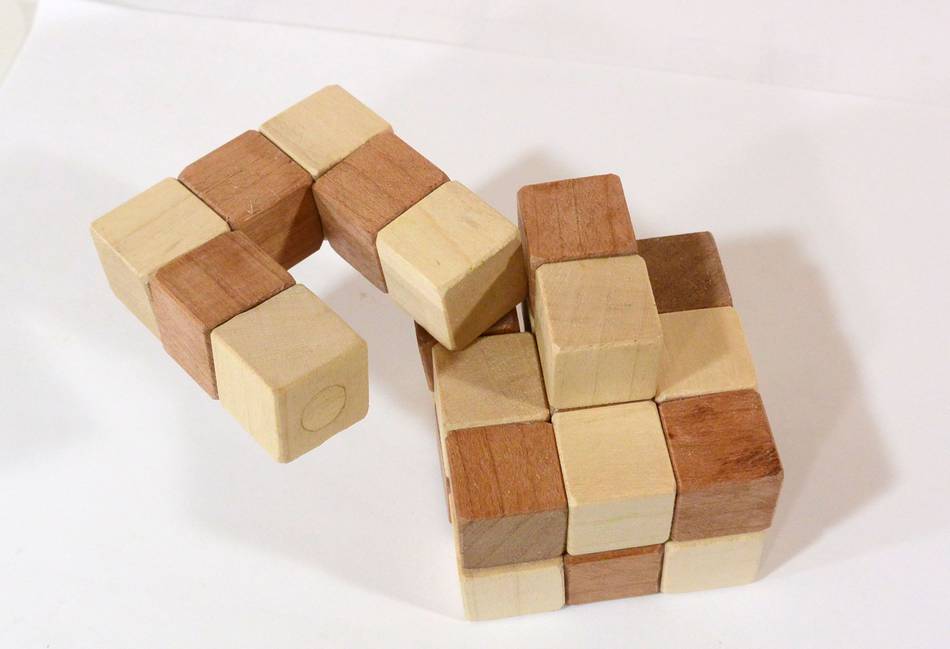
 I was given one of these snake cube puzzles as a present. I brought it
out at a party and, to my surprise, some of my guests became
completely obsessed with solving it.
I was given one of these snake cube puzzles as a present. I brought it
out at a party and, to my surprise, some of my guests became
completely obsessed with solving it.
I was given one of these snake cube puzzles as a present. I brought it
out at a party and, to my surprise, some of my guests became
completely obsessed with solving it.
So I figured this would be a good puzzle to figure out how to make. The cubes are held together by a string that is stretched through holes along the length of the "snake".
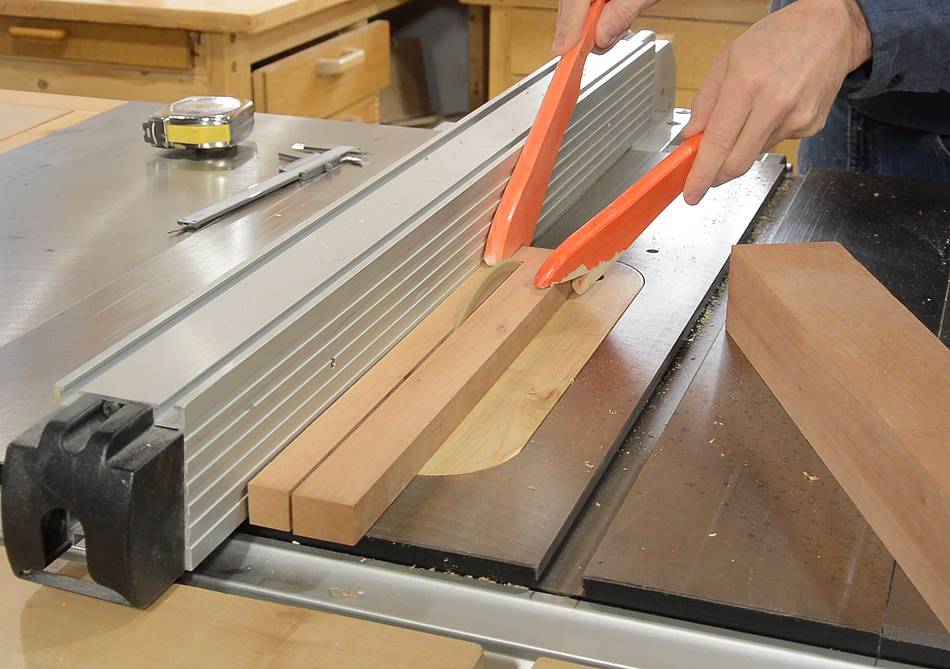 I started by ripping some square stock of maple and mahogany, 2x2 cm.

 I then cut 2 cm cubes from it with my small
table saw sled, using a stop
attached with a clamp. I set that stop by measuring to the blade with calipers.
I then cut 2 cm cubes from it with my small
table saw sled, using a stop
attached with a clamp. I set that stop by measuring to the blade with calipers.
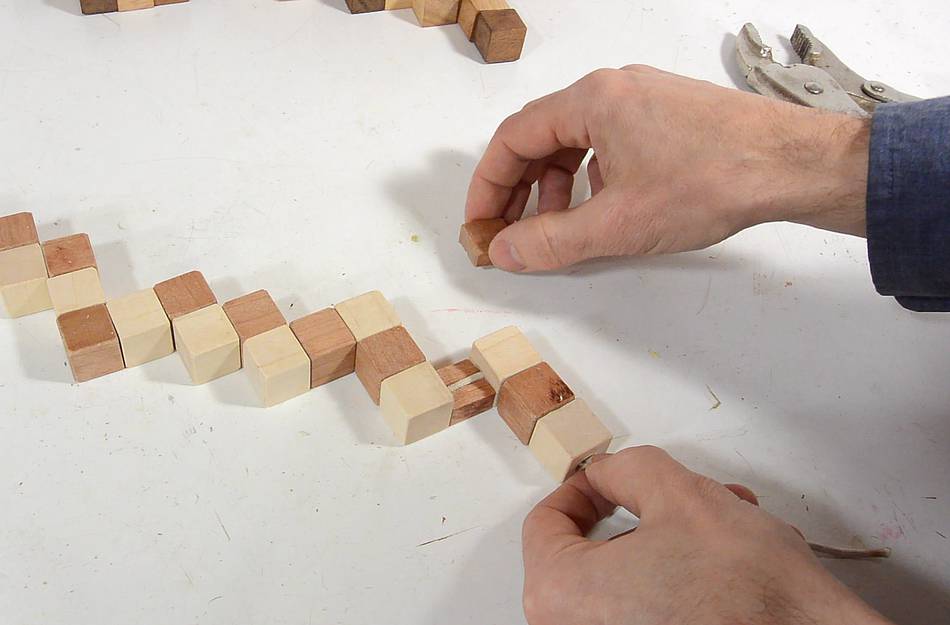
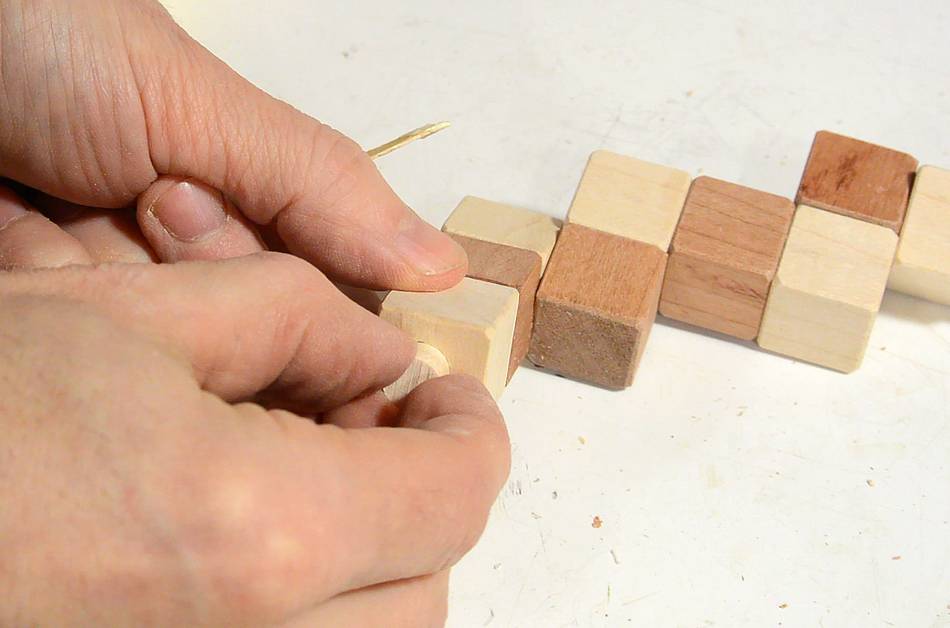
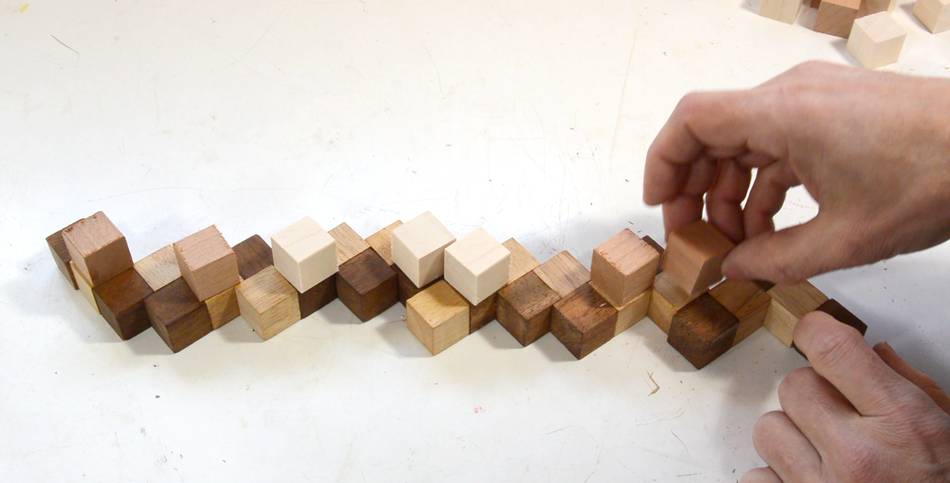 I started with the straight-thru pieces. These are the pieces that have cubes
attached at opposite ends. I just laid my pieces on top of the puzzle
I already had to figure out how many and which colour I
needed, though I reversed light and dark on mine.
I started with the straight-thru pieces. These are the pieces that have cubes
attached at opposite ends. I just laid my pieces on top of the puzzle
I already had to figure out how many and which colour I
needed, though I reversed light and dark on mine.
 If you want to make your own, having an 1:1 image of an unwound cube is very useful.
If you make yours with 2cm cubes, print this PDF
of the image at left with "fit to page" turned off to print the image at
1:1 scale.
If you want to make your own, having an 1:1 image of an unwound cube is very useful.
If you make yours with 2cm cubes, print this PDF
of the image at left with "fit to page" turned off to print the image at
1:1 scale.
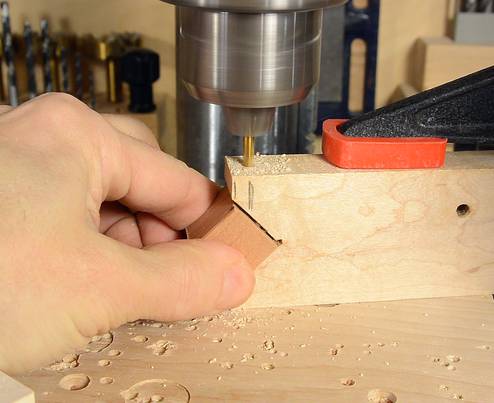
 Drilling the straight-thru pieces. I'm using a drill just a little bit larger
than the string I'm going to use.
Drilling the straight-thru pieces. I'm using a drill just a little bit larger
than the string I'm going to use.
I clamped a piece of wood with a square notch cut near the end to the table. This helps me position each piece as I drill it.

 For the cubes where the string feeds through a corner, if I drilled two holes just
larger than the string, it would be extremely difficult to feed it through.
For the cubes where the string feeds through a corner, if I drilled two holes just
larger than the string, it would be extremely difficult to feed it through.
I could just drill the holes much bigger. On the snake cube I was given, this is what they did, which is why pieces at the corners really like to slide out of alignment (image at right)
 Instead of oversized holes, I decided to drill two shallow holes in the
middle of the faces, then a diagonal hole to join them up. I didn't
want to rely on a diagonal hole alone because it's hard to line that
hole up precisely and the sharp edge of the hole might damage the
string.
Instead of oversized holes, I decided to drill two shallow holes in the
middle of the faces, then a diagonal hole to join them up. I didn't
want to rely on a diagonal hole alone because it's hard to line that
hole up precisely and the sharp edge of the hole might damage the
string.
 I made a simple jig to help line things up. The jig holds the workpiece and the drill.
The jig is close enough to the chuck so that the drill never fully pulls out
of the jig.
I made a simple jig to help line things up. The jig holds the workpiece and the drill.
The jig is close enough to the chuck so that the drill never fully pulls out
of the jig.
 After drilling, I sanded a chamfer on all the cube edges to make them nice to handle.
This step is a little time-consuming, and on the snake cube I was given the corners
are just square.
After drilling, I sanded a chamfer on all the cube edges to make them nice to handle.
This step is a little time-consuming, and on the snake cube I was given the corners
are just square.
I did have the foresight to put a chamfer on the long edges of the sticks before I cut it into cubes so the long-grain edges were already pre-chamfered.
 I drilled a 3/8" (10 mm) hole in the end cubes, about 3/4 of the way through. This hole
seats the knot at the end of the string.
I drilled a 3/8" (10 mm) hole in the end cubes, about 3/4 of the way through. This hole
seats the knot at the end of the string.
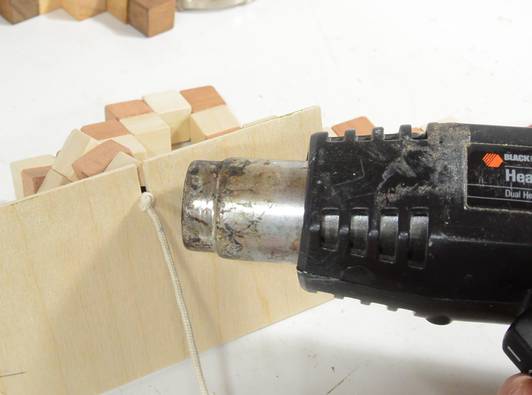
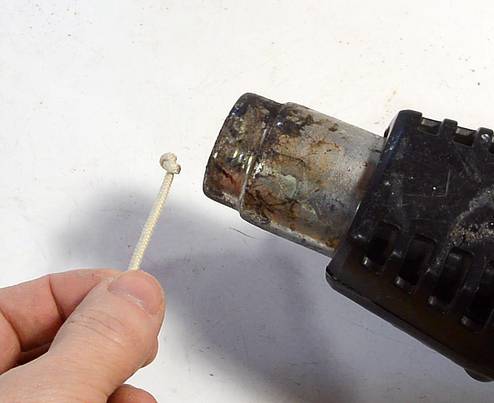 I put a knot on one end of the string and partly melted it with a heat gun to make sure
it wouldn't get undone.
I put a knot on one end of the string and partly melted it with a heat gun to make sure
it wouldn't get undone.
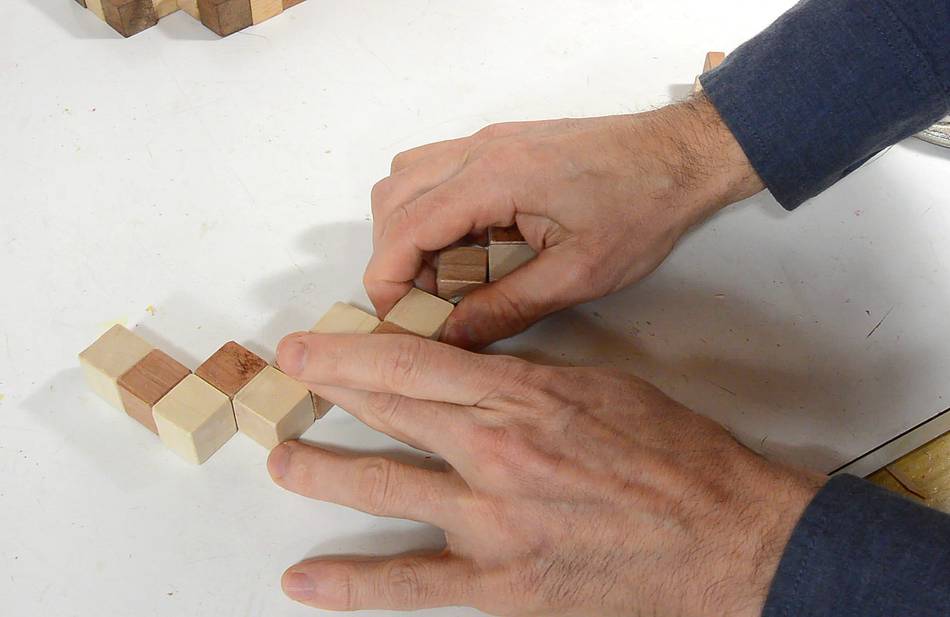
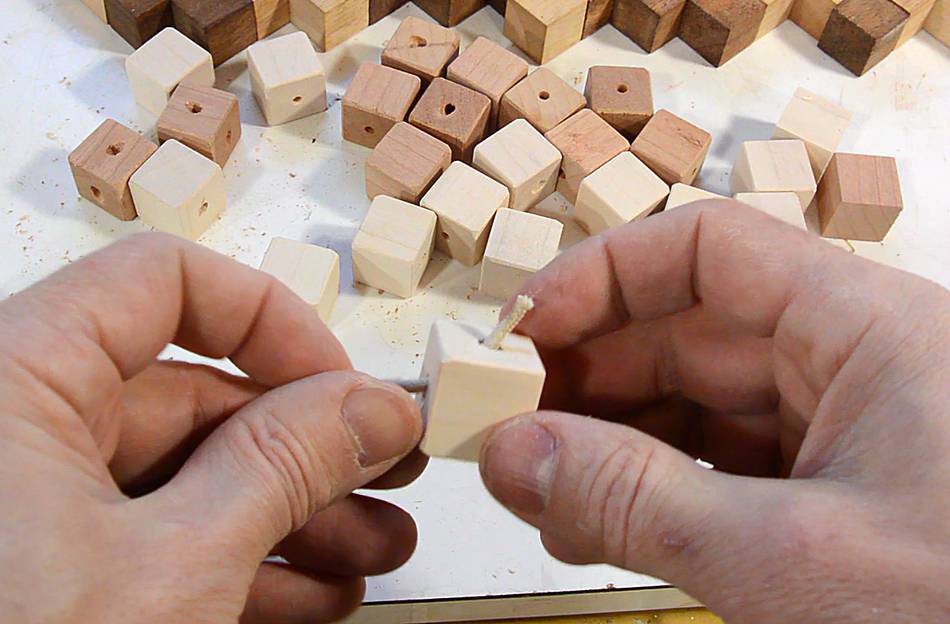 Threading up the cubes. With the diagonal holes, the corner cubes were as easy to
thread up as the straight-thru ones.
Threading up the cubes. With the diagonal holes, the corner cubes were as easy to
thread up as the straight-thru ones.
 All threaded up, checking how it works.
 I wanted to put some varnish on the cubes, so I took it all apart again, and dabbed
varnish on with a paper towel. I didn't want to use a brush because brushing
always causes a lot of varnish to get into holes. Spraying would solve that, but I don't
like to spray indoors and it's winter outside.
I wanted to put some varnish on the cubes, so I took it all apart again, and dabbed
varnish on with a paper towel. I didn't want to use a brush because brushing
always causes a lot of varnish to get into holes. Spraying would solve that, but I don't
like to spray indoors and it's winter outside.
If I was doing it again, I'd varnish the cubes before drilling. Better yet, I'd varnish the square sticks before cutting cubes out of them so that I'd only have to varnish the end-grain faces.
 The next challenge: How to make the string tight, yet still have the
knots recessed in holes at the end. It's impossible to
move a knot on a string with tension on it.
The next challenge: How to make the string tight, yet still have the
knots recessed in holes at the end. It's impossible to
move a knot on a string with tension on it.
So I split one of the cubes in two so I could put it on after stringing everything up.
 But even with the extra cube, I had to make sure the string was in moderately tight
along the whole snake. With the string going around so many corners, there's too
much friction to just pull it tight from one end.
So I pulled it tight a few cubes at a time, sliding the cubes to the
tight part of the string, and working my way from one end to the other.
But even with the extra cube, I had to make sure the string was in moderately tight
along the whole snake. With the string going around so many corners, there's too
much friction to just pull it tight from one end.
So I pulled it tight a few cubes at a time, sliding the cubes to the
tight part of the string, and working my way from one end to the other.
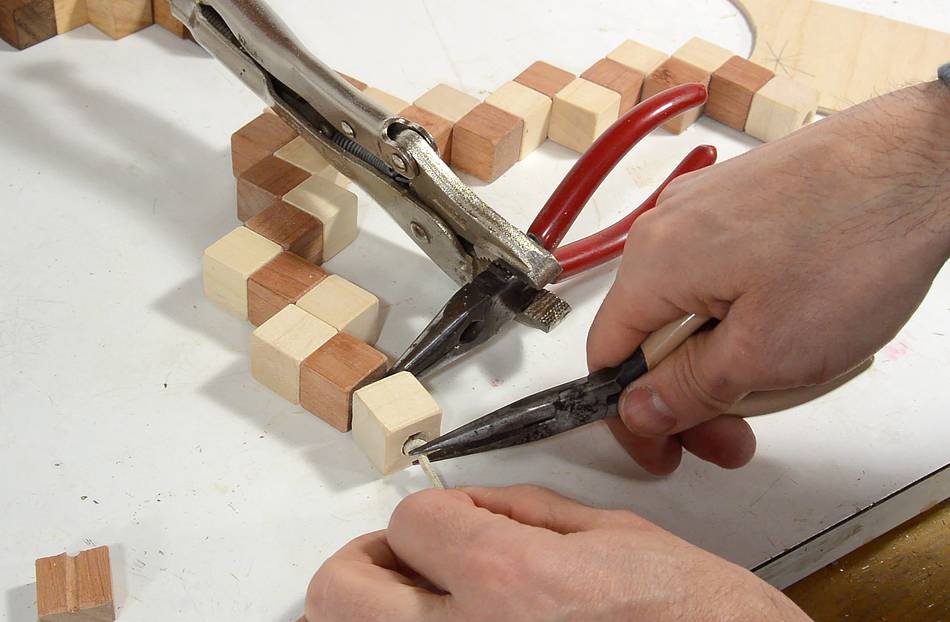
 I then used some pliers to hold the tightened string while working the knot mostly
into the hole. Again, I partially melted the knot with a heat gun to make sure
it won't come undone.
I then used some pliers to hold the tightened string while working the knot mostly
into the hole. Again, I partially melted the knot with a heat gun to make sure
it won't come undone.
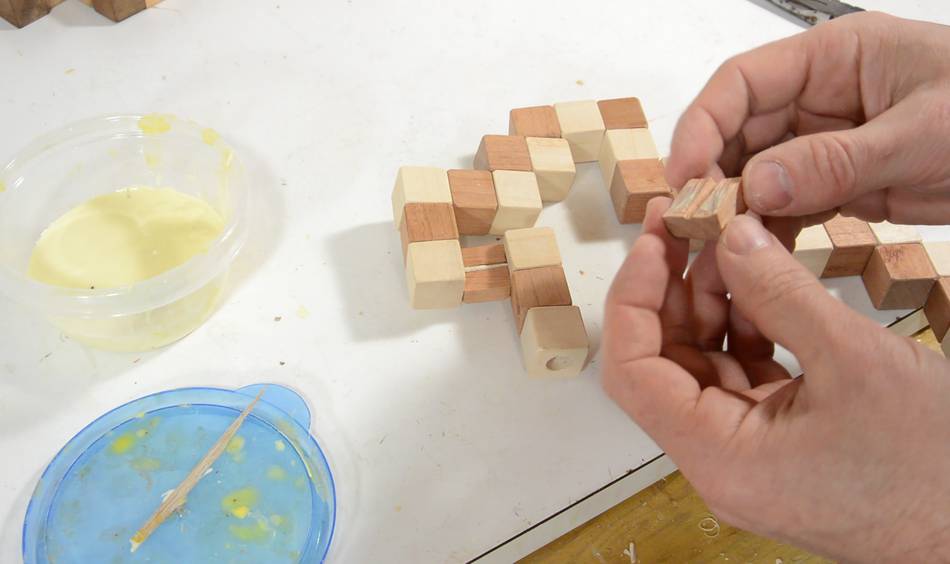 Finally, prying open a space for the last cube and gluing the cube together.
Why not use some stretchy cord?
A number of people have suggested just using a stretchy cord. But that won't
do. There is actually quite a lot of tension in the string in one of these
to hold the cube together. More tension than a stretchy cord can handle.
Plus, rubber, when left stretched, deteriorates over time.
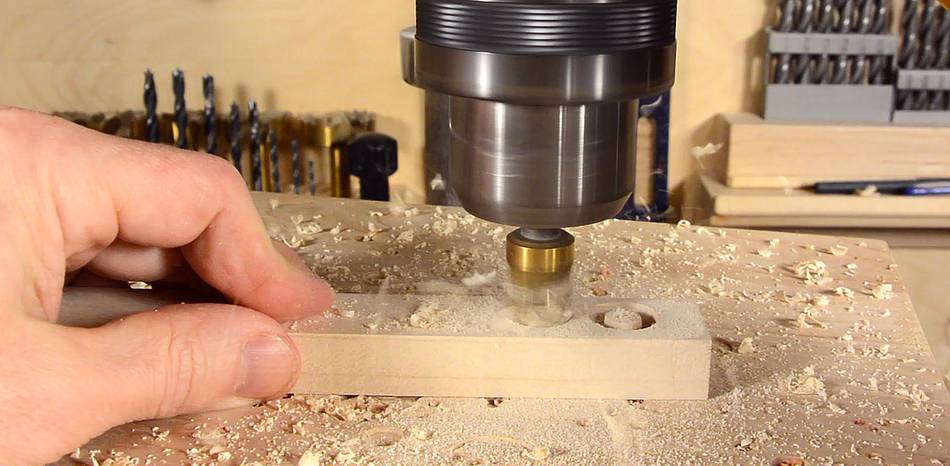
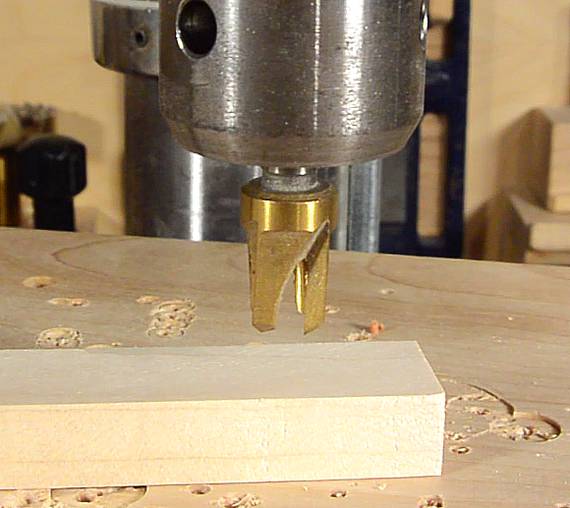 I used a plug cutter to make plugs for the holes.
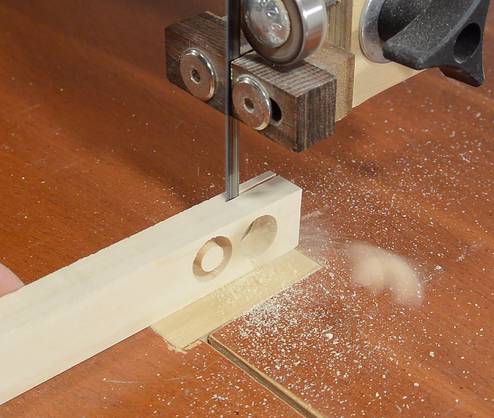
 The plugs are freed by cutting through the wood with a bandsaw. The plugs
are conical, you just push them in until they make tight fit...
The plugs are freed by cutting through the wood with a bandsaw. The plugs
are conical, you just push them in until they make tight fit...
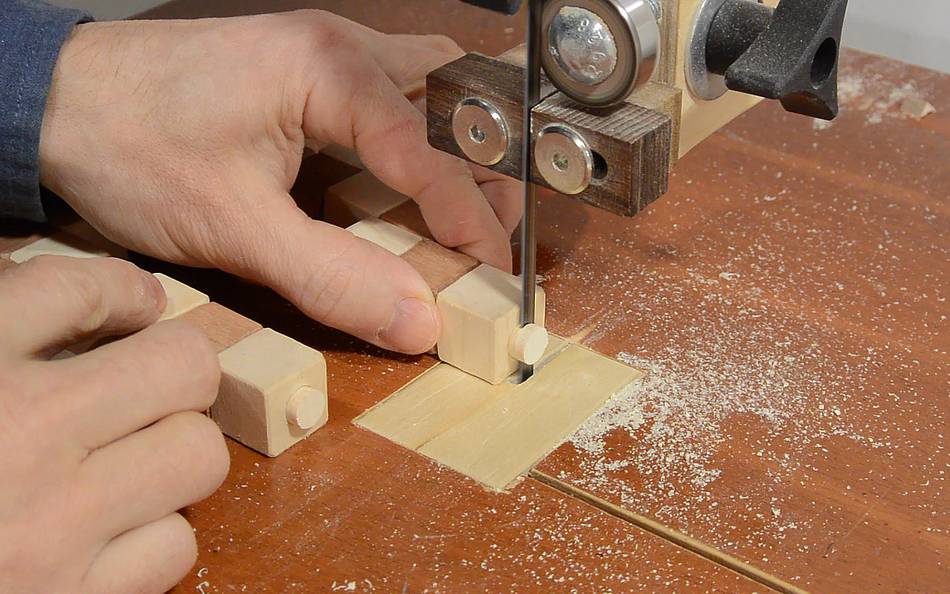
 ...then cut them nearly flush with the bandsaw and cut them flush
with a chisel
...then cut them nearly flush with the bandsaw and cut them flush
with a chisel
The snake cube I was given also has plugs in the end, though you can also see the string jammed in next to the plug. So I imagine they just pulled the string tight, then jammed some glue and a plug in the ends and cut it flush.
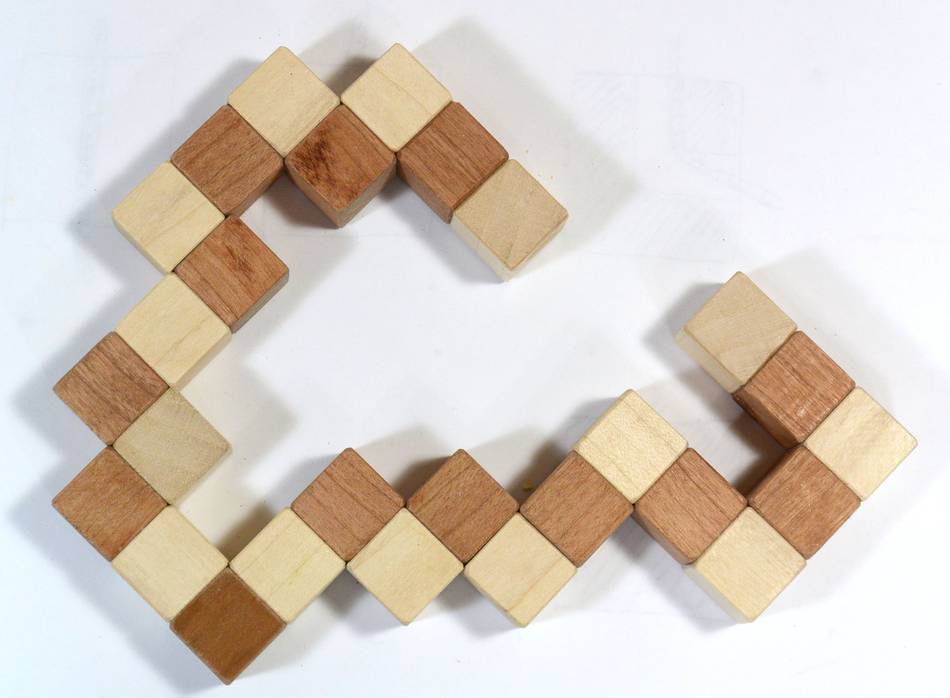
 Finished snake cube.
It feels much more precise than the one I was given. But with the holes fairly small, it's much harder to twist some rotations where the corner scrapes against other parts of the cube. So if I was making it again, I think I'd make the holes a little bit larger to give it a bit more slop.
If you want to build your own, this PDF of the snake unwound,
at 1:1 scale,
might be useful as a guide.
Steve Glista emailed to point out some pages analyzing these puzzles:
I was pleased to see your post about the snake cube. Your readers may be intersted to know that the 3x3 puzzle has thousands of possible forms, based on the hamiltonian path that fills the space. The exhaustive analysis of the problem space and list of all solutions has been done at least three times that I know of, apparently the 2nd and 3rd guys didn't spend a lot of time googling before they re-solved the problem.
This page is a good exhaustive description of the graph theory and all the possible solutions:
http://oscar6echo.blogspot.com/2012/09/snake-cube.html
 More wooden assembly
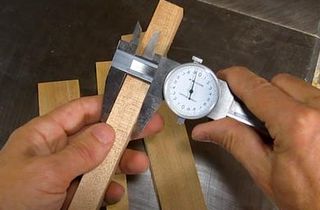 Making precise cuts
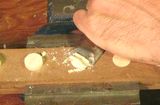 Flush cutting a dowel
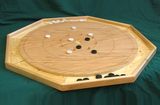 More wooden toys